When working with tools or retouching tools, there are a few things to consider and also a few tips and tricks that I would like to share with you here. Let me Blender my tool group (1). There's a lot in there: These are all empty layers, there's the skin color (2) adjusted, the glitter (3) adjusted, the ankle (4) corrected, it was painted with color (5) and it was retouched on an empty layer (6).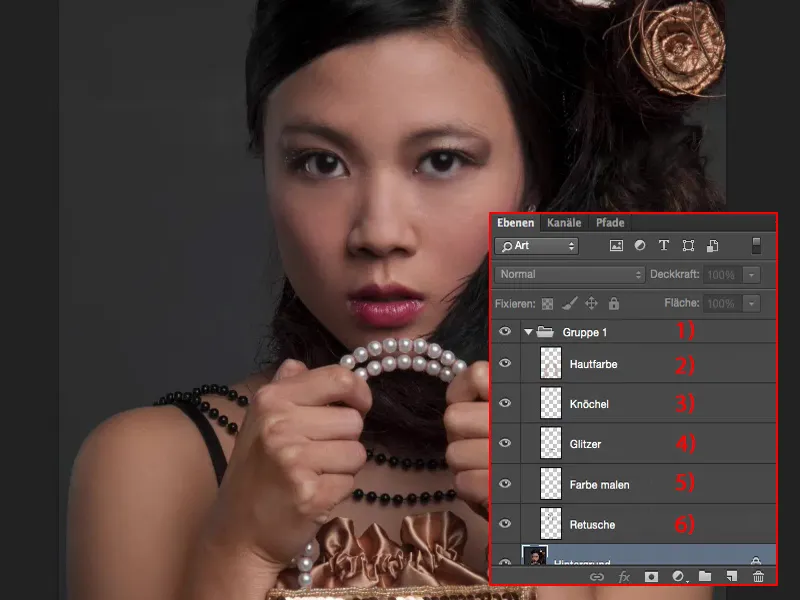
As a result, my file size remains relatively small (1). As long as I'm not doing any great composing here and really just want to optimize the image, I have very nice opportunities to work non-destructively on empty layers (2). So whenever possible - first rule: work with tools on empty layers, not here on 10, 20 background copies, because that blows up the file unnecessarily. So this is important for a non-destructive workflow with tools - always work with empty layers.
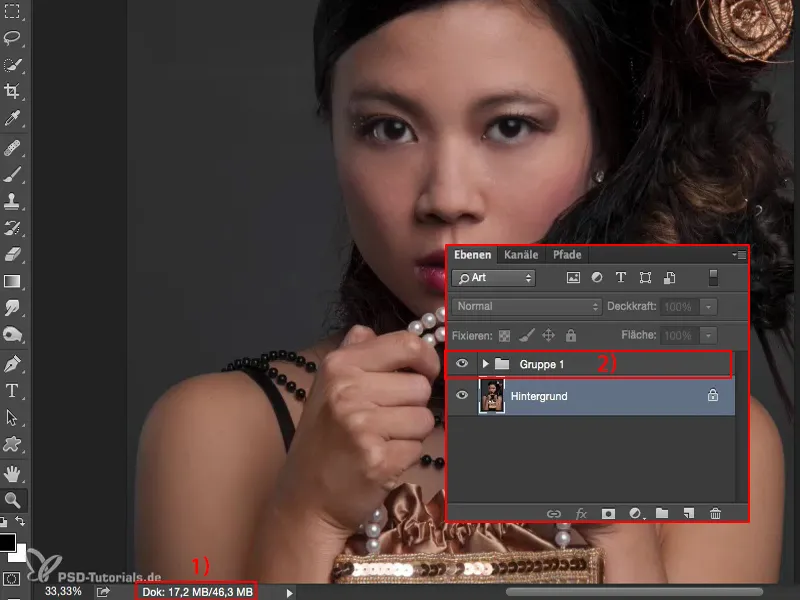
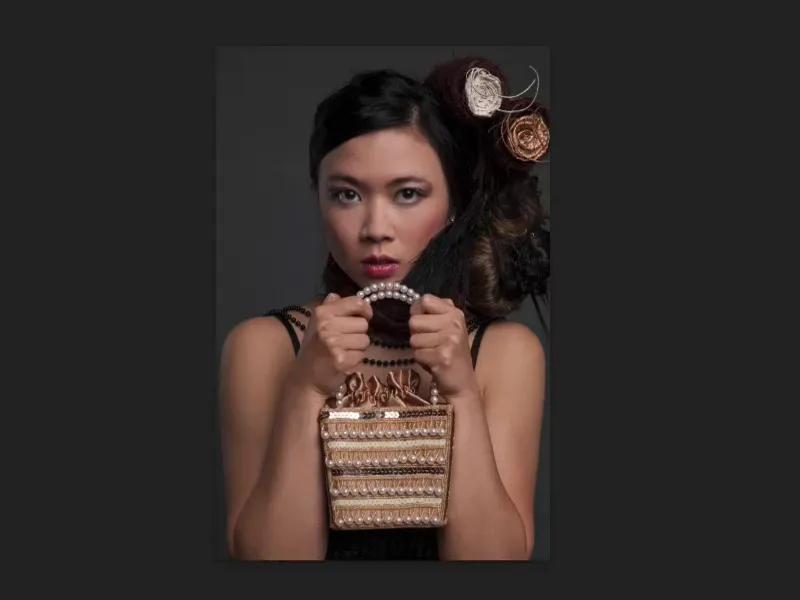
What's really in here now? - You can see that a lot has changed in the face: the shadows have been lightened, the whites of the eyes, the hands have been color-adjusted, because they were a bit red before due to the tension, because I said "Hold the bag as tight as you can", the knuckles really stand out. These are all things that you don't even think about when you're taking photos, and you don't even see them, because you're busy chatting to the model and making sure the light is right, that the posture is right and that her hair is right and, and, and. You don't usually have time to pay attention to that during the shoot, and I didn't see it at all - it wasn't until post-production that I thought to myself: Oh dear, what am I doing here with the ankles, they're all coming out really white, and the hands are red and the model's skin color is actually a nice skin tone, as you can see here on the shoulders on the left and right. So now I have to adjust everything.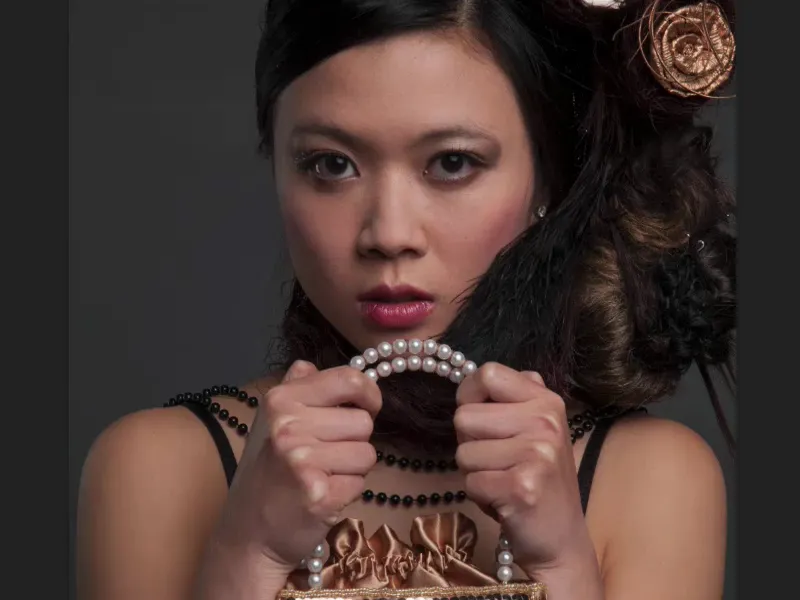
Working on the skin with the repair brush
Then let's get started: I'll create an empty layer and name it "Skin" (1) or "Retouch" or "Texture", for example, whatever you like. I'll start with the repair brush (2). I'll zoom in a little closer to the face, it should be 100 percent (3) for skin retouching. And for almost all tools, you have the option to control the layer selection. By default, the tools are all set to Current layer (4).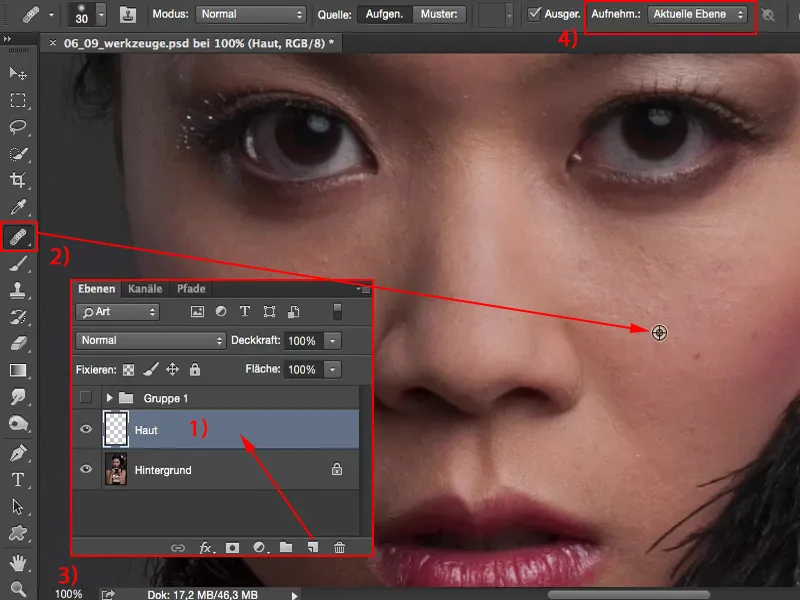
This means that I can record here with the Alt key(1) and brush around here, and no matter where I brush around, nothing happens because the layer is empty. What is Photoshop supposed to do here? Nothing at all.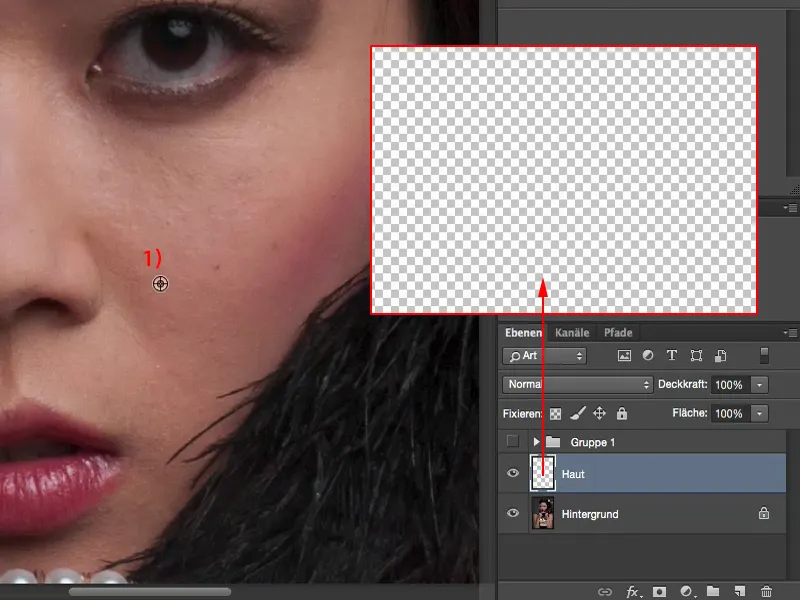
Of course. But the moment you set the whole thing to Current and below or to All layers, Photoshop can of course go ahead and say: "Aha, you want to record all layers here, I think that's cool, because you can remove all the noise in no time at all."
And the closer you zoom in, the more beautiful your skin will look. You could also start by working with frequency separation, but in this tutorial I want to introduce you to the tools and settings required to work on empty layers.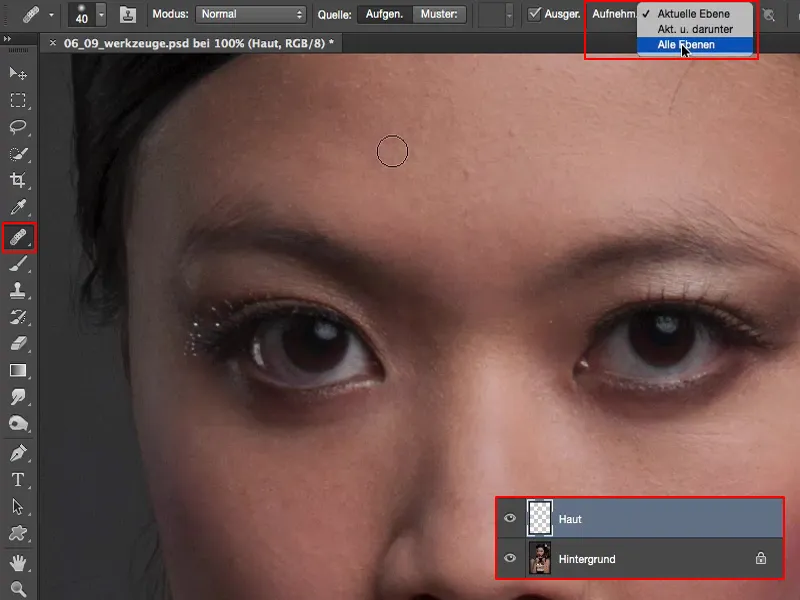
Depending on how much time you take here, the skin image will get better and better. I'm still bothered by one or two hairs, so I'll take them out up here. You can also do this over a large area. The skin here on the model has very, very fine pores anyway. I correct the eyebrow a little, I take out the little hair a little more. I still have a few wrinkles down here and I also adjust the area a little. That's about right. And here under the nose a little bit, like this. That would be my rough retouching.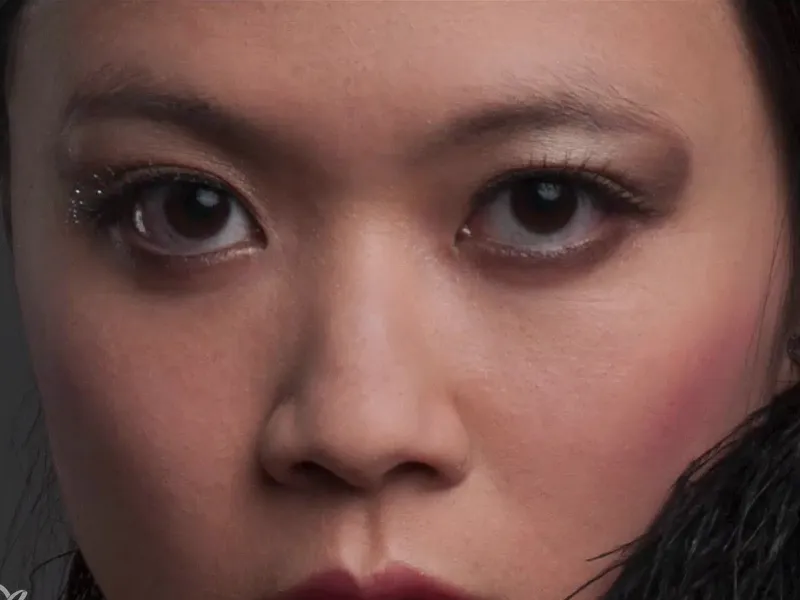
If you then hide the background layer (1), you'll also see why the file size remains so small, because everything you've just retouched here is on this layer (2).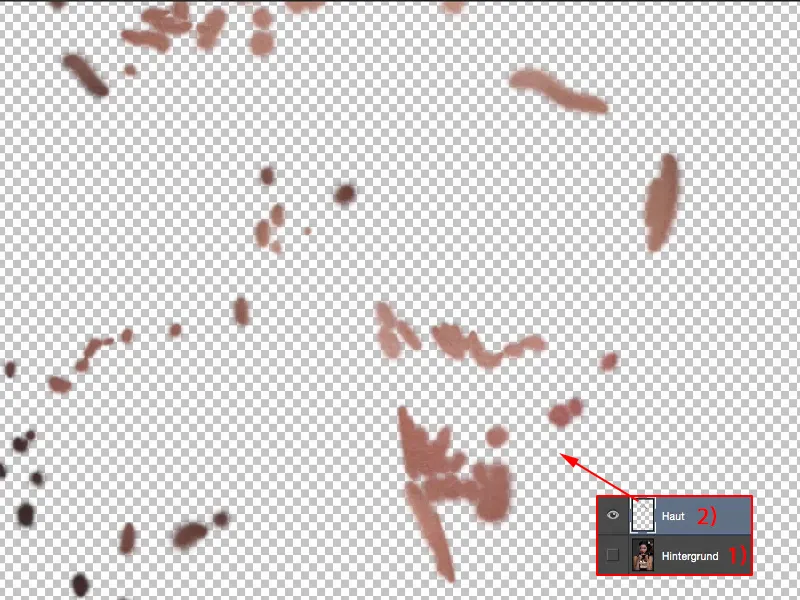
And if you've messed up or made a mistake, you can now simply correct the whole thing here using a mask (1) or you can also destructively switch to the eraser tool (2) and say: "No, that mistake, it didn't look so good after all, I'll just delete it from this layer (3)." And that way you can really bring all the things back to light.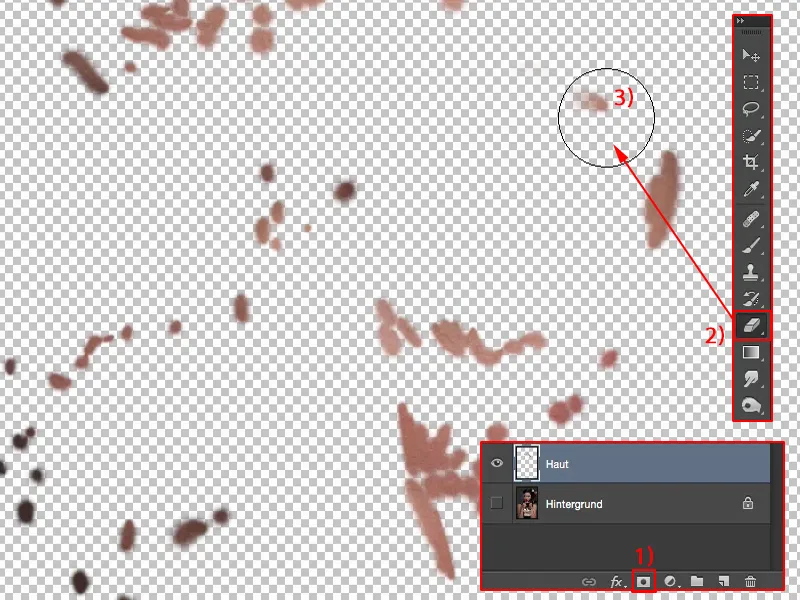
That's super practical, of course. Let's say there was a really dominant birthmark here and you thought to yourself: "I'll do the model a favor and erase the birthmark out of here, retouch it away," and then the model faints, because that was the trademark, that's why the model was booked, for example - then of course that's a huge faux pas - that's why I would always clarify something like that beforehand, so big things like a larger scar, birthmarks ... Yes, if it's been clarified with the model that it can all be removed, then you remove it, but if the model says "No, it's part of me" - or the private person, doesn't have to be a professional model - then you can remove it again at any time, so simply erase it and the birthmark will reappear. Of course, you can also remove these imperfections in exactly the same way.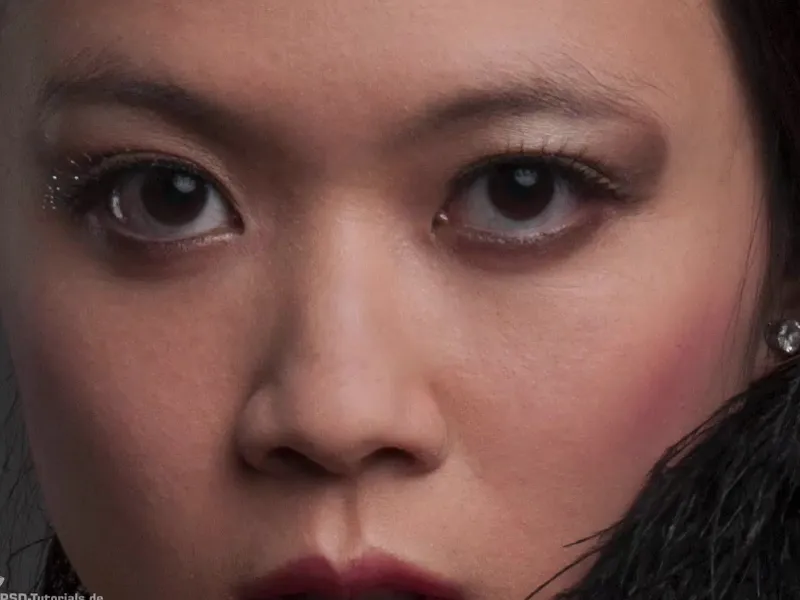
So: retouching tools (1) - if possible, work on all layers (2). This also works if you already have 20 layers (3) here, with color settings and who knows what else. Photoshop will then think a little longer when you're brushing around here, but really pulls out the right information from all the layers that are under here, under your skin or retouching layer, and you can go ahead and retouch. And that's the be-all and end-all when it comes to working non-destructively with tools.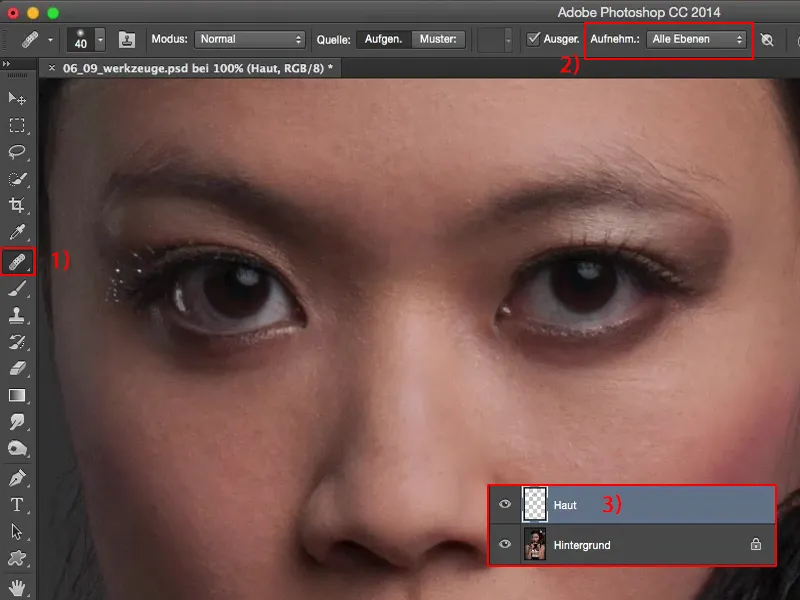
Lightening and darkening with the brush
Next, I'd say we'll lighten the shadows a little here. To do this, I'll rename the layer "Shadows" (1).
Yes, and you now have several options here: For example, you can grab the brush tool(2). You don't have the option of adjusting all the layers or anything else, because this is really just the Photoshop crayon, so to speak. You can now go all out and paint on your image with a certain opacity (3) and with a certain calculation mode.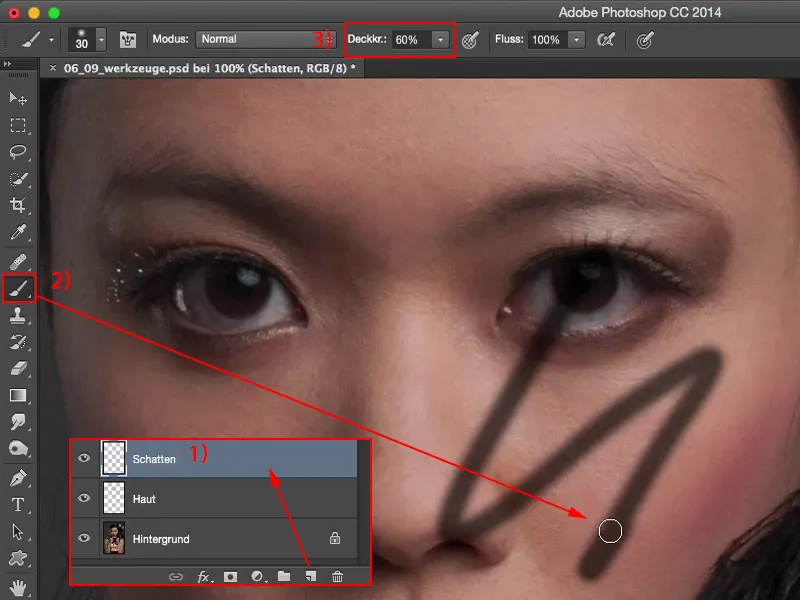
And if you set the calculation mode to soft light (1), for example, you can lighten and darken areas here with white and black (2). I'm just going to do this a little with the eye ring (3) and say: I want to lighten this area over a large area. And I'll do exactly the same here (4). This is basically dodge & burn that we are doing now.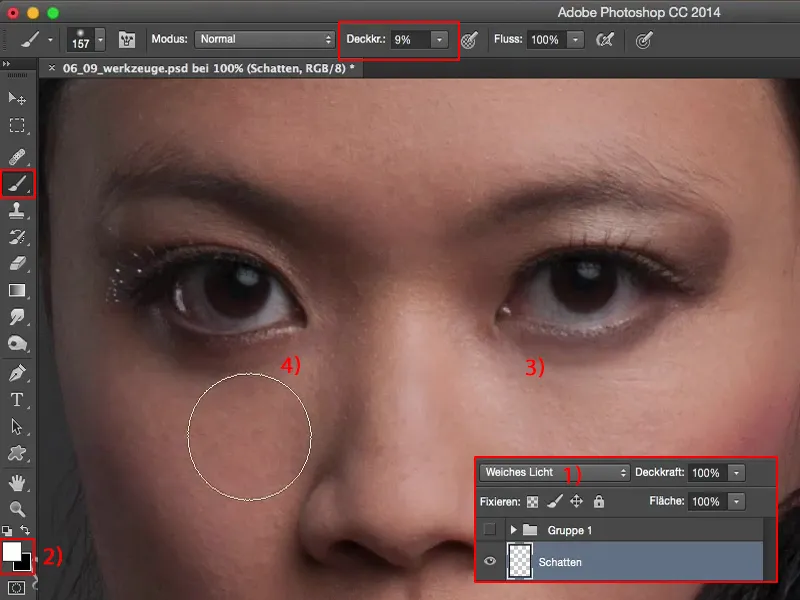
If you look at the before and after, you don't have to be a Photoshop freak to do it.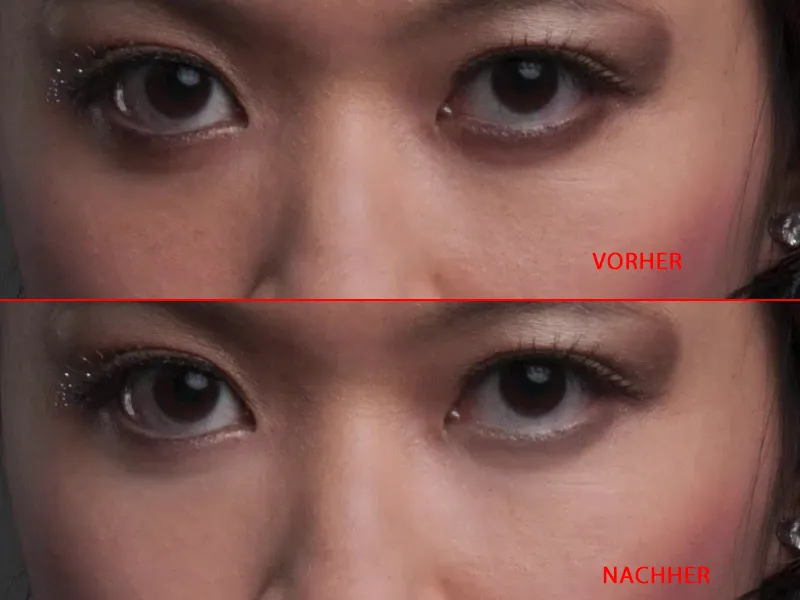
All you have to do is: empty layer (1), soft light (2), paint with white and black (3) (4). Use X to swap the foreground and background colors (3).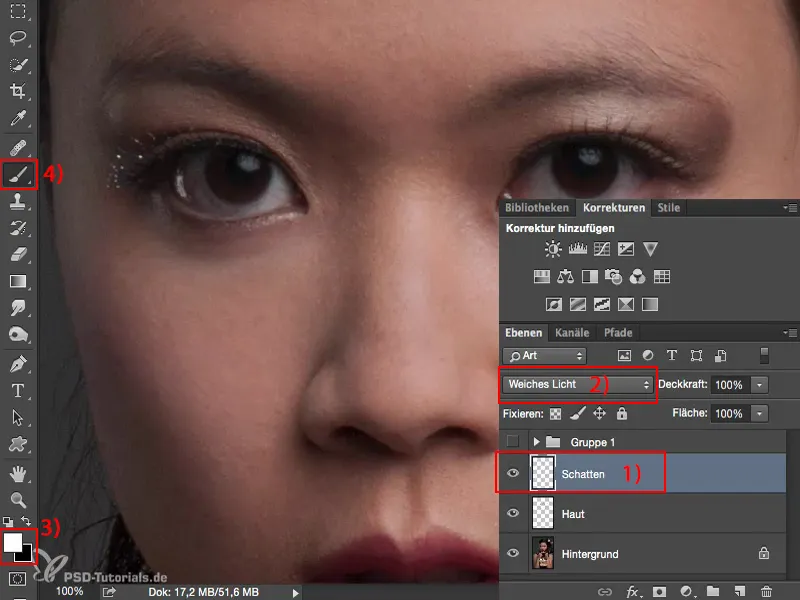
You want to emphasize the blush here (1) a little, then simply draw a little black (2) over it - and the whole thing is darkened. This draws the focus much, much better onto the face. You can also make eyebrows (3) much, much more striking, for example, by brushing over them once, twice or three times at 10 % opacity (4) (5). And you've already enhanced the image here - empty layer, just paint on it.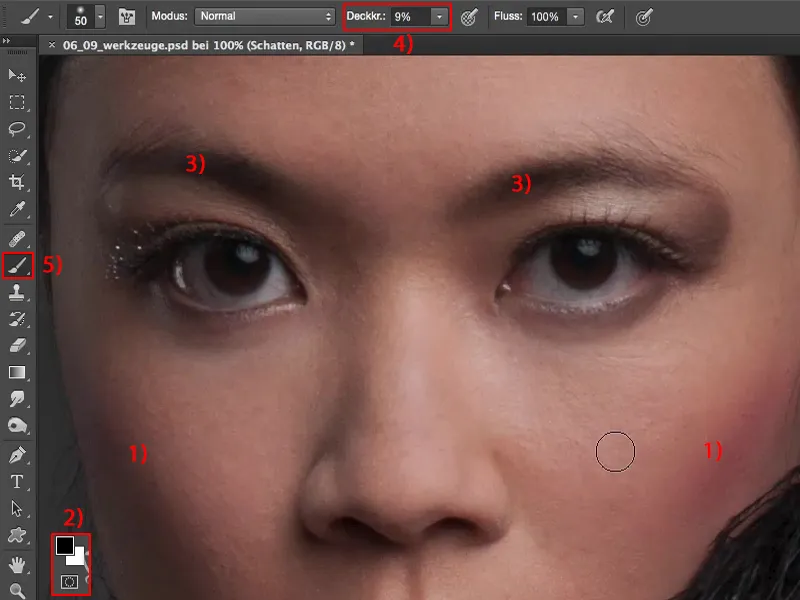
You can also correct colors. For example, set the layer (1) to Color mode (2). If you don't like the blush and would like to have the skin color for it - nothing could be easier: Take the brush tool(3), with the Alt keyyou get a color pickup (4) in many tools, including the brush.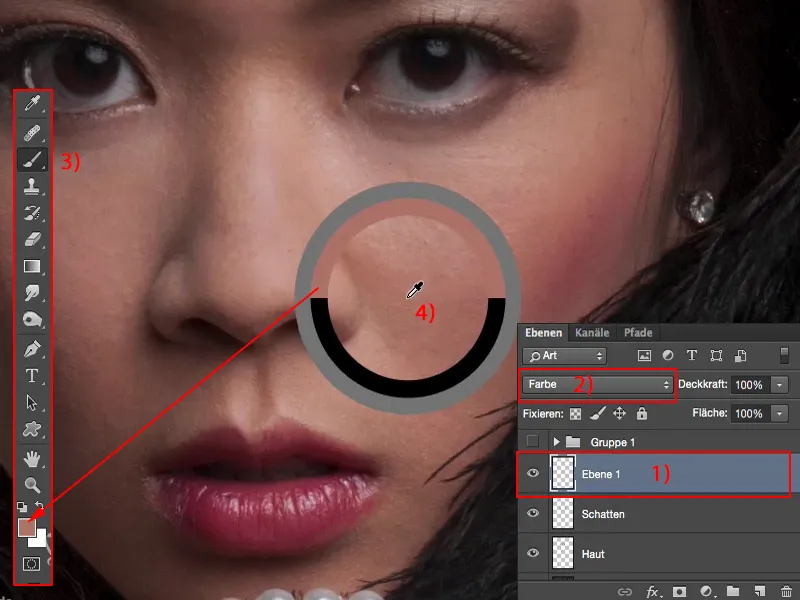
You take this skin color (1), go to, let's say, 23% (2) - less is more - take a soft brush tip (3), color mode (4), go over it once or twice - and the blush is adapted to the skin color.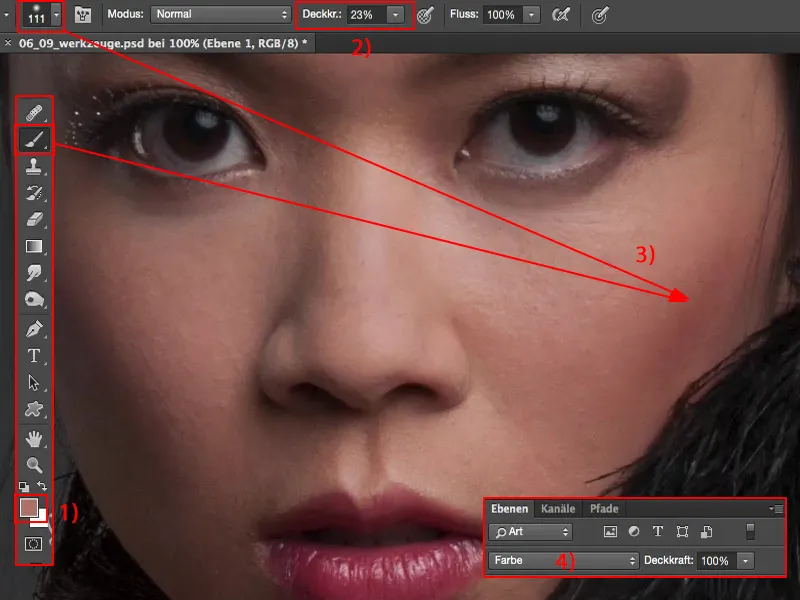
Things like that, I think, are really great, because how often do you have a skin shift somewhere in the picture, a color shift on the skin, especially on the legs or something, when the girl is nervous, or maybe the guy is nervous, we don't necessarily have to be with female models.
But very often they get red spots on their neck, you've probably seen that if you often take portraits. Then make an empty layer, take the healthy skin color and just brush over it. So this is my color layer here. And that's exactly what I need for the girl here.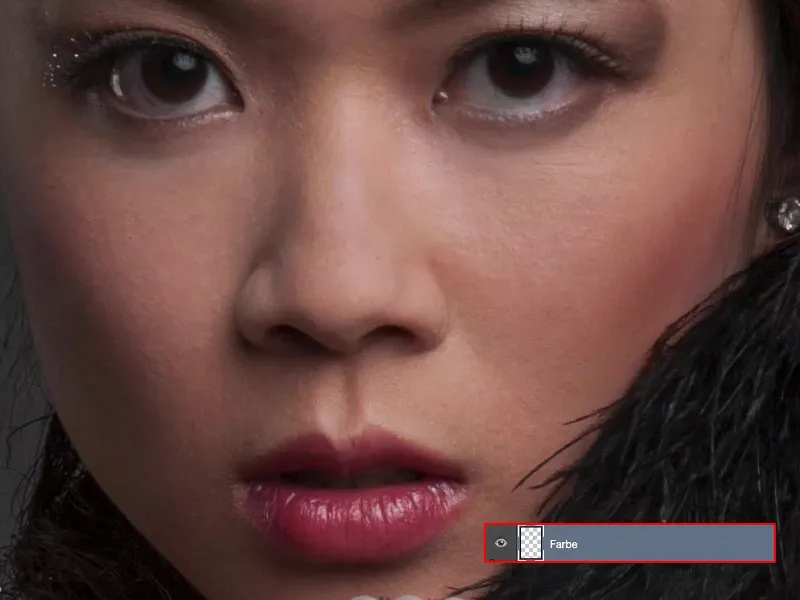
Retouching the hands
The color of the hands: Down here it still fits to some extent, but then it becomes desaturated and turns a bit red.
What do I do? - I pick up this color.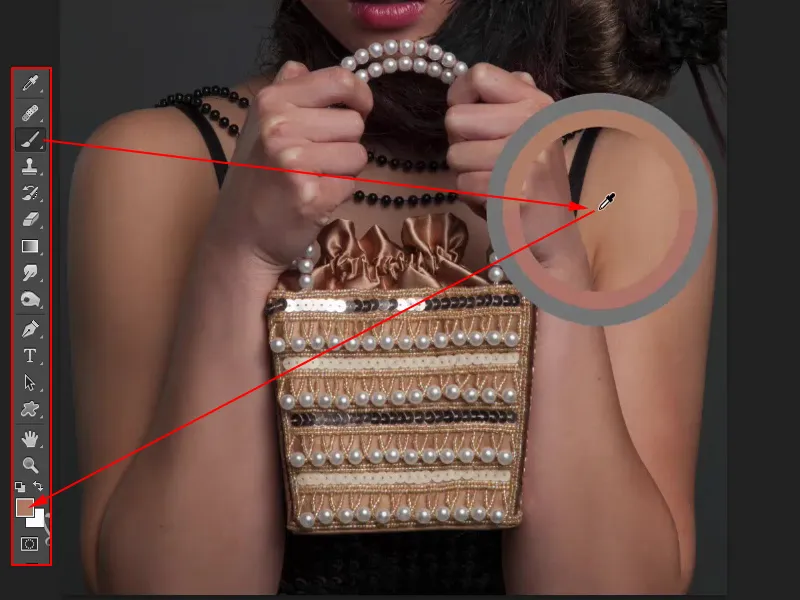
I go for 30 to 40% (1), 100 is a bit much, grab a soft brush (2) and brush on this new skin color (3). I do this a bit too much, because I have 100% opacity on my empty layer (4).
It doesn't bother me at all if it's too much, because I want to control the whole thing using the opacity. Now I have really taken over the color one to one, the structure of course remains the same, the brightness of course remains unchanged, because all Photoshop knows here is the color mode (5).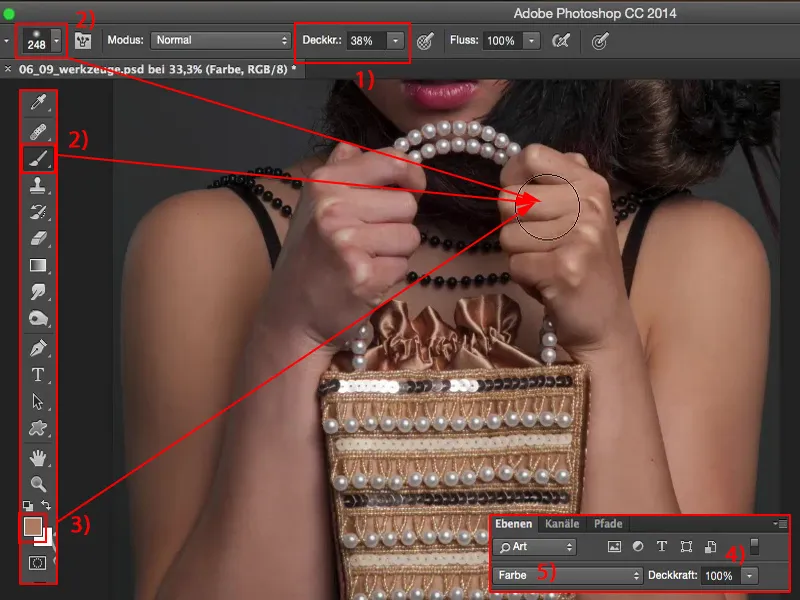
And using the opacity - then you can see how red it looked before - I brush it in so that it fits really well.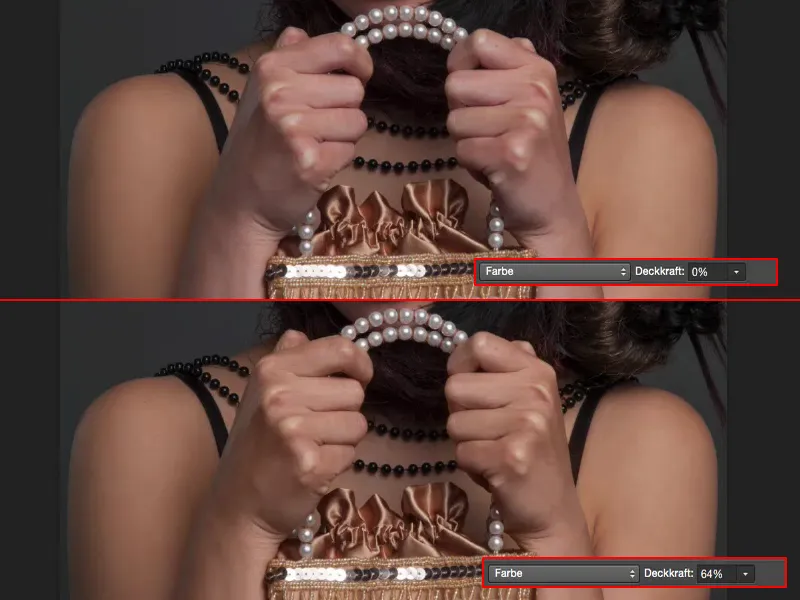
I play the same game with the brightness. All I have to do is set the layer mode to Luminance (1). There it is already. Now Photoshop only knows brightness ... Color: doesn't matter. Structure: doesn't matter at all.
It's all about brightness, and I'm going to take advantage of that by working with the stamp here (2). I go to All Layers (3), I really already have a lot of layers underneath, set the mode to Luminance (4) and now stamp the brightness over it. Opacity 25% (5), the soft edge of the brush is again very important.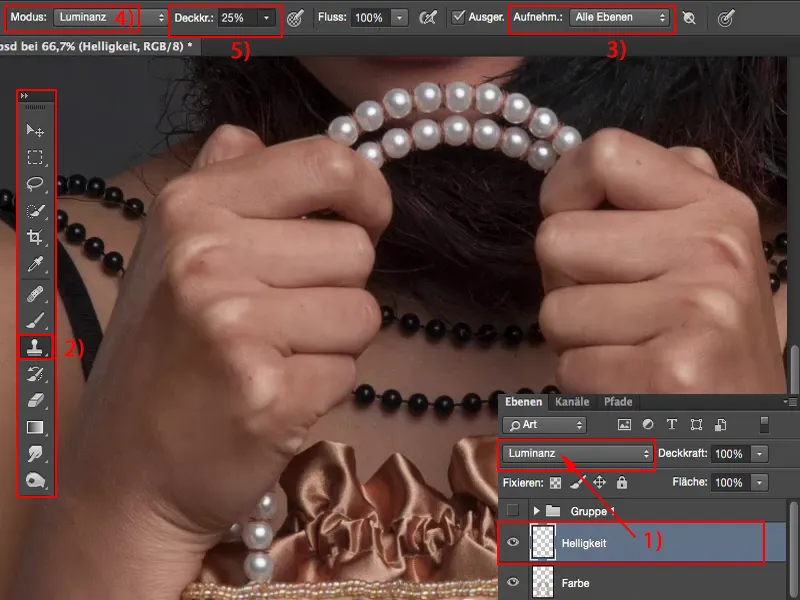
And here I have a dark area. I'll just go over these knuckles with it, which unfortunately grays out a bit, also here over the crease, but it also darkens the whole thing.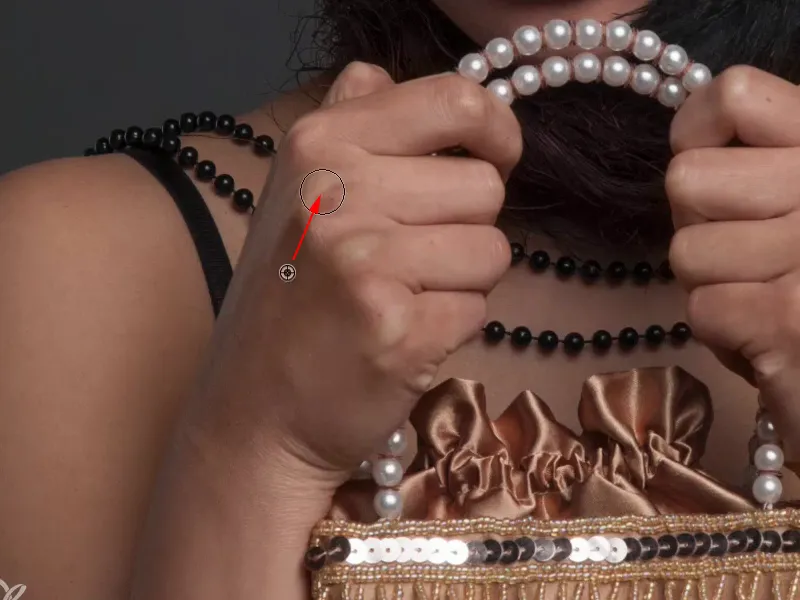
And I mustn't forget: I have 100% opacity here. So the whole thing looks a bit "junky". But when I look at the before and after ...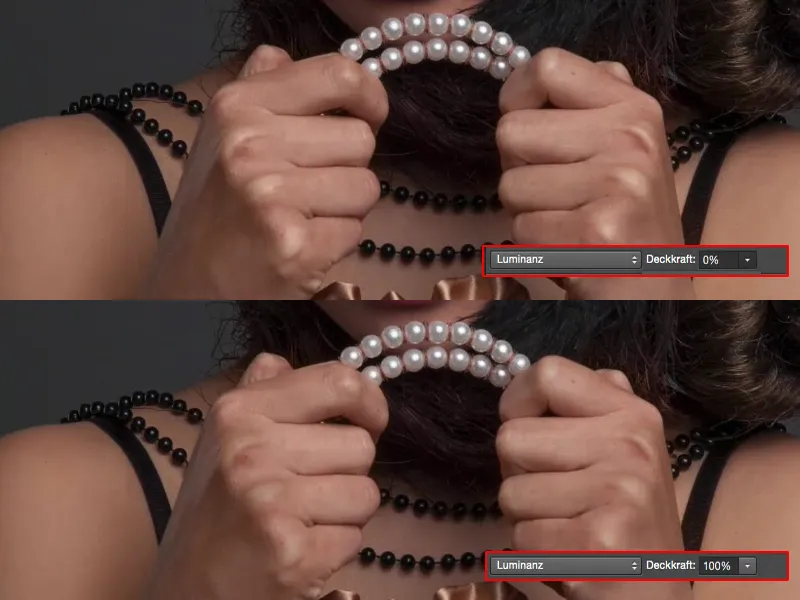
... that's quite a lot, and I'm sure that even 50 to 60 % will definitely detract a little from those shiny white knuckles. So I can also easily understand that here with tools.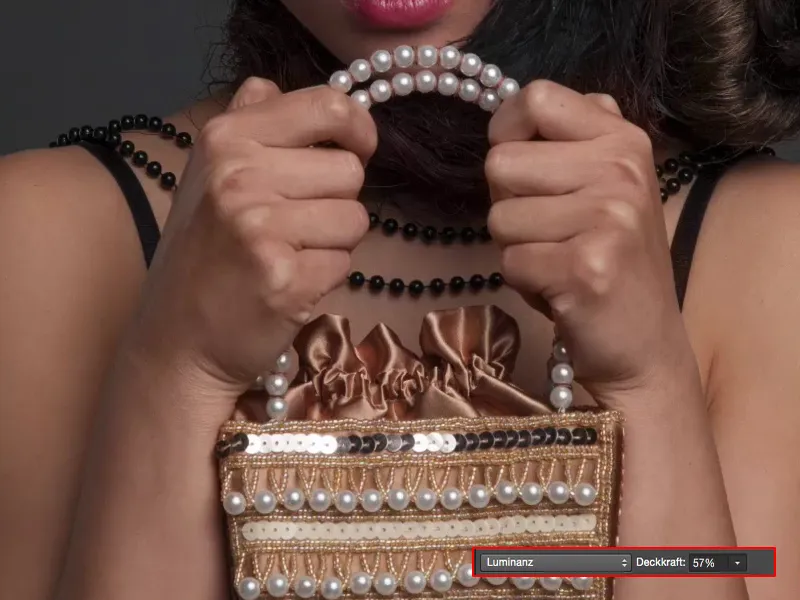
Working on the eyes
Let's move on to the whites of the eyes: Here, too, I can work with the luminance. I'll reset white and black (1) as the foreground and background color, take my white (2) brush (3) and just see what happens when I go over it with white. I realize: This doesn't look cool - unfortunately I see this very often in communities - photos with these alien-white eyes - it doesn't fit.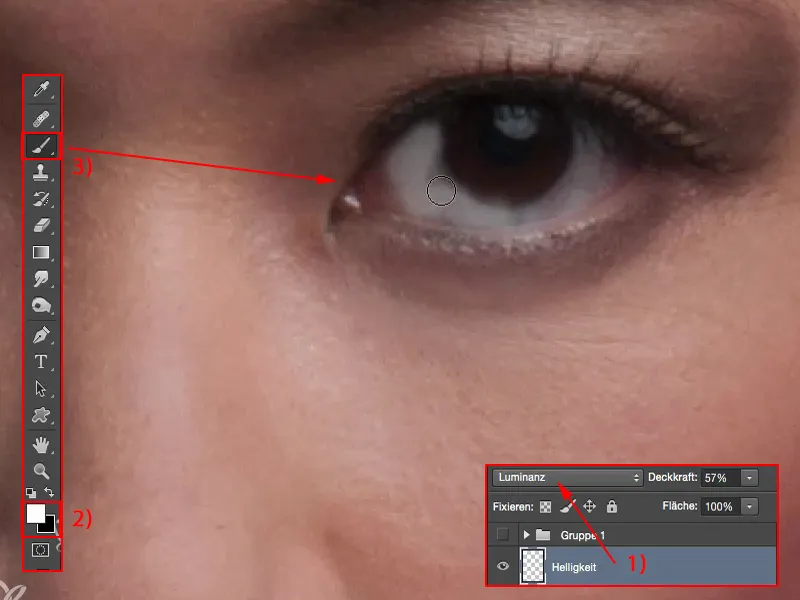
So it's better to work with less opacity here. Once again, this settles at around 10% percent (1). Soft brush tip, and now I can really lighten the whites of the eyes (2) properly.
And while I'm at it, I can also touch up the lower lid (3) and fill in the upper lid a little, including the reflex (4), which can really shine. I simply go over it with white in Luminance mode (5) and make the eye really glow, really shine.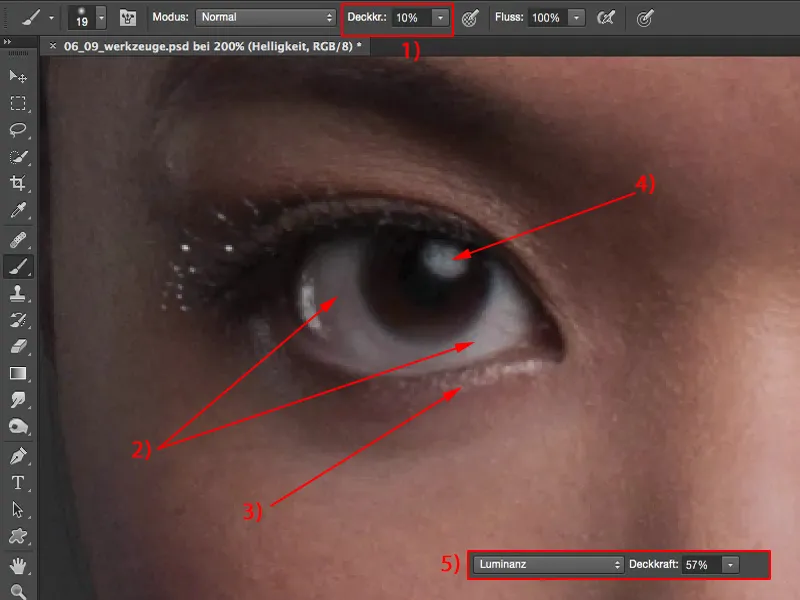
I think the whites of the eyes are a bit too much. No problem, I'm at 57% luminance here, so I'll go down a bit, but in any case I've enhanced the whole thing.
And that's always my goal: each layer really has to have such an effect on the whole picture that I say: "Yes, it was worth taking the time to create a new, empty layer."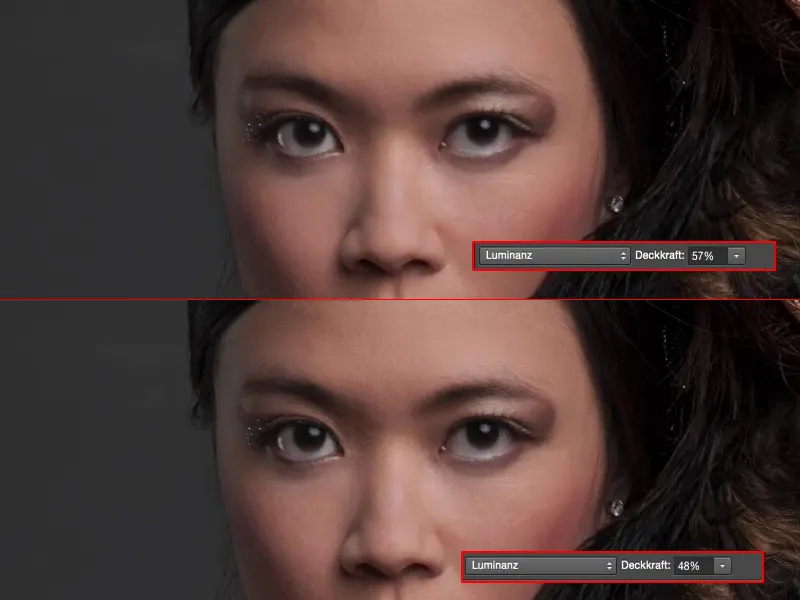
Summary
And so now I can work my way through the whole picture. Here, once I've created all these layers, I know: Okay, here's the skin (1), I'll remove any spots or things that bother me. Here I have lightened the shadows (2) in Soft Light mode, i.e. white and black - Dodge & Burn for the poor. Here I can correct colors (3), no matter what colors I take here now, I can easily brush them on. And here I have changed the brightness (4). Now I've almost saved myself a few adjustment layers with empty layers. I do a lot with color changes via color saturation (5), via selective color correction (6), tonal value correction (7), gradation curves (8), who knows what. I can save myself all that, at least up to a certain level and up to a certain problem, if I am aware of what I can achieve with simple tools, the layer modes and with certain tool settings. So much for that.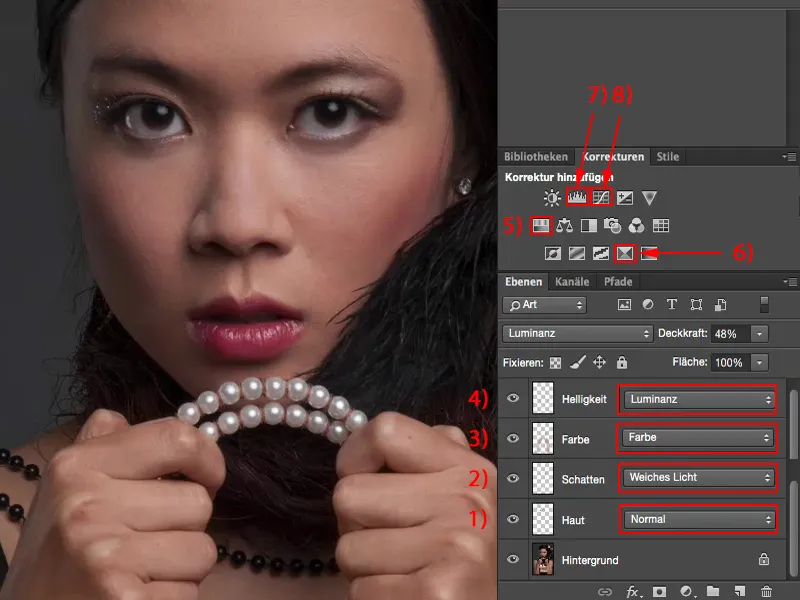
If you then notice any deficits in the picture and say: "I can very well imagine that this glitter, for example, should have a different color", you simply go to the Color mode (1), select the color (2) that the glitter should have, for example skin color, and then you can also color this very subtly with your brush (3).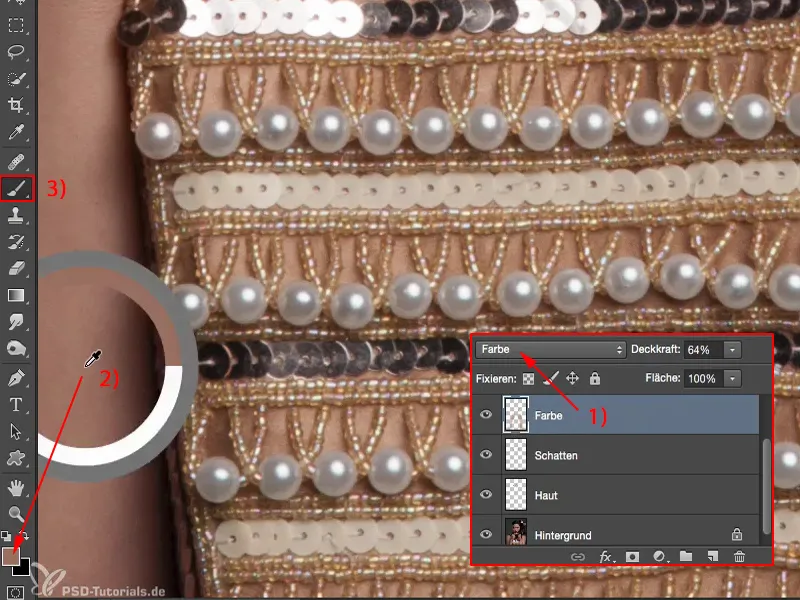
I'll go a little higher with the opacity (1) if you just want to match the glitter to the skin color or maybe even the pearls. These shouldn't be white pearls, they should also shine a little in the skin color - these are such small, subtle changes where you can really save yourself adjustment layers, because with low opacity - if you don't use brute colors, now green for example, or blue with a very high saturation - you can really work very, very well with these things.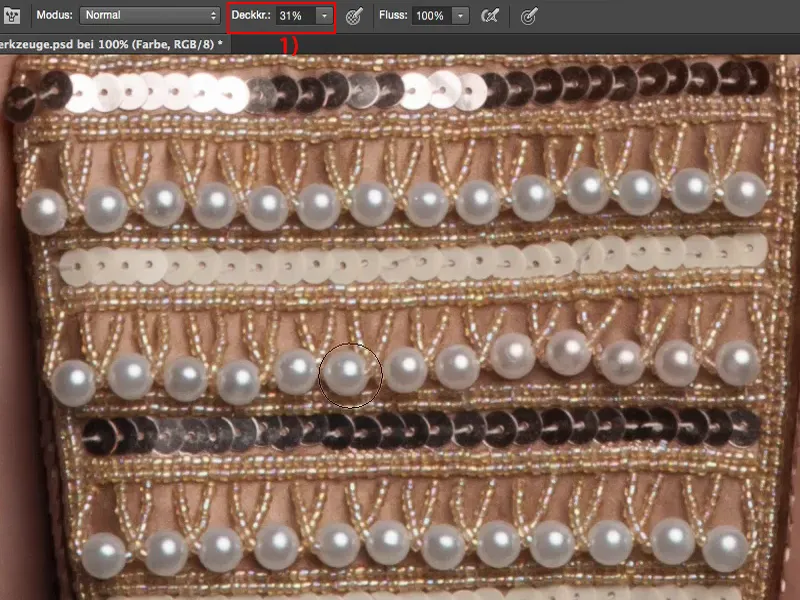
If you take that into account, then you'll see - before you do frequency separation, blurring of the skin, any other things with Dodge & Burn on neutral gray layers - the longer you learn or have learned to work with these empty layers, the more you'll love the whole thing and you'll definitely notice it: The file size stays small, I'm flexible, I can swap layers with each other as I like, the tools usually work on all layers anyway - and then working with tools is really fun.