When I talk about "painting with light" or "light painting" in this training, then for once I'm not talking about Dodge and Burn. I don't want to lighten or darken anything on the skin or anything like that. No, I want to paint my model in a light - I want to put her in a different light. Let me show you what the original picture looked like.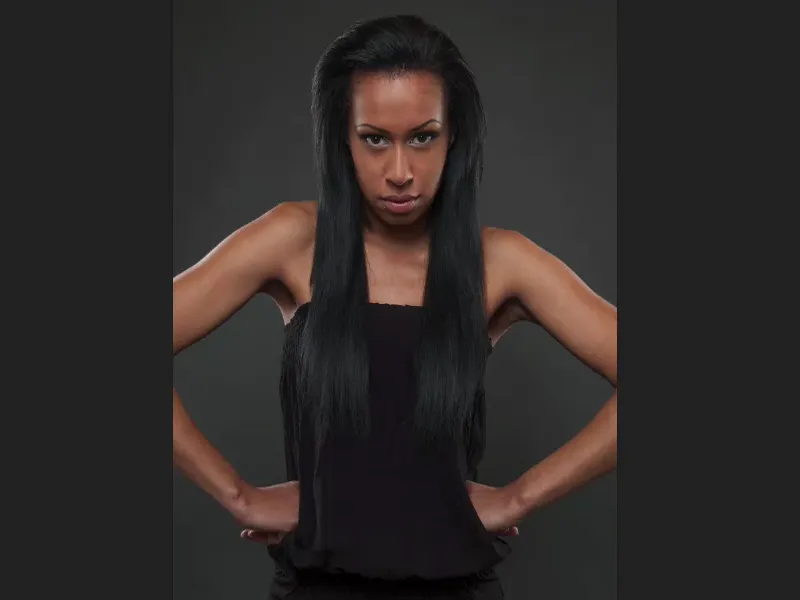
Initial image
I used a small Octa for the frontal lighting and positioned two Striplights on the left and right. As a result, I get bright light edges on the upper arms and you can still see it clearly under the armpits. And from the front I have a nice glow on my hair and forehead and of course I also have these highlights on the left and right.
This is a relatively normal portrait setup, but you can do a lot with it, because no matter how my model turns here, I always get an interesting lighting situation. For me, this is more appealing than if I had simply held the Octabox up front.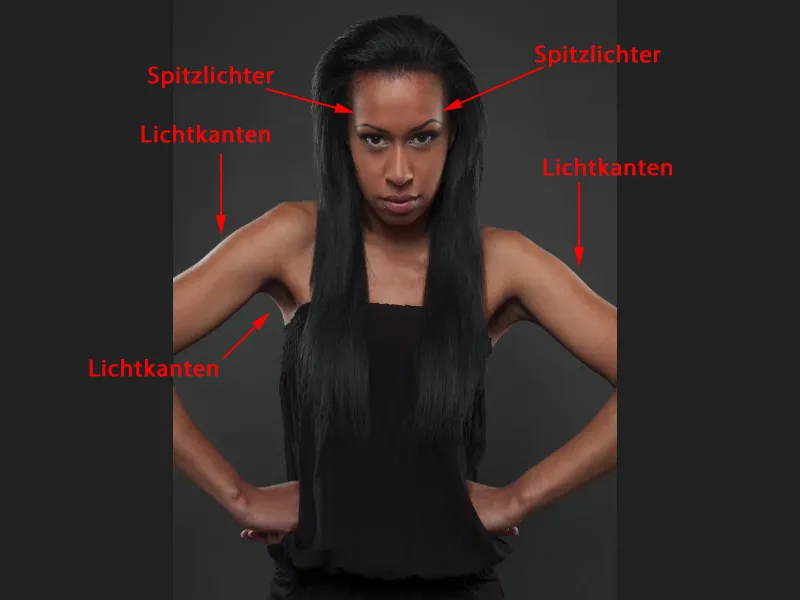
Inserting a light spot
Now here's my idea for the picture: I would like to make the whole thing look as if there is a spotlight behind the model. How do I create this spotlight?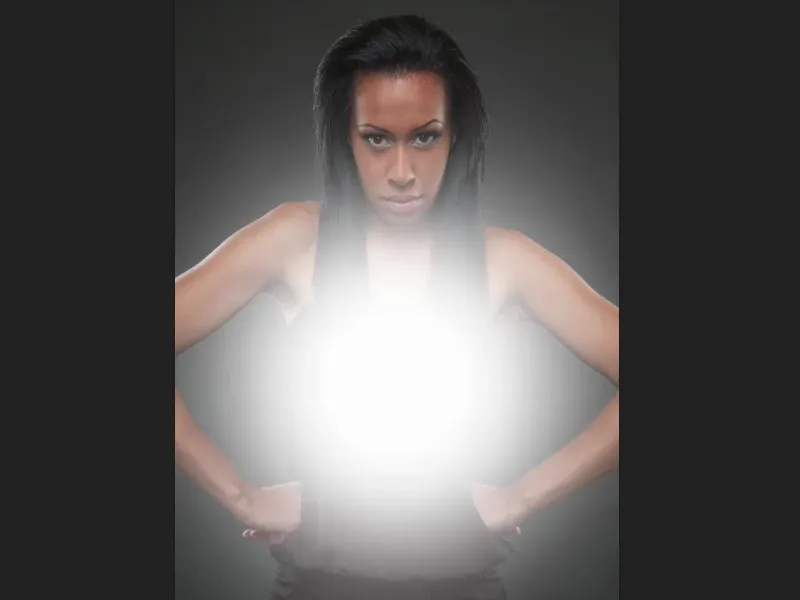
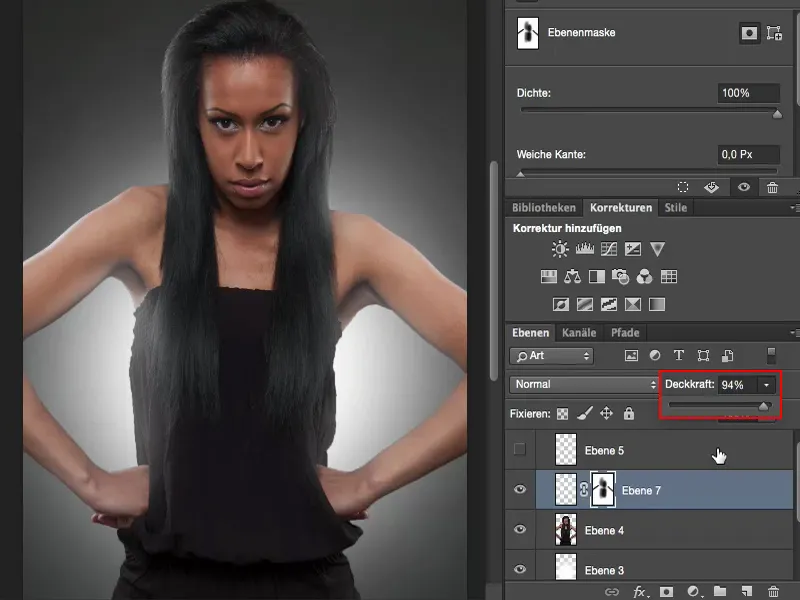
It's very, very easy to explain. You simply create an empty layer (1) over your background layer, use a brush (2) with full opacity (3) and set the hardness to very soft. Make it as big as you want your spot to be. I'd say that's roughly where you position the spot (4).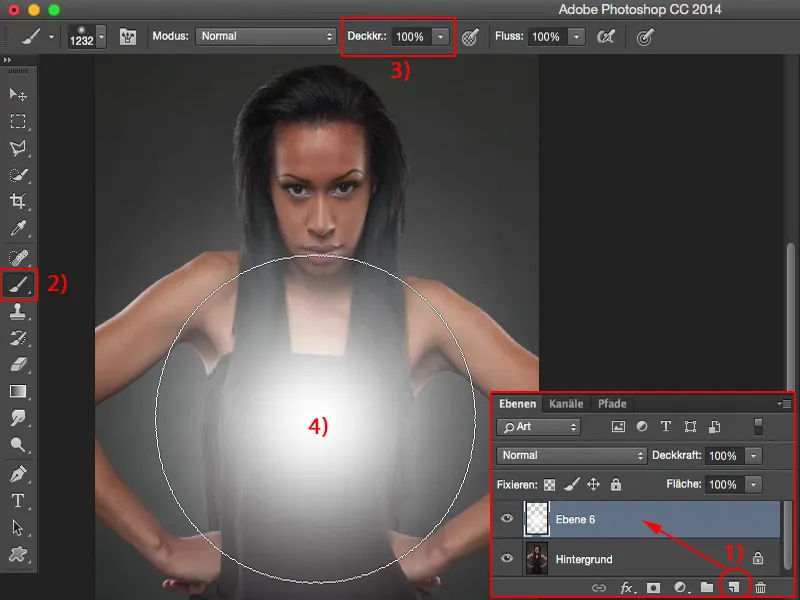
Cut out
Now I have this bright light spot. All you have to do now, of course, is to crop the model first. I've done this here before, so I've prepared it a bit using quick selection and enhancing the hair with an edge. That's the work you have to do beforehand, because the spotlight is supposed to be behind the model.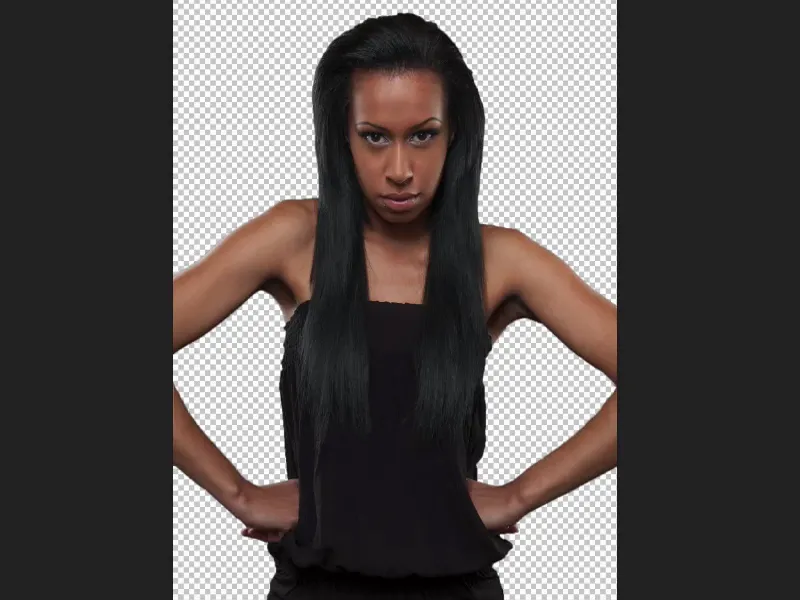
And when I then activate the spot, I have it behind the model. The spot is also in Normal mode.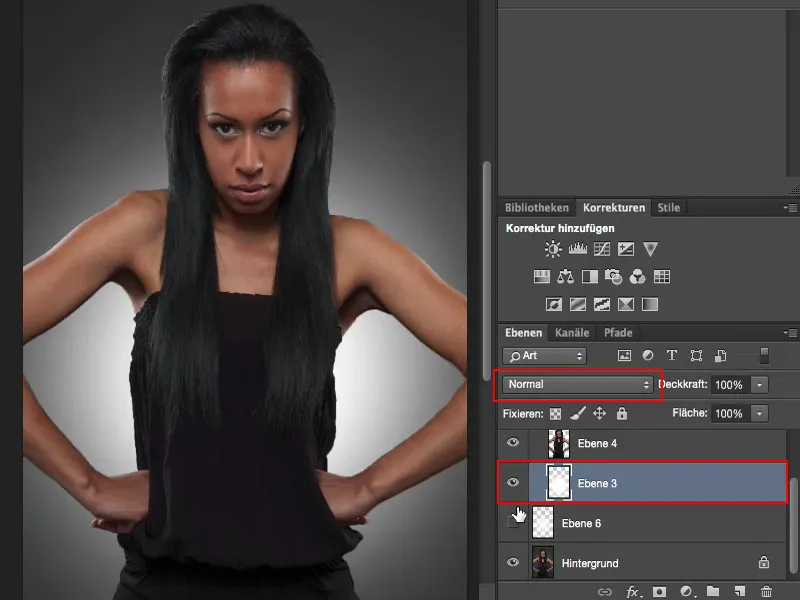
I could also set it to Soft light mode, for example, which would make it a bit more subtle and it would also look good. I could also set it to the Invert mode, which is a bit more intense.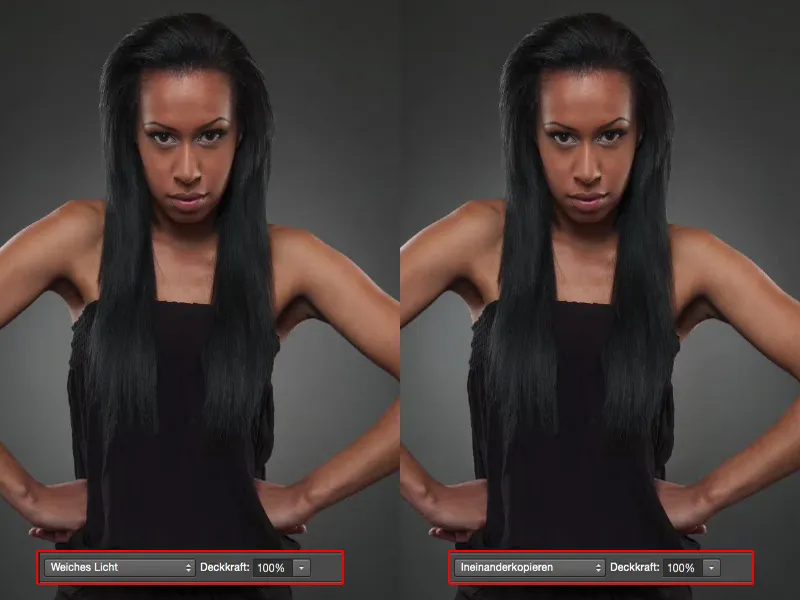
Create lightspill
In this case, however, I leave it in Normal mode, because I really want to paint this over-glow effect onto the skin.
So I want it to look as if the light is shining out behind the model on the left and right, brightening the edges and also reflecting off the hair. The technical term for this is "light spill".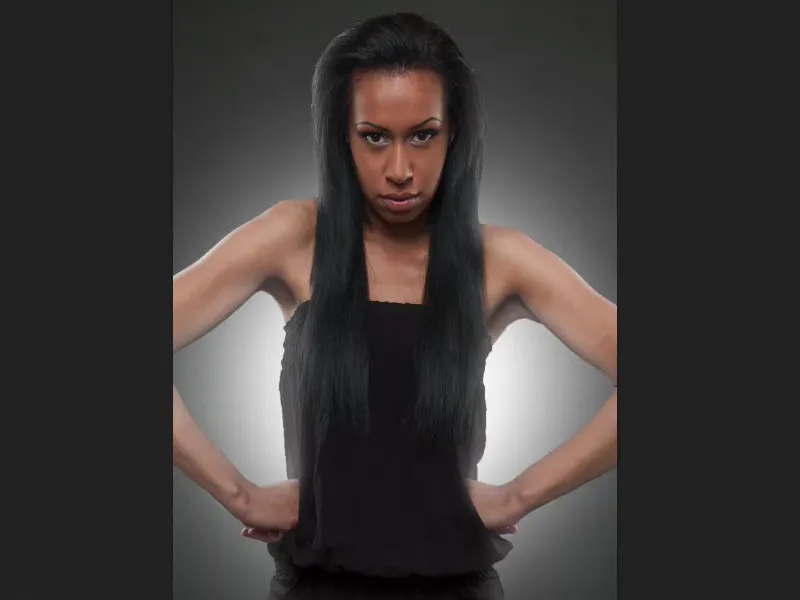
This also works very easily. Again, all you need is an empty layer, ...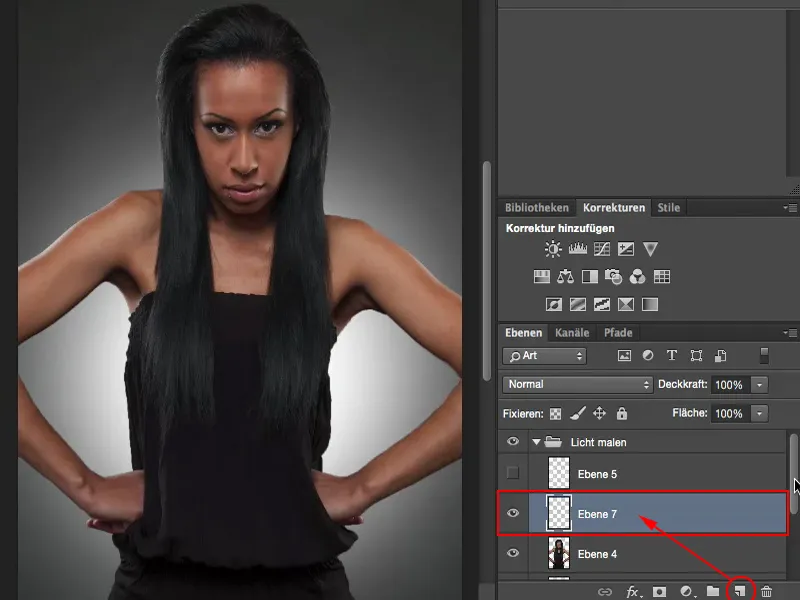
... but what you need to do now is go to the clipped layer and load the selection while holding down the Cmd or Ctrl key. Now you have selected your model and ...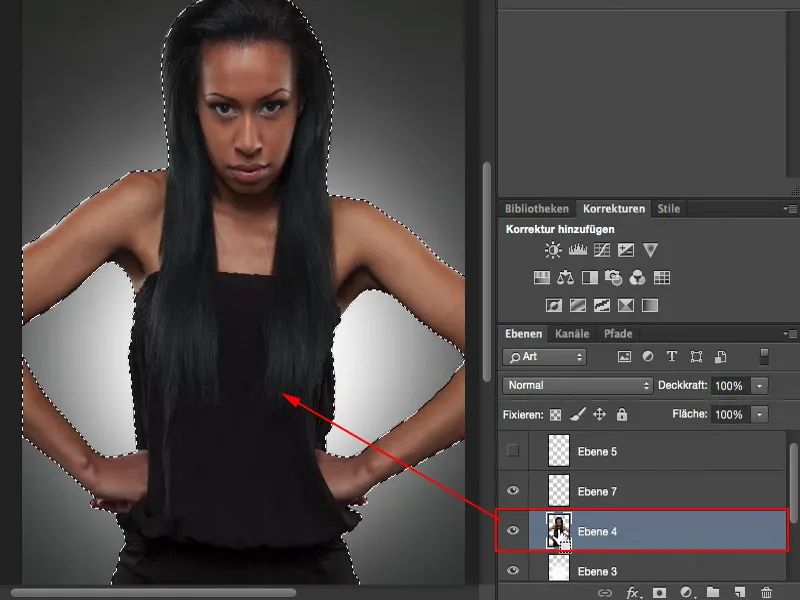
... with reduced opacity - I'm going for 10 to 12 % (1), relatively low - you can brush on this light pill with a soft edge. The whole thing will only have an effect within the selection.
Now you can paint on your model (2). In any case, do not paint over it with the entire brush, but only on one edge area, because then you will have a soft, flowing transition. You can also add a little more on the inside, on and under the armpits, approximately at chest height. That's where most of the lightspill will appear and I'll draw a semi-circle of it in the picture. And then I'm actually already finished.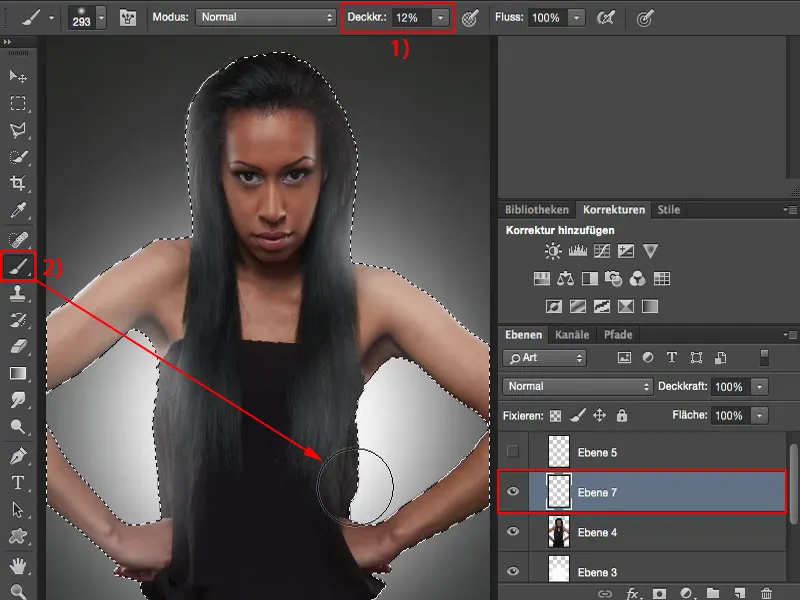
I cancel the selection with Cmd + D or Ctrl + D and take a look at the result.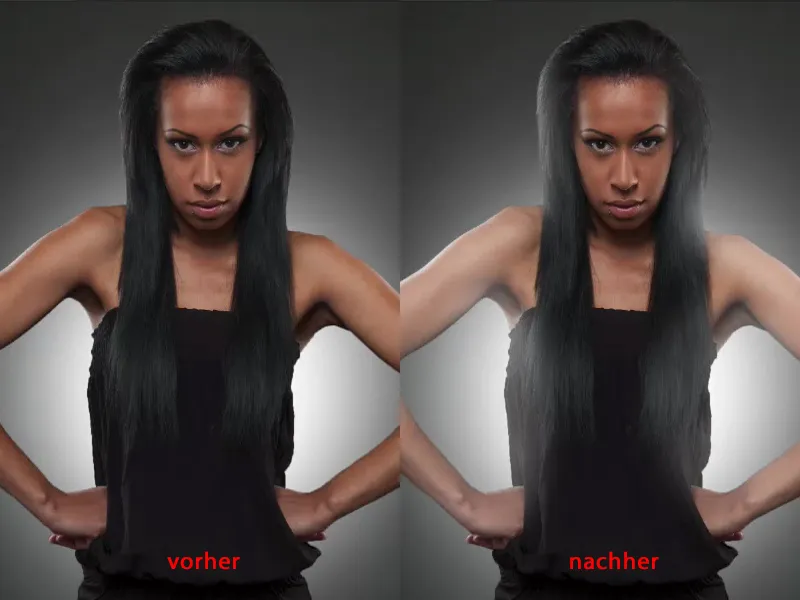
Refine the lightspill
If you realize that the whole thing is a bit too much, you can always take it back using a mask (1) with black (2). I go to 30 % opacity (3) and just pull it out a little again. And so I can really, really fine-tune it, I can just take a little bit out of the arms in the middle. That's roughly how I draw out the areas on the mask with black.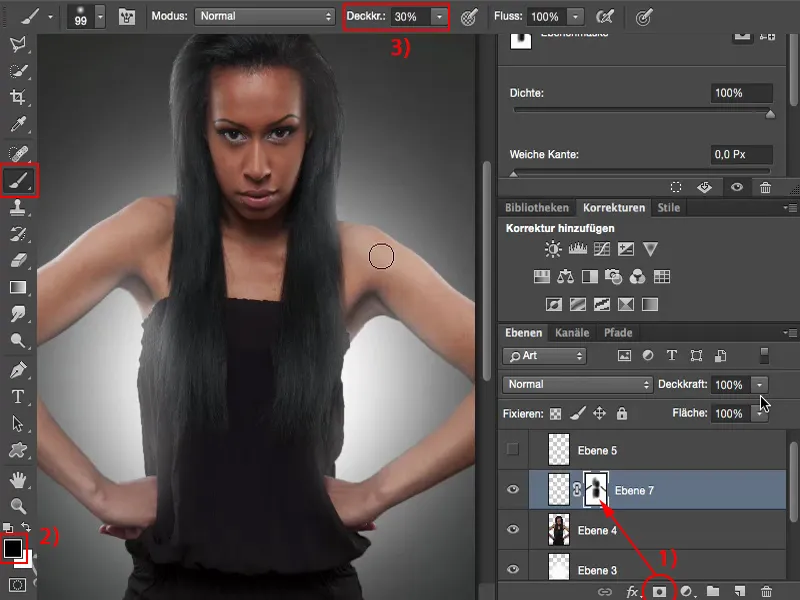
And then you also have the option of adjusting the opacity at the end.
So you can completely change the lighting situation using the simplest Photoshop tools on an empty layer with a white brush.