I will now show you how nice, relaxed and easy it is to work with smart objects. Smart objects are real time-savers in image editing and they also provide a certain degree of clarity.
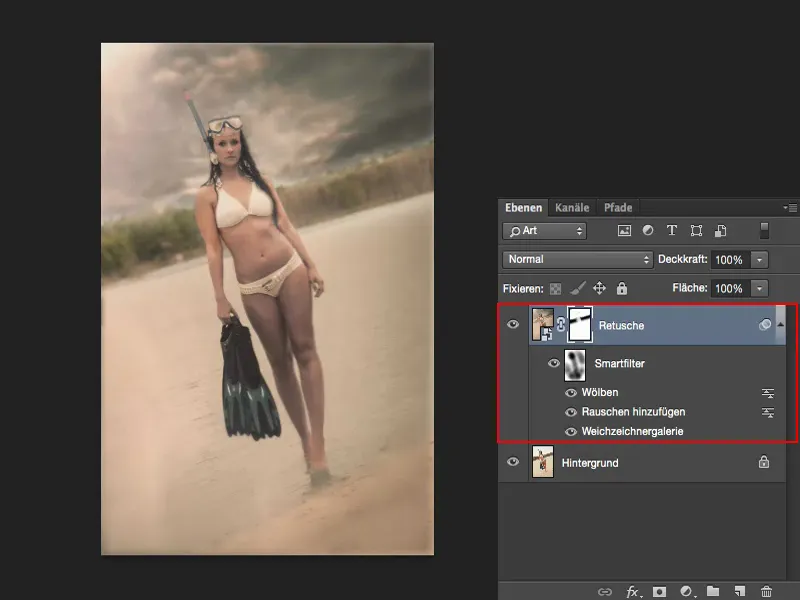
Here, I have tried to create a scene for this Bond girl similar to the one in the movie. The well-known scene when the lady gets out of the water. And of course I need a bit of Caribbean flair, dramatic clouds, a beautiful sandy beach and that milky, creamy look that characterized the film. I tried to recreate that.
Originally, the whole thing looked like this, snapped at the next quarry pond around the corner. And unfortunately I have these trees behind it, these firs and spruces. I have a beach that needs to be cleaned up, there's all sorts of small stuff, food and so on lying around. I also have to do a bit of retouching on the model, color adjustments and so on. The whole thing is relatively time-consuming. It may not look so bad at first glance, but there's a bit more to it than that.

All edits hidden in the smart object
Where is the whole thing hidden now? All I can actually see on this layer here is: Smart Object, Smart Filter, Warping, Add Noise, Blur Gallery. That can't make up the entire image look ...
Yes, and that's how I did it here: I've hidden the whole thing in this smart object (1).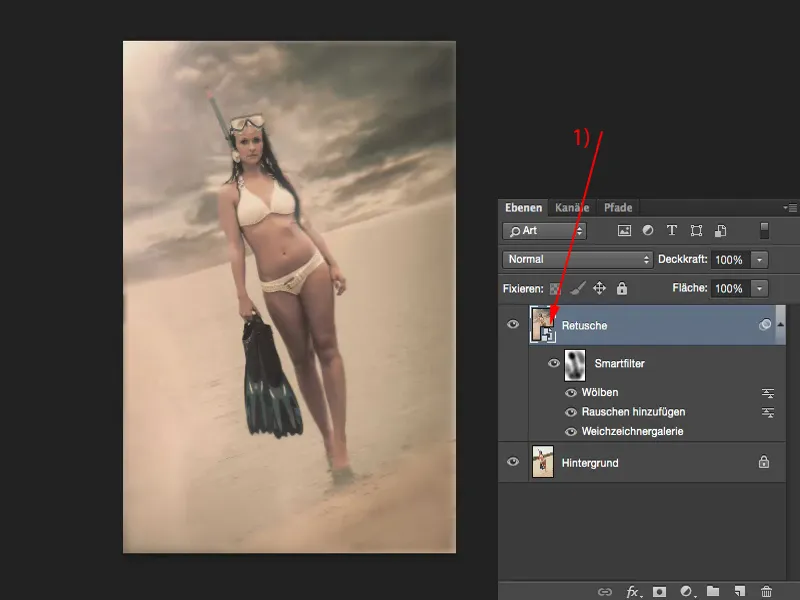
When I open it, the first thing you'll see is that the workspace is hugely enlarged because I've included various elements here. For example, the file with the new sky: I have produced a flare at the top, I have a texture over it and, and, and ... All of this is in my retouching layer.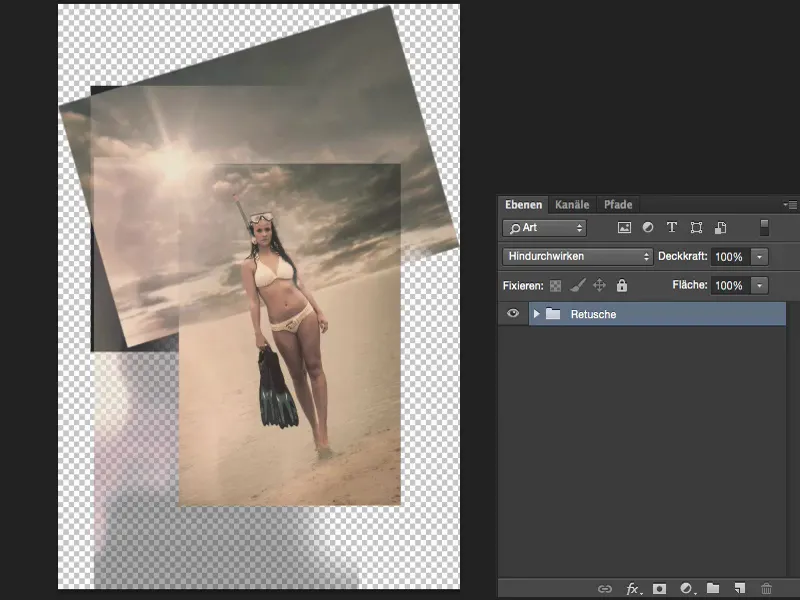
If I open it up (1), you can really see the complete image processing, you can click on and off the individual layers. And let's just go through briefly how it all works.
And then I'll come straight back to the smart object. This is basically the working method or the story when I start here with my original image.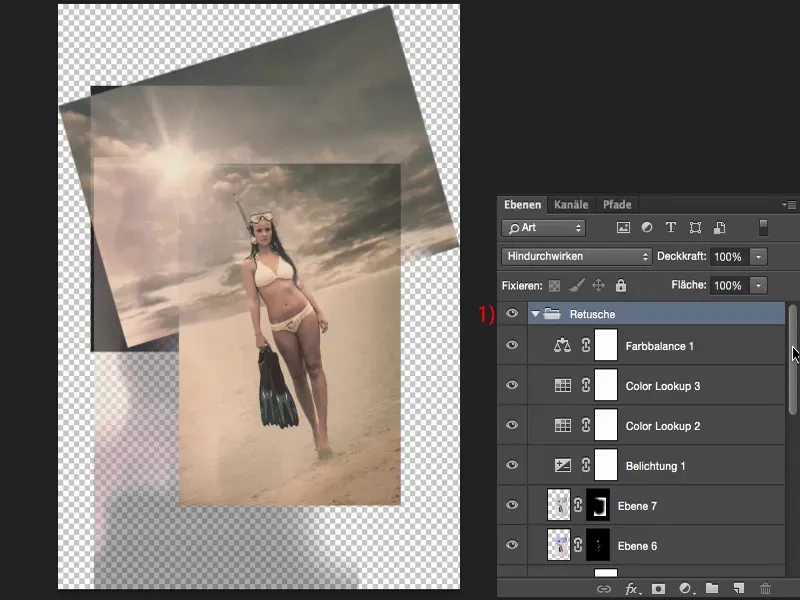
Example: This is all in the smart object
A hue/saturation layeris applied over the water in the original image. I want it to be a bit Caribbean blue.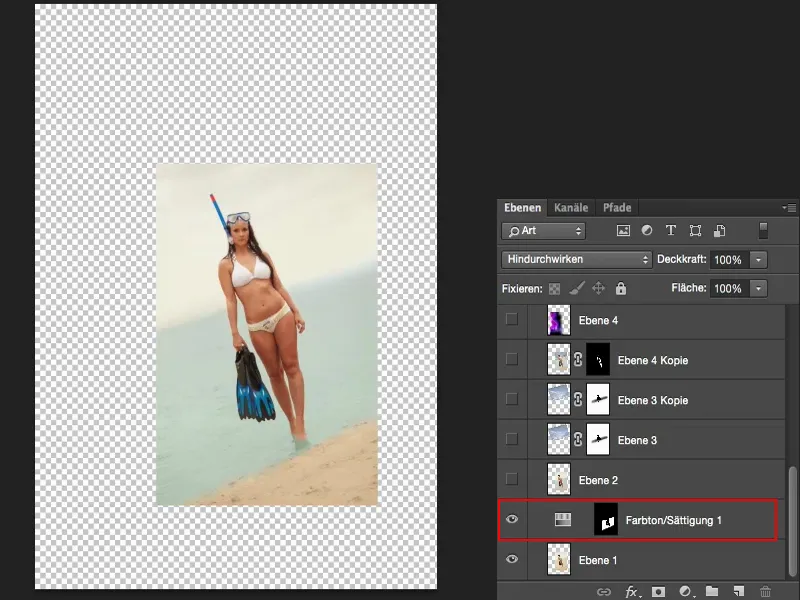
I have simply transformed the model downwards (1), which results in the legs and fins becoming longer, but nobody who doesn't know the original fins and legs will notice this.
Then comes the sky (2) in overlay mode. And because the drawing is not yet as I imagined it, it is simply copied again (3), then removed from the model using a mask (4) and blended a little softly.
This layer (5), not much happens here, except that the mask is corrected a little, because there was still a bit of the sky in there.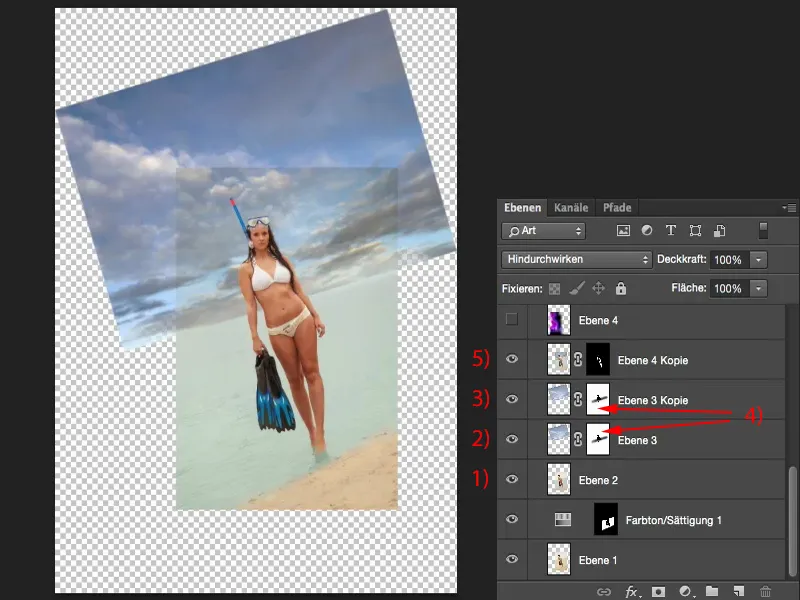
Here comes a color mood (1), I brushed around a bit with color and masked it off. Then comes the sunbeam (2), of which I actually only need the small corner.
Then a selective color correction (3), the first color adjustments are made. The Color Lookup layer(4) brightens the whole thing up a little.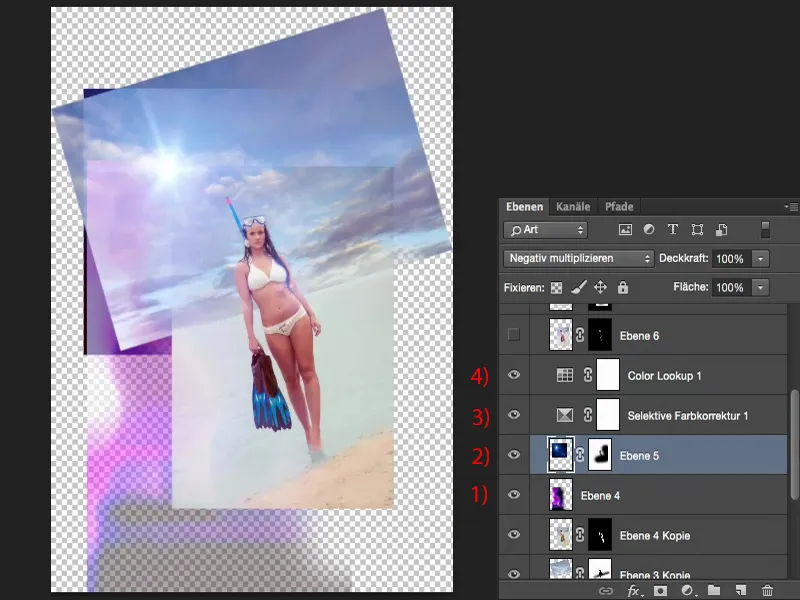
On the next layer (1), everything is taken down a little from the model. A vignette is added to the right of this layer (2). I made the exposure (3) a little brighter with the adjustment layer.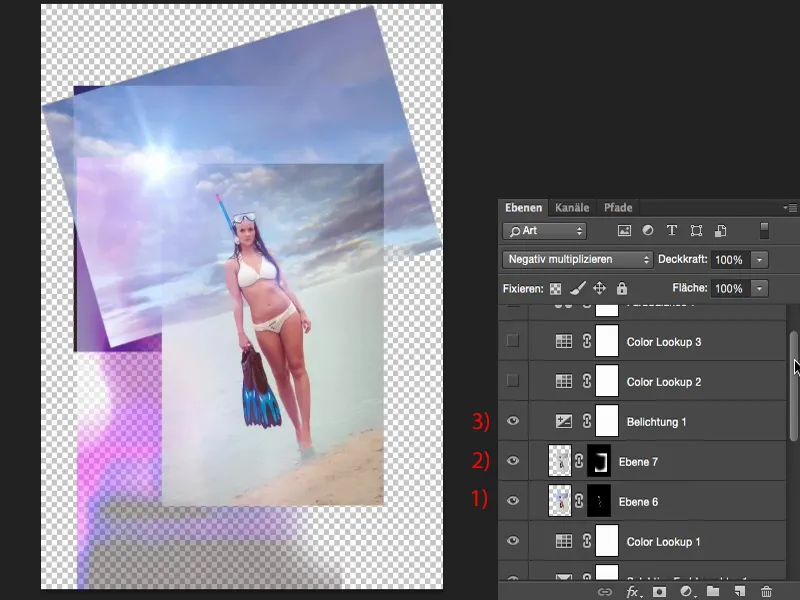
The color lookup layer(1) provides the main look in this case, is modified a little by another color lookup (2), and a color balance (3) is added on top to make the whole thing a little warmer.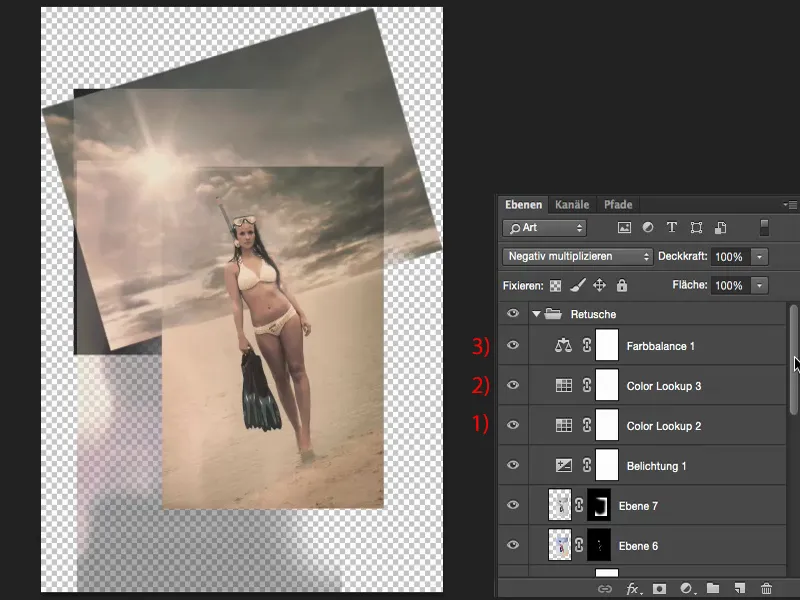
That's basically all the retouching. There's not much behind it, mainly working with layer modes and masks and with adjustment layers. The nice thing about it is that I can now intervene at any point because I have worked completely non-destructively.
I can change the sky (1) here, I can retouch the model (2), I can bring in a different color mood, I can pull the flare (3) out a little and pull it in a little. So I'm really working in a completely non-destructive way.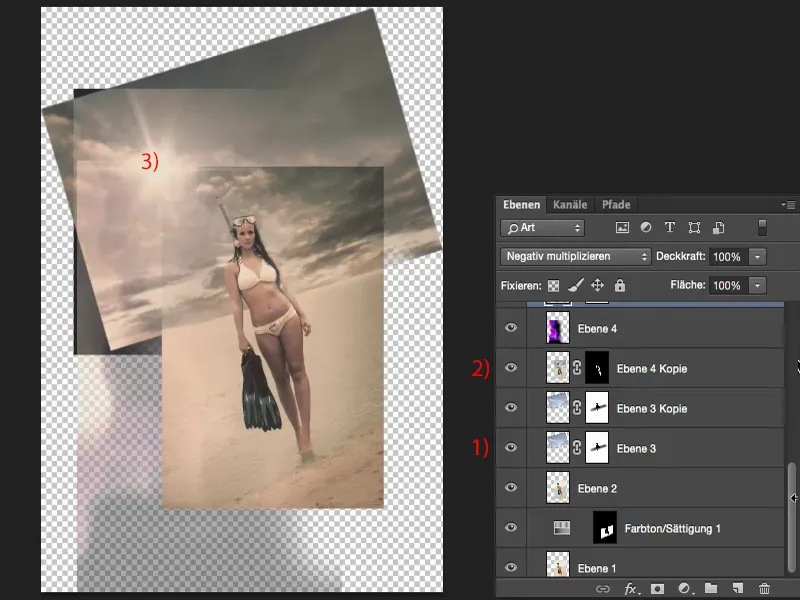
And every change I make is saved when I simply close the file up here (1). I then have the option of canceling the whole thing and continuing to work (2), not saving (3), i.e. not transferring the changes to the smart object, or saving (4).
With Save, my change is calculated back here.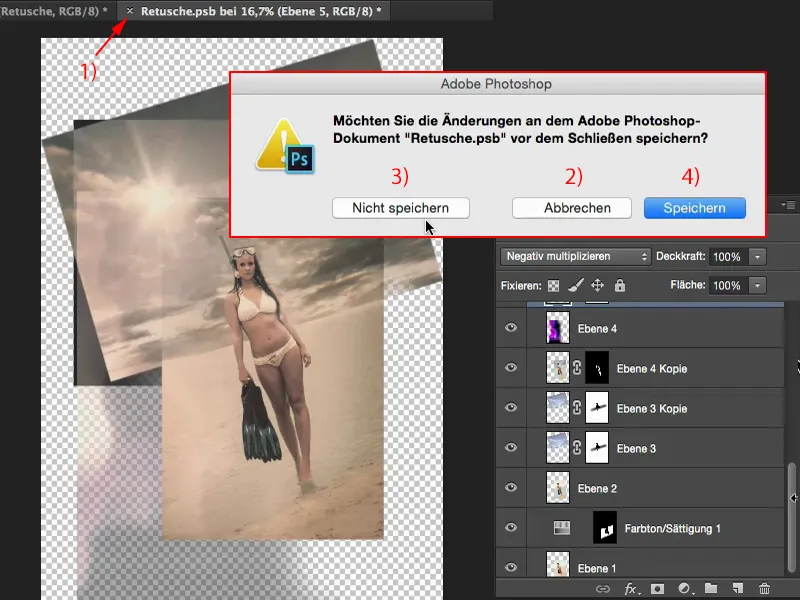
Depending on how complex this group is, which is hidden here, it may take a minute, but it really has to convert the entire layer stack back into this smart object (1).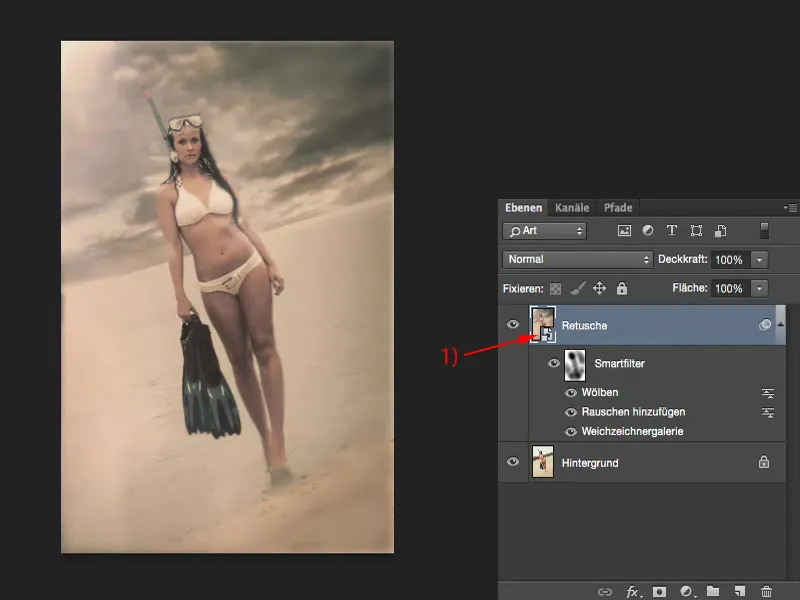
Further editing options
This means that I can now use this one layer to display the before and after completely.
And this is actually how I personally prefer to work, because in the end I basically have a pixel layer, even if it doesn't look like it, and I can do all sorts of things to it afterwards with a Smart Filter.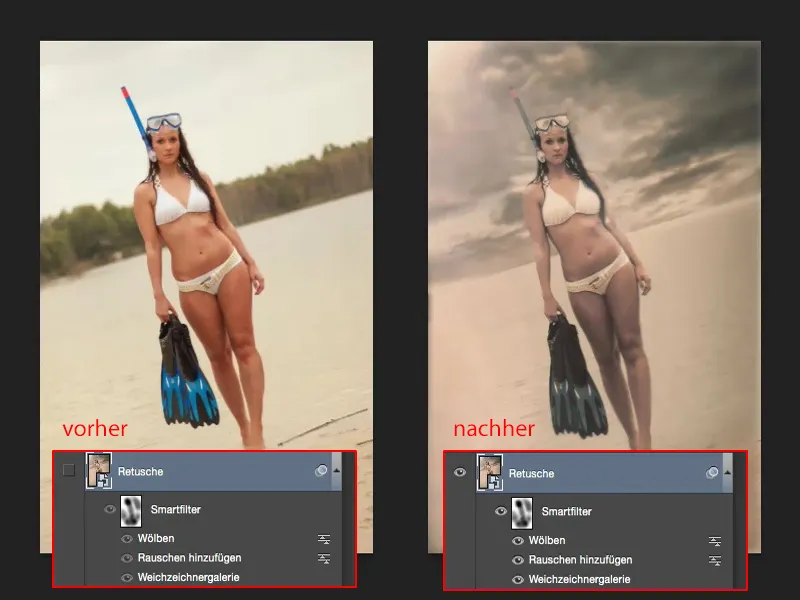
I'm also so flexible with the smart object that I can, for example, create a mask (1) on this smart object layer, in this group, on which there are at least fifteen or twenty retouch layers, and immediately replace the sky, for example. I paint (2) over it here - and I have my original sky and my trees from the Bavarian Forest again.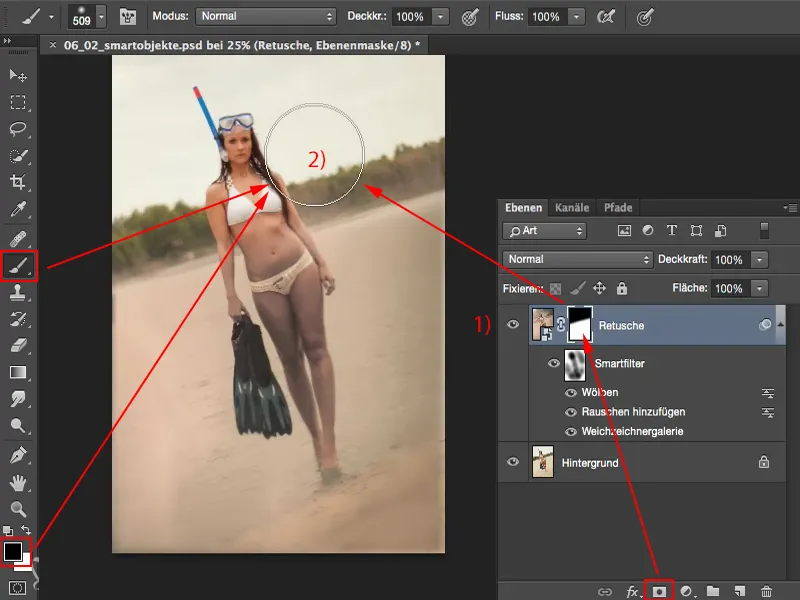
On the model (1), I would now have to paint on the color look again with reduced opacity (2), otherwise there would be too much of a transition here, of course, but that can easily be done with a mask ...
And it flows over so easily here. So I have the Caribbean look below and the Bavarian forest in the background.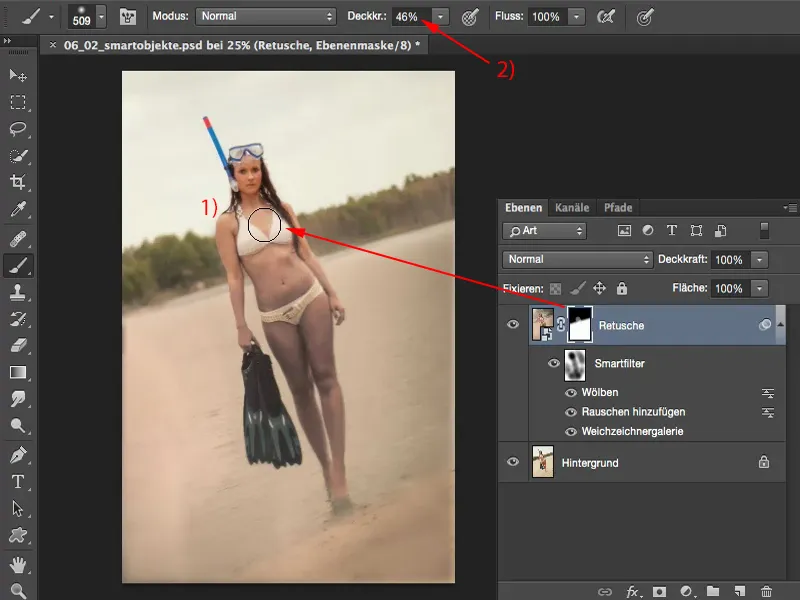
And now I can mix and match. I can now also leave the trees in and say: "Yes, but I'd really like the dramatic sky" - and use a mask to bring it back into the picture.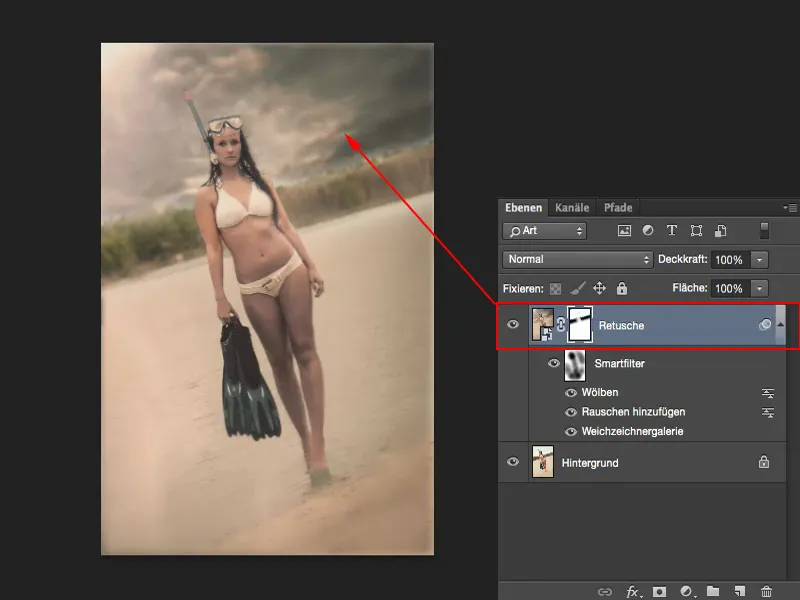
Summary
That's the advantage of smart objects: I can work with a mask on a single smart object, I can add filters, I can put all sorts of things in here. In principle, a smart object is nothing more than an empty box that is waiting for settings. "Give me something! Feed me!" ... And we've really done a lot of that here.
If I create an entire group as a smart object, then I really have a very, very clear layer stack. I can work on this smart object layer, which contains countless groups and who knows what else, at any time with masks and filters and adjustment layers and so on. So the smart object is a real, real jack-of-all-trades.