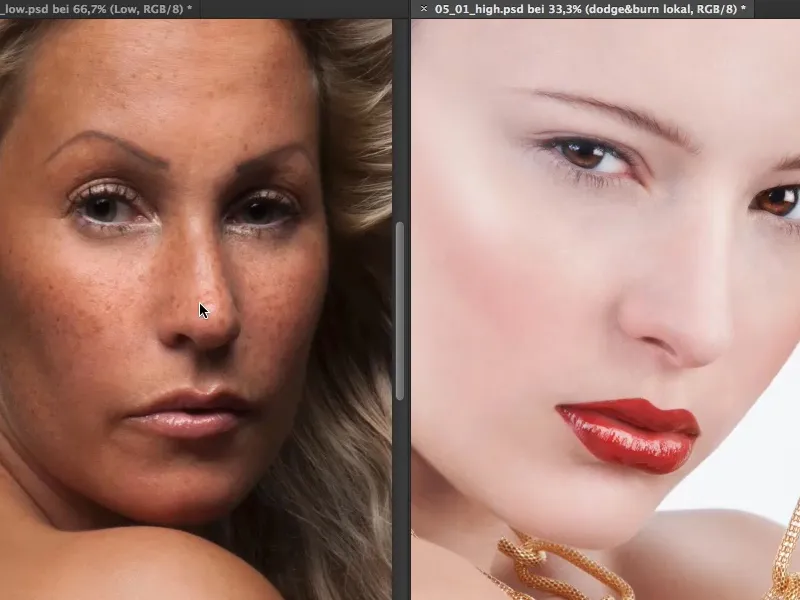
In this tutorial, I would like to show you two different types of skin retouching and beauty retouching in general. I thought about the fact that you could theoretically divide the whole thing into low-end and high-end. I have opened two pictures for you. On the left you can see a kind of low-end retouching. I'll come back to the terms in a moment and explain what I mean by them in a little more detail. And on the right you can see a high-end retouch of mine.
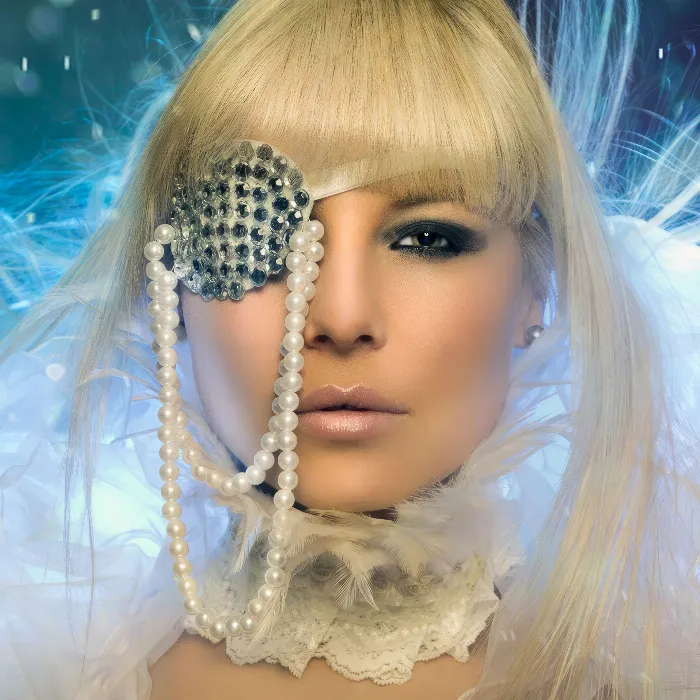
High-end doesn't necessarily mean that the image looks super good. It means that there are certain techniques involved. Low-end doesn't mean that this is somehow a bad kind of retouching and for me it has nothing to do with the image being poor quality - it just means that I'm working with the basics in Photoshop here. I'm not going to transform lips, mirror eyes, paint hair ... That has no place in a low-end, normal beauty retouching for me.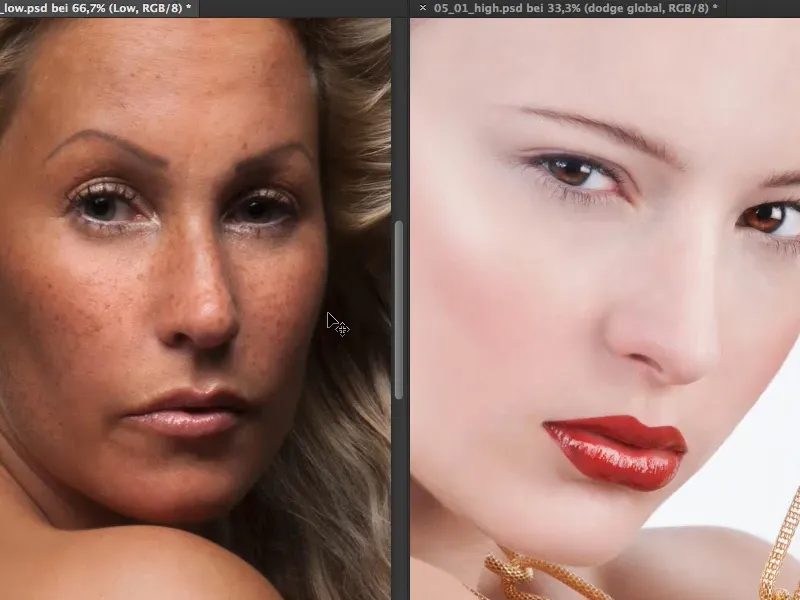
I have the high-end retouching for that or I simply do things more and of course achieve a completely different image look, because if you imagine this here (left image) as a cosmetics advertisement, for example, then you would all say: "No, you can't use that for that."
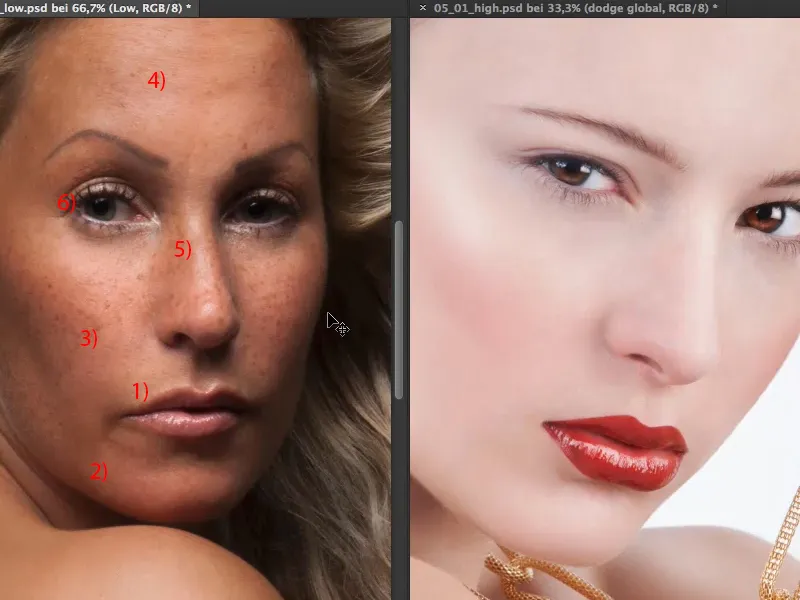
And why can't you use it for that? You can't use it because, for example, there's such a light border around the lips (1), because there's a lot of midtones, shadows, depths, highlights, everything is so mixed under the mouth and in the chin area (2). I personally think the freckles are really great, I would never remove them (3). But the forehead is still quite blotchy (4), I have blotchy shiny spots everywhere (5), they're not continuous, and so on - the eyes are a bit dark, I have no shine in the eyes, hardly any reflection in the eyes (6). And I can continue the same with the hair.
So: that's why I wouldn't use this picture for a cosmetics campaign, for example. If you imagine cosmetics images, advertising images, they don't look like this. They look like this (right-hand picture) - and they look like this because, firstly, they were photographed specifically for this purpose, of course, but they also look like this because a day's work has gone into a picture like this, or perhaps four or five hours have been spent just tinkering with the skin and an hour on the lips and so on and so forth.
For me, that's the difference between low-end and high-end retouching. I have to think about it first: What is the purpose of the image? What purpose is it supposed to fulfill? Does it fulfill a purpose at all or should it just look nice for my client? For example, if I work in a normal photo studio and the customer comes in and says: "I'd like five nice photos of me." - Five nice photos?! - I'll retouch them as naturally as possible.
I'll Blender you the before and after here. You can see that there were small wrinkles in the mouth area before, and there were large imperfections under ten (arrows in the picture). There were a few wrinkles under the eyes and a bit of shadow under the eyes (1).
And if you then show the retouching (After), you can see: Aha, it's a little brighter here (2), the wrinkles have been retouched away, the freckles are of course all still there. The shadow behind the eye (3) has been lightened a little. Yes, and the shine in the hair has also been enhanced a little.
That's all that's been done to the picture. Apart from that, it looks like it came out of the camera. This retouching, I can do it all on one or two empty layers. Maybe a dodge-and-burn retouch to lighten it up a bit, but five to ten minutes, that's all the time there is in the picture. And I think the skin looks good because it's a natural image. It's a low-end retouch that looks good.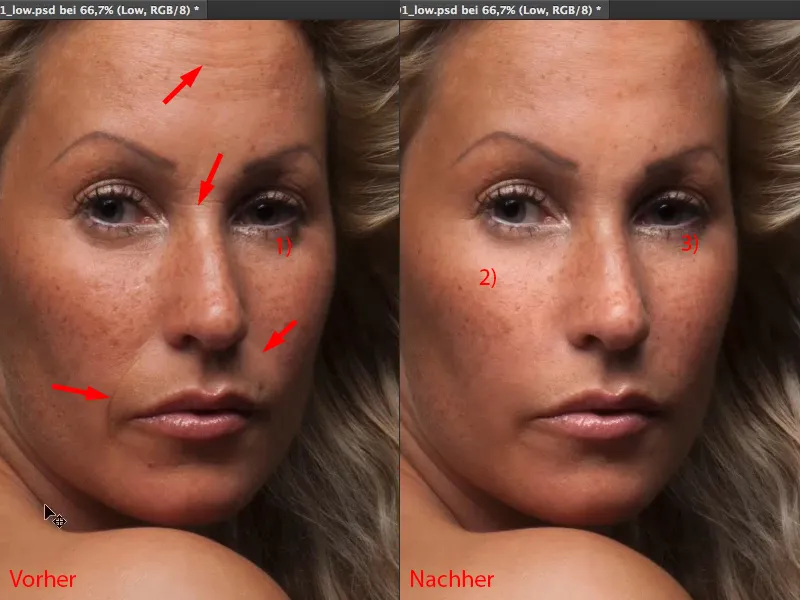
In the picture here (1), I'll show you what the repair layer looks like (2). I'm going to go to 50% or maybe even 100%. You can see from the nose: I would say that three to five minutes of brushing has already been done in this area. And that alone is now only the repair level. It really closes pores, one next to the other. Everything where a little hair grows here is really retouched out, because in this high-end retouching, as is usual for advertising purposes, I really need every pore to be super clearly visible, the skin must be structured. That's the first story I do here - even if it takes a long time. And I think that alone took me a good hour, at least.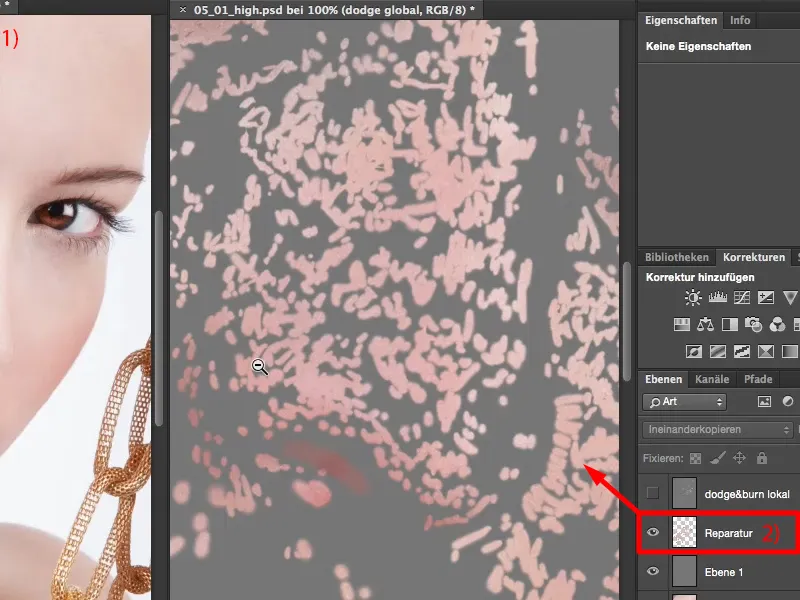
So that's the difference: here I'm removing the rough blemishes, with normal retouching (left). With high-end retouching (right), I usually zoom in to 200% and say: "Okay, now I can see all the pores and here we go, now it's time to repair them."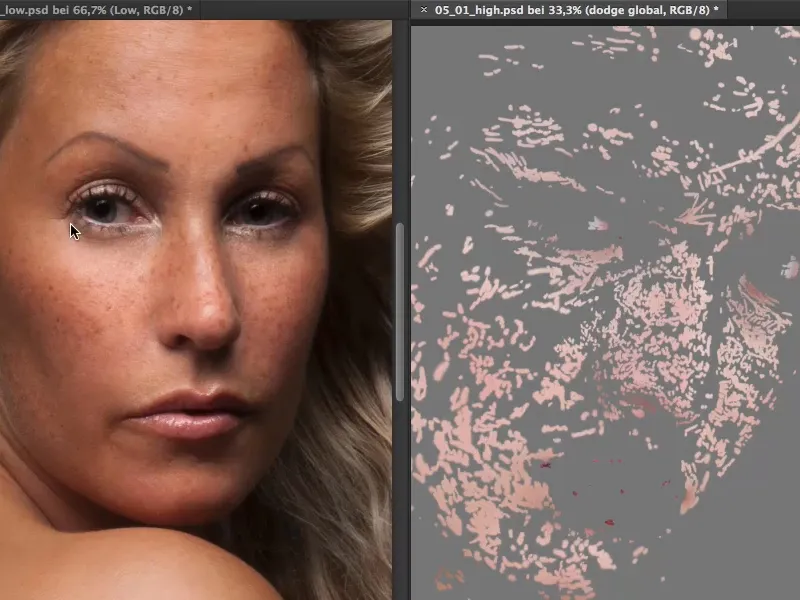
I then do the same with lightening and darkening in this picture (1). Let me Blender in my two dodge-and-burn layers here. So this is the local dodge-and-burn layer (2).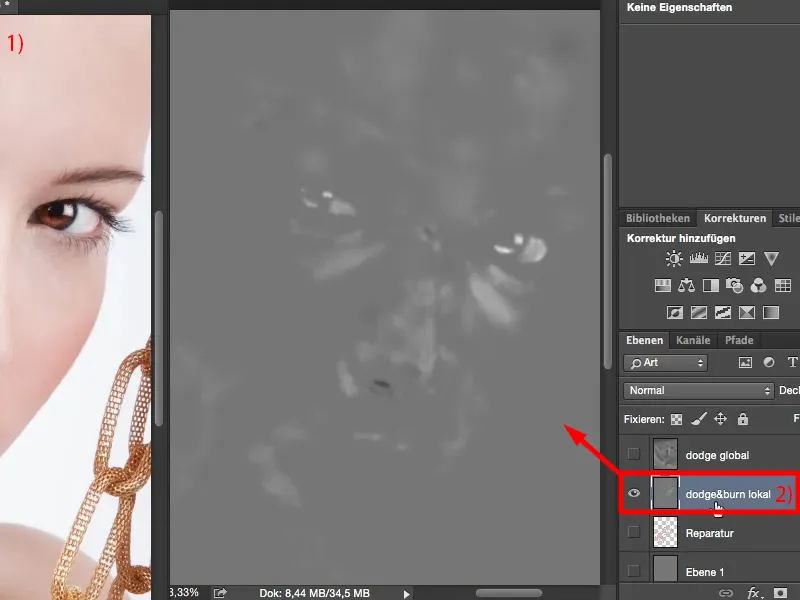
If you zoom in here: You see many, many small areas. So this would also be the area of the nose (1 and 2). And that's where it gets down to business. I darken small wrinkles a little if I want them to be even more pronounced, or I lighten them if I want them to stand out.
I also go into the iris (3), into the pupil and lighten the glossy effects here, make the white a little whiter. That's where it really gets down to the details.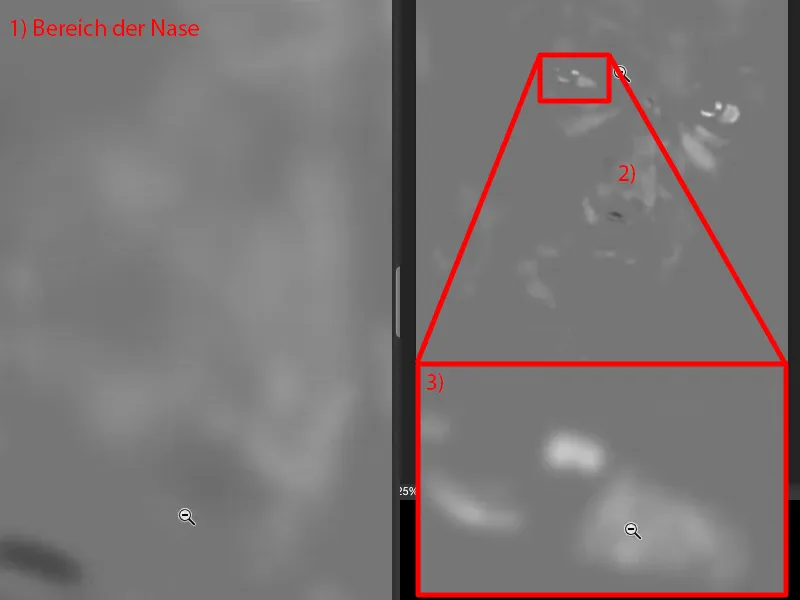
And on the global dodge-and-burn layer, I then bring my highlights and shadows to the right positions. All of this together takes maybe another hour, maybe two if I do it on the pores, on the whole face.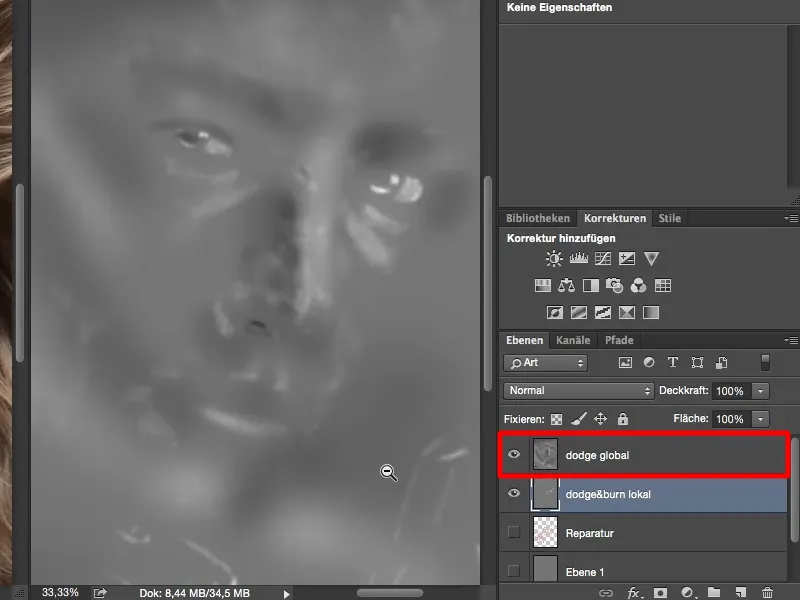
And that means that after hours of work, I end up with a high-end image. It's always a bit of a shame when you publish something like that on the internet, because everyone will say: "Ah, the skin is terribly smooth." Of course it's terribly smooth, if I upload it in Facebook resolution, you can't see any texture. But if you zoom in to 100%, you can actually see that every pore is there. The skin has simply been completely cleaned. Of course it's not natural and nobody walks around on the street like this, but unfortunately the advertising industry demands it of us.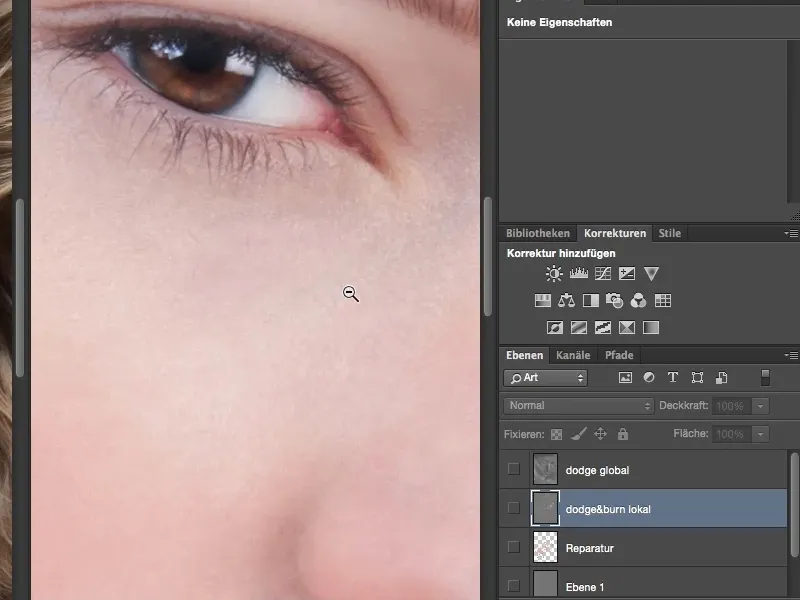
The whole thing may also lead to a huge rat's tail of what should and shouldn't be done here and how the whole image distorts our perception. But we mustn't forget: I don't think the average consumer can be misled, they can see very clearly: "The advertising poster has nothing to do with naturalness and this here, the low-end image, is a real photo." But those of us who deal with these photos on a daily basis - I believe that our perception always swings back and forth somewhere in between. And drawing the line - what is still natural and what is already high-end retouching and absolutely unnatural - is becoming increasingly blurred between these two areas. And I think we retouchers or hobby image editors or photographers, whatever we want to call ourselves, we oscillate between these two worlds. And sometimes it's not so easy to get this balancing act right.
That's it on the subject of high-end retouching versus low-end retouching: normal, standard retouching - improving an image a little, compensating for deficits - and ultimately transforming an image into an art image.