When it comes to correctly exposing a shot, there's nothing better for me than the Adobe Camera Raw converter.
I've put this layer in here, made a smart object (1) and exported the original layer as a pixel layer (2). As you can see, this is absolutely identical. And if we double-click on the smart object (3), we are in the raw converter.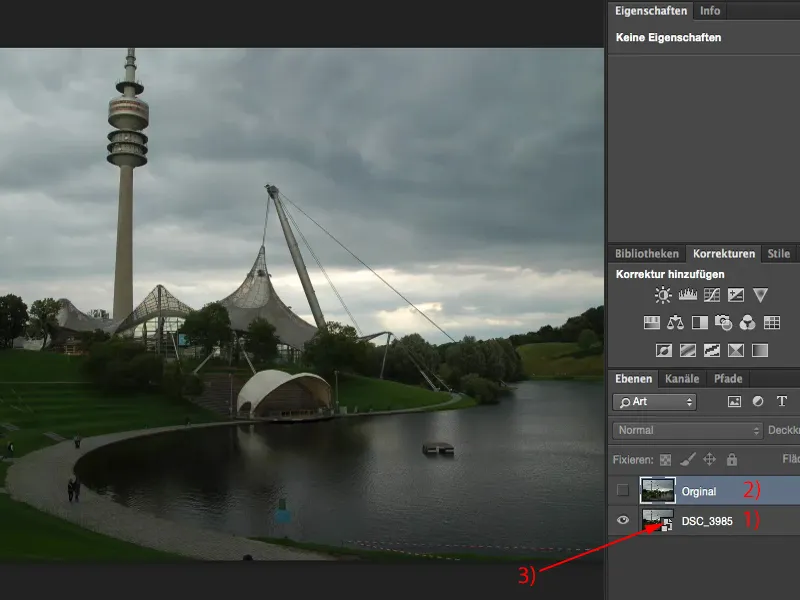
Exposure with the Camera Raw converter
This is how the image came out of the camera, everything is zeroed (1). 17-70 mm, a cheap Sigma lens, 1/160 s at Blender 6.3 and ISO 200 (2). So I can already see that here. I can also see the histogram. I can see that I have a little something in the highlights - that's where the sun disappears behind the clouds (3). I have a lot in the depths, that's all the dark areas of the image (4).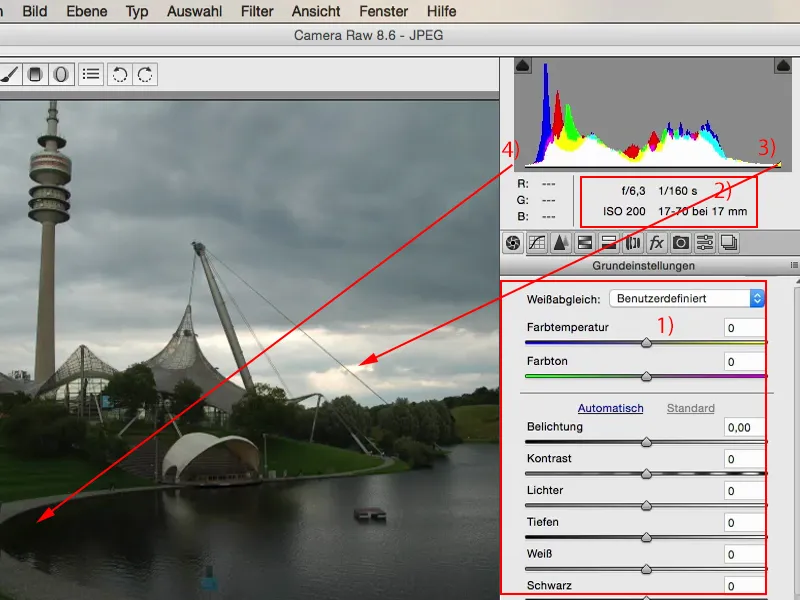
And if I want to optimize that now, my first move is always the exposure slider. I just see what happens if I expose half a Blender or a whole Blender brighter (1). I think the lake and the green areas are actually correctly exposed now. The sky loses a bit of tension and detail as a result.
And that's the beauty of the raw converter: I have everything I need here. I have white, black, depth, highlights and the contrast control, which I hardly ever touch. And I can now make very selective adjustments.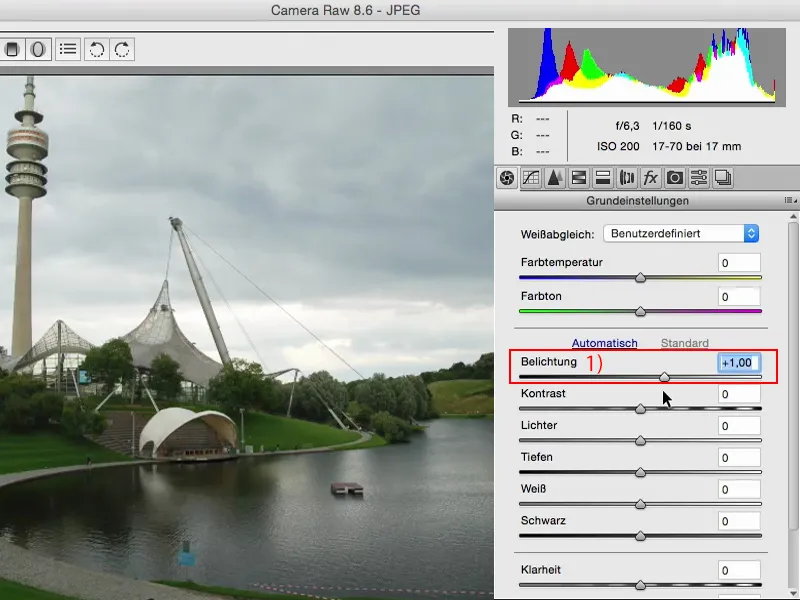
I can see what happens when I pull out the highlights (1). And bingo: I almost have my original drawing in the sky again, I can see exactly: Here are these torn out lights. I definitely want to use that.
Observe the histogram (2): If I pull the slider down further, you can see how these highlights are pulled across. Otherwise, the histogram stays relatively the same. It doesn't change much because, as the name suggests, this slider only affects the highlights.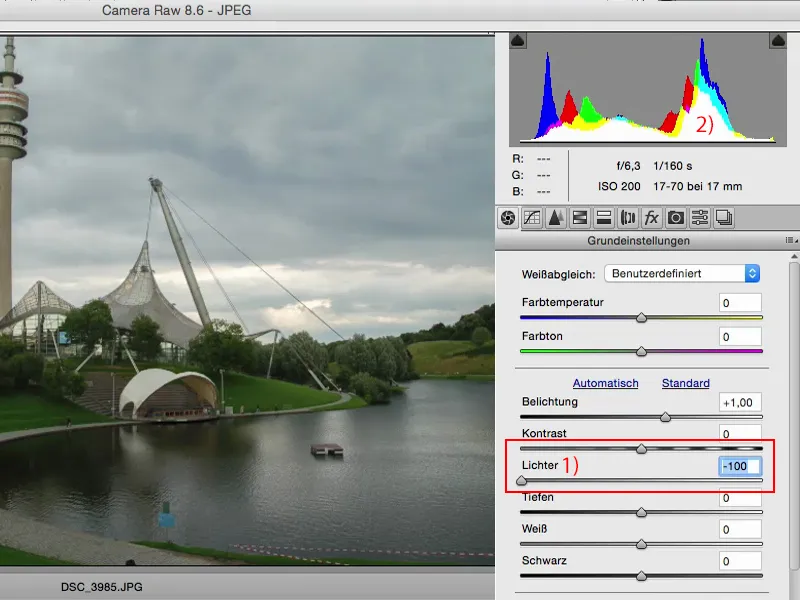
Of course, I can do the same with the shadows. I can try to darken the shadows, I can try to lighten the shadows. And if you look at the histogram: one time the whole thing goes to the left, one time the whole thing goes to the right. So I'm shifting the tonal values of the shadows from light to dark.
If you want a fake HDR look like this, there's nothing easier than this for landscape shots: set the correct exposure (1), lower the highlights (2), raise the shadows (3), maybe even do the whole thing again in the smart object, set the clarity (4) a little higher and then you can push the colors a little more. Then you've created a fake HDR image - an HDR image for the poor.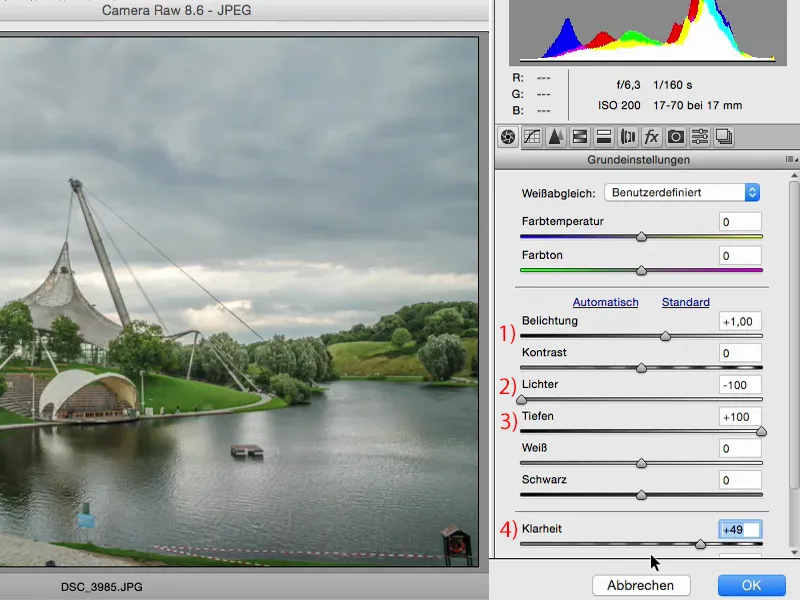
So that's what I definitely want to change here in terms of the exposure. If you're already in the raw converter, you should also always look at the HSL/greyscale area, because you have a luminance controlhere.
If you notice that the exposure is correct, but the green is too dark, then simply go to the green tones sliderand pull the green as far as it will go. You won't ruin anything.
Many people are a bit timid. It used to be that if I dragged too far to the left and right here, the picture would be ruined. That was the case a few years ago. In the meantime, this raw engine here is really so well built that you can play with the sliders.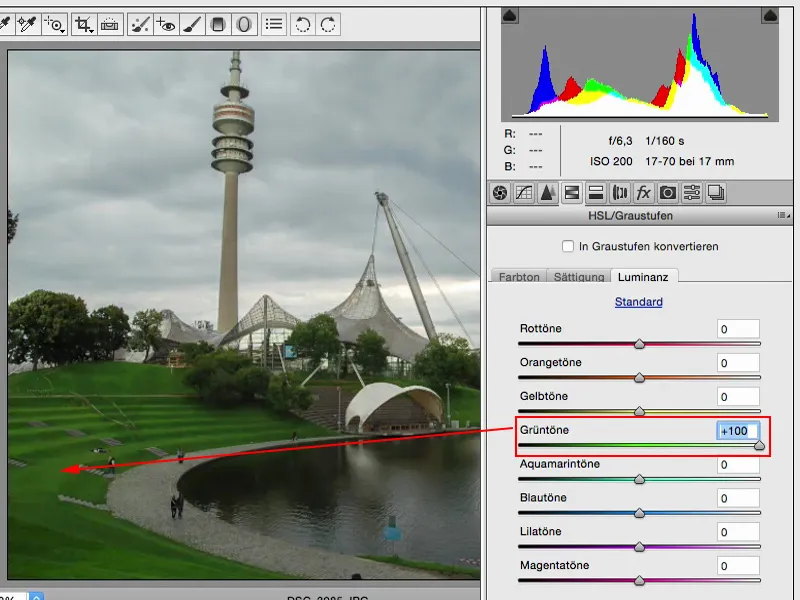
You can do the same with yellow... That also leads to you getting to know your image and the colors that are in the image. If you pull this down, you'll see that there's a lot of yellow at the back of the highlights.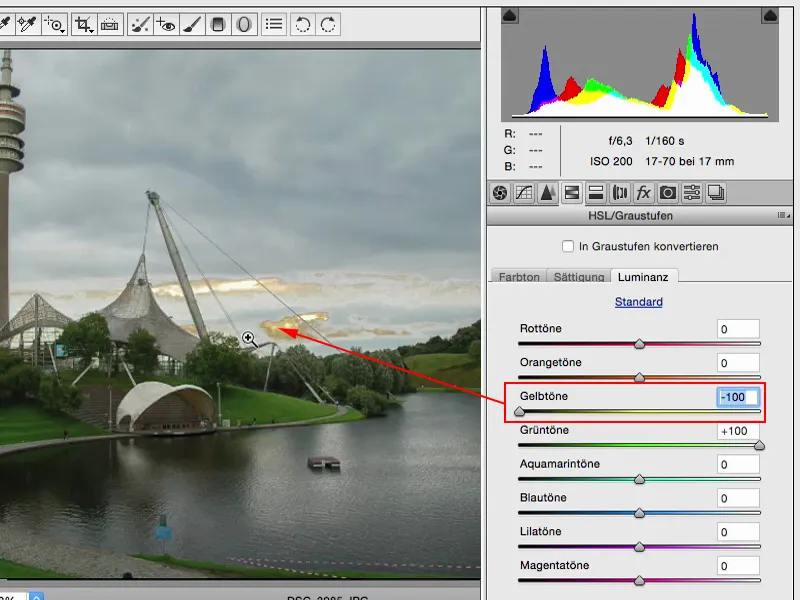
If you want to brighten them up, which doesn't actually look too bad in the sky, you can easily do this using the raw converter. Now it looks as if the clouds are really white. It doesn't detract much from the rest of the image.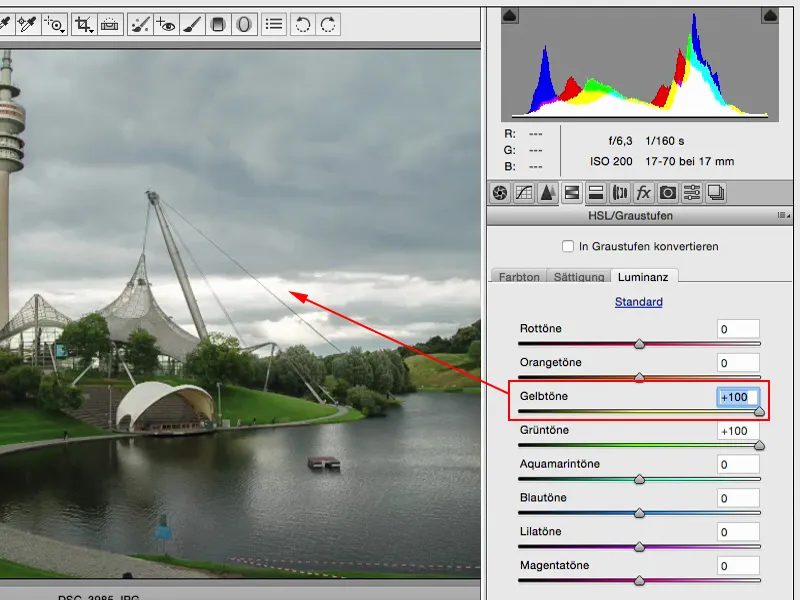
You can do the same with orange. There's not much left in it, at the top of the tower, and I'll leave it like that for now ...
Just as an aside, but Luminanz also deals a bit with exposure, and if I'm already adjusting the exposure globally on the image, why shouldn't I also trim the exposure and the brightness of my colors if I'm already using it so beautifully, non-destructively in this smart object?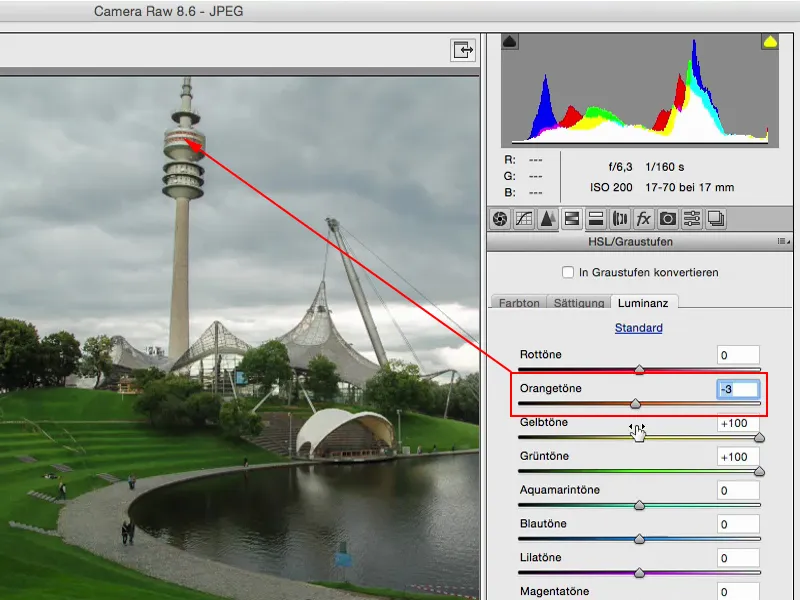
That was the before, this is the after. And I think there are simply worlds in between.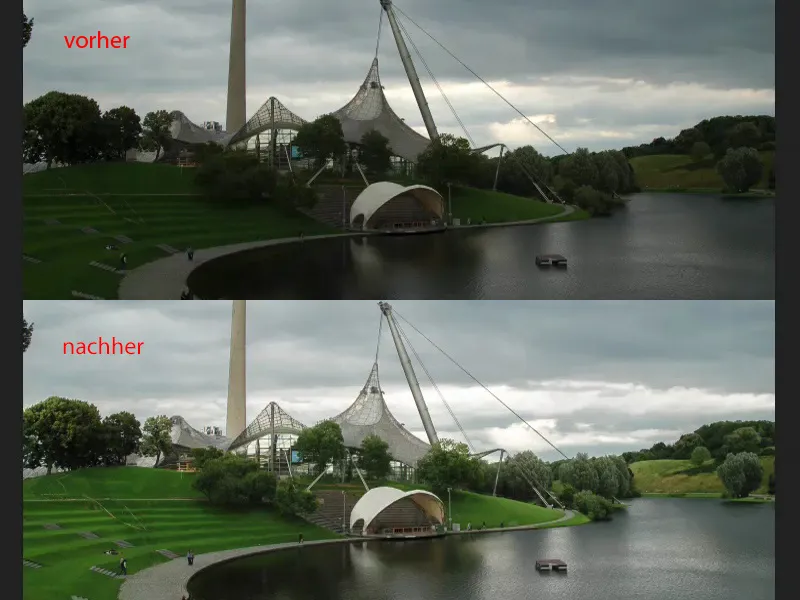
Exposure adjustment layer
I'm going to blend this original layer back in (1) so that we have the original source material again.
Then, of course, there is the Exposure adjustment layer (2). Honestly? I think the last time I used it was two or three years ago. I have so many other ways of creating light and dark in Photoshop that this has simply become too mundane for me.
Offset (3) and gamma correction (4) are things that I need to get to grips with or perhaps google: What exactly is gamma correction ?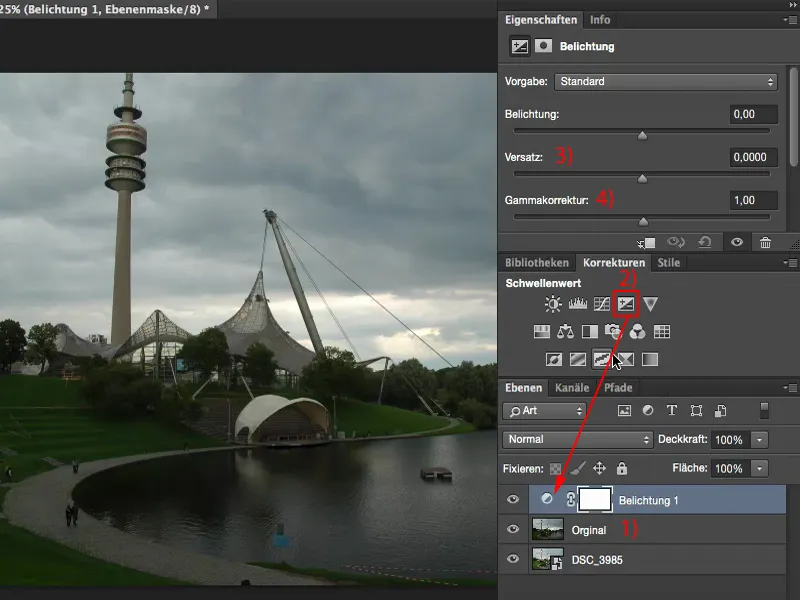
Gamma correction extremely brightens or darkens the depths.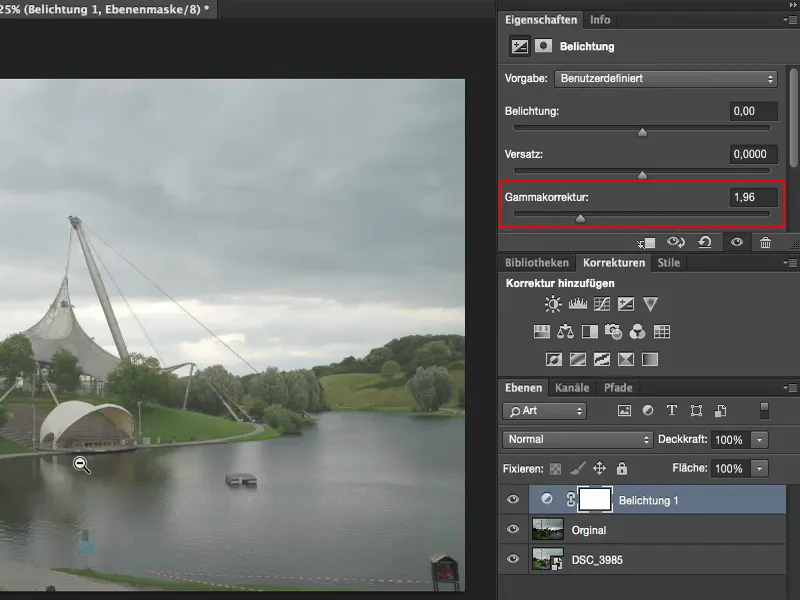
And what is the offset? The offset generally makes everything that is not necessarily one hundred percent highlights quite dark, if not pure black. And if I lighten it up, it leaves me with the highlights there a bit and tries to pull everything else to white. And these are things for the newspaper look, for special effects or something.
If I need that fade, then I always go for offset and gamma correction. Otherwise, I try to stay away from them, because you usually do more damage with these sliders than you actually do good.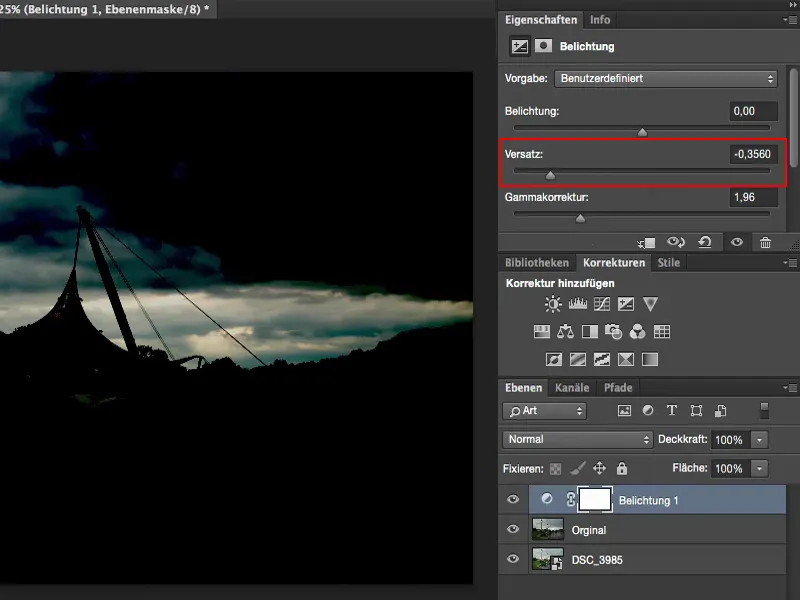
The exposure slider : It's a single slider for exposure - and that actually tells you how much I think of it, namely not very much. It's good if you really have an image where you say: Oh come on, quickly drop a Blender or something. Zack. Then you make it a little darker, or a Blender up, then you make it a little brighter, but it touches all the tonal values in the image. If you look at the lights at the back of the picture: that's how it was at the beginning, I've got a nice drawing here, it's exciting back there, that's what makes the picture a bit special.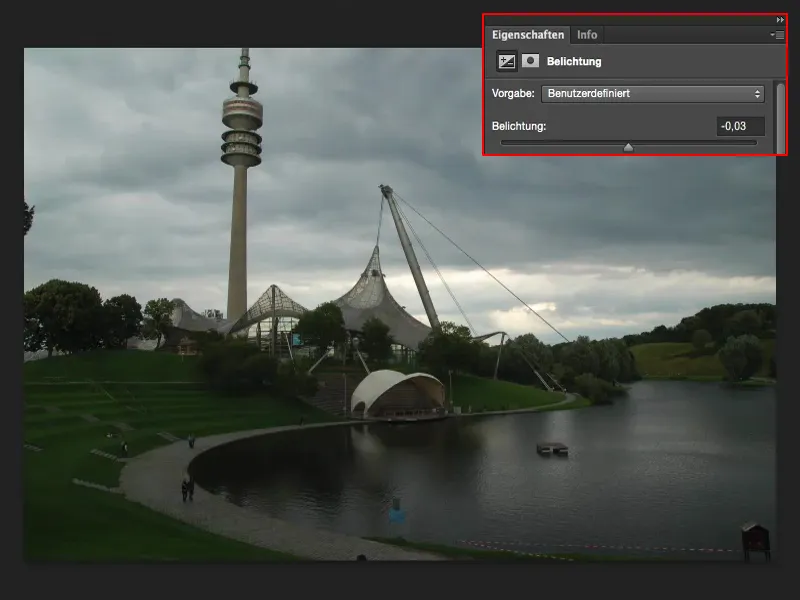
And if you expose just half a Blender higher here (1), then the midtones, depths and also the highlights are raised by this value. And the back of the picture is already broken (2).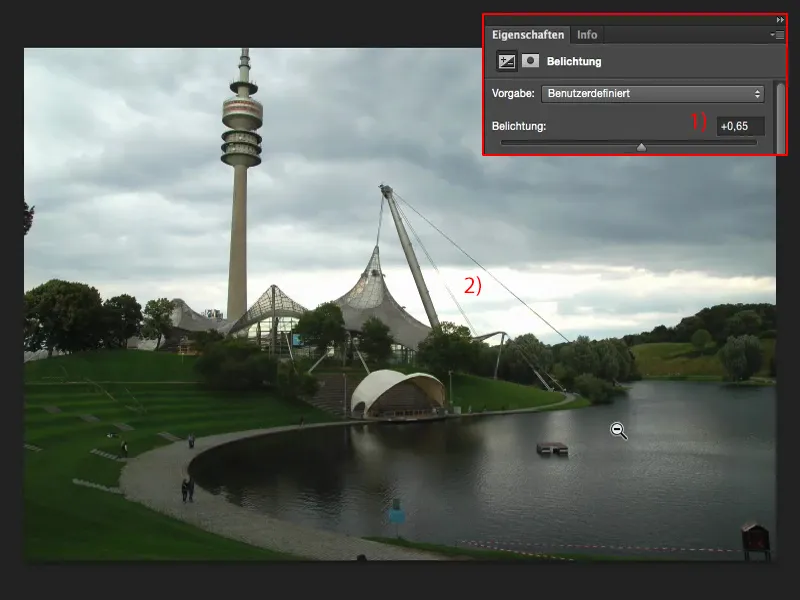
If you darken by a Blender or one and a half (1), the whole thing also gets a gray touch somehow. And I don't like that. That's why I use this exposure slider very, very rarely - usually only when I really want to make an image a little brighter, a little darker very quickly - then I fall back on this exposure slider.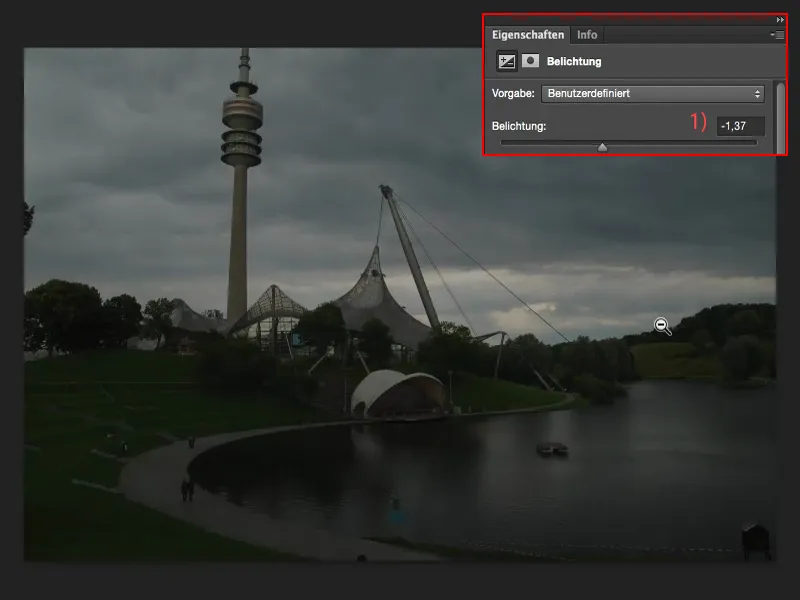
Setting the exposure using the tone value correction
I much prefer the tone value correction (1), because here at least I have these three pipettes (2).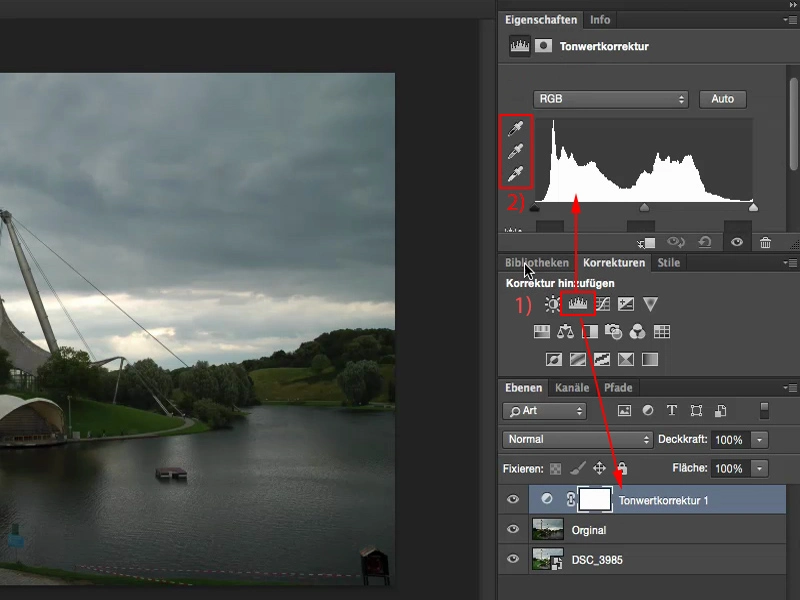
So I can already say: This here, the gray pipette, should be a normal gray-saturated area. I've already done the white balance here, so to speak.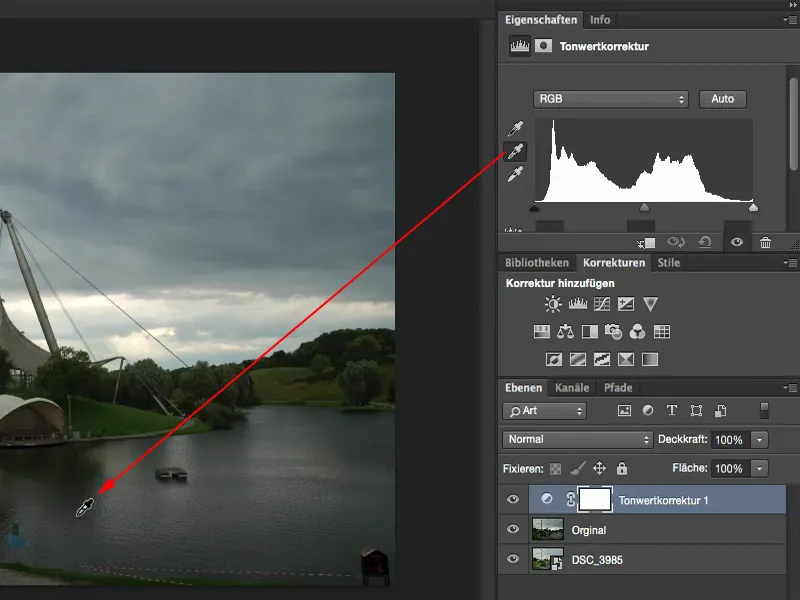
And the highlights should be at the back here.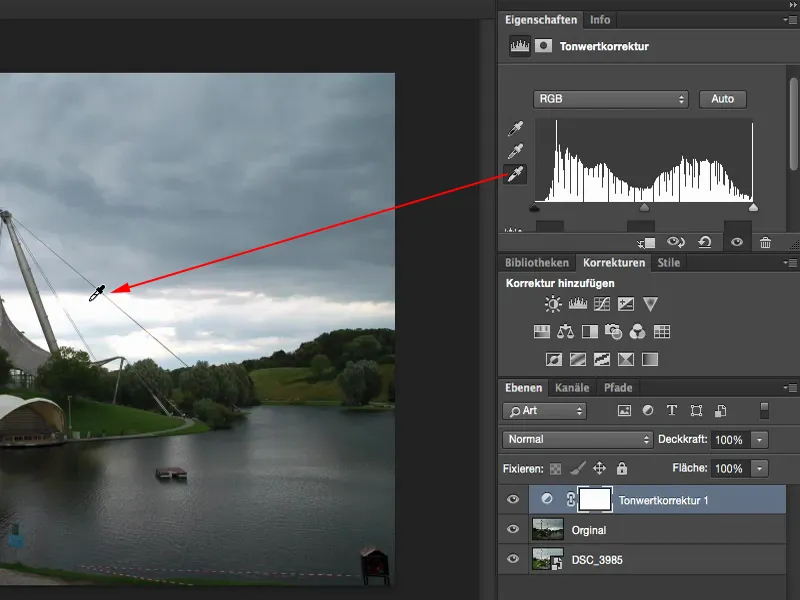
Compared to the original, I'd say I'm much, much closer to the correct exposure than if I'd just used the exposure slider, because I can't actually set this value in the Exposure adjustment layer.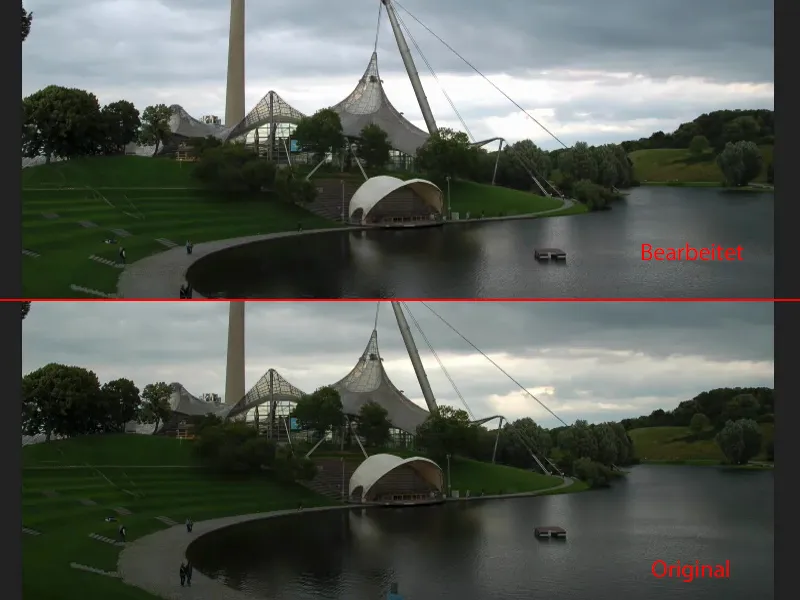
Summary
These are my thoughts on the matter. It sounds a bit strange when you say: "Do everything in raw", but why should I do any work at all in Photoshop - and Lightroom also plays a bit into this way of thinking - if I can already do the whole thing in raw.
At the moment, the engine behind raw development is completely identical to the Lightroom engine. The controls and the whole structure are of course different, but the functionality behind it and the possibilities are currently one to one. Lightroom of course offers keywording, cataloging, various export formats and so on. You can create books directly from Lightroom and many other things that Photoshop can't do in its basic function. But then again, this is a completely different way of thinking. But when it comes to pure raw development, I would say that this Camera Raw converterfrom Adobe can keep up very, very well with Lightroom. And you should definitely take advantage of that when it comes to exposure.
