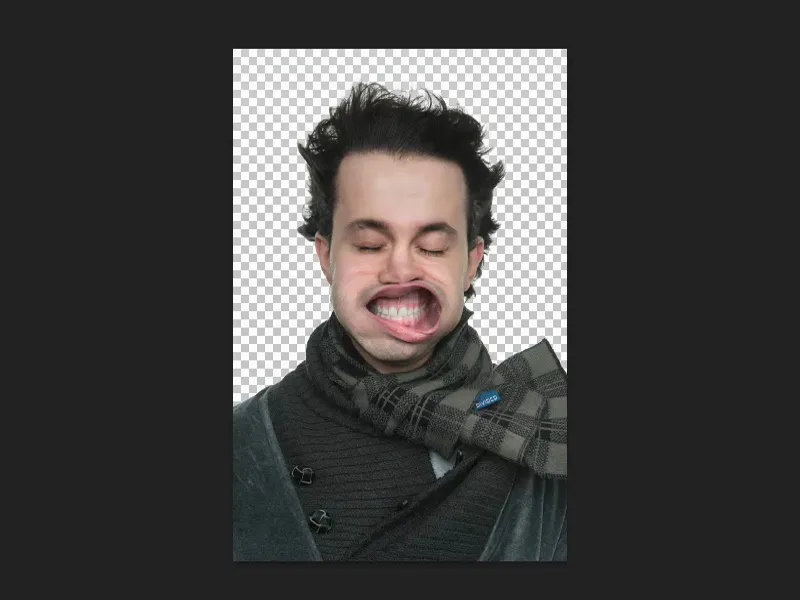
In this tutorial, I would like to show you that tone value correction is a really versatile tool, a versatile adjustment layer. I have already prepared three different PSD files for this purpose. You'll see that a tonal value correction can also do a lot of other things besides just light and dark.
The first example is this clipping. If I zoom in a little closer, you can see that the little hairs are actually really, really well cropped. And you can do that with a tonal value correction.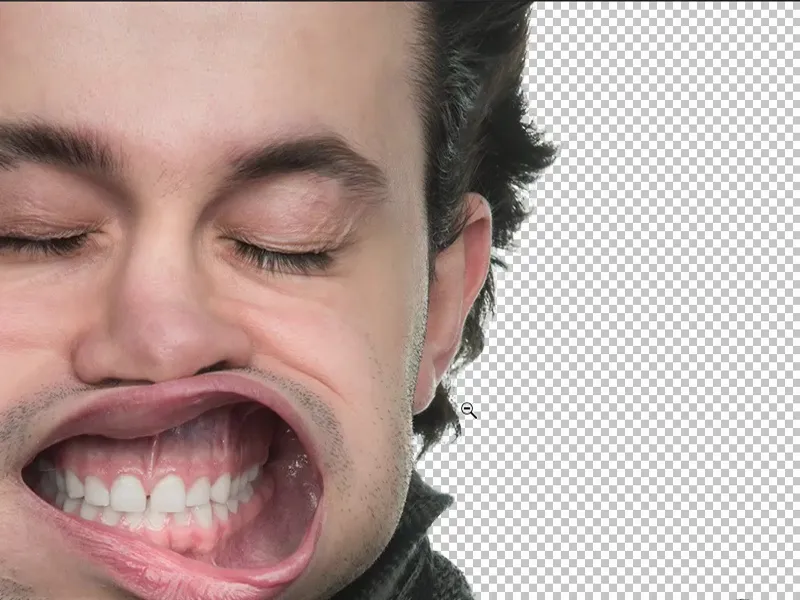
Using tone value correction for cropping
To do this, I simply duplicate my background layer (1) and go to the channels (2), which are listed right next to the layers.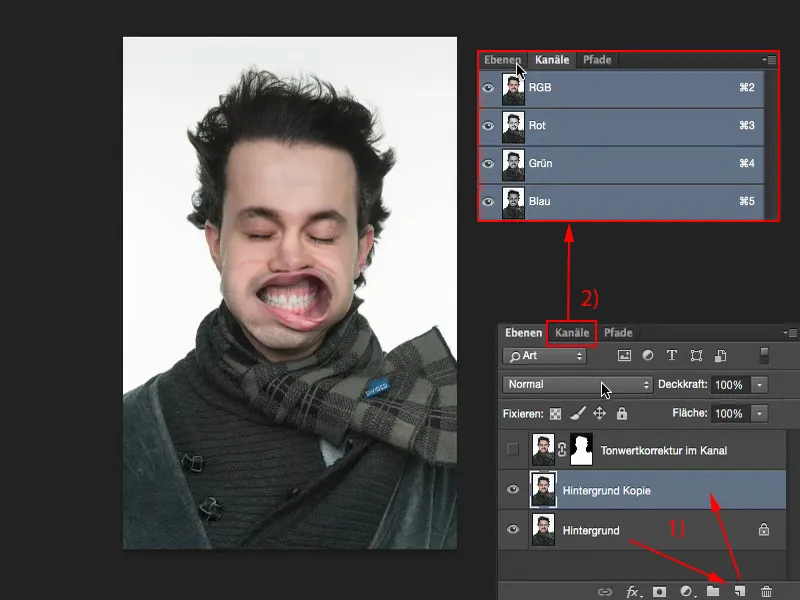
Then I select the channel that has the greatest contrast to the background. I'll take the blue channel(1) and duplicate it (2). Now all the channels are grayed out, i.e. hidden, and I can now work on this blue copy.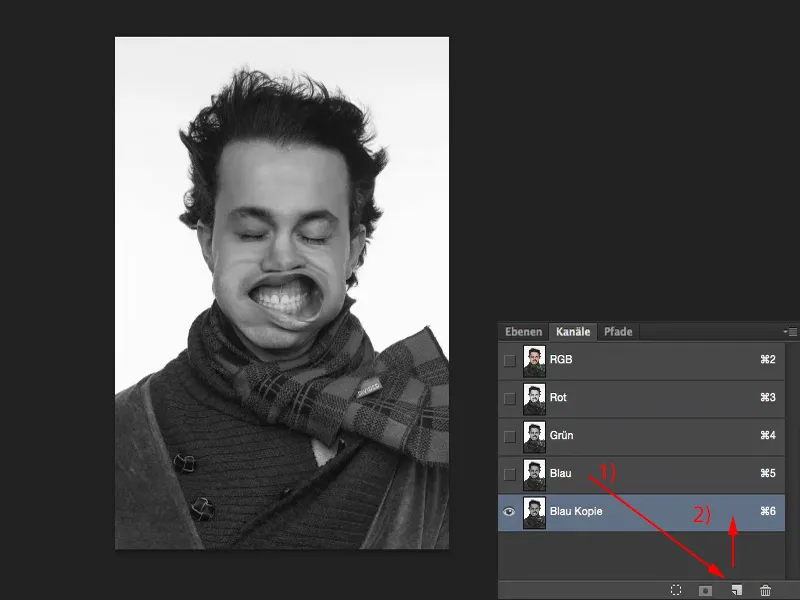
I can also work with a tone value correction (Image>Corrections>Tone value correction...).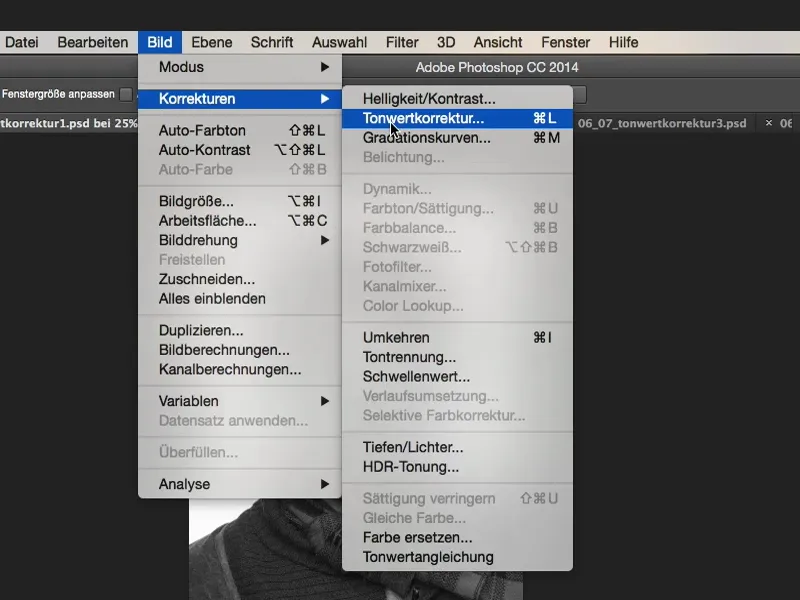
All I have to do now - because the background is pure white - is to shift the tonal values to the right (1) until the white just starts to fade away (2). And then you can clearly see that the little hairs are perfectly cropped.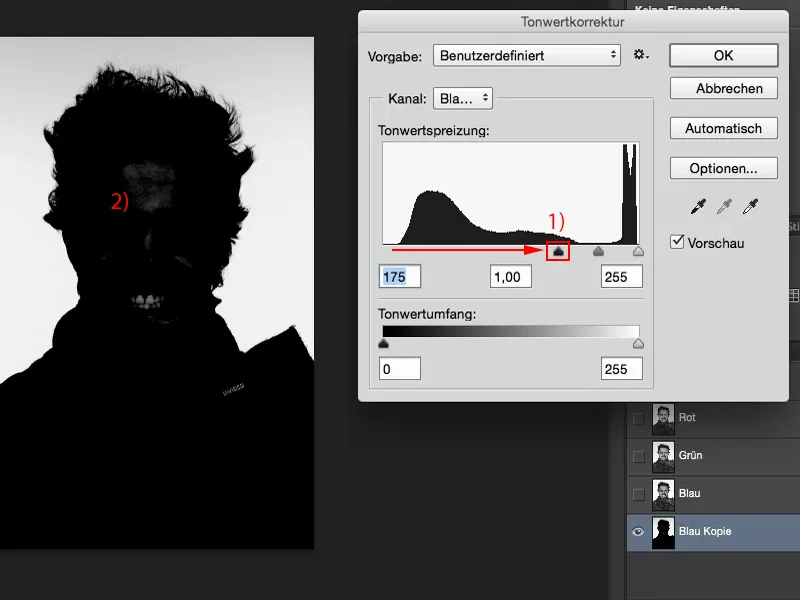
But now we still have some black at the back that we need to change a little. So I can still see the teeth, I can still see the forehead (see previous picture). And I can paint on this copy of the canal without any problems.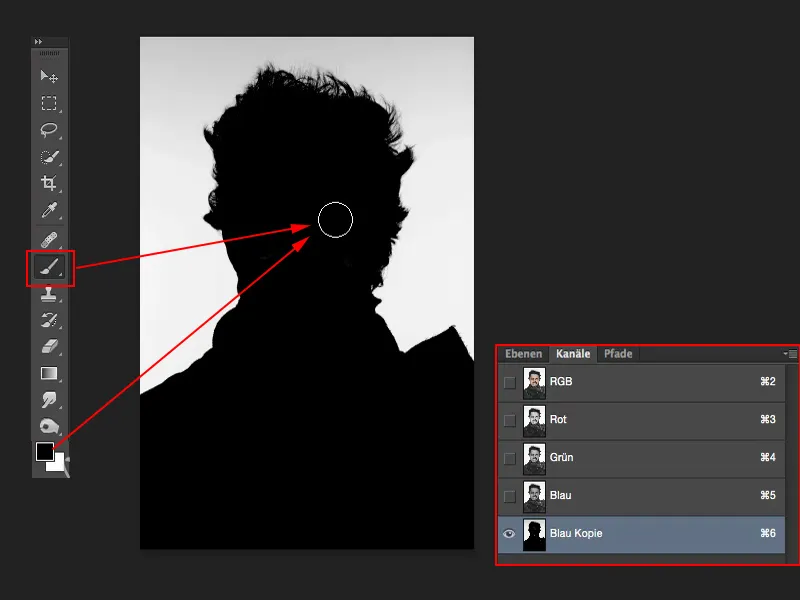
I can load this as a selection. All I have to do is hold down the Cmd key(or Ctrl key) and click (1) - I have now selected the luminance of this layer (2).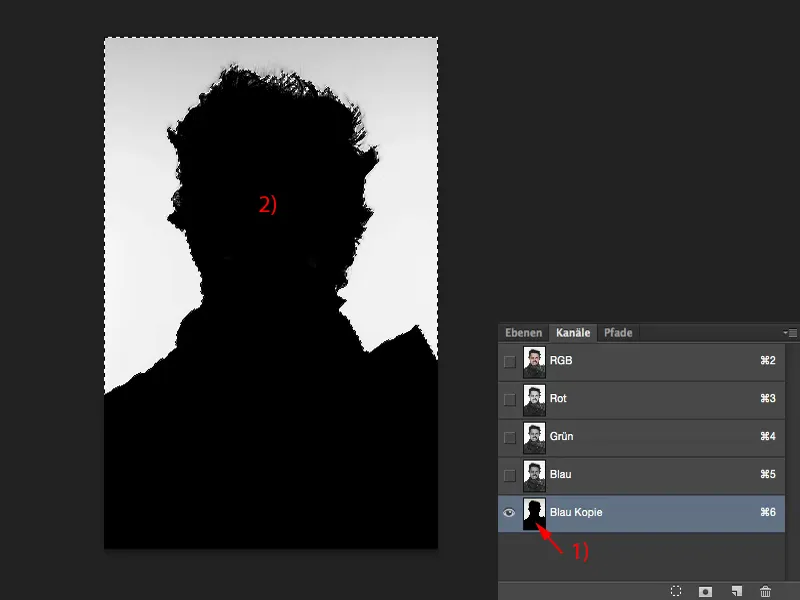
Then I go back to RGB (1). I hide the channel copy (2), go back to my layers (3) and invert the selection (4) (Selection>Invert selection). Now my person is selected.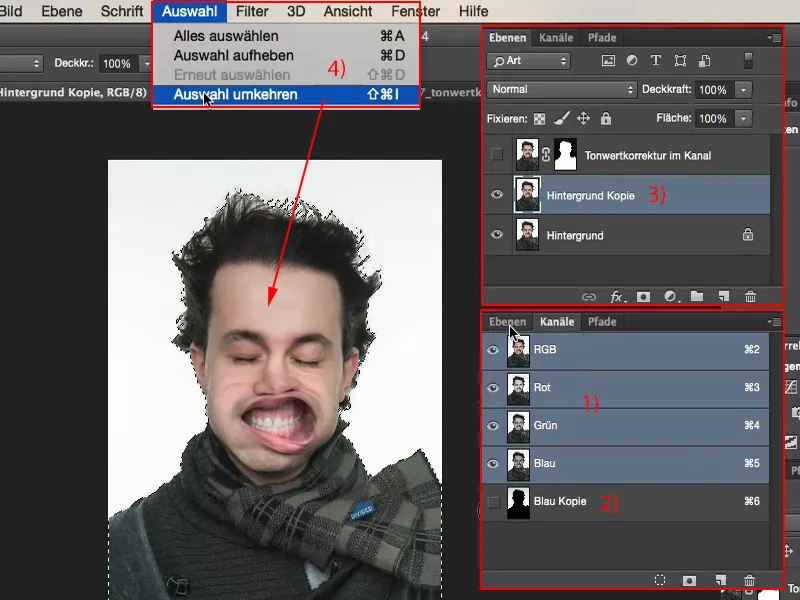
By clicking on the mask, I have cropped this person. And I have cropped it so well that I can really work with it seriously and can now insert a new background here immediately.
A quick word about the picture: no, the young man has no problem. We had a really, really, really strong leaf blower here in the studio and had made this series "Blow". And this is one of these pictures, which I still think are brilliant.
So you can use the tone correction for that. If you have a plain, light-colored background, you can use it to crop your subject very quickly. A very, very cool way to work with tone value correction.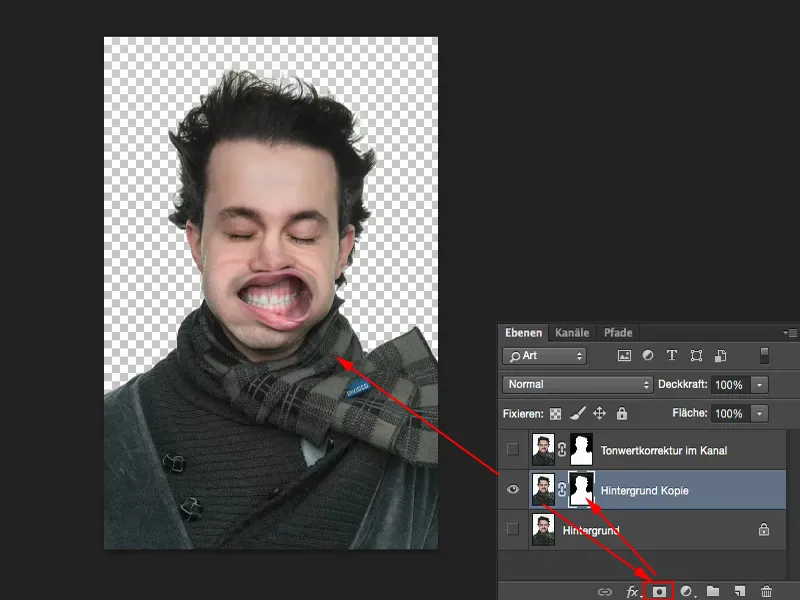
Using tone value correction for color correction
Another example: I want to change these colors in the picture. I can do this very easily with tone value correction. The green is much, much more saturated, the blue is nicely saturated.
So here the picture (1) has a color cast, of course it has a color cast on purpose because it's a montage, but with a tonal correction (2) I can firstly remove the color cast and secondly I can create a completely new look. And that is also the topic of this training course.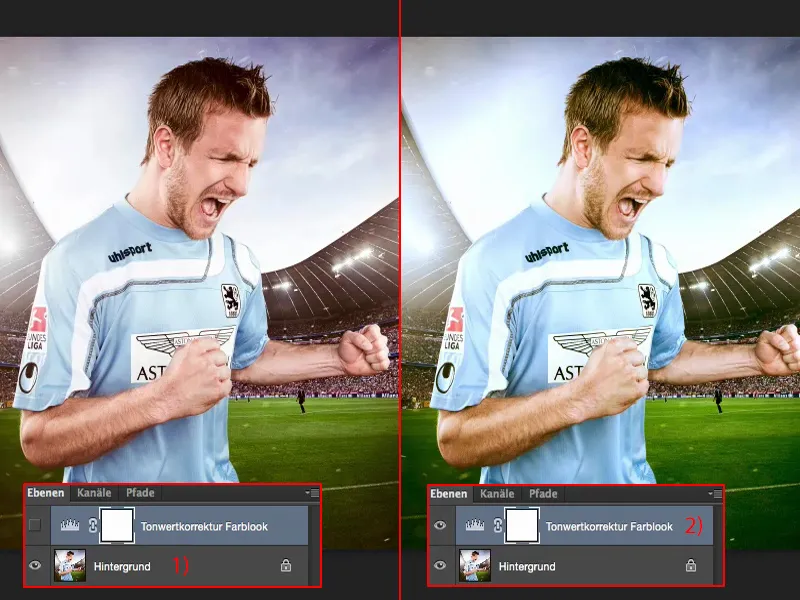
The whole thing works very simply: you need a tonal value correction. And then, similar to gradation curves, you not only have the RGB channelshere, but you also have the individual channels displayed.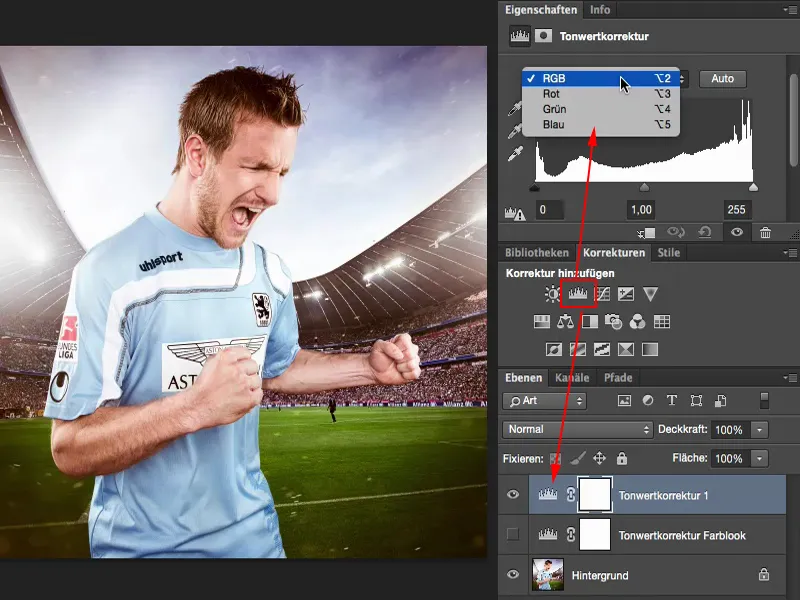
You can see this, for example: The red channelis practically missing image information. And the only way to get the real green back here is to move the slider a little. The highlights are fine so far.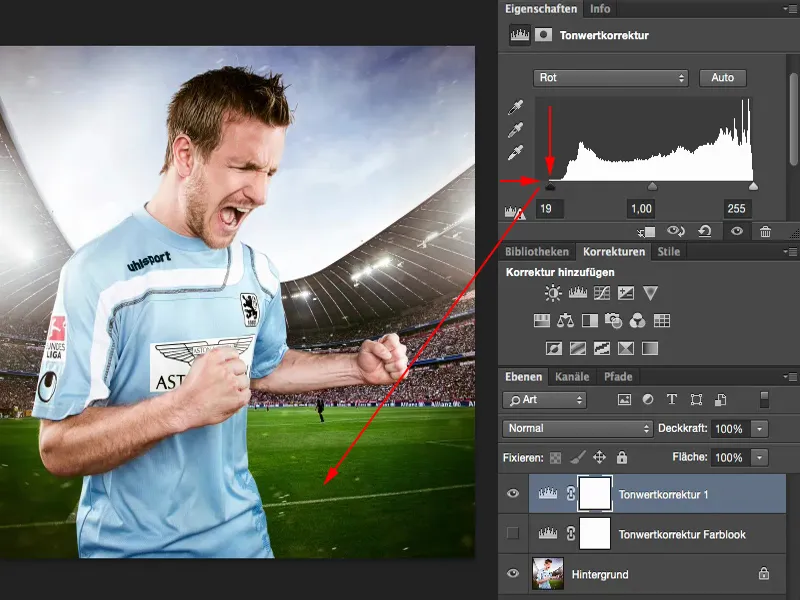
I'll have a look at the green (1): Green could also do with a touch. I'll see what happens with the lights. No, it doesn't look good, so I'll leave it alone.
Same with blue (2). I've actually already drawn it completely. Maybe I'll move it a little to the left or right (both sliders at 2).
And then I've created a color look here with a tone value correction. And that's only because I've tweaked the mids, lows and highlights a little in the individual channels here. So that would be the second option for tone value correction.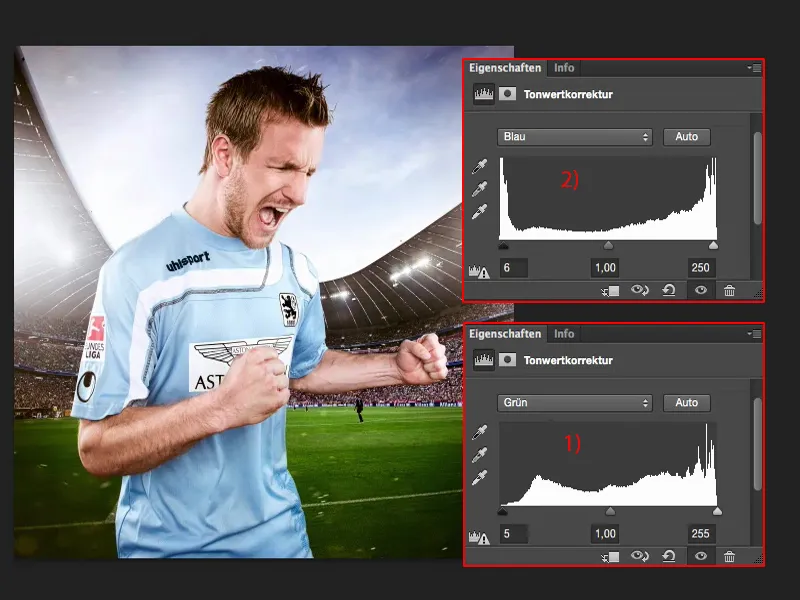
Brightness adjustment using tone value correction for composings
I'll show you the third purpose of tone value correction using the simplest photomontage you know: This is the photomontage in front of gray. The whole thing should look like this later.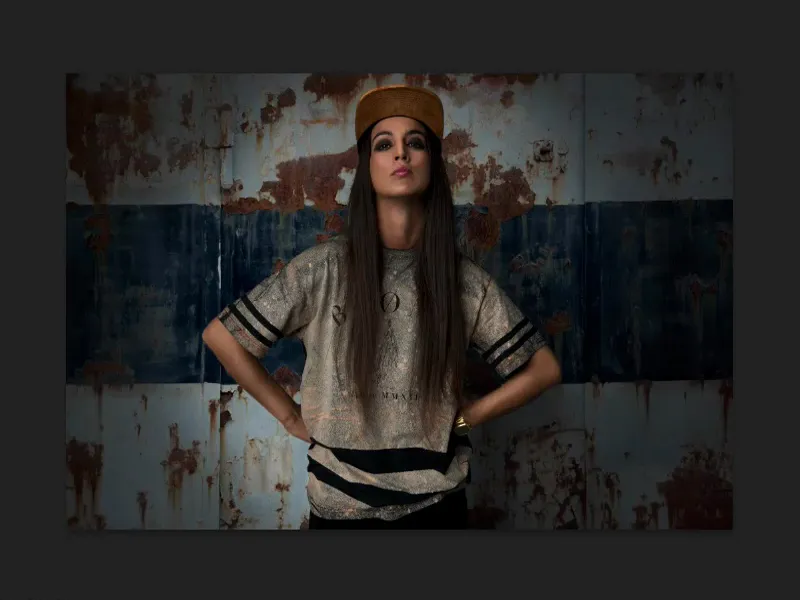
To do this, I first have to crop the person (1) reasonably well. For the sake of speed, I'll do it with a simple mask.
Then we need a texture here. I'll quickly load it over and add it to the layer stack (2), go to Free Transform and realize: Okay, it's huge. I think it was photographed with a D800, and the PSD file has already been reduced to 2000 pixels for the training. I would have been better off placing it here in the picture. But it also works this way.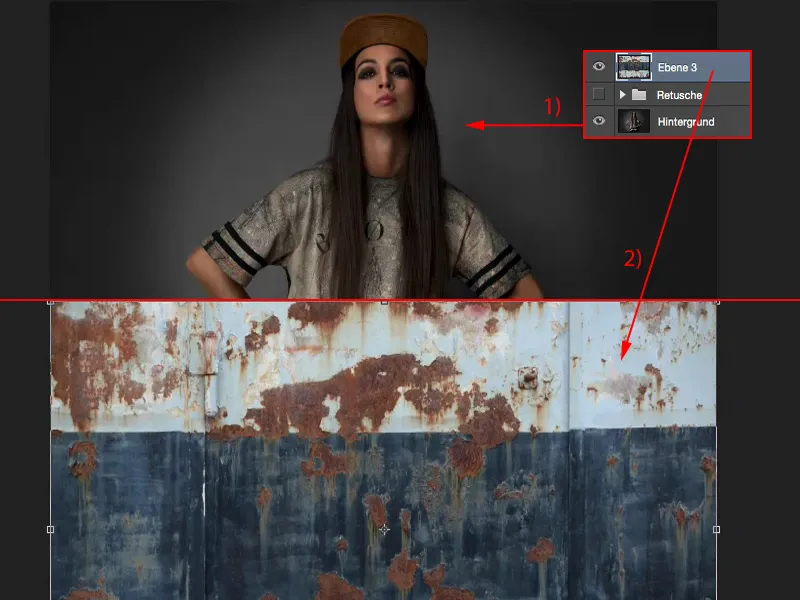
The Enter key confirms the transformation. Then I set the mode to Copy one into the other (1). But now I have a problem: the brightness of these two images doesn't quite match.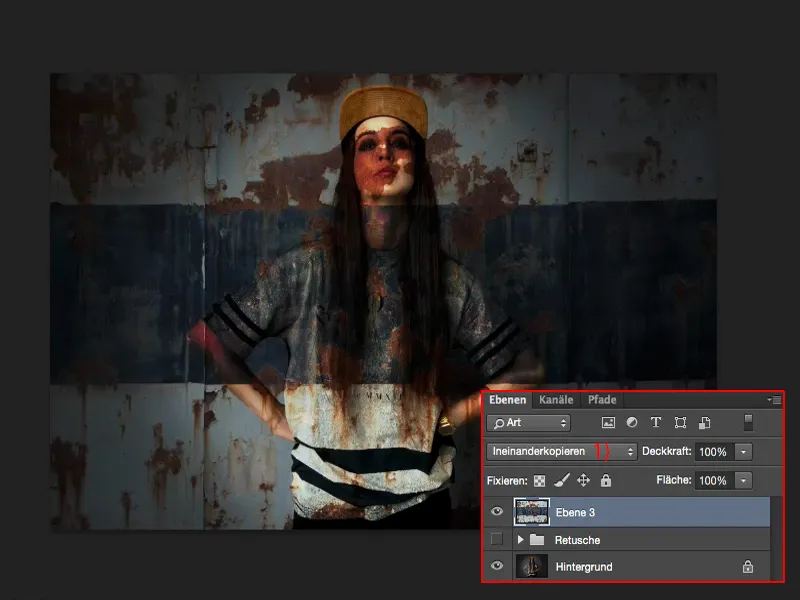
I first make a rough mask (1) of the person so that we can continue working quickly. The nice thing about gray is that you really don't have to pay attention to the hair at all and that you can finish relatively quickly, even if it's not super accurate.
Of course, if you take your time, you'll get a much, much nicer result, but for training and understanding the technique, that's enough. Something like that. The person is now standing in front of this background.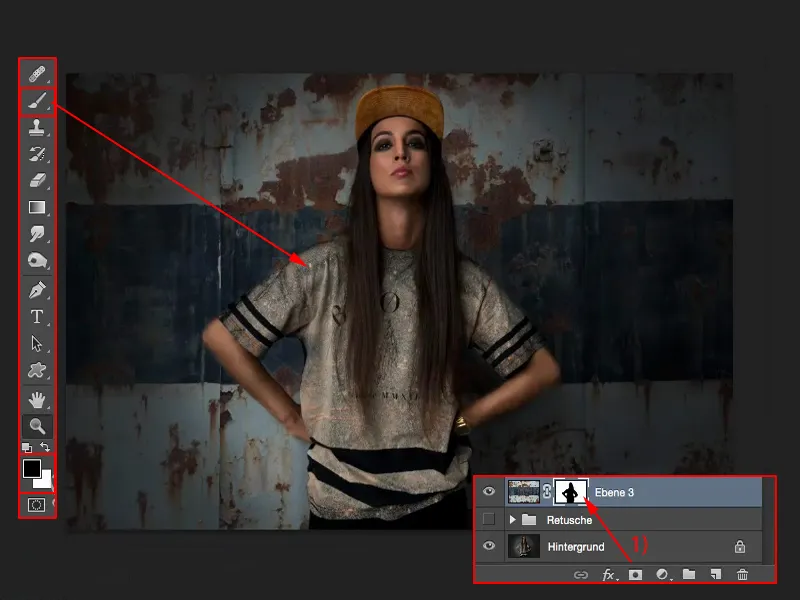
The spot doesn't stand out as well as I have already photographed it here (1). So - what do I need? A tone value correction of course (2), in this case not on the entire layer stack, but with a clipping mask (3). Then you can already see how the histogram changes. And now you can also see the deficits that this structure has here in the Invert mode compared to our old background, namely: the depths lack a bit of a kick (4) and the highlights lack a bit of a kick (5). And I'm simply recreating that here.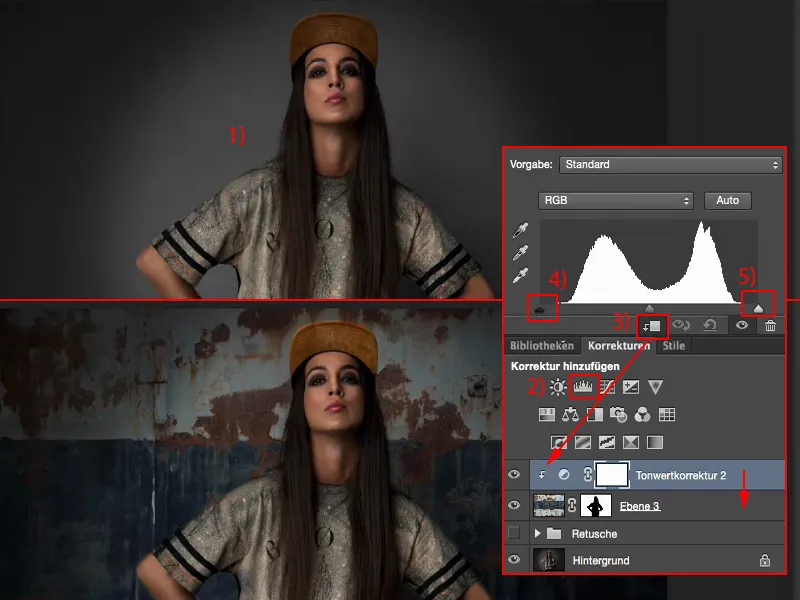
And then you can already see how this spotlight on the background comes out much, much better. It's not much, but it's the touch of realism that this photomontage ultimately lacks. And I'm sure that you can't reproduce it like this either.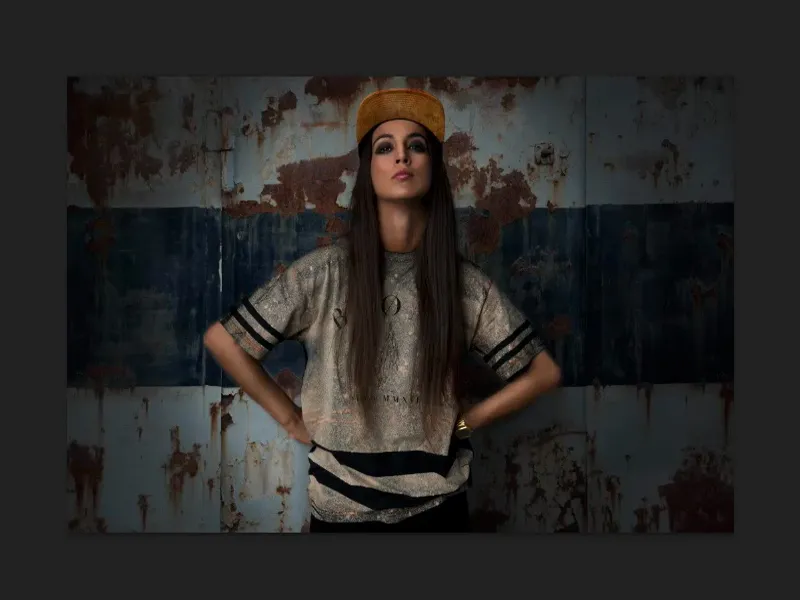
With the midtones (1) you can now adjust the brightness globally here, but as a rule this always works quite well with the midtones if the texture is not overexposed or underexposed ... but it worked quite well here. I can leave it like that. I might really only go a touch lighter or a touch darker, but as a rule I don't have to touch much.
But if you see that there's no more information (2) here, no drawing in the depths, mids, highlights, wherever, then you have to adjust it. And you can do this very nicely using the tone value correction.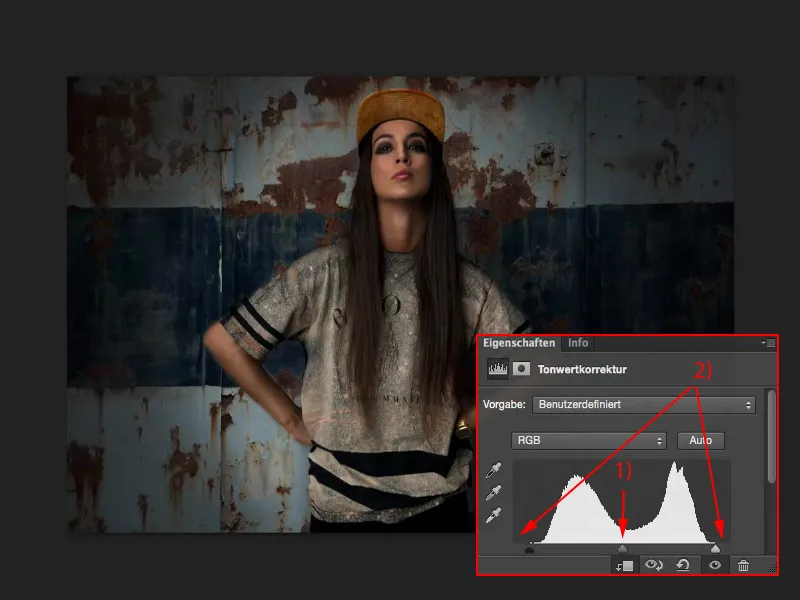
Summary
I think these three examples have clearly shown you how powerful tone value correction can be. Now you also know that you can apply the whole thing to masks, that you can apply it to channels.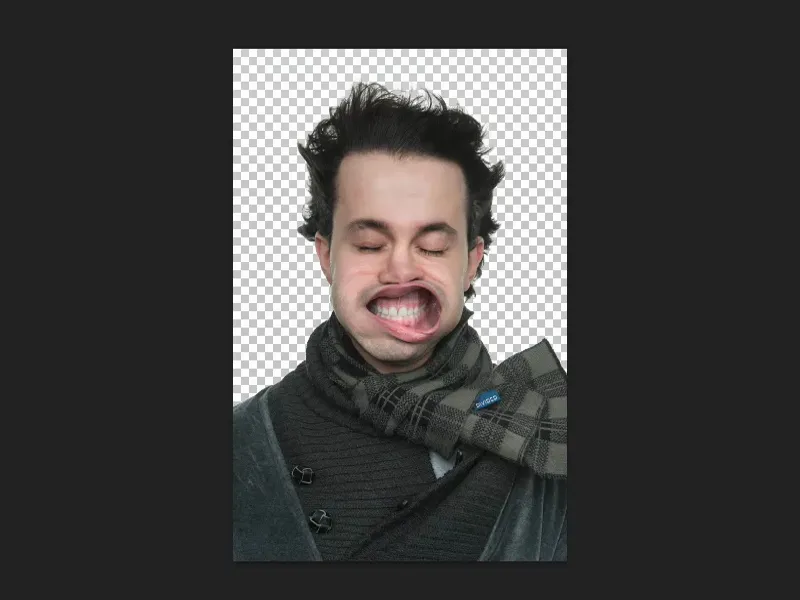
You can also apply it to the individual RGB channels as color correction ...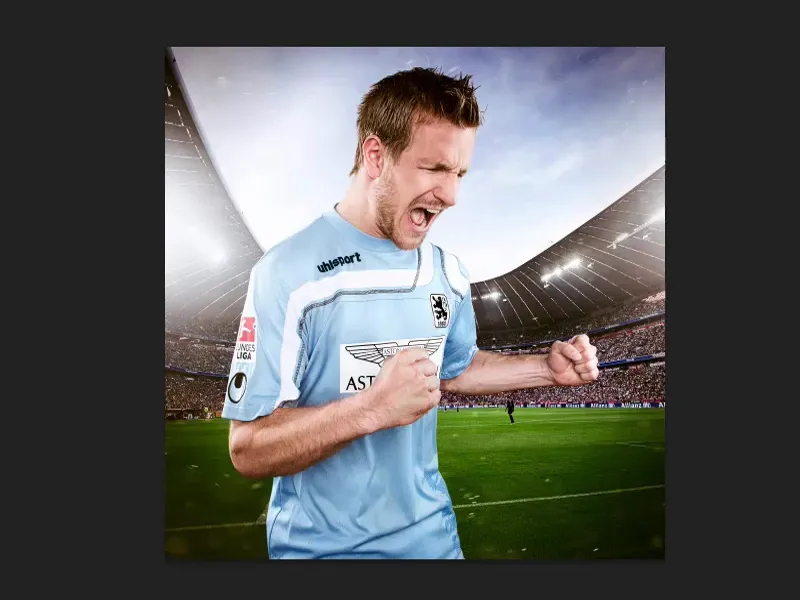
... or to adjust the brightness of composings in front of gray. Then you also get a bit of a feel for how Photoshop actually works.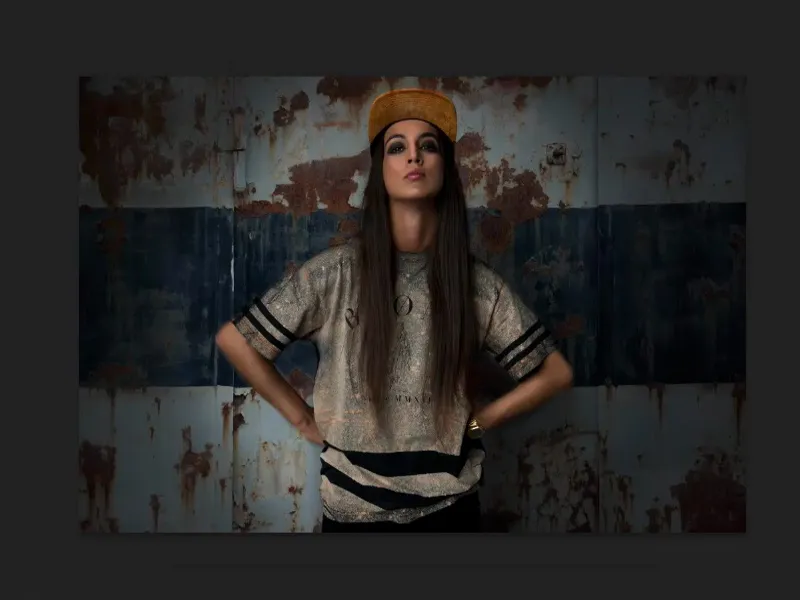
I always have the feeling that all these adjustment layers (1) below, including the tonal correction (2), always do roughly the same thing in certain layer modes, but the buttons are a little different. And whether I end up using a tonal value correction or a gradation curve (3) - I can basically do the same thing ...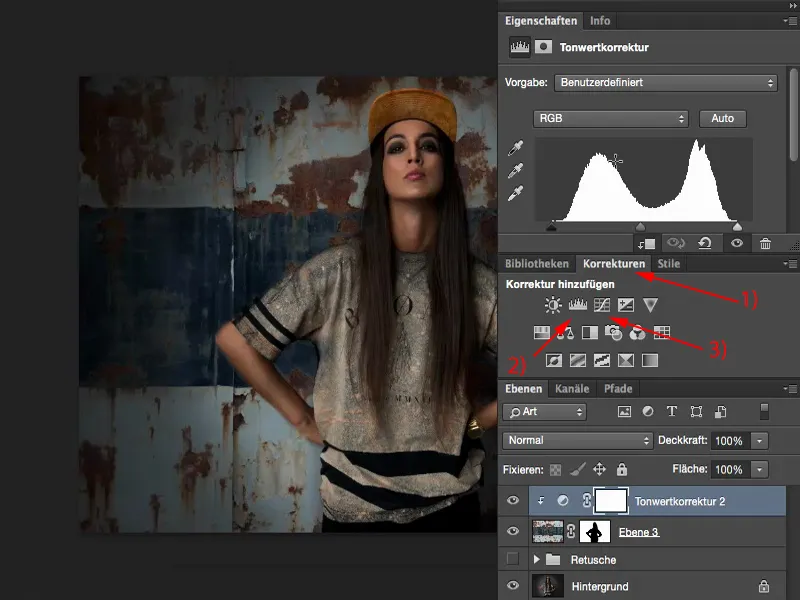
I can also do the clipping via the gradation curve. All I have to do is simply move the black value completely and the white practically disappears.
It can be that simple if you know these different options for tone value correction.