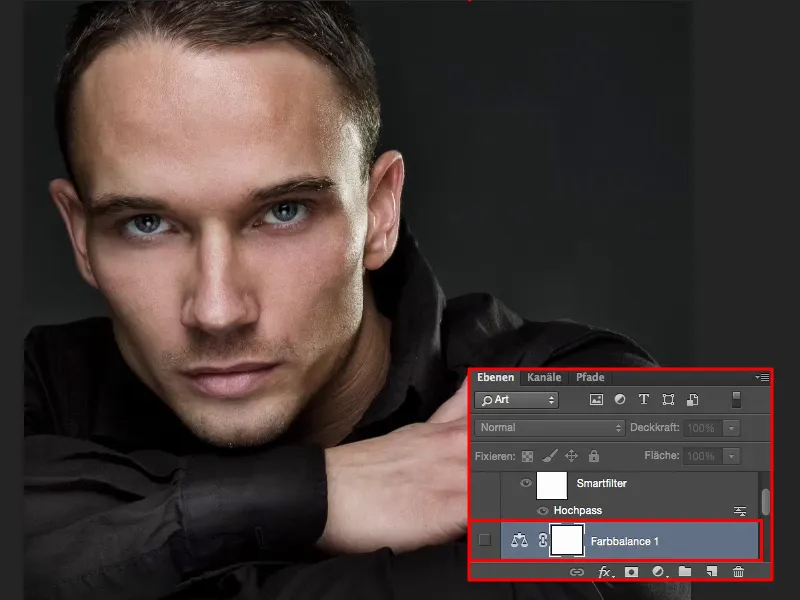
When we talk about a high-pass look, we primarily think of a normal high-pass filter that provides sharpness. In my case, the high-pass look looks like this (right). This means that my mids or lows are darkened and the highlights are brightened again. And look at the front of the shirt, for example, or in the area around the eyes, everything is extremely brightened. The saturation has also disappeared from the skin.
I think that's a look that I can immediately use one-to-one with 100% opacity here on my picture, especially for portraits of men, and the picture is finished. I might add a vignette around it, remove a few spots and so on, but when I look at how the skin looks here, it's all really nice and porous and the highlights really shine. I find the high-pass look super appealing.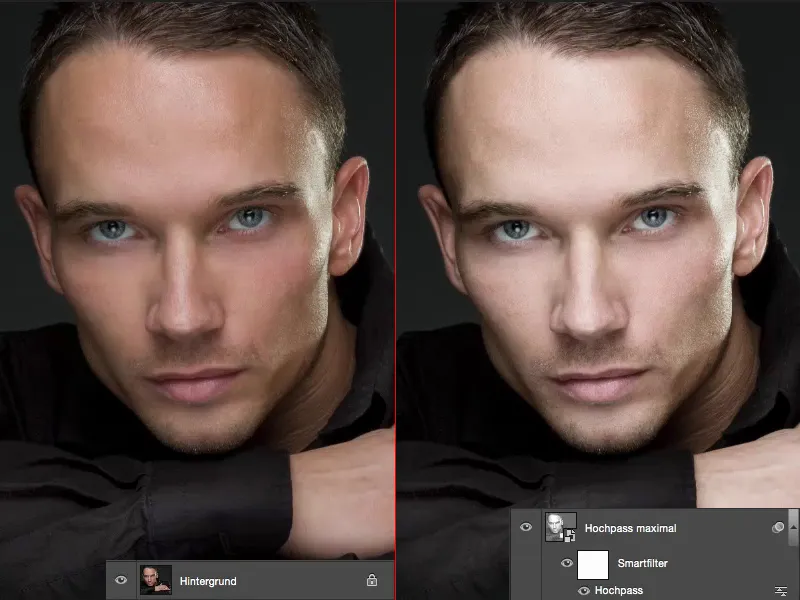
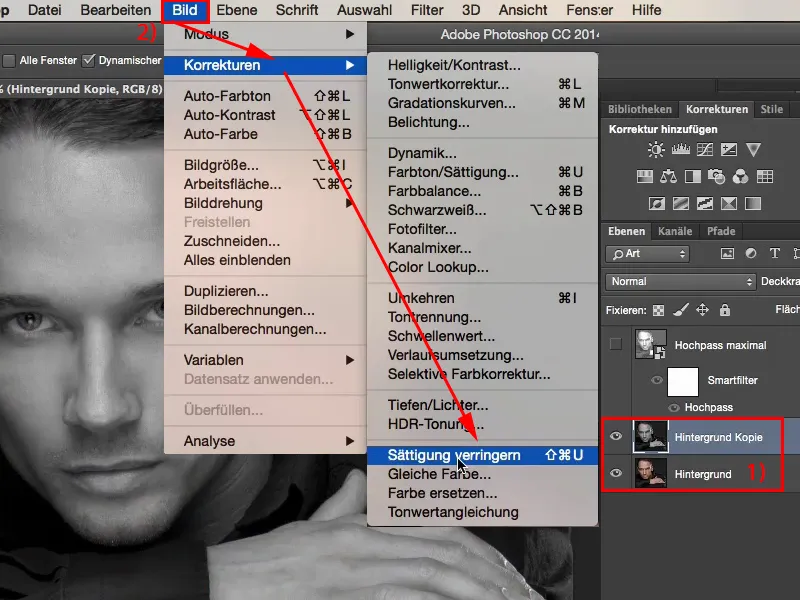
And it's really, really easy. All you have to do is make a layer copy (1), then remove the saturation completely via Corrections>Reduce Saturation (2) ...
... and then convert the whole thing here into a smart object via Layer>Smart object>Convert to smart object. The whole thing, because you can create different looks with this high-pass filter, with this high-pass look here. It's very, very easy.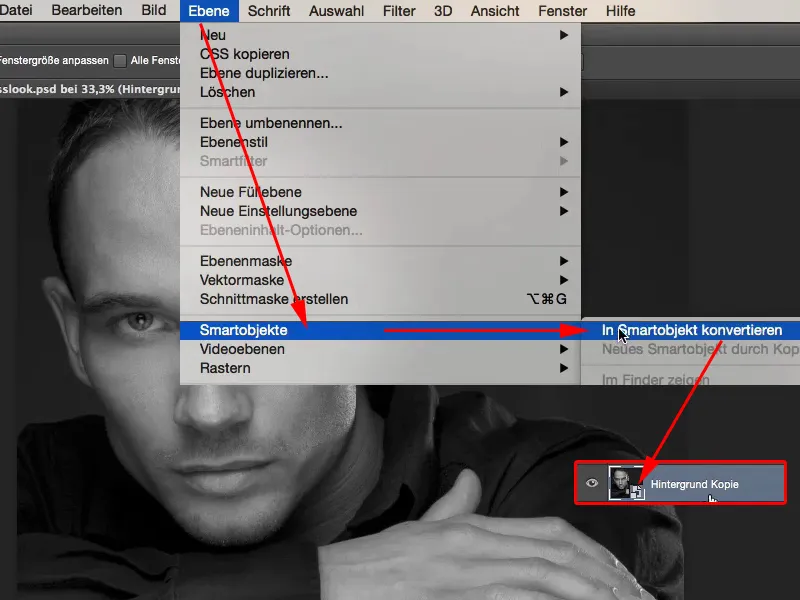
All you have to do is set the layer mode to Soft light (1). Well, the layer copy alone (2), black and white mode , with soft light, looks really cool here, I've created a really dark portrait style. So remember this, even without the high-pass filter - plane copy, black and white, soft light - it looks really, really cool on men.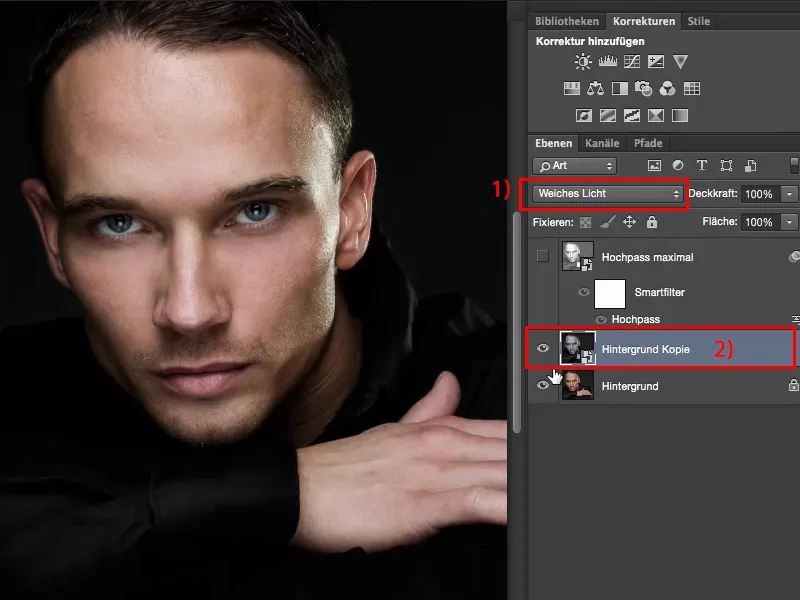
Now the high-pass filter comes into play. You can find it under Filter>Other filters>High pass filter (1).
This is what happens if you set it to a maximum of 1,000 pixels (2). It practically stretches your photo, spreads the tonal values until everything becomes terribly, terribly bright. This looks really cool with normally exposed portraits. If, on the other hand, you have an outdoor shot, a landscape photographed in sunshine, and you do that, I think the picture will be almost overexposed. It will probably already be broken.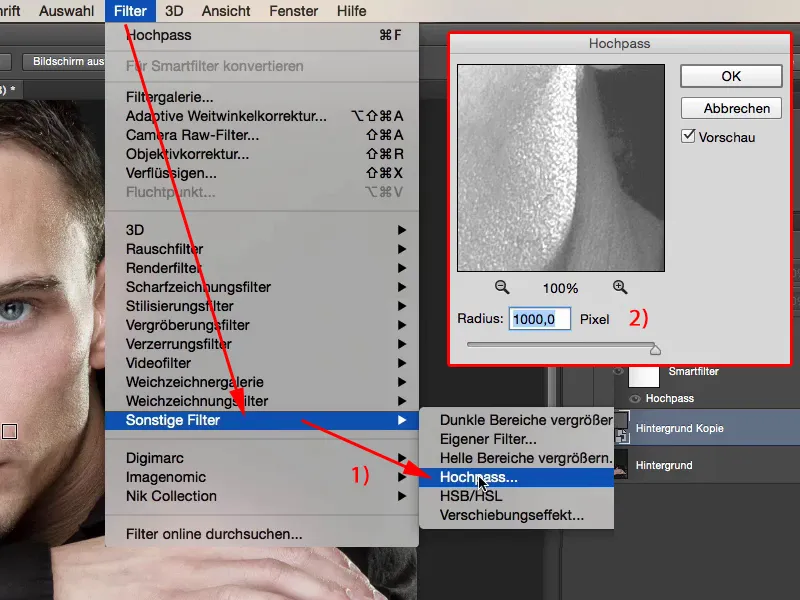
Most people are familiar with the high-pass filter, as I said at the beginning, when you use it as a sharpening filter. This usually takes place in the range of one to four pixels. You can also see this very clearly here in the preview: The structures are emphasized, I get this grey layer. This is calculated in the soft light, inter-copy calculation mode, removed, made invisible and the structure remains sharpened in the image. So of course you can apply the high-pass filter in this way.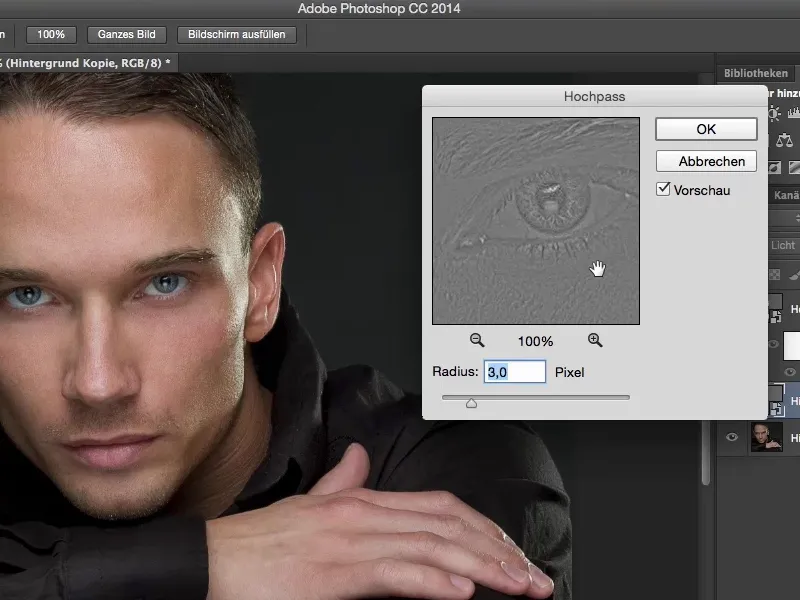
But look - if I simply move the slider to the center or perhaps a little more to the right, you can see how the eyes here become darker and more pronounced? And even at around 100 pixels, I have an effect in my portrait of a man where I say: "Wow, I've finished editing the image, thank you, that's it." And that's what I love about Photoshop, I can change and enhance the image so completely with a single layer that I don't have to do much to it. I can still think about a color look, but in terms of the contrasts, the tonal values - it looks really, really cool how the eyes shine out of the dark here.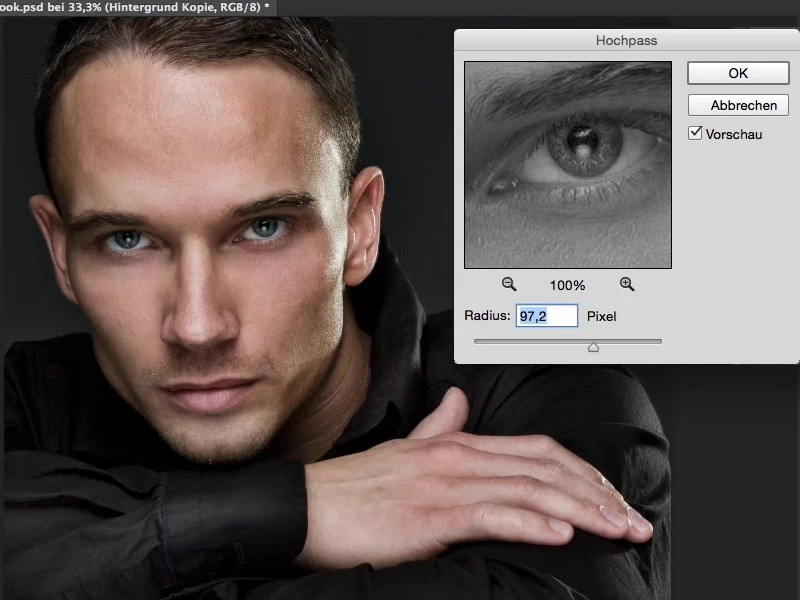
For comparison - if I take that out - the picture looks almost boring and very flat here in the face, but at 100 pixels the face is really cool.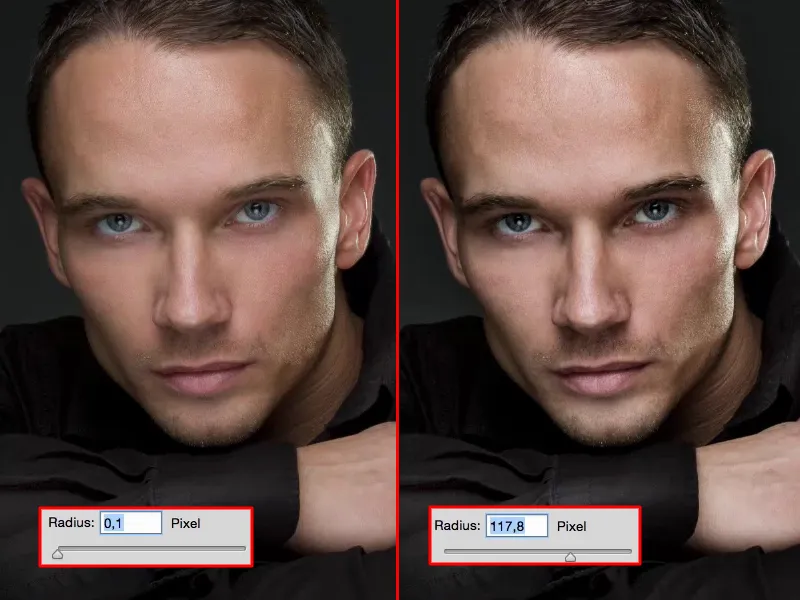
That would be one way of using this high-pass look here, at around 100 pixels. Or you can pull it up to the full 1,000 pixels, all the way to the stop, and you'll get a very brightened image, but with a very, very different look than if you usually move around 100 pixels here.
And so you can actually generate two different looks with one filter, with a high-pass filter on this black and white copy. On the one hand, an appealing, high-contrast look and then something brighter, which is no less appealing. Everything here in the face simply glows, especially the eyes and everything that was relatively bright in the face here, you can also create that with it.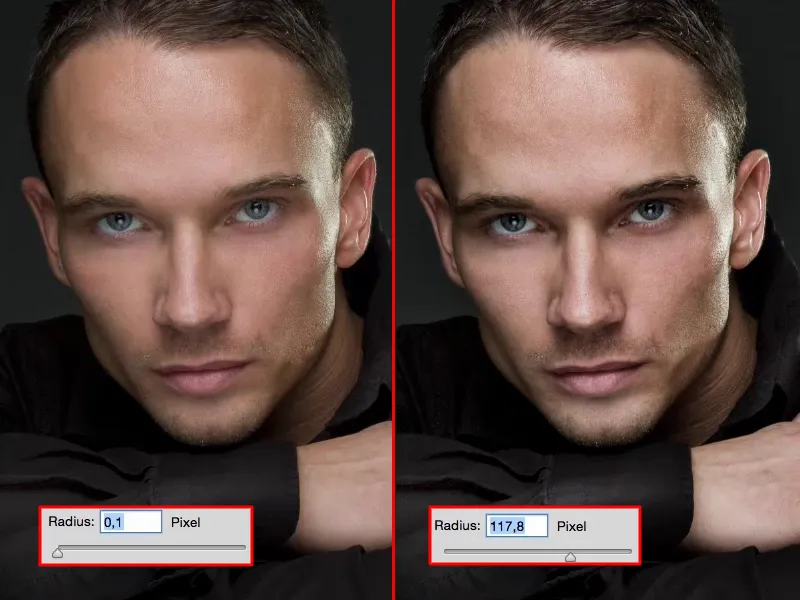
And that's why I love the high-pass filter so much when it comes to looks. And with portraits, you can be sure that I always have one or the other variant in a picture, with a certain opacity. I can also control the whole thing again here and say: This - this is how it looks cool, at 80% and not at 100%. And then my image look is already finished in terms of contrast.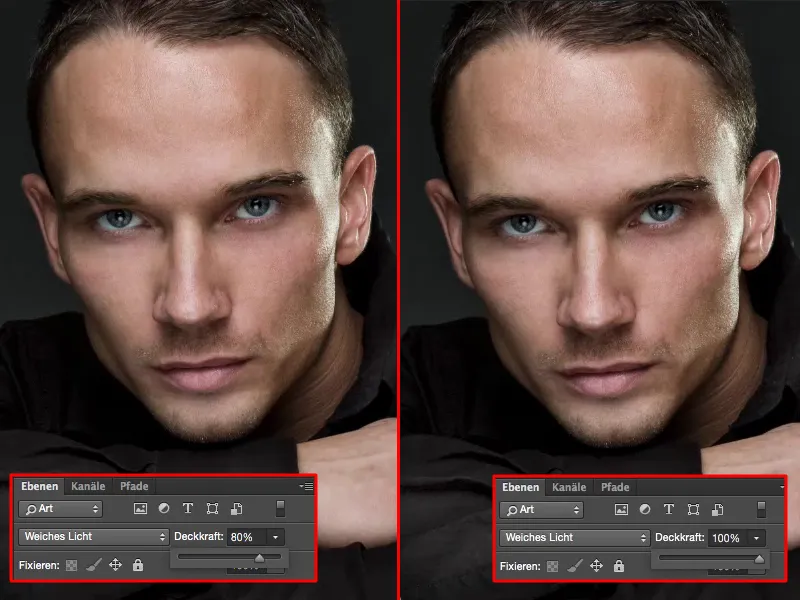
Then I just have to think: do I make the whole thing a bit cold in terms of the colors or do I make it a bit warm? How do I want it?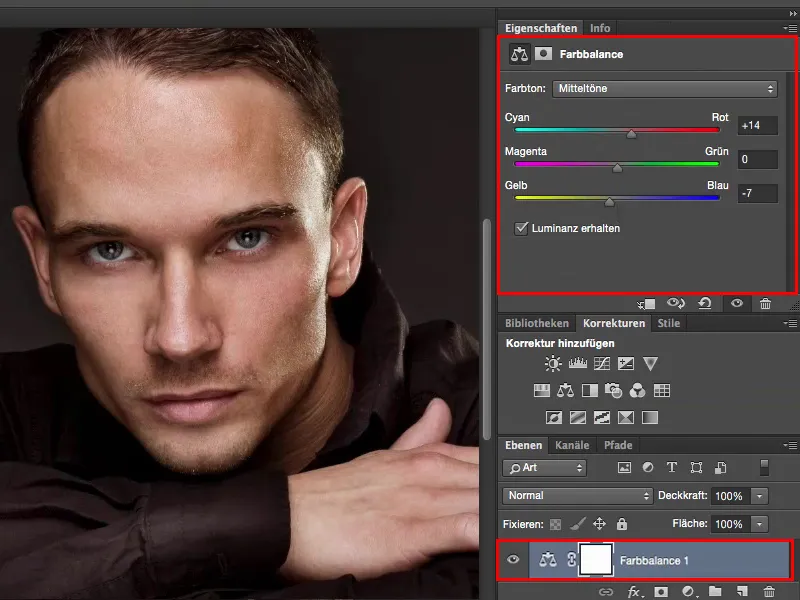
... but whatever I end up tinkering with it doesn't really matter, because the look is created here on this high-passage level.