In the previous tutorial on dynamic inverse kinematics, the alien character was made suitable for animation with two IK chains on the antennae in a first step.
In this tutorial, we want to use the PoseMorph morphing tool to create a slider control for the mouth and antennae that makes it easy for us to animate the alien's face.
In the file PSD_C4D_R12_PoseMorph_Start.c4d you will find the initial state - compared to the tutorial on dynamic inverse kinematics, only the dynamics function has been switched off and two additional joints have been integrated for the mouth.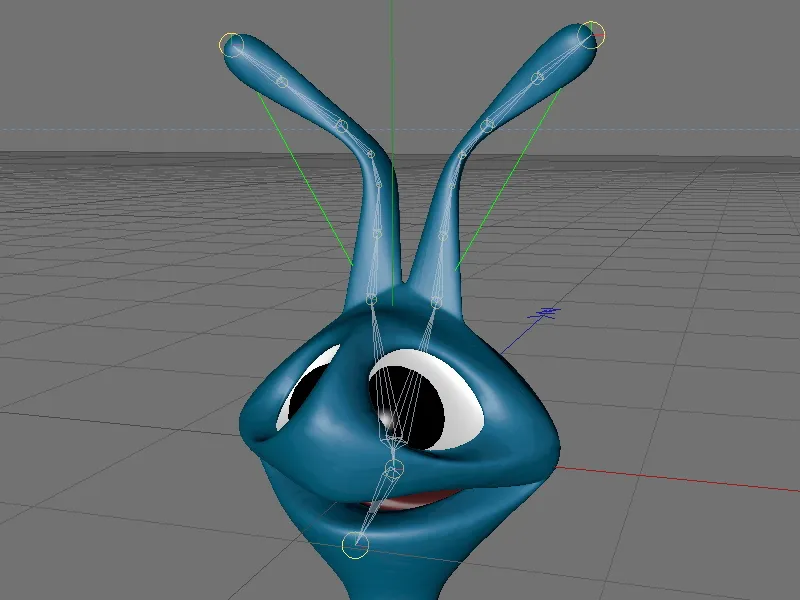
These two joints are necessary so that we have a jaw joint in the right place for opening the mouth. In their current state, these two joints are neither part of the alien IC, nor do they have any weightings that could be used to change the geometry of the alien. We will do this beforehand - if you want to start morphing directly, simply open the file PSD_C4D_R12_PoseMorph_Mund.c4d and skip to the next section in this tutorial.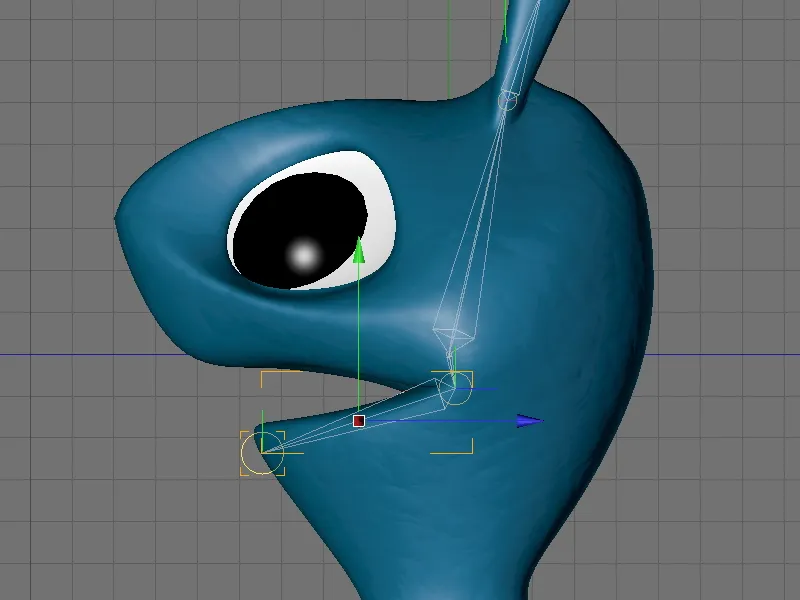
Integrating the new joints into the existing IK chain
At the moment, the two joints for the jaw and mouth are still outside the IK chain. The jaw joint provides the rotatable jaw joint, while the mouth joint will later allow us to distort the lower jaw.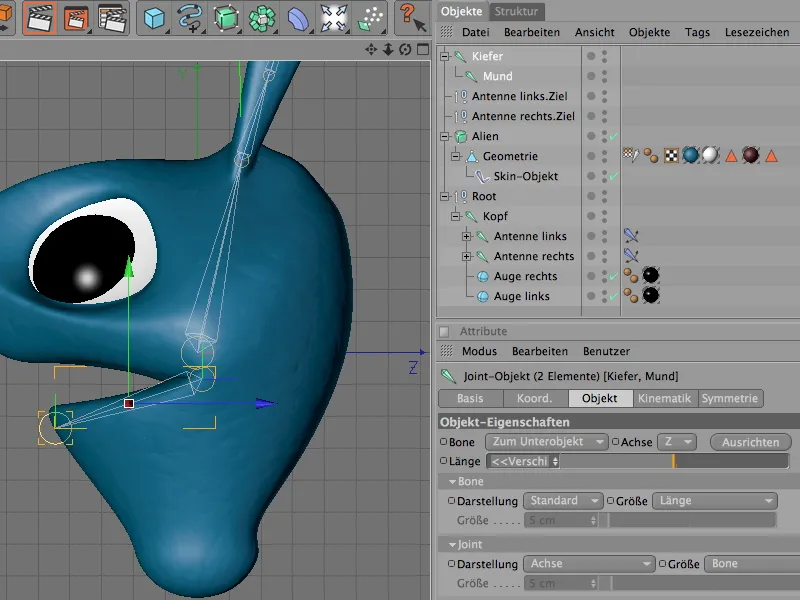
The first step is to integrate the jaw IK in the right place in the alien joint hierarchy. As the head joint is responsible for the alignment of the head in our case, we place the jaw and subordinate mouth joint as sub-objects in the head joint.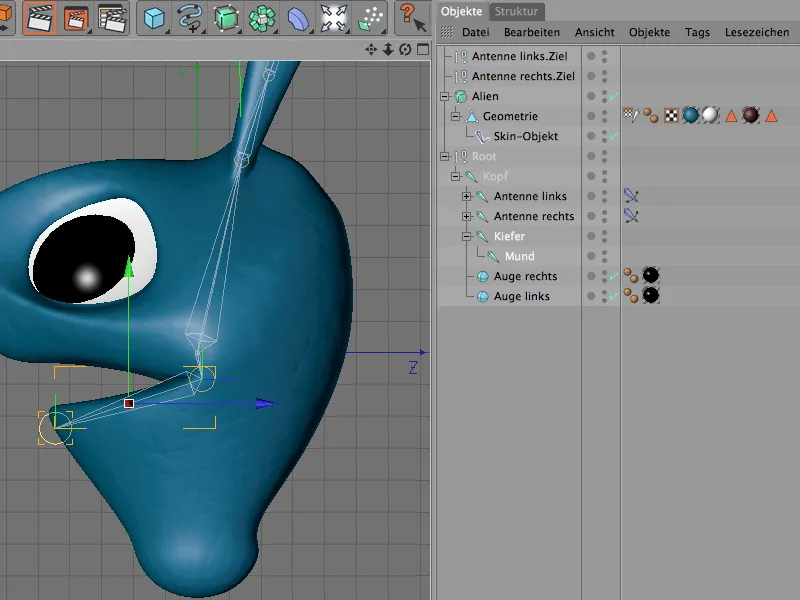
This means that the jaw joints are already part of the overall IC, but these joints are not yet bound to the geometry - a basic requirement for them to be able to deform the geometry at all.
The skin object enables deformation via the joint and weighting information stored in the weighting tag. To include the two subsequently created joints, we open the weighting tag in the Attribute Manager and drag the jaw and mouth joint into the corresponding joint field in the settings dialog.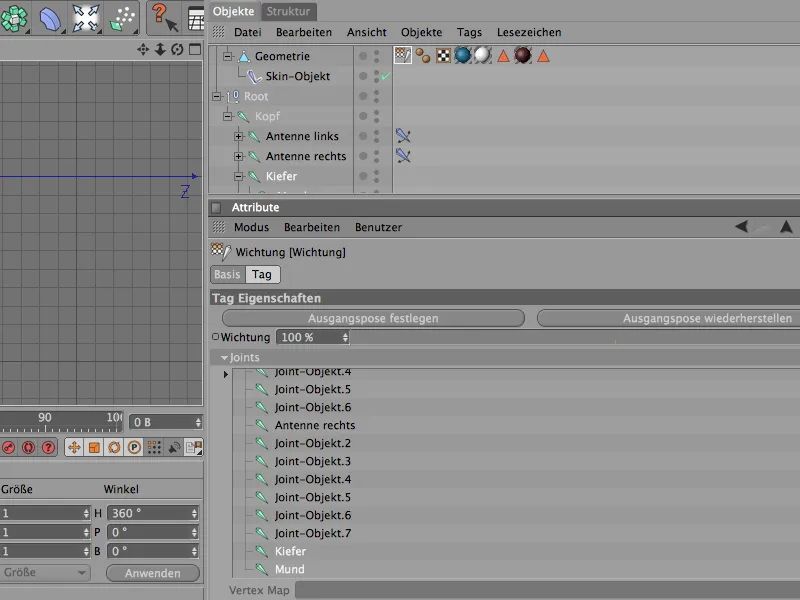
The two joints are now accepted by the skin object for the deformation. But what about the weighting? By manually integrating the joints, they initially have no influence on the geometry - so we also have to set them up later by weighting.
To do this, we deactivate the HyperNURBS cage of the alien character and activate the weighting tool via the Character menu. Once we have selected the mouth joint, we can apply the weighting with the brush tool. For the alien head, the mouth joint should be able to influence the entire lower jaw.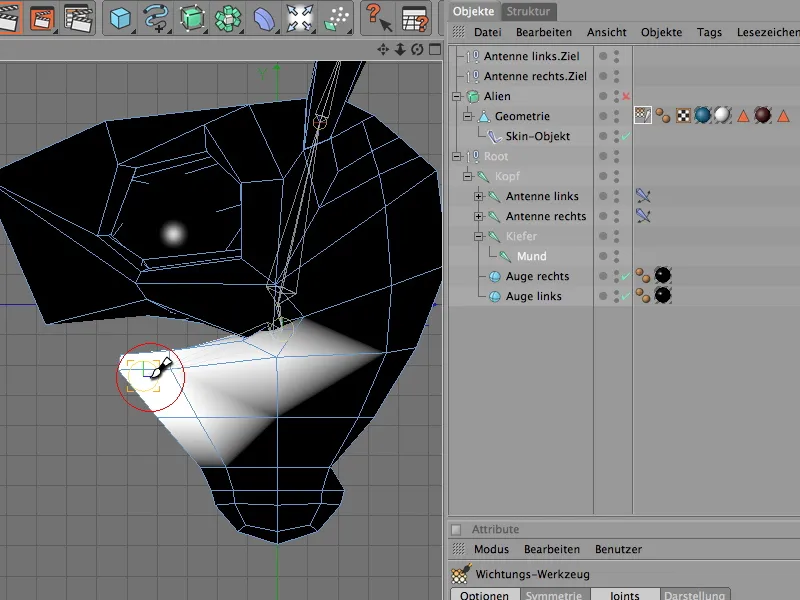
This weighting is already sufficient for our purposes. As the jaw joint only provides the basis for the rotation of the mouth joint, it does not need to be assigned its own weighting.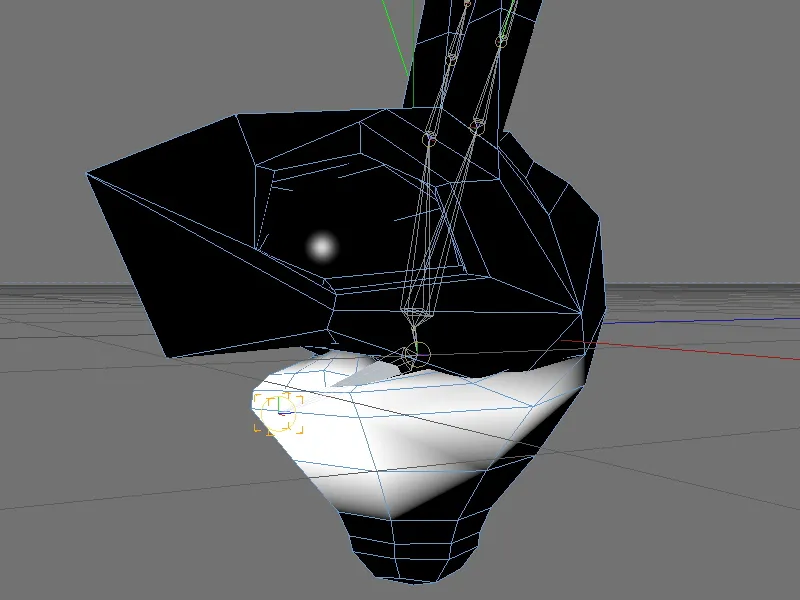
Again, it is advisable to check at the end whether all weightings are still functional due to the subsequent weighting. In my case, the subsequently added mouth joint took some weightings away from the head joint, which can be easily checked by selecting the head joint and corrected with the weighting tool.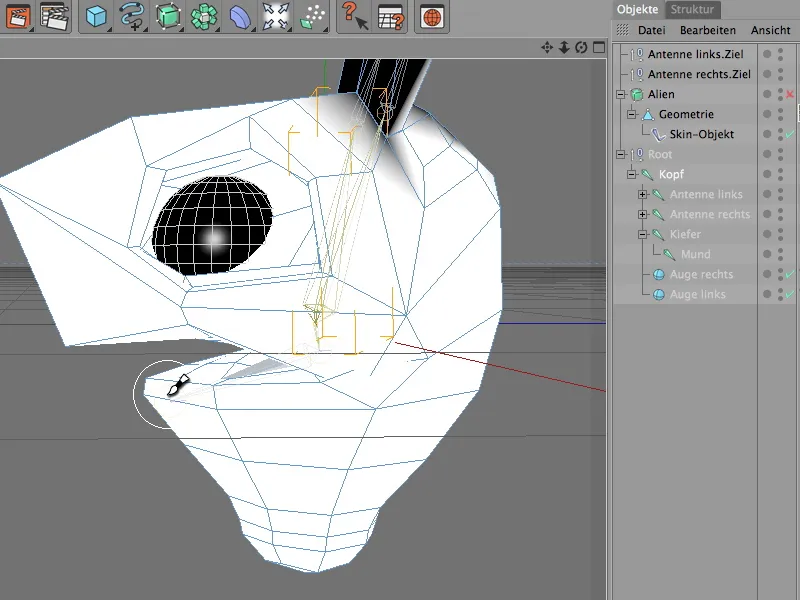
The two joints are now fully integrated into the IK hierarchy and can contribute to the deformation of the alien head. We test this right away by simply moving the mouth joint in any axis direction.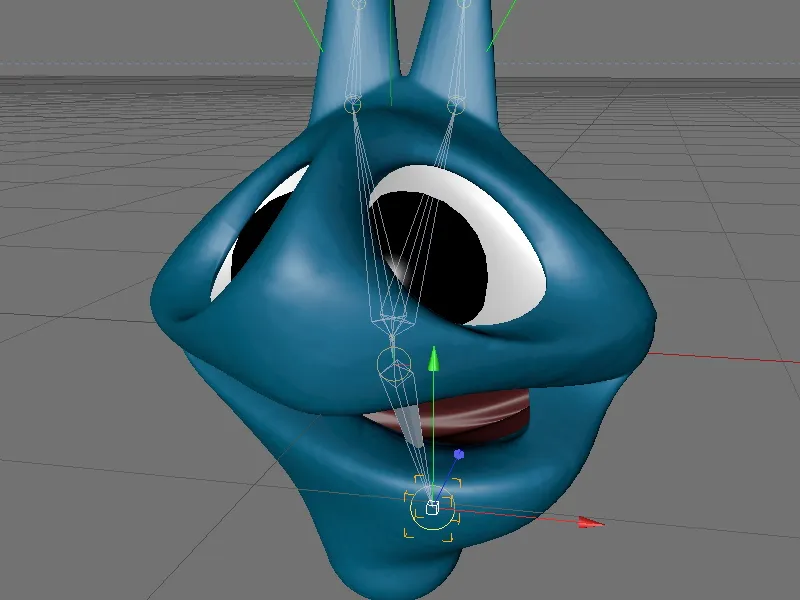
Setting up the PoseMorph poses for the mouth
One of the biggest advantages of PoseMorph is that it can process entire hierarchies of different objects. Because we will use both joints from the IK chain and null objects (the targets for the antennas) for the animation of the alien head, we simply group these objects together under a common parent object Rig, to which we then assign the PoseMorph tag.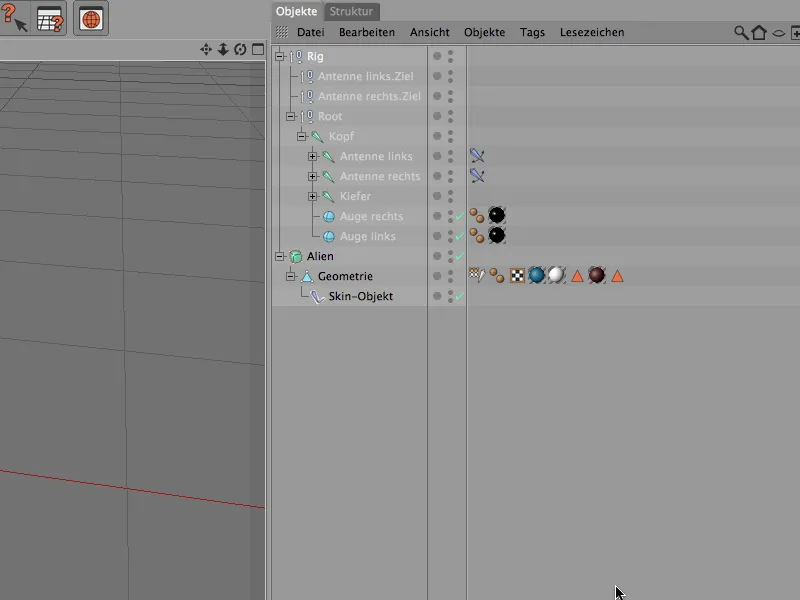
In the Character menu, the PoseMorph tag is available in two versions: for point morphing and for morphing the position, size and direction of the objects it contains, as PSR morph (Position, Size, Rotation). To assign the correct PoseMorph tag to the rig group, we select the rig object and add the PSR morph using the command of the same name in the Character menu.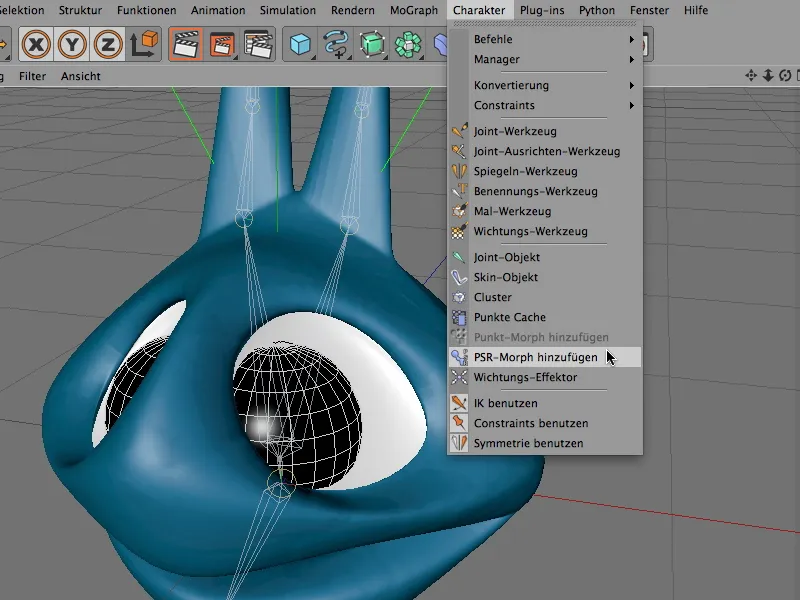
In the settings dialog of the PoseMorph tag, we are now in edit mode, which already offers us the basic pose and a first pose for the other morphings. We will use this pose for opening the mouth.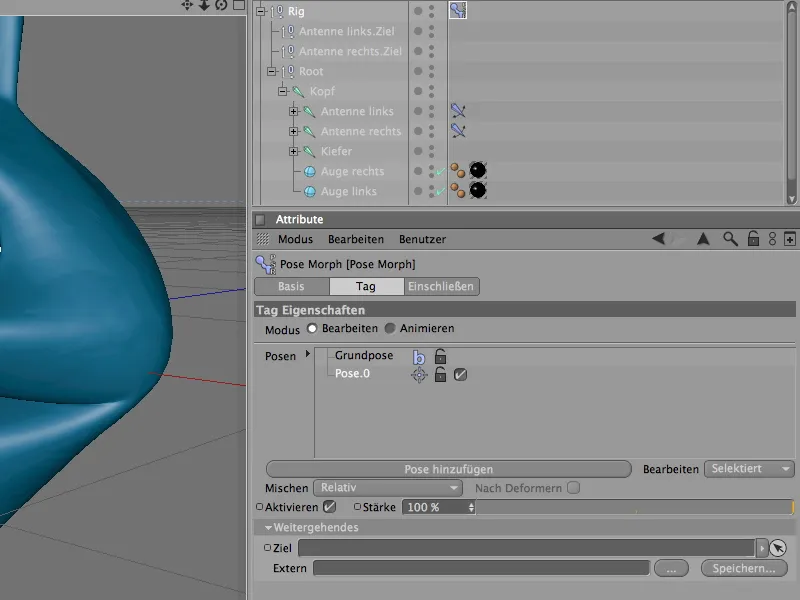
After double-clicking on the Pose.0 entry, CINEMA 4D allows us to use a meaningful name for the pose.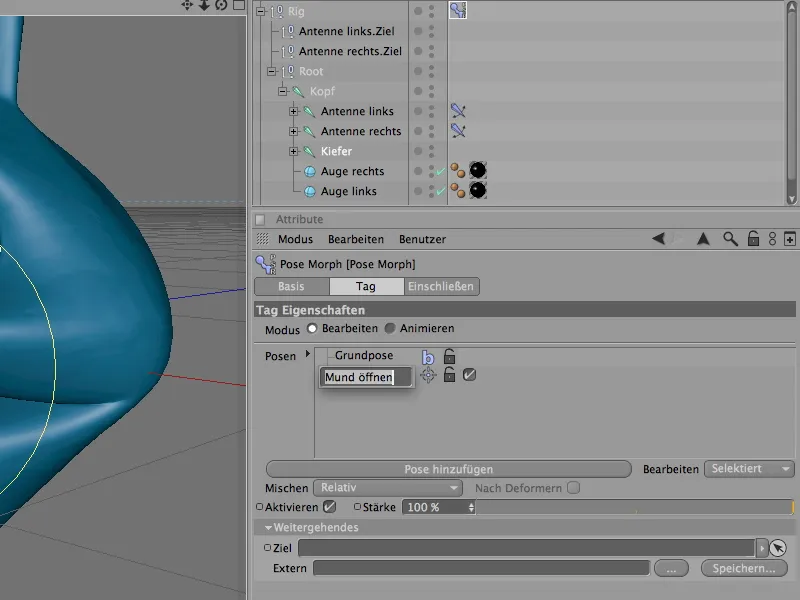
The selected pose is already activated for editing, so we can start immediately. We select the jaw joint in the Object Manager and activate the rotation tool. By rotating the joint along its x-axis, we open the mouth of the alien character - not too far, so that there are no unwanted or unnatural distortions or overlaps in the geometry.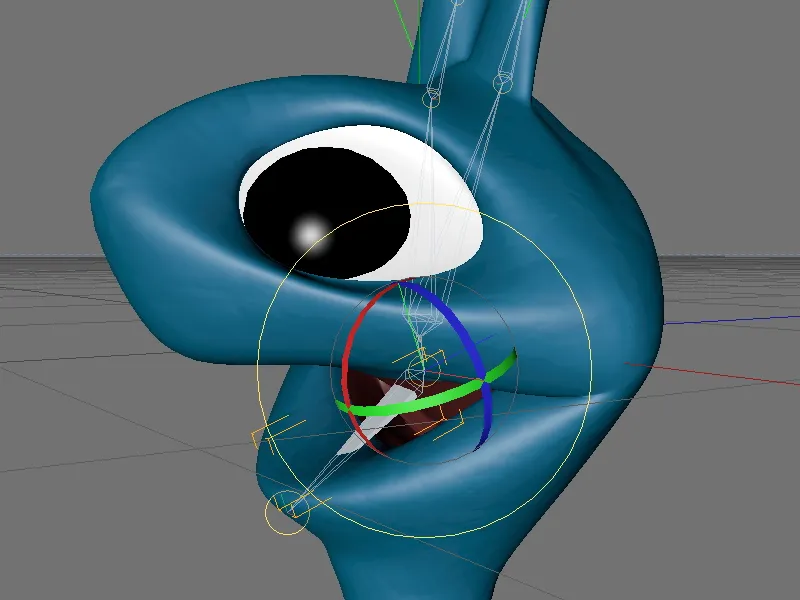
To make the lower jaw or chin appear slightly larger, we select the mouth joint and move it down or forward a little. PoseMorph remembers every change in position as well as the angle, so we can freely tweak the poses.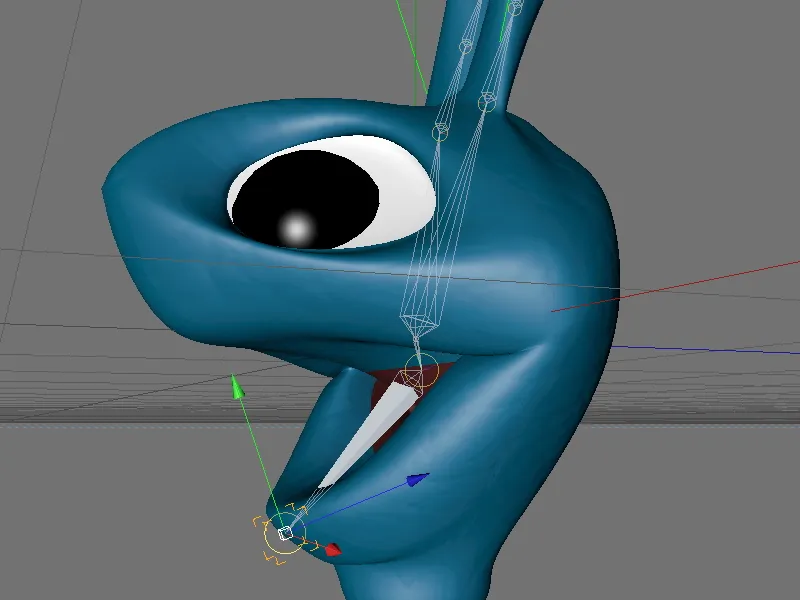
Let's test whether the created pose works as expected. To do this, we switch from edit to animate mode via the settings dialog of the PoseMorph tag and move the strength slider. Depending on the value set, the mouth of our alien character opens or closes.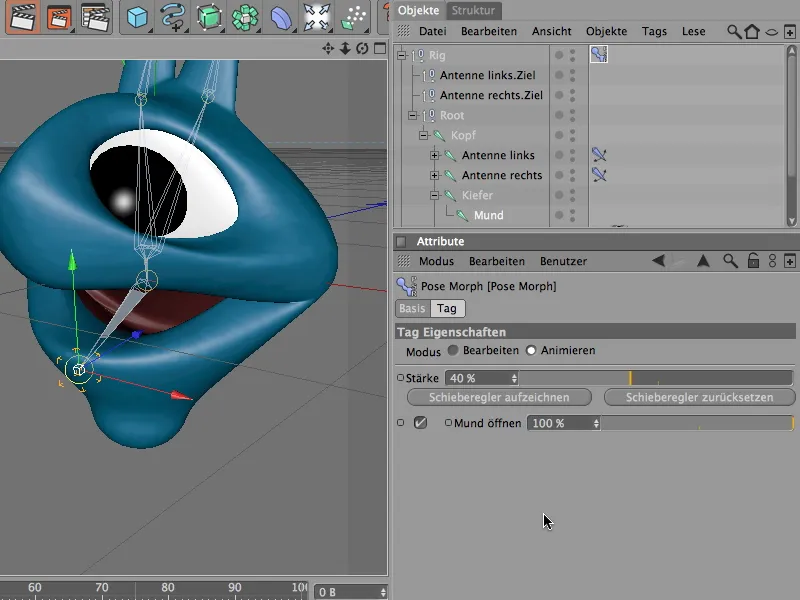
Now the mouth can already be opened, but to make the alien look even funnier, we create additional poses to distort or move the lower jaw to the sides.
To do this, we first create another pose by clicking on the Add pose button.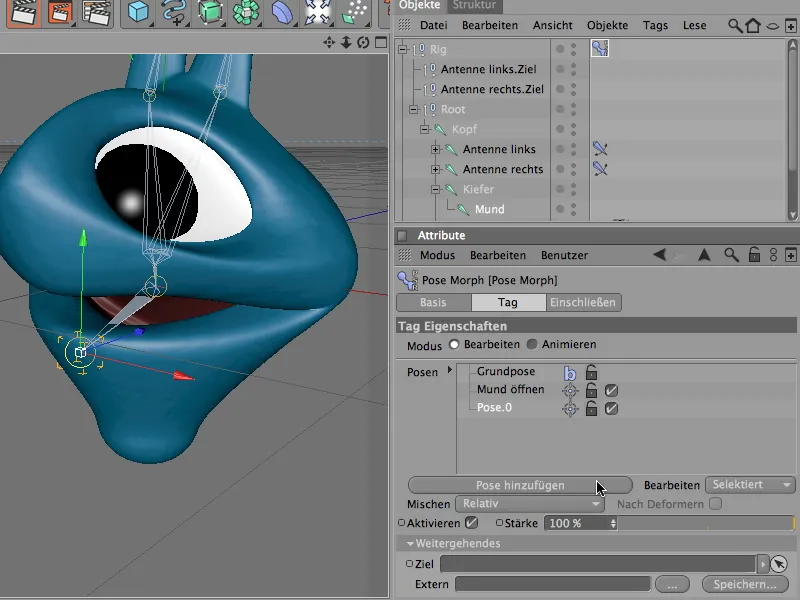
We also rename this pose appropriately. At this point, I have used the page logic that I have seen as a user for easier orientation. After setting up the pose, we move the mouth joint to the left or right according to the side position, but again make sure that there are no unwanted distortions or excessive deformations.
Using the coordinate manager, we can see the amount by which we have moved the mouth joint to the side. We remember this value so that we can ensure an equally large offset for the left side.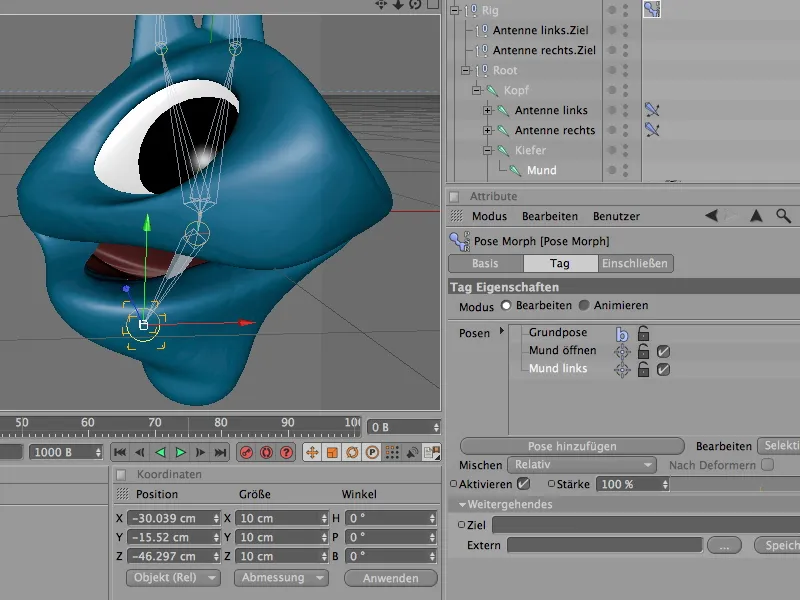
Analogous to the left side of the mouth, we also create a new pose for the right side, which we name appropriately. This time, the mouth joint is moved by the negative amount of the offset known from the left side. You can do this very easily using the coordinate manager.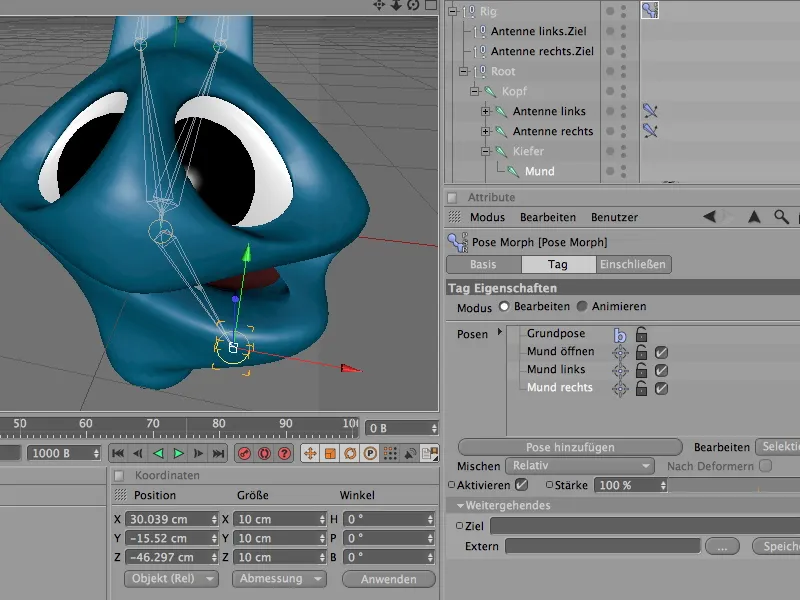
Now that the most important poses for the mouth have been created, we can start testing the set poses. In animate mode, we now find a total of three poses for the alien mouth, which we can adjust as desired using the respective sliders and - very importantly - of course combine with each other.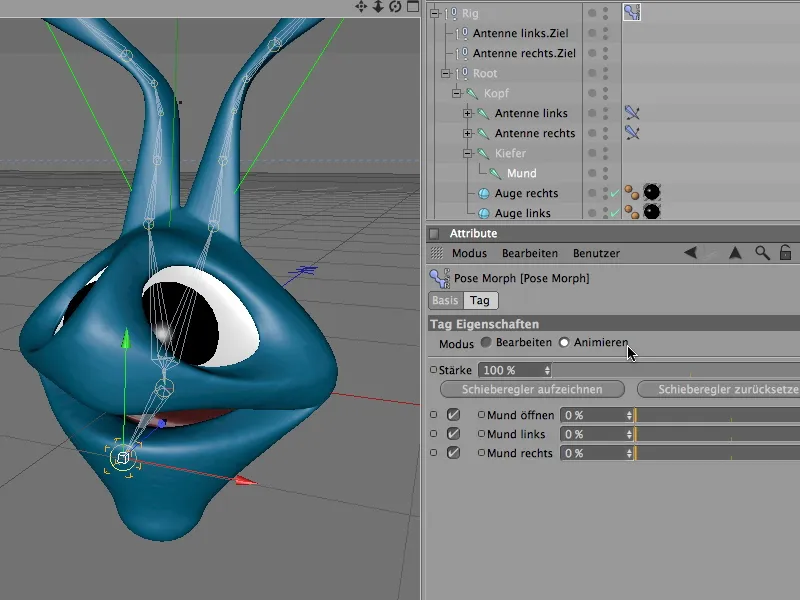
In order to be able to control this mouth control conveniently outside of the PoseMorph tag, we add the three parameters or poses to the head-up display (HUD). To do this, we select the three parameter entries in the Attribute Manager and open the context menu with the right mouse button. With the Add to HUD command, we conveniently place the three controls in the 3D view, ...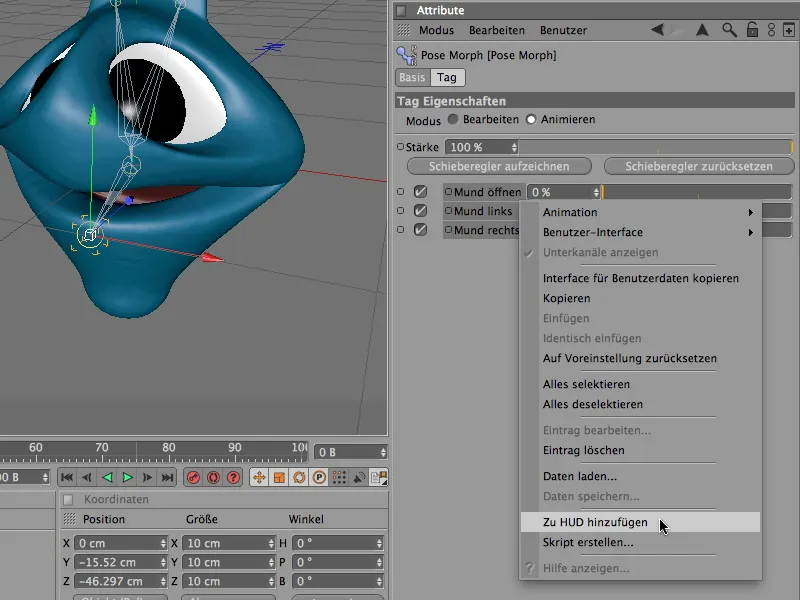
... where we can immediately continue experimenting with the controls available to us.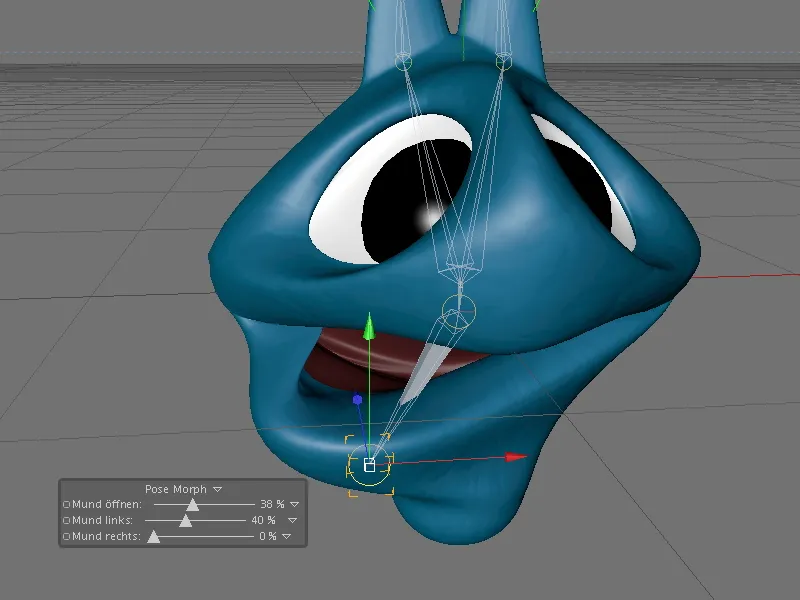
Setting up the PoseMorph pose for the sensors or antennas
So far, we have created the poses for morphing in the PoseMorph tag by moving or rotating the joints in our IK hierarchy. With the sensors or antennas, we can see straight away that the position of simple null objects is also sufficient information to work with the PoseMorph tag.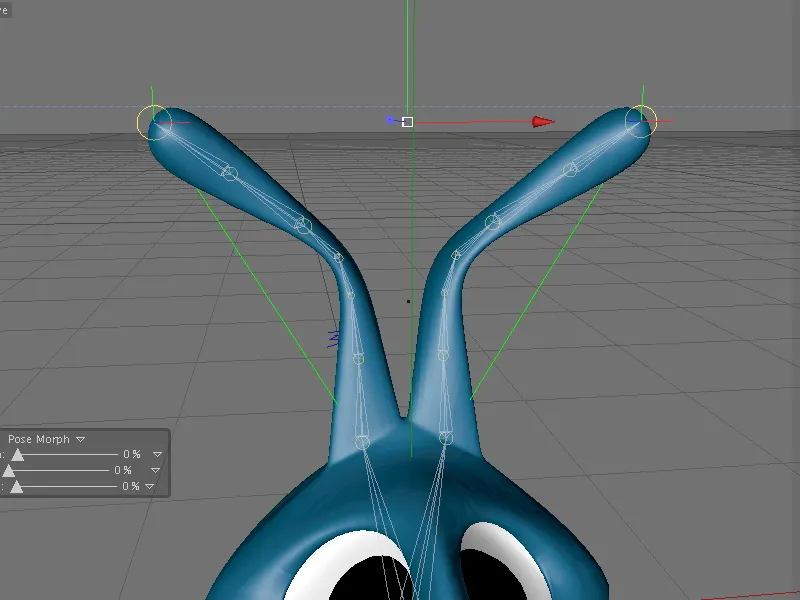
To do this, we first select the two target null objects of the antennas using the Object Manager. In the existing PoseMorph tag, we add another pose for the antennas using the Add pose button.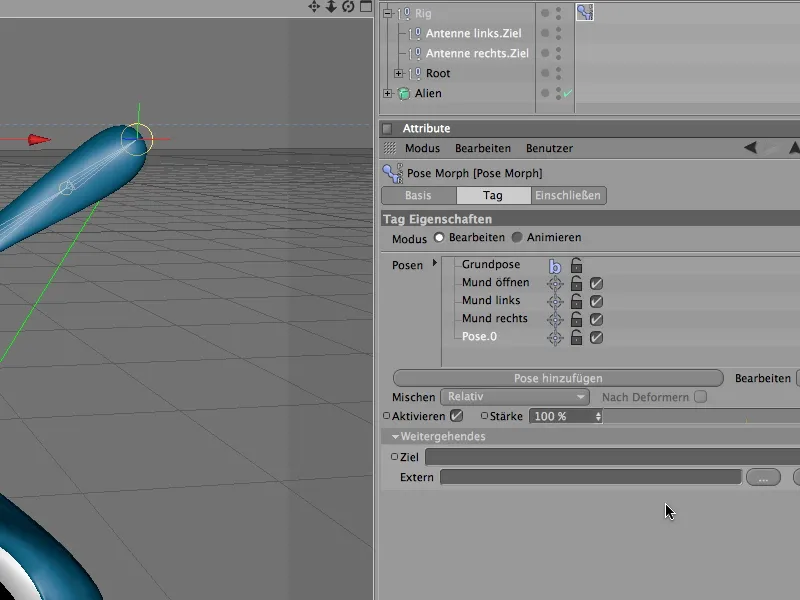
After double-clicking on the name of the newly created pose, we assign a unique name for the control of the sensors or antennas in the PoseMorph tag.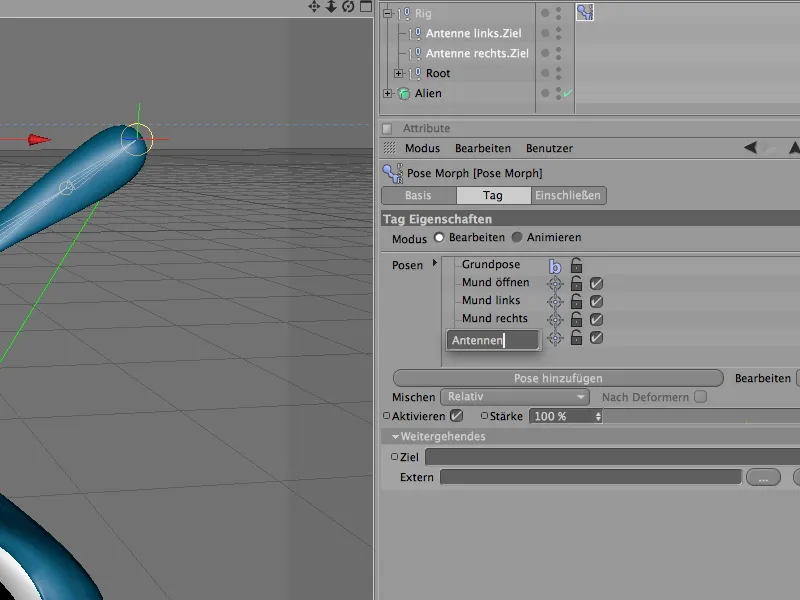
In the target pose, we have the alien character strongly retract the two antennae. All we have to do is move the two selected target objects for the antennae down along their y-axis.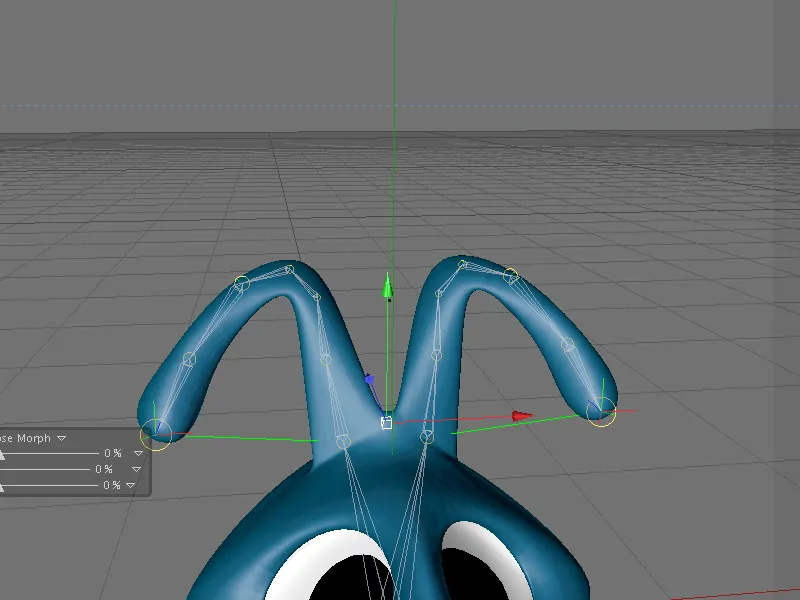
Once the pose has been created, the test takes place - we switch to animate mode and control the antennae of our alien character using the slider of the pose in the PoseMorph tag.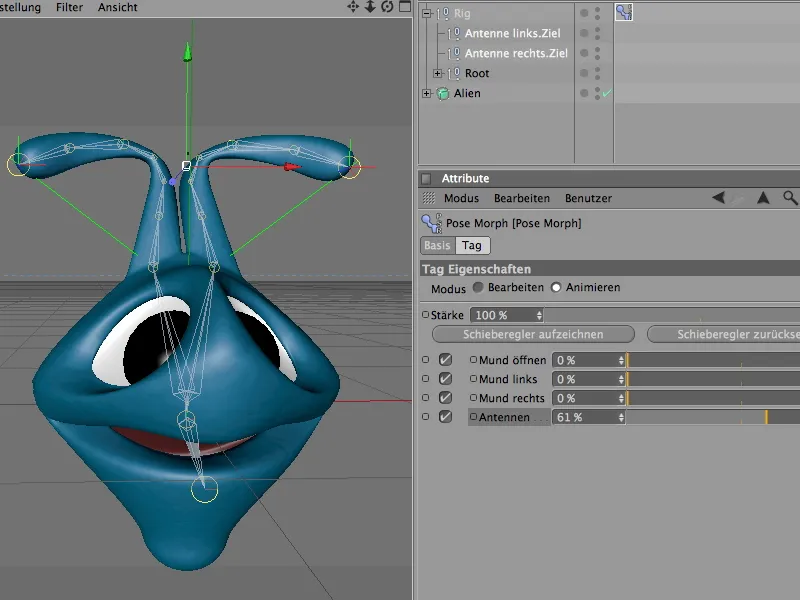
If the new control element is to be added to the other HUD entries, we have to delete the existing HUD element via the context menu by clicking the right mouse button and selecting the Remove command.
We then select all the parameter entries suitable for the HUD using the Attribute Manager and add them to the HUD again using the context menu with the right mouse button.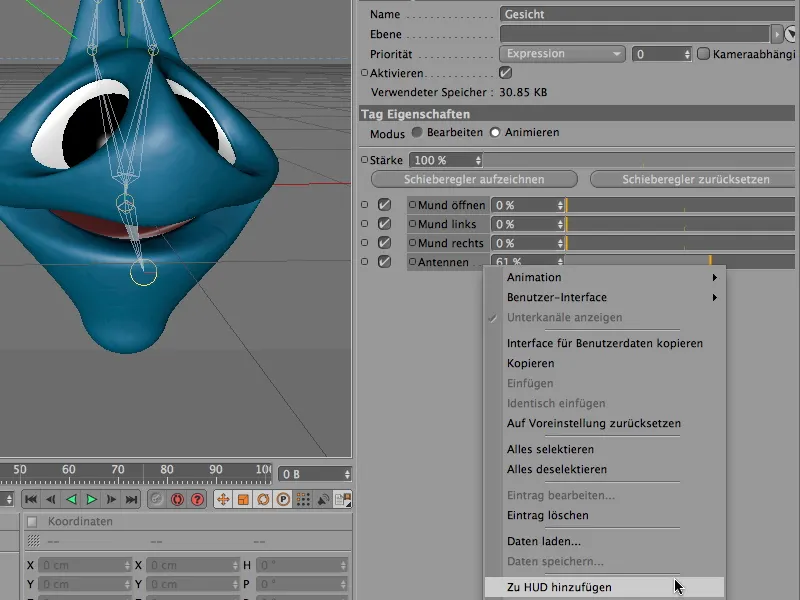
To ensure that the HUD group remains visible in the editor view even if the PoseMorph tag is not selected, right-click on the HUD element to open the associated context menu and select the Always entry in the Show sub-item.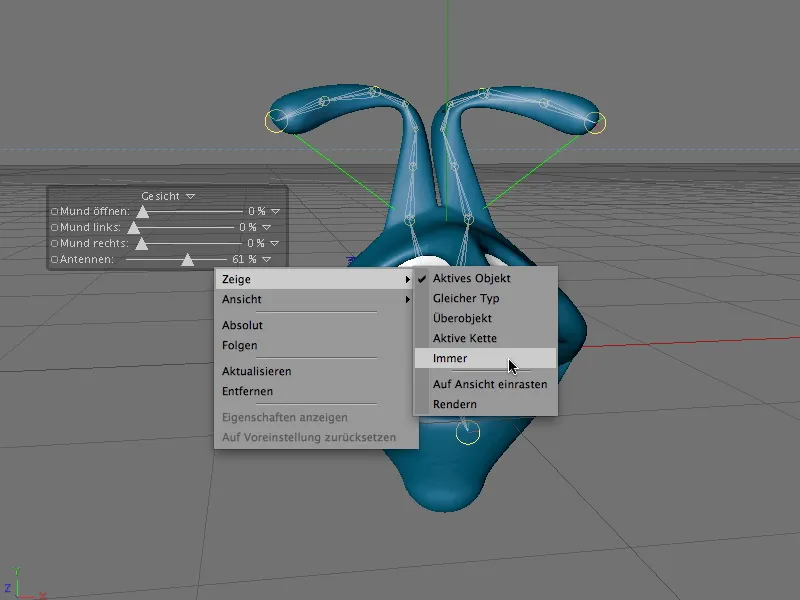
With the control and combination options already available, the alien character can now be controlled quite nicely using PoseMorph.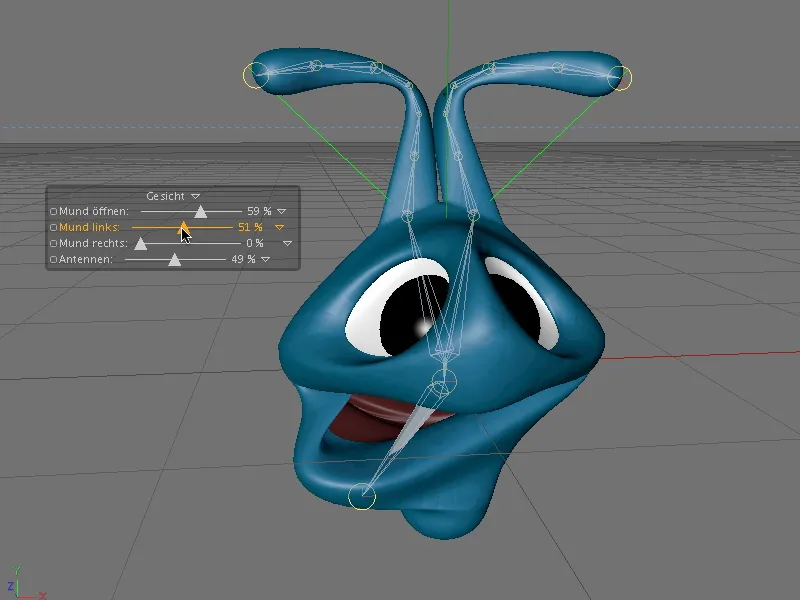
This is a brief introduction to the possibilities of the new PoseMorph tool in CINEMA 4D Release 12. Of course, you can integrate and experiment with many more poses.


