These further highlights include really practical work simplifications, impressive new functions and a further connection option to an established, powerful texturing software.
Editor view
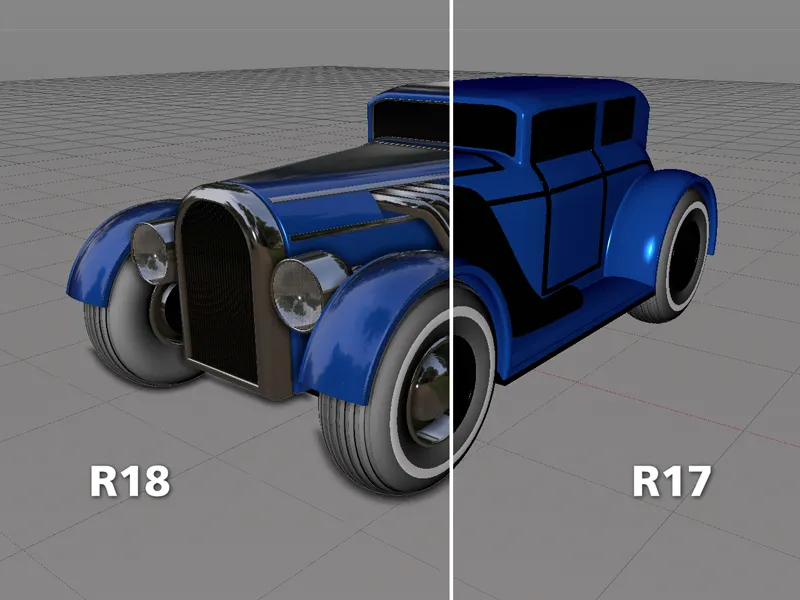
In this illustration, I have compared one and the same scene in Cinema 4D Release 18 and 17 in the editor view. The new version already offers the display of reflections in the view when Extended OpenGL is activated and, in addition, a so-called Screen Space Ambient Occlusion (SSAO) for better recognizability of the geometry. Compared to rendering, both are of course only an approximation, but in some cases they may even make rendering superfluous.
Both view functions can be switched on or off via the View options menu.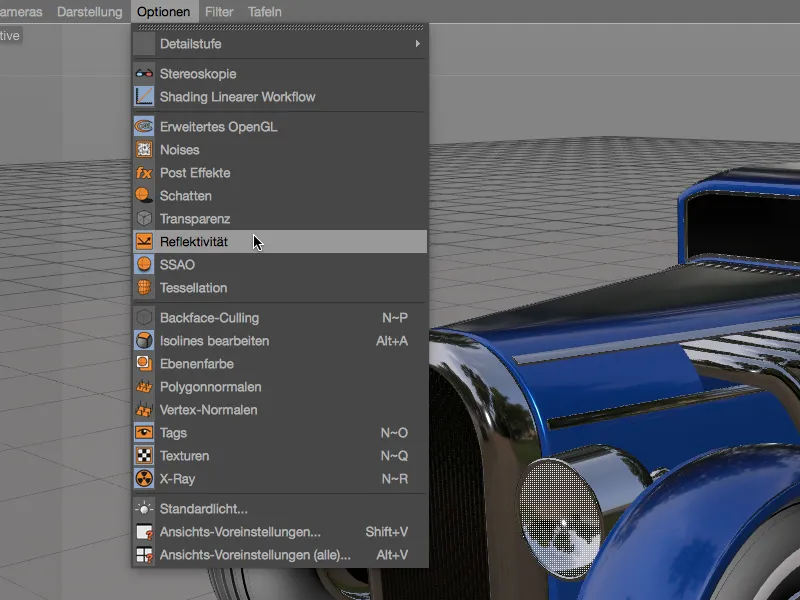
In the view preferences, on the Advanced OpenGL page, we can find a few options to further customize the preview to our needs. For example, the default mirroring environment is not suitable for every application. To specify a different environment for reflectivity, we simply need to load a different HDR file as the environment. There are also several parameters available for adjusting the size, strength and fineness of the SSAO.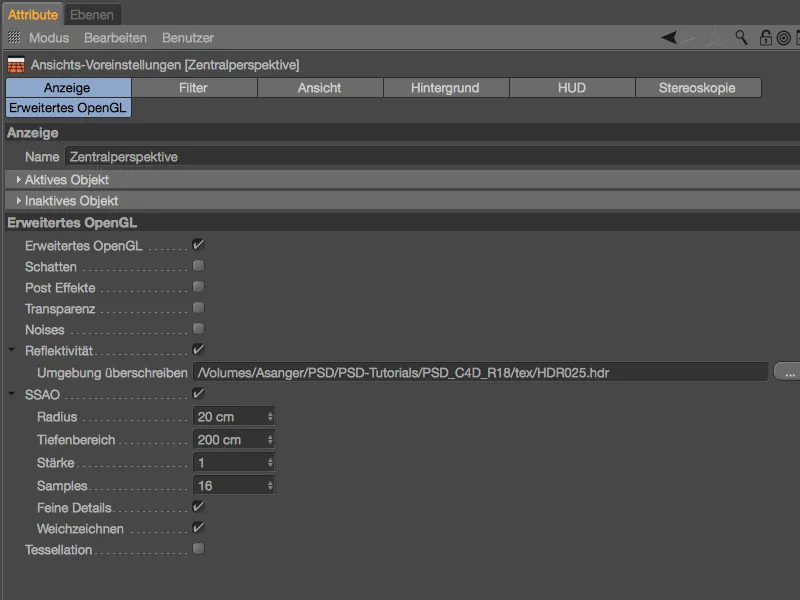
The reflectivity preview after loading a different (indoor) HDRI environment.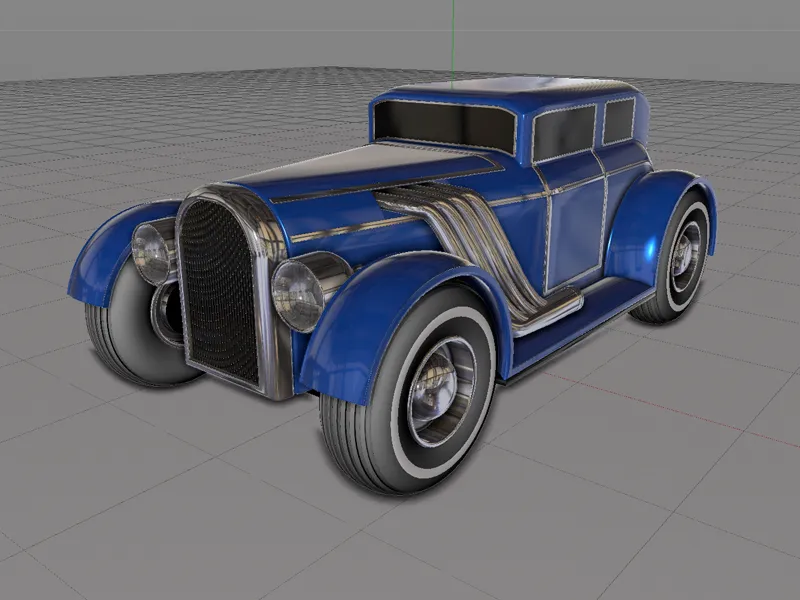
We can control the quality of the reflectivity preview via the material itself. On the editor pageof the material, there is a new section called Reflectivity preview , where we define the resolution of the environment texture via the size. The number of samples determines the quality in the matt areas of a reflective material.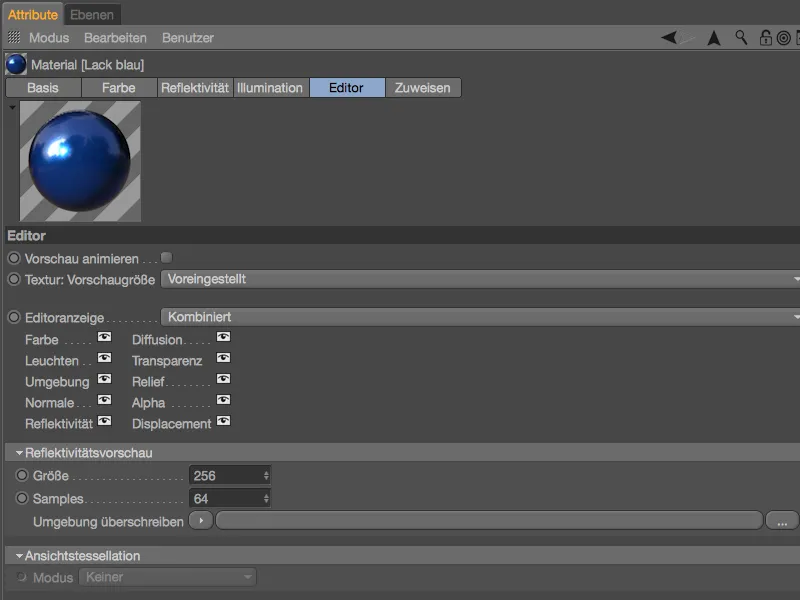
The third new option for the editor viewallows us to display a preview of the displacement. This so-called tessellation is also merely an approximation that cannot be rendered as such.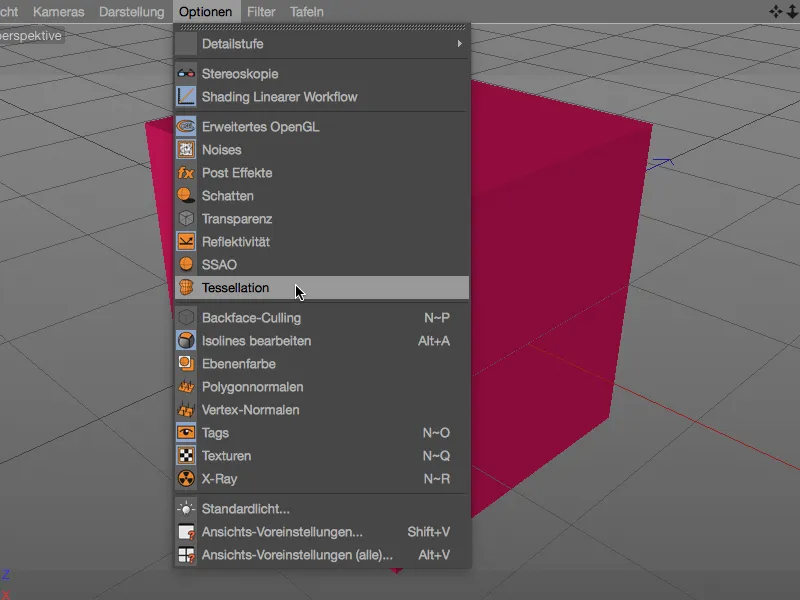
To display the tessellation in the editor view, the material must have a displacement channel. In the simple example shown, I have stored a tile shaderas a texture and activated Sub Polygon Displacement at a subdivision level of 10.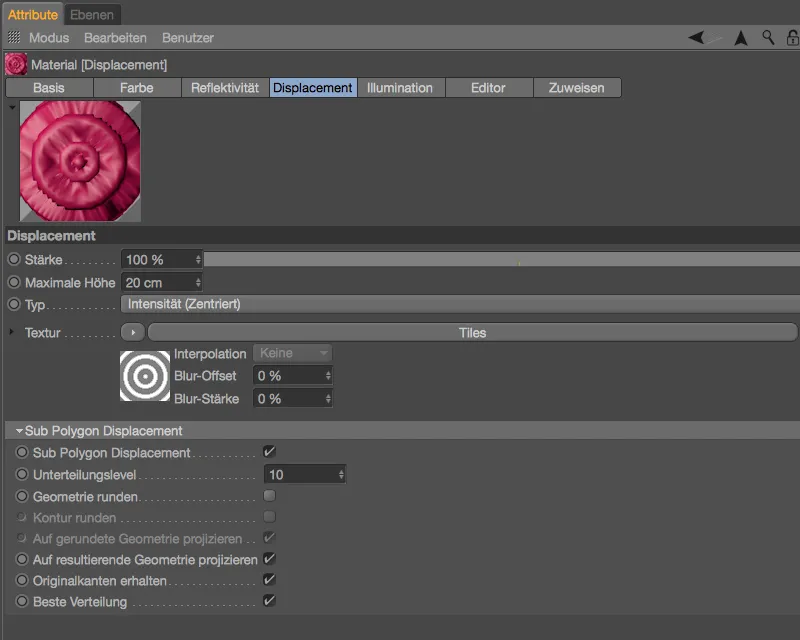
On the editor pageof the material, we again find additional setting options for the view tessellation. In Uniform mode, tessellation is performed uniformly without taking the camera distance into account. If, on the other hand, the tessellation should be higher or lower depending on the camera distance, the Projective mode should be selected. At the bottom, the information GPU Max. Levels shows us the number of tessellation levels that the built-in graphics card is capable of displaying.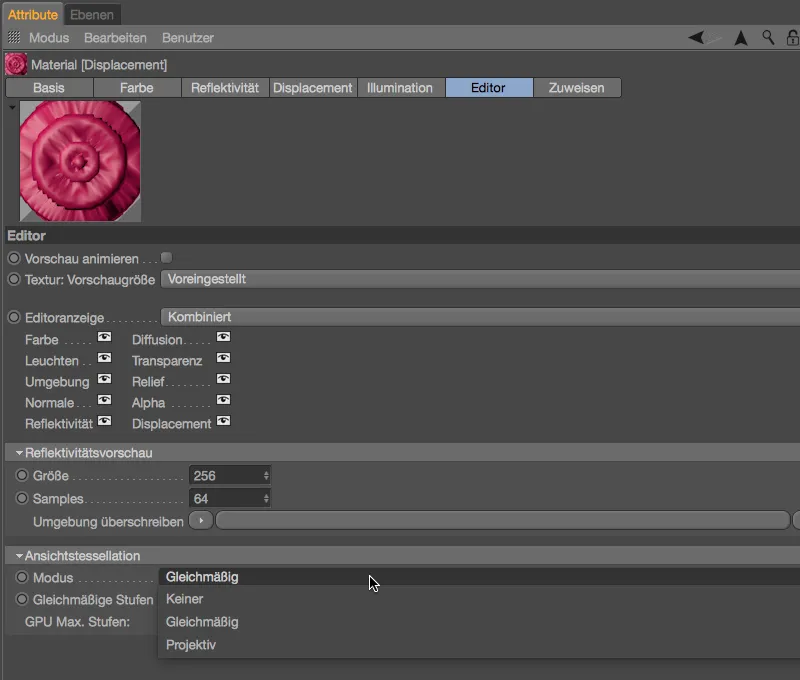
A tessellation that is already recognizable in the editor viewis extremely practical for the exact positioning or animation of such 3D objects, ...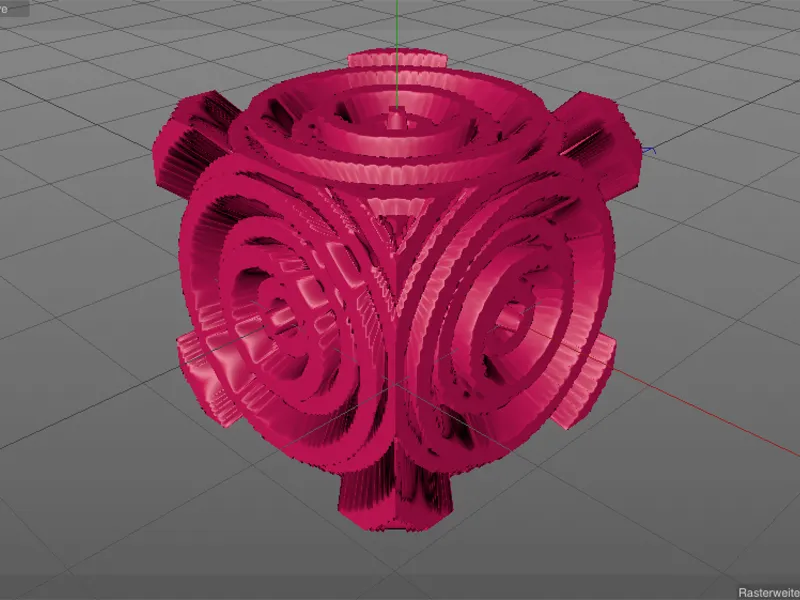
... as it comes quite close to the rendered result.
Substance Pipeline
Substance Designer is a node-based, non-destructive program for creating procedural materials and textures of all kinds. Cinema 4D Release 18 gives us the ability to import Substance materials via the built-in engine and use them directly in Cinema 4D as materials.
If you don't have Substance Designer, you can still enjoy many high-quality materials. After creating an account, you can download a large number of free Substances via Substance Share and use them in Cinema 4D.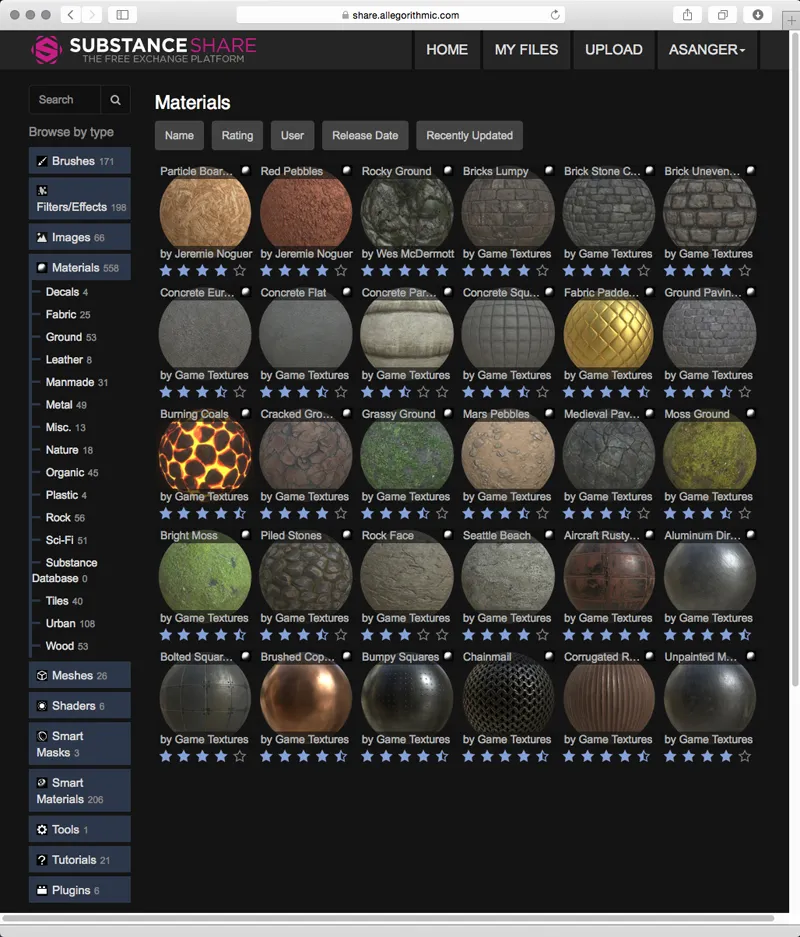
To load a Substance asset into Cinema 4D, we use the Load Substance... command in the Pipeline>Substance Engine menu.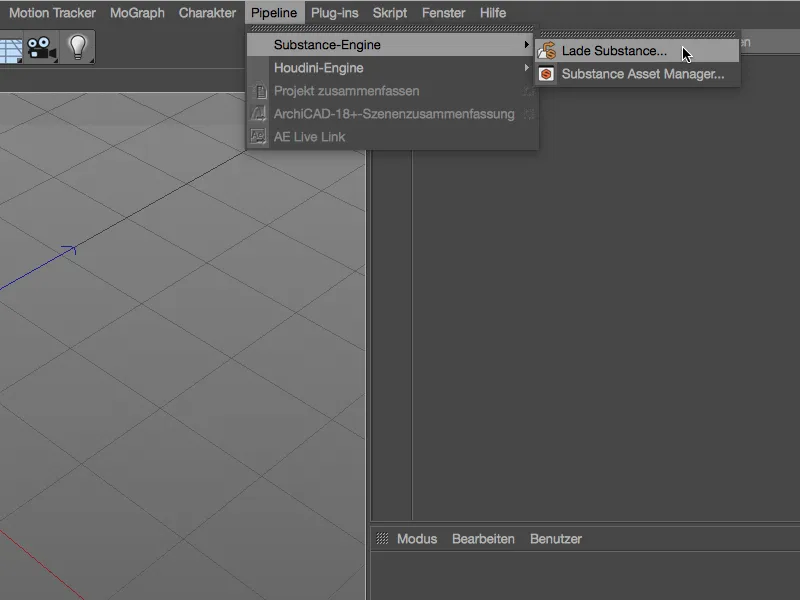
Please note that the asset file to be imported must have the extension .sbsar. Cinema 4D cannot load Substance assets with other file extensions.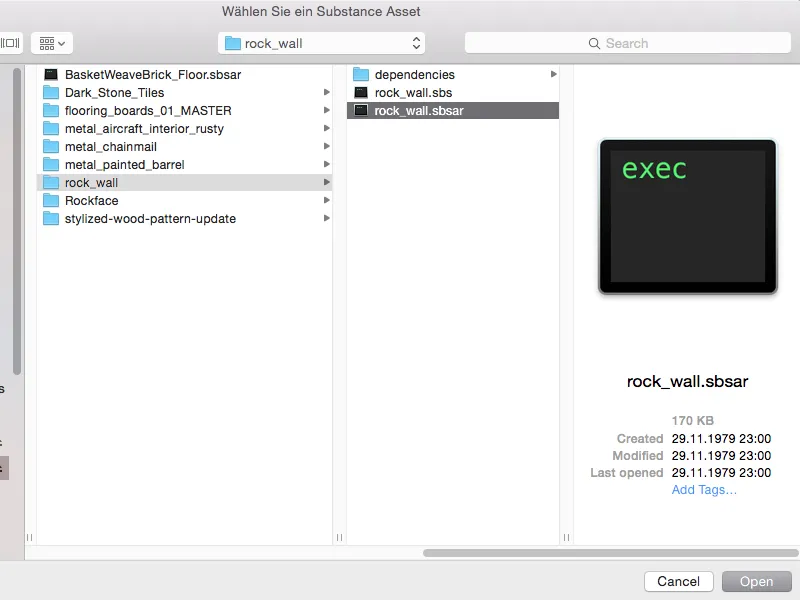
All Substance assets loaded in Cinema 4D are listed in the Substance Asset Manager. Next to each entry, we see small preview images of the associated texture information.
To use the Substance assets as materials in Cinema 4D, we simply have to drag and drop the assets onto an object, a Texture field or into the Material Manager.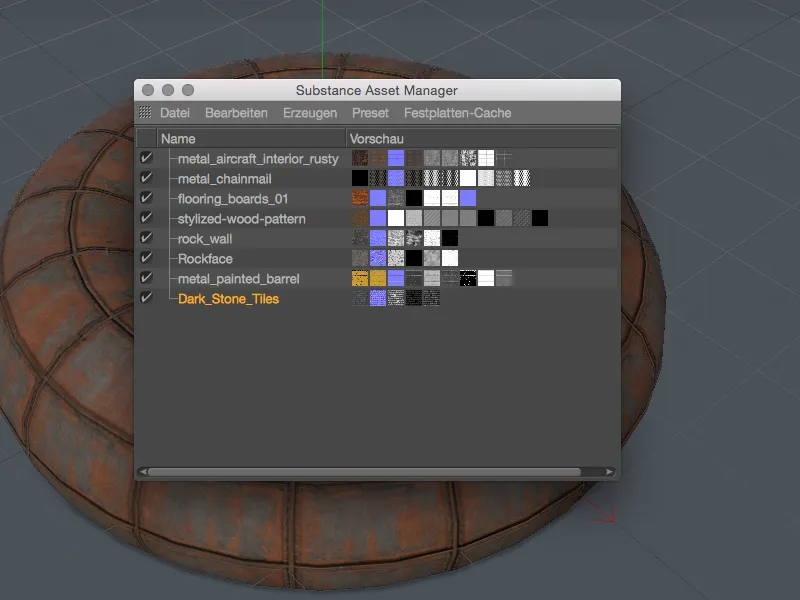
Cinema 4D builds the corresponding material channels from the output channels of the Substance asset into an automatically generated new material. The associated textures end up in the respective material channel via a separate Substance Shader.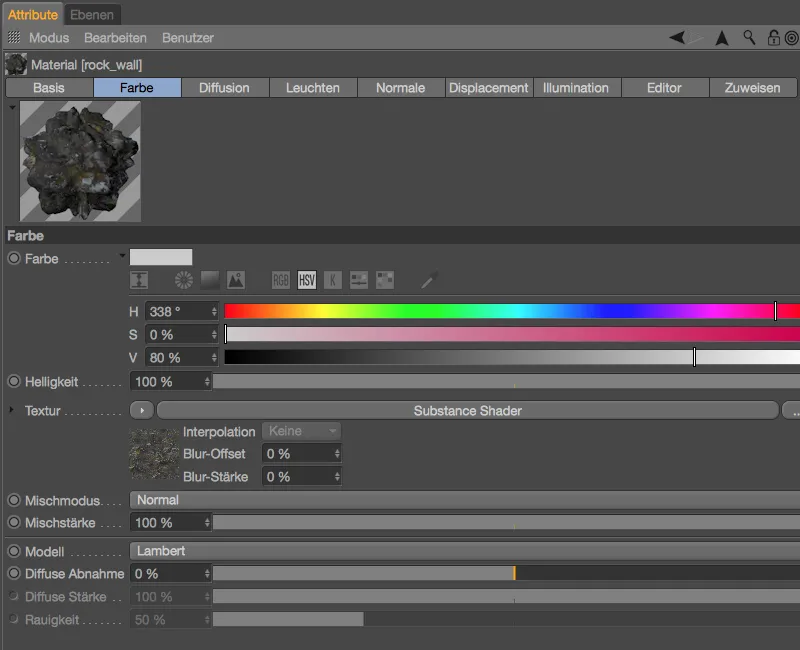
If we take a closer look at the Substance Shader, we will find further options for customizing the material transferred to Cinema 4D, depending on how the asset is structured or equipped. In the example shown, the moss growth and snow layer can be controlled in this way without having to use the Substance Designer.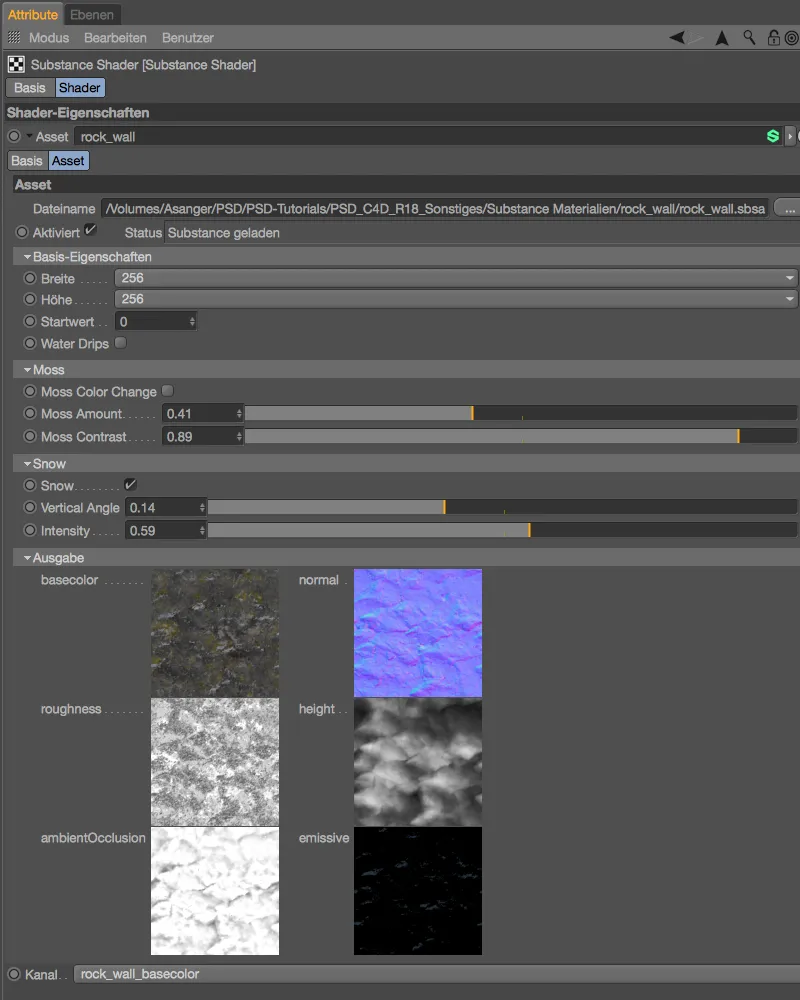
In the program settings for the Substance engine, we can define how Cinema 4D should handle the imported assets. To ensure smooth cooperation between Substance and Cinema 4D, both programs should use the same calculation method. With the OpenGL setting, this is done via the graphics card (GPU), with the SSE2 setting via the software (CPU).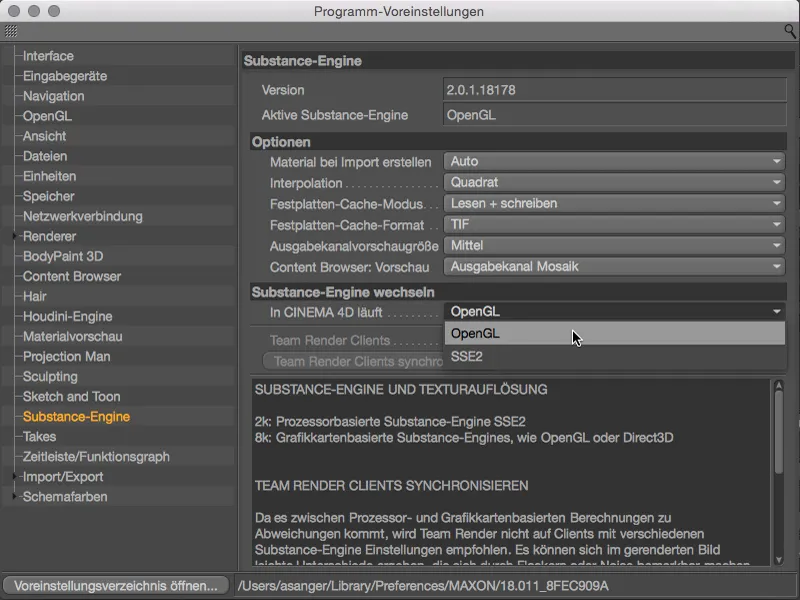
The connection to Substance is therefore a real benefit, even for those who do not (yet) use Substance Designer to develop their materials. Trying it out is highly recommended!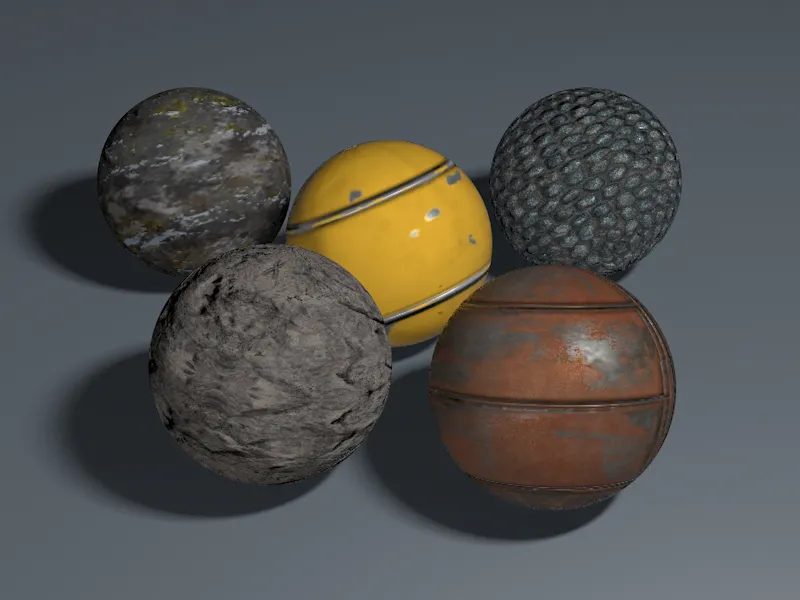
Parallax effect
With this inconspicuous new feature, we can make the appearance of materials with relief (bump) maps much more realistic. The actual geometry remains unaffected, of course, but the slight distortion of the UV coordinates gives us a much more vivid result.
As long as the parameter Parallax Offset is set to 0 in the settings dialog of the material in the relief channel, the relief calculationknown up to version R17 prevails.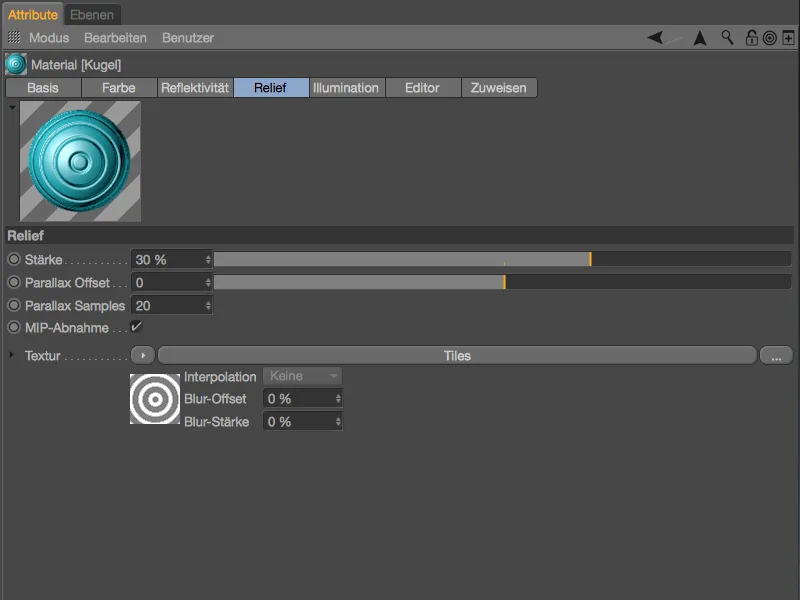
Although a relief effectis recognizable in the example shown, it appears very flat due to the less pronounced and relatively hard height structure.
As soon as we activate the Parallax effect by specifying an offset, we achieve a much better imitation of a height structure based on the aforementioned texture distortion. We only need to increase the value for Parallax Samples when visible artifacts can be seen on the relief structures.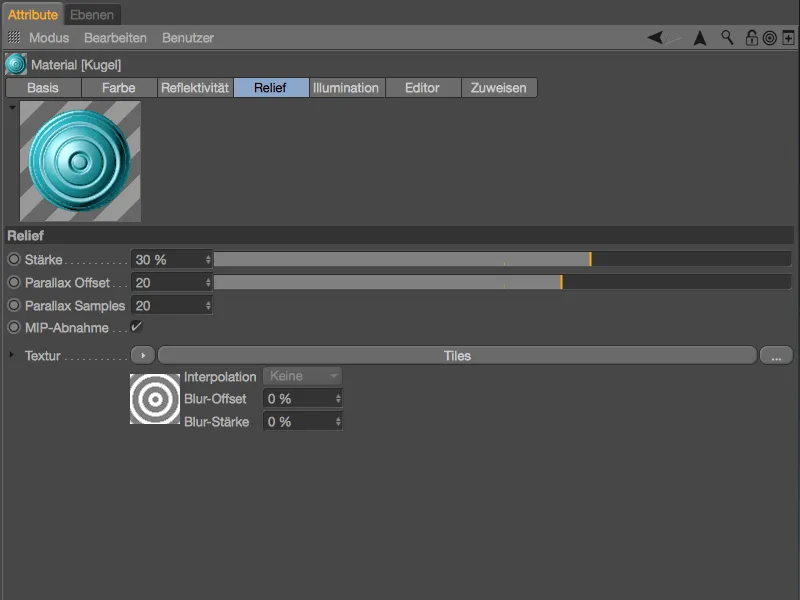
For comparison, the rendering with the Parallax effect activated. The relief structures look much more realistic, even if no real displacement is used.
Parallel processing of reflectivity channels
The reflectivity channelis not exactly known for its clarity or ease of use. Up to version 17, the simultaneous editing of the reflectivity channels of two materials was not provided for at all.
In Cinema 4D Release 18, this is now finally possible, at least as long as the reflectivity channelsof the two materials have an identical layer structure (same number, type and order of layers).
An identical reflectivitystructure for a selected material is indicated in the Material Managerby a small square in the top right-hand corner of the material.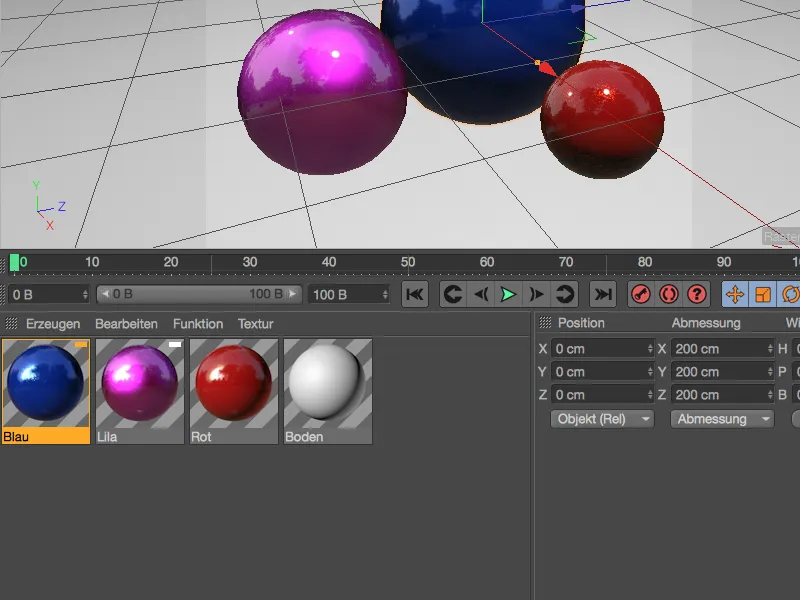
Alternatively, we can select materials with the same reflectivity using the command of the same name in the Function menu of the Material Manager.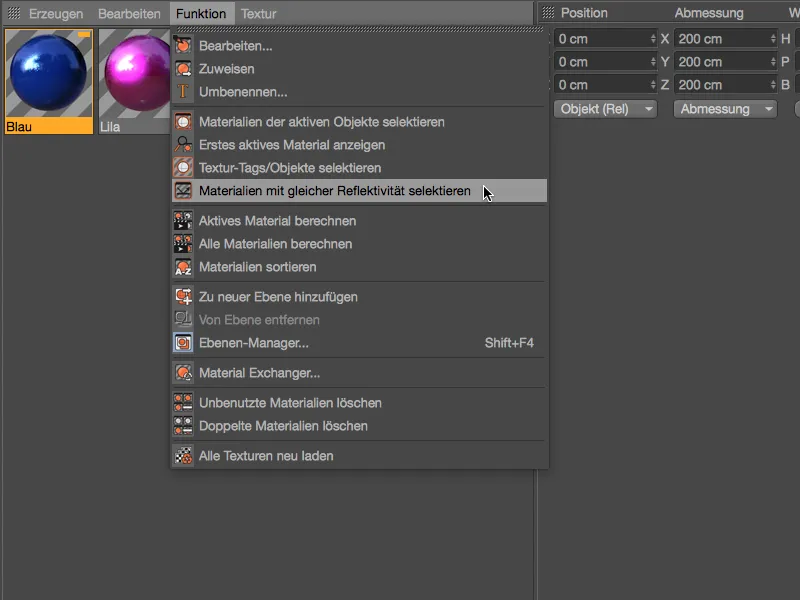
If both or all materials are selected in the Material Manager, the parameters can now be viewed across the board and modified as required, as is usual in Cinema 4D.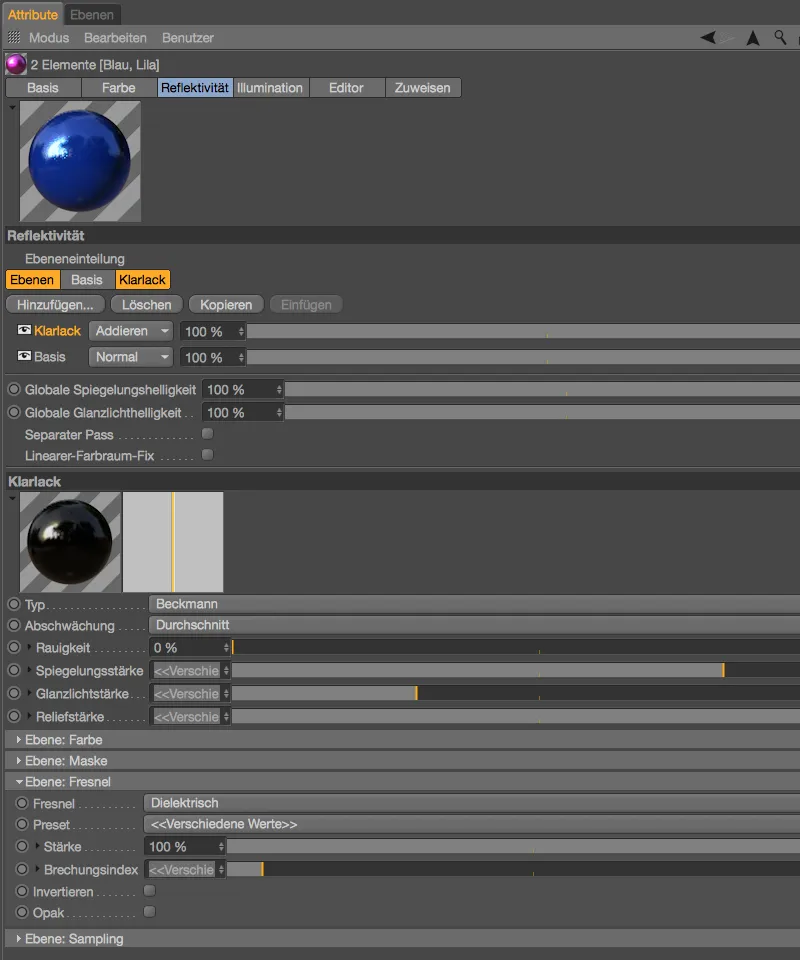
Shadow catcher shader
The shadow catcher shaderoffers us a relatively uncomplicated way of adding the shadows or reflections cast on objects to the alpha channel. In the example shown, this would be the shadows cast by the bouncing balls on the floor.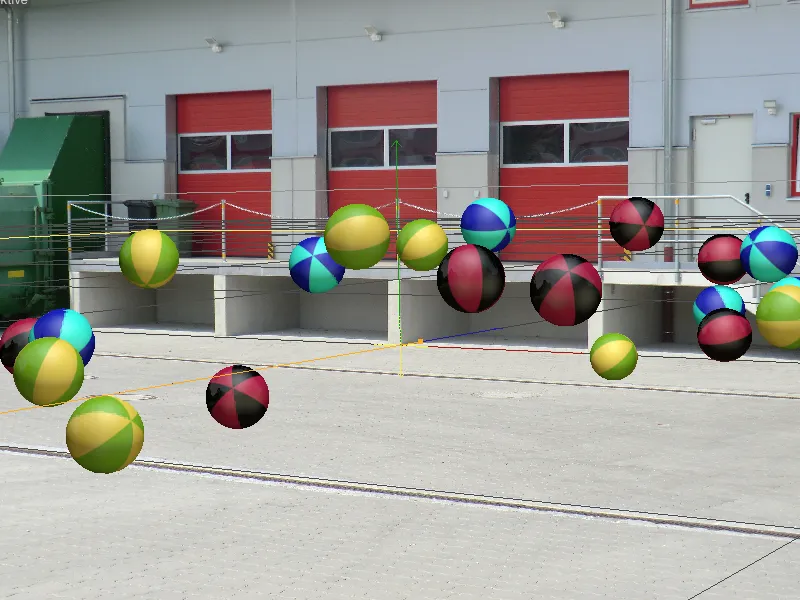
The shadow catcher can be found in the Create>Shader menu of the Material Manager. Once this shader has been created as an independent material, we assign it to the object in the scene that receives the shadows.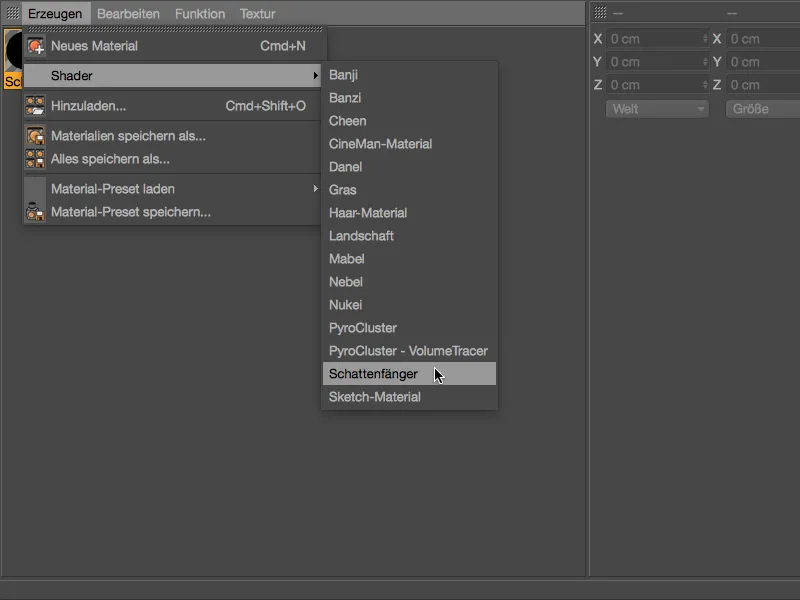
In the example scene, the layer objectis intended as the shadow receiver; the layer receives the texture tag of the shadow catcher via drag and drop from the Material Manager. In the associated settings dialog, we can adjust the implementation of shadows and reflections separately.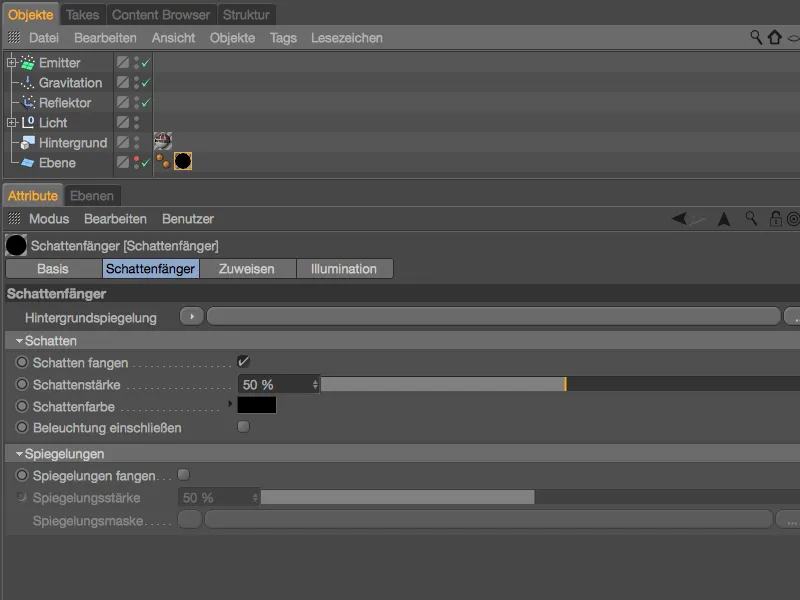
To ensure that an alpha channel is actually written to the file during rendering, we need to activate the Alpha channel option in the render preferences on the save page.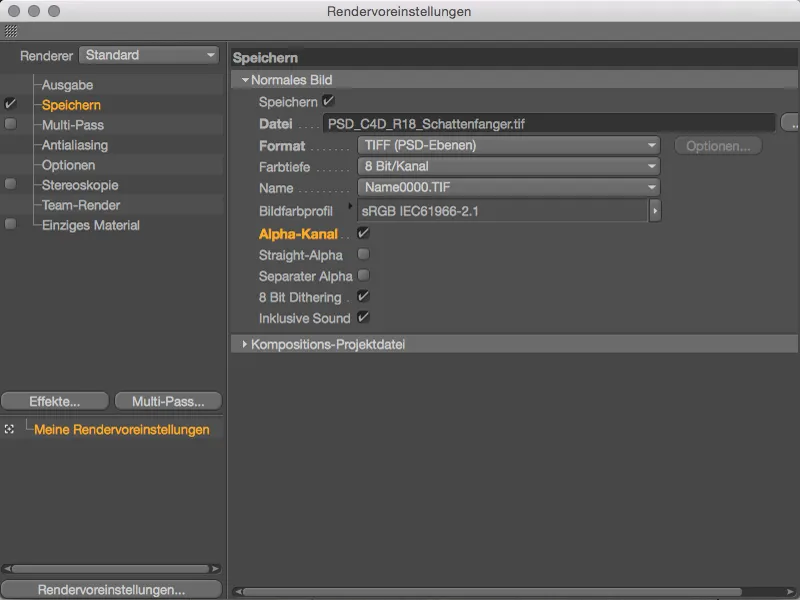
The result of our simple example when rendering in the image manager: In addition to the alpha channel informationof the bouncing balls, the shadow catcher shaderensures that the shadows cast on the floor are included.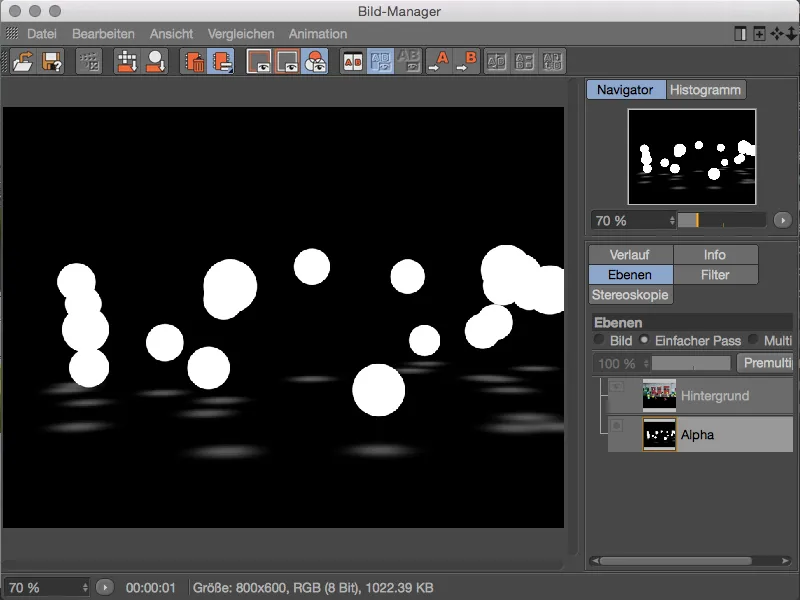
Color variations via image textures
While the options for color variation with image textures were limited to a basic and secondary texture up to version 17, in version 18 we can import entire directories of images as shader textures into the variation shader. Each imported texture can then be activated separately and its probability of occurrence can be controlled.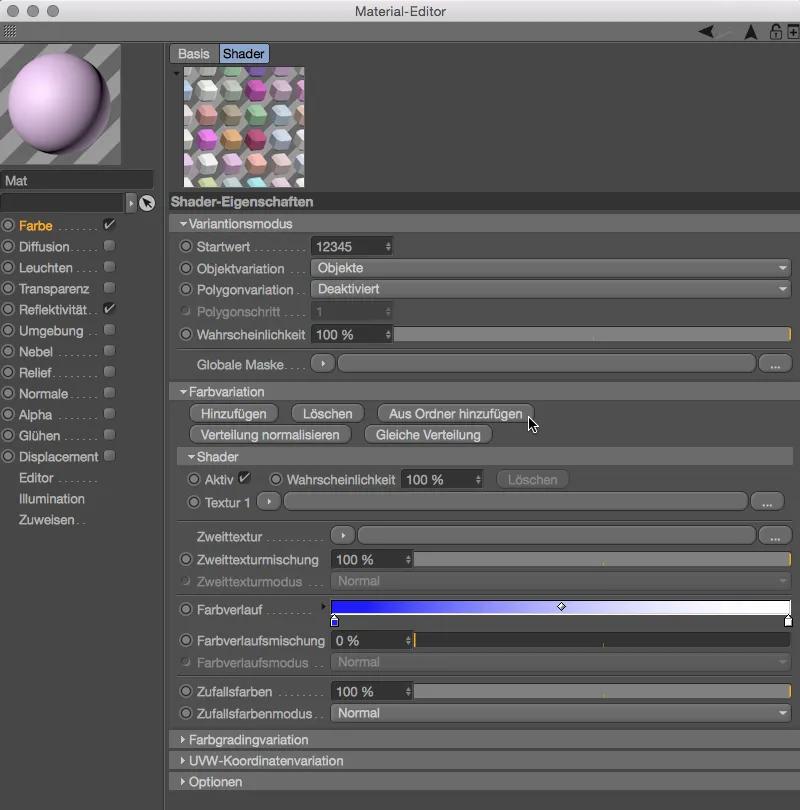
Color picker
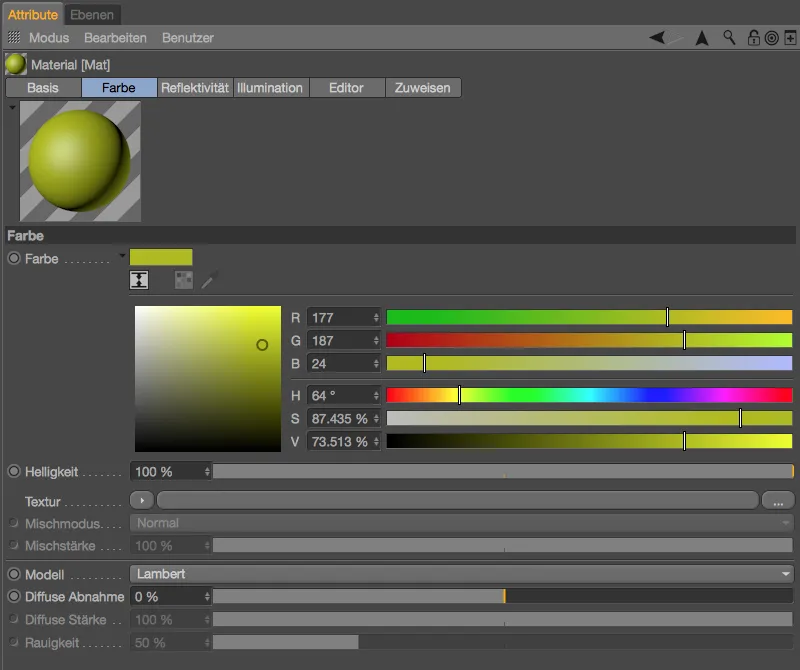
Last but not least, I would like to mention two small but important improvements to the color pick er. In order to reduce the rather space-consuming color pick er to a more compact size, an additional icon on the left now offers a compact mode.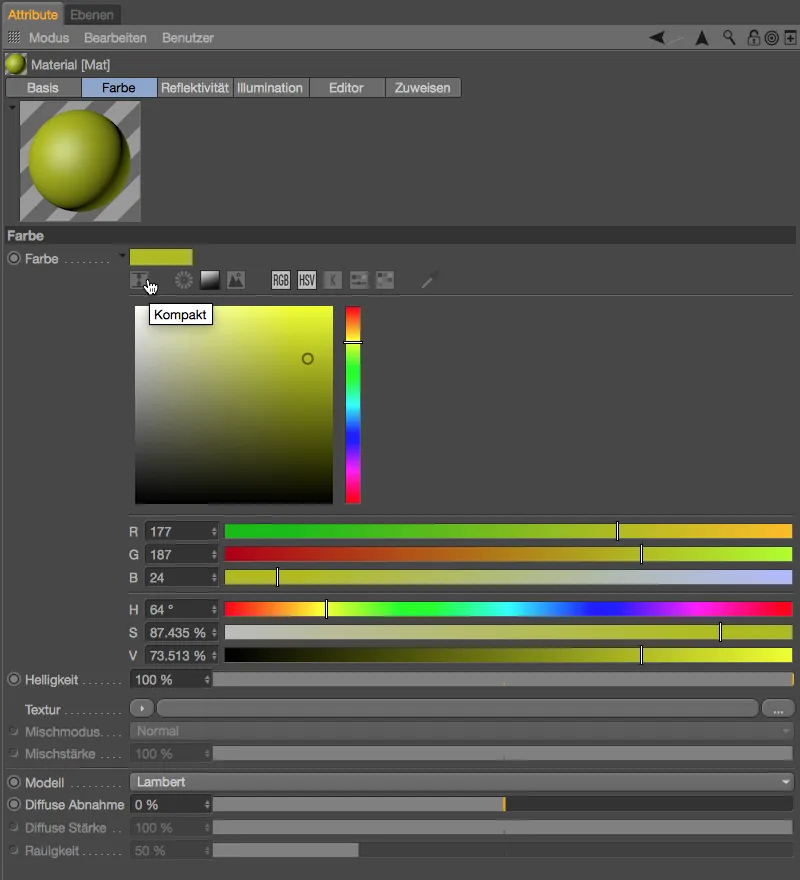
The compact mode consists of the space-saving, smaller spectrum as well as the RGB and HSV color controllers. The color adjuster in the spectrum can now also be controlled via the cursor buttons (left, right, up and down) in 1-percent increments. Adding the Shift or Ctrl key results in 10 percent steps, the Alt keyresults in a direct jump to the respective edge of the spectrum (0 % or 100 %).