Even if the 'random' placement of some sphere objects of different sizes doesn't really challenge anyone, you will find my source project file in the package with the working files as usual.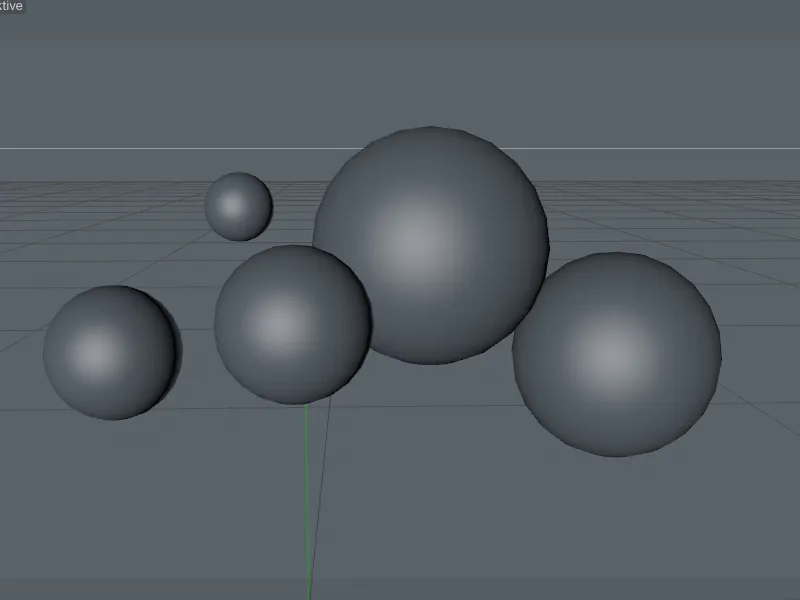
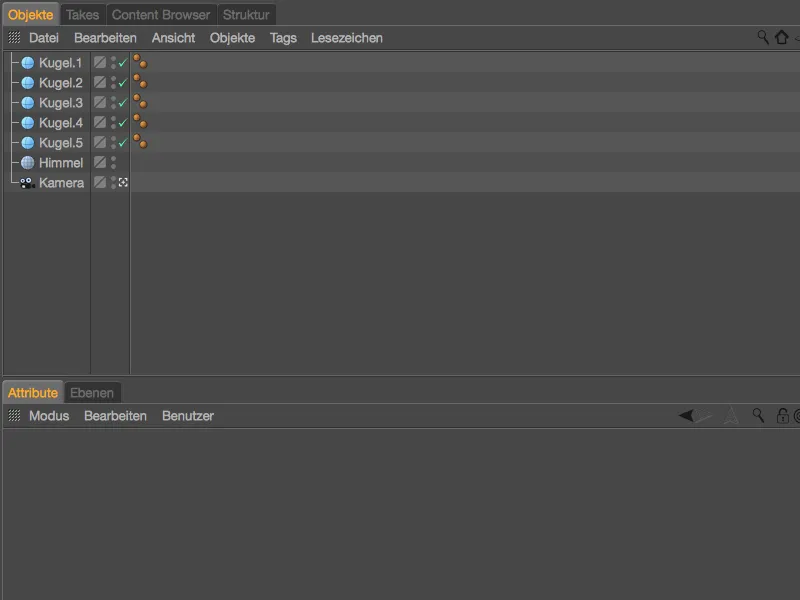
In addition to the five sphere objectsbuilt into the scene, you will also find a sky objectfor the surroundings and a separate camera. With these two scene objects, we want to create a suitable background in the first step so that our soap bubbles are shown to their best advantage later on.
Setting up the scene environment
As with all reflective materials, soap bubbles need an environment that they can reflect. We already have the predestined sky objectin our scene and you can also find a material called "Sky" for this environment in the material editor.
Because sharing HDR images from the Content Browser of Cinema 4D is not allowed: Please select a suitable environment in the form of an HDRI image file from the selection in the Content Browser, from your own pool or via a search on the Internet and load it as a file into the glow channelof the sky material.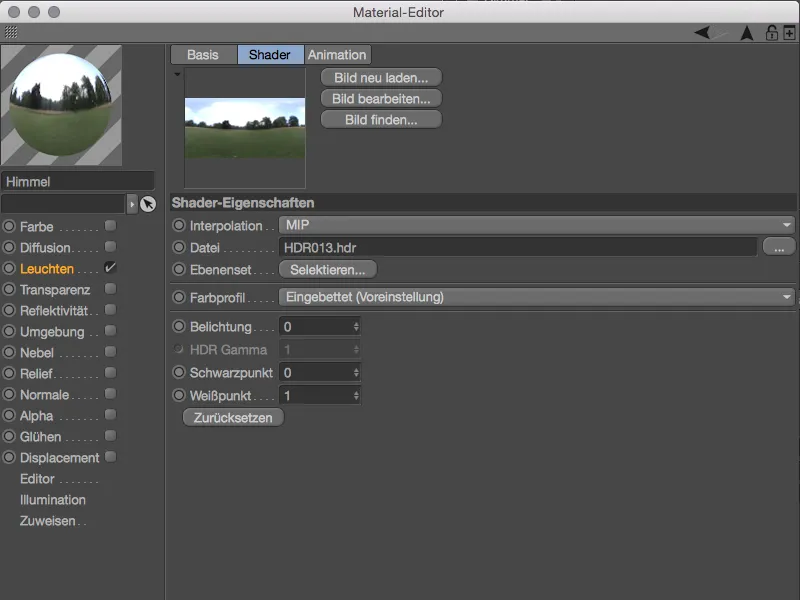
If you use the same or a similar HDR image with a comparable color appearance, you may also be bothered by the somewhat dull appearance. For me, a sunny afternoon goes much better with the soap bubbles, which is why our original HDR image is given a slight color refresh.
To do this, click on the texture buttonand use the shader menuto load a layer shader over the existing HDRI texture.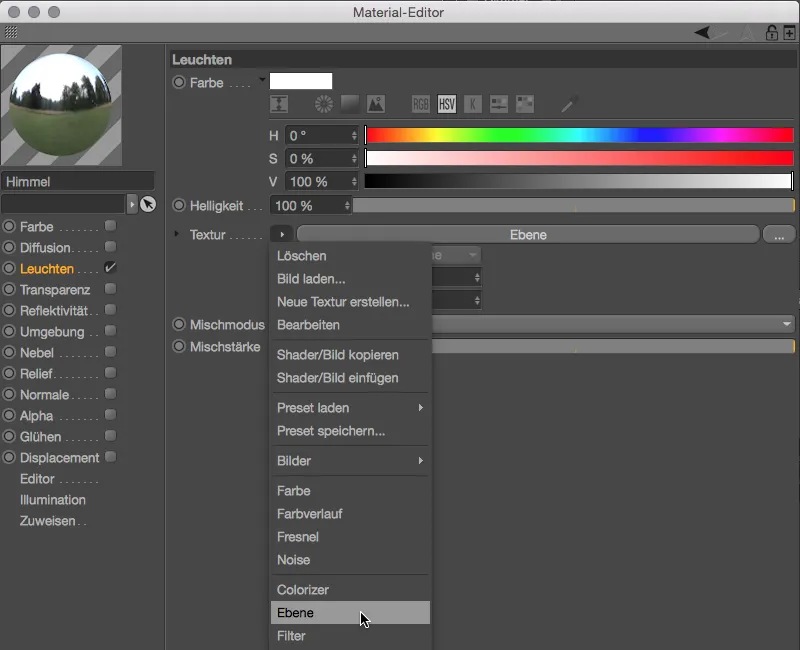
Don't worry, the HDRI texture has not been deleted or overwritten, it is in fact a bitmap layer in the layer shader we have created. A color gradient shader, which we insert as a second layer using the Shader... button, is now used to refresh the colors.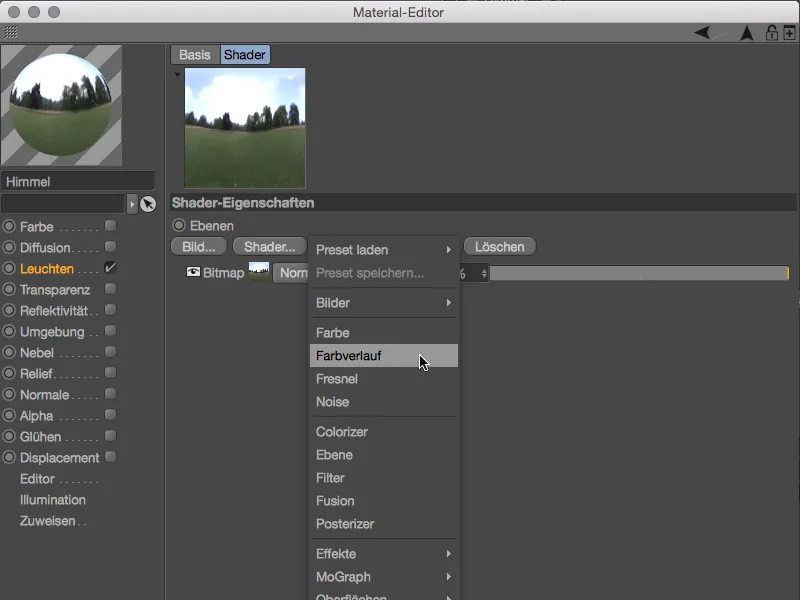
Clicking on the small preview square takes us to the settings for the gradient shader. To obtain a vertical gradient, we change the type to 2D - V. The actual coloring is, of course, entirely up to you - with the gradient I have created, which ranges from green to yellow to red, the HDR image gets a rich, sunny afternoon mood.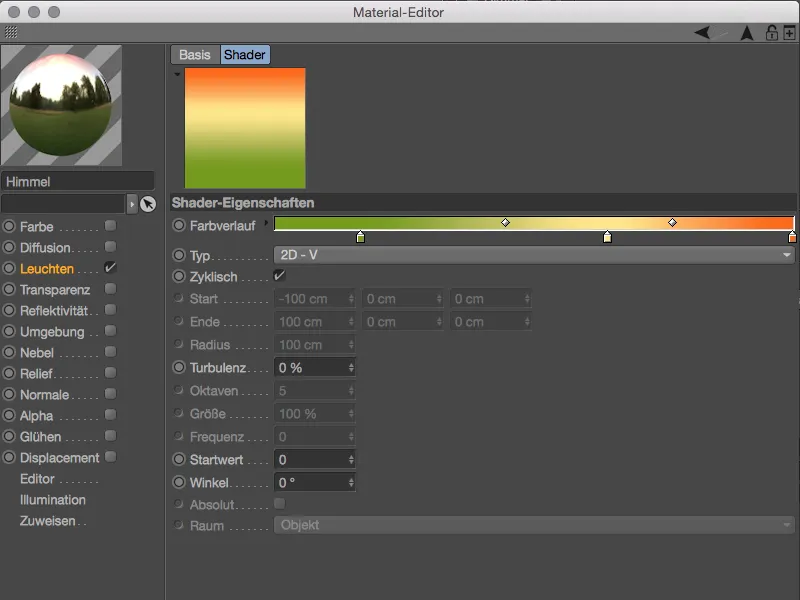
Use the arrow pointing upwards to switch back to the layer management of the layer shader. There we change the blend mode of the gradient layerto Multiply so that the color gradient can have the desired effect on our HDR image. If the coloration is a little too extreme, simply reduce the percentage influence of the layer, in my case to 80%.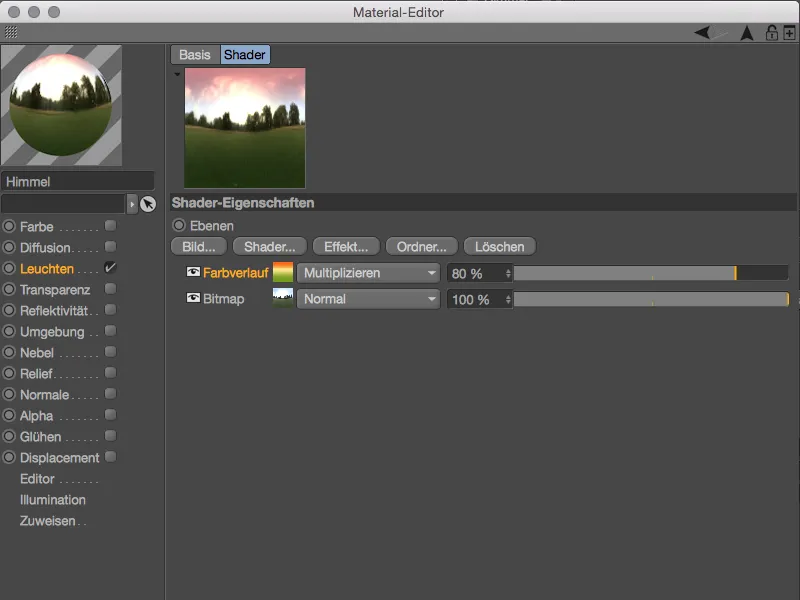
The material for the environment is now complete, so we can assign it to the sky objectby dragging and dropping it from the Material Managerinto the Object Manager. In the settings dialog of the texture tag, we set the projection of the texture to sphere mapping to match the HDRI environment.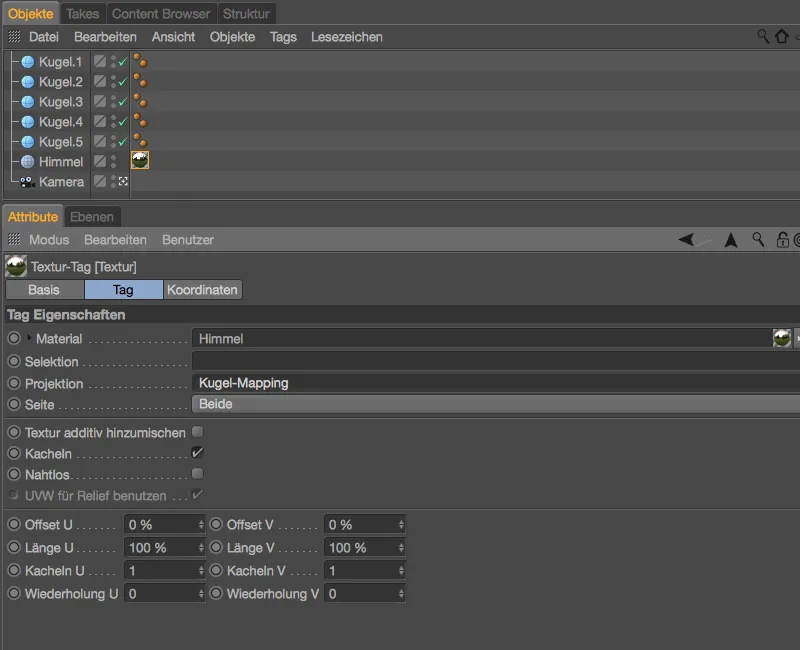
As mentioned at the beginning, in addition to the sky object, we also use a camera to shape the environment. We can use it to apply a camera blur to the HDR image in the background so that the soap bubbles really stand out. The camera is already installed, so let's go straight to the render presets in the Render menu.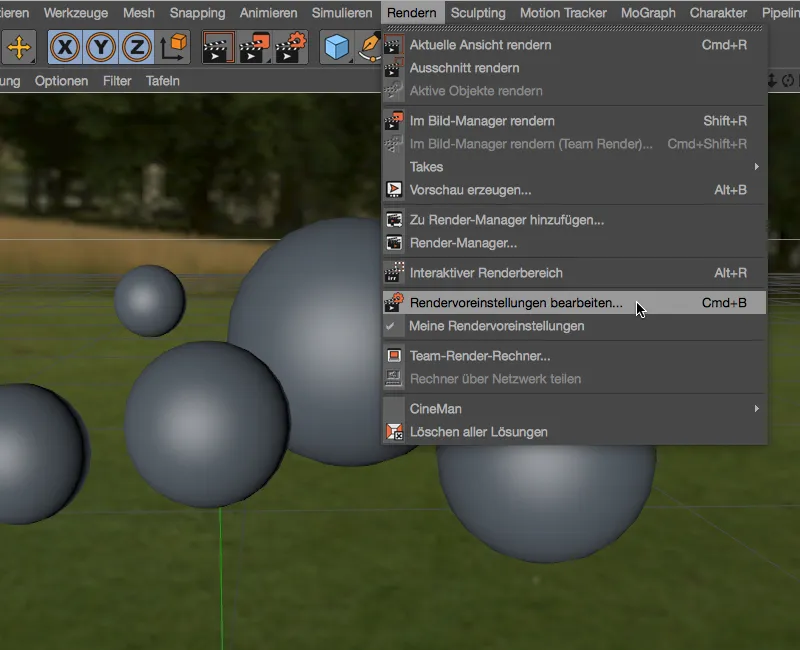
For our purposes, the depth of field of the standard camera or the standard renderer is sufficient. We find them by clicking on the Effects... button and activate them for our scene.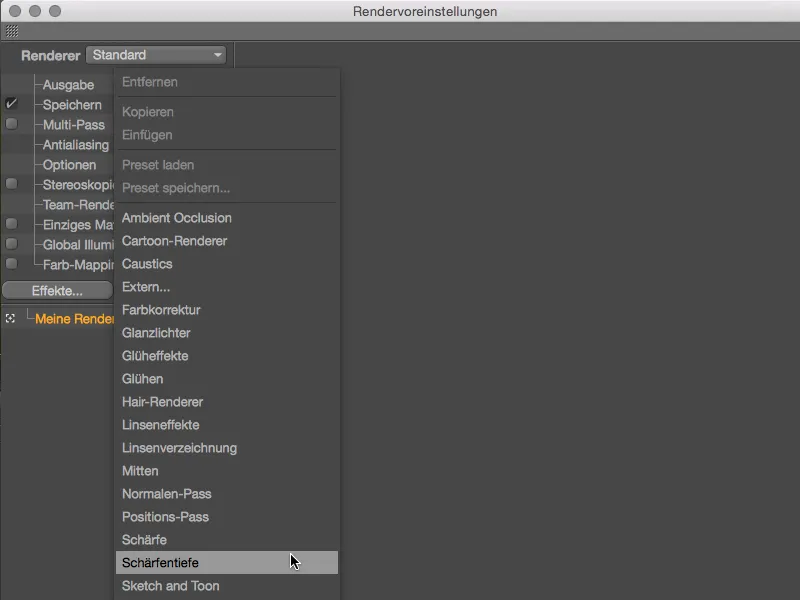
As we only need the blur for the sky objectin the background, we only need to adjust the blur strength in the render presets for the depth of field. A value of 5 % is sufficient for my HDR image; if you want the background to be even more blurred, you can also increase the value.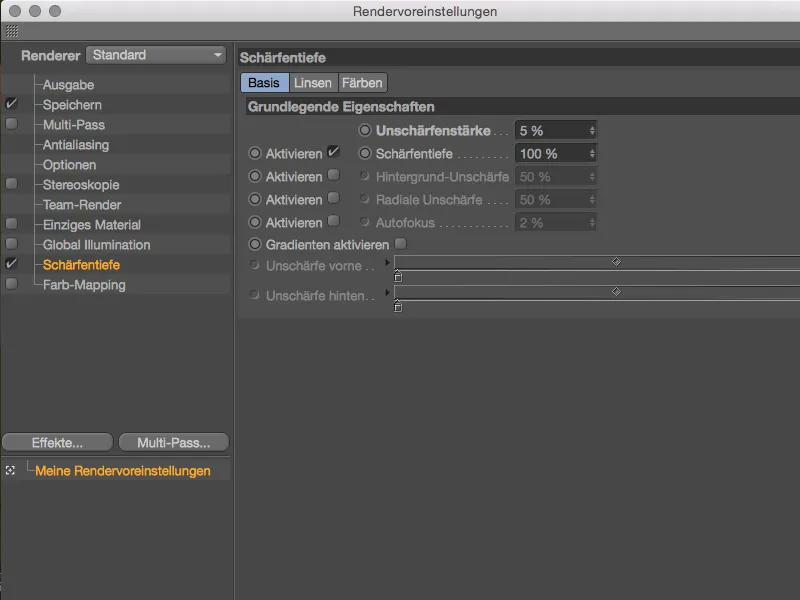
The reason why the depth of field already works is of course due to the active camera, which already has a focus distance stored in its settings dialog on the object page. Currently, sphere.4 is in focus, but as all spheres are almost in line, there should be no noticeable difference here.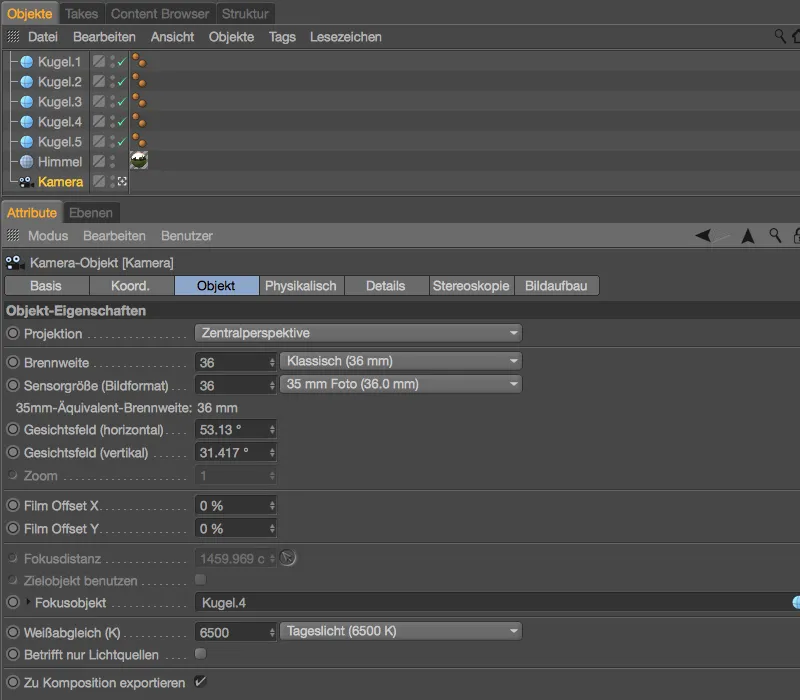
On the Details pageof the camera 's settings dialog, it is only important that the depth of field for the rear is activated. As the blur is limited to the distant sky object, the standard parameters are sufficient.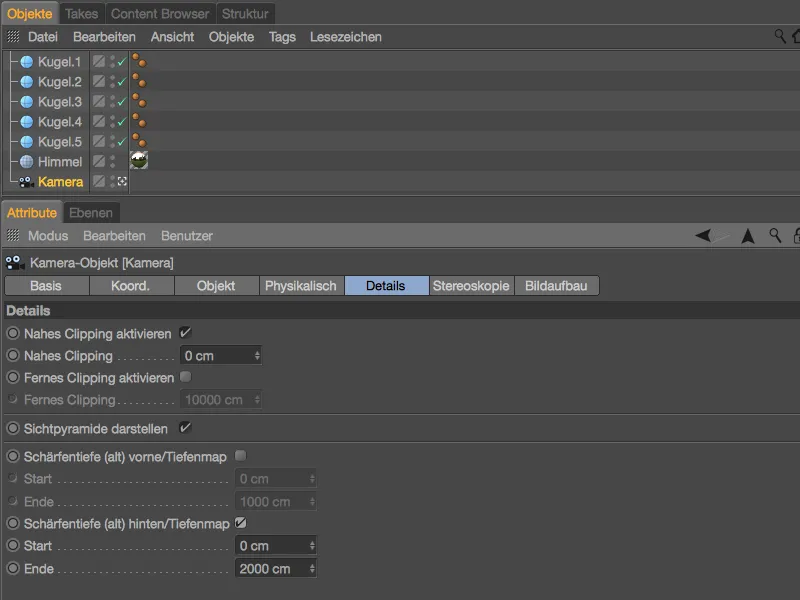
After these measures, our scene is now perfectly prepared for the soap bubbles. The spheres in the scene do not overlap or touch each other. Now let's finally take care of the soap bubbles with the thin film shader.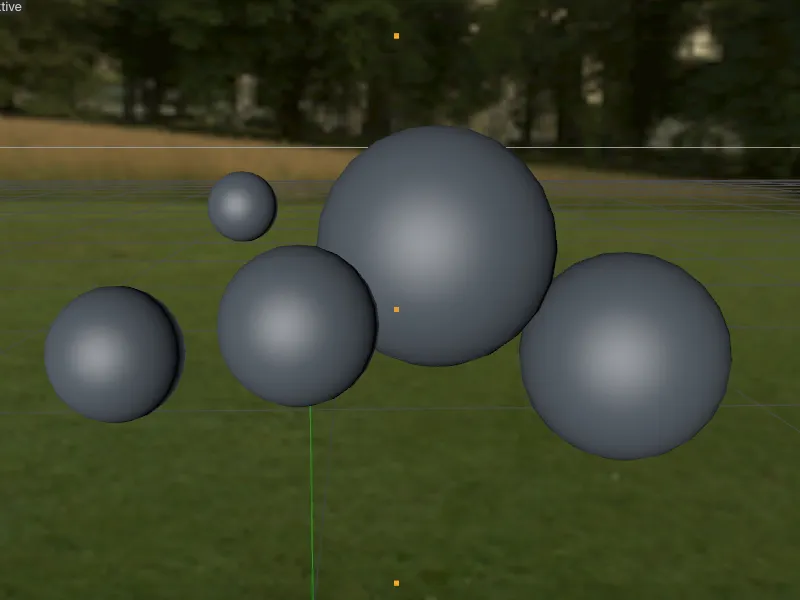
Setting up the effect in the thin-film shader
Because it is naturally difficult to assess the modifications on transparent material such as a soap bubble, we will make do with the glow channelfor setting up the thin film shader, which we will no longer need afterwards.
First, we create a new material by double-clicking on a free space in the material managerand activate the glow channelin the settings dialog of the material on the base page.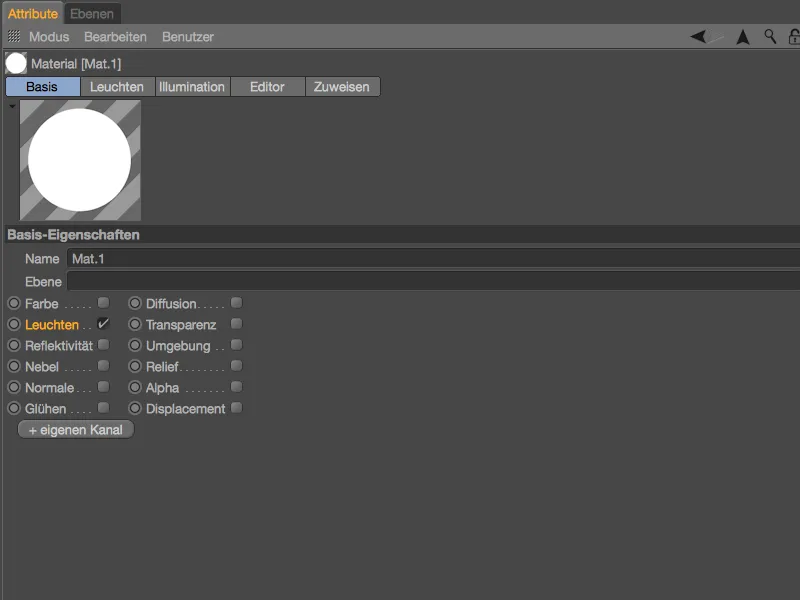
On the light channelpage, we open the shader menuvia the texture buttonand select the thin film shader as a texture from the Effects submenu.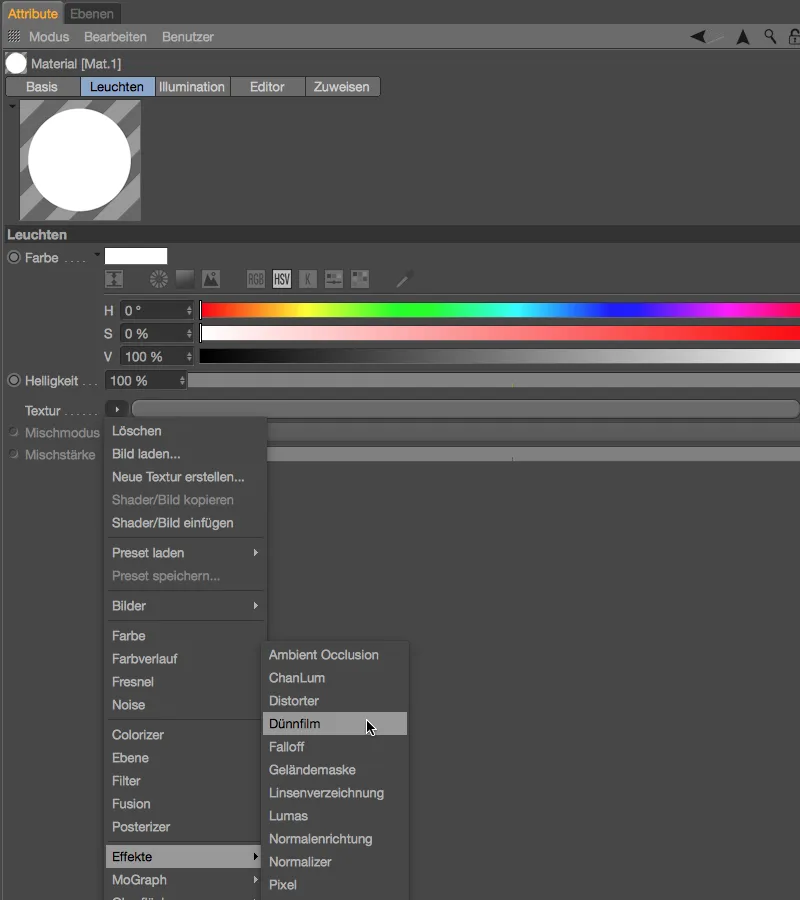
After loading the thin film shader, we can already see the associated rainbow effect in the material preview. At the moment, however, the effect is created on the basis of a constant layer thickness of the thin film and is therefore not really spectacular.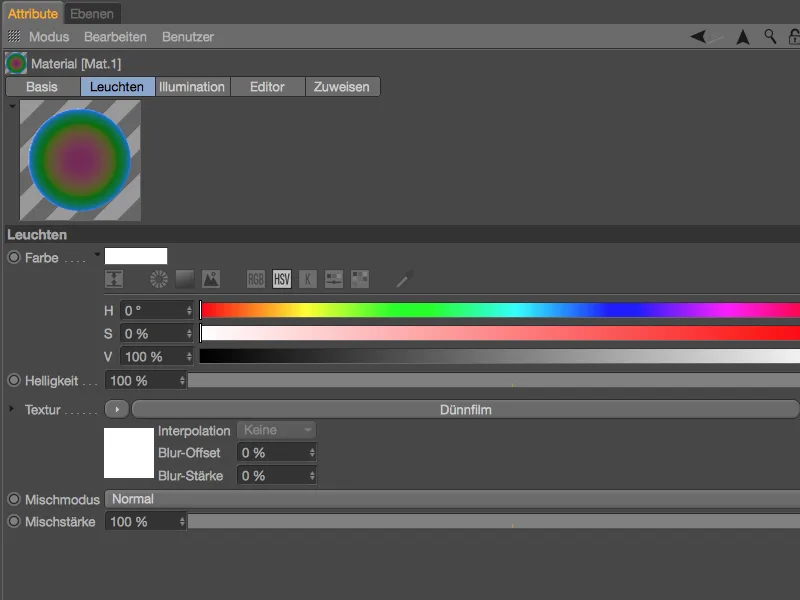
After clicking on the thin film shader button, we land in its settings dialog. Although the number of parameters is manageable, even small deviations can have a significant effect on the result. As can be seen from the units behind the thickness and variation parameters, we are dealing with real-world figures here. The set 500 nanometers correspond to the average wavelength of white light and provide a good starting point for our first steps.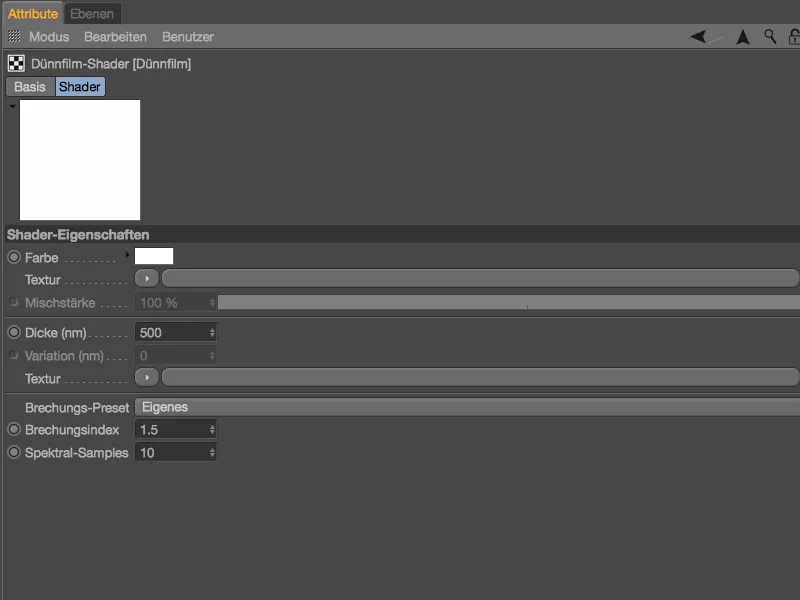
The thickness is currently still constant and the Variation parameter is grayed out. It is now up to us to adapt the variation of the layer thickness to our ideas or the natural conditions using a suitable texture.
We start with a color gradient shaderfor our first soap bubble material, which we get from the shader menuvia the texture button.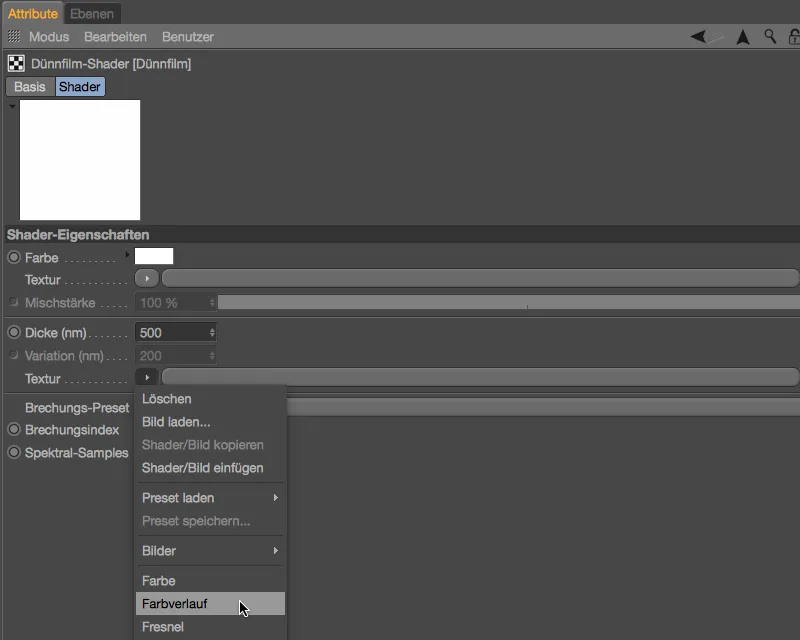
We open the settings dialog for the gradient shaderby clicking on the shader buttonand change the orientation of the gradient to vertical using the Type parameter with 2D - V. Since gravity acts on the thin film of the soap bubble, a vertical variation is certainly not wrong.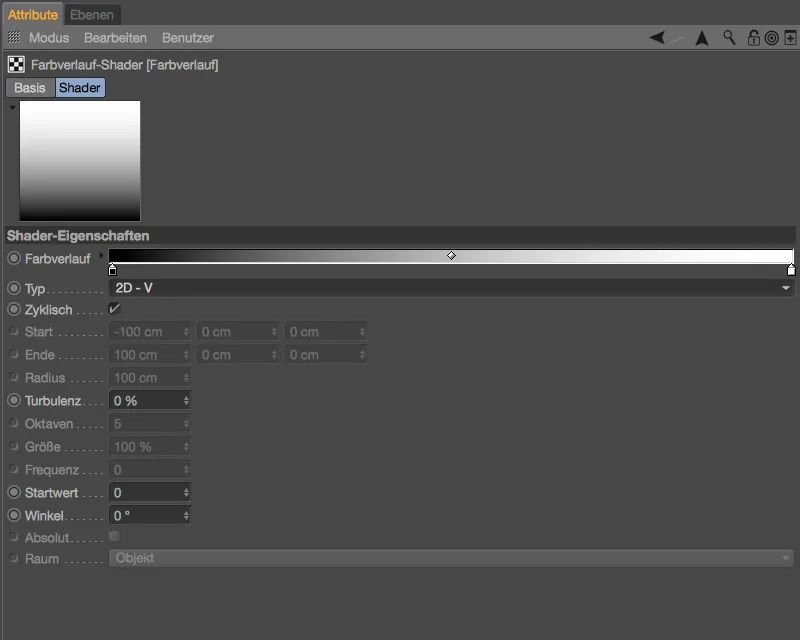
Now we finally have access to the Variation parameter. We stick with the standard variation of 200 nm for our first soap bubble. In plain language, this means that the layer thickness on the subsequent soap bubble varies between 300 and 700 nanometers.
The refractive index of an oil film is around 1.3, which is the value we can use for our soap bubbles in the thin film shader.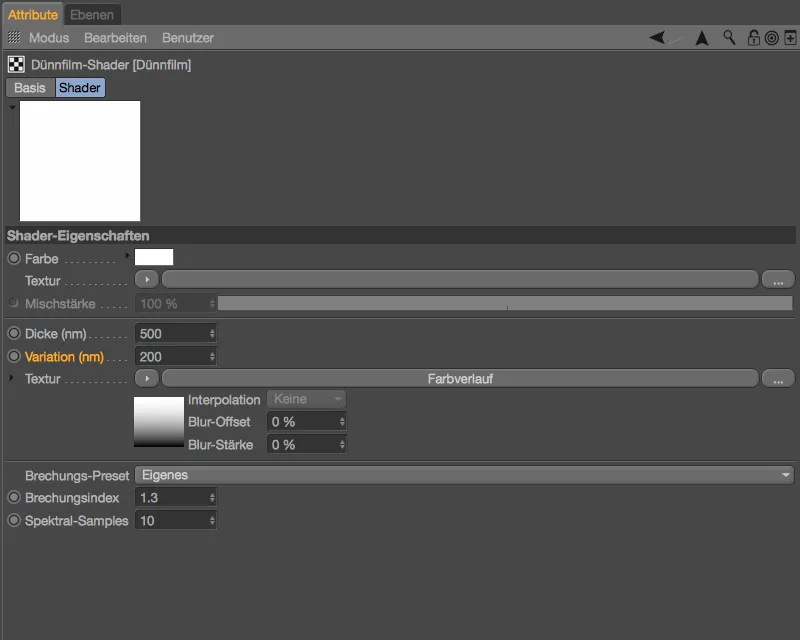
If we now use the upward-pointing arrow to switch back to the settings dialog of the light channel, we can already see the effects of our modifications in the material preview.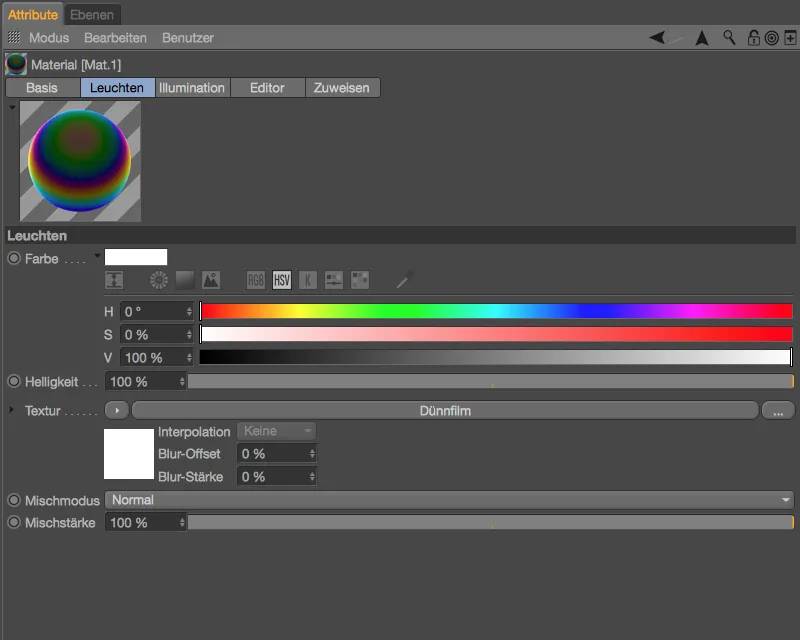
Finishing the transparent material
As mentioned at the beginning, the glow channelis only used to visualize the rainbow effect. To complete the first bubble material, we need the thin film shader that has been set up. We therefore copy it to the clipboard with all the settings made using the Copy shader/image command from the Shader menuof the Texture button.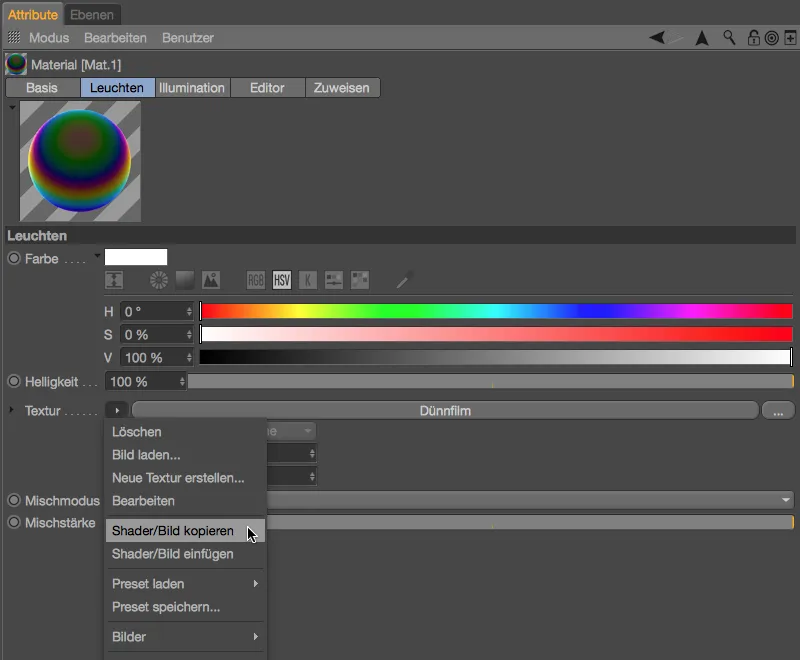
On the base pageof the first bubble material, we now deactivate the glow channeland activate the reflectivity and transparency channelsinstead. Further material channels are not necessary for the soap bubble material.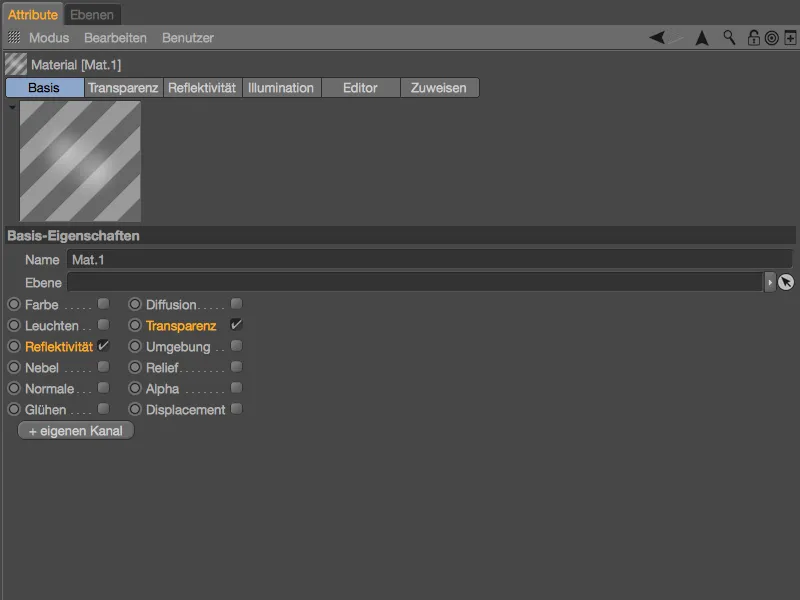
On the reflectivity pageof our material, we find an automatically created standard glow layernext to a transparency layer. We simply delete the latter using the delete button...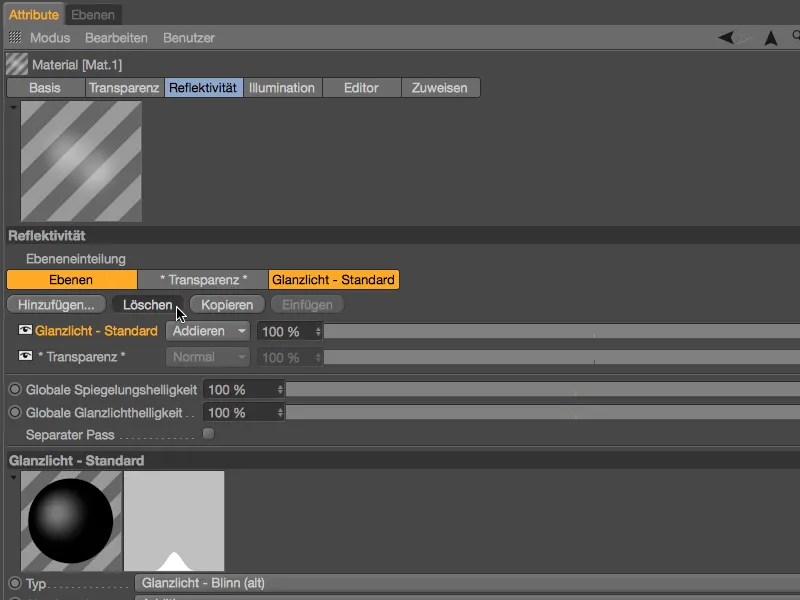
... and instead create a new layer of the Beckmann or GGX type using the Add... button.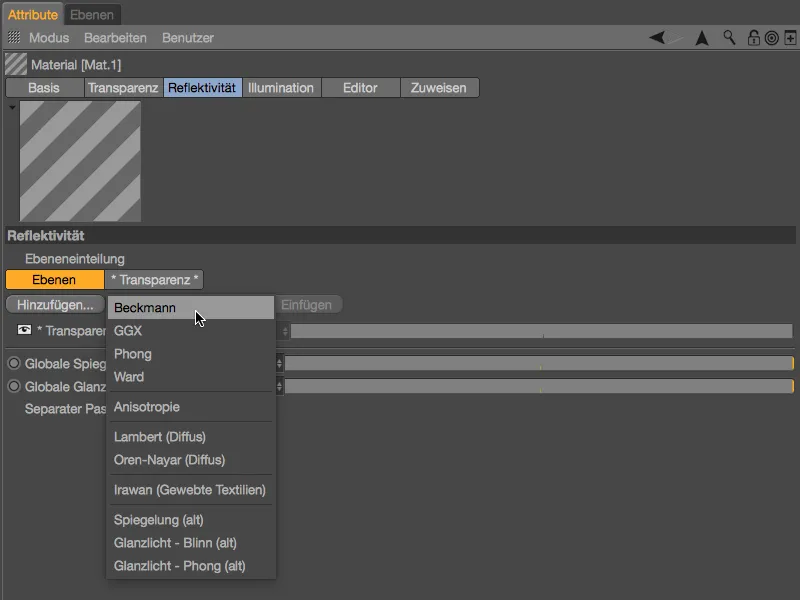
On this new reflectivity layer, we open the Layer: Color section and insert the copied thin-film shader as a texture via the Shader menuin the Texture button.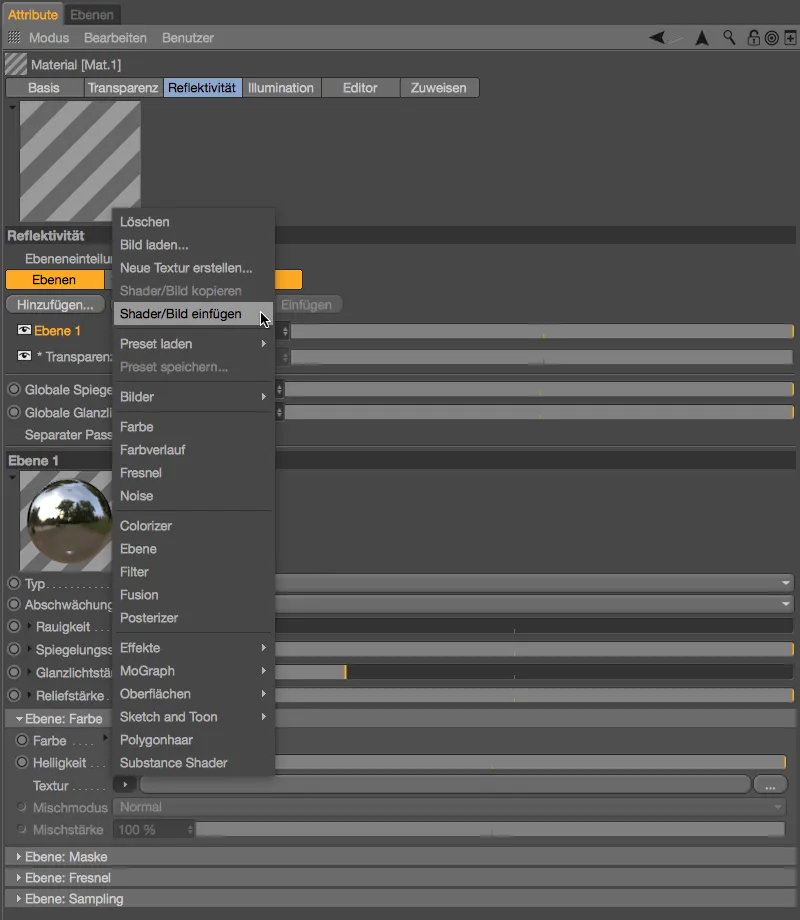
It should now be clear why we did not go straight to the reflectivity channelto set up the thin film shader: The material preview is not really meaningful.
The reflectivity channelis already set up, but there is still a small but very important adjustment to be made in the transparency channel. The higher-level material preview already shows us the problem: the prevailing transparency doesn't give our thin-film shader a chance.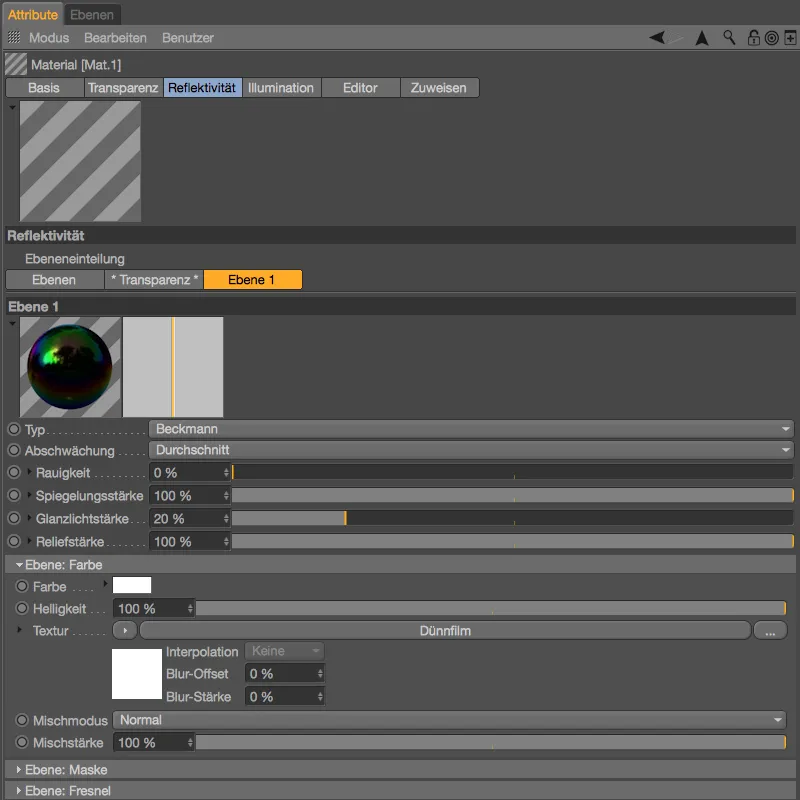
However, this problem is quickly solved by activating the Additive option in the transparency channel. The transparency is now added to the existing color information - our thin-film shader remains intact and also shows up immediately in the material preview.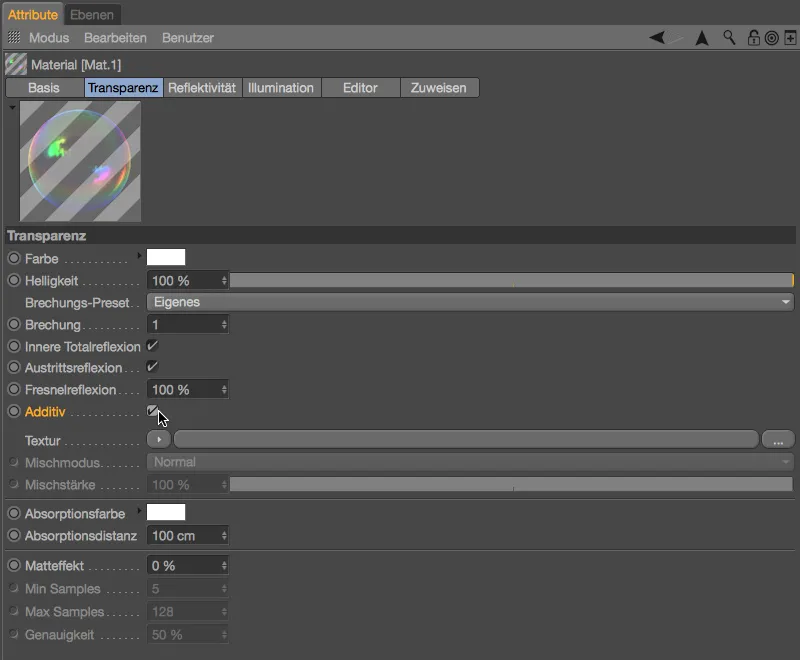
Our soap bubble material is now ready for a first sphere object. We can simply drag and drop it from the material manageronto one of the spheres in the editor view or in the object manager.
High time for a test rendering: The thin-film shader is clearly recognizable and the environment created via the sky objectis also visible on the soap bubble.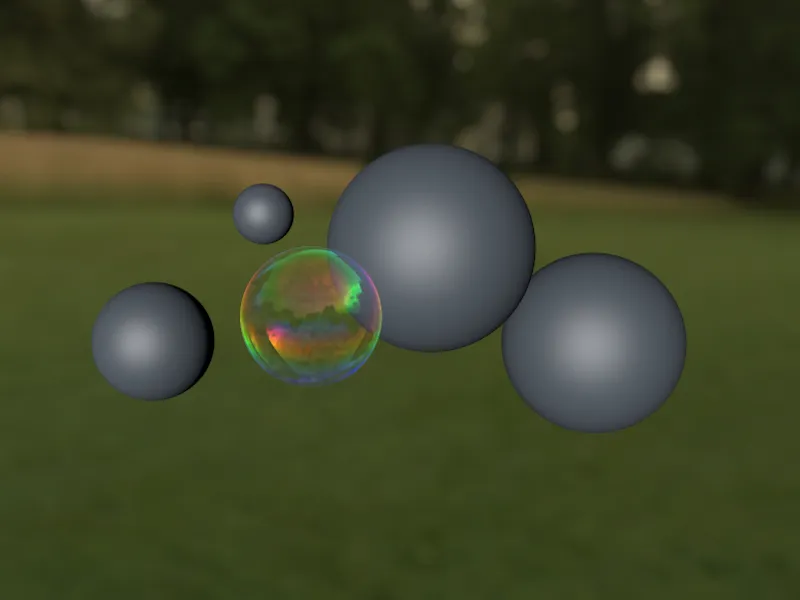
More soap bubbles - variants of the thin-film shader
We slightly modify the existing thin-film shader for the four other sphere objects. On the one hand, this makes the scene look more credible, and on the other, it allows us to experiment a little with the parameters. My variants should only be seen as suggestions.
We can create the four additional soap bubble materials very quickly by duplicating the existing material in the Material Managerby holding down the Ctrl keywhile dragging. For better visualization, I have set all the thin-film shaders in the glow channelagain.
For the second soap bubble material, I reduced the variation of the thin film shader to 30 nm.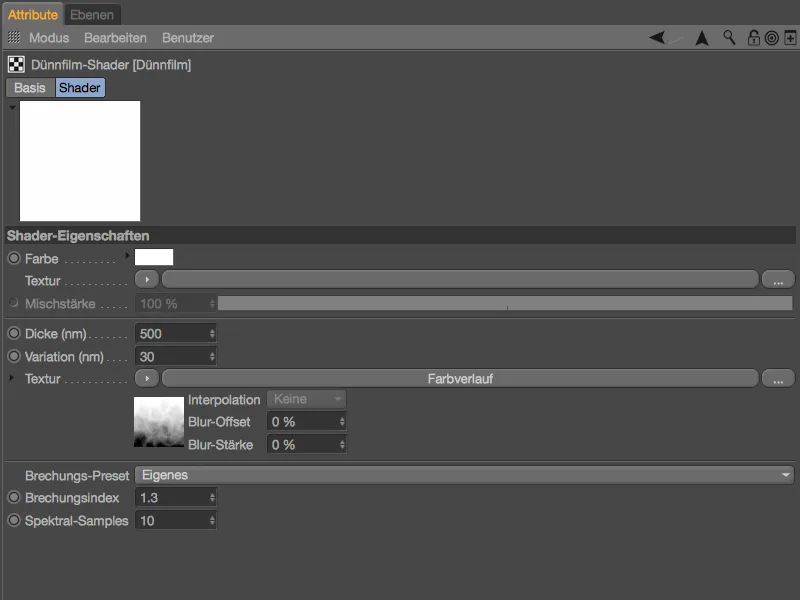
To make the color gradient a little livelier, a turbulence of 30 % is stored in its settings dialog. This is one of many ways to add more life to the gradient.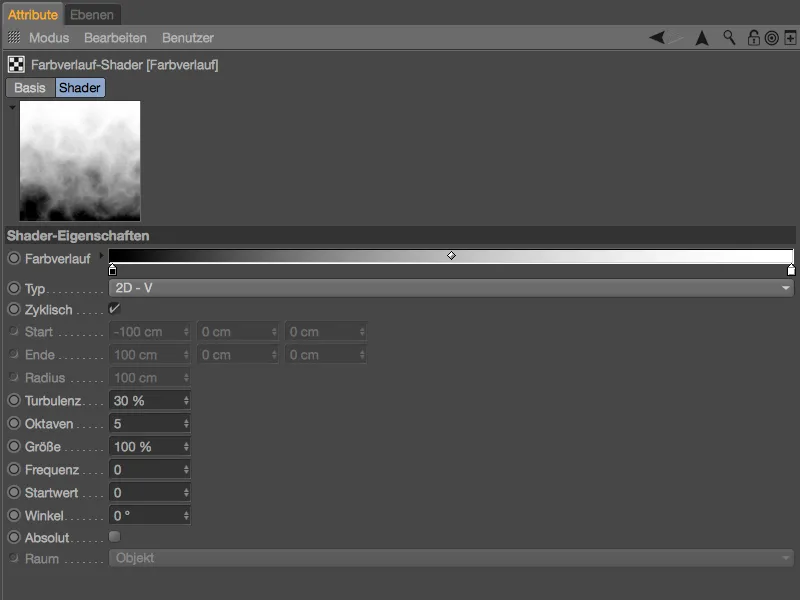
As you can see in the material preview, changing the variation alone gives our second soap bubble a completely different color range.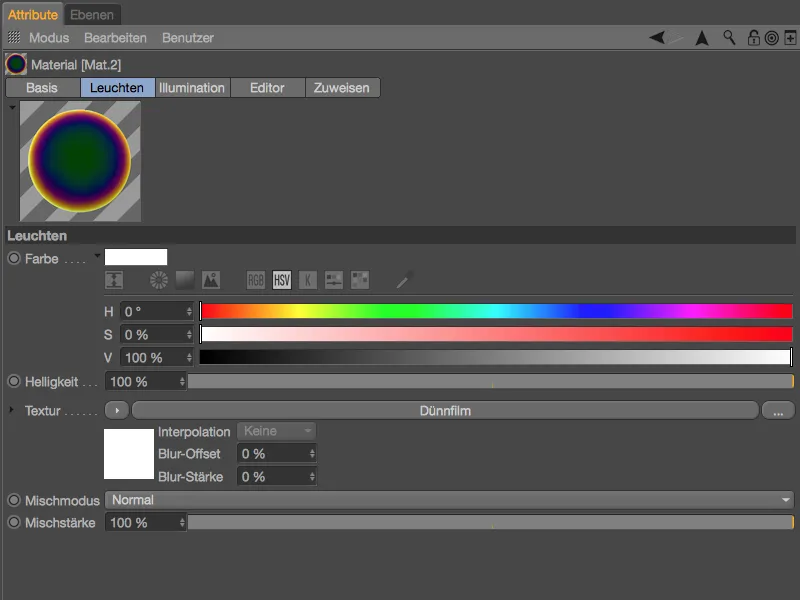
In the third bubble material, I set the varying layer thickness to 100 nm and tilted the color gradient from the vertical direction via the 2D - U type to the horizontal.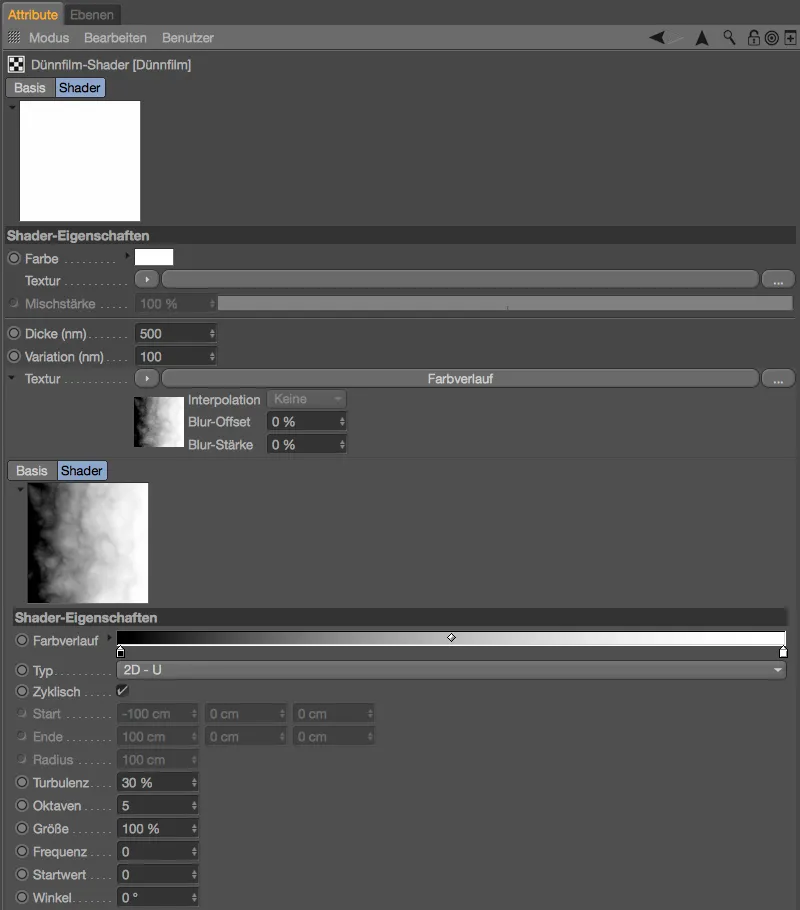
Again, the color change and the horizontal direction can be clearly seen in the material preview. Soap bubbles and their surface film may be subject to the force of gravity, but shortly after being ejected from the puster tube, this horizontal variant would also be consistent.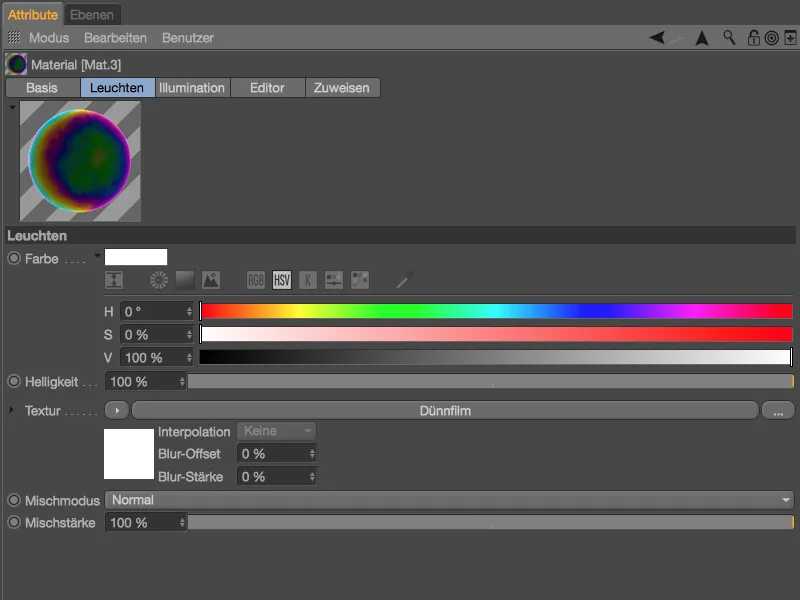
My fourth soap bubble material again has a vertical color gradient with turbulence, but this time it has a significantly lower initial layer thickness of only 300 nm.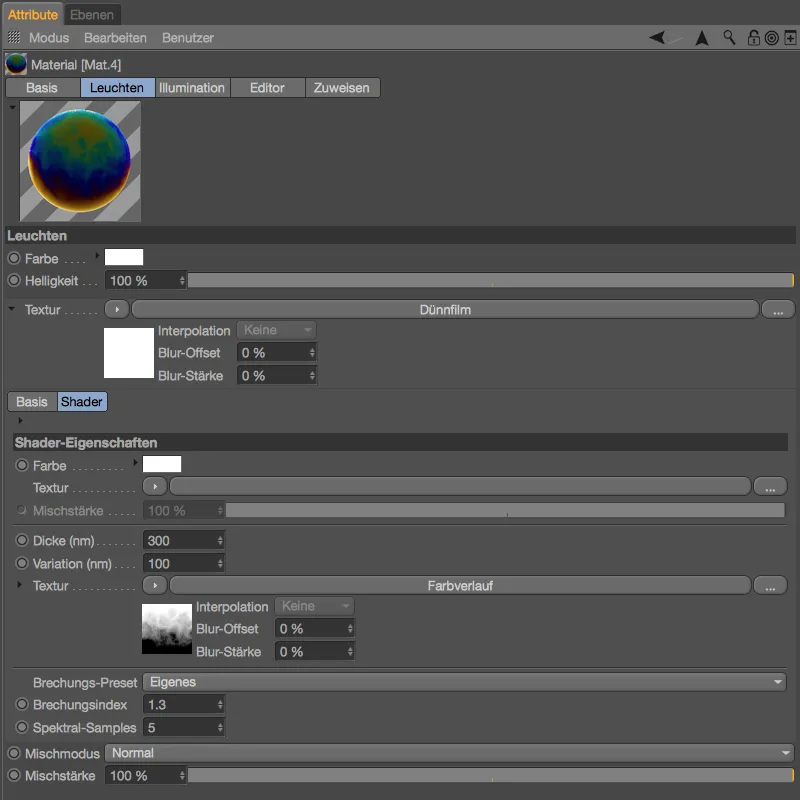
For the fifth and final bubble material, we will use a noise shaderinstead of a color gradient to create the varying layer thickness. With the right shader settings, we can imitate the shimmering distortions and island formations on the surface.
I have set the initial layer thickness for this material to 400 nm, for the variation we first use a noise shaderfrom the shader menuvia the texture button.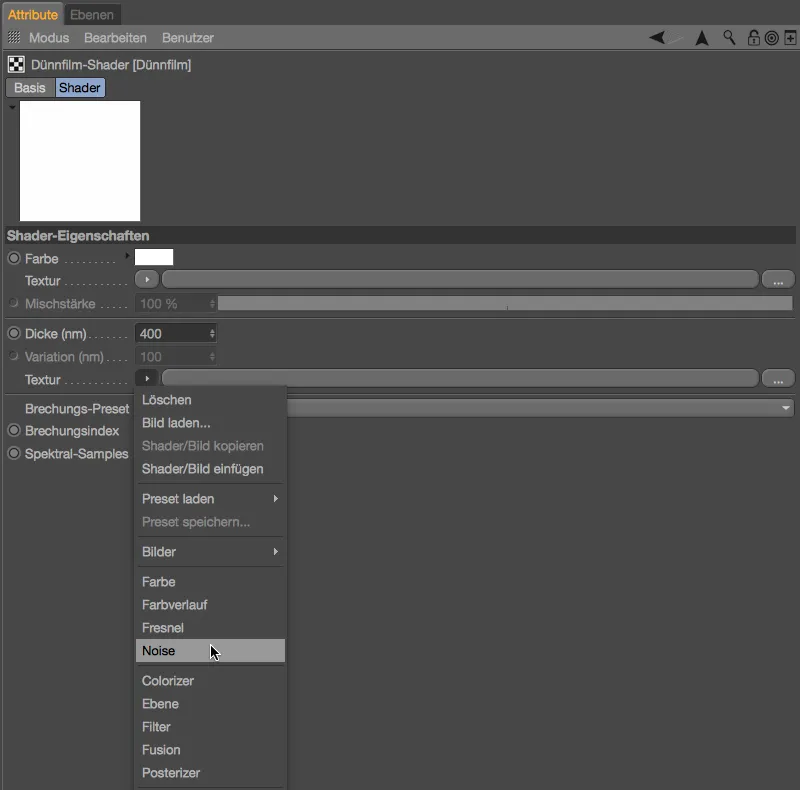
Clicking on the shader buttontakes us to the noise shadersettings dialog. There we select the noise variantcalled Stupl, which is best suited for oil film surfaces. We set the global size to 500 % so that the shader is easily recognizable and not too delicate. With a little clipping at the bottom, we cut off the lower area of the shader to make the island formation a little easier.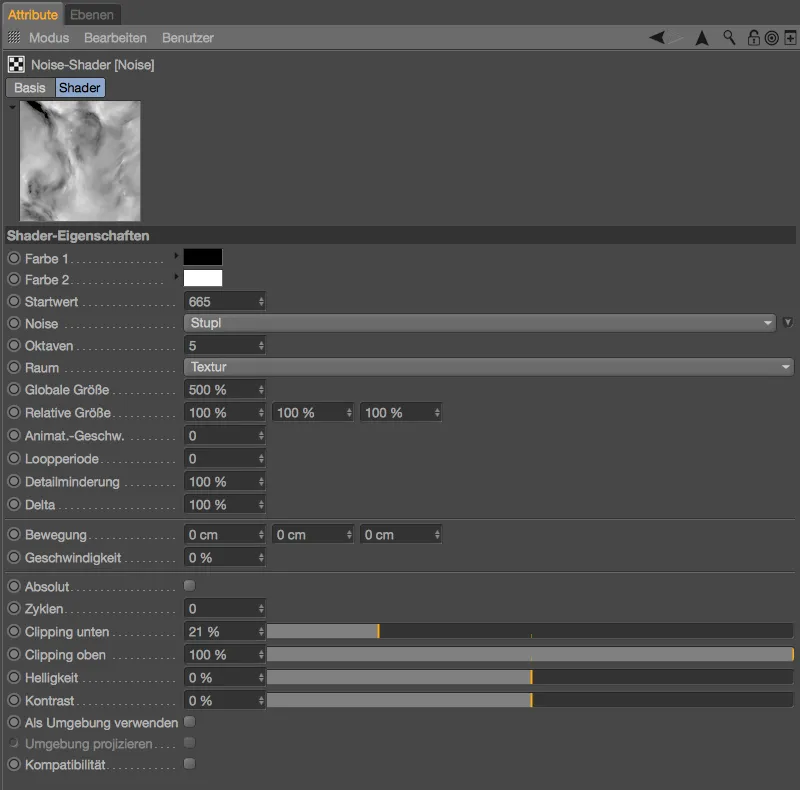
In the material preview, we can already see that the noise shaderis doing a great job. So that we can include the shape of the soap bubble in the design this time, we add a second shader. To do this, we click on the texture buttonon the thin film shader layer and select the layer shader from the shader menu.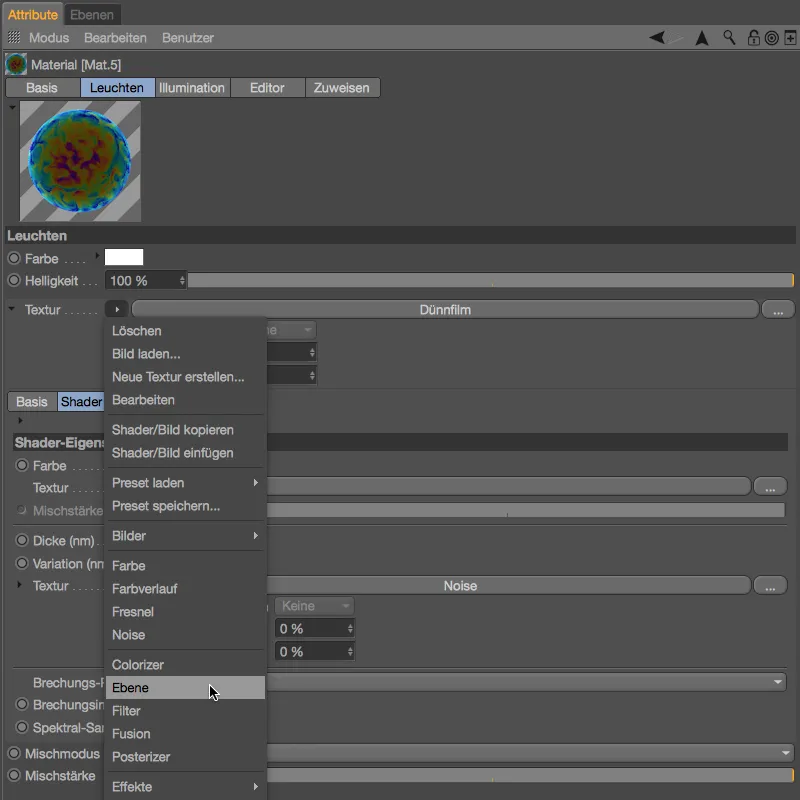
After this action, the layer shader is in the material channel as a texture and the noise shaderhas been integrated as the first layer. We integrate a falloff shader as the second layer by clicking on the Shader... button. This shader determines the deviation of the surface normal from a specified direction so that the noise shadercan react to the round shape of the soap bubble.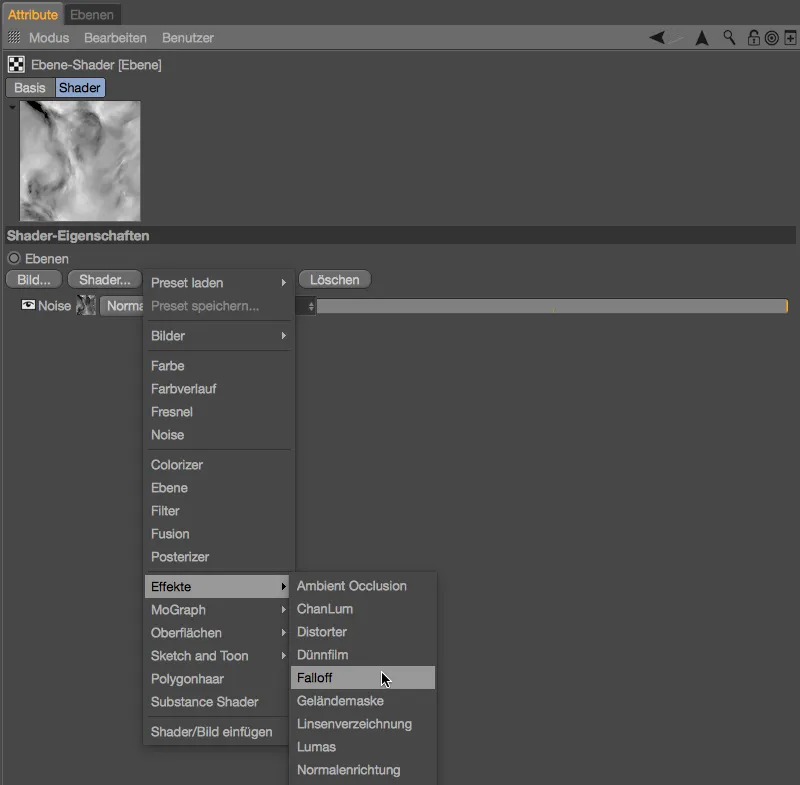
In the settings dialog of the falloff shader, we first delete the unused color sliders and create a gradient from white to black. We move the two maxima a little closer together so that the transitions are not too long or soft.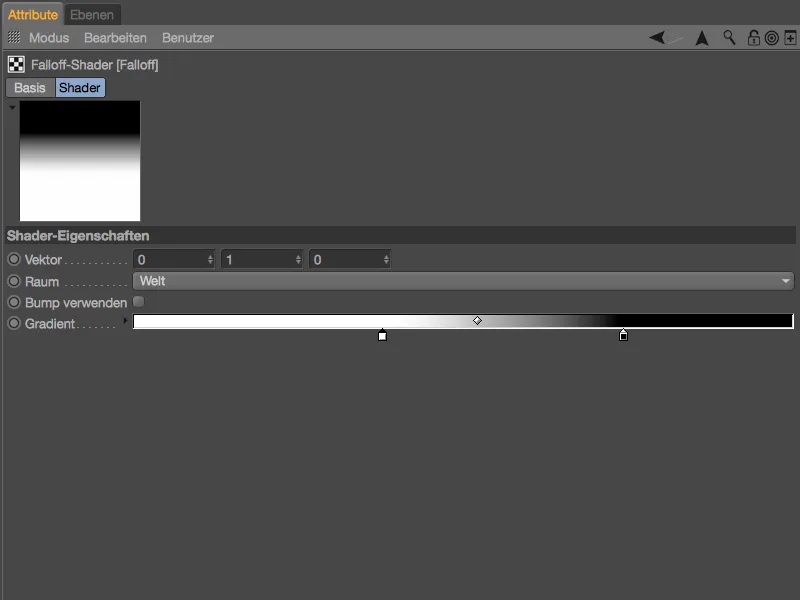
Using the arrow button pointing upwards, we switch to the settings dialog for the layer shaderand set the falloff shader 's blend mode to Multiply. Now both shader layers are offset against each other equally.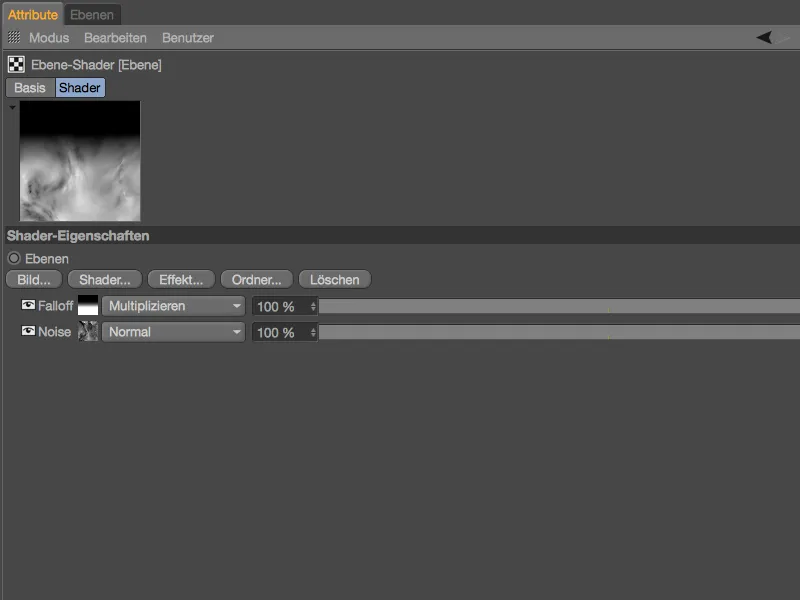
The effect of our new shader structure for the variation of the layer thickness can be clearly seen in the material preview. In addition, the Variation parameter can now also be edited; here we use a range of 100 nm.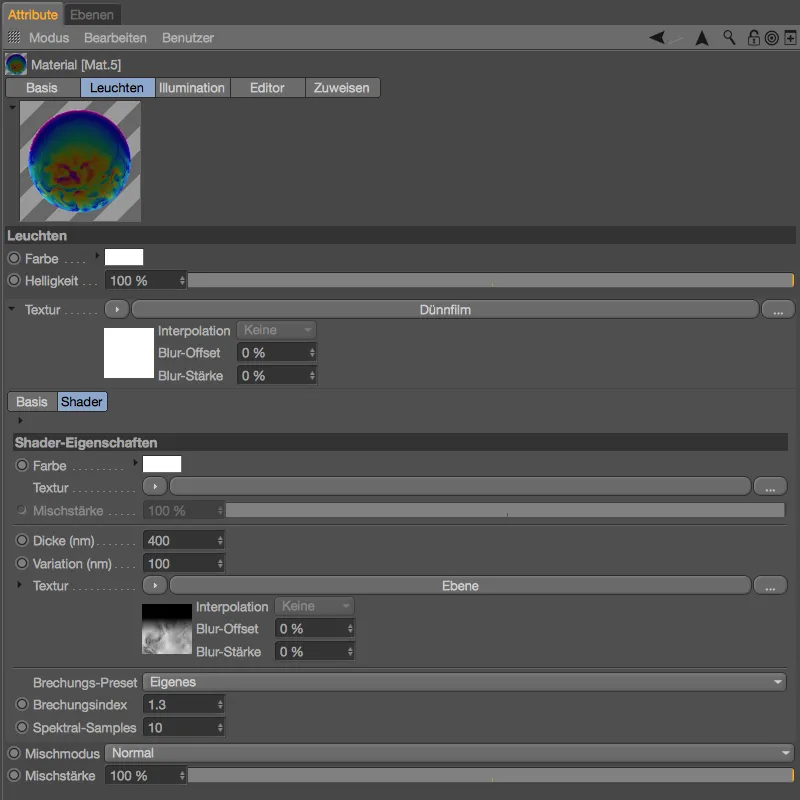
This means that all five sphere objectsare now supplied with soap bubble materials. If you have also used the glow channelto better visualize the thin-film shader, you must of course insert it into the reflectivity channelunder Layer: Color. Finally, it is only the reflectivity and transparency channelsthat form our soap bubble surface.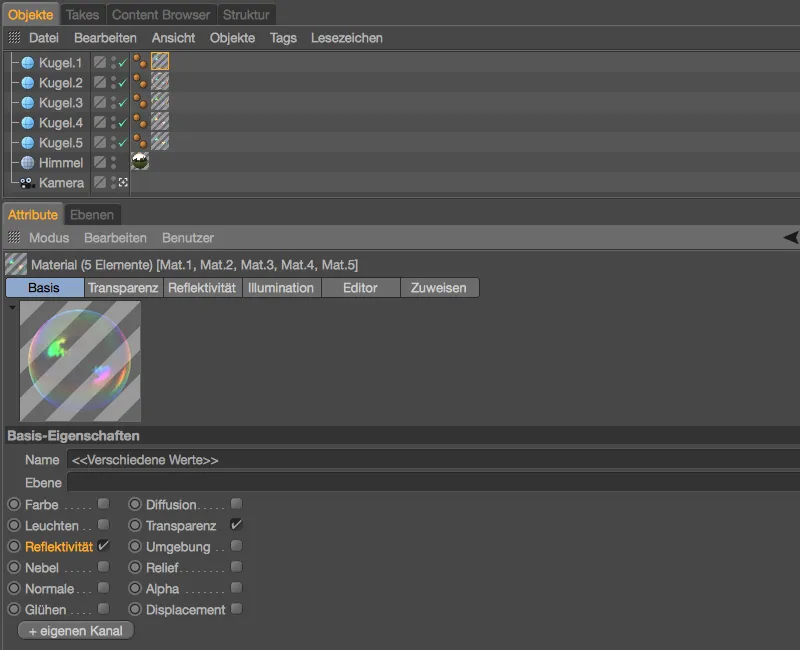
Here is a rendering of the soap bubbles with the thin film shader in the glow channelfor comparison ...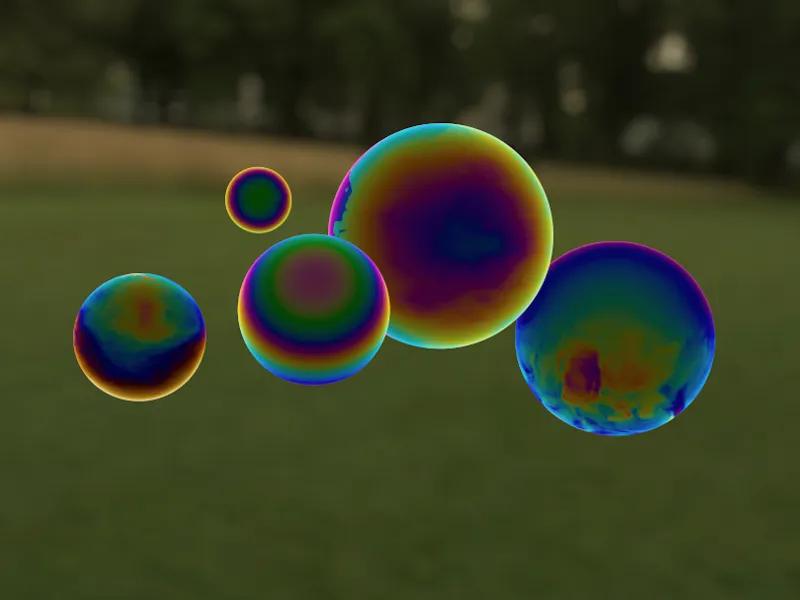
... and the corresponding final rendering of the soap bubbles.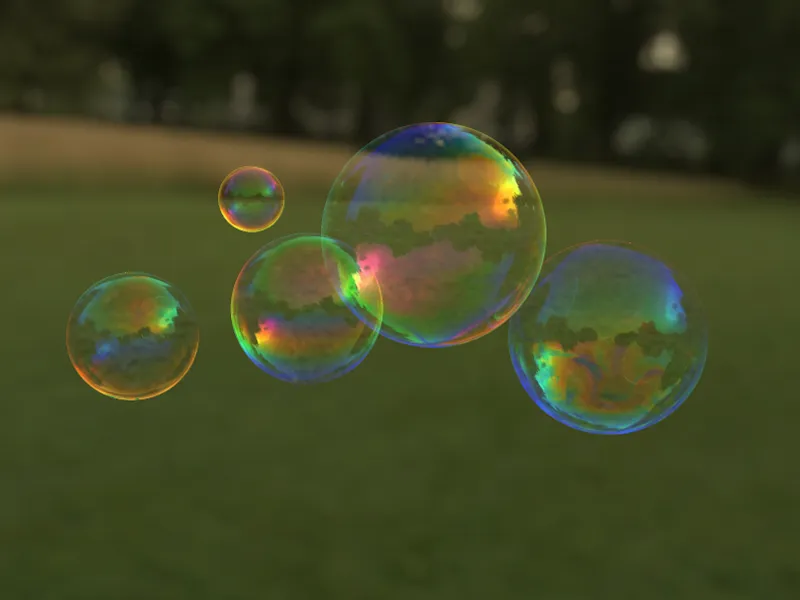
Using the thin-film shader on metallic objects
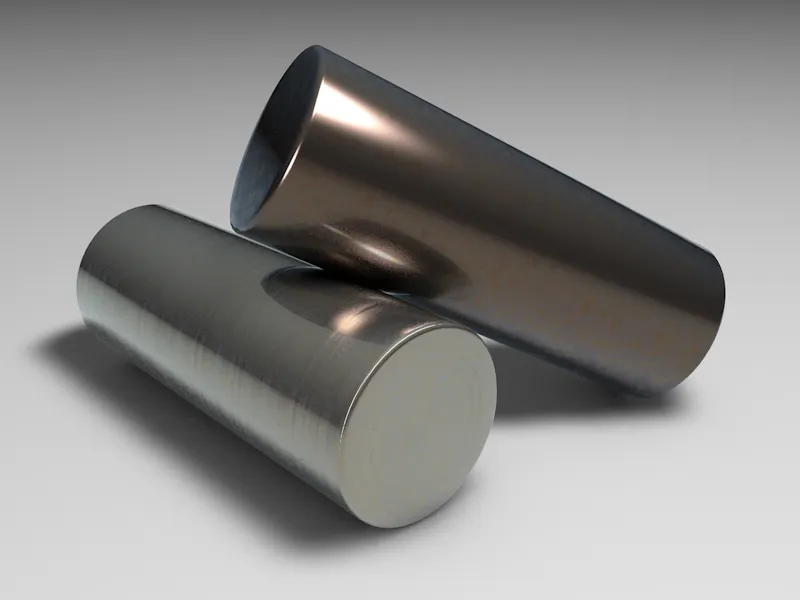
Our soap bubbles were just one of many application examples for the thin-film shader. It also works well as an oil film on puddles, for example, or as a wafer-thin, shimmering surface on glass, plastic or even metal. At the end of this tutorial, I would like to briefly show you how you can use the thin film shader on metallic objects. Here too, the reflectivity channel is assigned the thin-film shader on a separate layer - similar to a clear coat layer. The shimmering coloring of the surfaces is done via the Layer: Color area.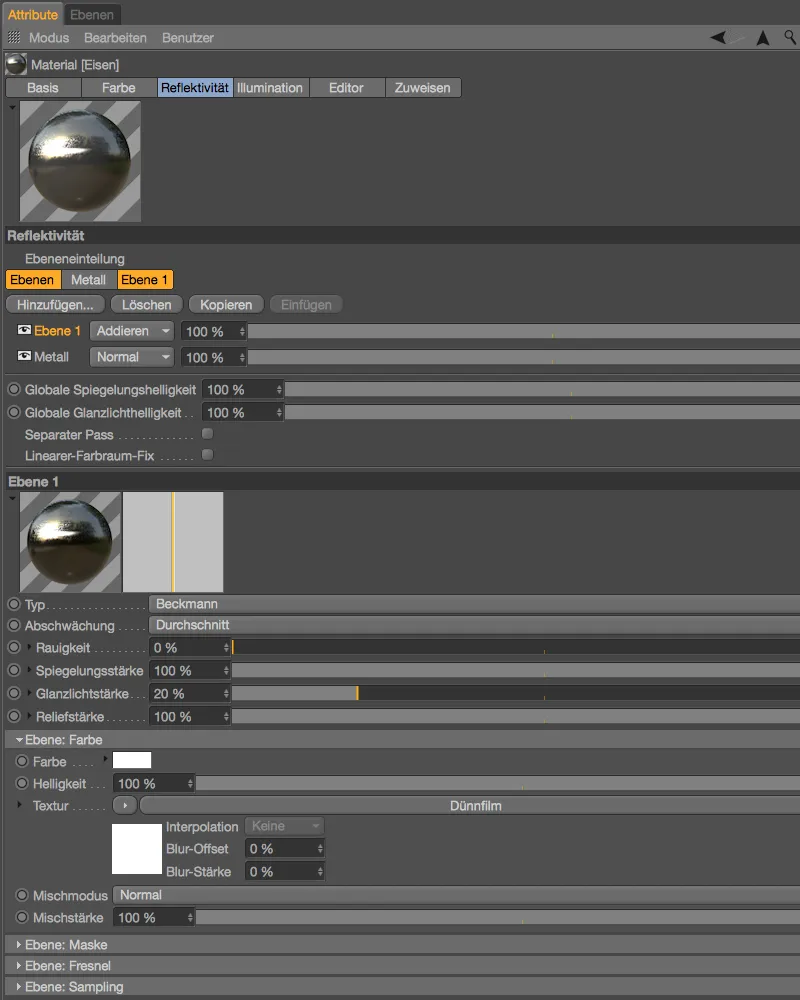
As usual, the coloring of the rainbow effect is largely determined by the Thickness and Variation parameters - in the example shown, a Sema Noise shaderwith strong clipping ensures strongly isolated thin film traces.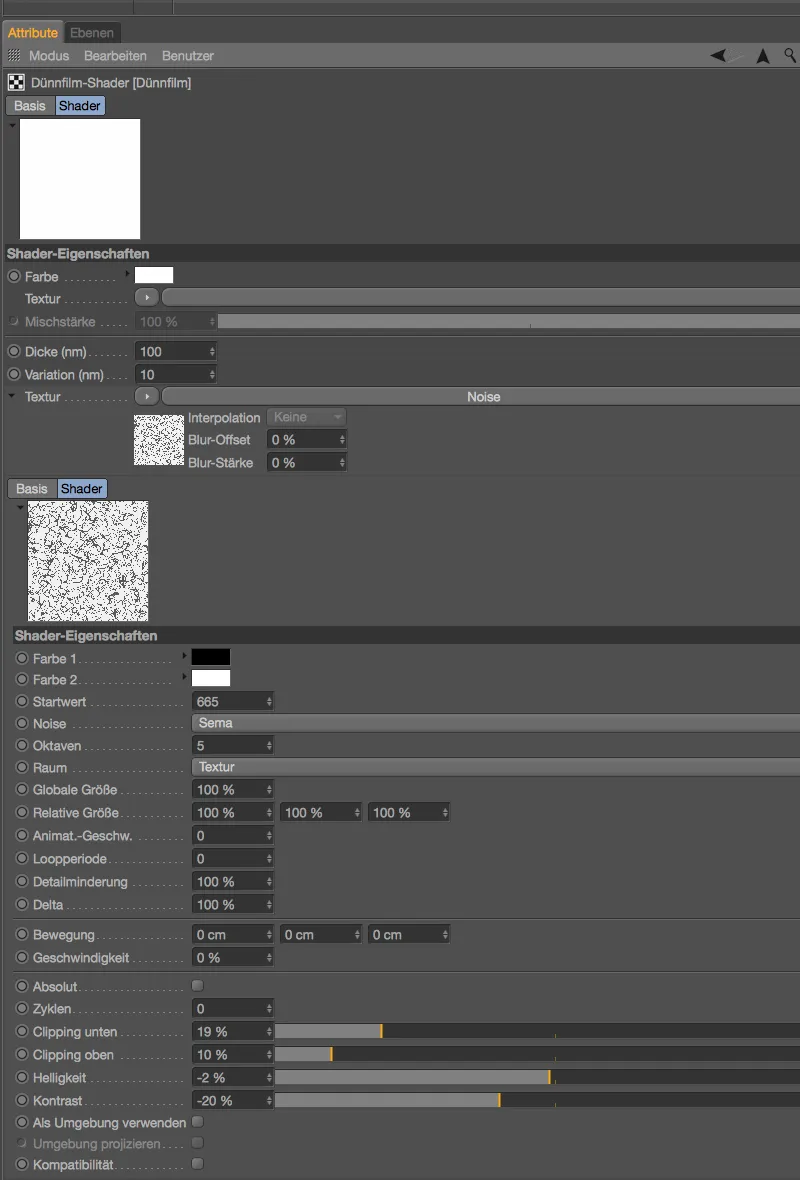
The rendering shows two differently colored examples of light oil film traces on metallic objects, which could be caused by machining residues or light fogging, for example.