The term "field" is new in the context of removal functions in Cinema 4D. However, if we take a look at the list in the Create>Fields menu, we will see a number of familiar removal shapes from the particle modifiers or entries reminiscent of the MoGraph effectors. For owners of the Prime and Visualize versions of Cinema 4D, this list is somewhat shorter, as they have the "Basic Fields".
The three examples worked through in this tutorial can be found in the package of working materials for this tutorial.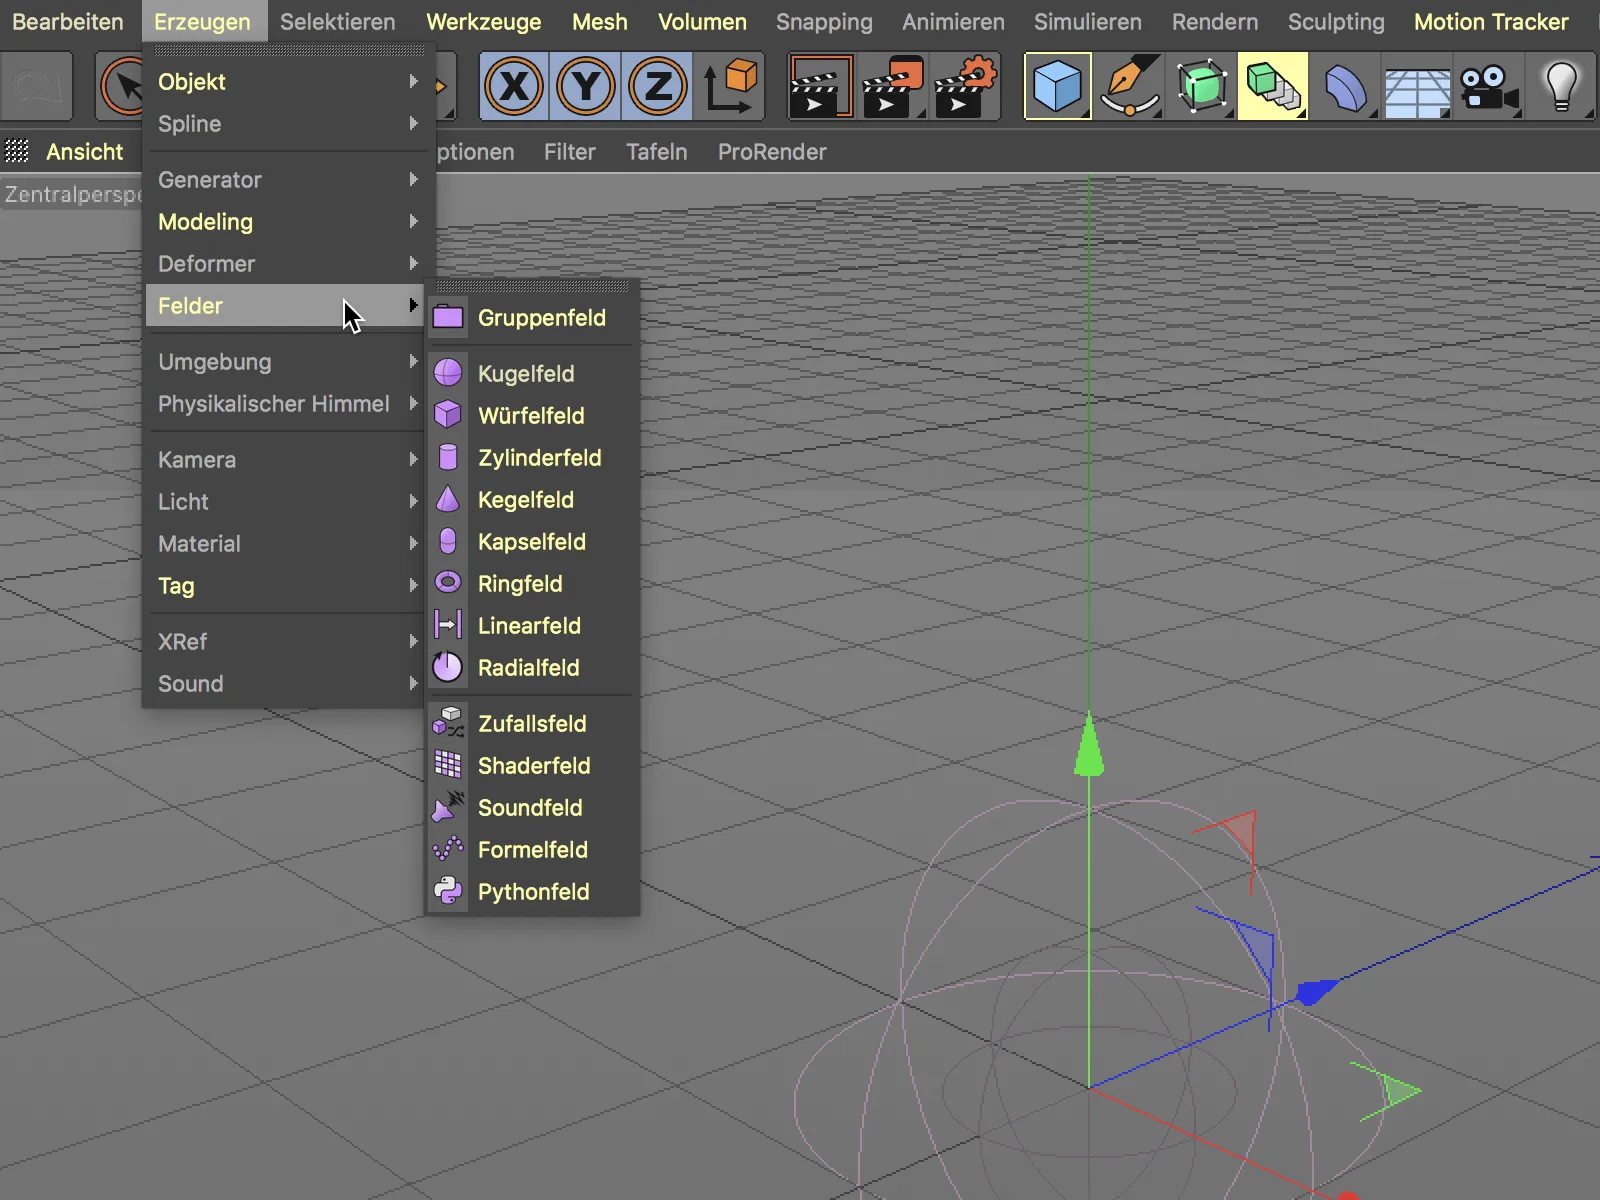
Integration of fields
If we look at the new settings dialog of a particle modifier, we now find a list view on the decrease pagefor the fields that should be involved in controlling the decrease of the modifier. The Mix and Opacity columns already reveal that fields can be offset or combined with each other in a variety of ways.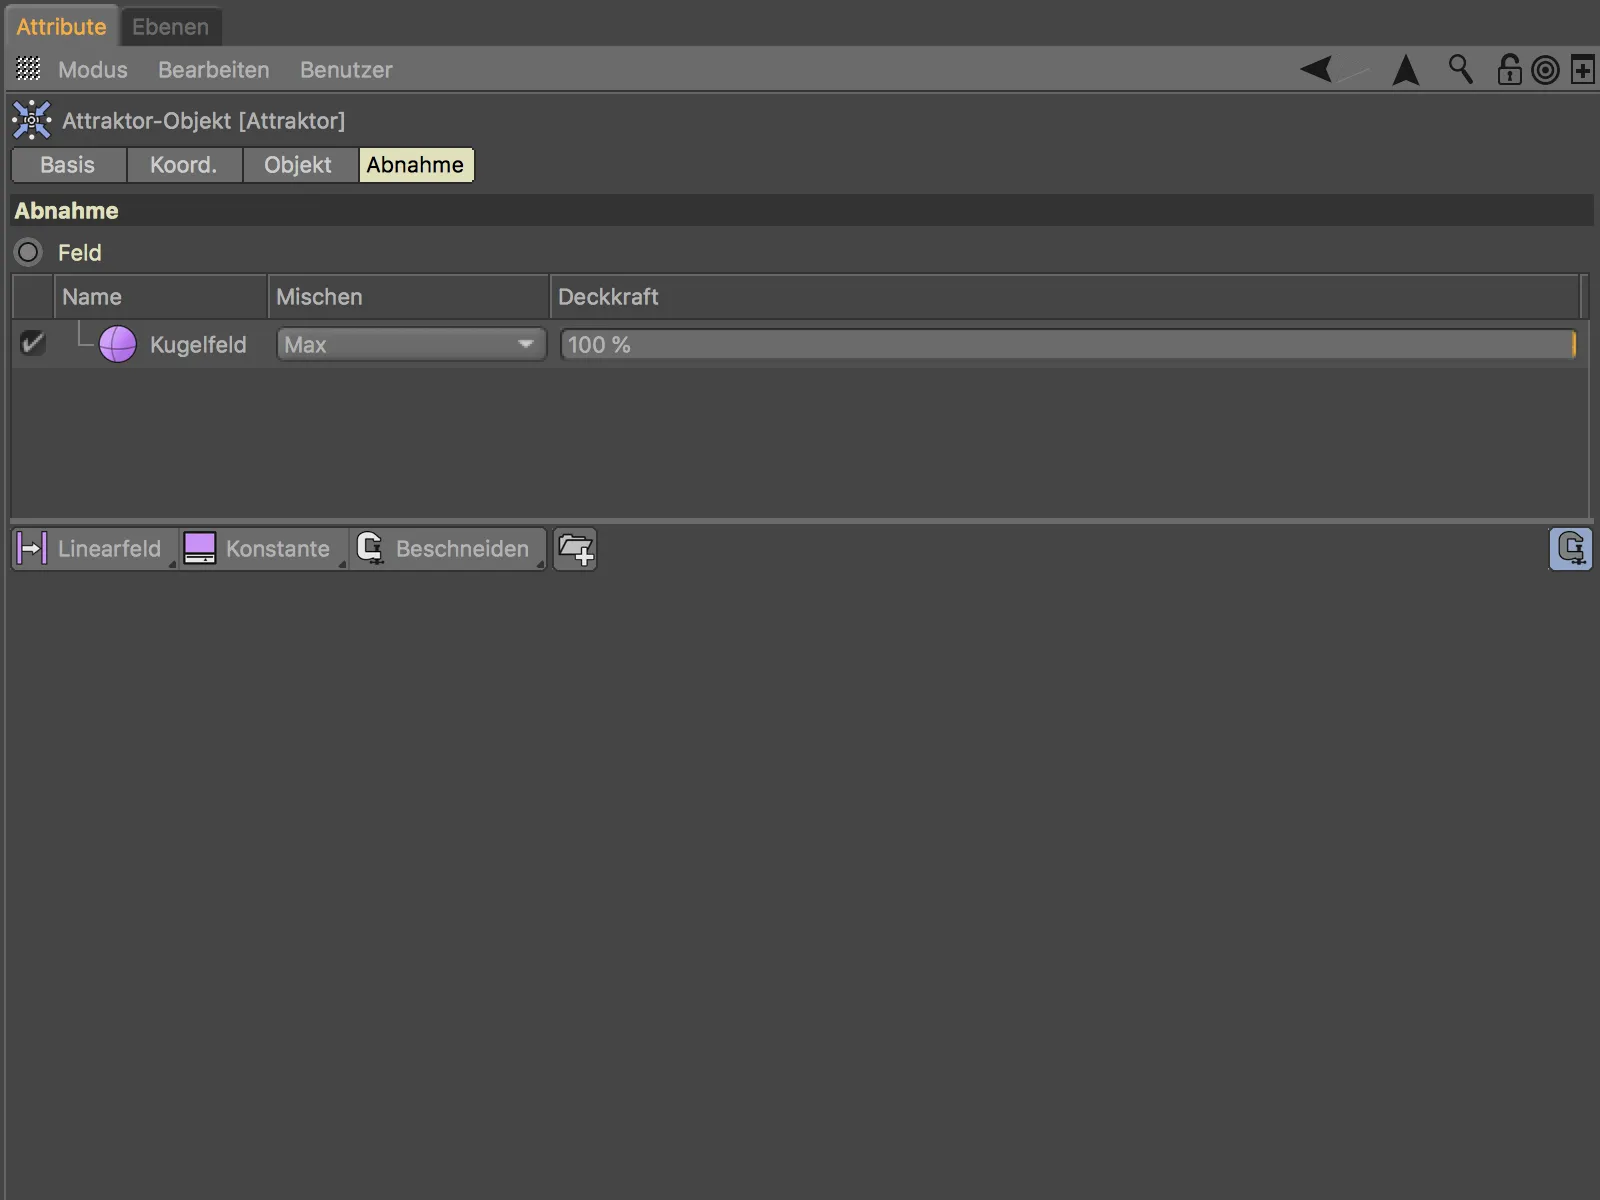
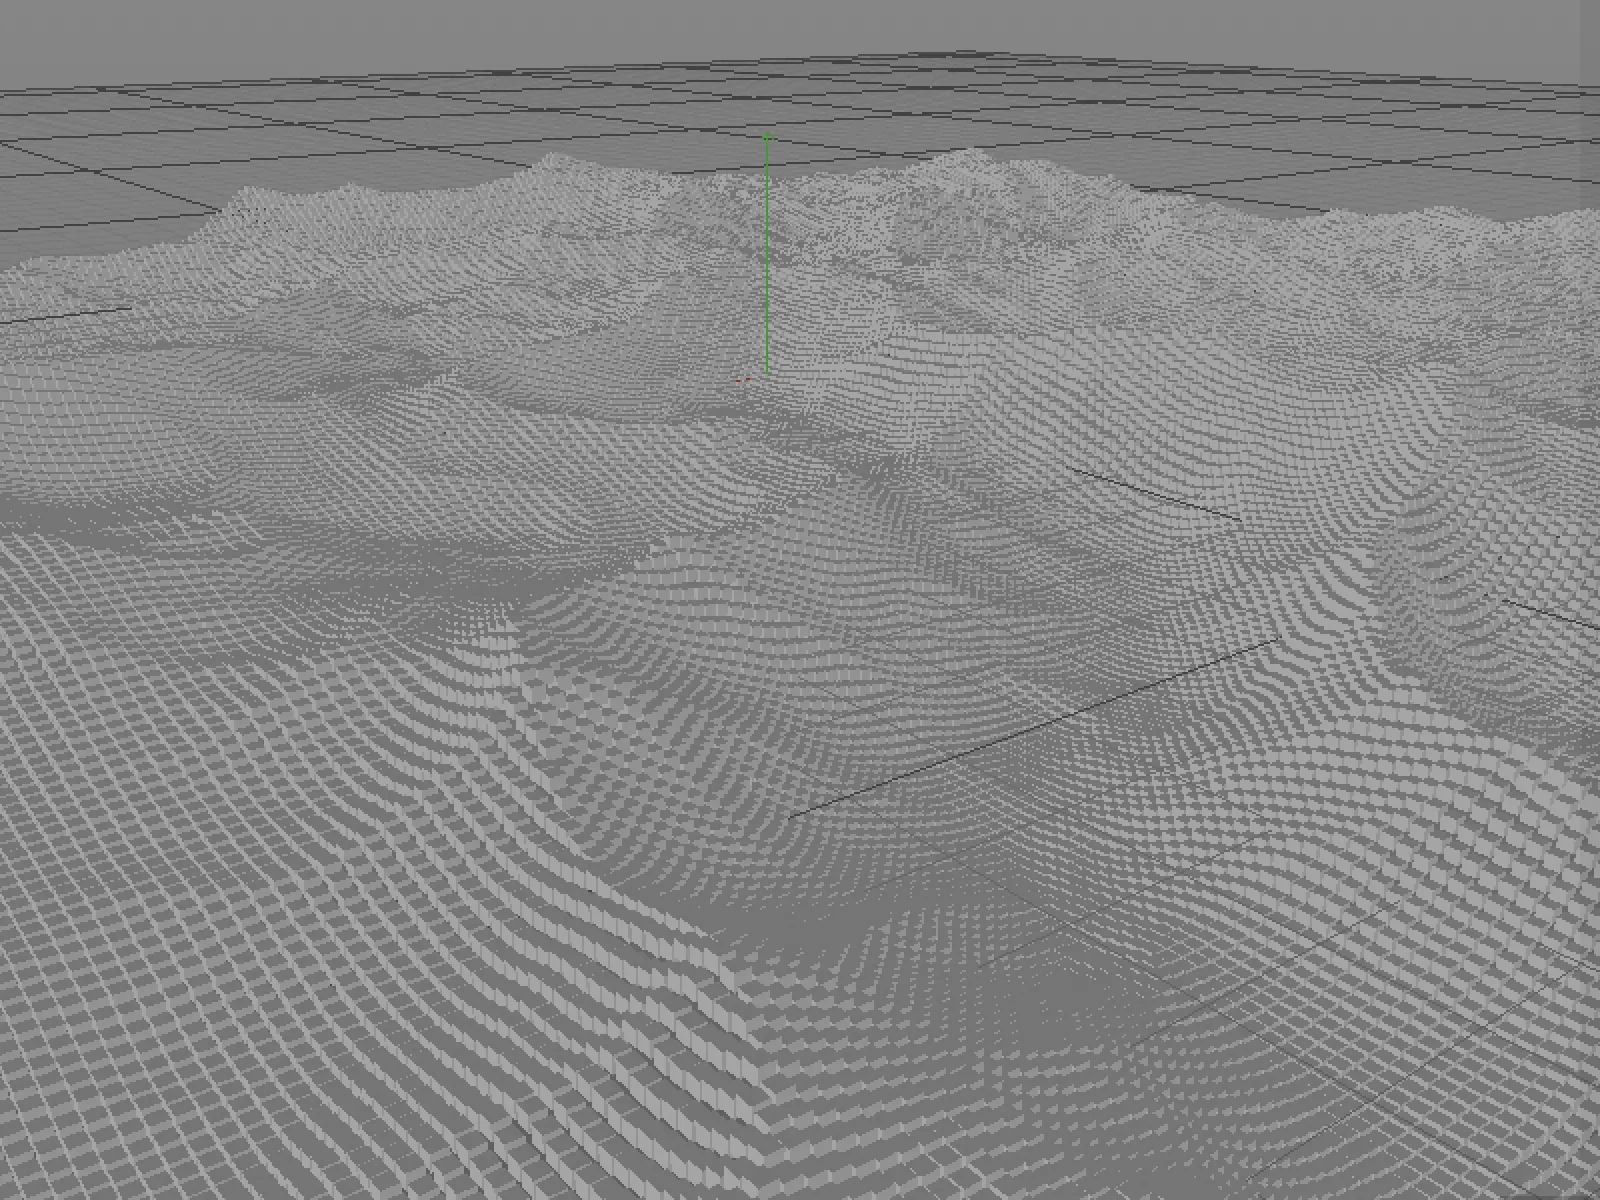
Let's take a look at working with fields on a clone object from MoGraph, which distributes its subordinate cube objects on a horizontal grid surface. A Simpel effector, which is assigned to the clone object on the effectors page, acts on the clones.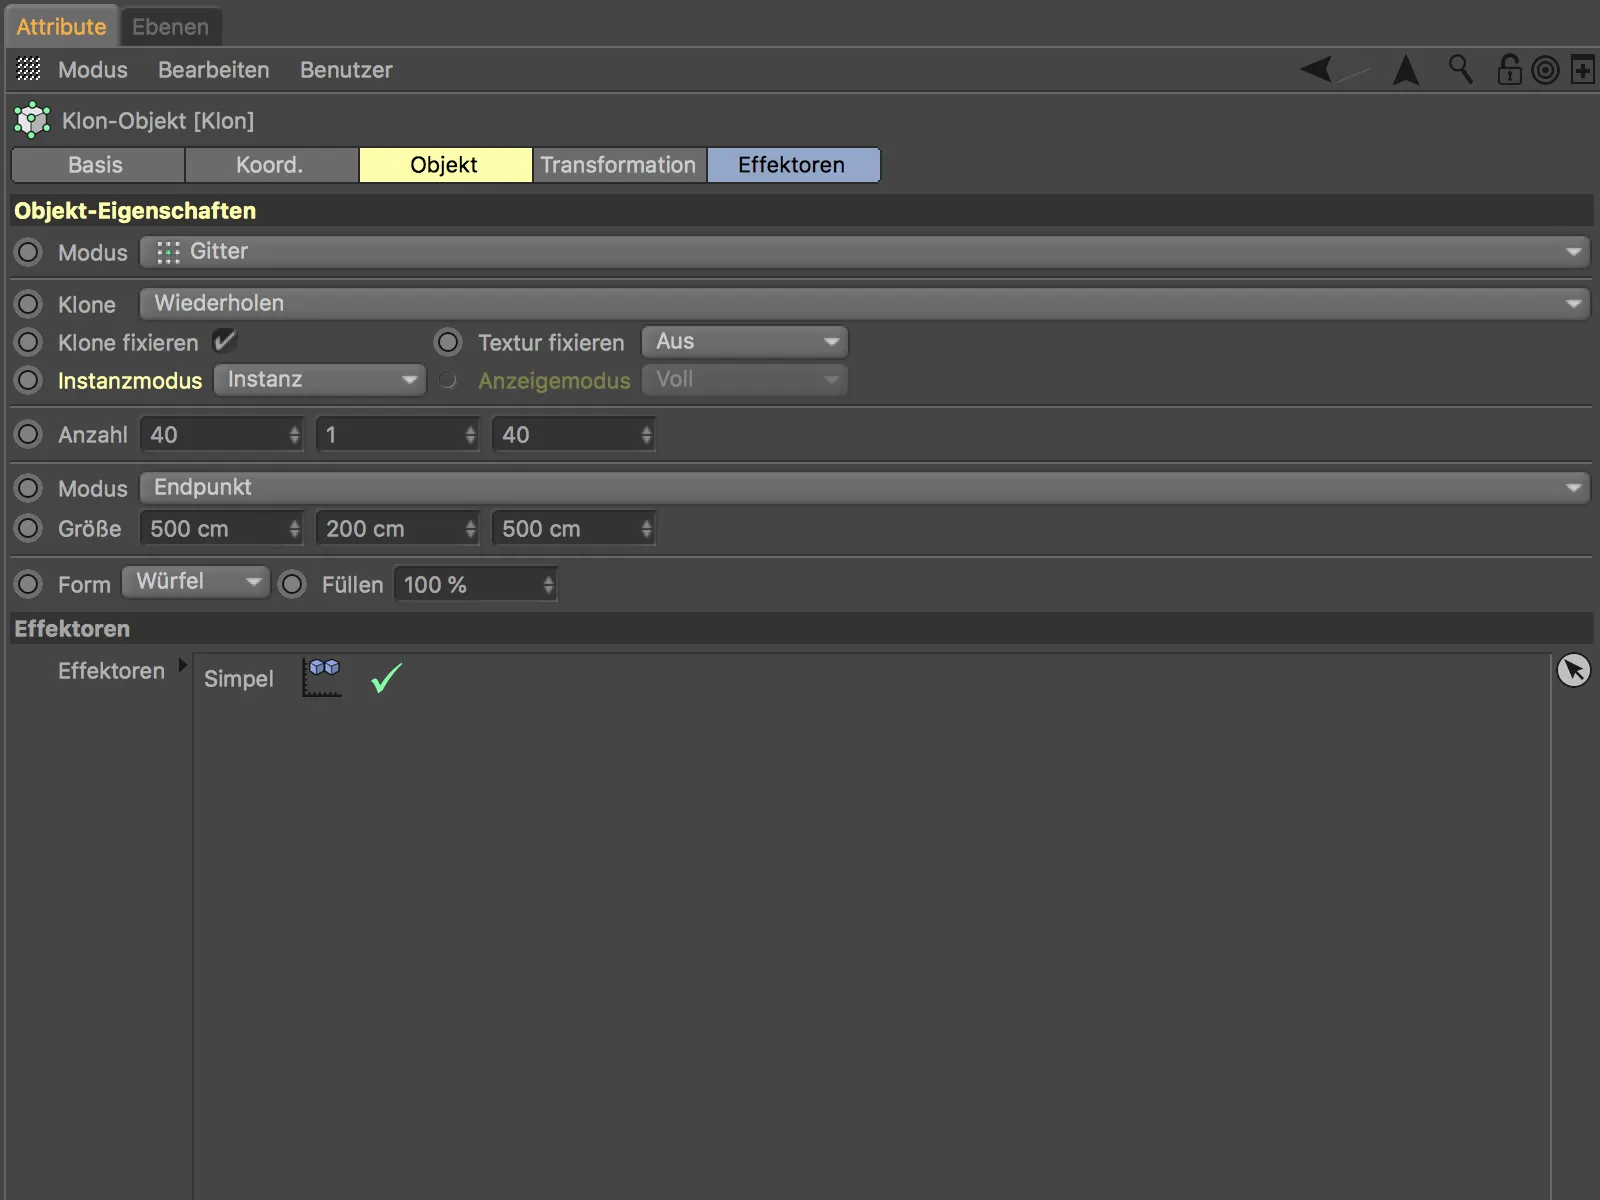
Here we see the initial state with the Simpel effector deactivated. A simple transformation of the clones will suffice to illustrate the effect.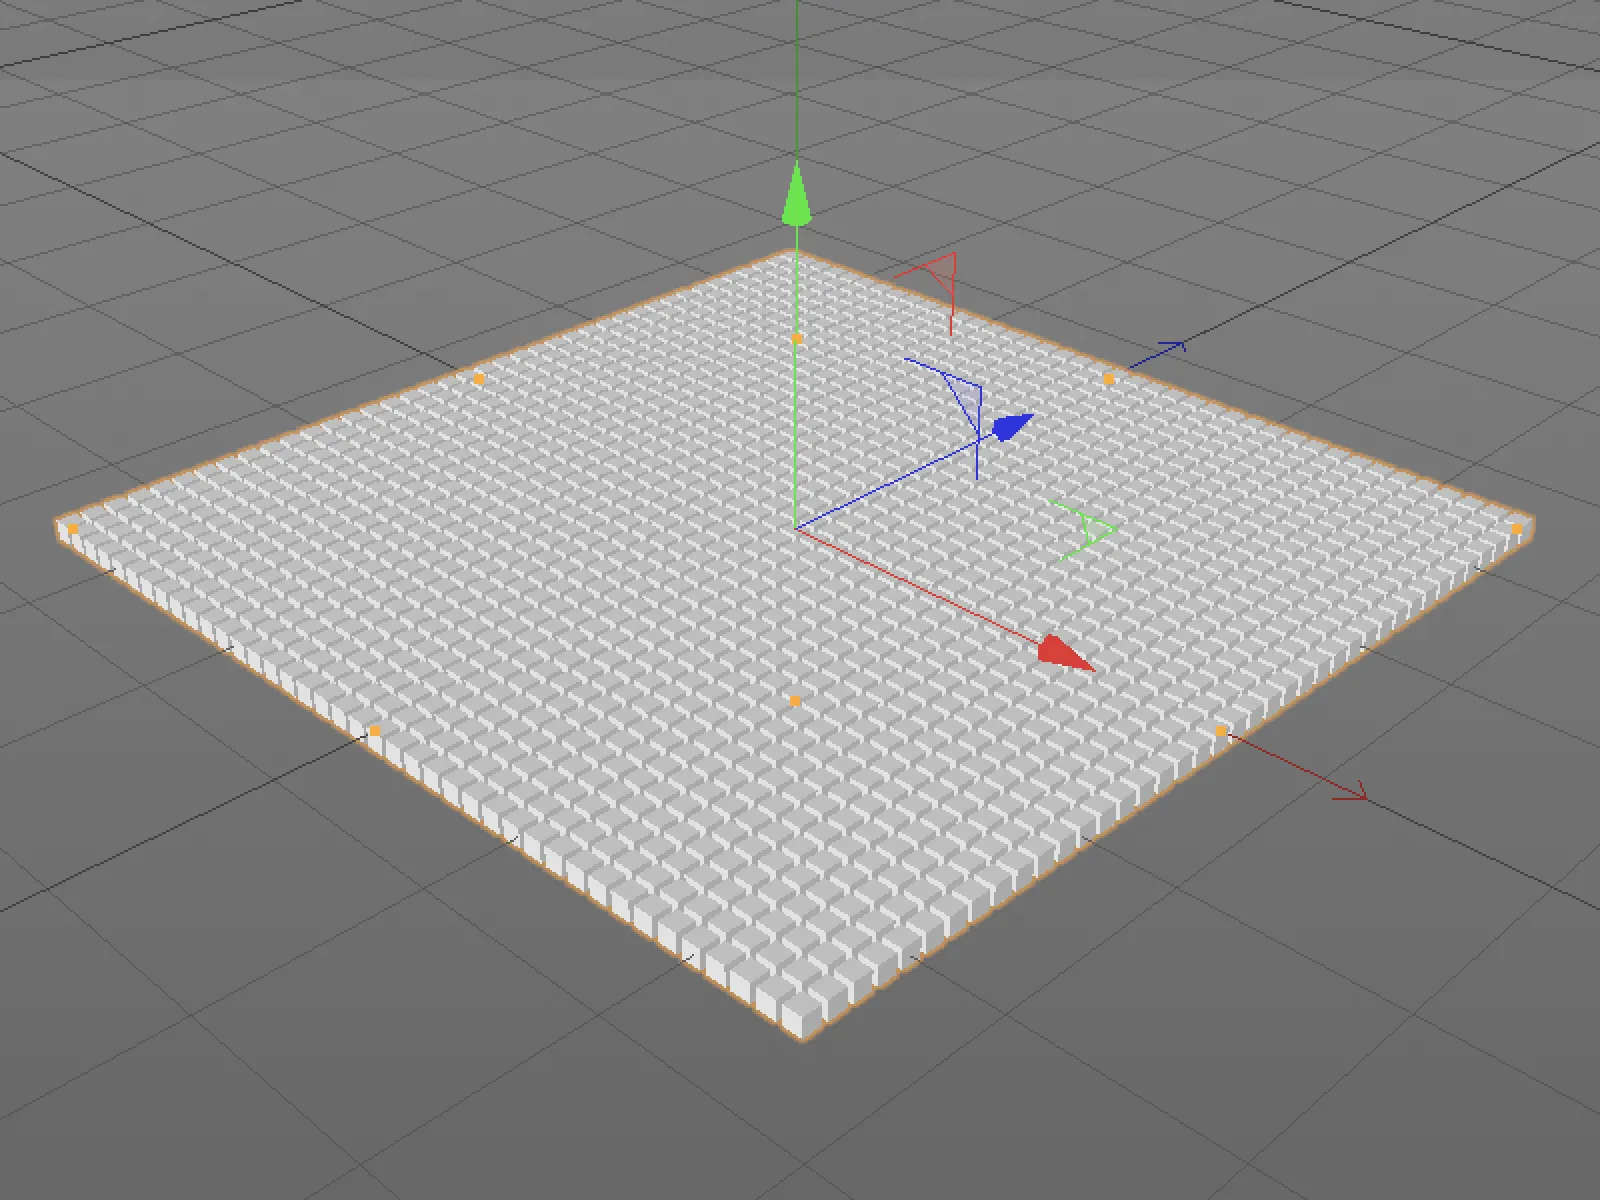
On the parameter sideof the Simpel effector, a transformation of the position is sufficient; a value of 50 cm in the Y direction is sufficient. As already mentioned, we also find the new decrease pagewith the field list in this effector. There are three buttons at the bottom which we can use to add field objects, field layers and modifier layers to the field list and combine them with each other.
Field objects are clearly defined, they are stored as spheres, cubes etc. in the object managerand influence the effect through their position, their shape, through an imported sound file or even through a small script. To get started, we will content ourselves with a sphere field.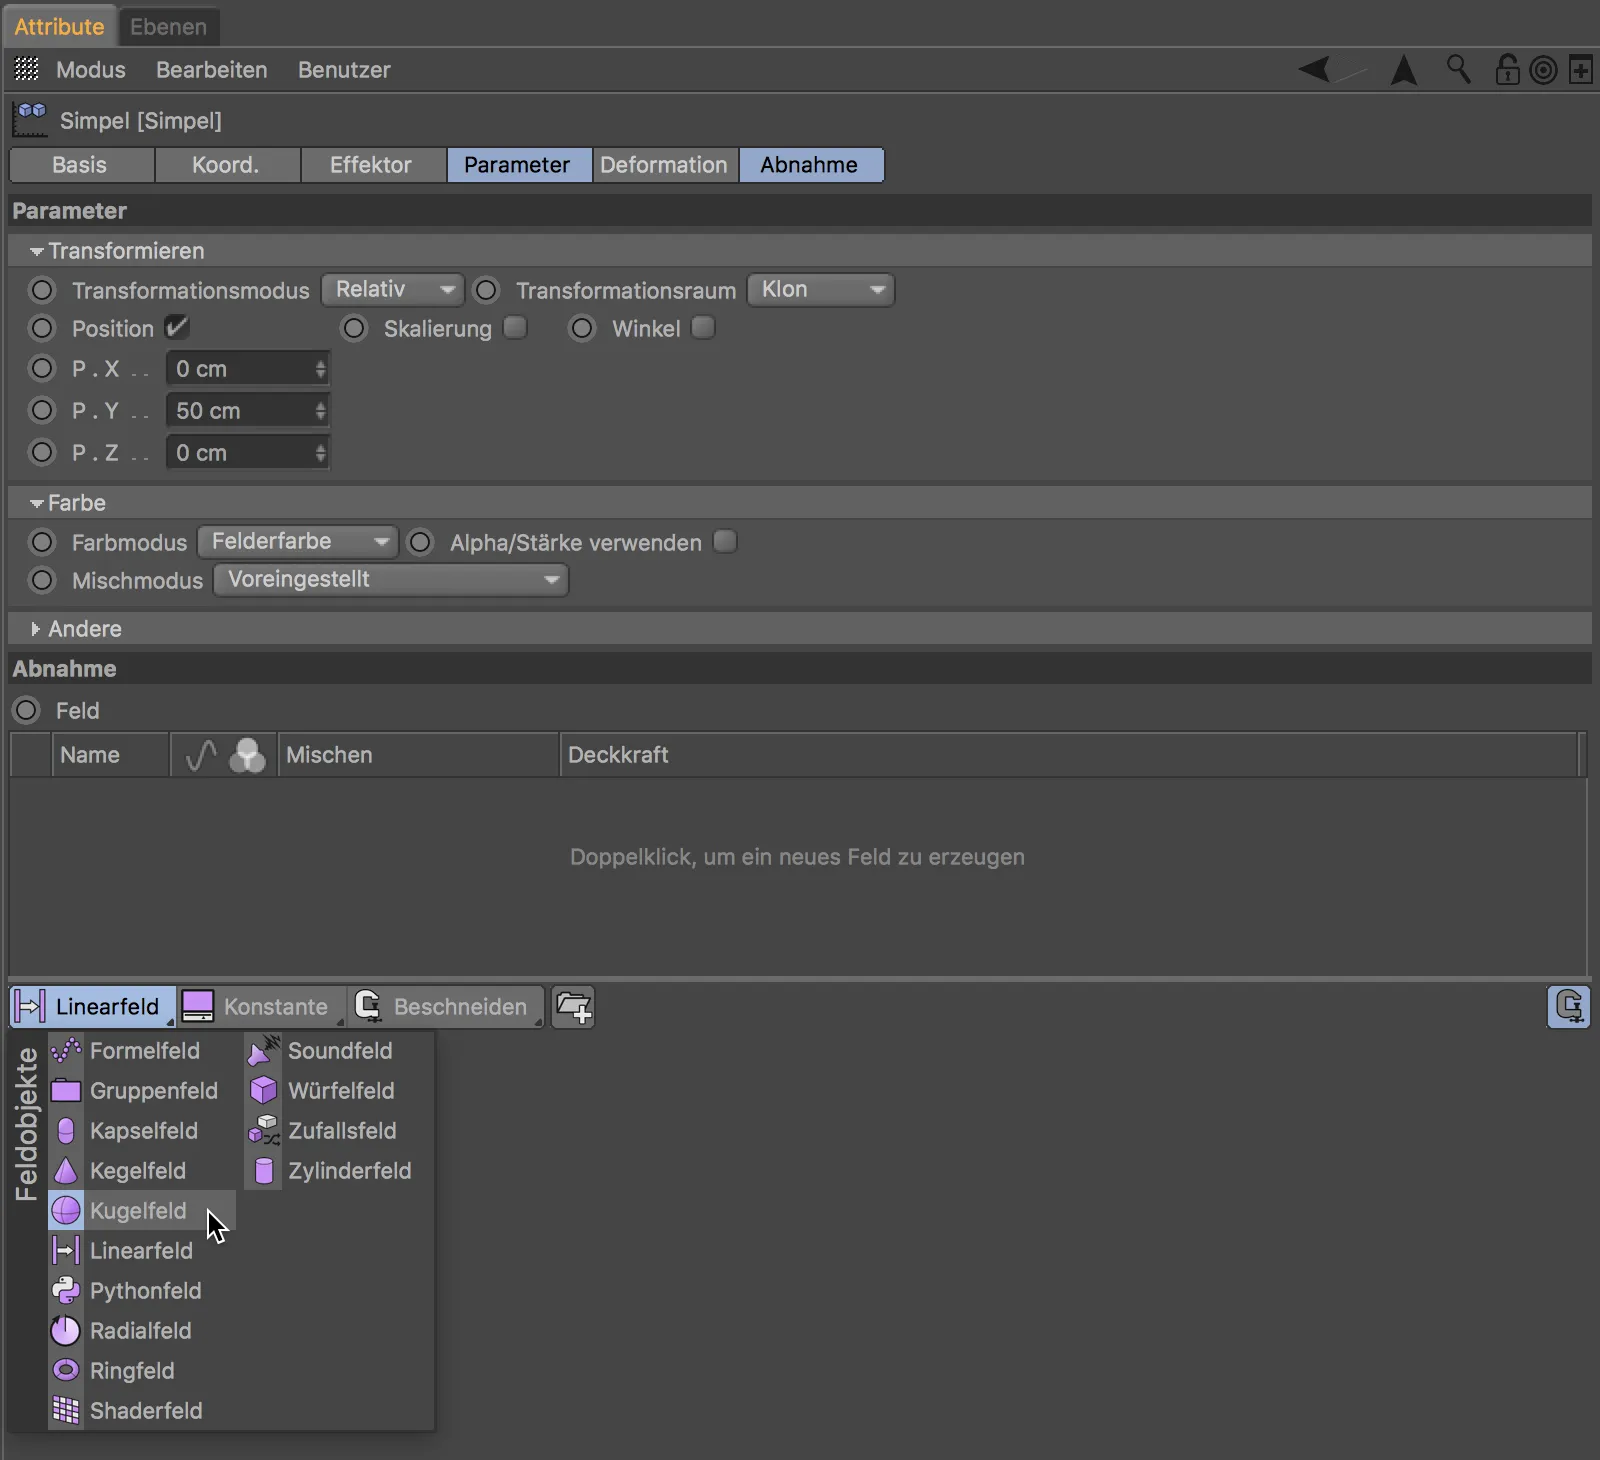
The effect of the Simpel effector is now limited to the area defined by the sphere field. Using the handles on the sphere field, we can interactively adjust the position, the radius or even the decrease at the edge of the sphere field. Conveniently, the strength of the effect on the clones is displayed in color.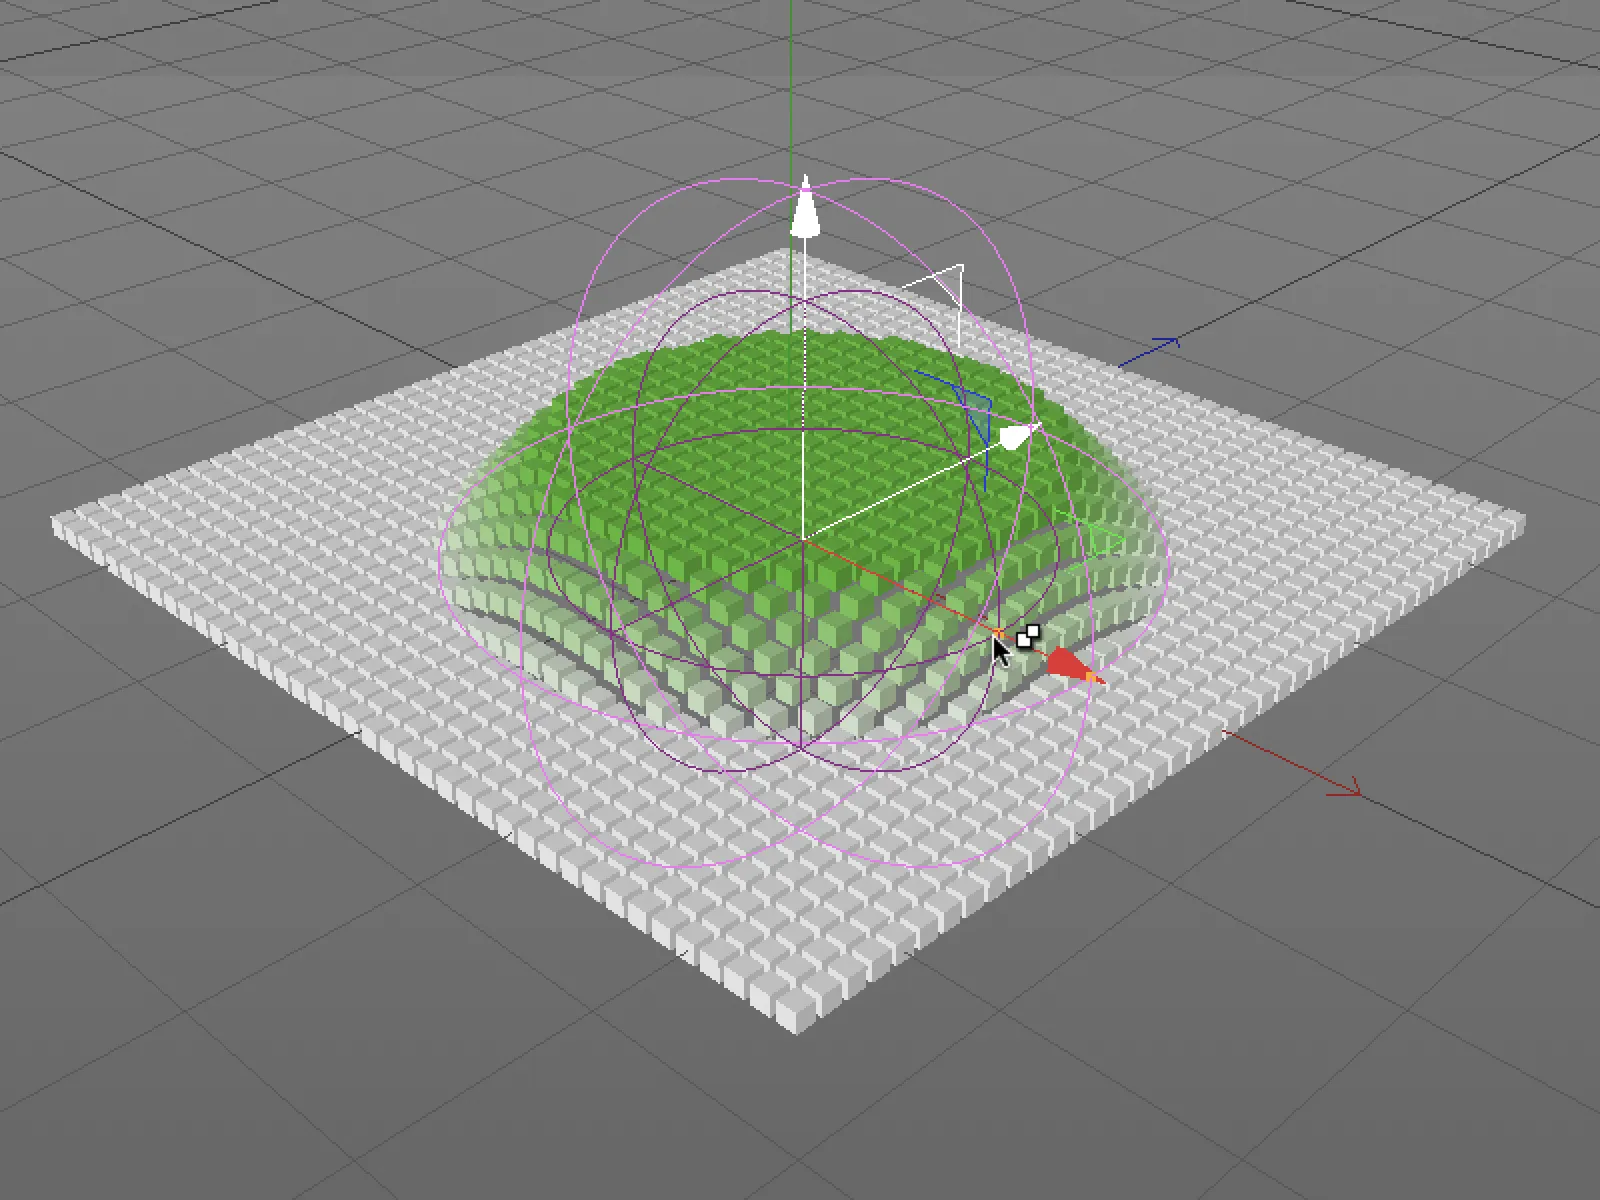
If we select the sphere field level in the field list, we will find numerous parameters for defining the decrease within the field in the sphere field settings.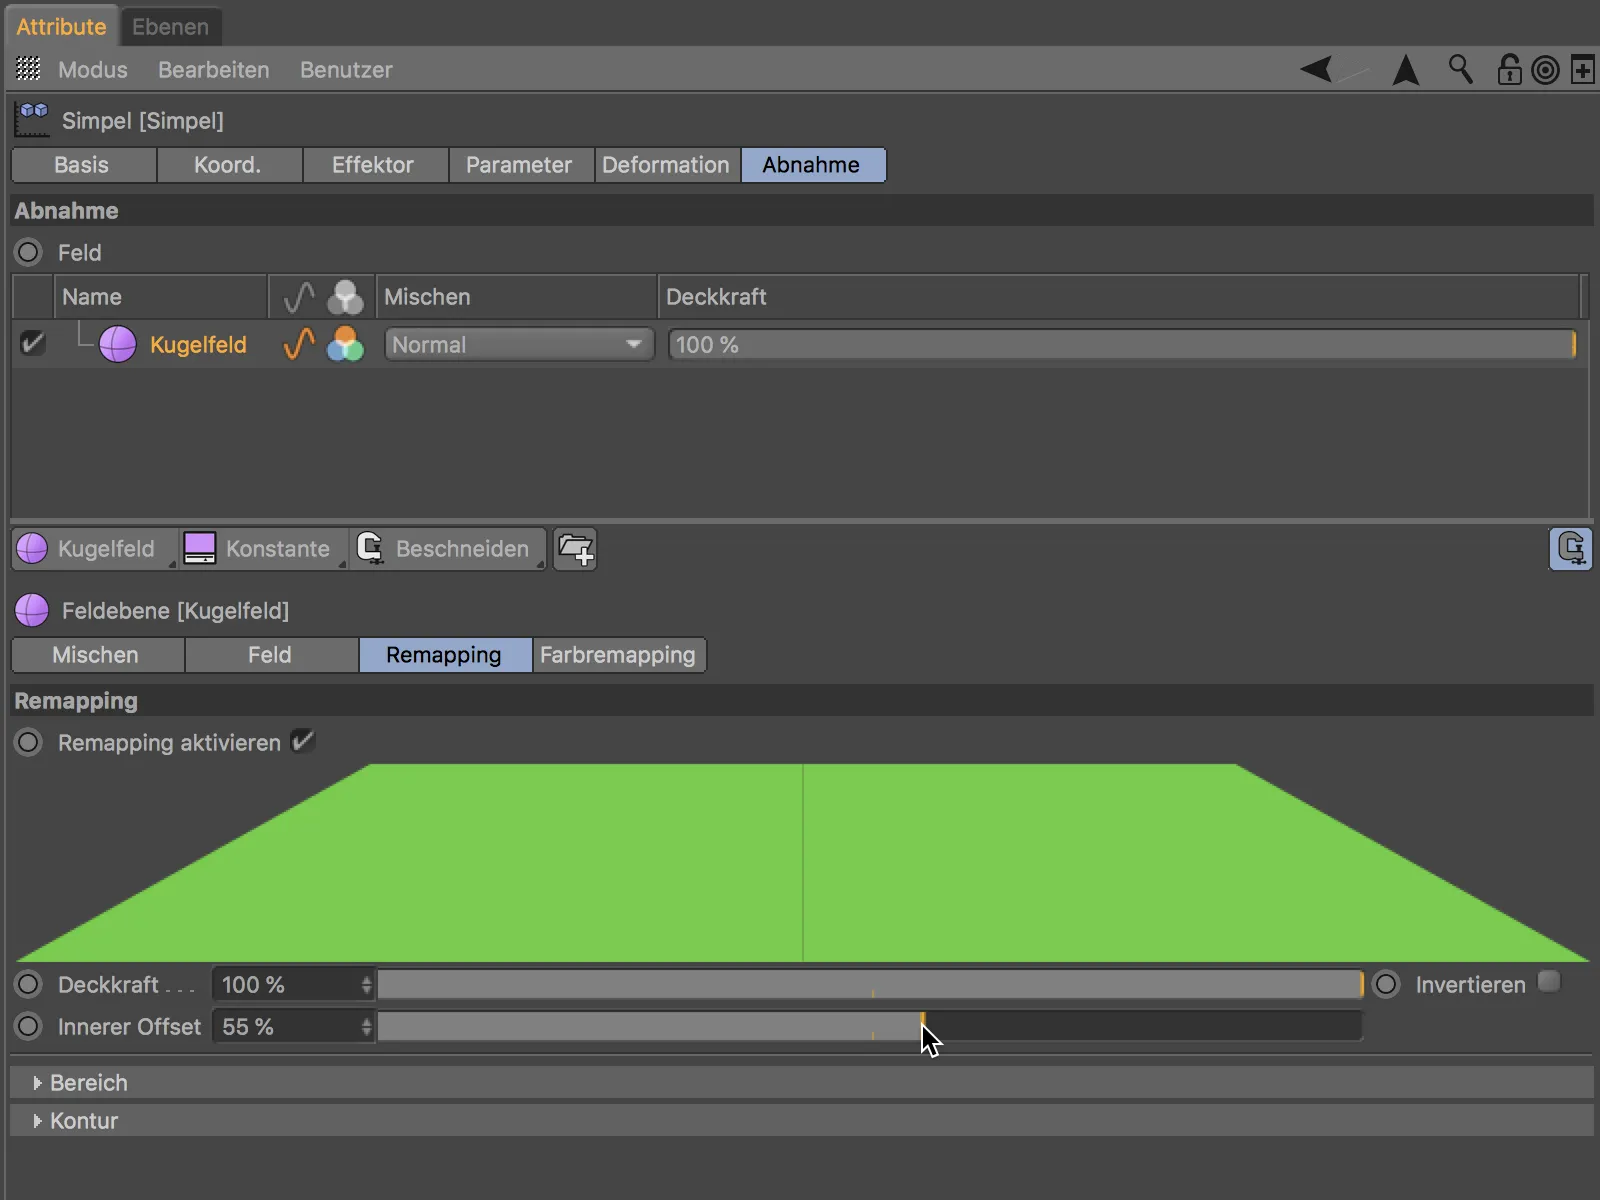
If we expand the remaining areas on the remapping page, we are provided with further options for designing the area and the contour.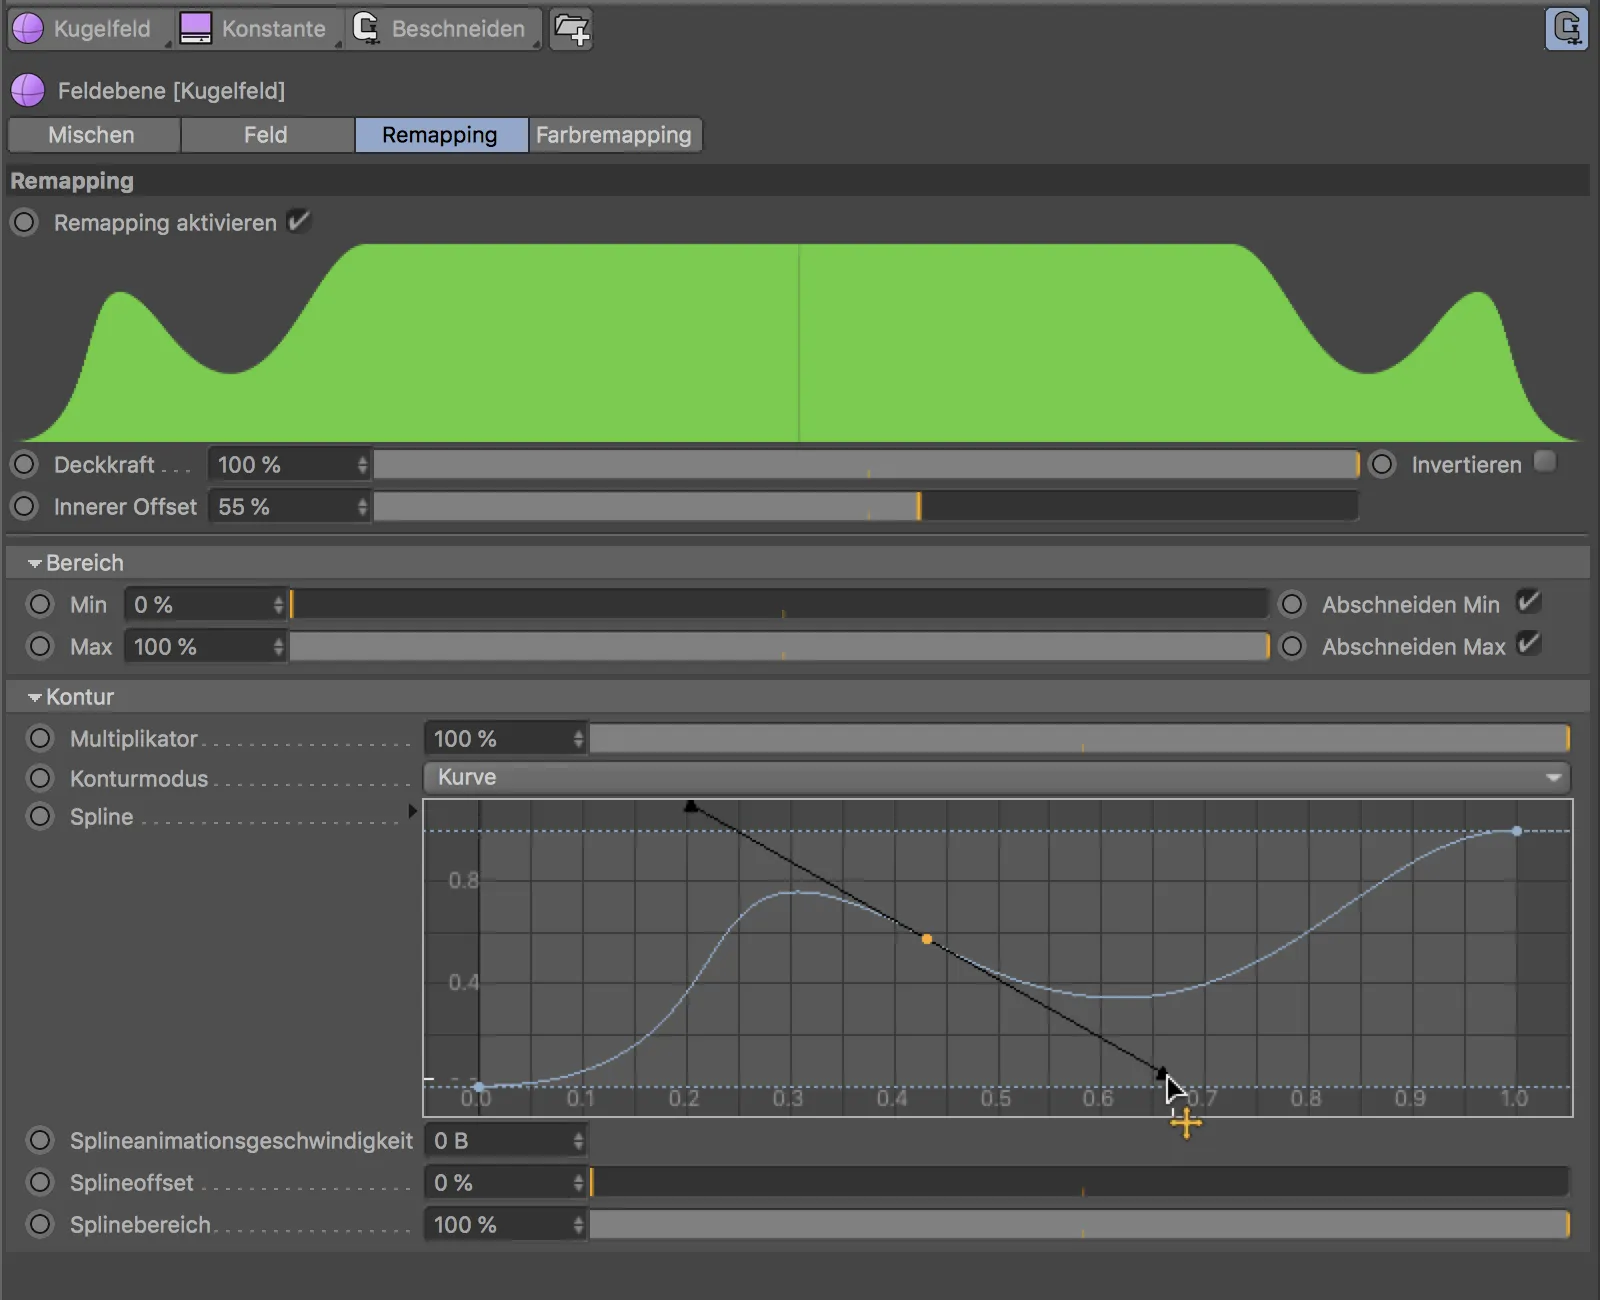
We can of course see the effects of our changes directly in the editor view.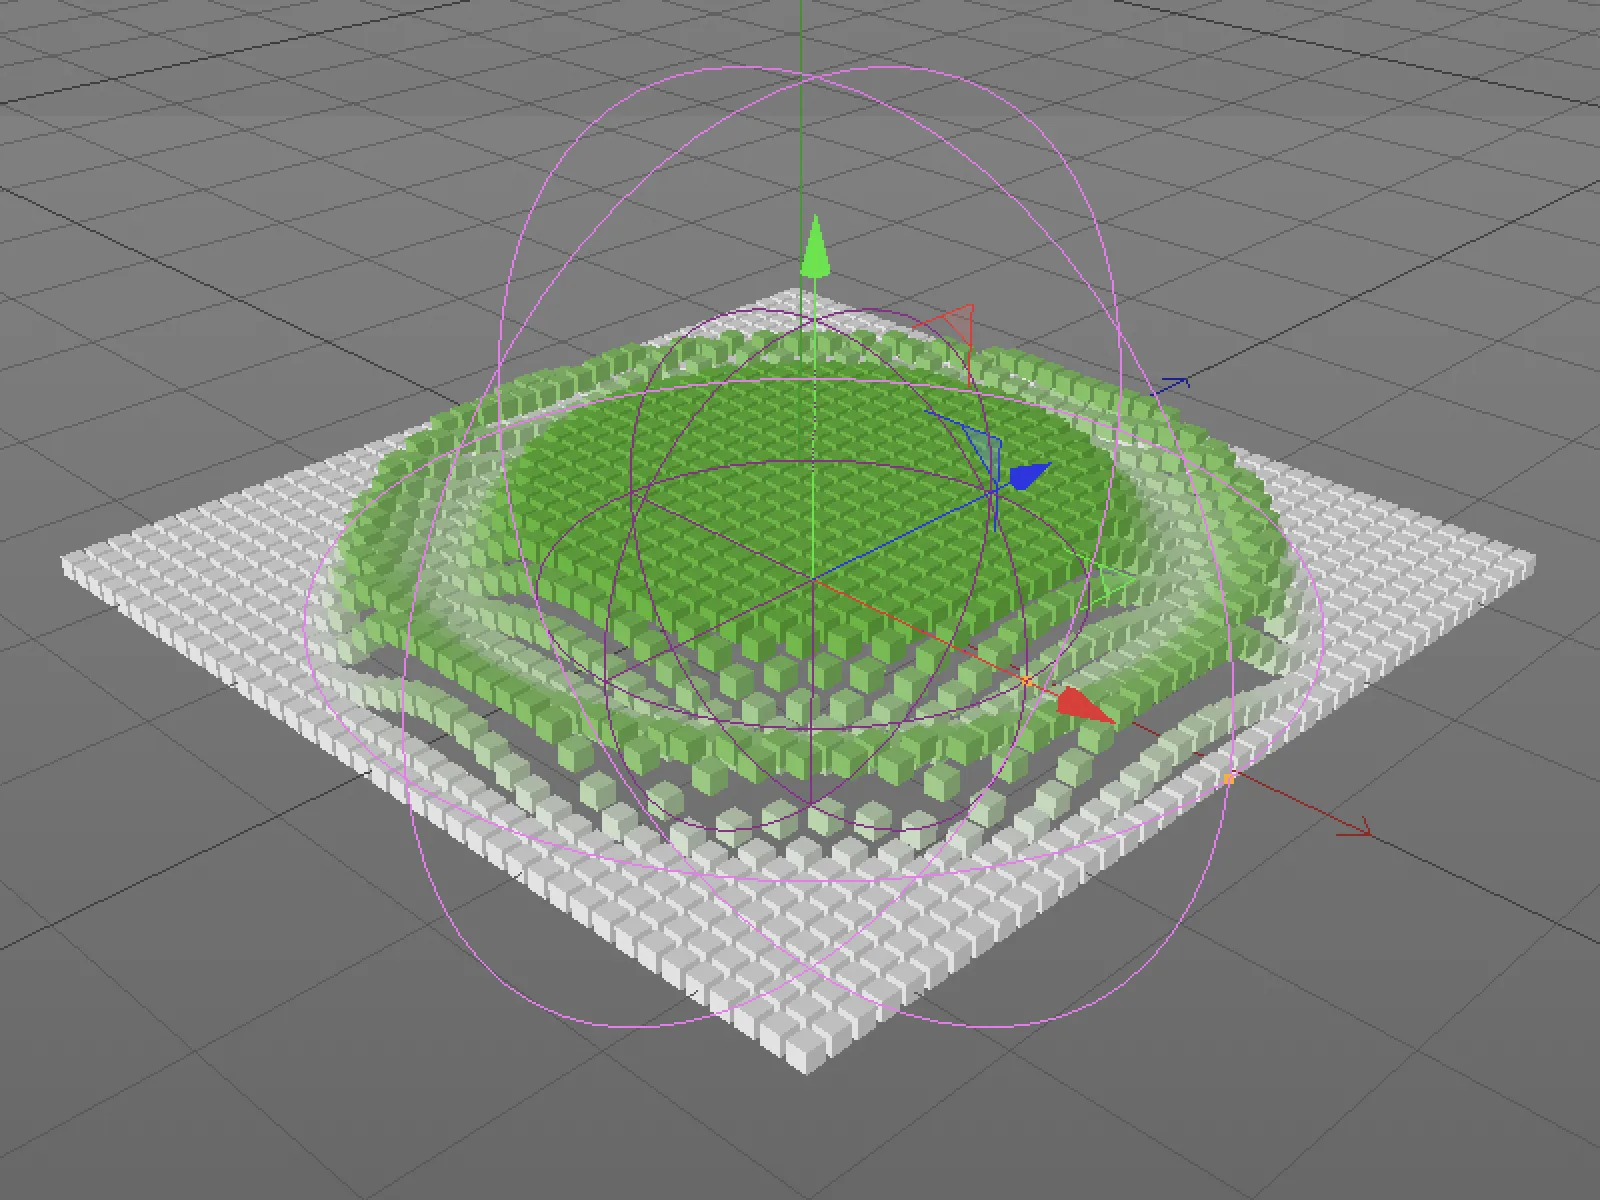
Combining fields
The options shown so far relate to a single field. However, we can of course add further fields to the field list. We then have a selection of blend modes and an opacity sliderin the blend columnmenu to combine the two fields.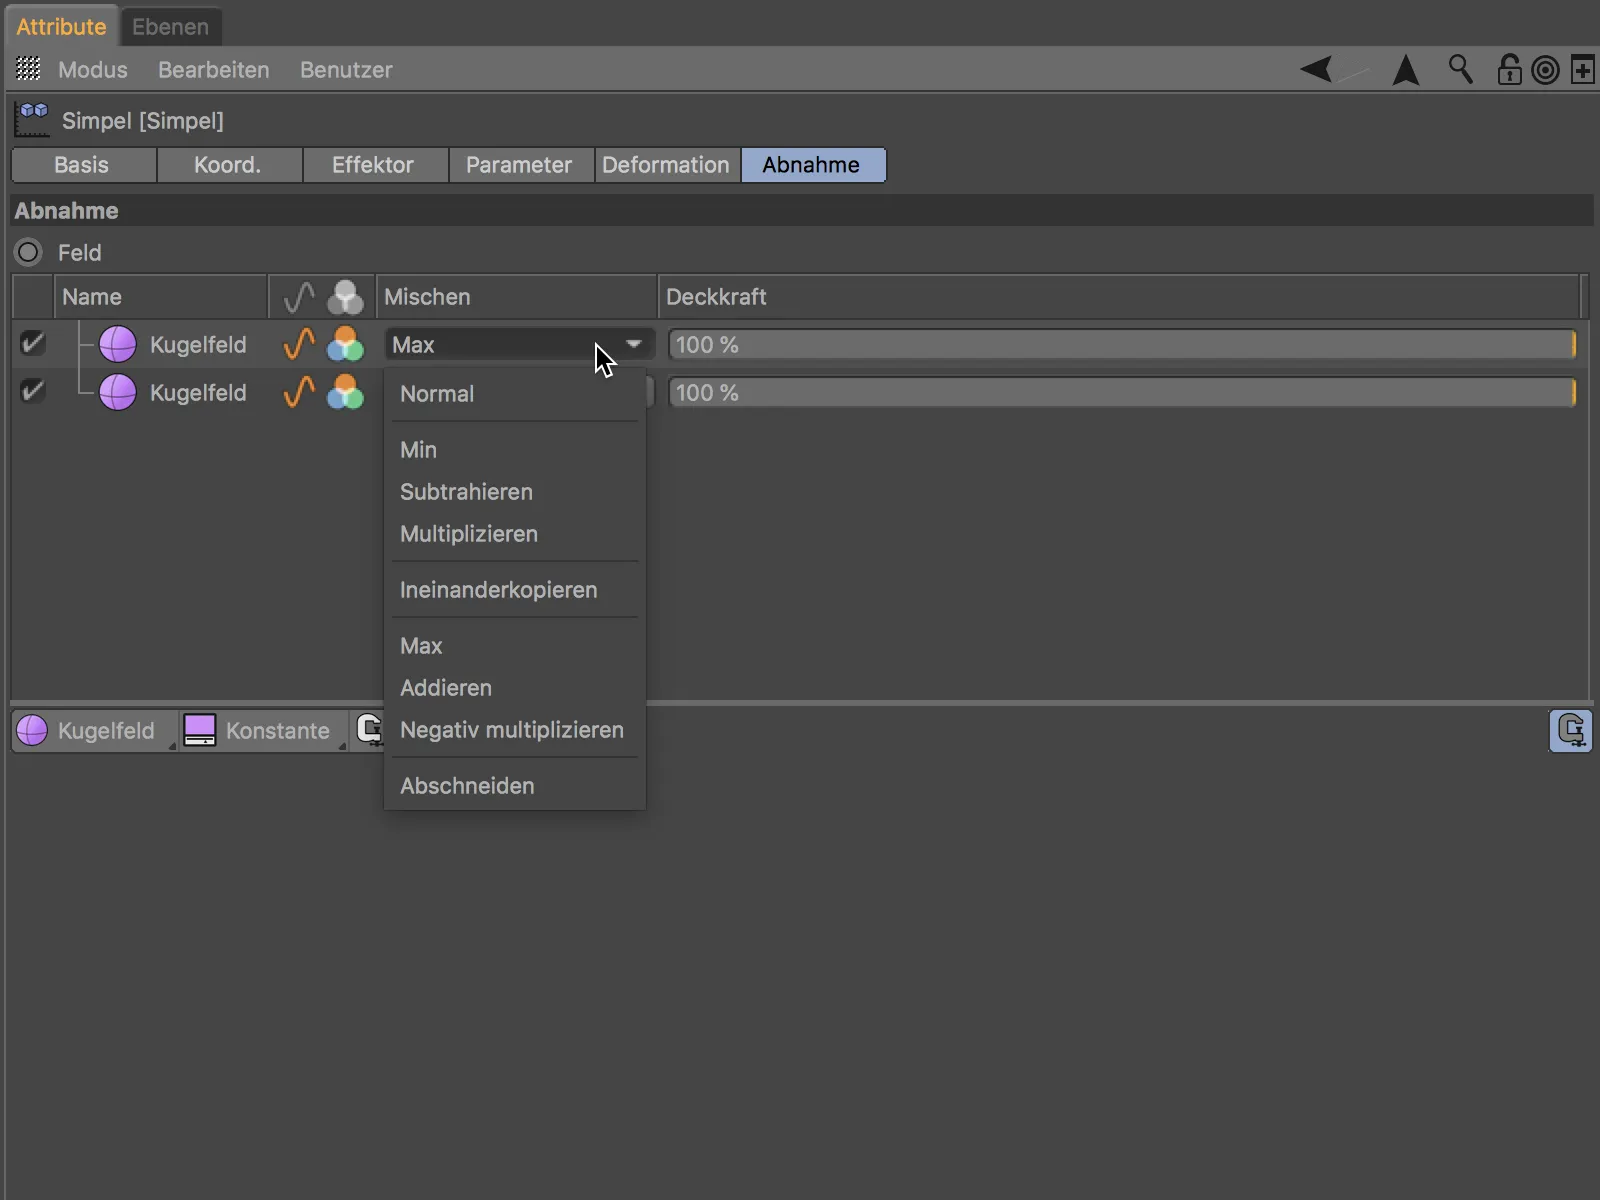
The fields are then offset according to these settings wherever the field objects overlap.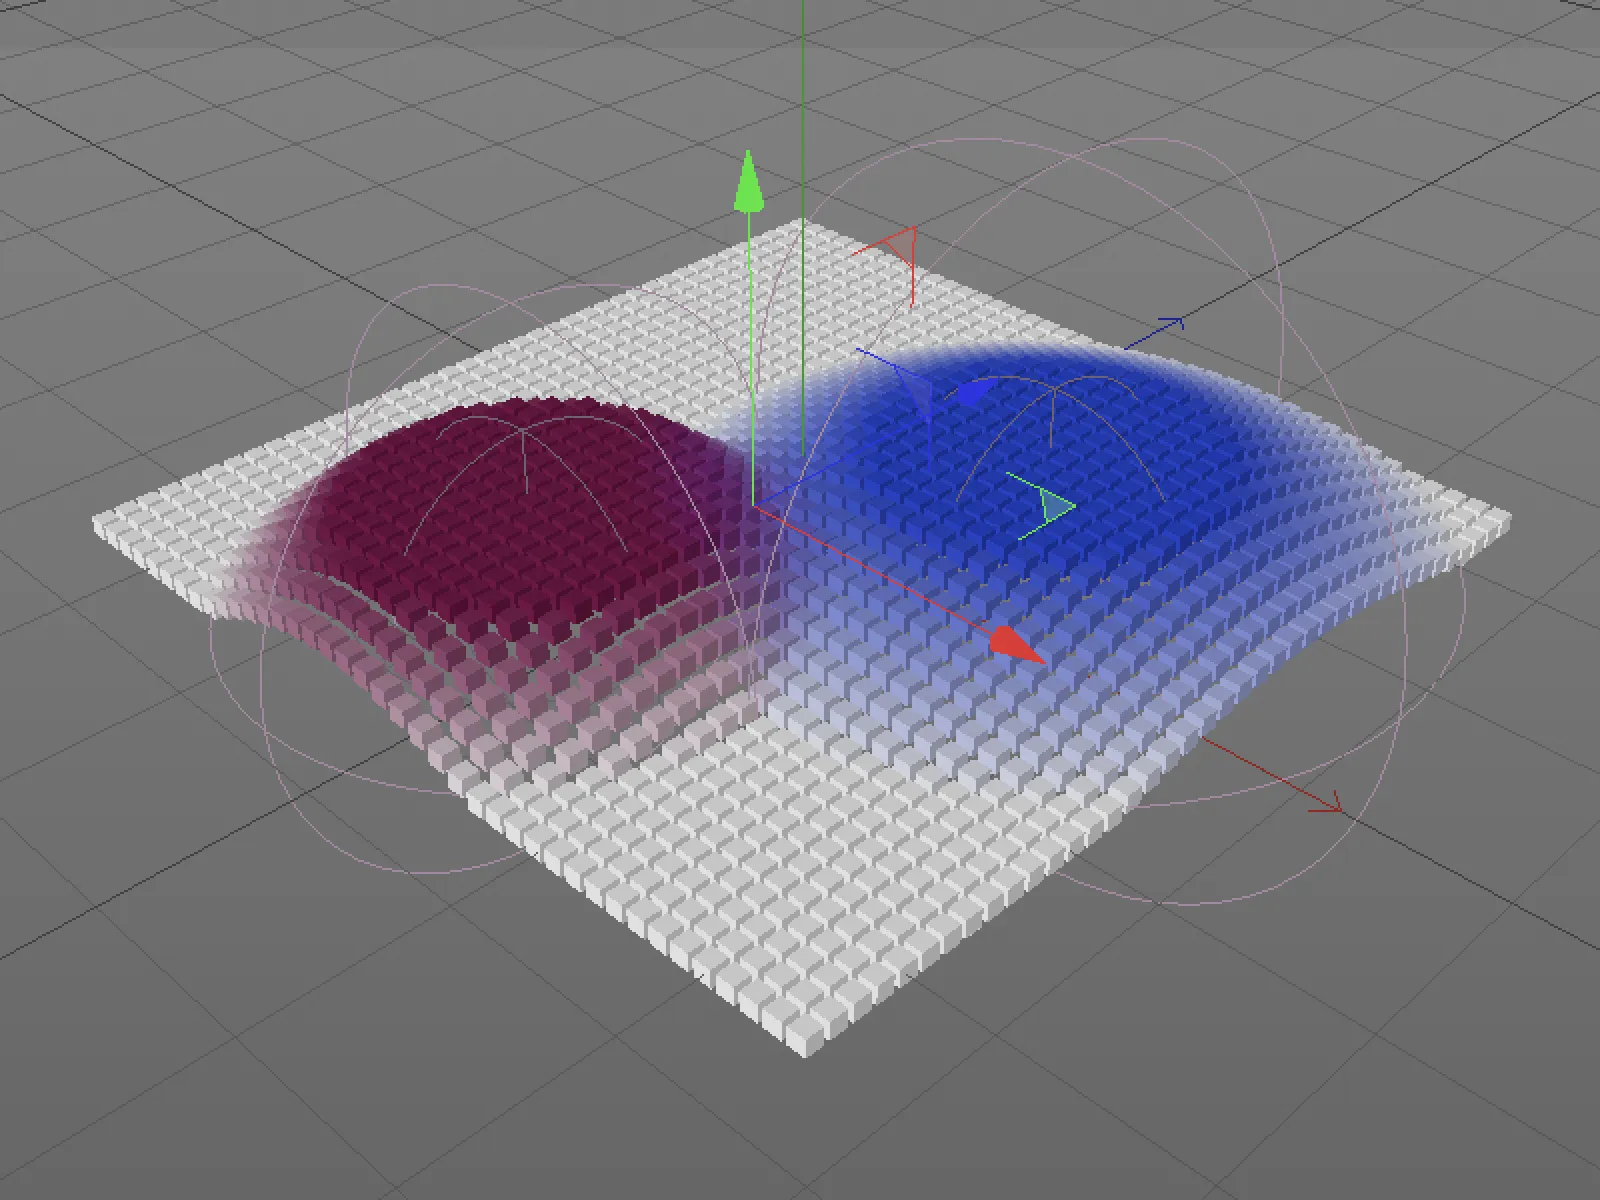
After the two spherical fields have offset each other to the maximum, a third field object in the form of a cube should now reduce the effect. The cube field is quickly created using the field objects button, and subtract is used as the mixing mode. As the cube field is positioned above both sphere fields, it affects both sphere fields.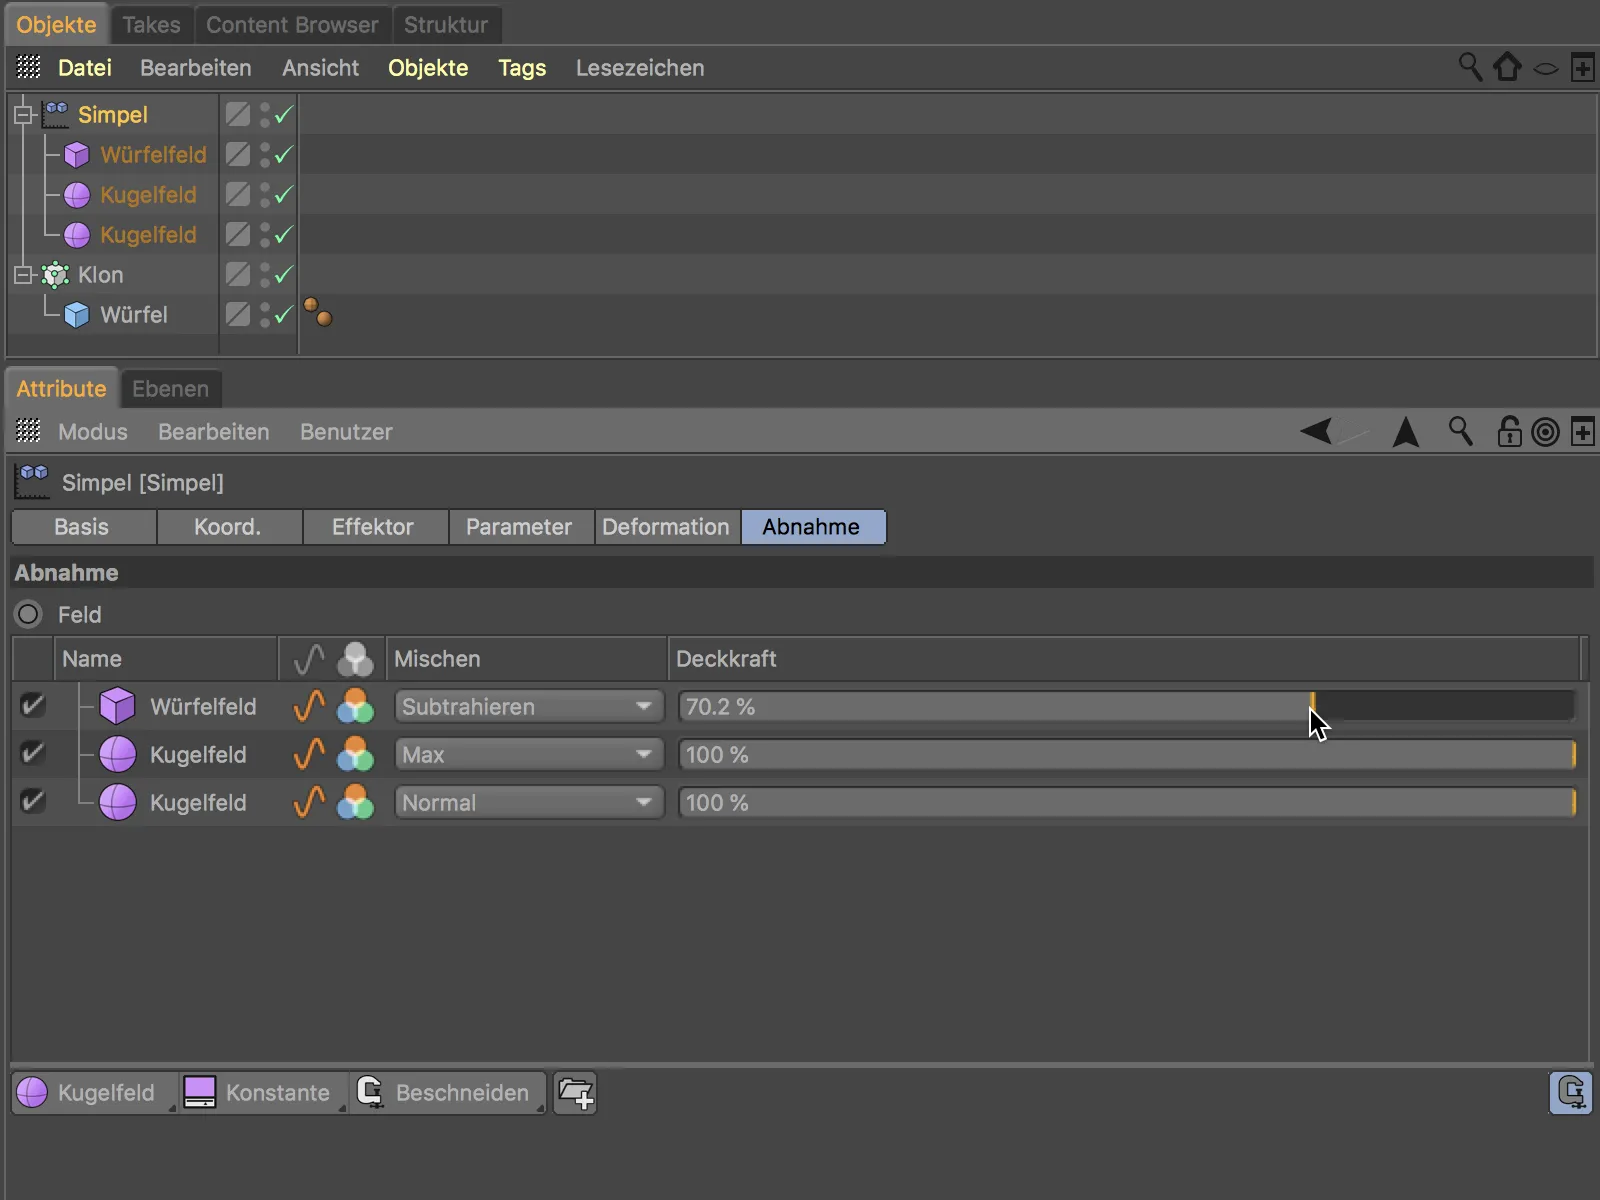
The position, alignment and size of the sphere field can of course be conveniently controlled via the editor view.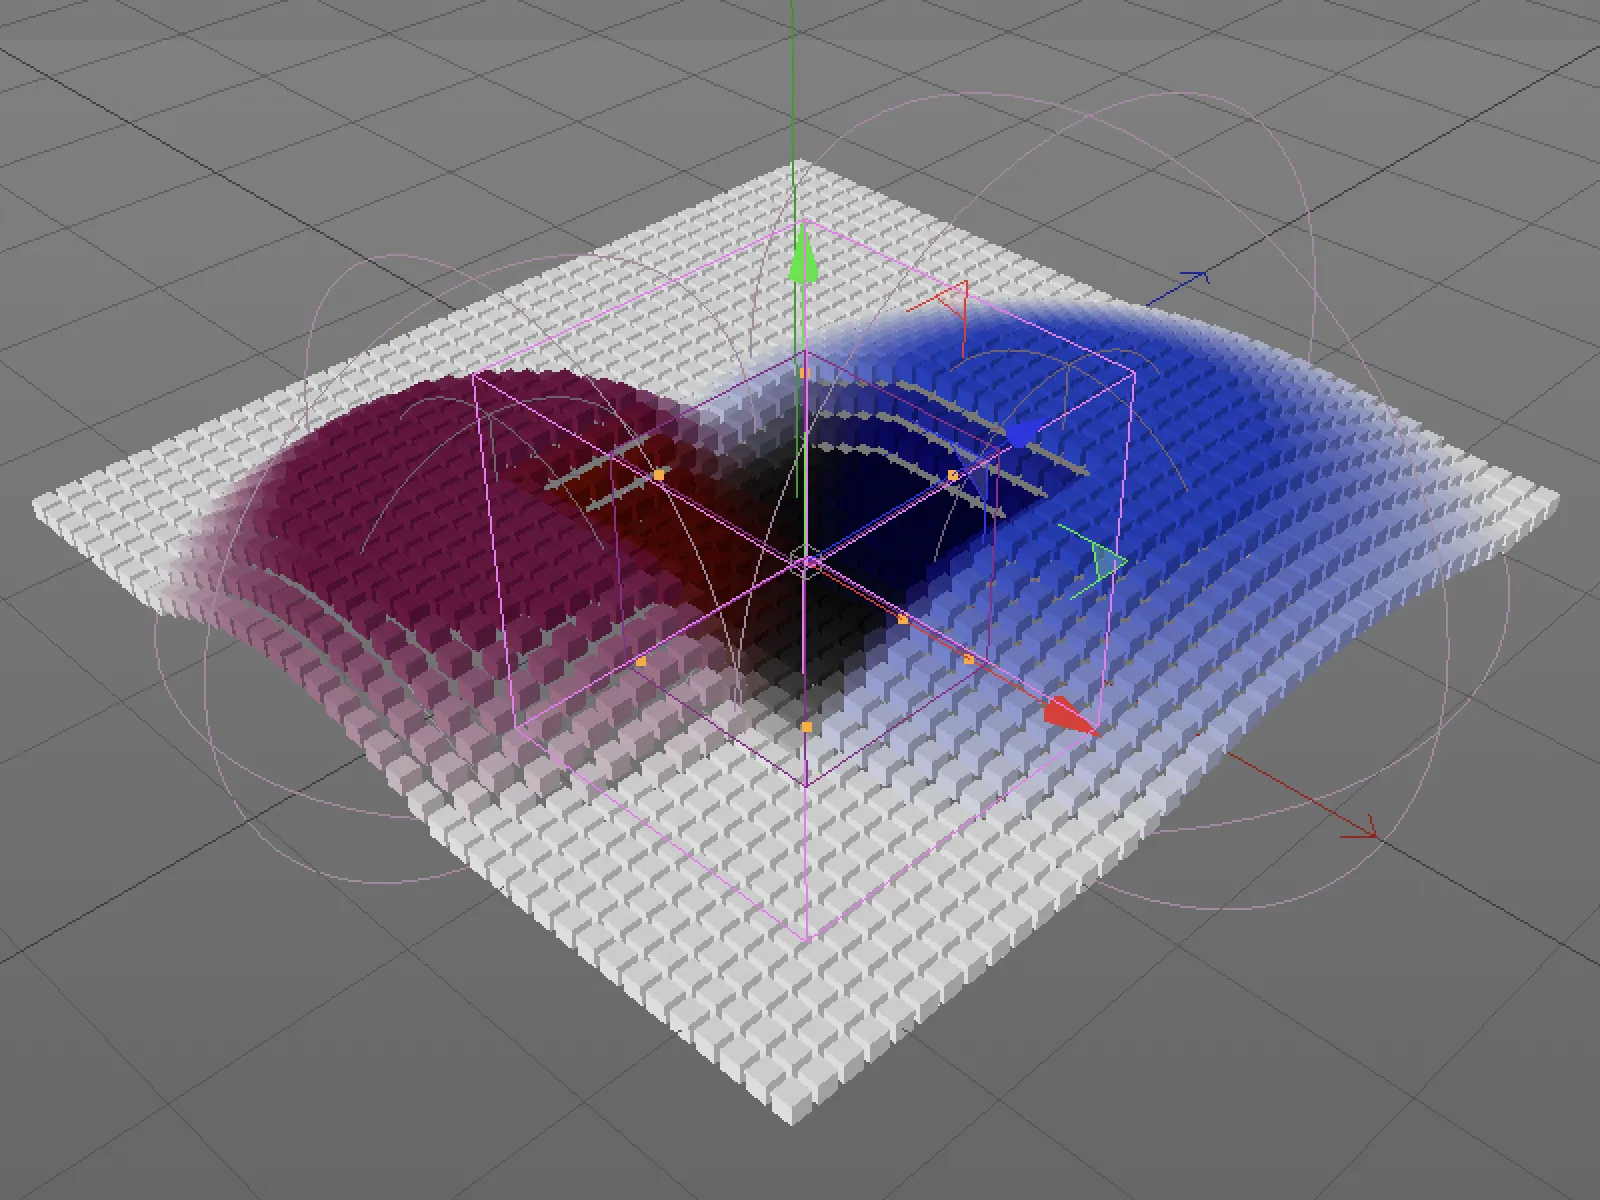
Field levels
A field level is now used in a second example. The information of field planes cannot be called up directly in the Object Manager, for example the emitted particles of an emitter, the points of an object or a path or even the time.
Instead of the field objects, a particle emitter should now control the transformation of the Simpel effector. We can find the field levels in the middle of the three buttons on the decrease pageof the effector - the particle object field level is stored there. Alternatively, we can simply drag and drop an existing particle emitter from the Object Managerinto the field list.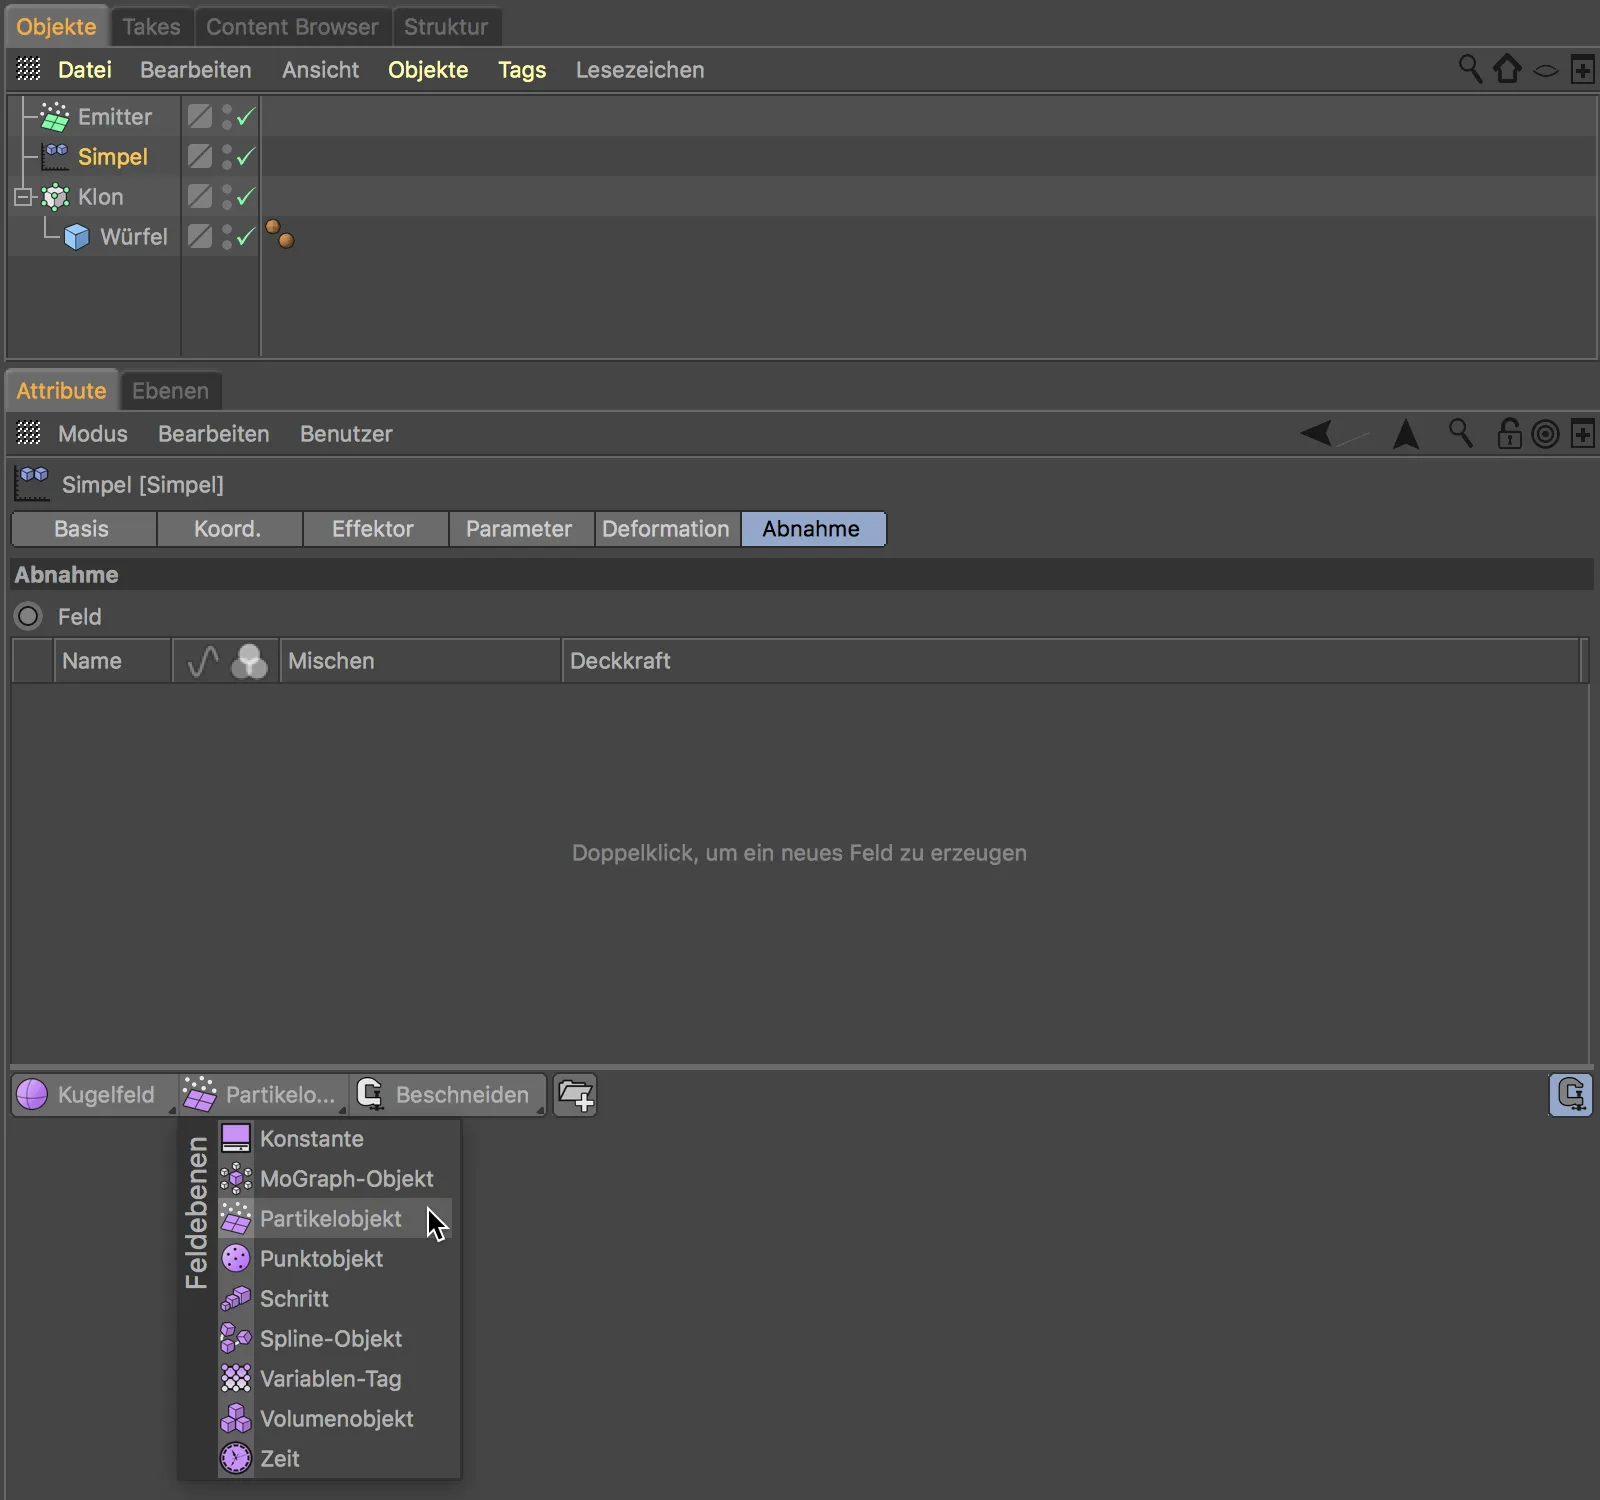
For the Simpel effector, the emitted particles are sufficient as transformation information - no real objects are to be emitted in this example. So that the effect can be clearly seen, I have adjusted the size of the emitter a little better to the clone object and reduced the speed of the particles.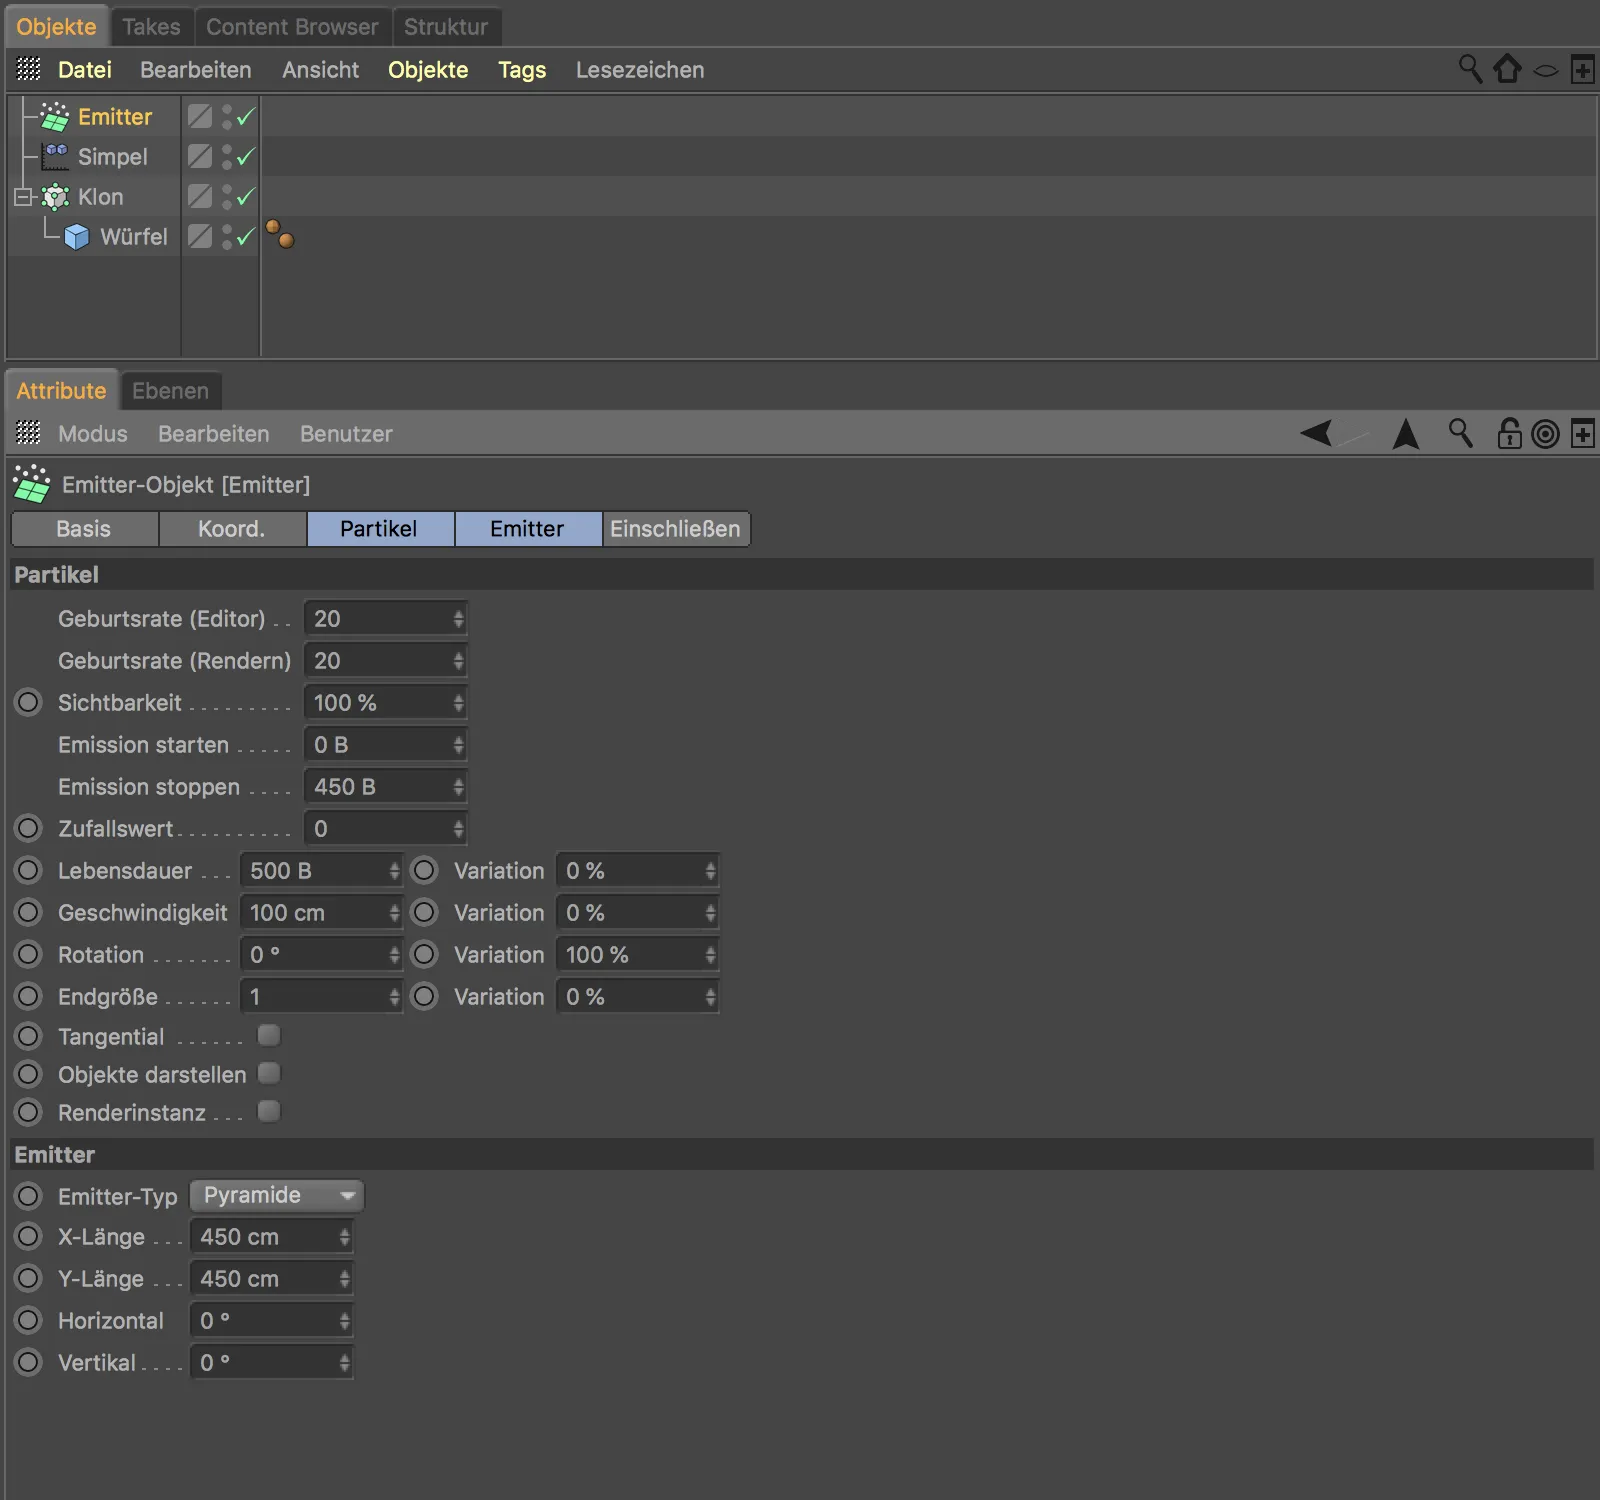
In the settings dialog of the particle field layer, we will adjust a few more parameters to control the influence of the particles. The effective radius of the particles is located on the layer page; it should be at least 50 cm here. On the remappingside, I have slightly slanted the decrease at the edge by an inner offset of 30 % and on the color remapping side, I have chosen a clearly recognizable blue for the coloring of the transformation effect.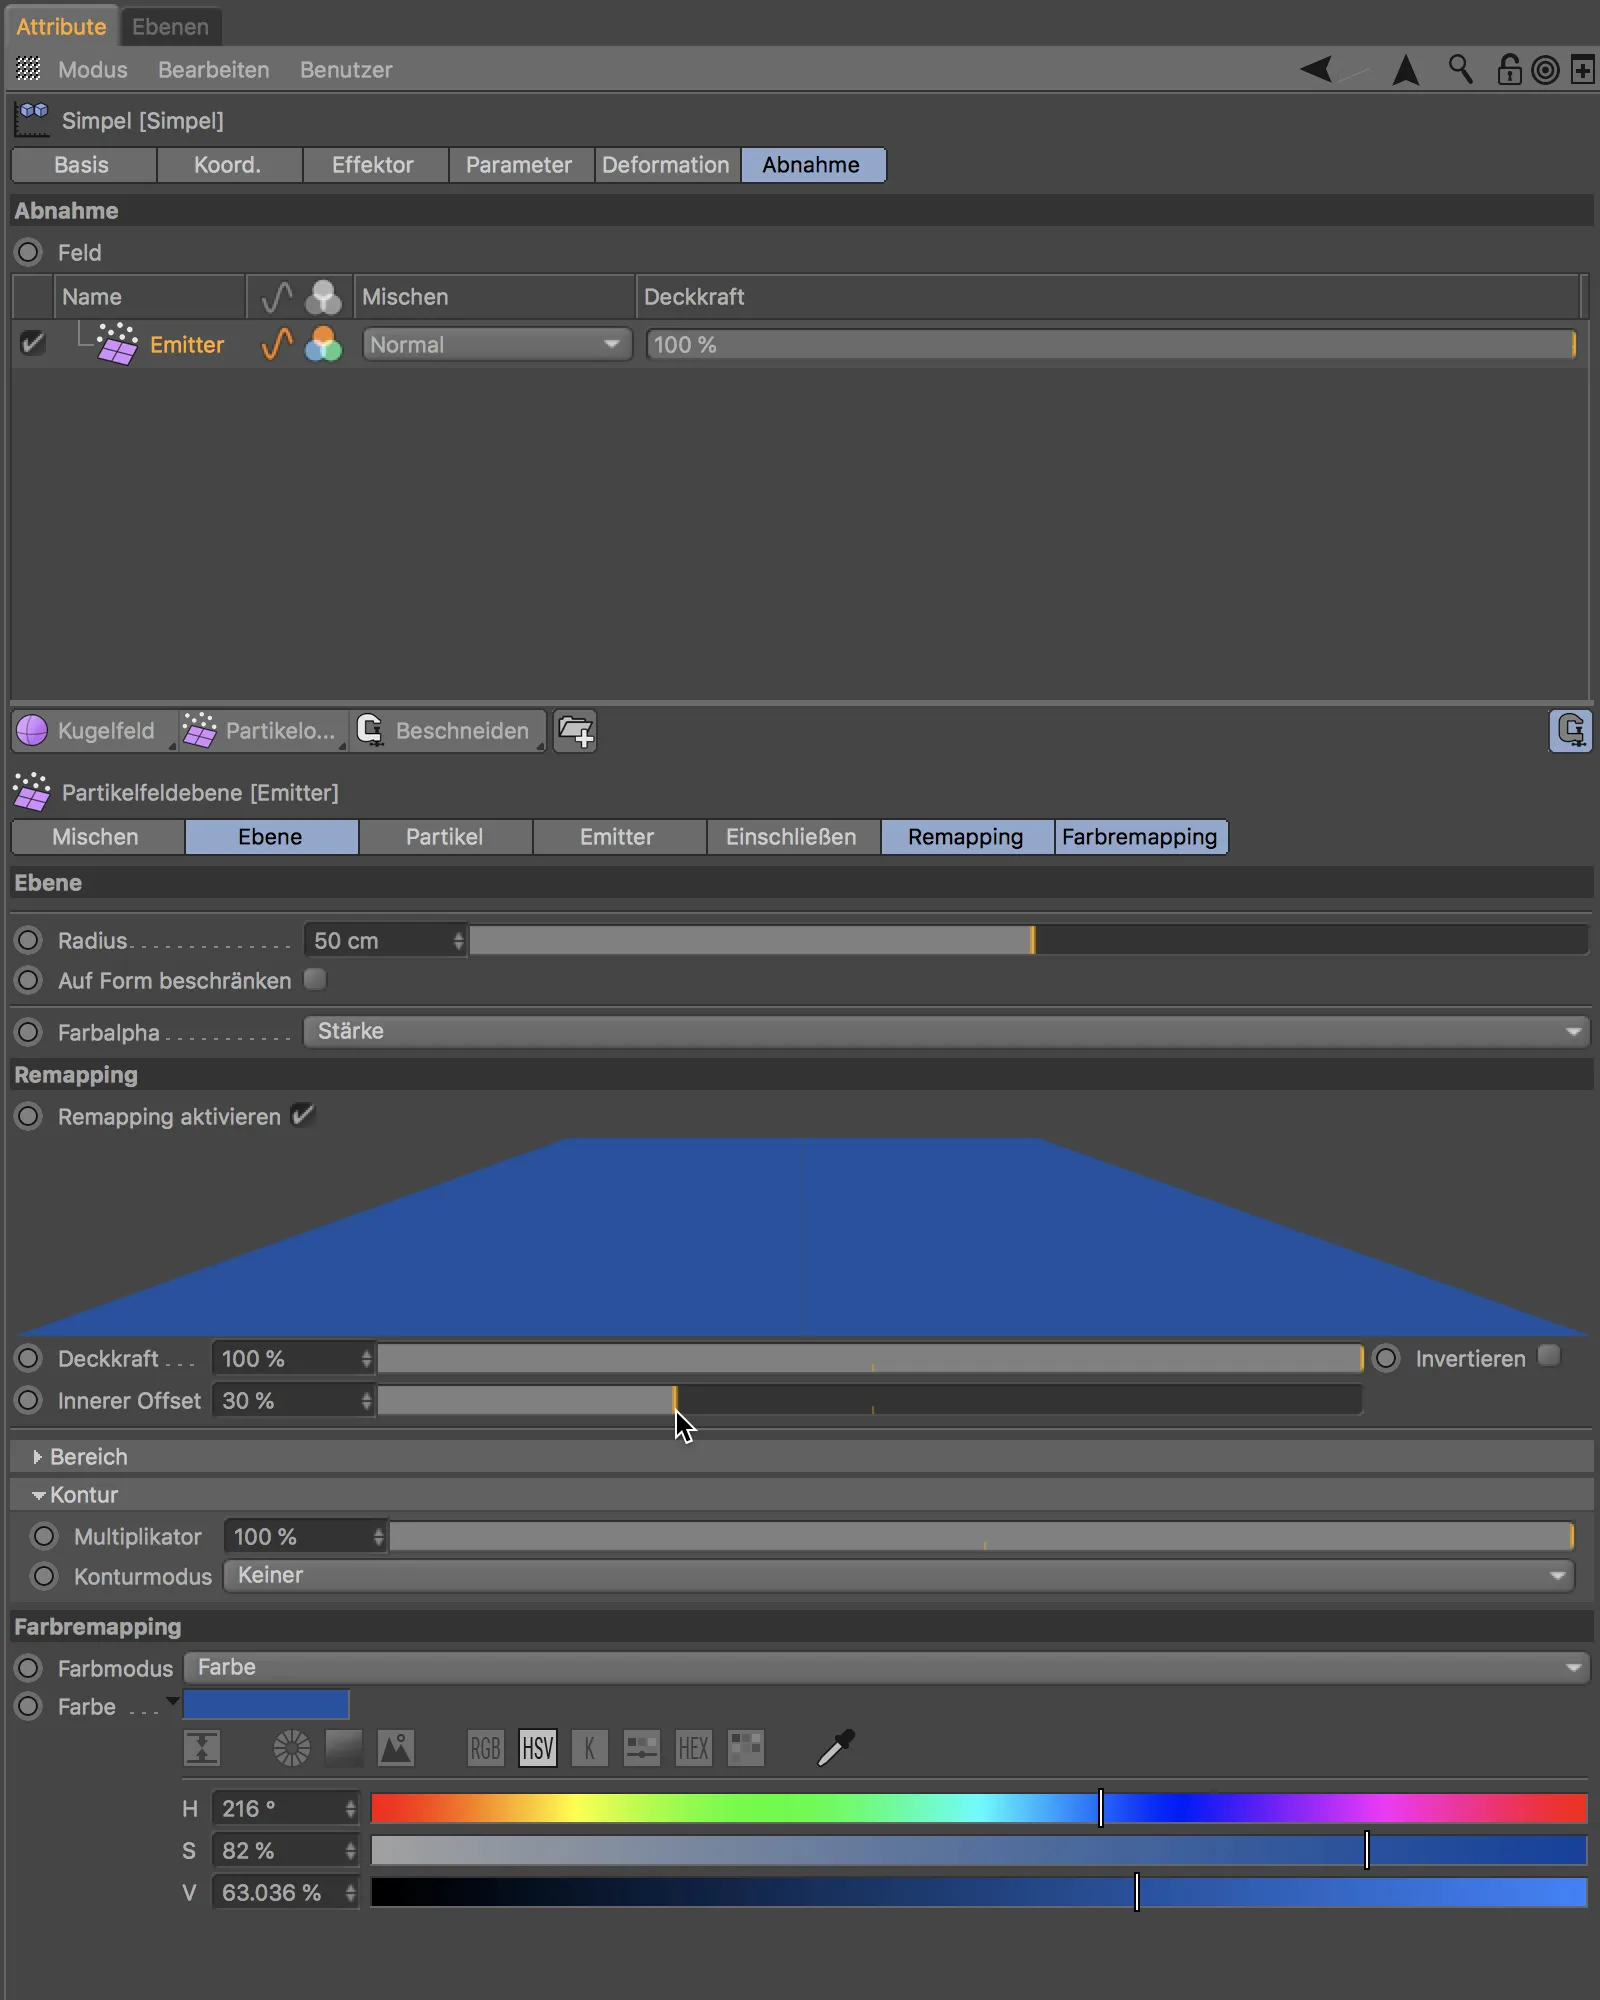
After starting the particle emitter by clicking on the play button, we can see how the impinging particles control the offset of the clones through the Simpel effector.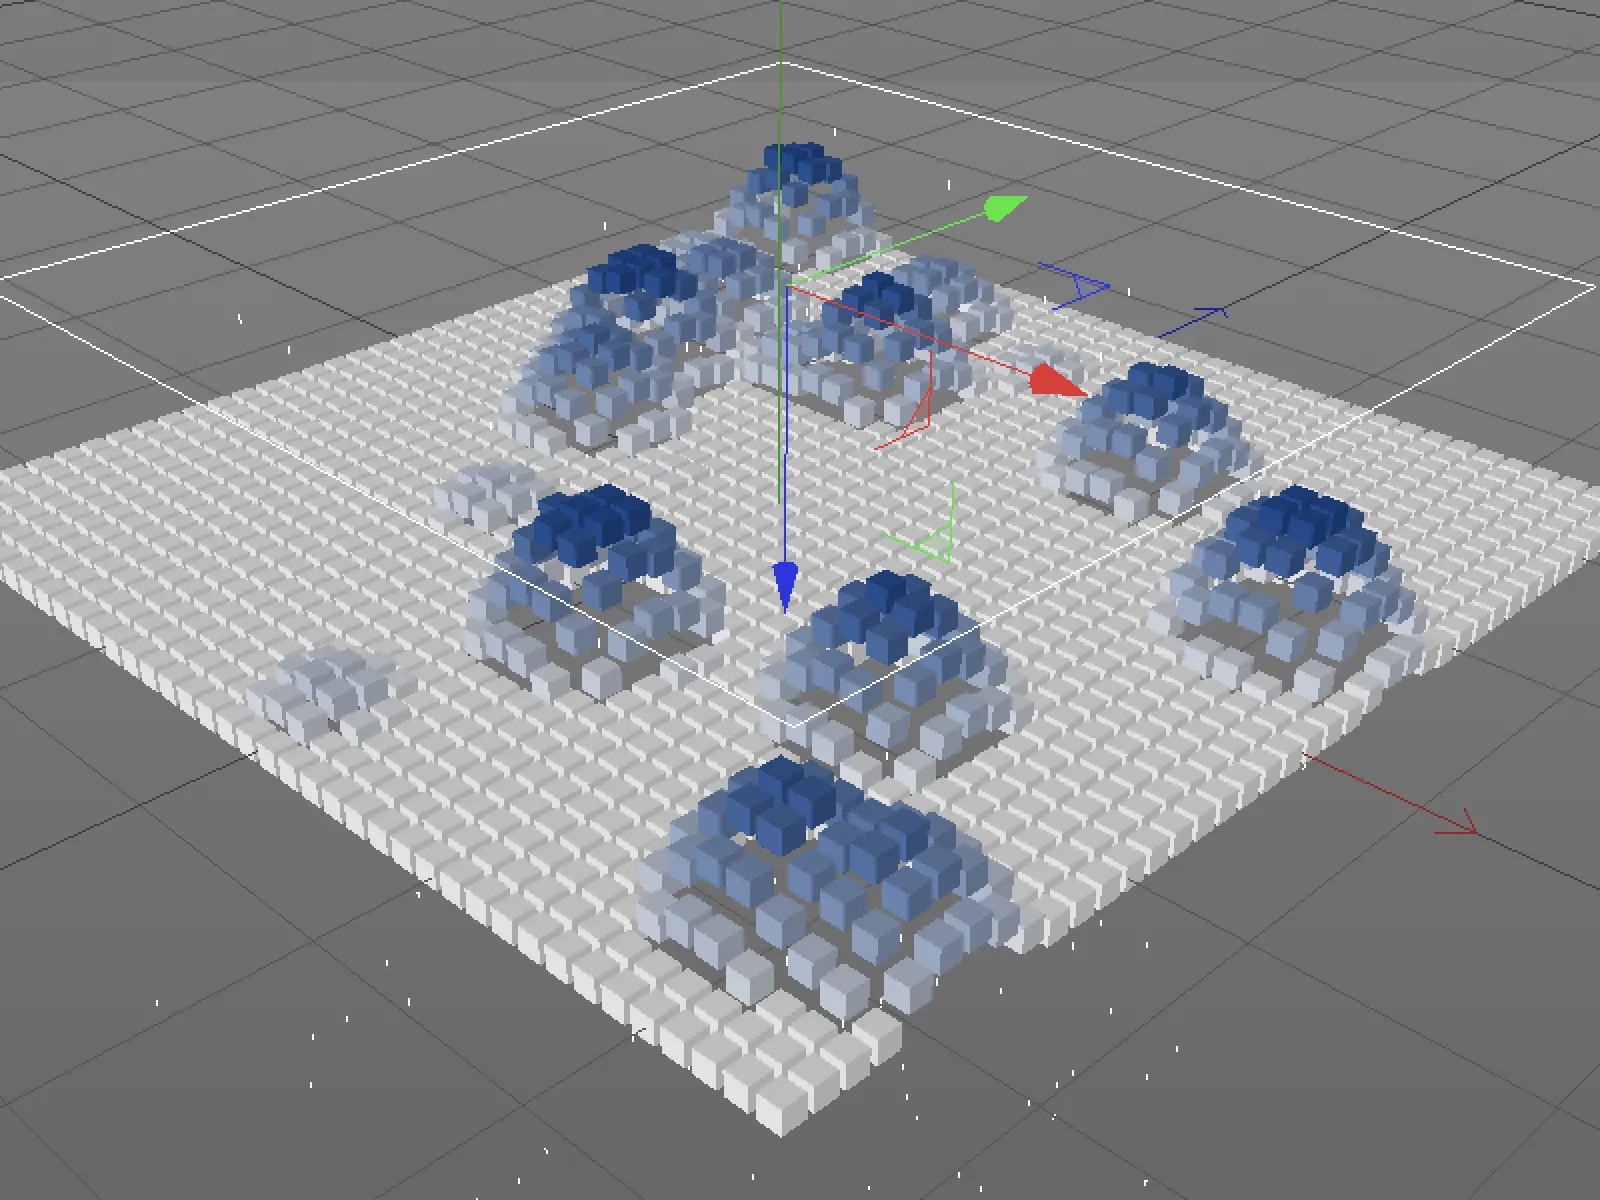
Modifier layers
Let's stick with this example to see what functions the modifier layers in the third button on the decrease pageoffer. As the name suggests, these layers are intended for modifying existing layers. In our case, we can use the delay modifier layer to add a slight delay to the transformation of the clones to soften them a little.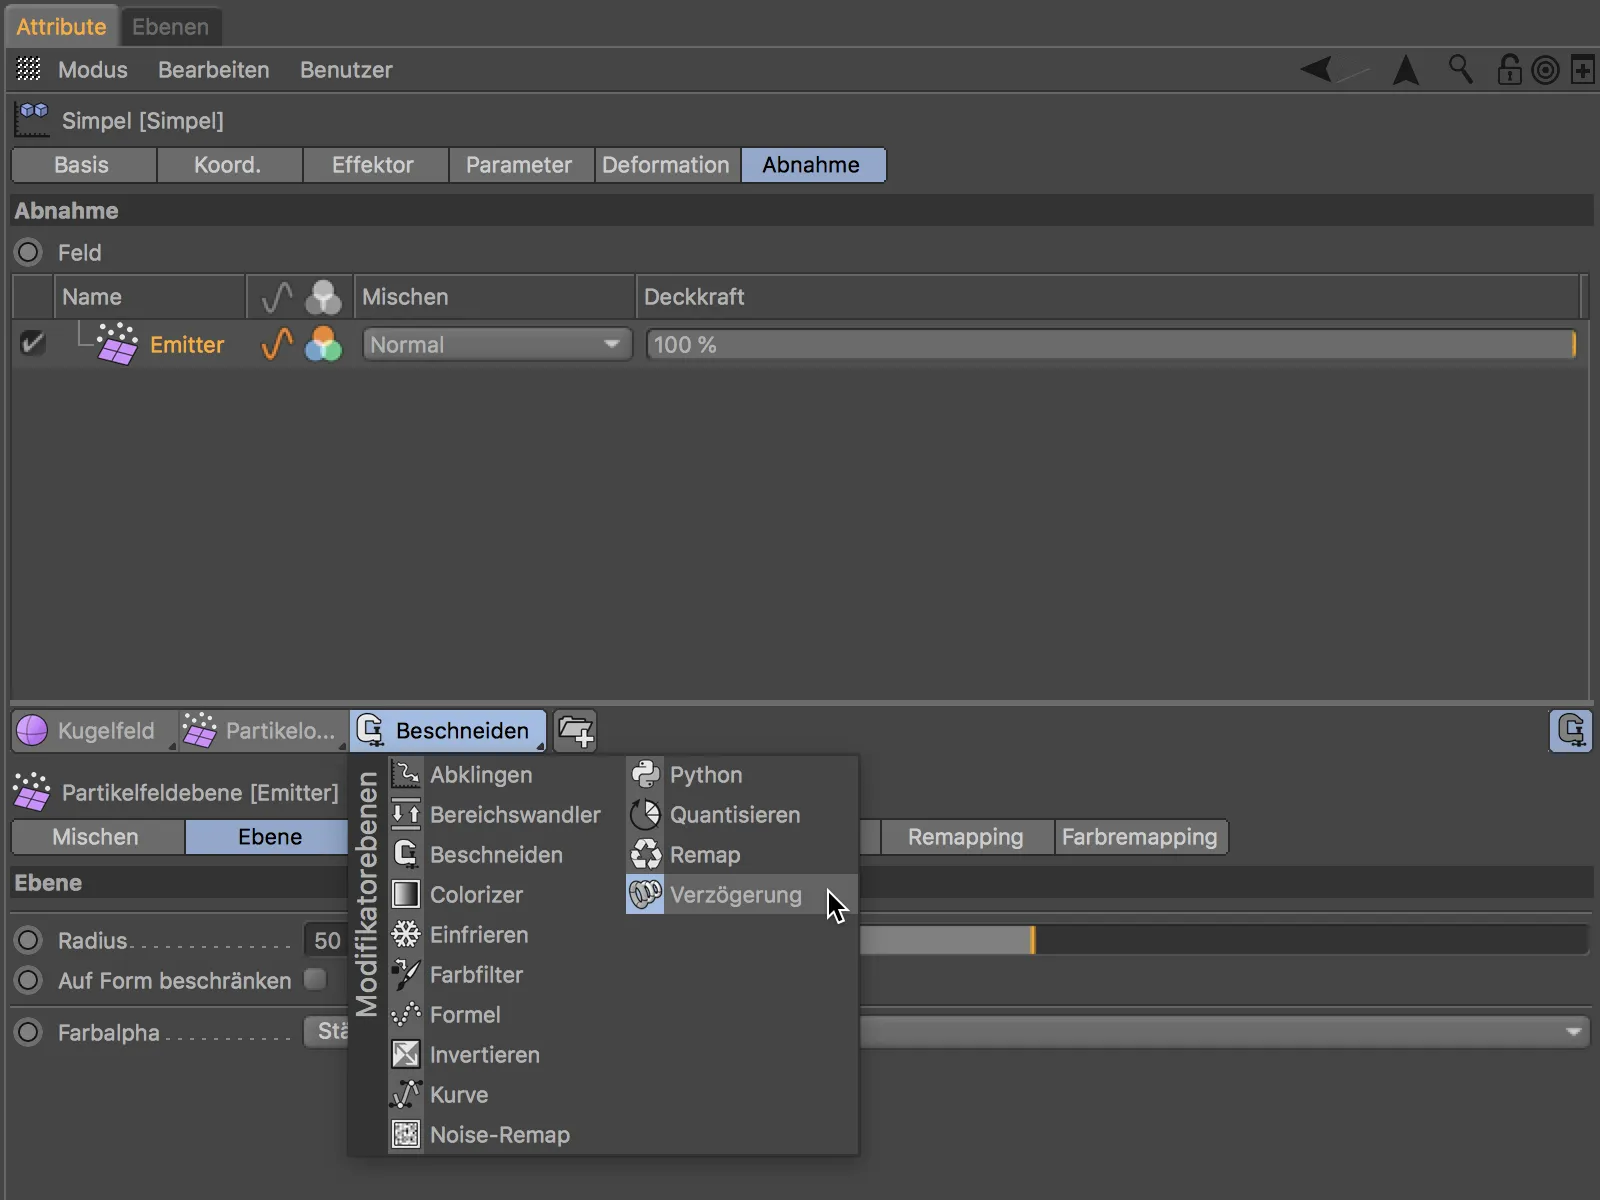
Once the modifier layer has been installed, it is placed in the top position and affects all the fields below it - in our case, the particle emitter field. The delay mod ifier can be calculated and combined like a field layer.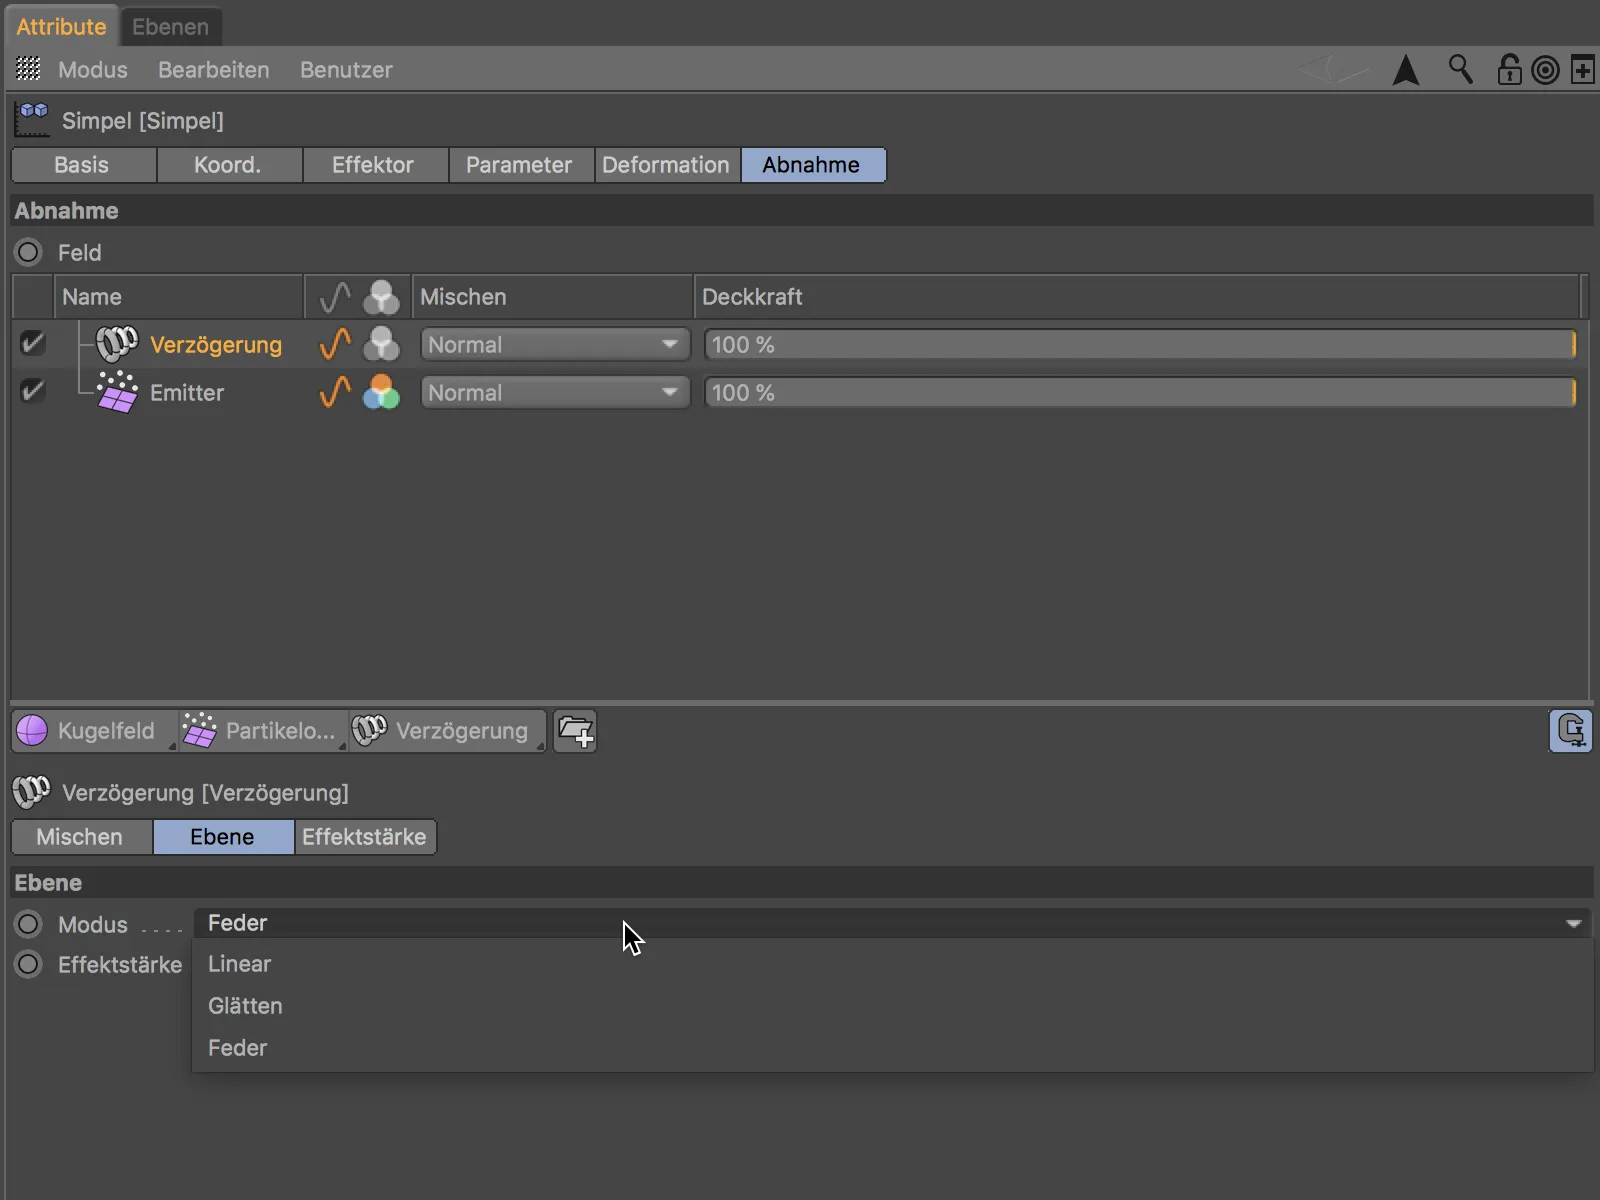
I opted for the Smooth mode for the delay modifier to make the movements of the clones appear as smooth as possible.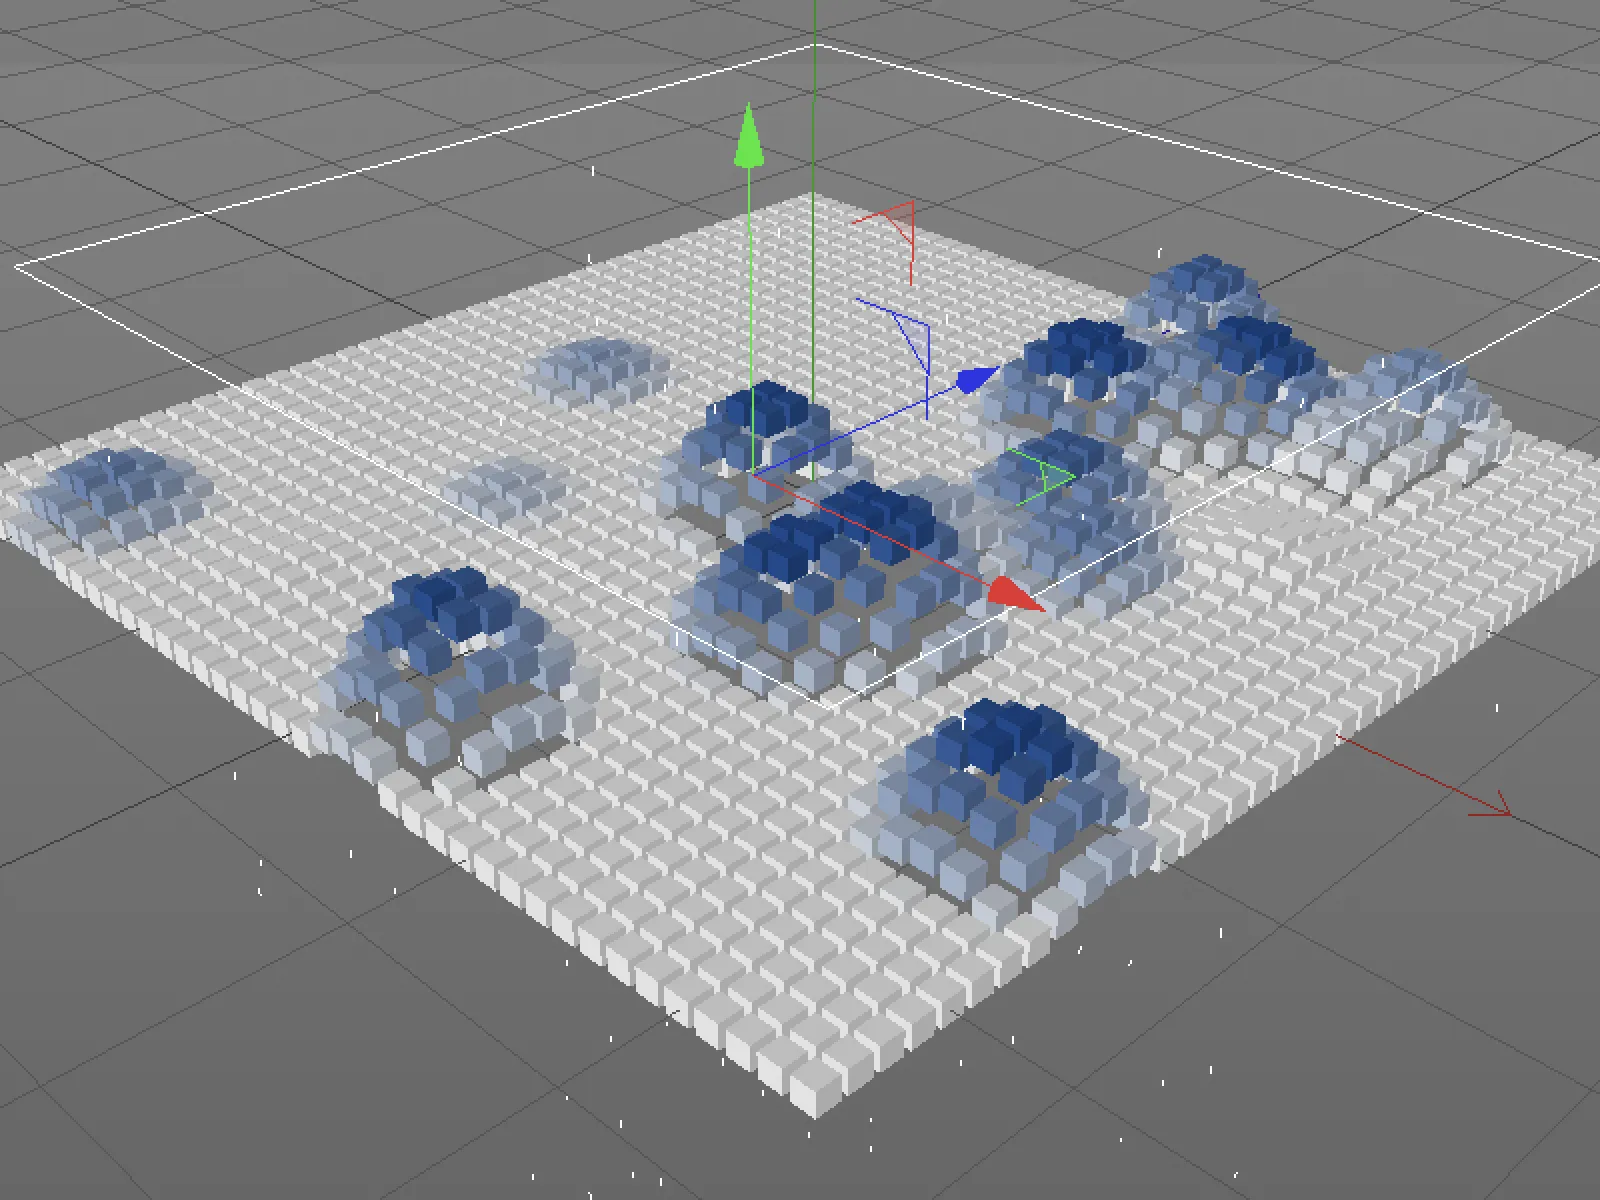
Influencing vertex maps with fields
For the third example in this tutorial, I have replaced the clone object with a very highly subdivided plane object and converted the latter into a polygon object.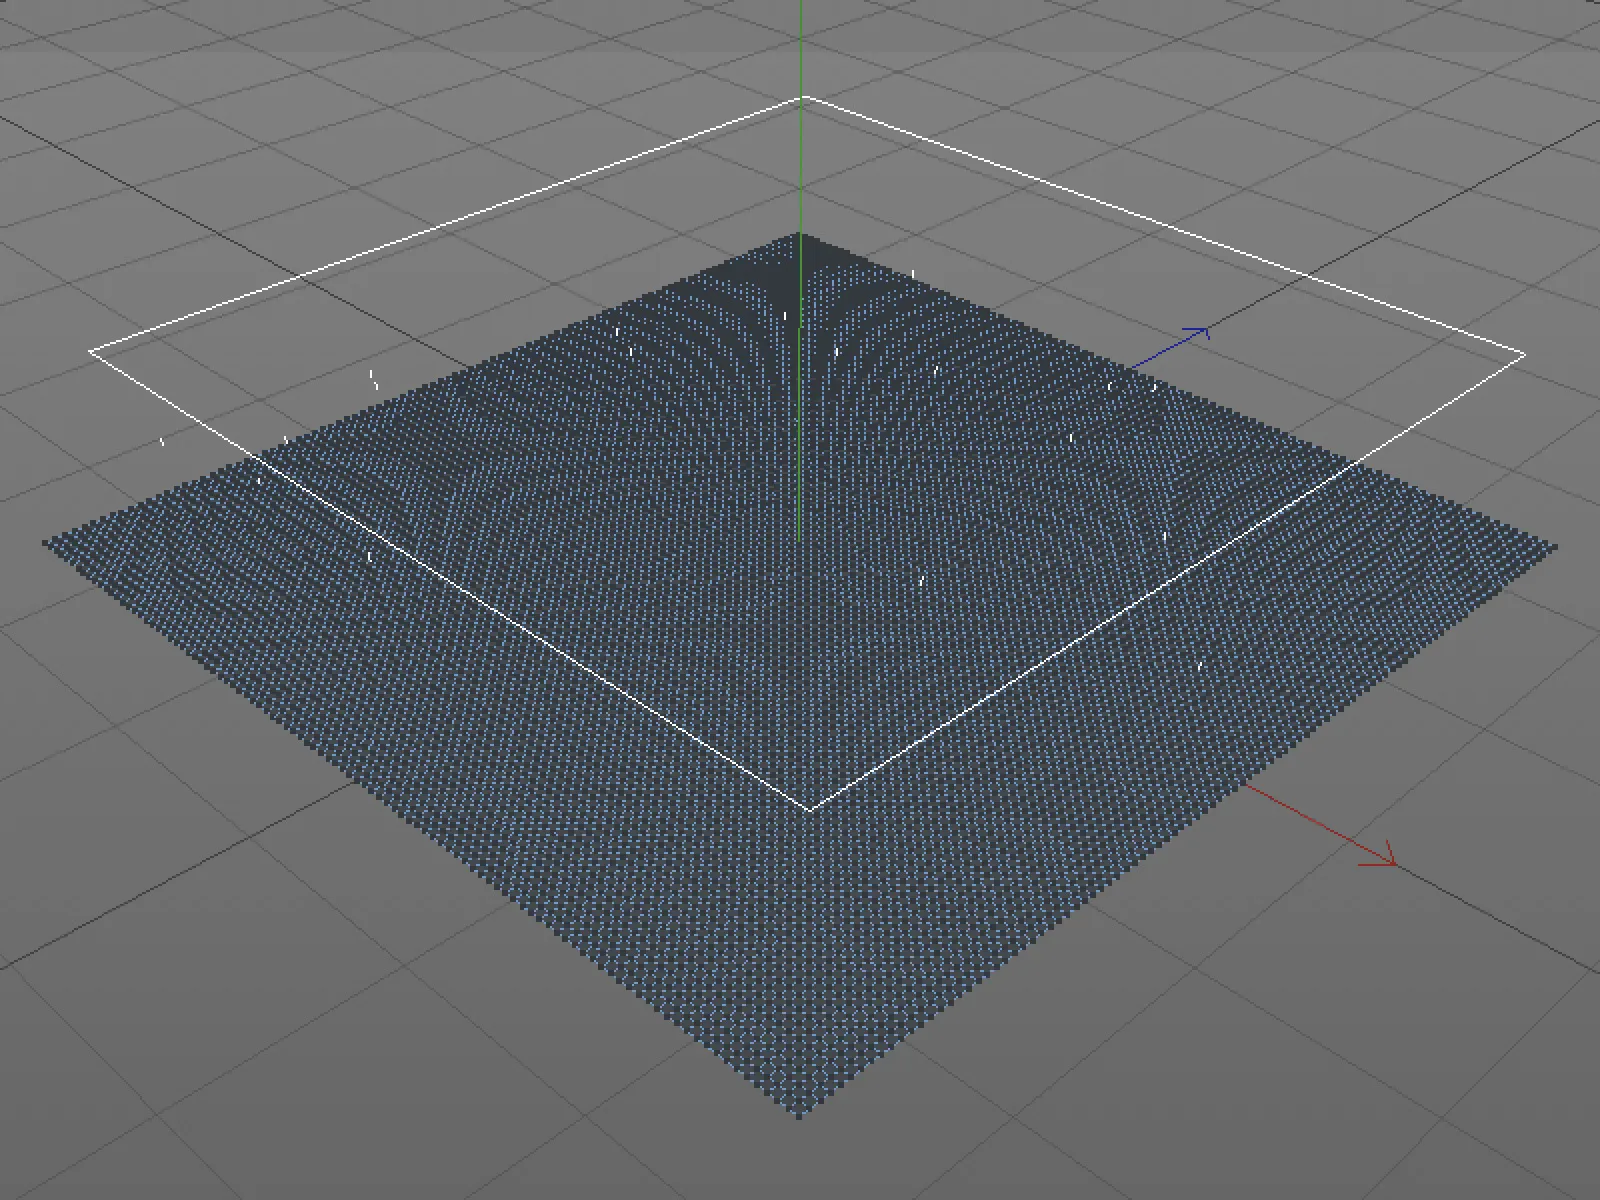
We now want the falling particles to influence the weighting values of a vertex map. To do this, the plane polygon object first needs an empty vertex map. Using the command Select>Set point weighting...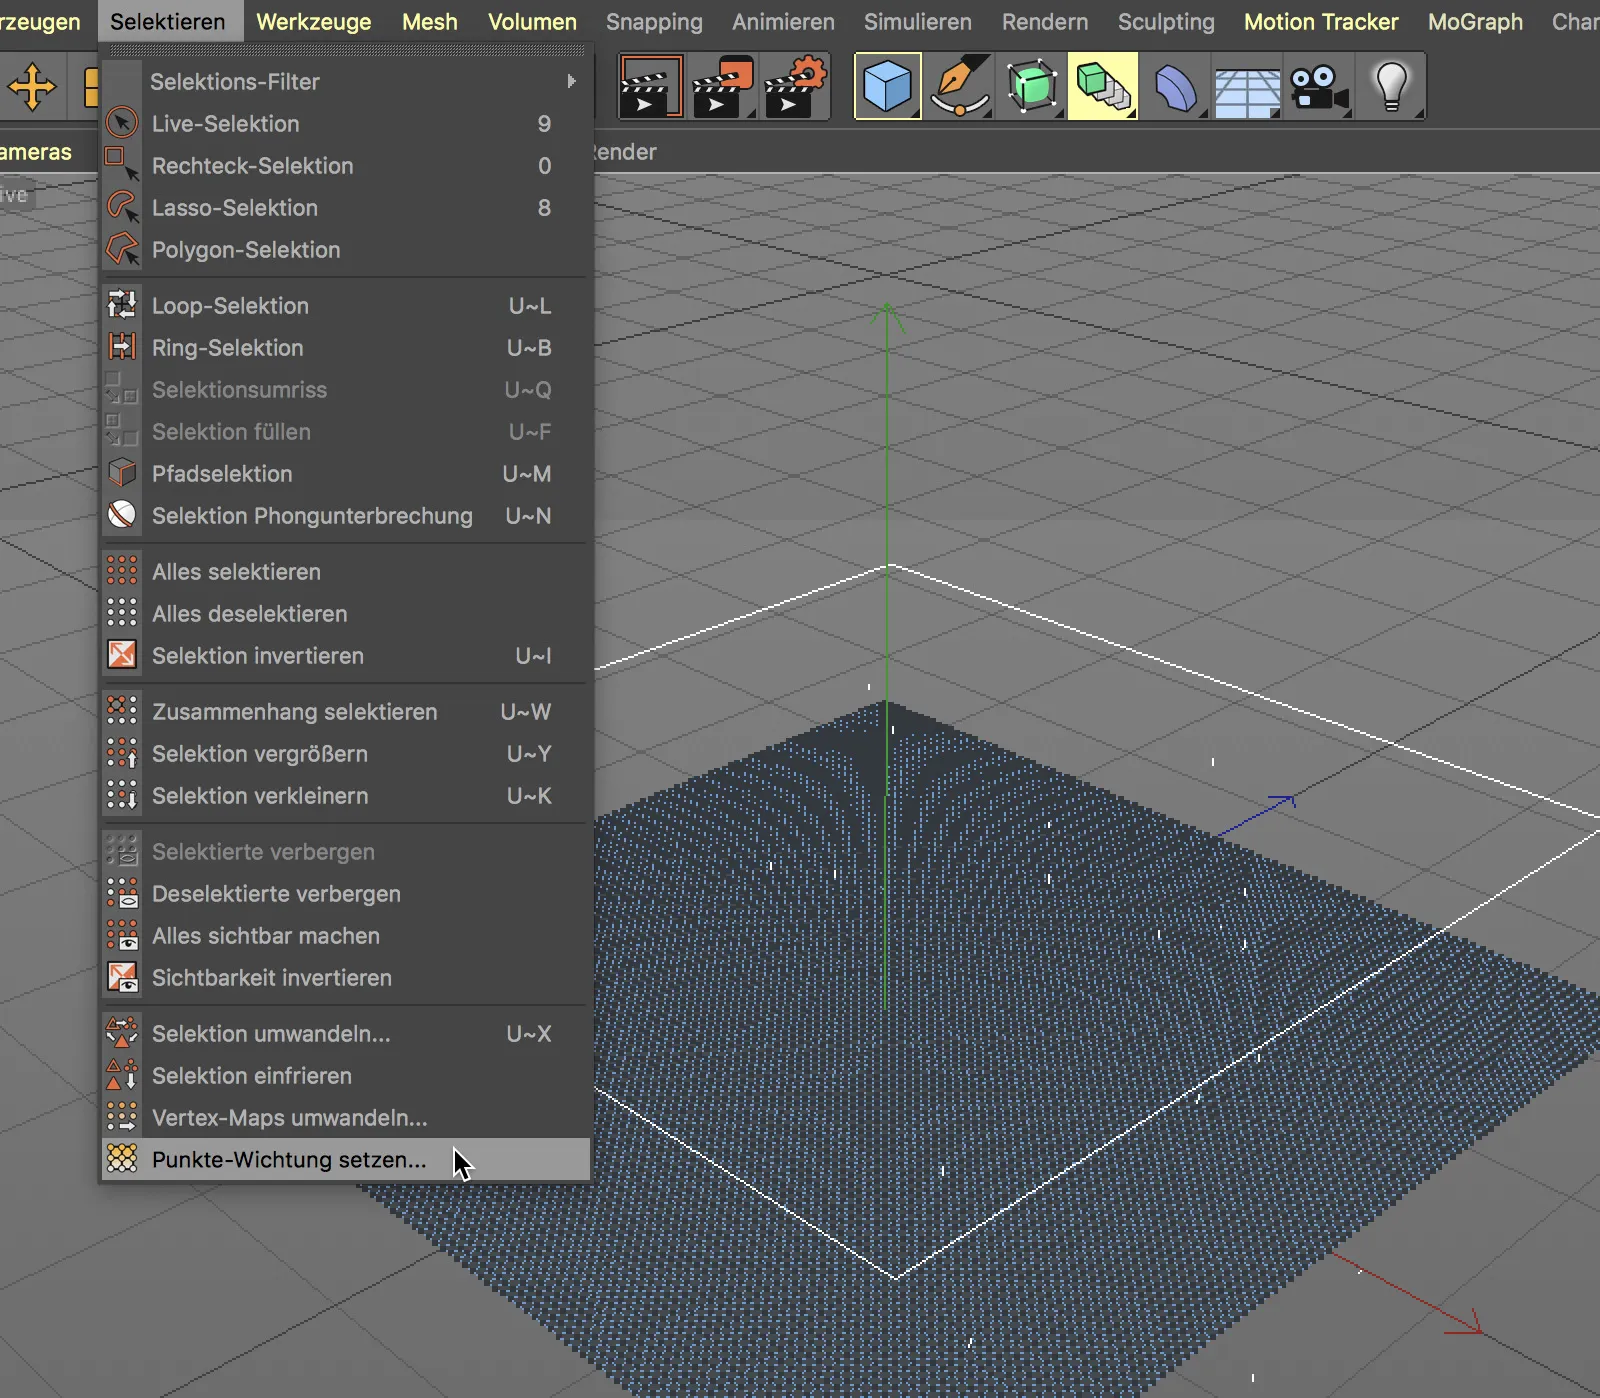
... we create this automatically and at the same time assign it a point weighting of 0%. The entire vertex map is then colored red.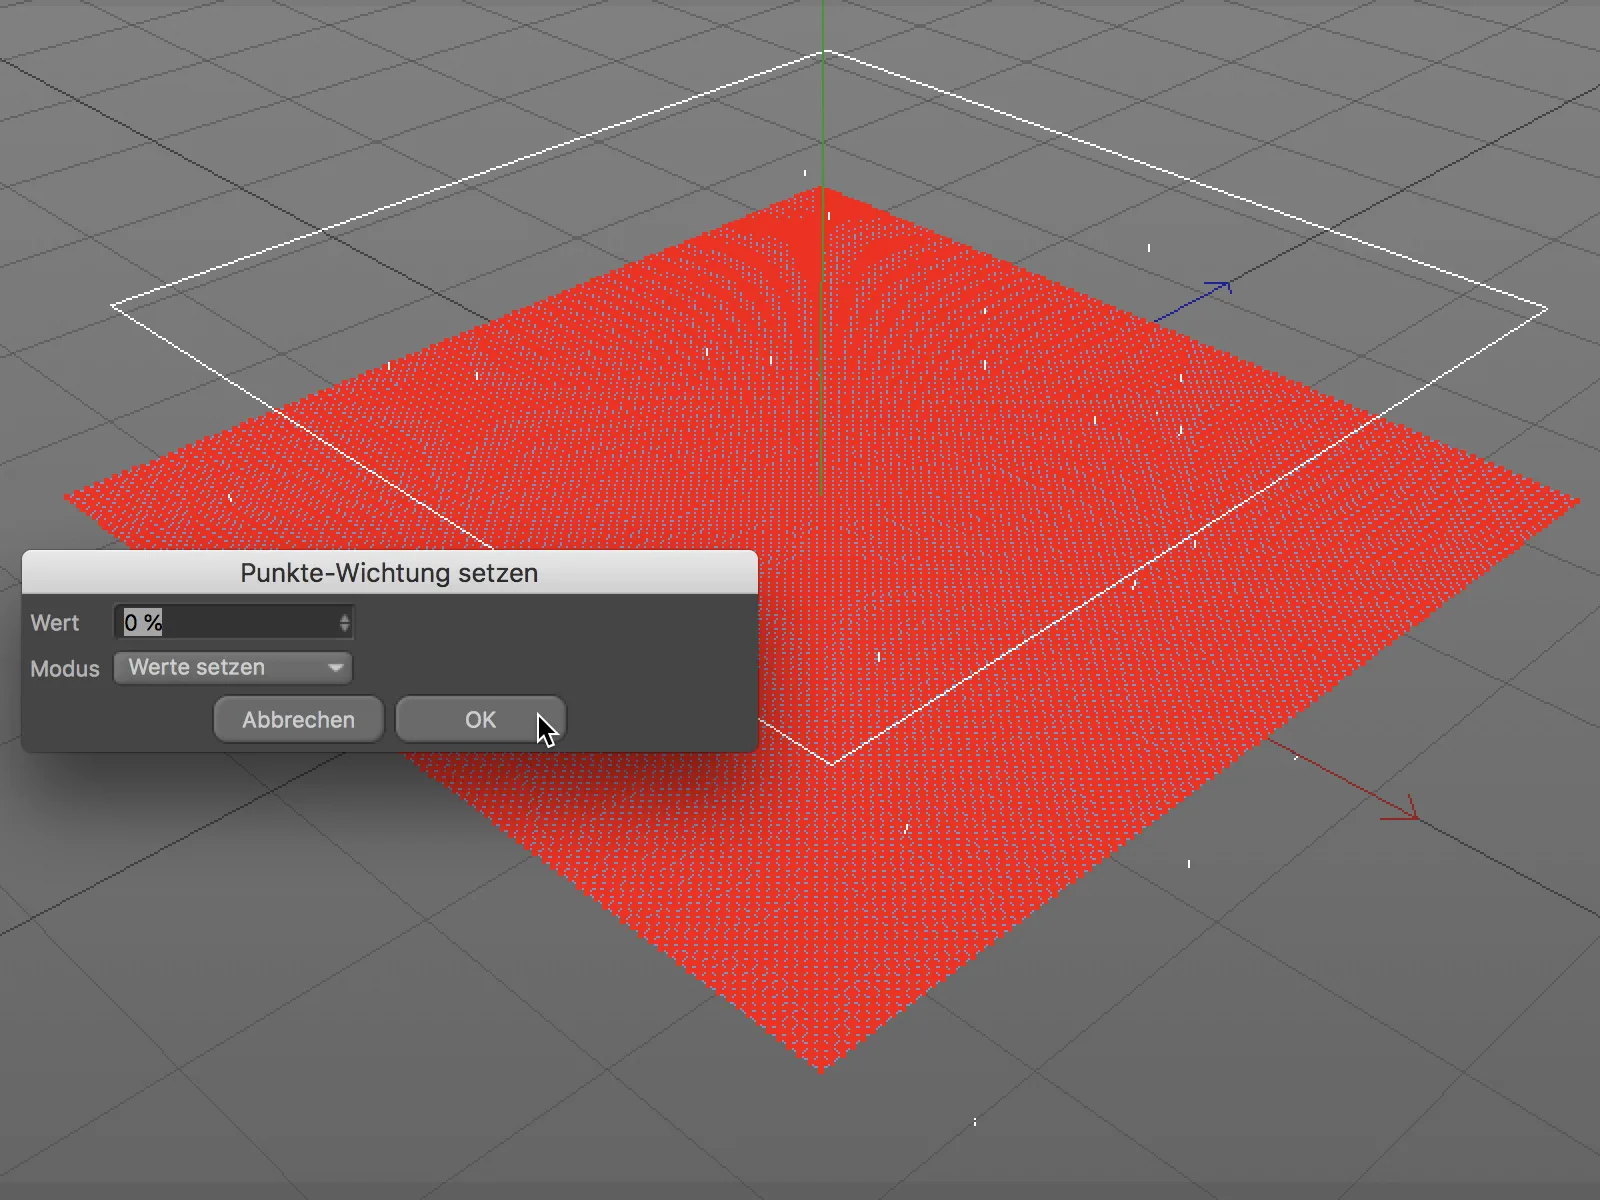
The Simpel effector should now refer to the polygonal layer object with the vertex map - for the sake of clarity, I have subordinated it to the layer object. The particle emitter field and the delay modifier layer from the previous example remain unchanged.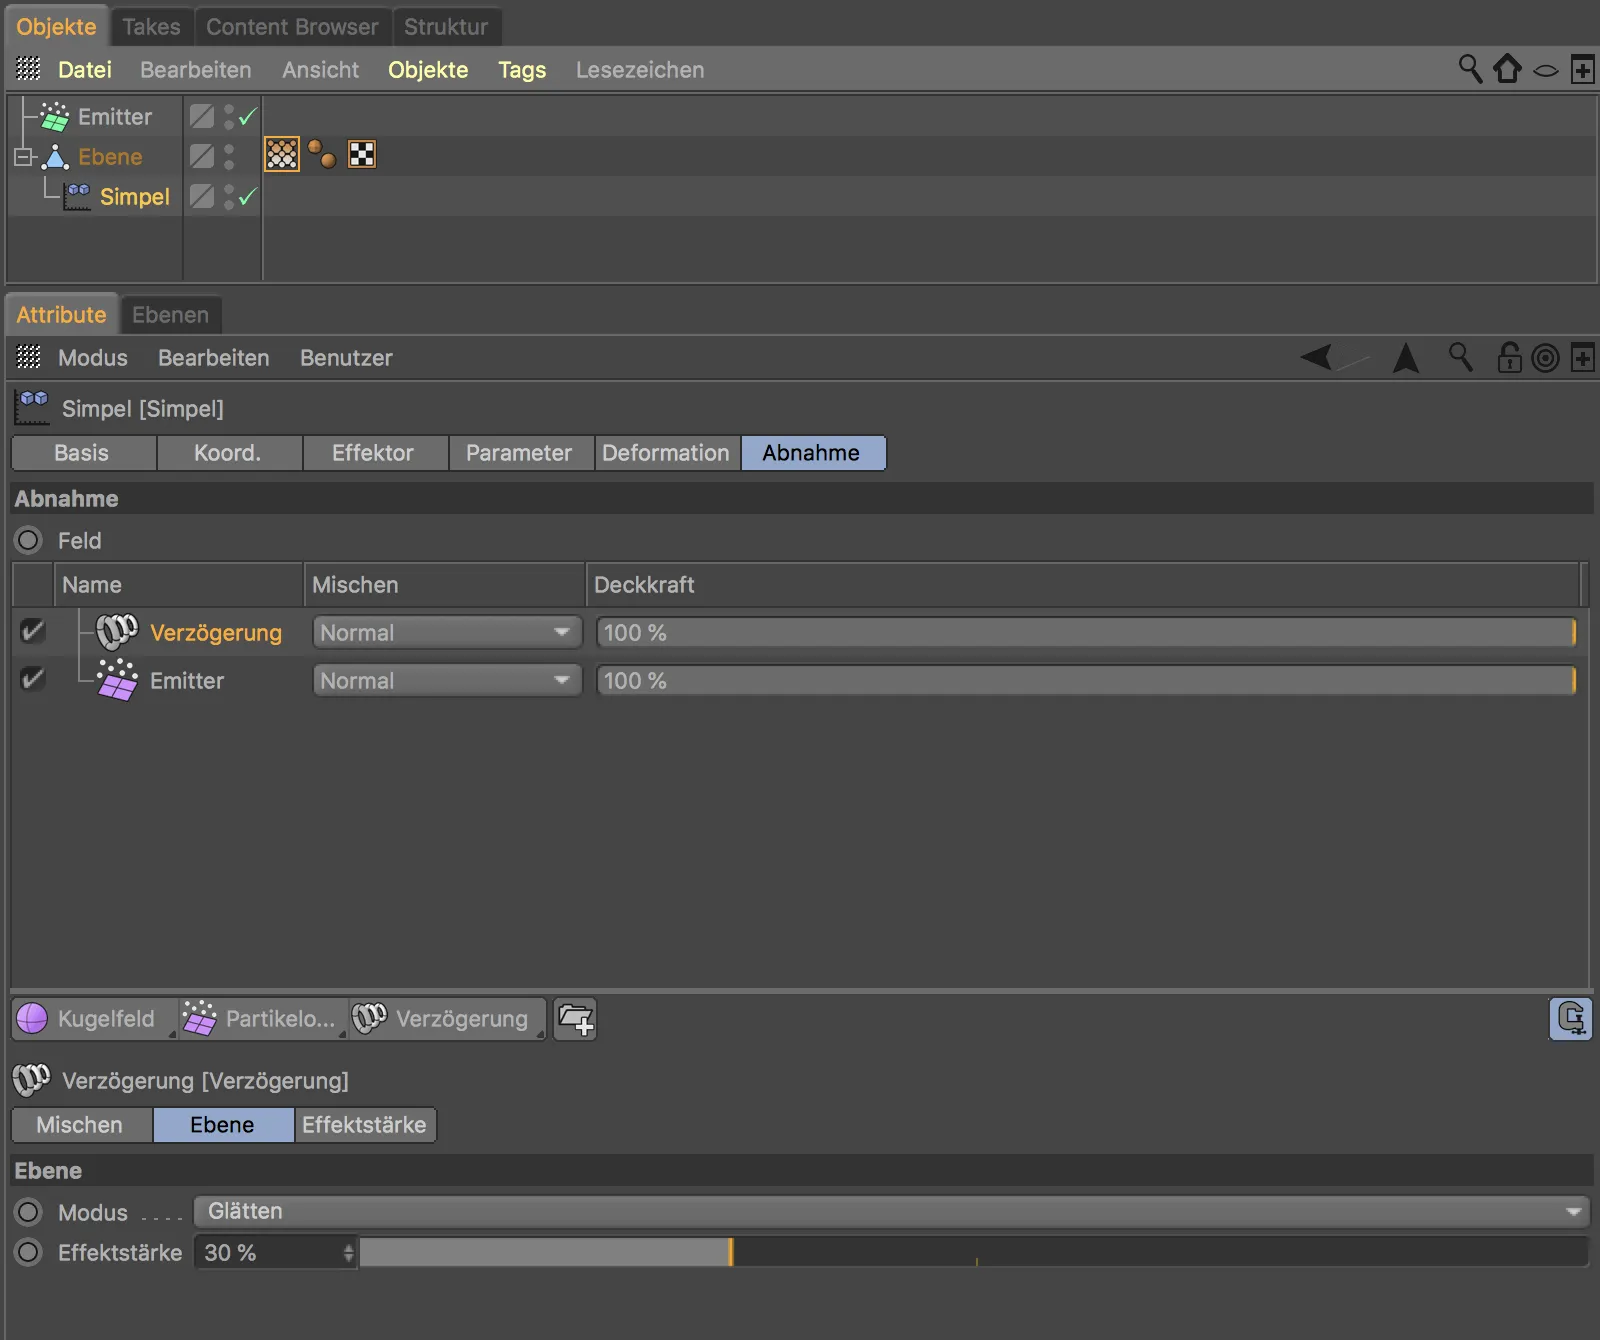
In order for the vertex map to react to our particle emitter field layer at all, we have to activate the Enable fields option in the settings dialog of the vertex map tag.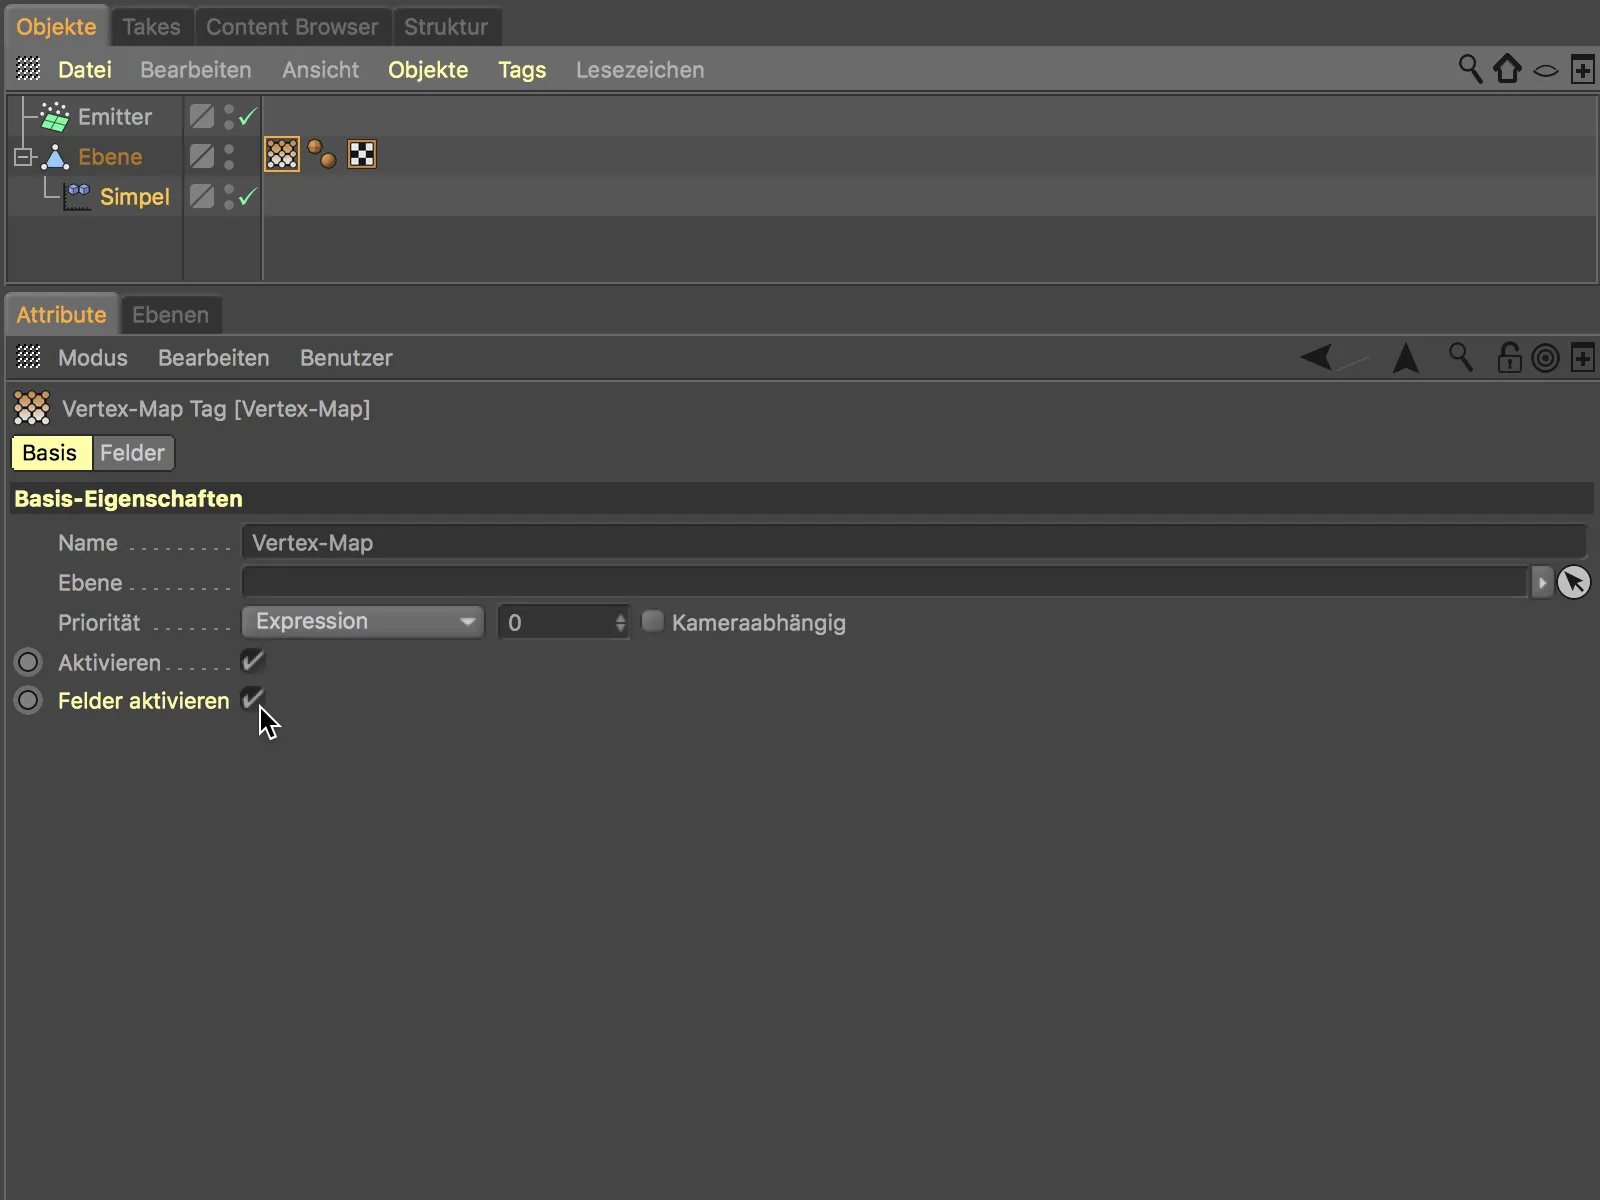
After this step, it is worth taking a look at the fields pageof the settings dialog. Completely independent of the parameters of the Simpel effector, we once again have a list of fieldsin front of us. Thanks to the fields, we can trigger different effects simultaneously with a single particle system.
In addition to the emitter, there is also a modifier layer of the freeze type, which has saved the unpainted initial state of the vertex map.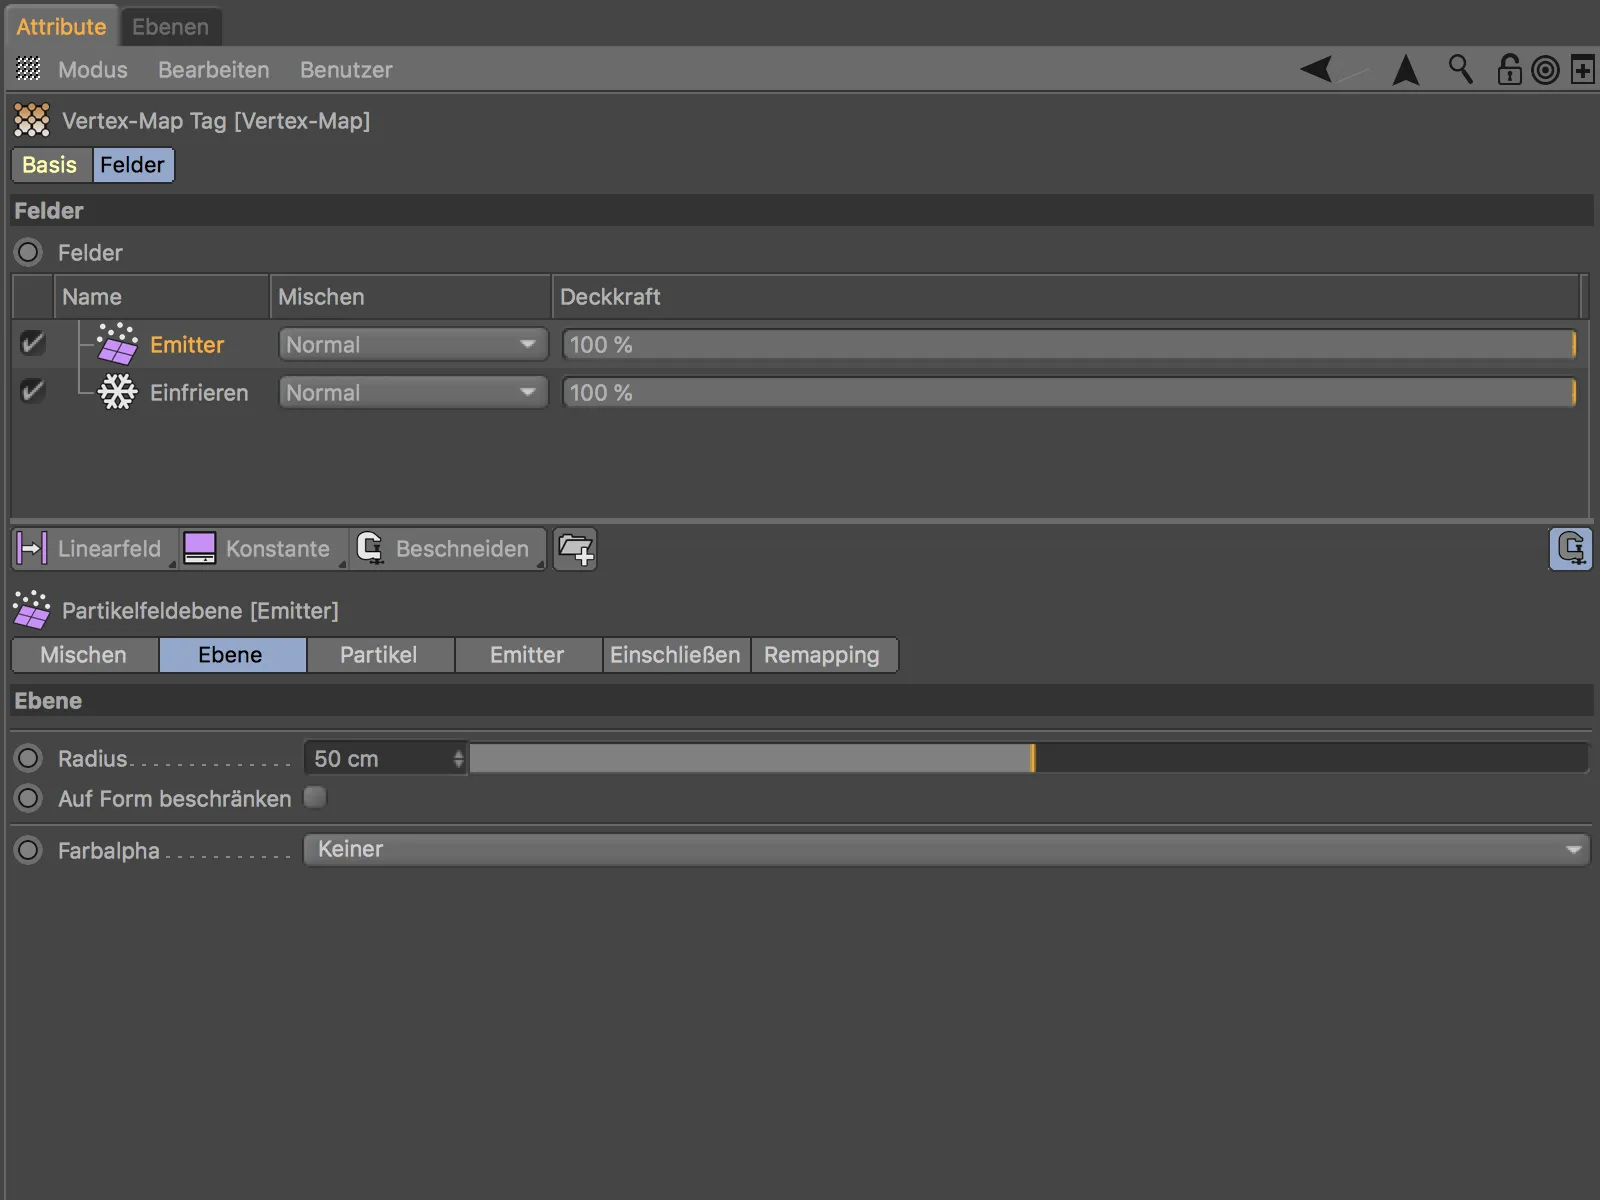
After clicking on the play button, we can see how the falling particles paint the effect on the vertex map. To make the painting stay and even spread, we just need to integrate another freeze modifier layer and set the mode to Grow.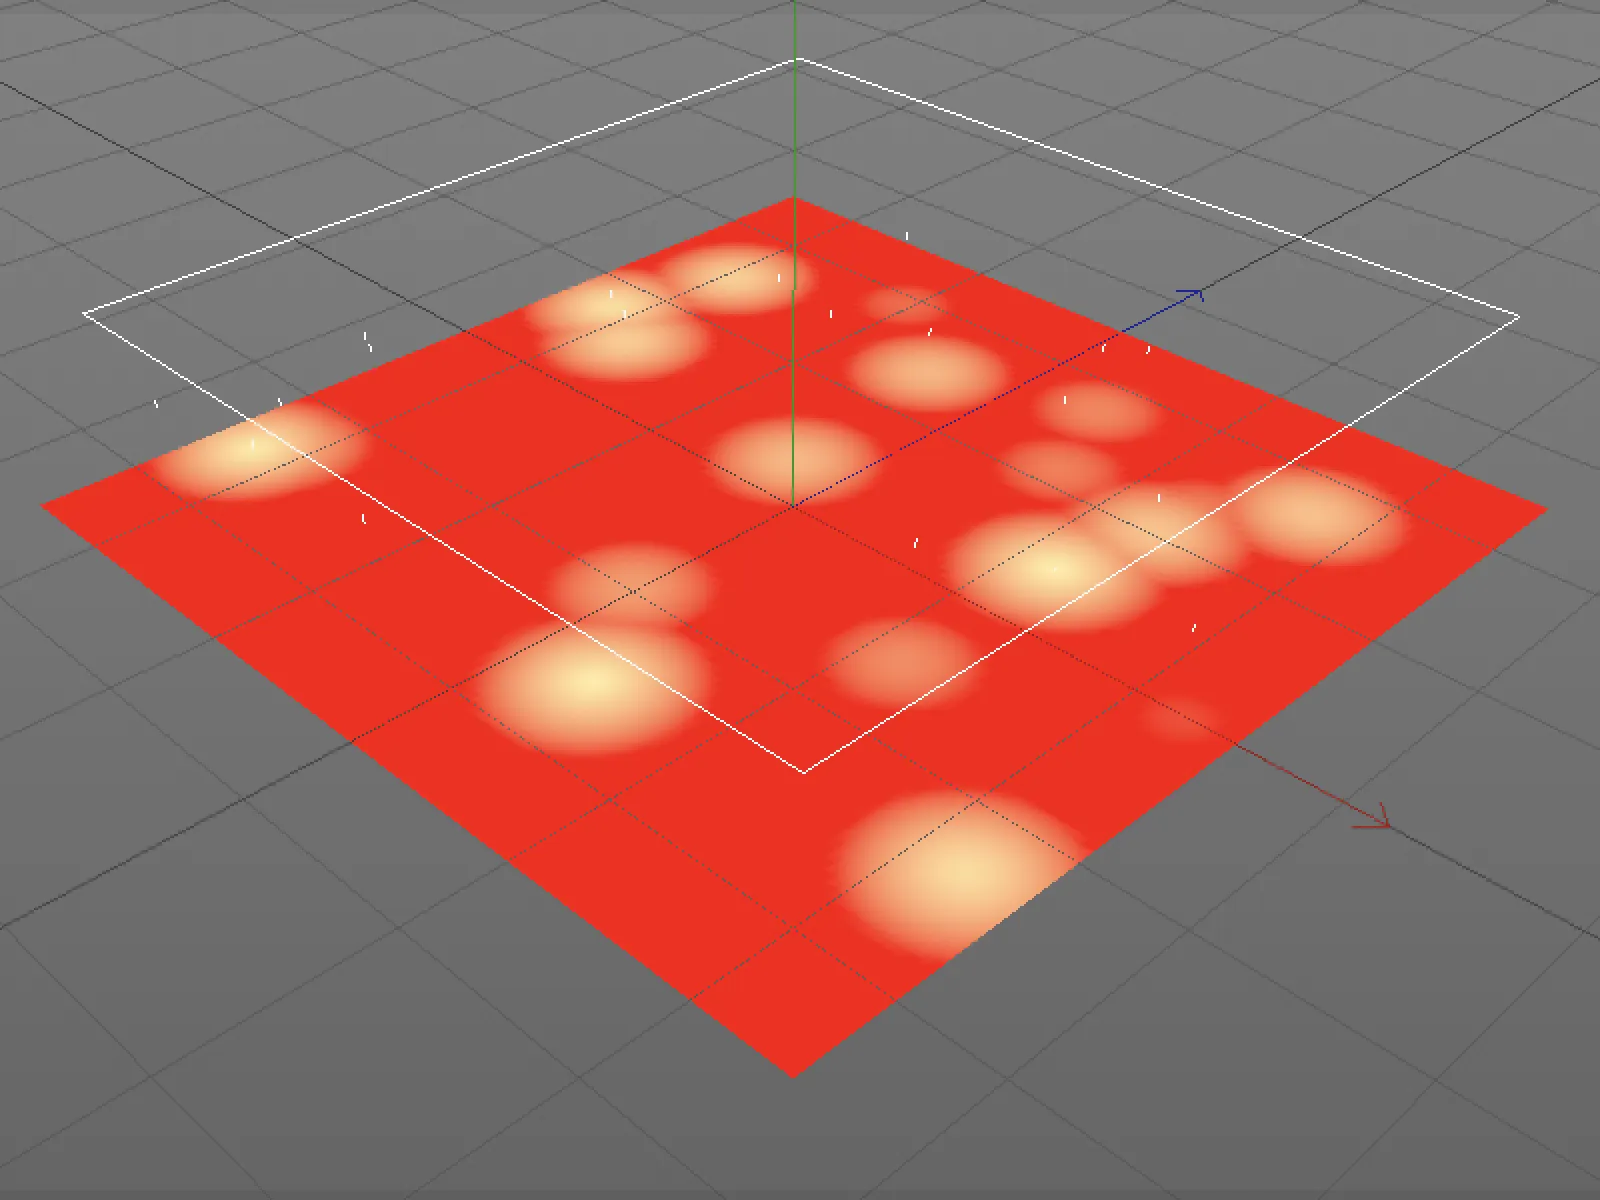
Multi-instances
To conclude this tutorial on the new fields in Cinema 4D Release 20, I would like to make a digression and point out an inconspicuous but very practical new function for instances.
If we are dealing with a large number of clones or objects, for example with grasses or meadows, the performance in the Cinema 4D editor quickly drops noticeably.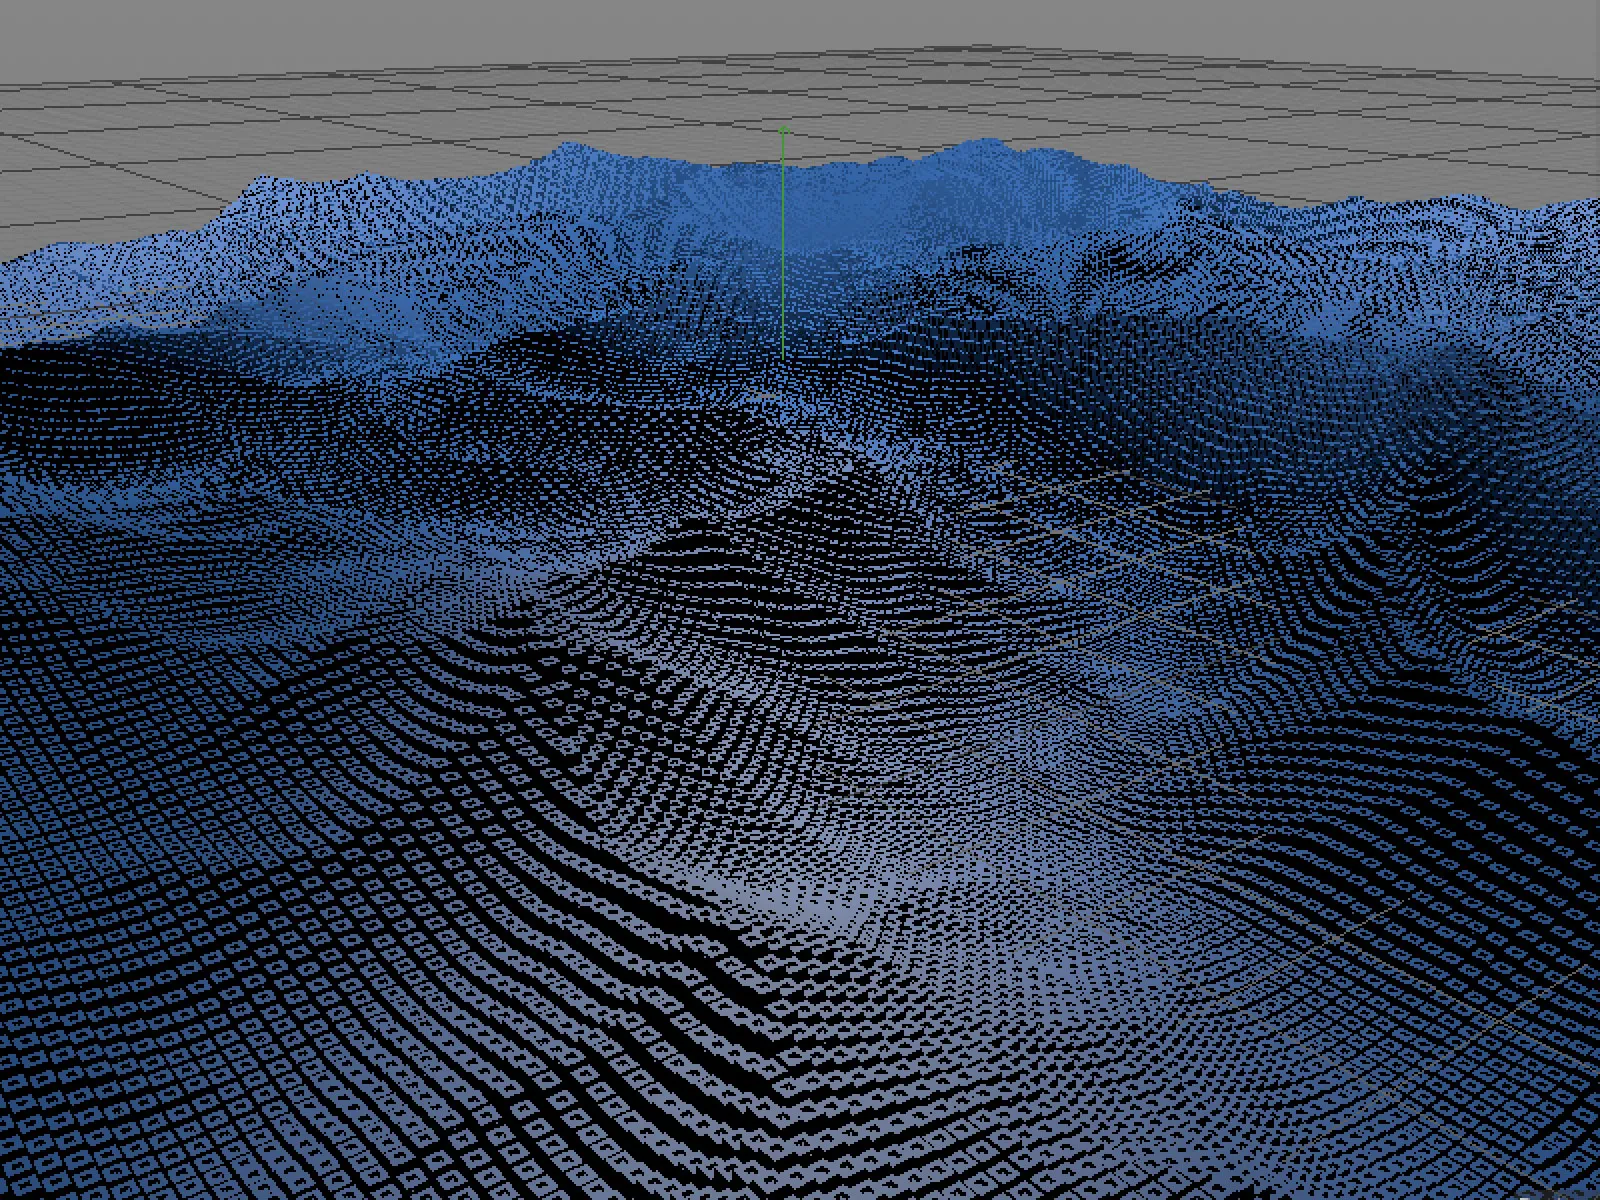
This is why render instances were introduced a few years ago. In Release 20, there are now the so-called multi-instances, which bring a further increase in performance, as they treat the clones internally as a single object.
In the settings dialog of the clone object, we select multi-instance as the instance mode on the object page.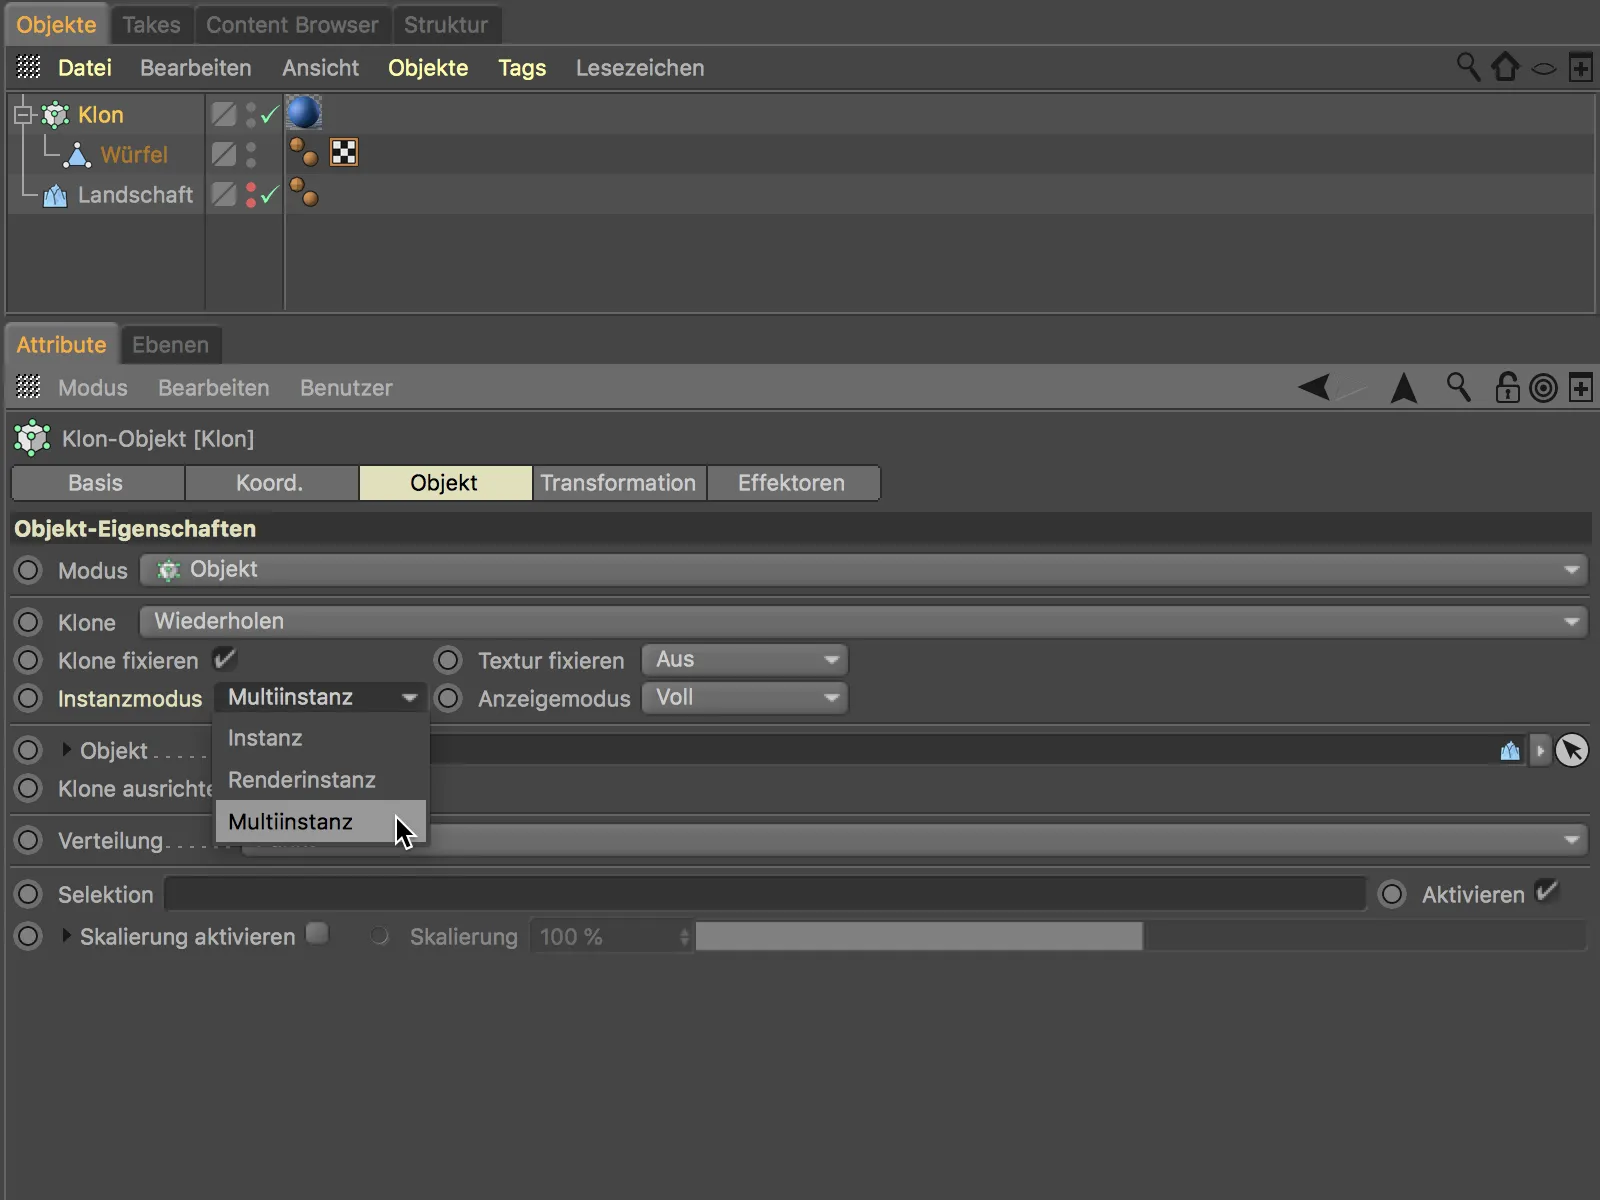
In addition, we can use the Display mode menu to select the quality or characteristics in which the clones are to be displayed in the editor.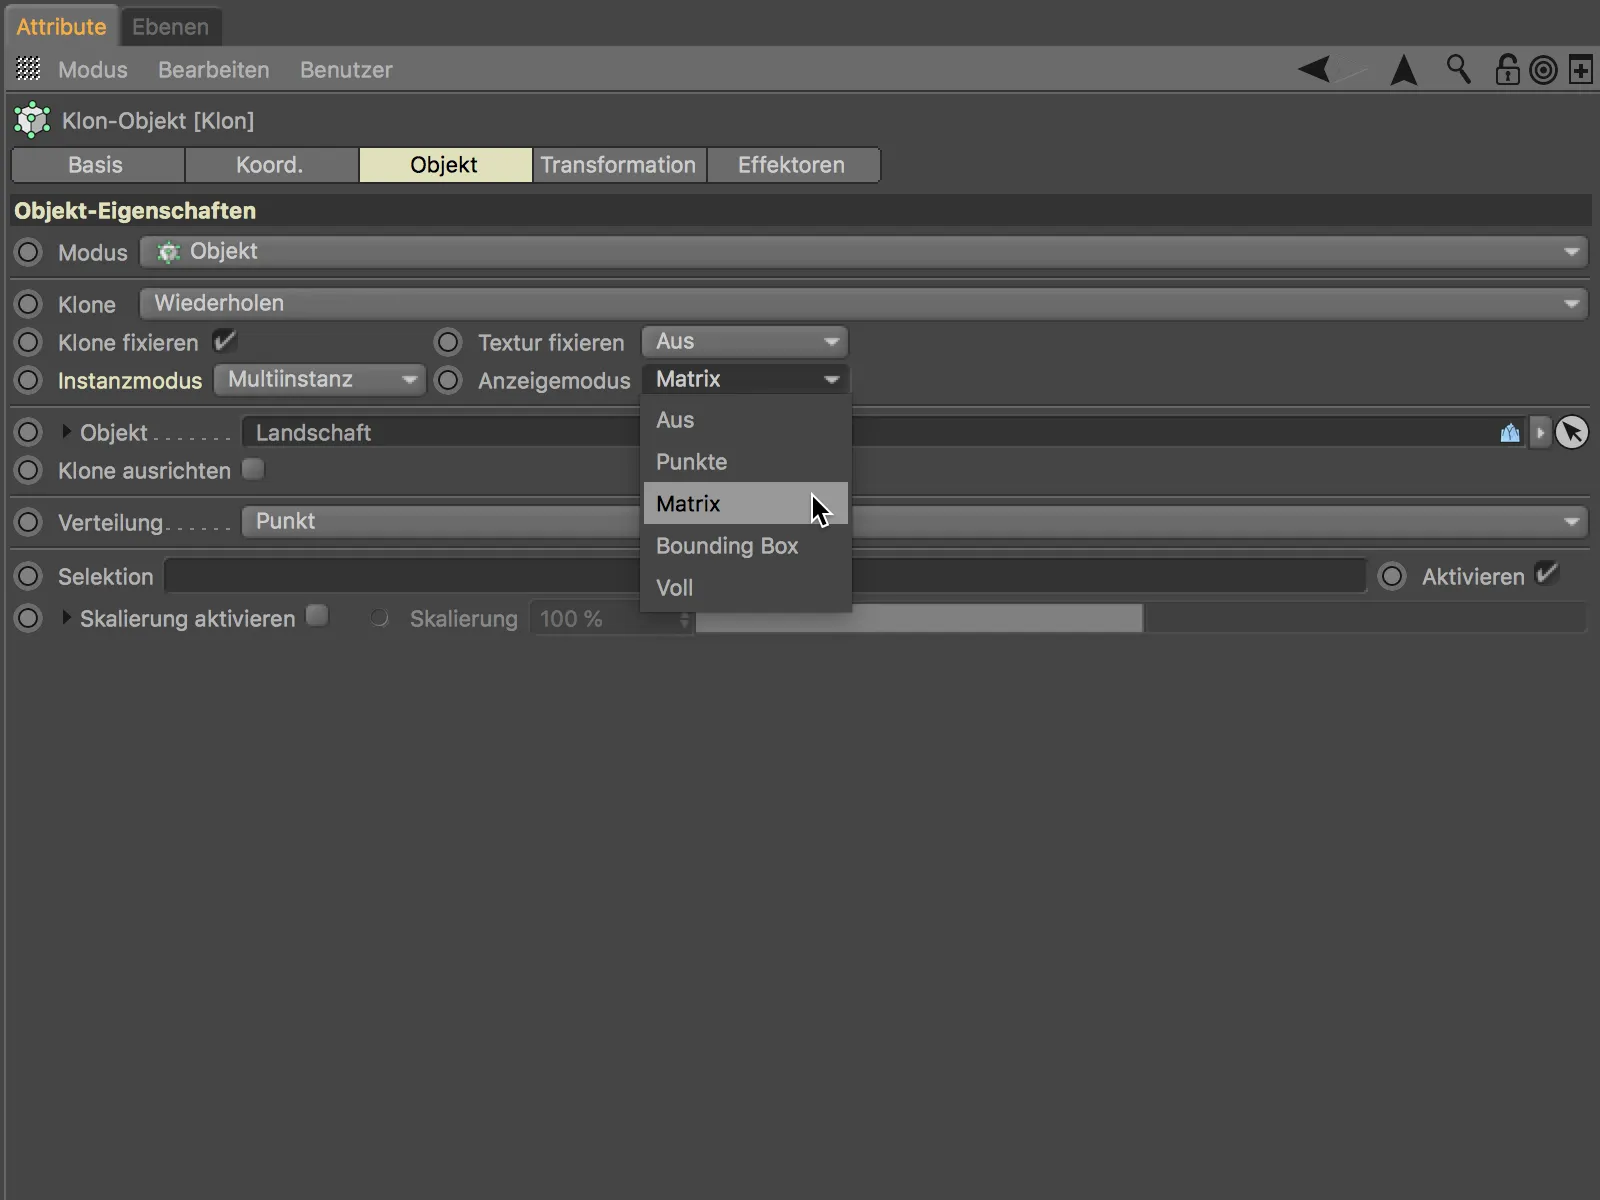
The matrix display known from the matrix object in MoGraph, for example, comes very close to the final result and speeds up the Cinema 4D editor extremely in combination with the new multi-instances.