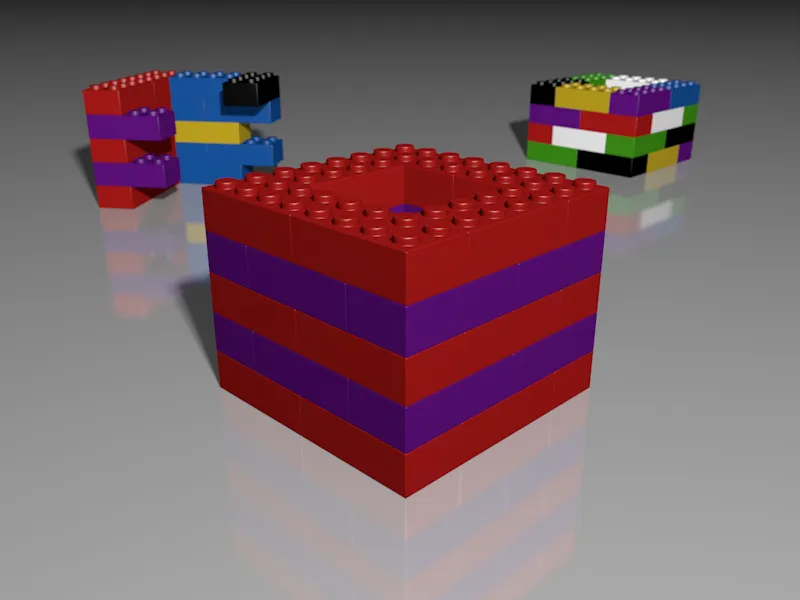
Of course, it is no problem in Cinema 4D to create different versions of objects, their materials and the scene with the light sources, cameras, etc. they contain. Within a Cinema 4D project, however, this sooner or later leads to an overcrowded and confusing object manager, while splitting into different Cinema 4D projects makes data management really unwieldy.
As a solution to this problem, Cinema 4D in Release 17 offers takes , often referred to as "takes". With these takes, Cinema 4D uses the Take Manager to save the differences between the basic version and the changes made. We can then easily organize and activate these variations using the Take Manager.
For this tutorial, I have created a simple example scene \"PSD_C4D_R17_Aufnahmen_start.c4d\", which you can find under the working files.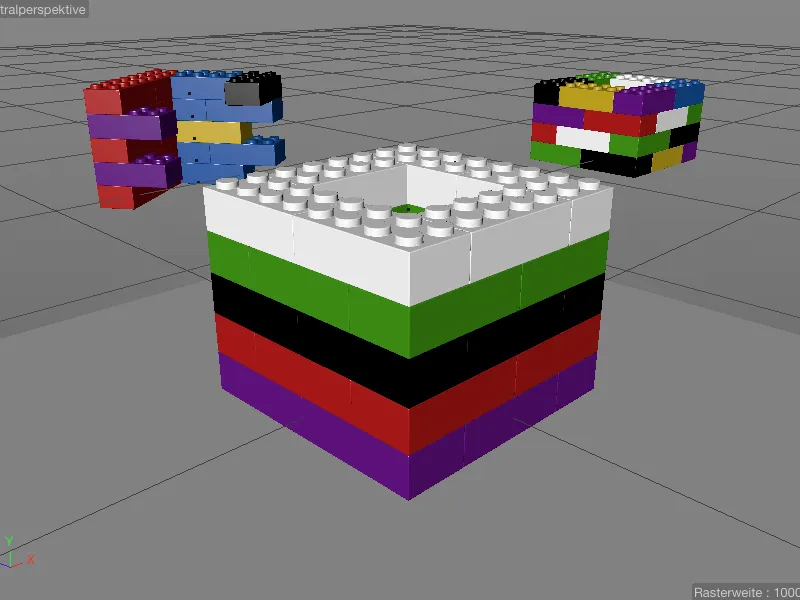
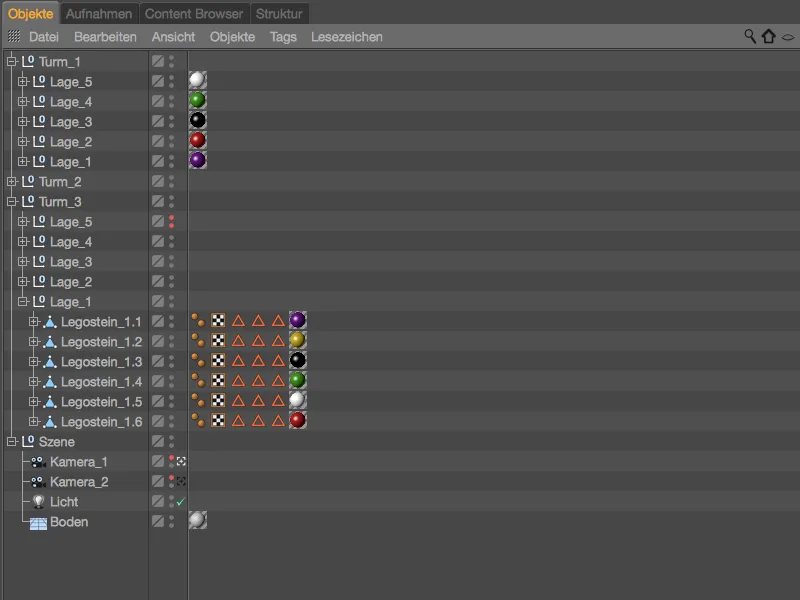
The three towers made of Lego bricks are grouped into individual layers, whereby we will concentrate on the front \"Tower_1\" with the layered texturing for the shots. We also find two cameras, the obligatory light source and a textured floor objectin the Object Manager.
If we take a look at the Recording Manager, we can see that we are already working with or in a recording. This is the basic shotmentioned above, the original state of the scene, so to speak. The currently active recording is also always displayed in the Cinema 4D window bar.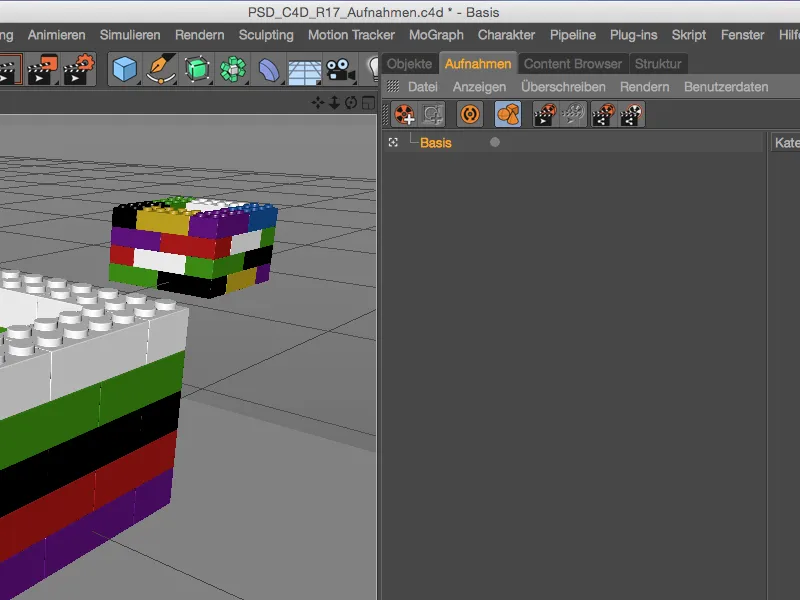
Creating a new recording
To save modifications to the scene in a separate recording, we create a new recording using the corresponding command icon in the recording manager.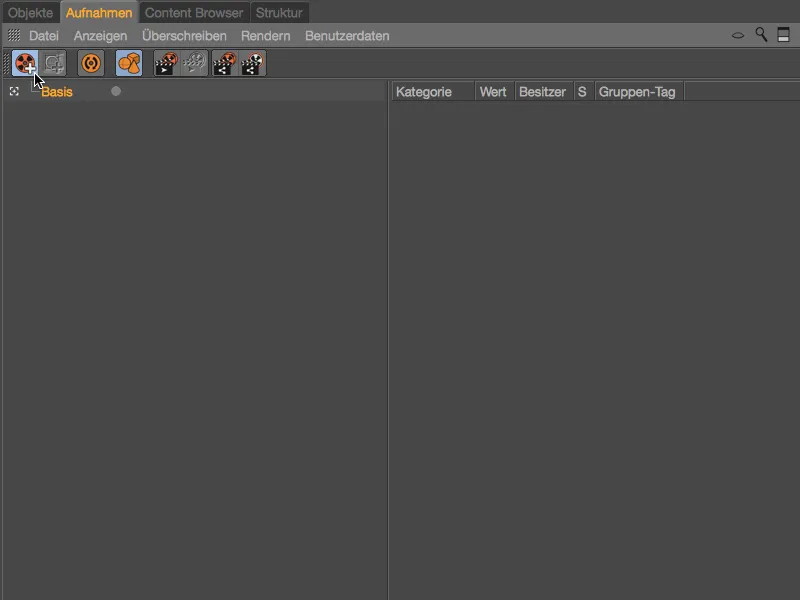
As the new recording is based on the basic recording, it is subordinate to it. It is also immediately active, as we can see from the white-colored viewfinder icon. By double-clicking on its name, we rename this shot appropriately - in our first example, we reduce the front \"Tower_1\" to just one \"Layer_1\".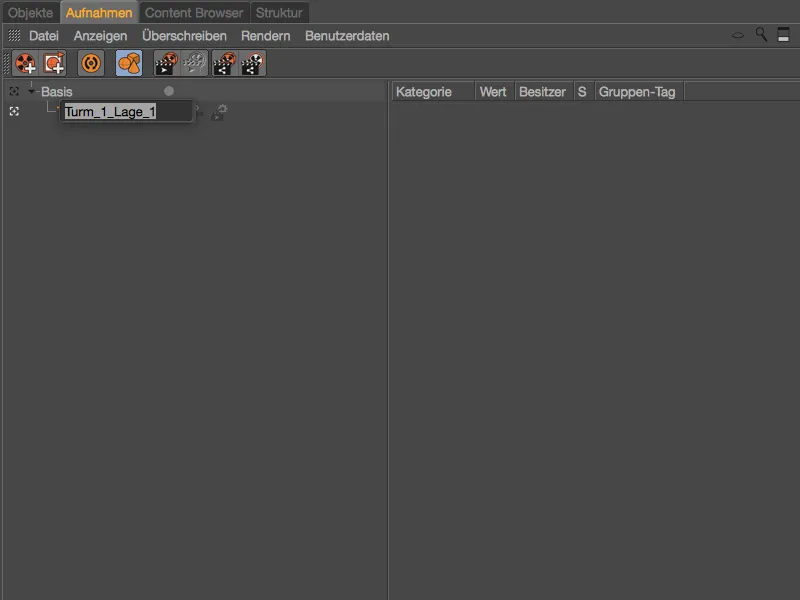
We achieve this by switching layers 2 to 5 to invisible in the editor and when rendering. However, if we select the affected groups in the Object Manager, we see that the required parameters Visible in the editor and Visible when render ing are grayed out and not accessible.
We can see this as a kind of protection that prevents us from inadvertently writing parameter changes to the recordings.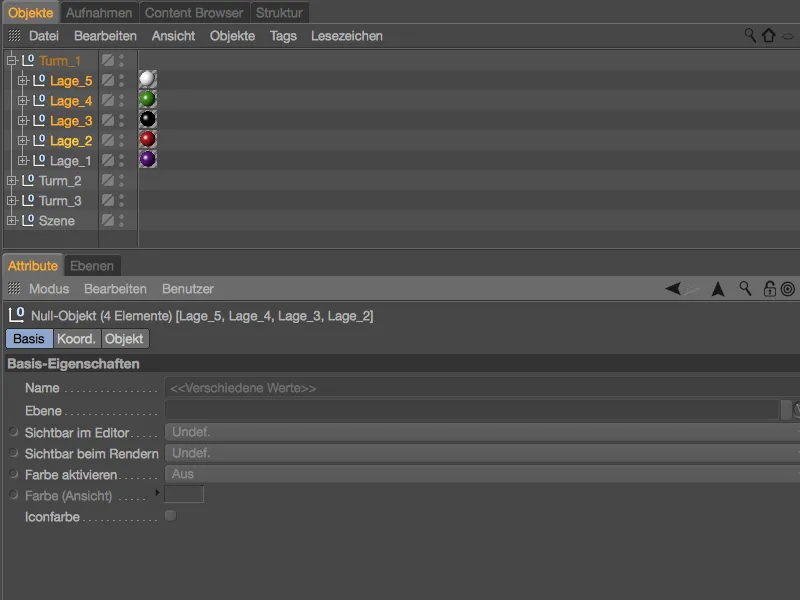
To remove this protection for the two parameters of the affected elements, we select the two parameters in the Attribute Manager, right-click to open the context menu and select the Overwrite command.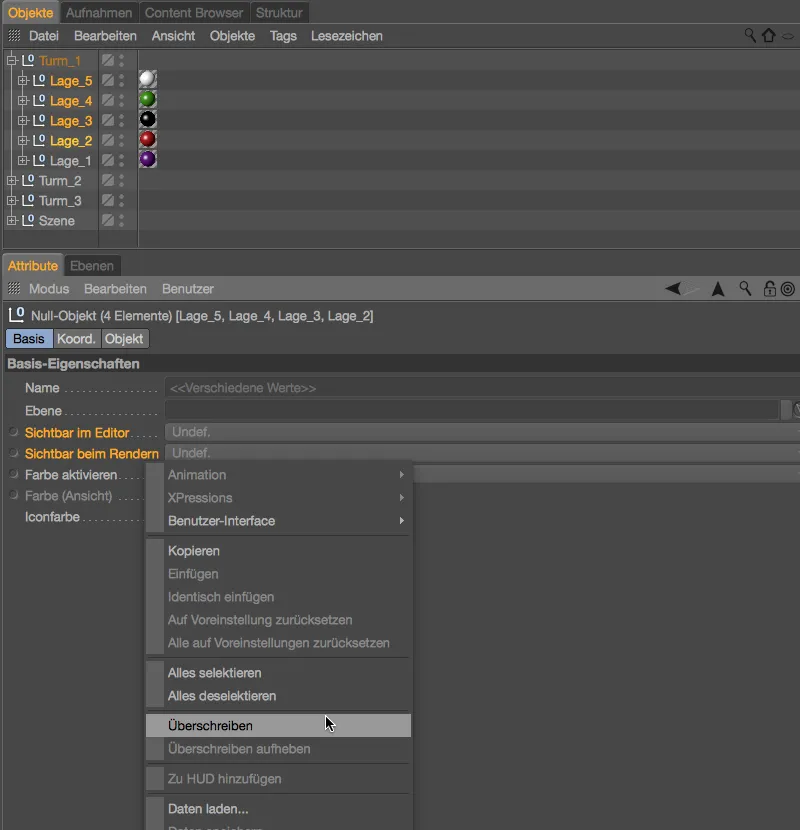
Both parameters can now be edited. Make sure that layers 2 to 5 are all selected and select the setting Off for both the Visible parameter in the editor and for Visible when rendering.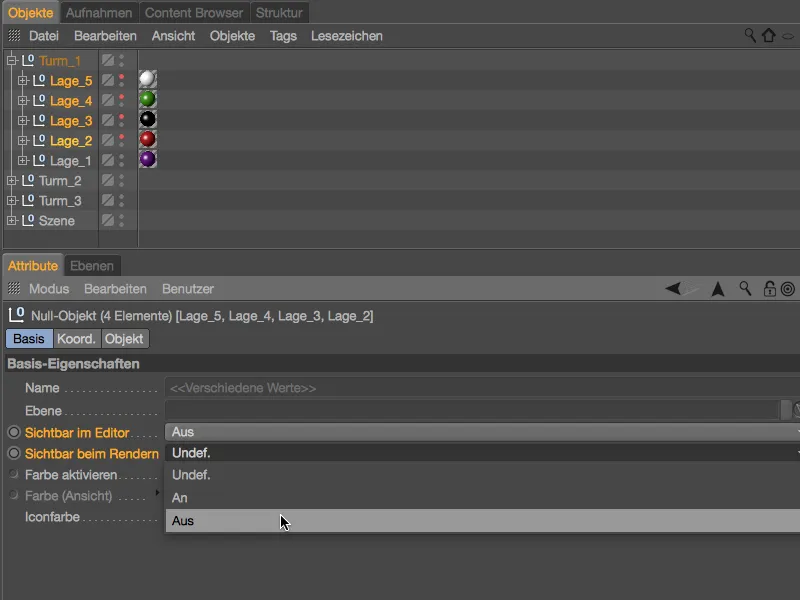
As you would expect, the front tower has now shrunk to its lowest layer. However, we have not recorded this in the scene itself, but in a recording.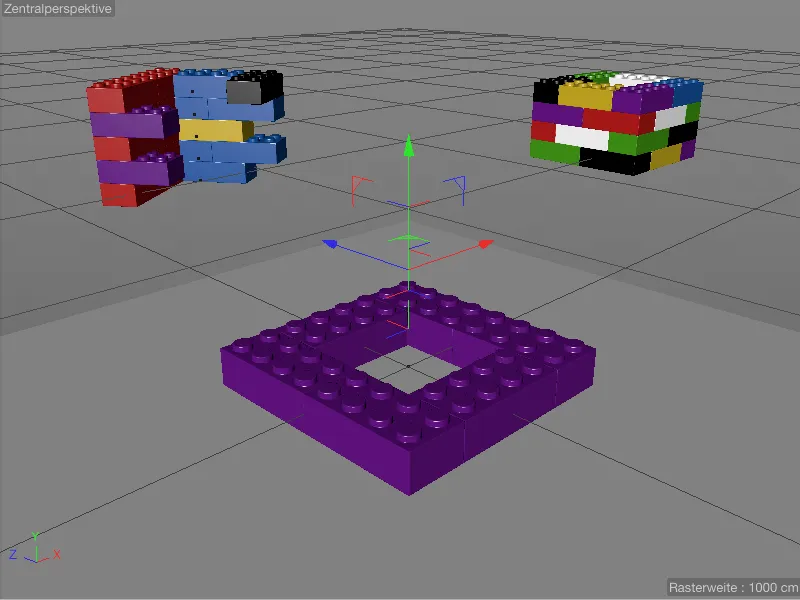
We can track this very easily using the recording manager. With our modifications, the right-hand area is now also filled with the dual tree mode view, so that by expanding the hierarchy of the saved objects or their parameters, the overwriting values are displayed.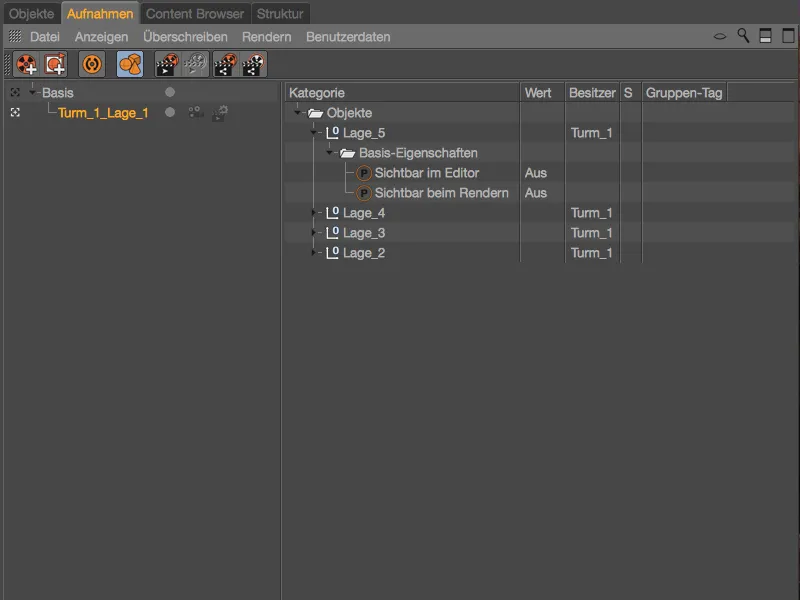
The modifications relate exclusively to the newly created recording. As soon as we activate the basic recordingagain, the unchanged scene is displayed and rendered.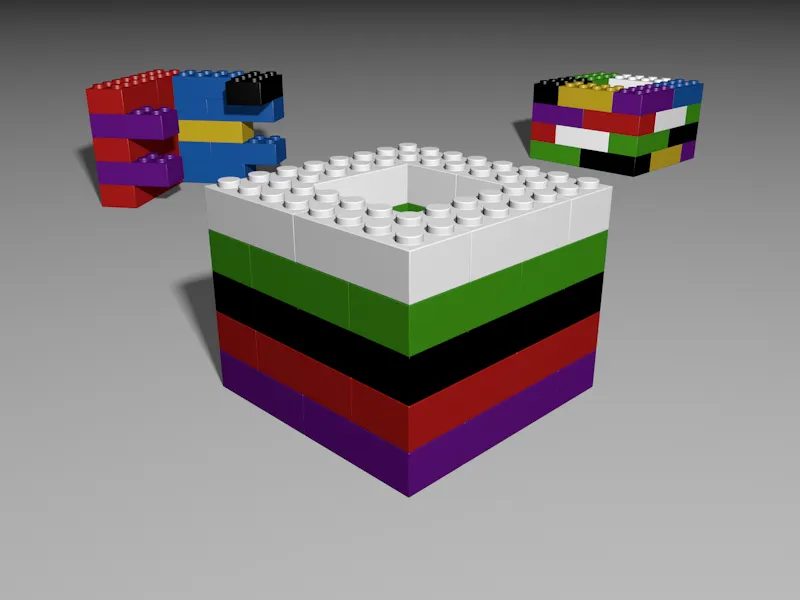
Creating a second recording for the floor texture
In a second shot, we want to create the option of using a different, reflective material for the floor. We create this additional shot via the context menu using the right mouse button and the New shot command below the basic shot.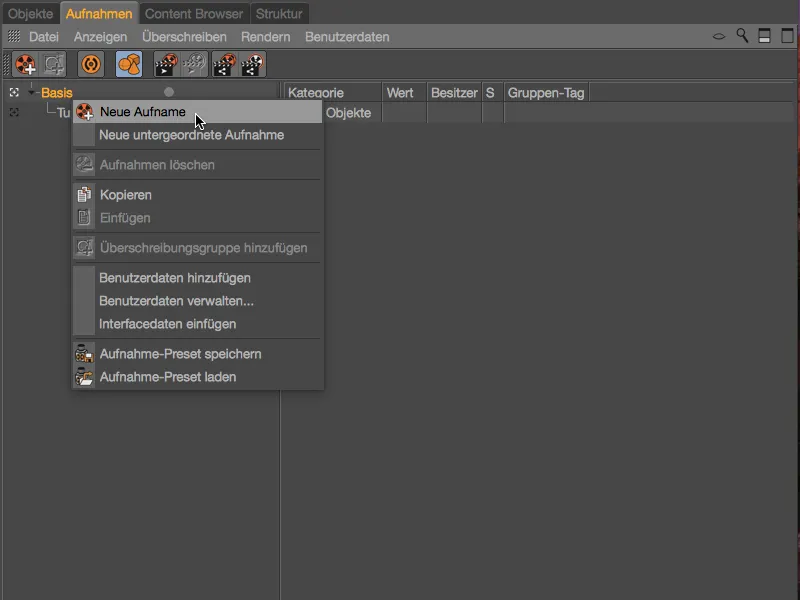
The new image is on the same hierarchy level as our first image for hiding the tower layers and is also already activated. After double-clicking on its name, we rename the image to \"Reflecting floor\" or similar.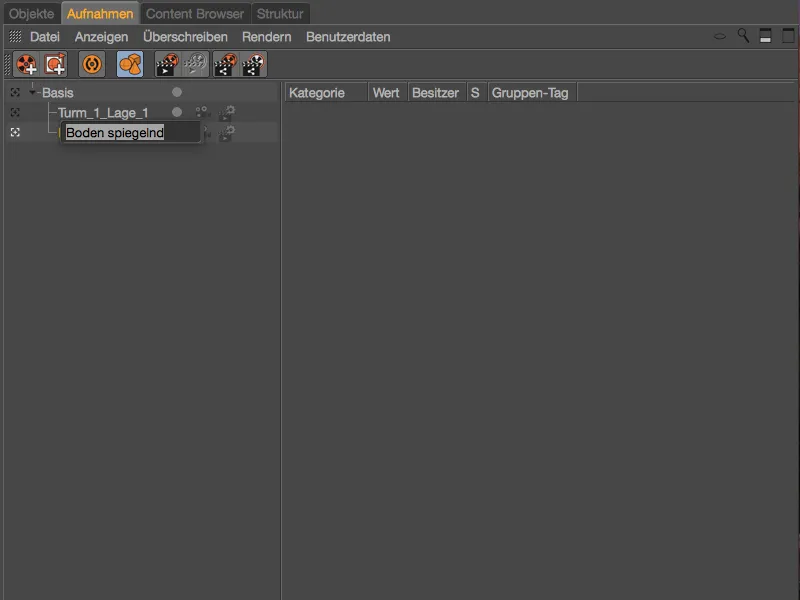
While we activated the overwriting of the parameters manually for the first recording, this time we activate the auto recording via the corresponding command icon in the recording manager, which automatically enables us to overwrite all parameters.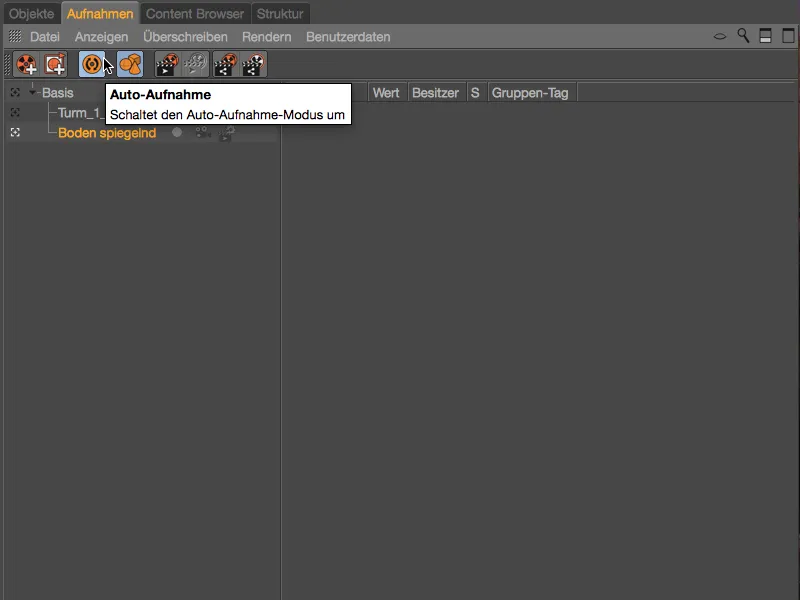
We can immediately see the difference visually when we look at the parameters in the Attribute Manager. All parameters released or suitable for overwriting are colored light blue. We can find the parameter relevant for our recording in the texture tag, where the linked material is stored.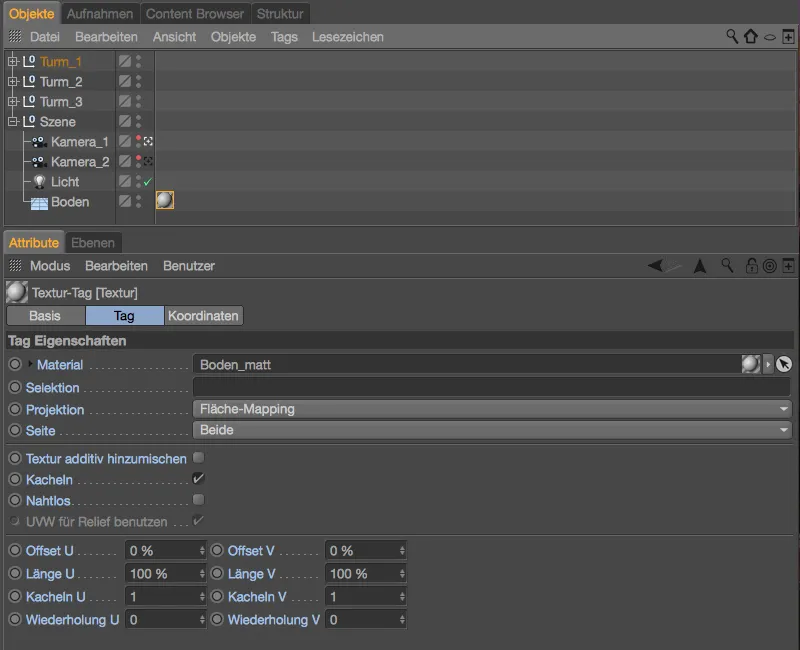
A material for the reflective floor is already available in the material managerof our Cinema 4D project. As we are in automatic recording mode, we simply drag & drop it from the Material Manager...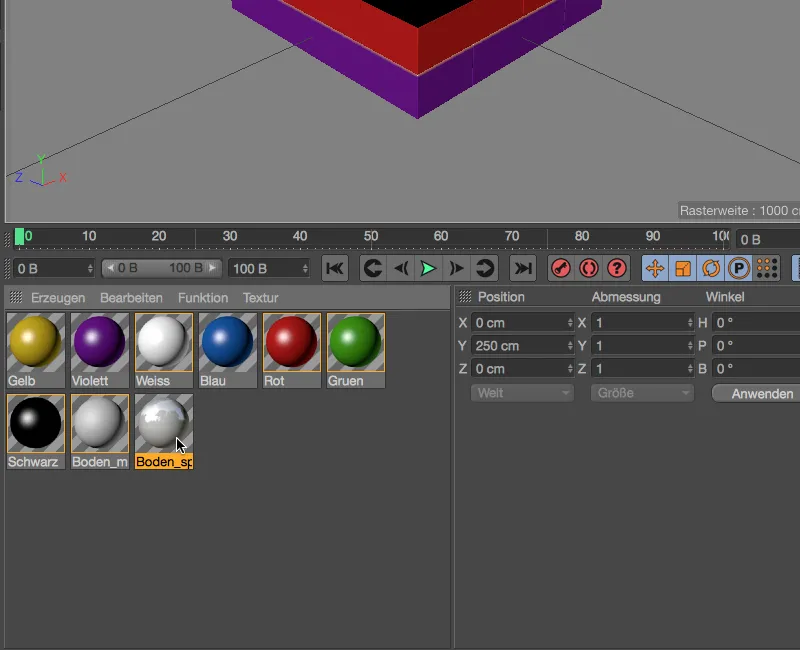
... into the Material parameter field to replace the matt floor material with the reflective floor material for this shot.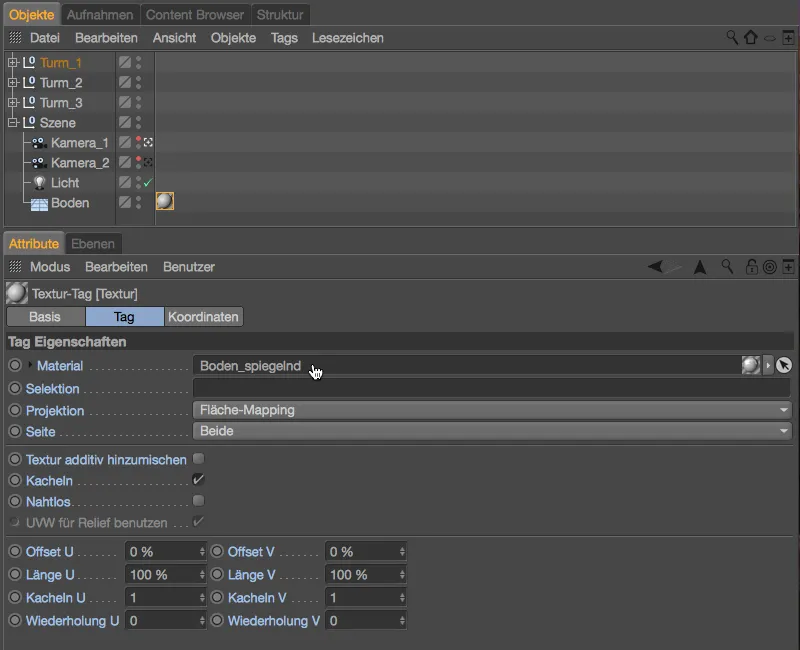
A look at the shot manager in dual tree mode shows us the overwritten Material parameter this time when we fully expand the hierarchy of the tag.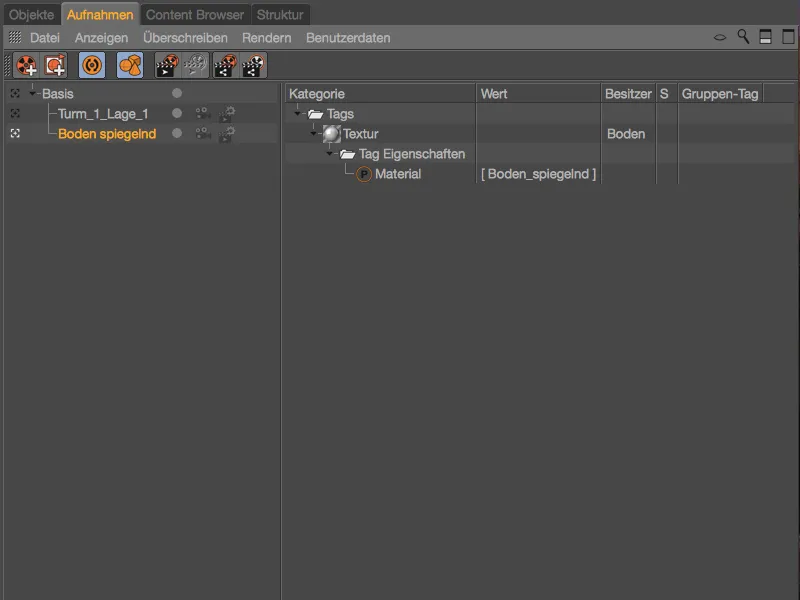
It is now sufficient to click on the shots \"Reflective floor\" or Base to switch back and forth between the reflective or matt floor surface.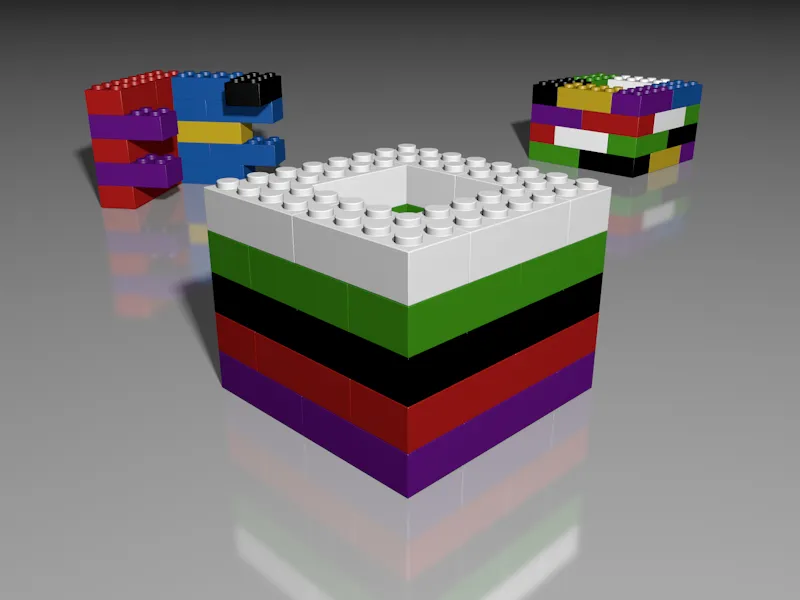
Before we move on to other recordings, we display the information stored for the basic recordingin the recording manager for comparison. Analogous to the overrides in the recordings, we can find the saved settings of the original state of the respective elements of our scene there.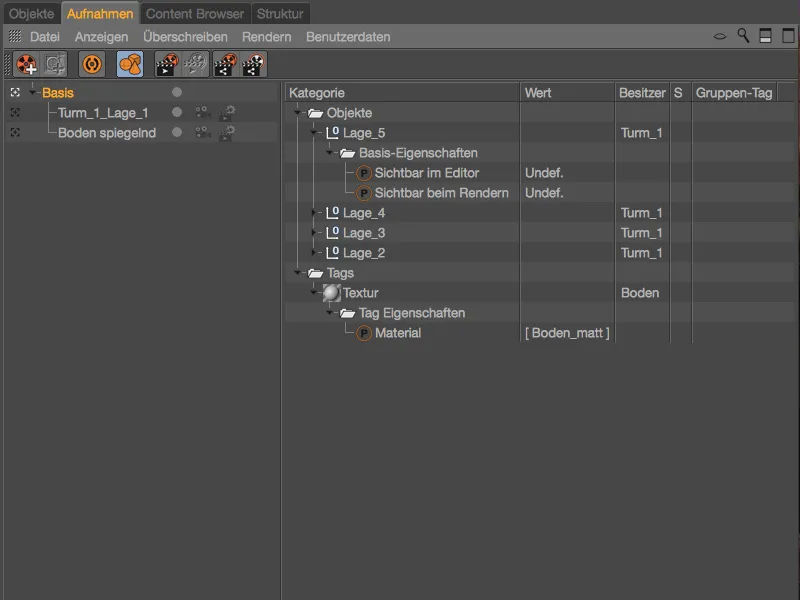
Recordings with override groups
We have already seen two examples of how we can vary certain parameters of an object or tag via a recording. However, we can also combine objects into a group and vary this group with overriding tags. We achieve this with override groups, which we now use to specifically modify the materials of the front tower.
To do this, we first create a new image using the command icon or the context menu.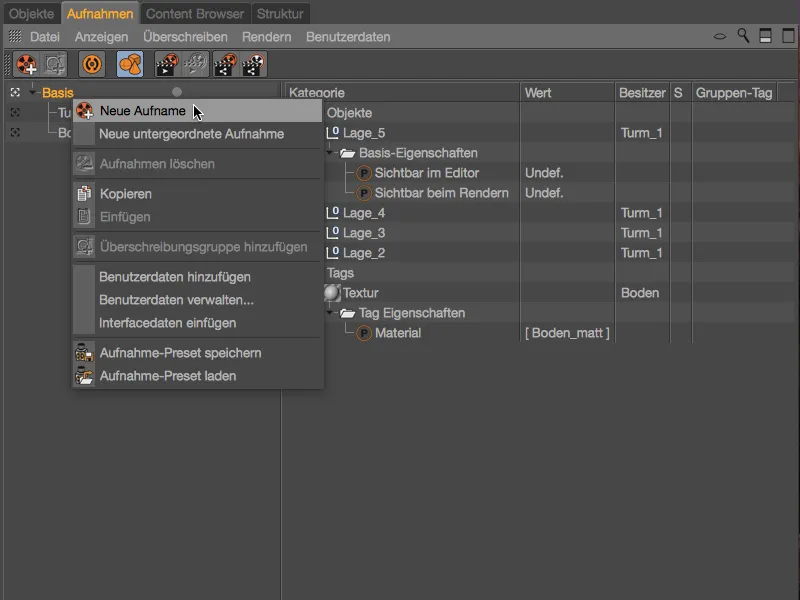
As we will vary the colors and materials of \"Tower_1\" in the following images, it makes sense to name the image clearly. I'll start with the color combination \"White-Blue\".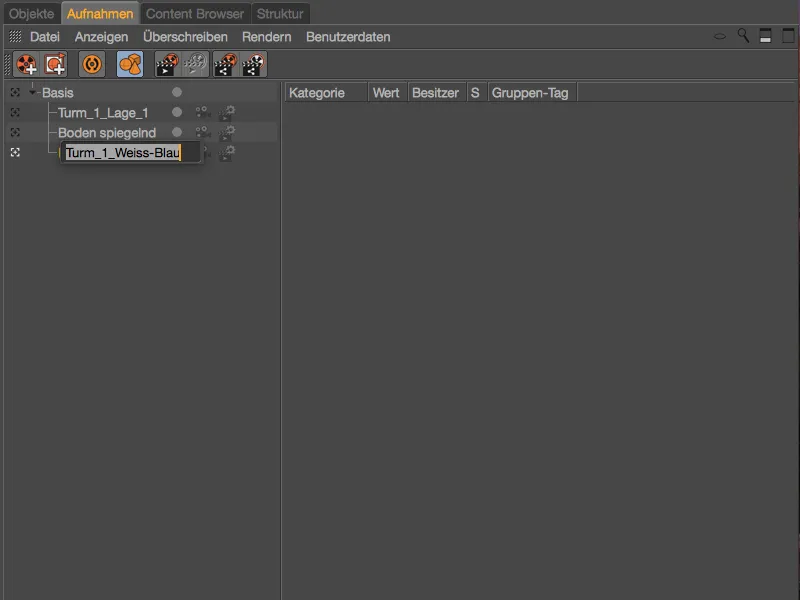
We add an overwrite group to this new image via the context menu using the right mouse button and the command of the same name.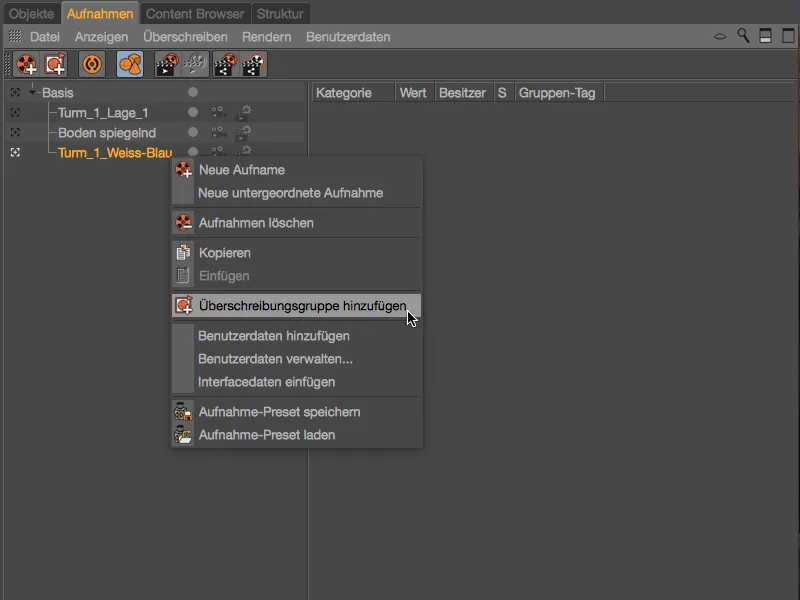
In dual tree mode, we now find the Objects category on the right with a new group as the first entry. For a better overview, we rename this group by double-clicking on its name. My first group should take care of the materials in layers 1, 3 and 5.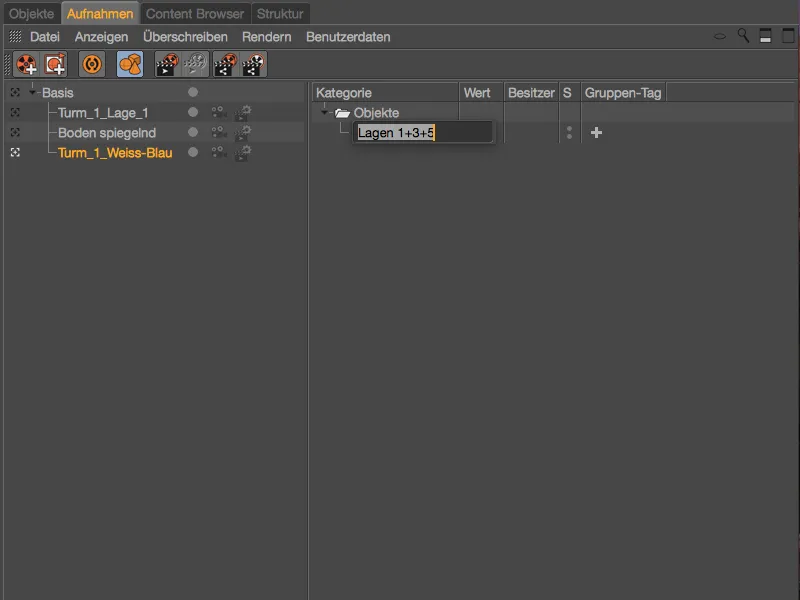
In order to assign these objects to the overwrite group, we simply jump to the Object Manager. There we select the three layers 1, 3 and 5 of the first, front tower and drag & drop them from the Object Manager...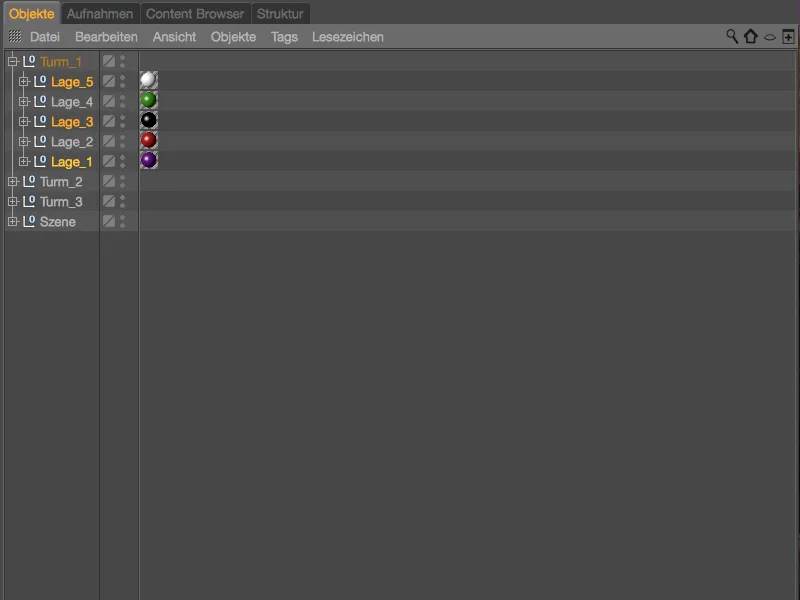
... into the overwrite group of the corresponding layers in the recording manager.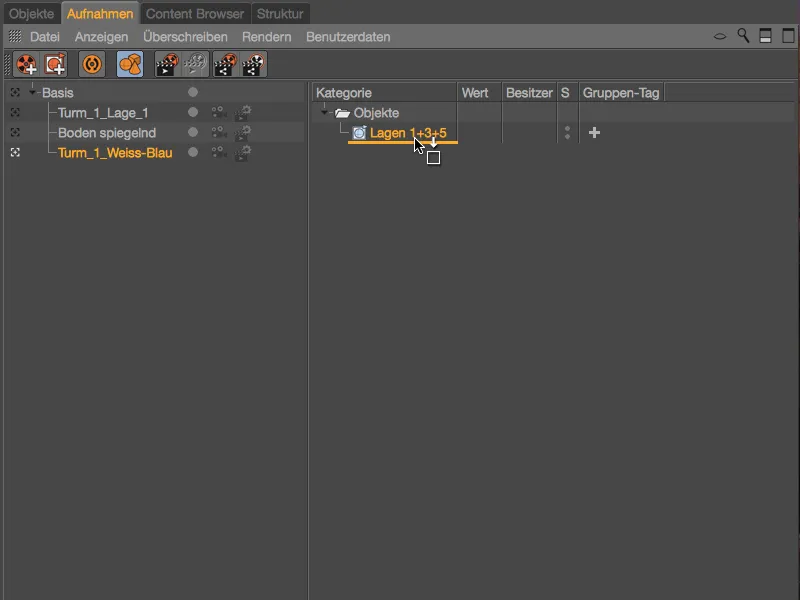
The three layer object groups of the tower (which also have the texture tagwith the material ) are now created in the overwrite group. Using the large + symbol in the Group tag column, we select which tag is to be modified for this override group. In our case, because we want to replace materials, Texture is the right choice as the group tag.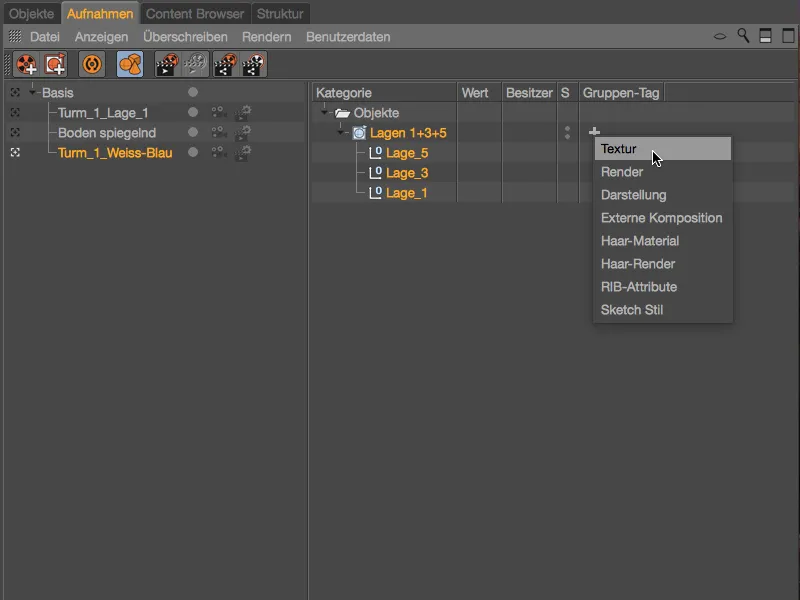
After creating the Texture group tag, we can already see a change in the tower layers in the editor. The layers we have created in the overwrite group have an empty texture tag, i.e. no assigned material.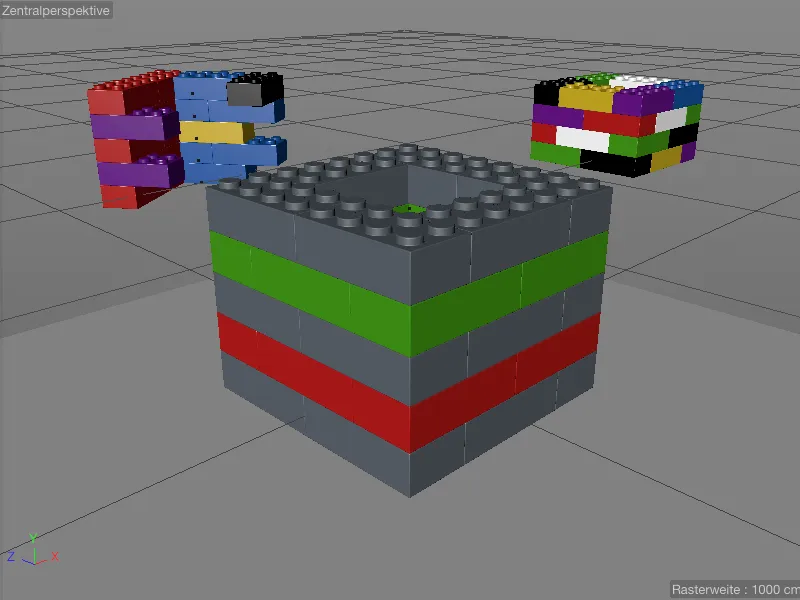
This can be easily changed by dragging and dropping the first white material intended for this shot from the Material Manager...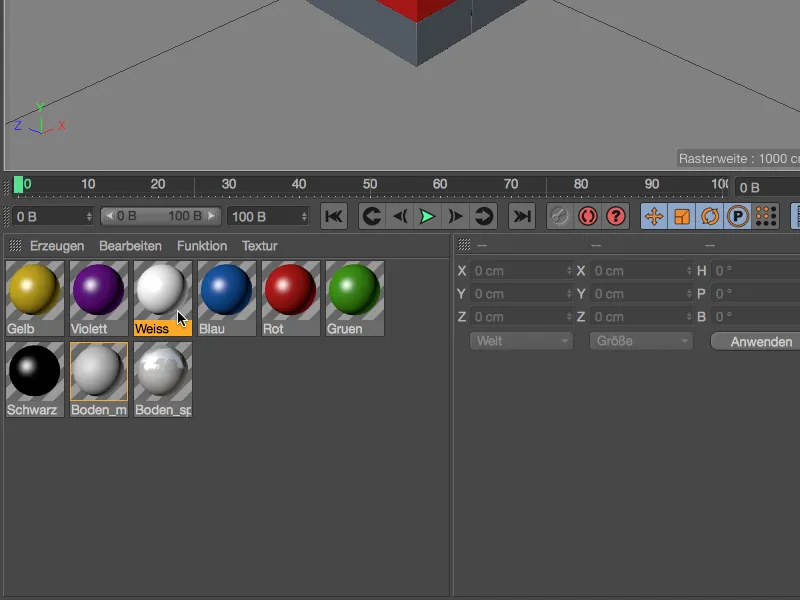
... onto the texture tagcreated as a group tag in the Recording Manager. The materials of the objects belonging to our overwrite group will then all be overwritten by the material defined in the group texture tag.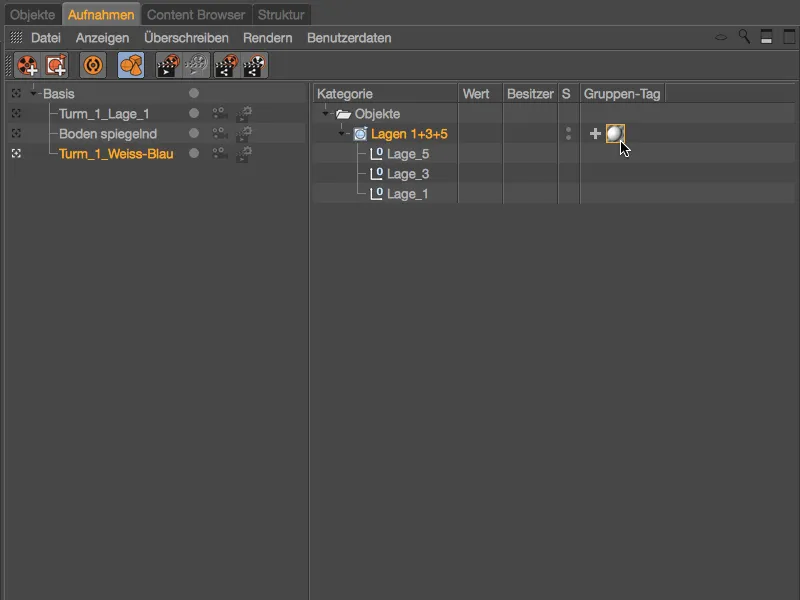
Of course, this change is also immediately visible in the editor.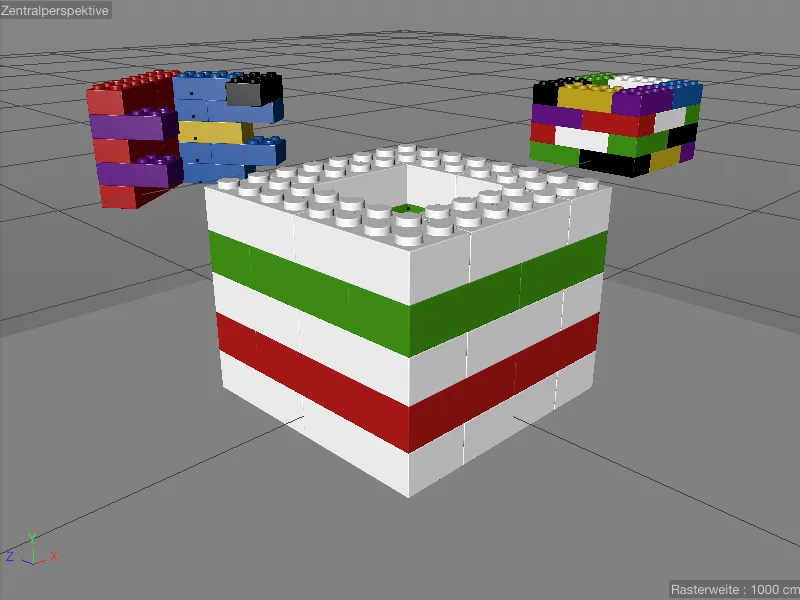
So that the layers 2 and 4 located between the white Lego bricks can also be provided with an alternative material, we add another overwrite group in the recording manager via the context menu using the right mouse button and rename it accordingly to \"Layers 2+4\".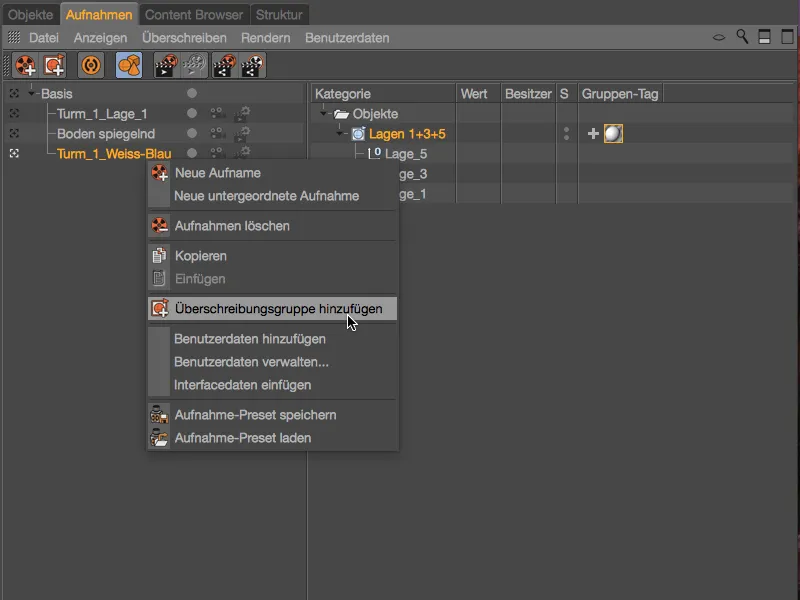
To populate the new overwrite group, we switch back to the Object Managerand drag and drop layers 2 and 4 of the front tower from the Object Manager...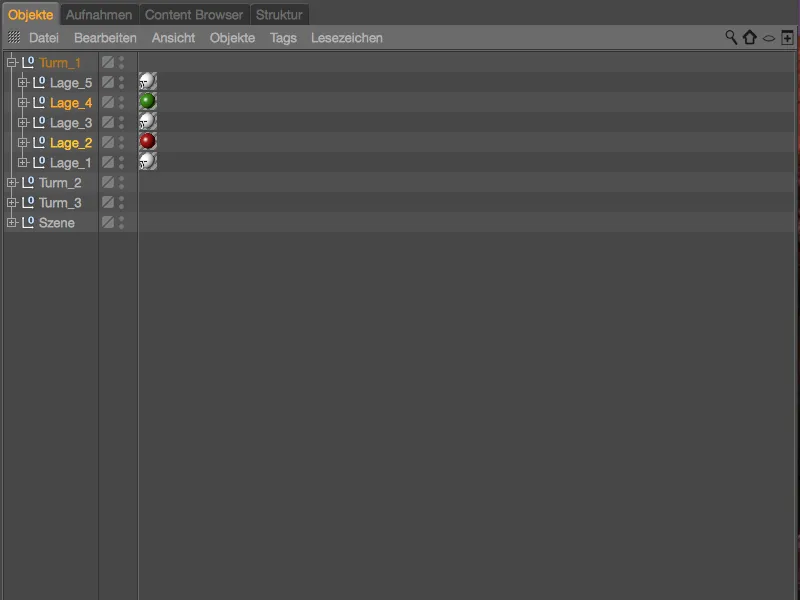
... into the second override group for layers 2 and 4. We also assign a texture tagto this override group using the + symbol in the Group tag column and drag the prepared blue material from the Material managerinto the texture tagfor the override.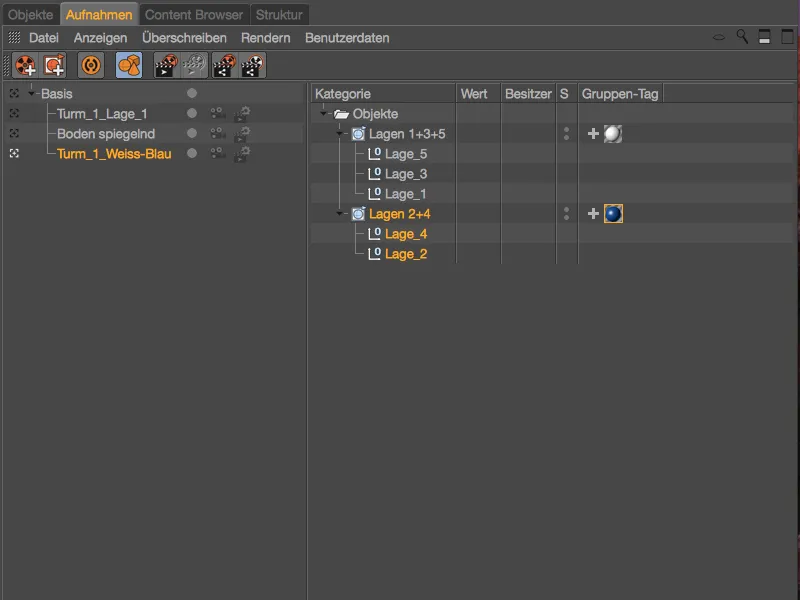
We can also see from the tag icons in the Object Managerwhether a particular tag is subject to overwriting. For example, the five layers of the first tower all have a texture tagwith a \"T\".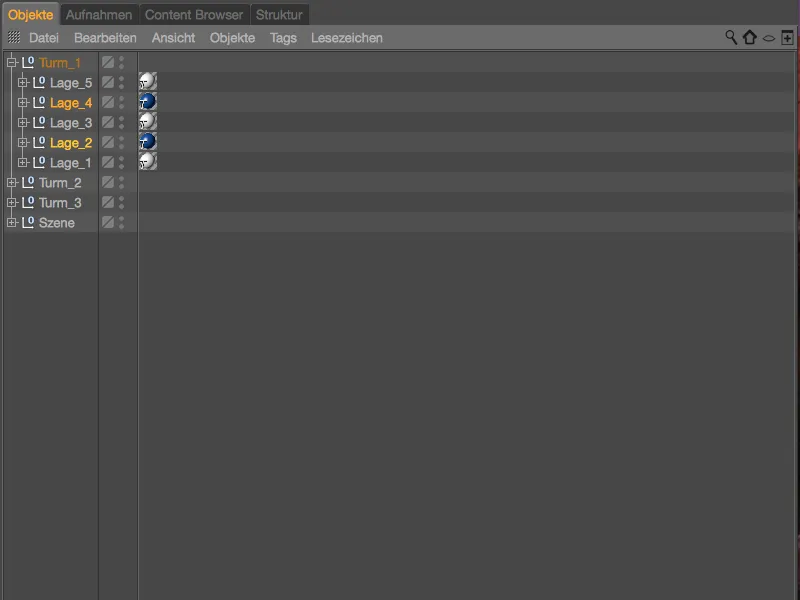
To create even more color combinations with the prepared materials, we make things easy for ourselves and duplicate the recording with the override group by moving it in the recording manager while holding down the Ctrl key.
Then we just have to rename the respective recording according to its function and replace the materials in the texture tagsin the corresponding overwrite groups.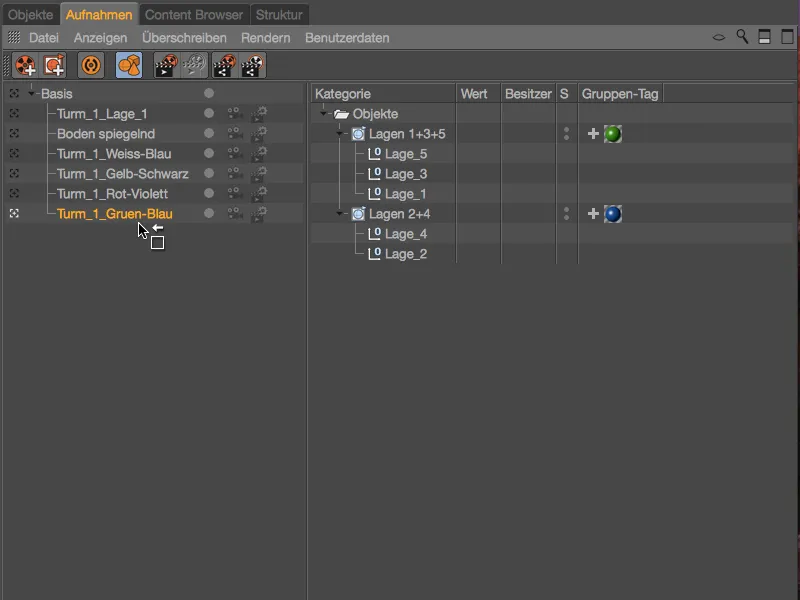
Now the color variants created by overwrite groups in recordings are also completed, so that we can easily click through the various combinations of the front tower.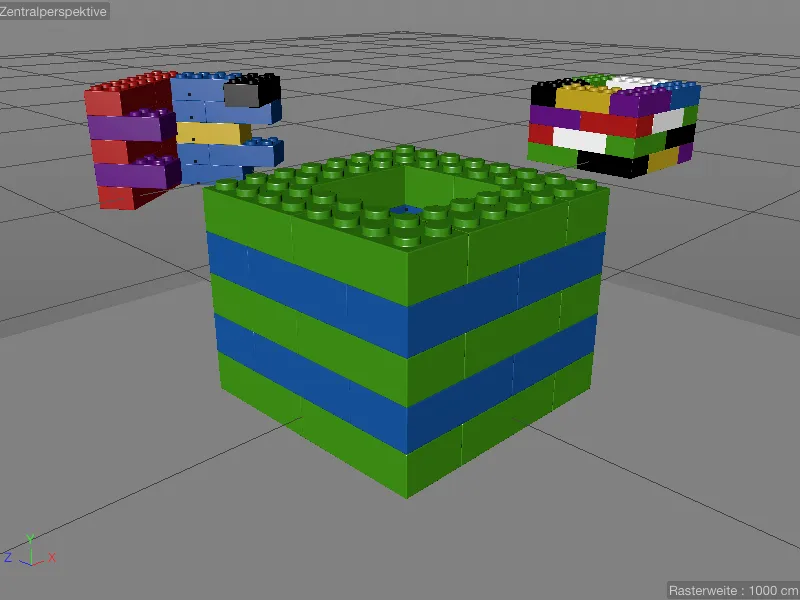
Duplicating and reusing recordings
As the Shot Manager works strictly hierarchically, we can easily duplicate and reuse existing variations in the form of shots. To do this, we simply have to duplicate the respective recording in the recording manager by moving it while holding down the Ctrl key and subordinate it to the target recording.
By subordinating the shot of the reflective floor in the example shown, we can ensure that a second variant with a reflective floor is available for each color variant of the tower.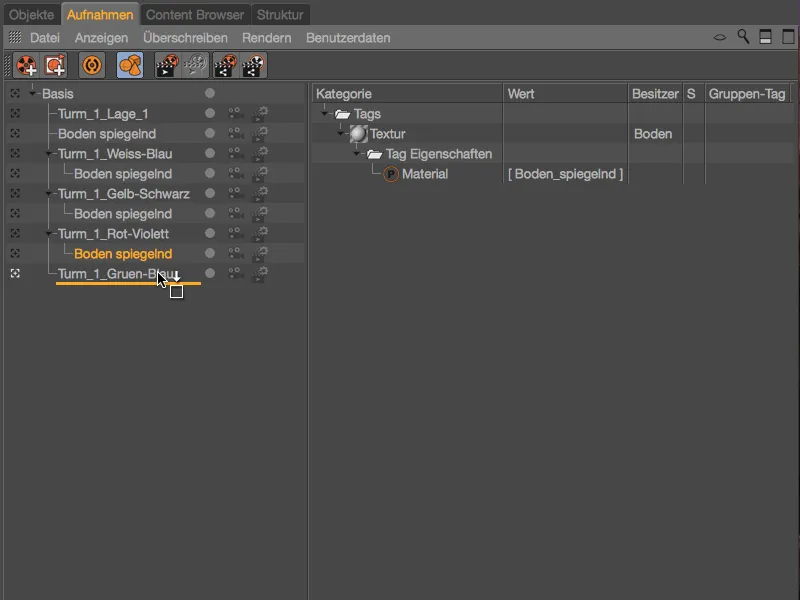
Changing cameras and render presets
For each shot, we can select an existing camera or render preset directly in the shot manager. In addition to the standard camera, two camera objects (Camera_1 and Camera_2) are integrated and set up in my prepared scene. Using the camera icon next to each shot, we can easily switch between the cameras or adopt (inherit) the setting from the parent object.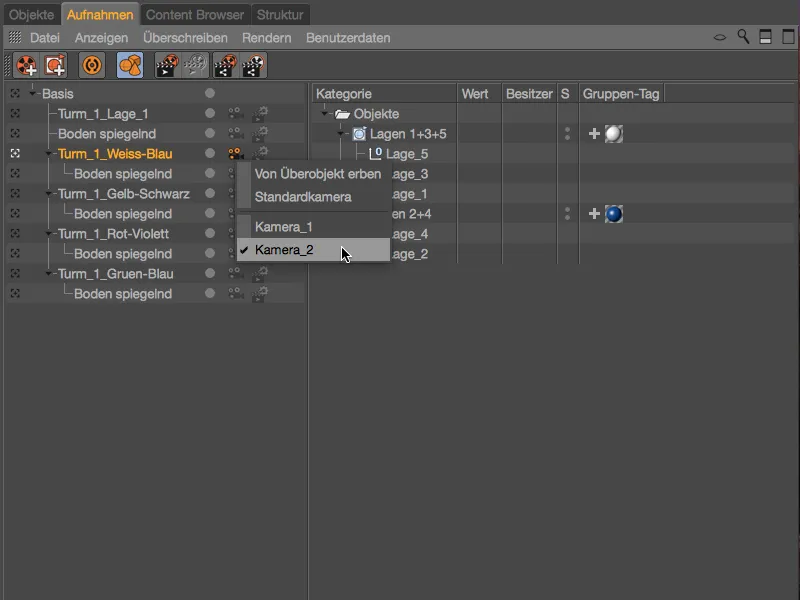
While the standard camera can be identified by a white camera icon, an orange camera icon indicates a separate camera object. Switching between the cameras for the active recording is of course immediately visible in the editor.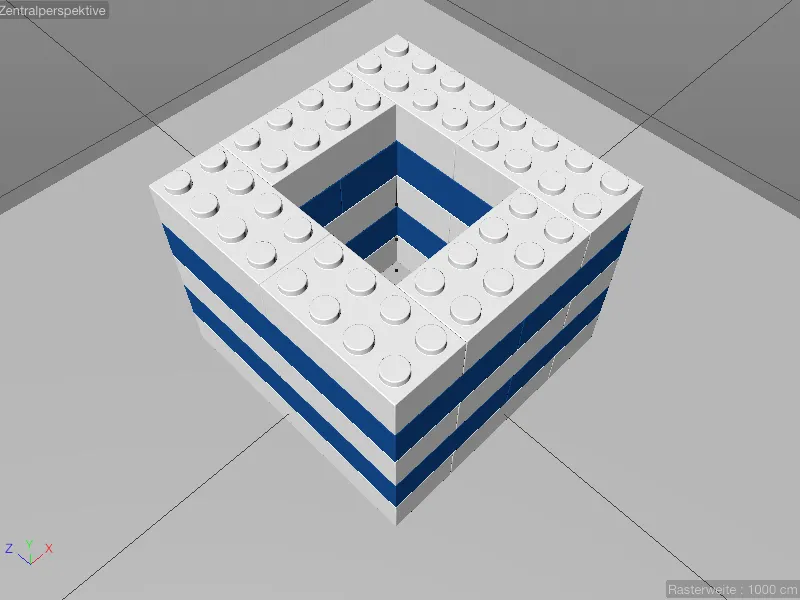
In order to be able to show the change of render presets, the prepared scene in my working file also has a separate render preset, here Renderer Physical, with activated depth of field.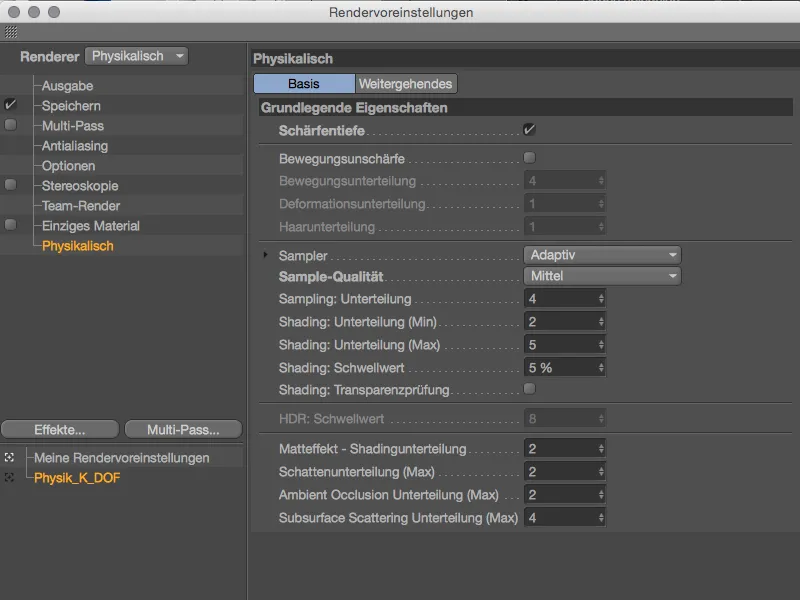
So that the depth of field can also take effect, I have set the focus of the camera in the corresponding settings dialog via Focus object to a Lego brick in front.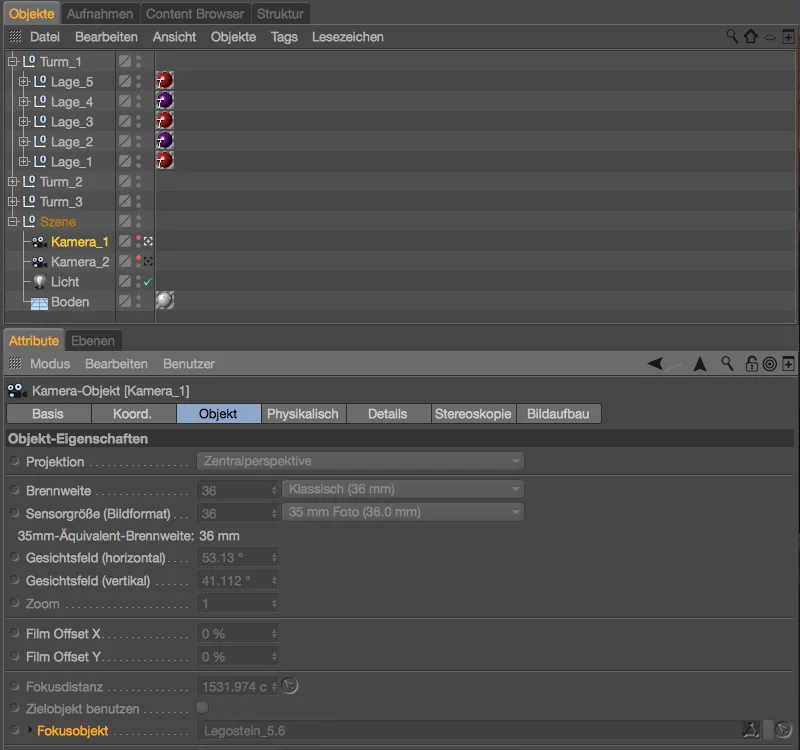
For the sake of completeness, let's also take a look at the settings on the Physical pageof the camera object. An aperture of f/0.5 is entered here to strengthen the depth of field effect.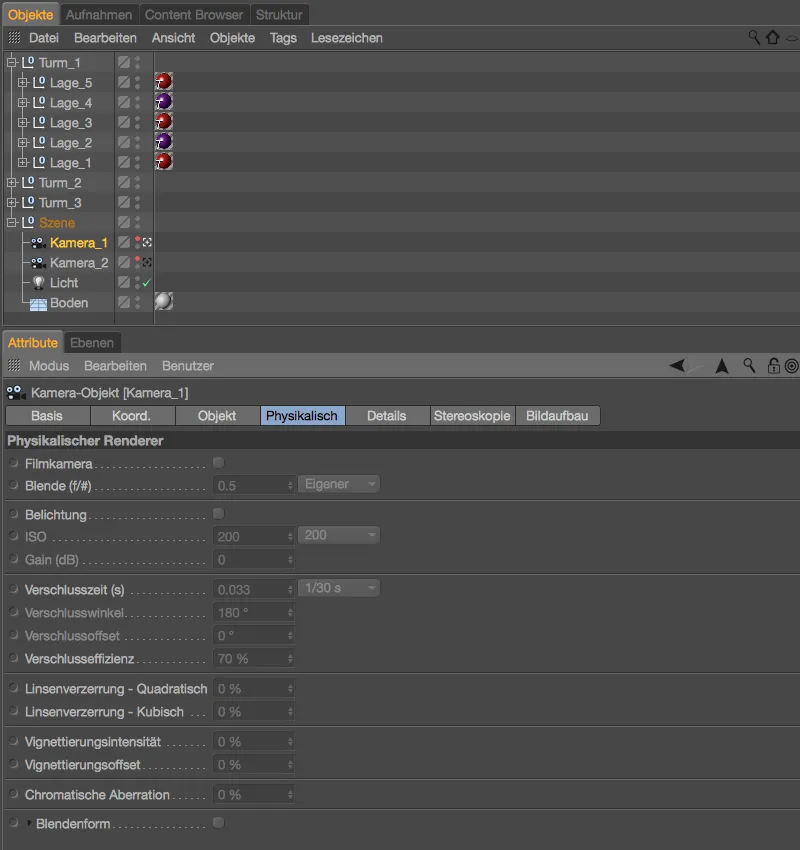
The renderer can be changed in the same way as the camera using the icon for the render presets located directly next to it in the Shooting Manager. All existing render presets are displayed here for quick switching.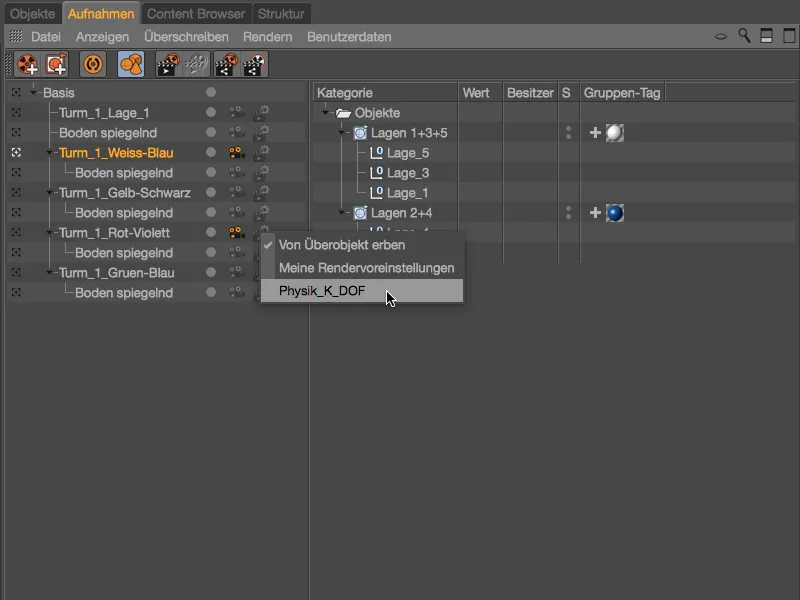
The conveniently organized and controllable scene variants in conjunction with the camera and render presets make the Recording Manager a powerful control center whose functionality extends through all relevant areas of Cinema 4D.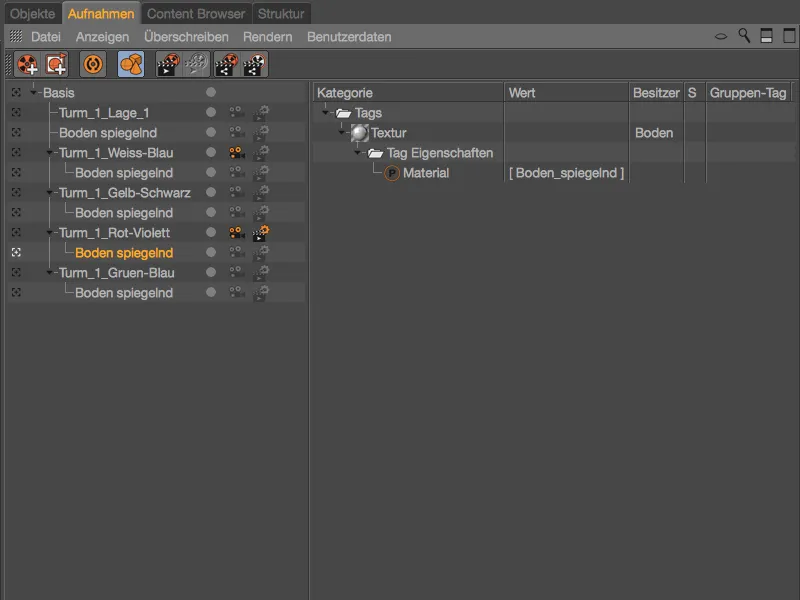
Recordings become even more interesting when we also consider the possibilities for rendering with variable path and file names. We will look at this in more detail in another tutorial.