Of course, it is not possible to cover all the small but practical improvements in one tutorial. This tutorial is therefore intended to invite you to discover the numerous improvements for yourself.
Color coding of new features
For all those who don't like to struggle through documentation before working with their new software, the color coding of the new features is perfect. Yellow-colored menu entries, yellow-bordered and highlighted palettes clearly signal that an innovation is hidden in the menu in question, the respective palette or the corresponding function.
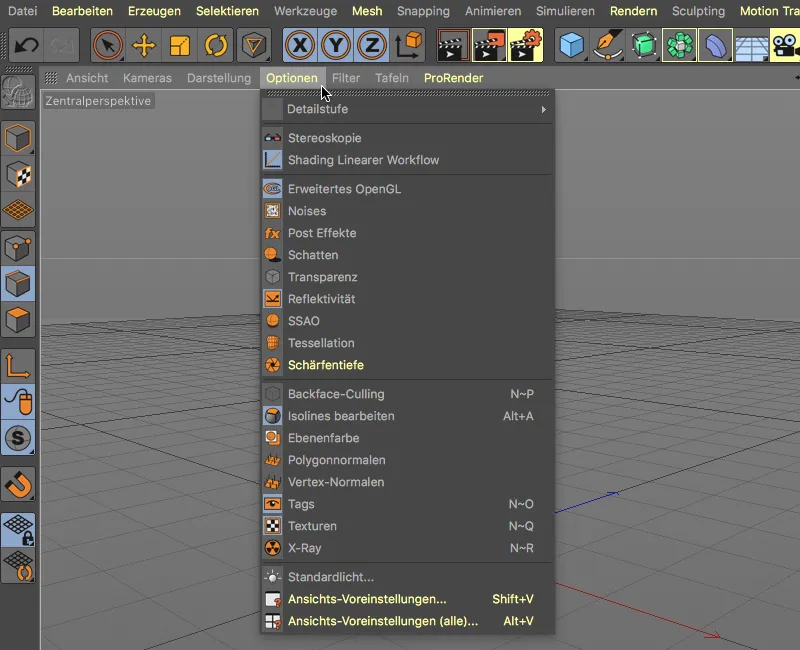
This also makes it easy to distinguish between the tried and tested options and the new, added or revised functions for existing objects or commands.
To jump directly from the colored entry to the right place in the Cinema 4D manual, the key combination Command+F1 is sufficient as usual when the mouse pointer is on the desired entry.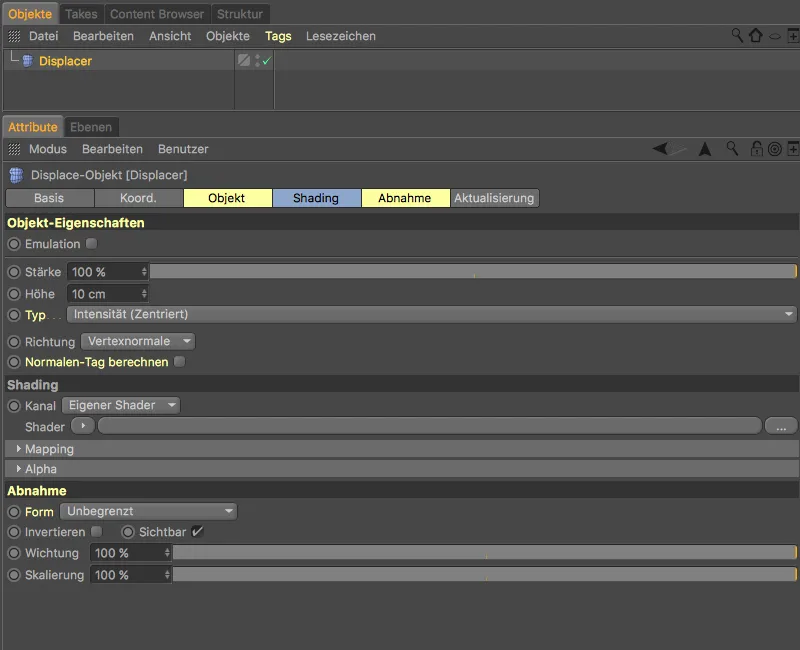
In the program preferences, we find the corresponding settings under Interface. In addition to the new features of the R19, the Highlight features menu can also be used to review the new features of the R18 or to switch off the color highlighting.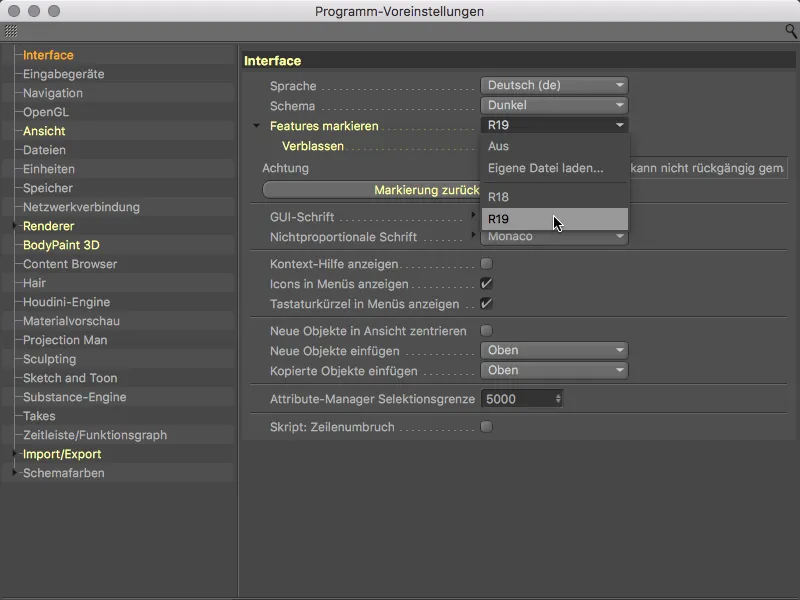
If we leave the Fade option activated, the yellow coloring becomes slightly weaker the first time the element is called up; the coloring disappears completely the fifth time it is called up.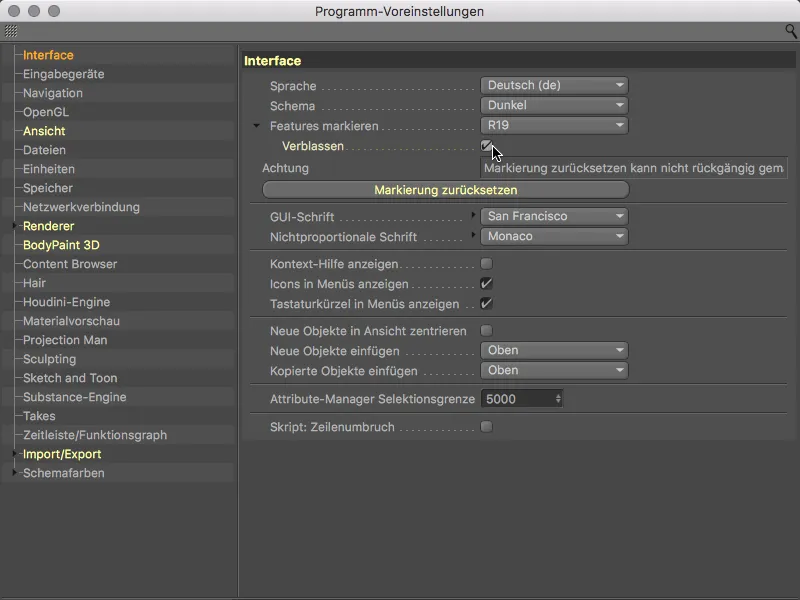
Improved OpenGL viewport
In Release 19, Maxon has once again worked on bringing the display quality in the editor vieweven closer to the changed result.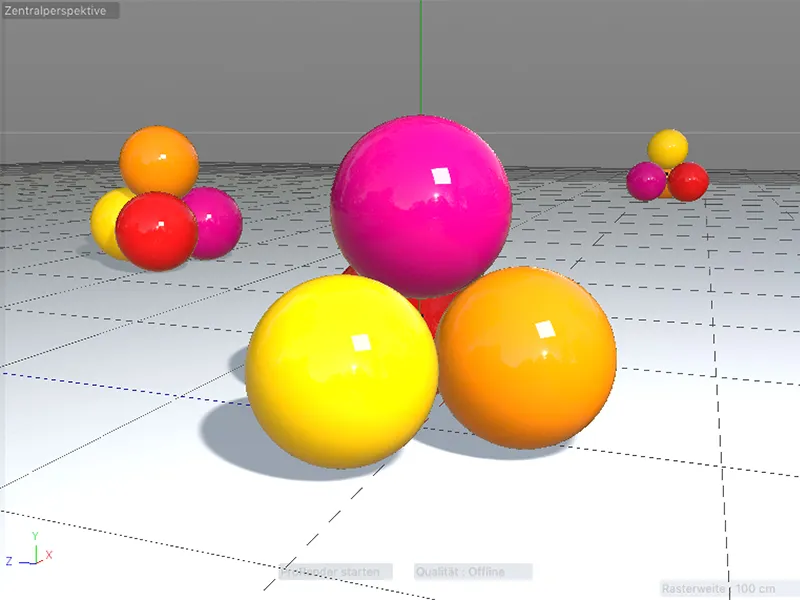
As the new features highlighted in yellow in the view presets tell us, the display of reflectivity has been significantly improved once again. Reflections of the sky and rectangular area lights are particularly affected.
Further down in the settings dialog, however, there is also a special option waiting for us if we are using a camera with a fixed focus distance: the depth of field display in the editor view.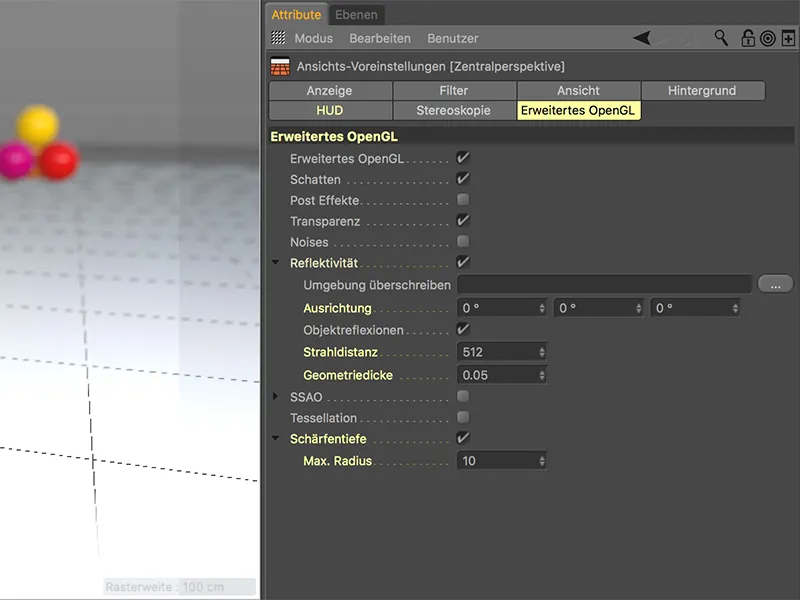
With this option, the depth of field can be assessed directly in the editor viewwithout any test rendering.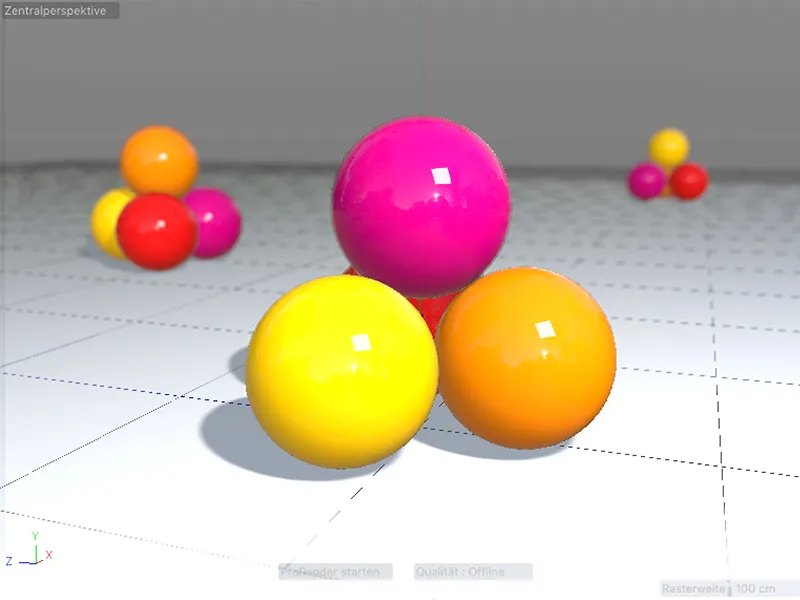
Extended modifier keys
Modifier keys are the practical additional keys such as Shift and Alt, with which we can automatically make a new object the child (Shift key) or parent (Alt key) of a selected object as soon as it is created.
A new feature in Release 19 is that the modifier keys also work with multiple selections. In this way, we can, for example, give each of the selected spline basic objects a separate object in one go by holding down the Alt key...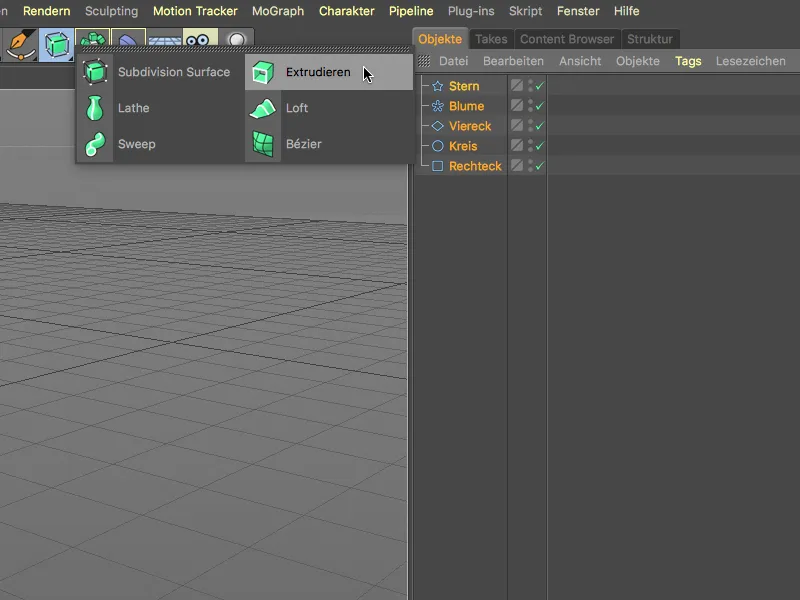
... assign a separate extrude object to each of the selected basic spline objects in one go.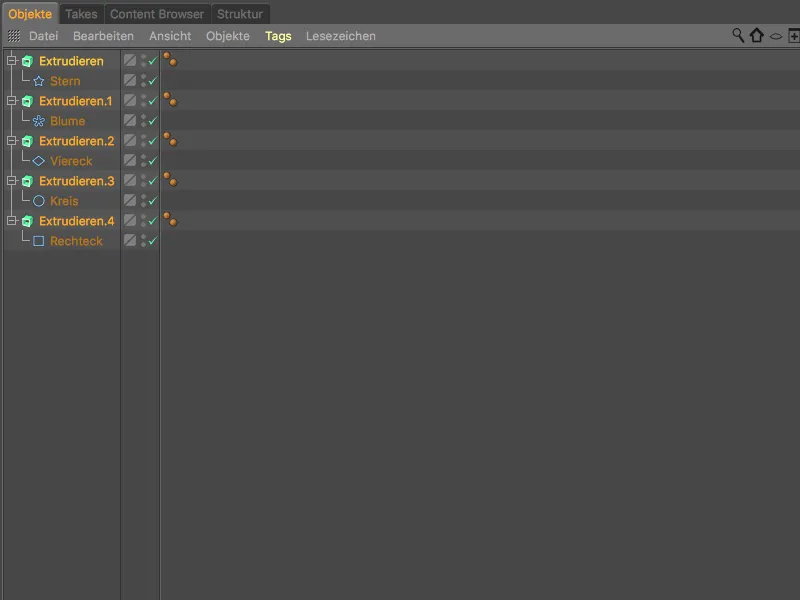
When subordinating a new object - for example a deformer - for several elements, we use the usual Shift key.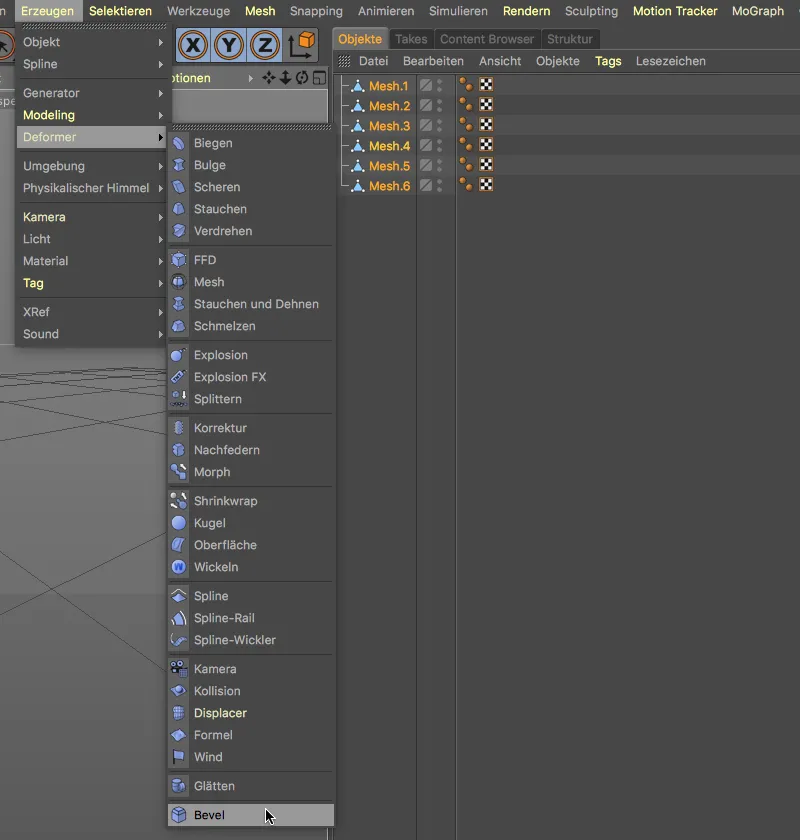
A separate deformer is then assigned to all selected elements.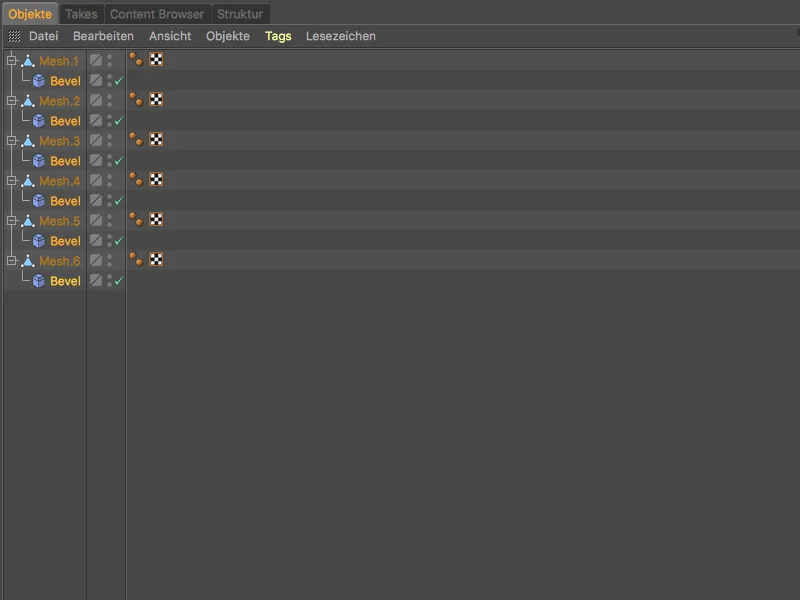
While this new feature is more of an extension of the existing functionality, the key combination Shift+Alt gives us a completely new modifier key.
Here is an example: In this case, a total of six polygon objects each have a subordinate, additional polygon object. All elements are selected.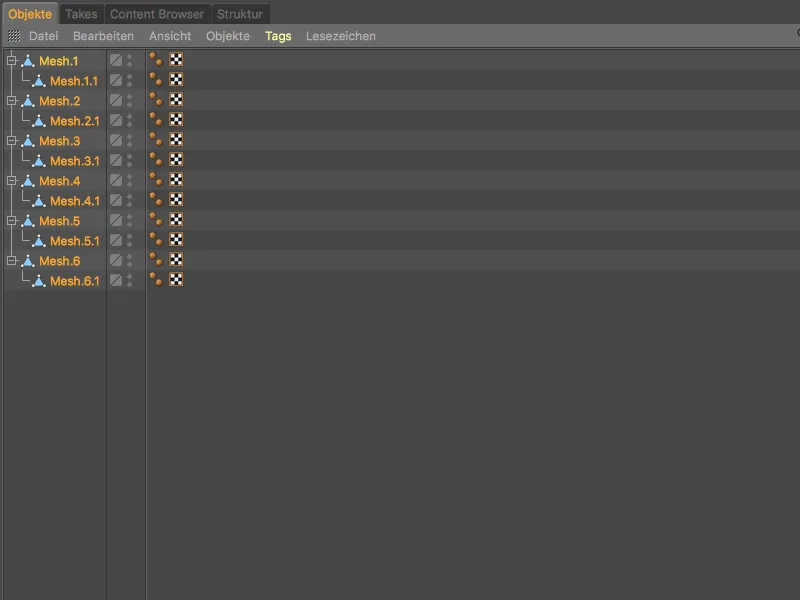
If we hold down the Shift keywhen creating the bevel deformer, the hierarchically superior elements are assigned or subordinated to the deformer.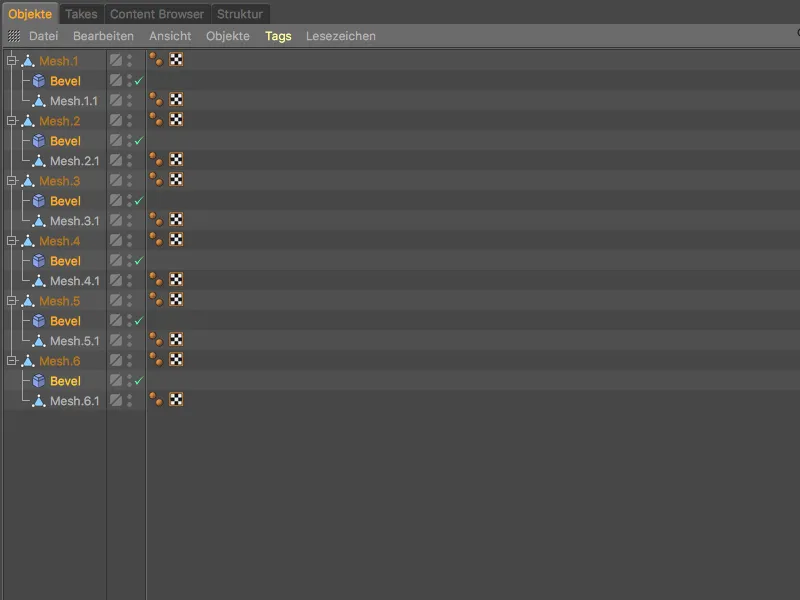
If, however, we use the new modifier key Shift+Alt, all hierarchically subordinate elements are also assigned or subordinated their own deformer.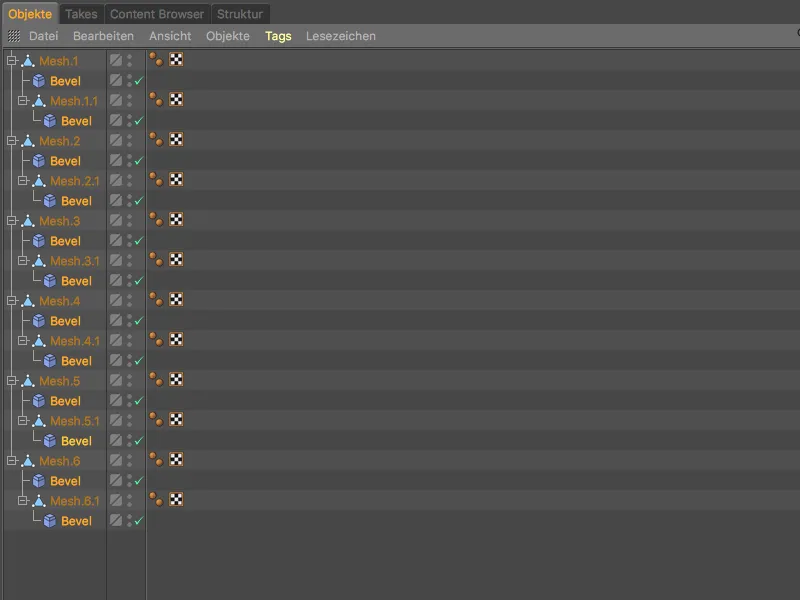
Another new modifier key allows us to group several objects under any parent object. When grouping using the Alt+G shortcut, a null object is always used as the new parent object.
However, if we define our selection and then create a new object by holding down the Ctrl or Ctrl + Alt key, ...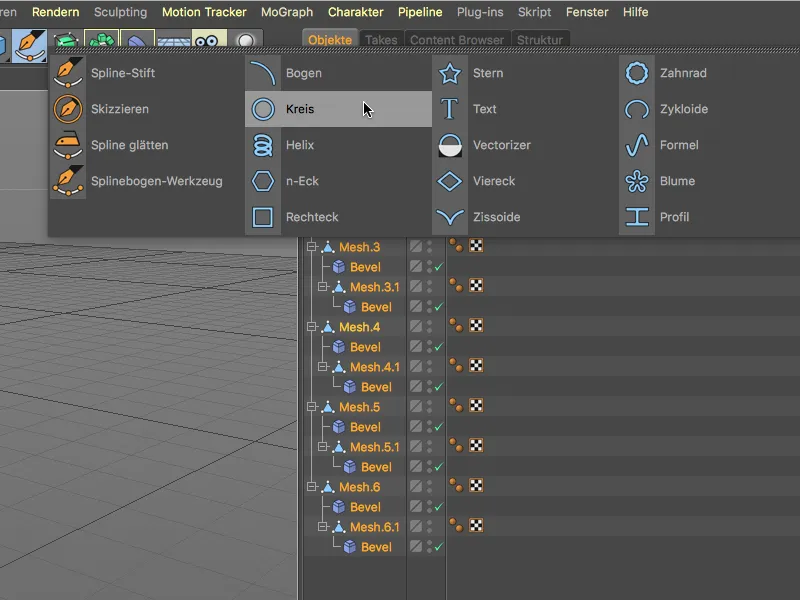
... this new object serves as a parent object for our grouped elements.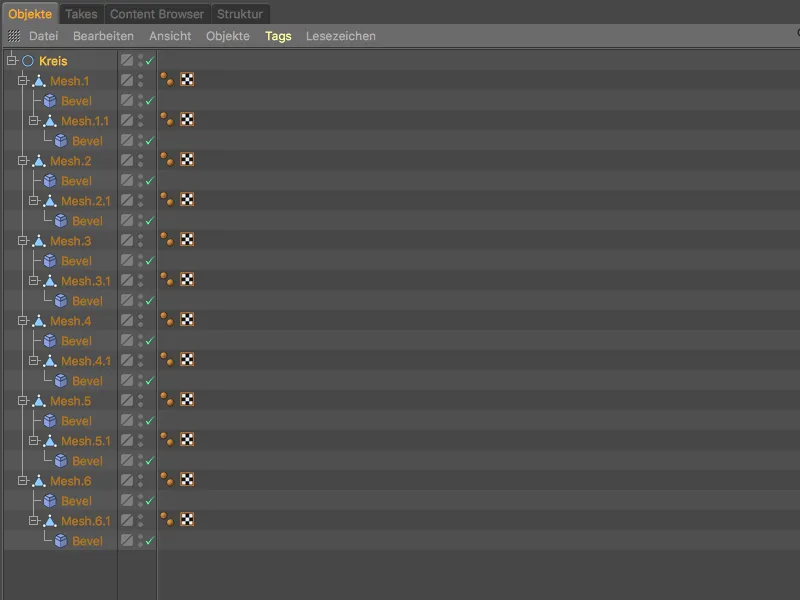
Improved layer sections
A long overdue improvement to the layer cut toolmakes it easier to apply evenly distributed cuts when modeling.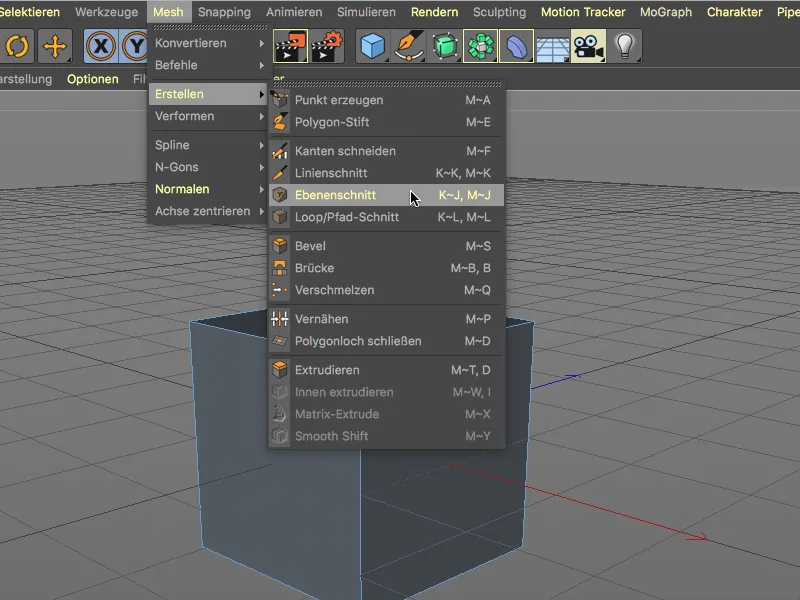
In the settings dialog of the layer cut tool, there is a new option called Uniform cuts. To divide an object with evenly distributed plane cuts, we select the desired mode and the cutting plane as usual and enter the number of cuts. Activating the Even cuts option then automatically ensures ...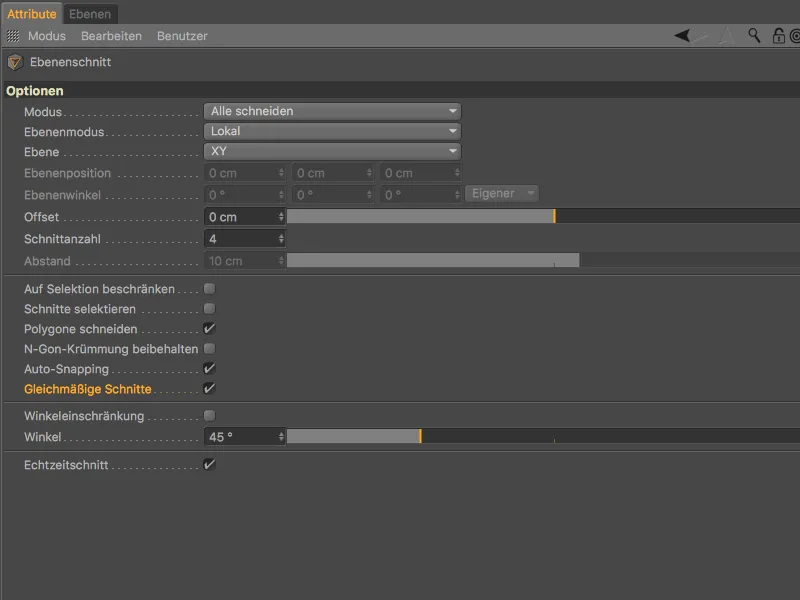
... that the cuts are distributed at equal intervals across the cutting plane.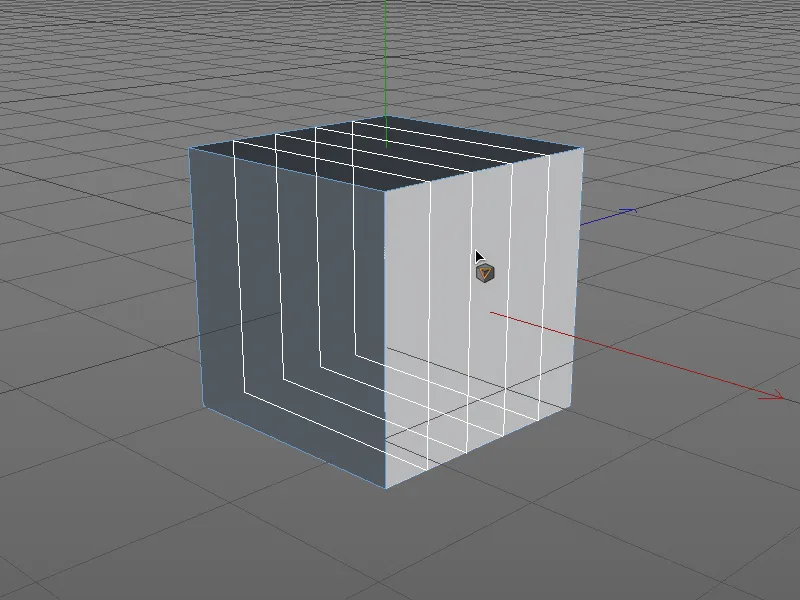
Display of area lights in the editor view
Not least due to the introduction of physically-based rendering (PBR) with physical materials and (physically correct) area lights, these light sources are being used more and more frequently.
In the settings dialog of the light object, we find the option Show in view as surface on the Details page, which takes this development into account.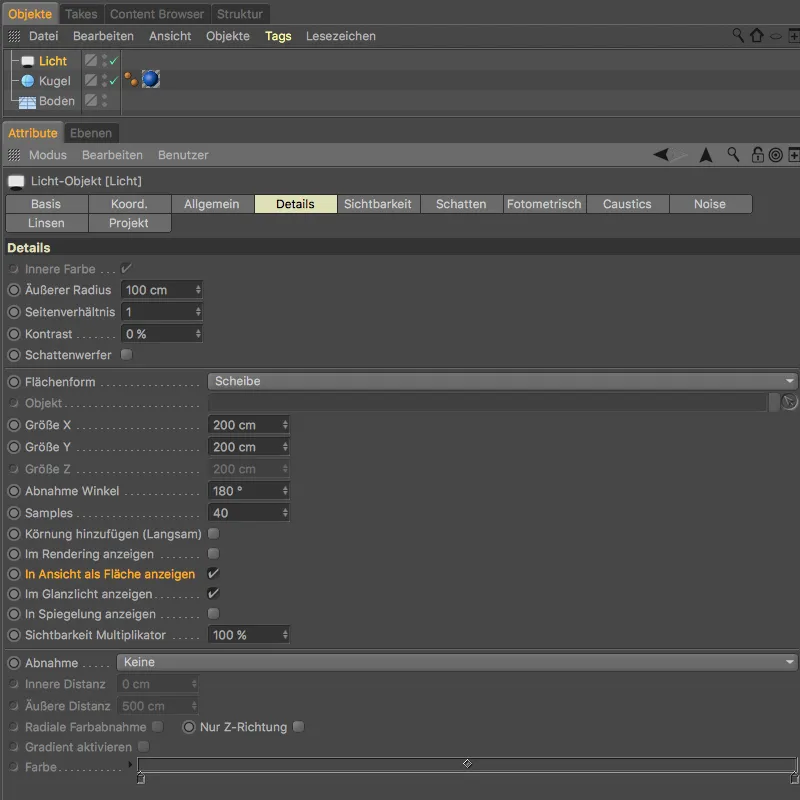
Thanks to this option, we can work with a luminous surface when illuminating the scene in the editor view.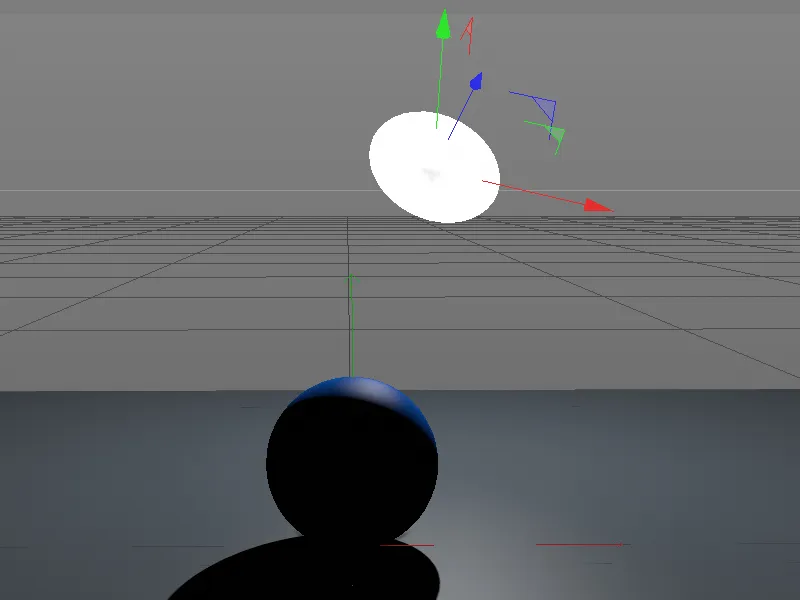
Working with UV points and polygons
The Convert Selection command from the Selection menu is very useful when it comes to converting a particular selection for a different editing mode.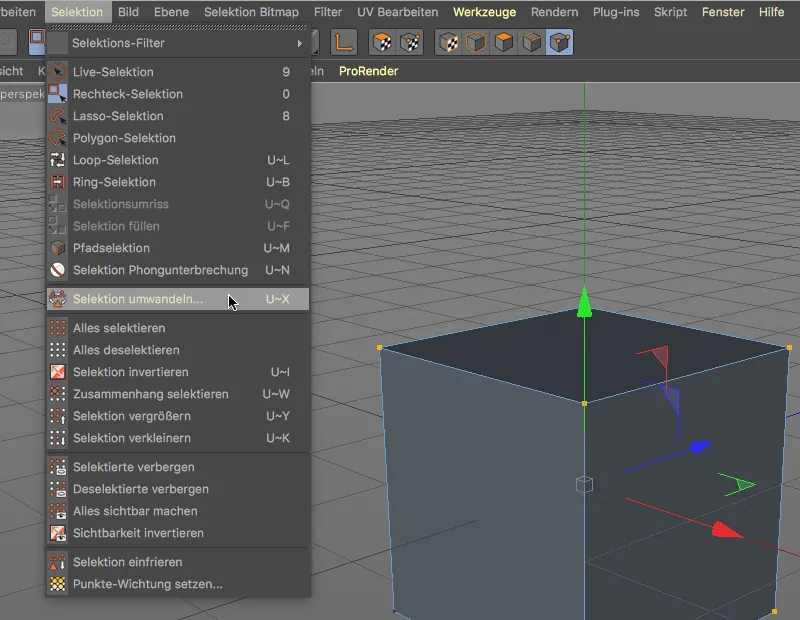
In Cinema 4D Release 19, UV points and UV polygons have been added to the conversion dialog.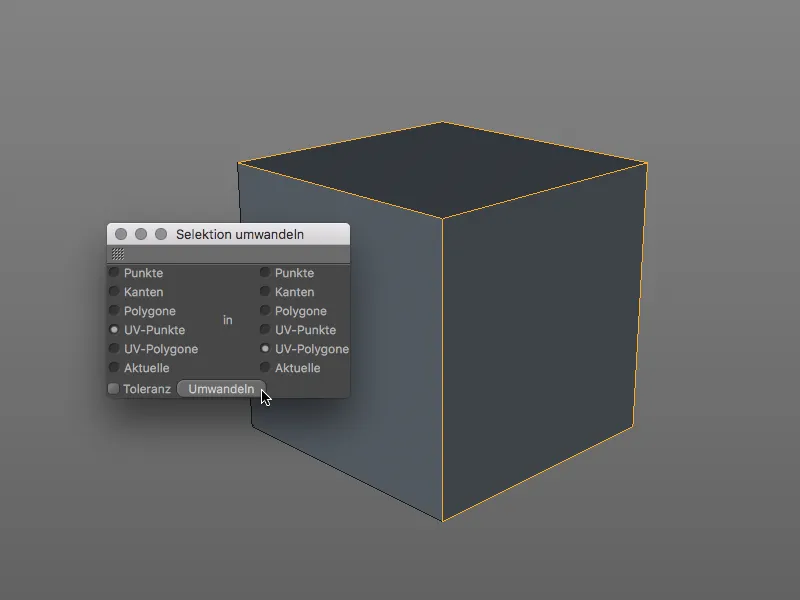
Working with UV points and UV polygons is now analogous to normal points and polygons in Cinema 4D. We can edit UV points and UV polygons via the Coordinate Manager...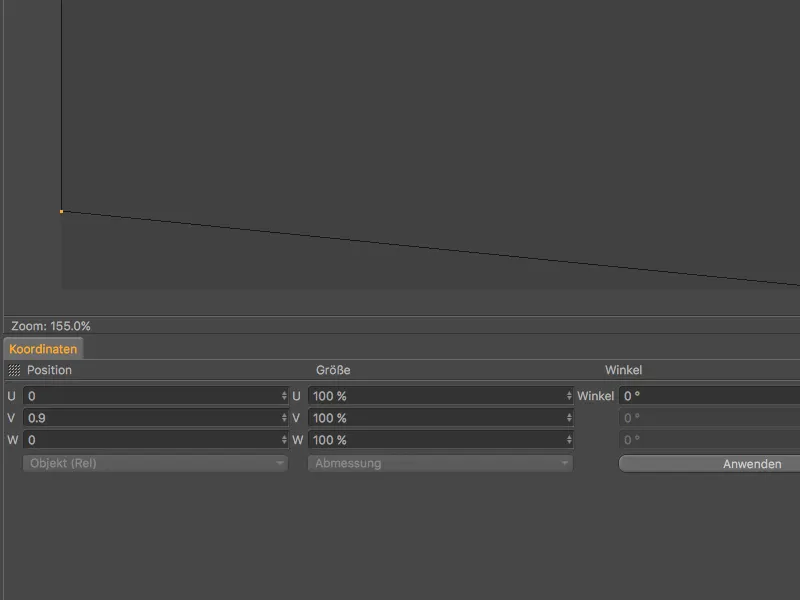
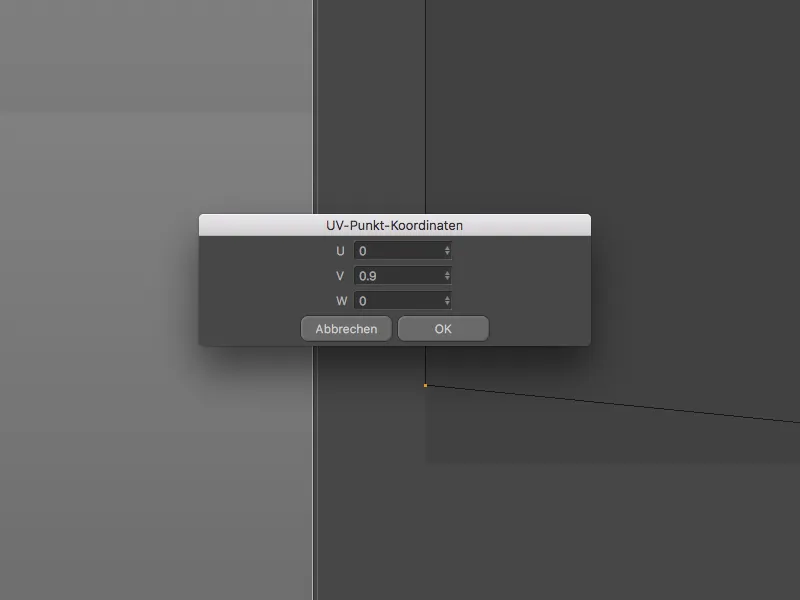
... or change the existing UV coordinates by double-clicking on a UV point.