To take a closer look at the individual parameters of the variation shader, we create a new material by double-clicking on a free space in the material manager and leave the color channel activated together with the reflectivity channel, which is set up by default.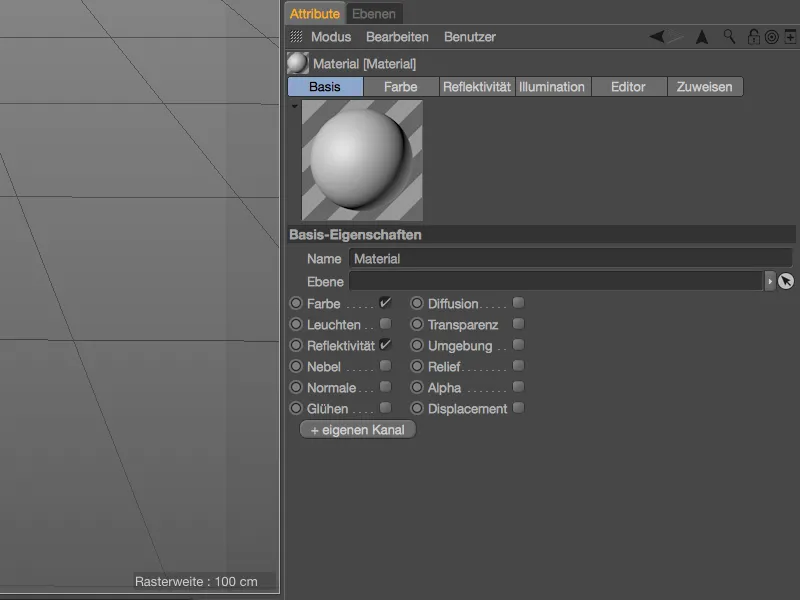
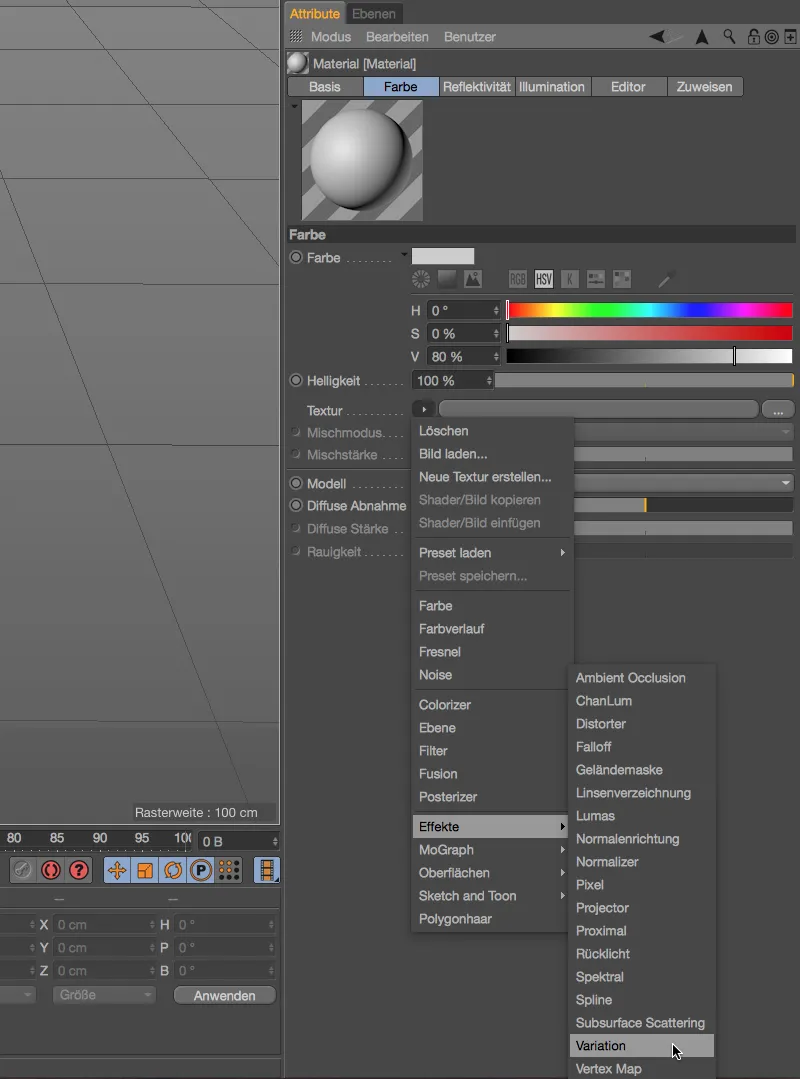
The variation shader should provide color variations in the color channel, so we add the shader as a texture using the corresponding arrow button. We can find the variation shader in the effect shader submenu.
The colored material preview at least indicates that the color of the material has changed. We can access the extensive settings dialog via the texture button of the variation shader.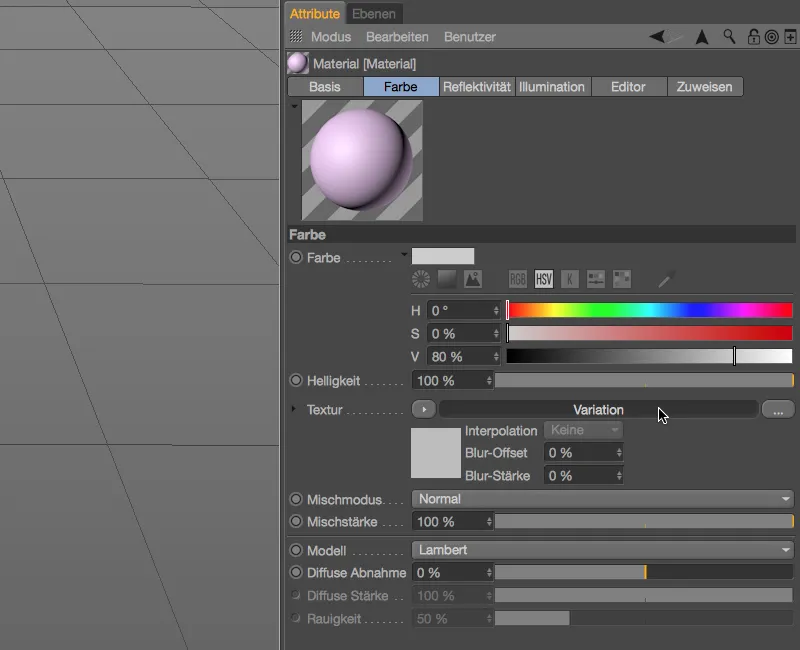
Variation modes
The variation mode section of the shader properties deals with the basic settings of the variation. The start value ensures the random distribution and can be varied by a different setting.
If the variation shader is to affect objects themselves, we can decide in the associated Object variation menu whether the variations should apply to different objects, object names, hierarchy levels (parent object), clones (render instances) or even object channel IDs.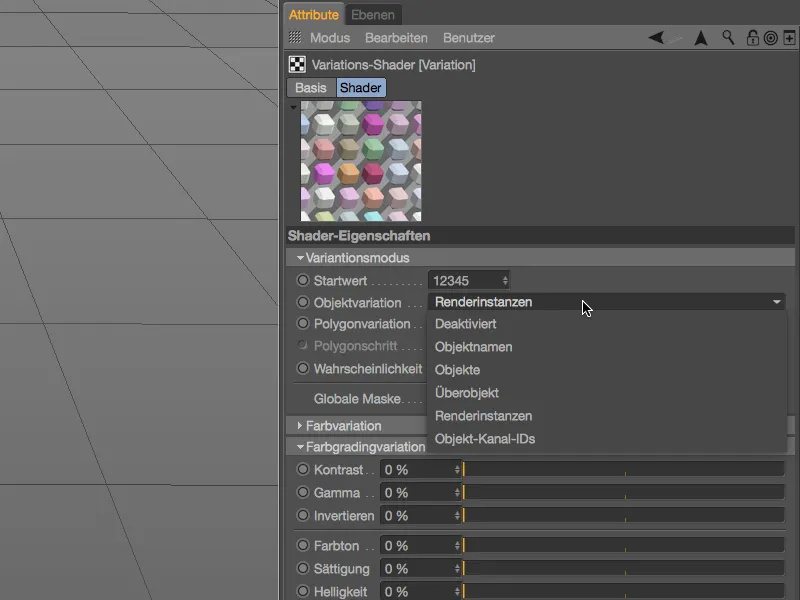
However, before we look at the object variation with a clone object, we will deactivate the object variation and first look at the polygon variation.
Here too, you can use a menu to decide whether all polygons belonging to the object , between different polygon selections or between the UV tiles should be varied - in our example, we will be dealing with all polygons.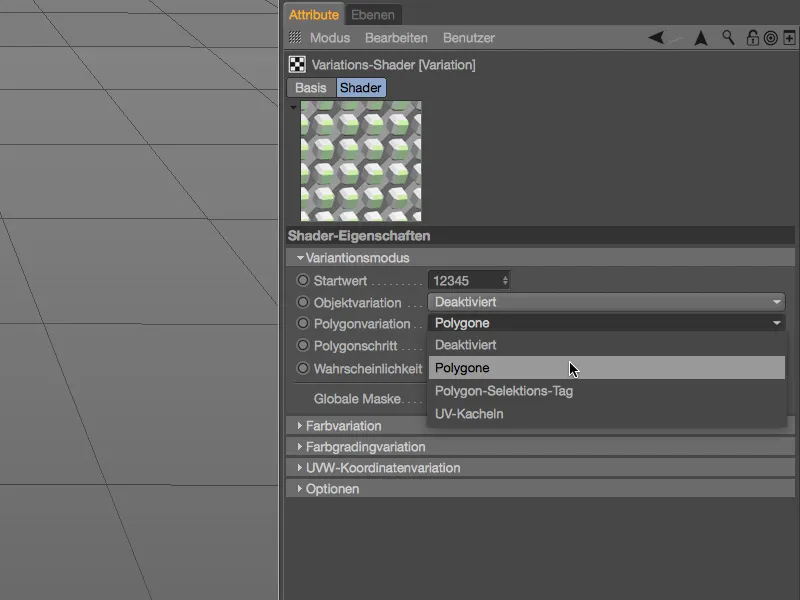
The material preview shows that numerous color variations have already resulted from the standard settings, so we can apply the material to a simple polygonal example object.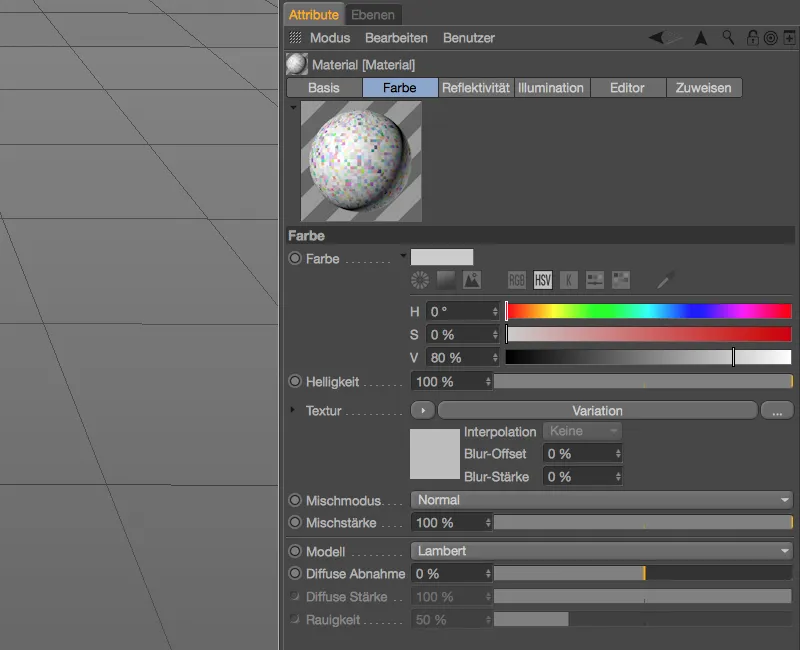
Texturing the polygon cube
For our first example, a parametric cube object with six subdivisions is sufficient, which we then convert into a polygon object using the Convert basic object command ( C key ) in order to obtain the desired polygons for our variation shader.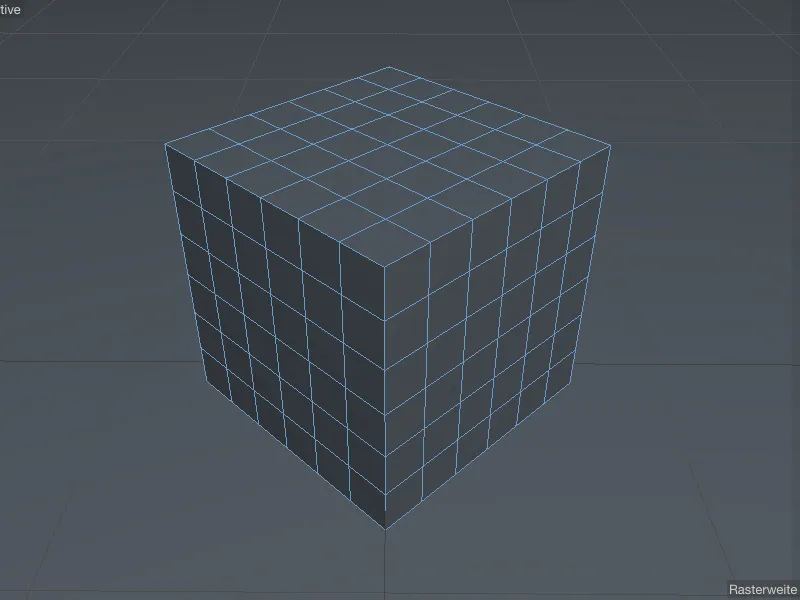
To texture the polygon cube with the variation shader material, we drag the material onto the cube object in the Object Manager. All settings in the associated texture tag can remain at the default values.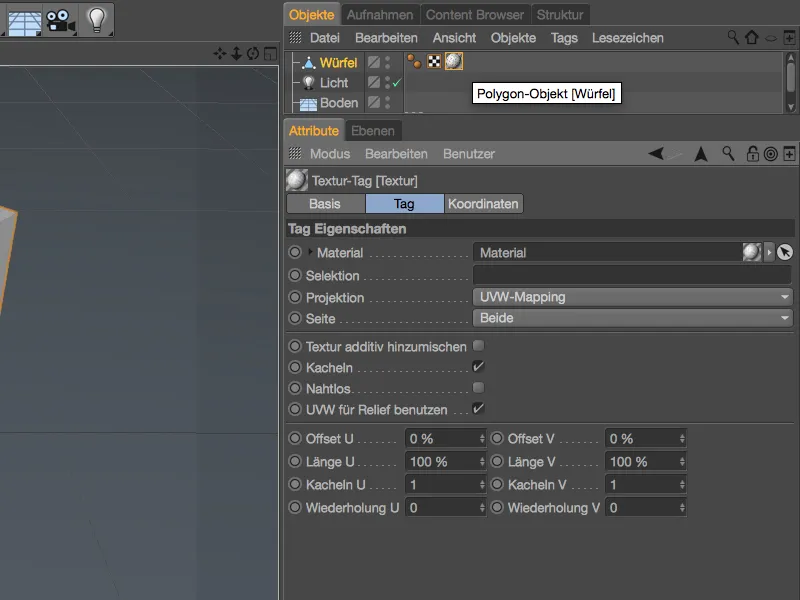
After texturing the cube, we unfortunately see nothing of our variation shader in the editor. Even extended OpenGL does not help here, so we have to render or at least get an interactive render area in the view.
To do this, we activate the Interactive Render Area via the Render menu ...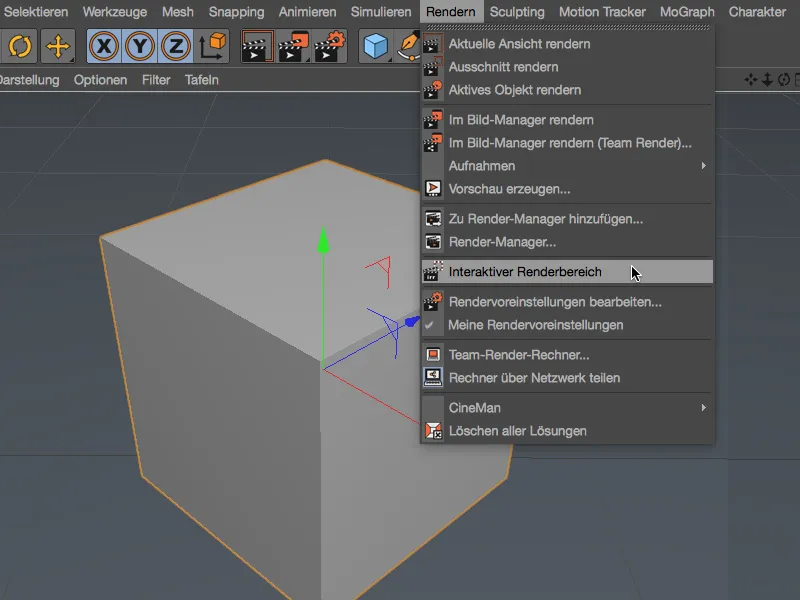
... and place it in the center of our editor view. As defined by us, each polygon of the cube has a different color, even if only with the default setting of random colors at the moment.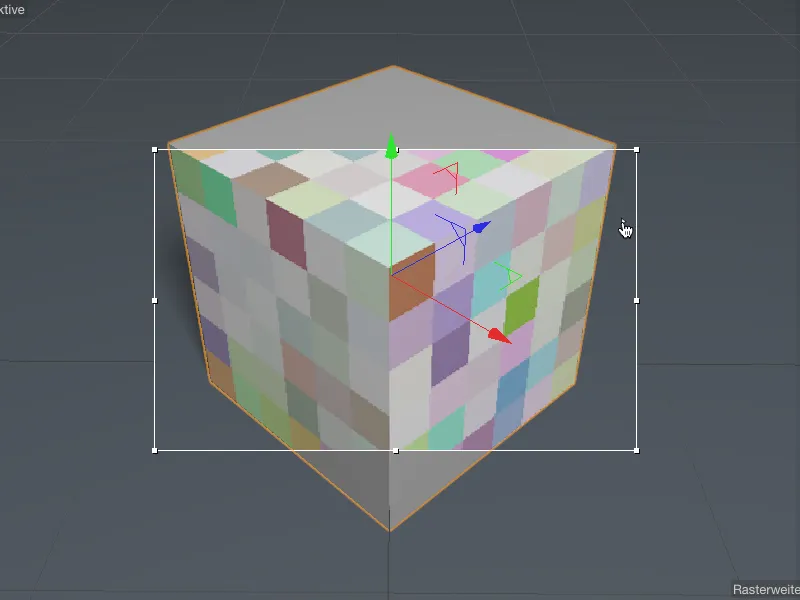
Random colors
So it's high time to take care of the heart of the variation shader, the color variation section. As already mentioned, the current color variations of the polygons are based on the default setting of random colors. We can control this parameter as a percentage, but also via its random color mode. This refers to the offsetting of the adjacent colors with each other, as we know it from the layer modes in other Cinema 4D shaders or, of course, in Photoshop.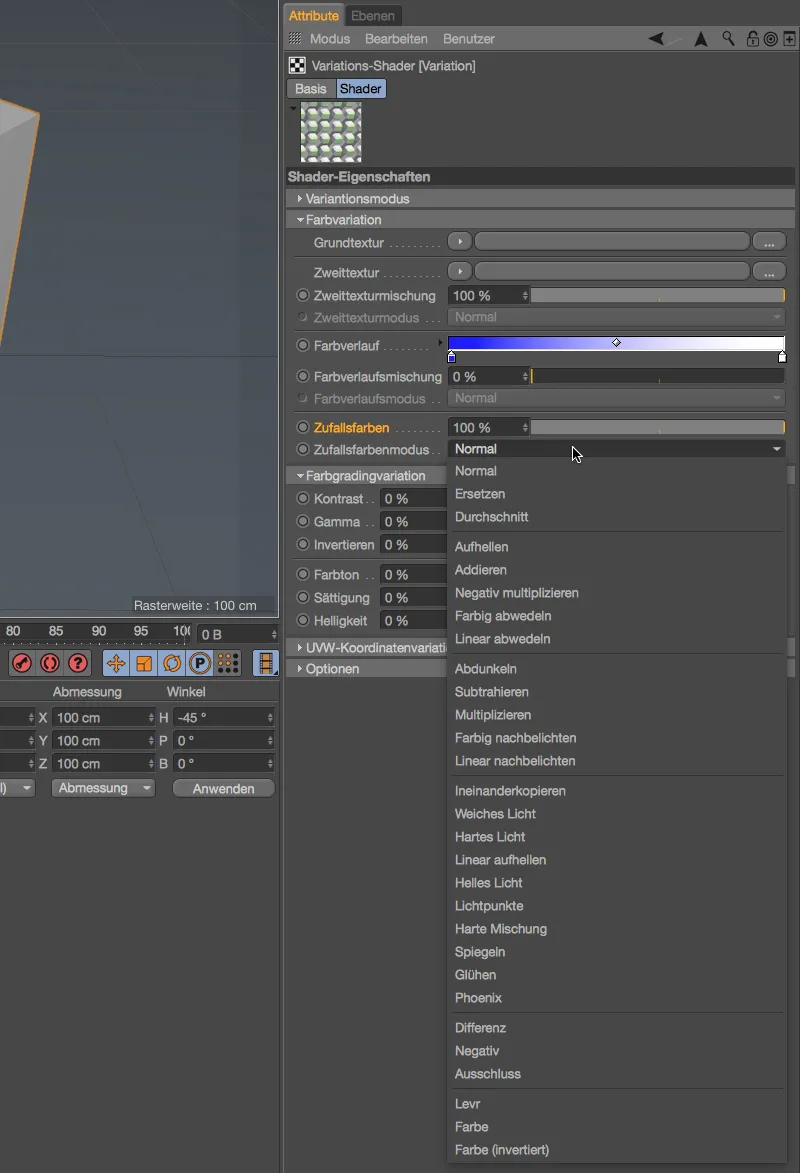
We leave the color variation via random colors at the default values and increase the polygon step parameter in the variation mode section to 3 to better assess the upcoming changes.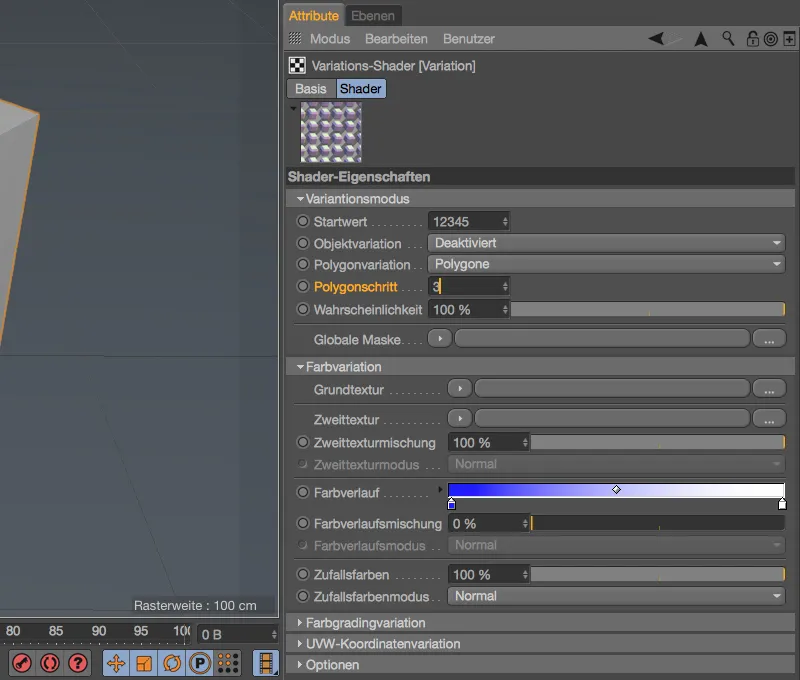
As a result of this change, 3 polygons of our polygon cube are now always combined and assigned a color variation.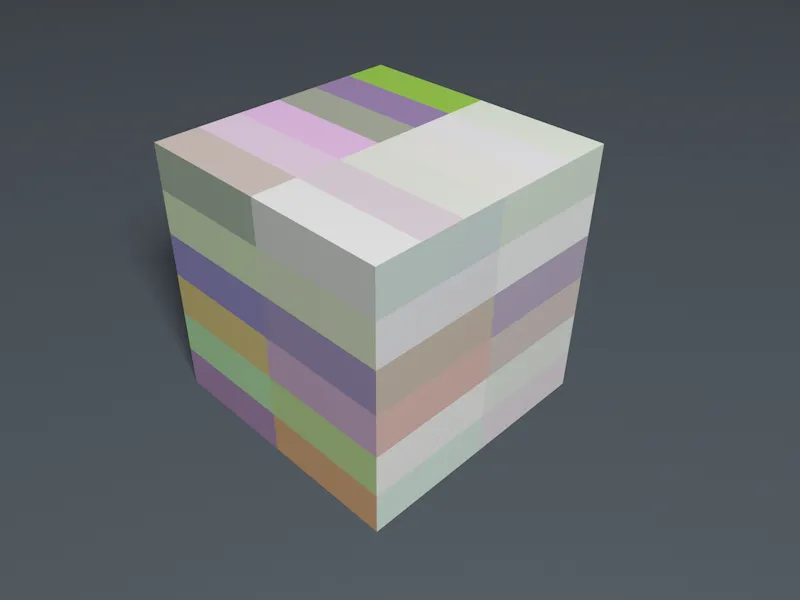
Although we are still working exclusively with the random color variation, we have by no means exhausted all the possibilities. The Color Grading Variation section offers us a total of six widely known color correction parameters, all of which we can apply individually to the random colors on a percentage basis.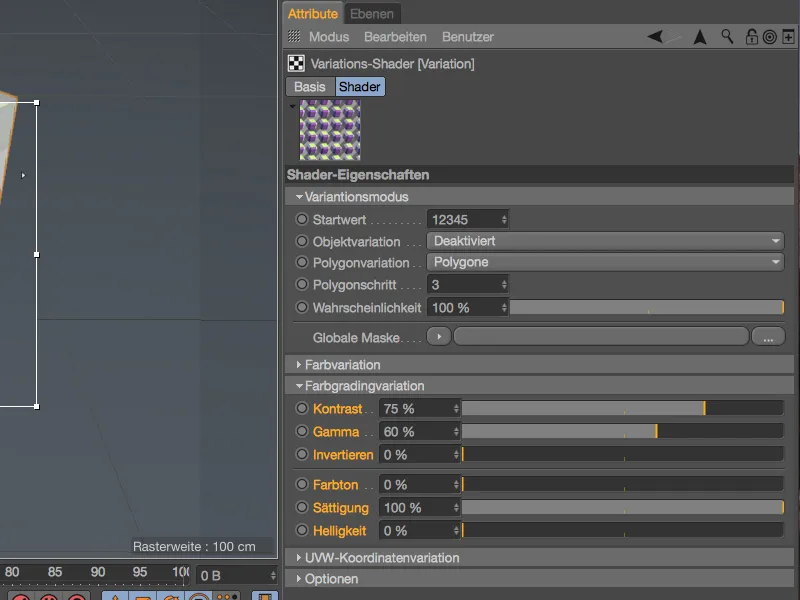
The change in contrast, gamma and saturation shown above makes the random colors used look much crisper.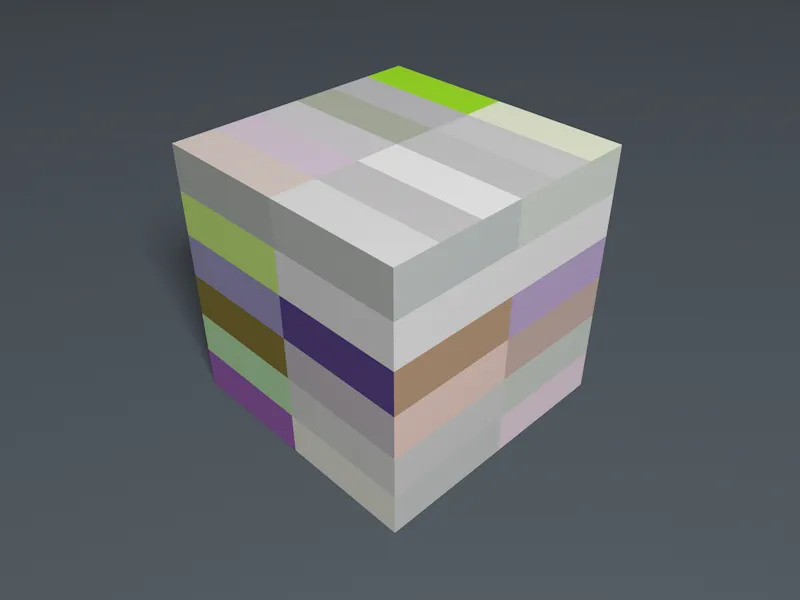
Targeted color variations
Now we come to the most important area of the variation shader, the color variation section. Here we find different variation approaches that we can use individually (as before with the random colors), but also in combination with each other. So that we can look at the different options separately, we set the random colors to 0% and start with a basic texture.
Click on the arrow button to load a color shader as a basic texture.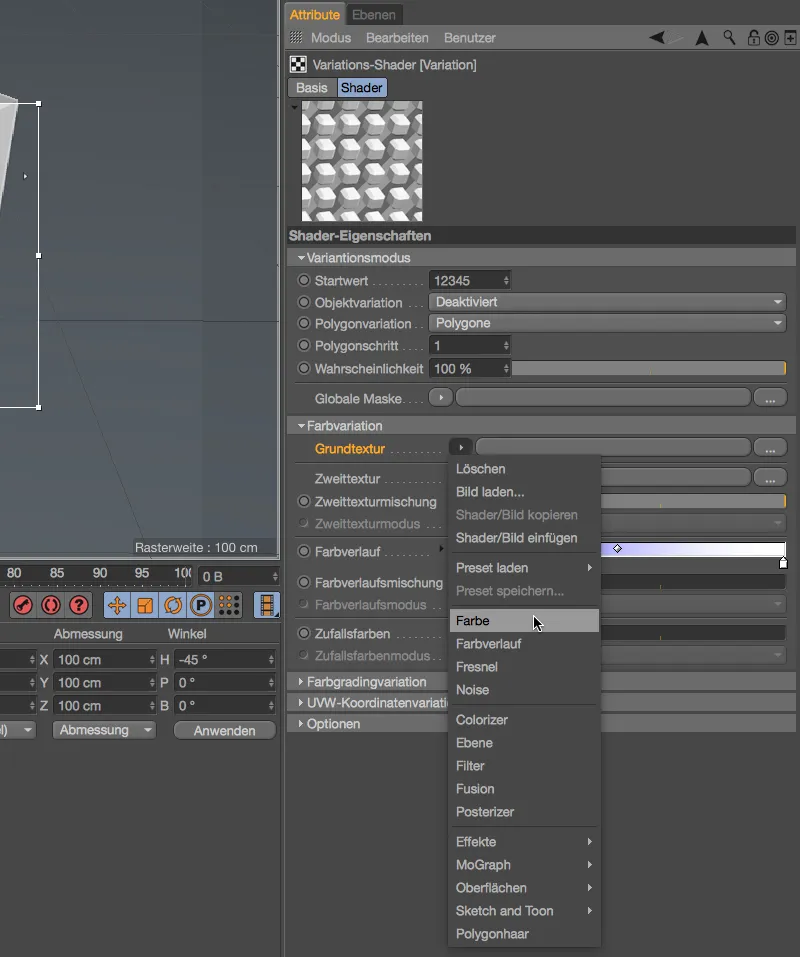
By clicking on the Color shader button or even more simply by expanding the link via the small arrow next to the basic texture, we open the settings dialog for the color shader. I have opted for a rich red as the basic texture.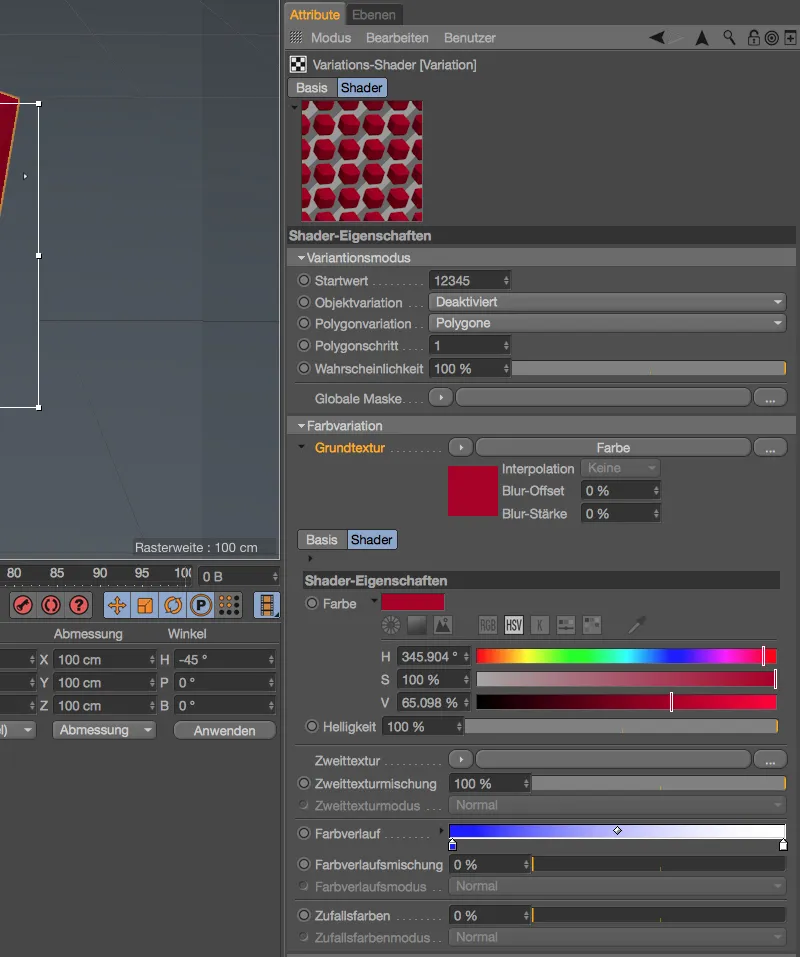
To complete the variation mode consisting of the basic and second texture, we load another shader as a texture using the arrow button for the second texture. I have opted for a noise shader here so that it is easy to see at which points or polygons which type of variation is used.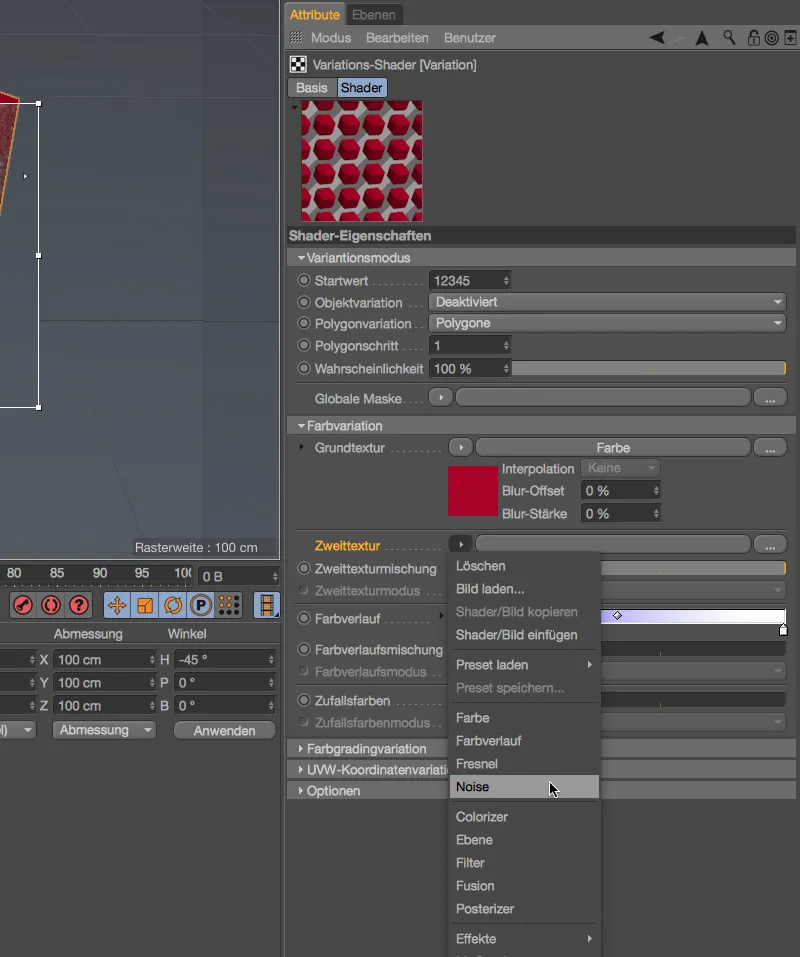
For the noise shader of the second texture, I chose the noise type Poxo with a small global size of 5%.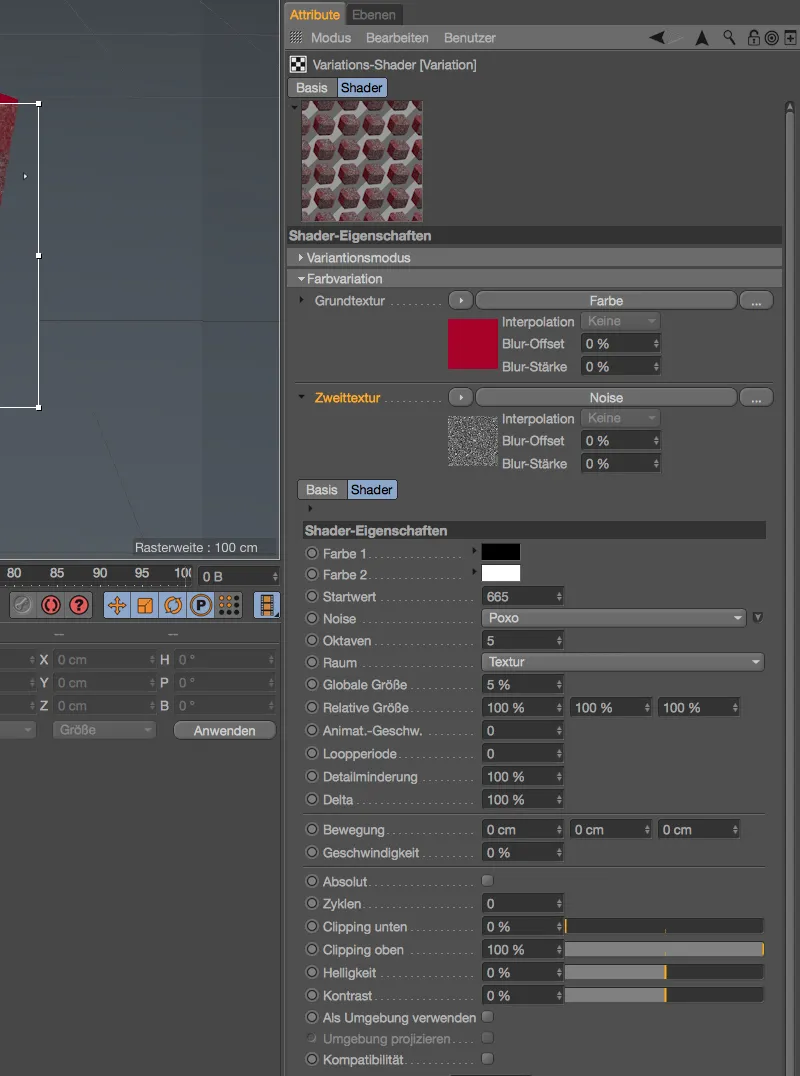
A look at the interactive render area in our editor view shows which variations result from the specified basic and secondary textures.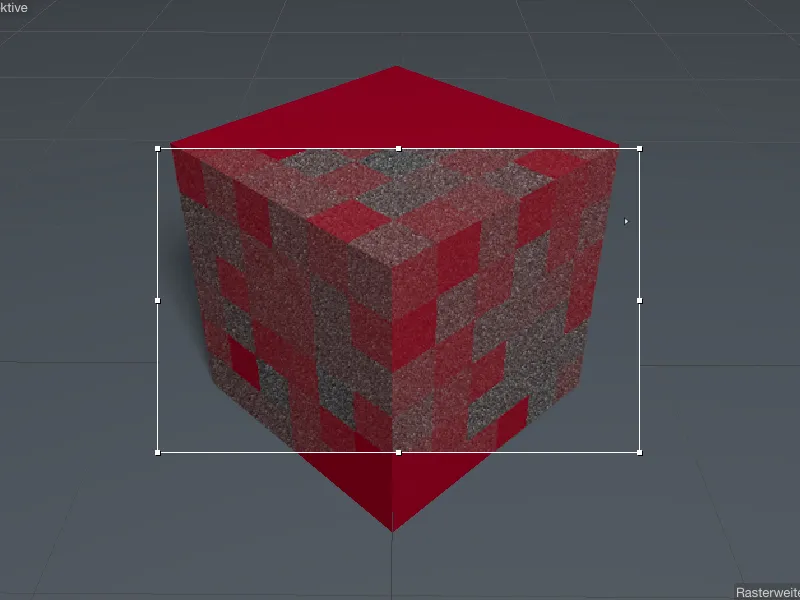
We also have two parameters for adjusting the blend and the calculation mode for the variation per basic and secondary texture. With a reduced blend and the calculation of the second texture using the Soft light mode, for example ...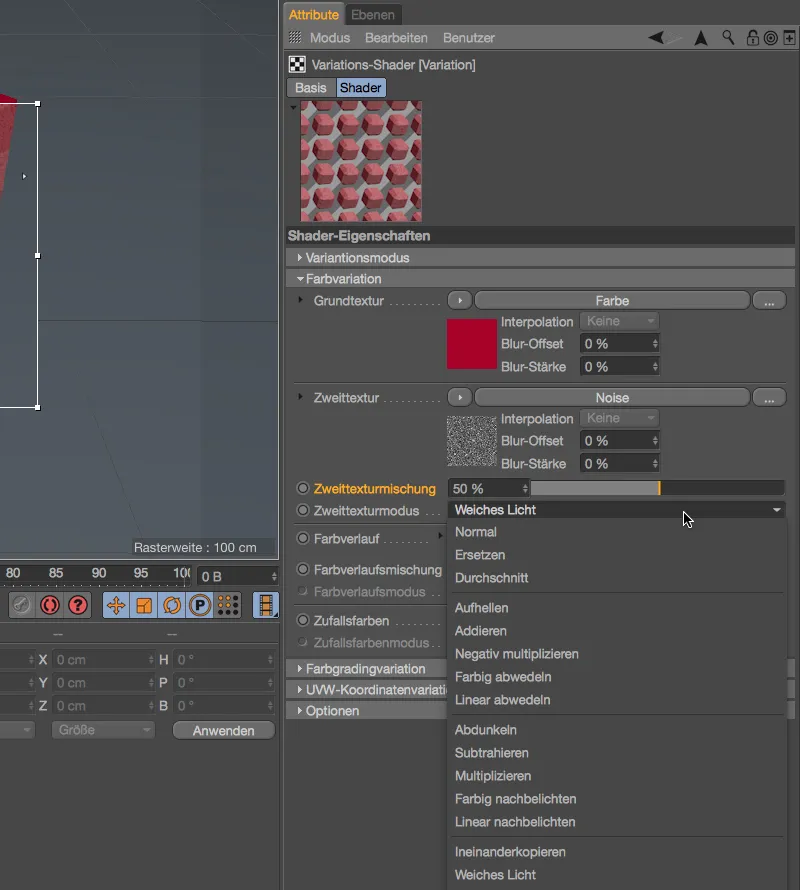
... the second texture no longer appears as such, it is only recognizable in the variation of the basic texture.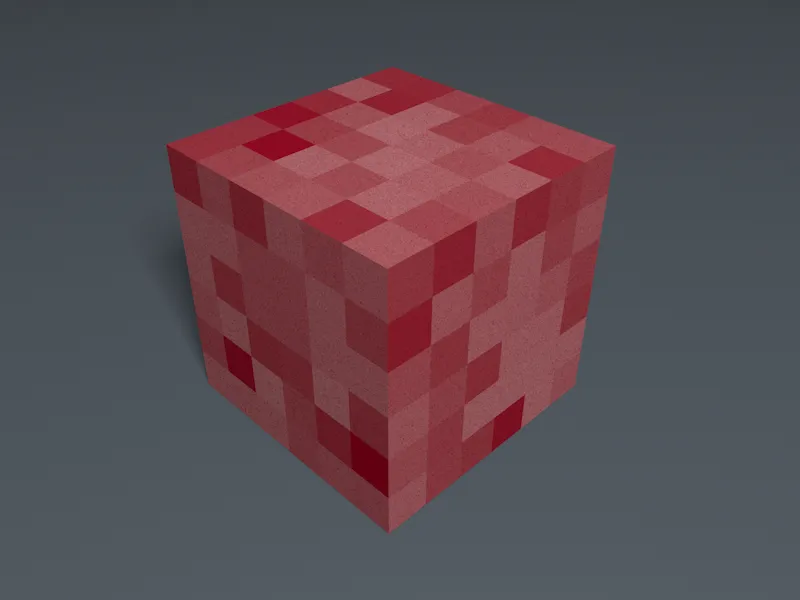
Let's turn to the third option within the color variation section, the color gradient. For better comparability, I have deleted the previously discussed color variation from the basic and secondary textures, but you can also simply set the slider for the secondary texture blend to 0% if you want to keep the basic texture.
By default, a gradient running from blue to white is stored as a color gradient.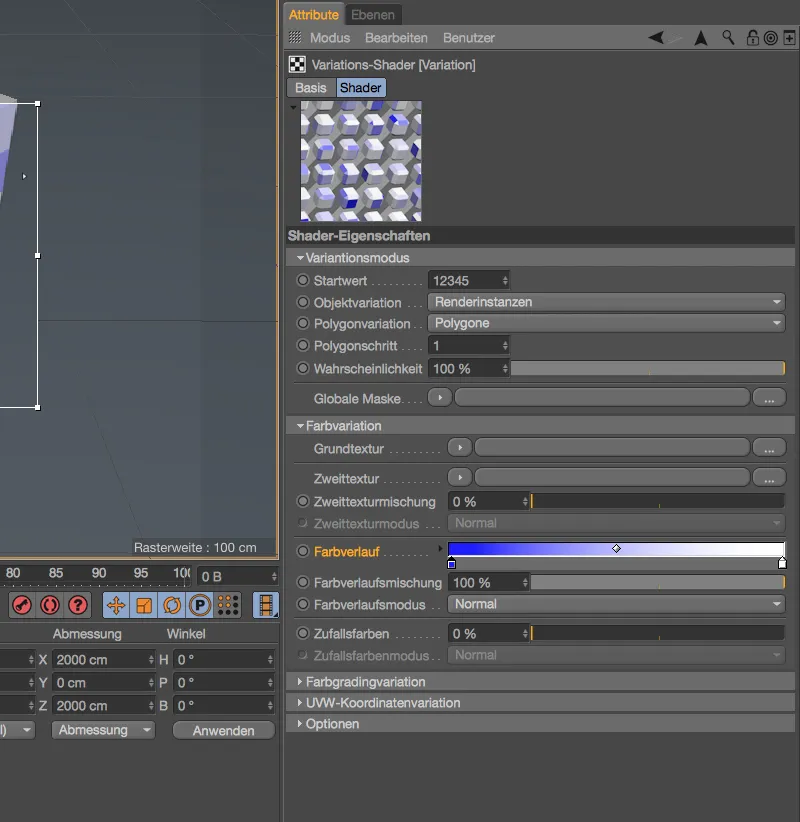
For the variation, this means that random colors are used for our polygons, but only those contained in the specified gradient.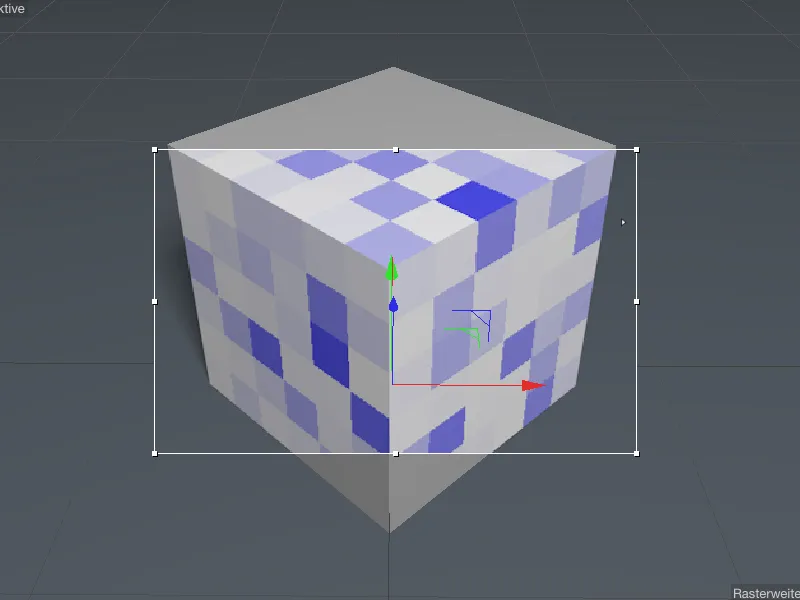
If we now add the previously used basic texture with the rich red and select a suitable method such as copying one into the other for offsetting the two variation color sources...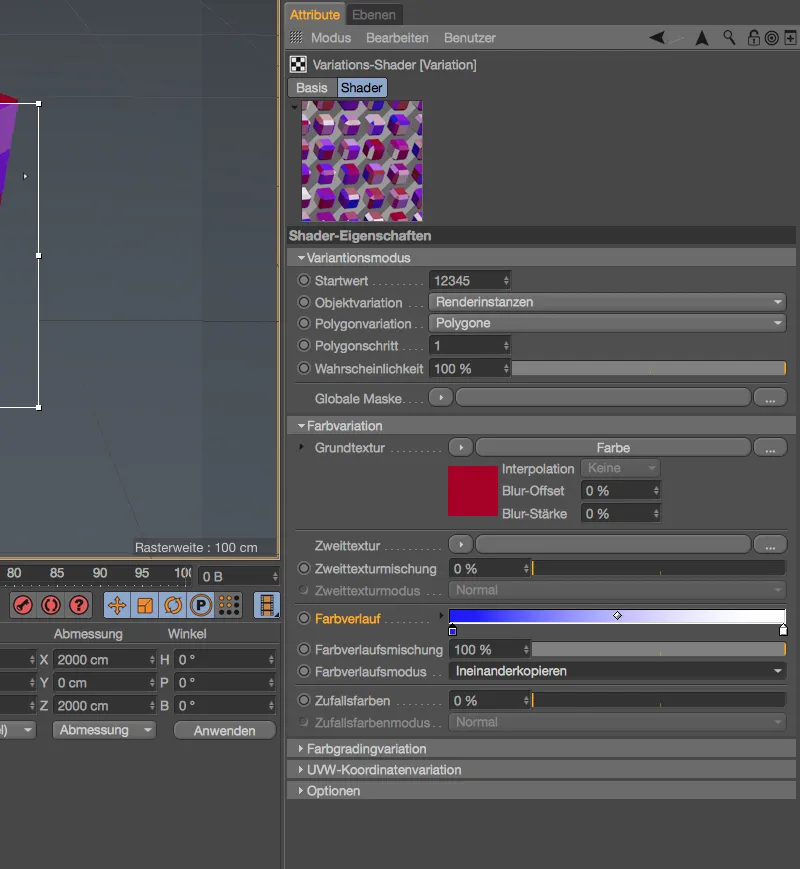
... then we can adjust the 'random' colors used for our polygon cube very well according to our (color) ideas.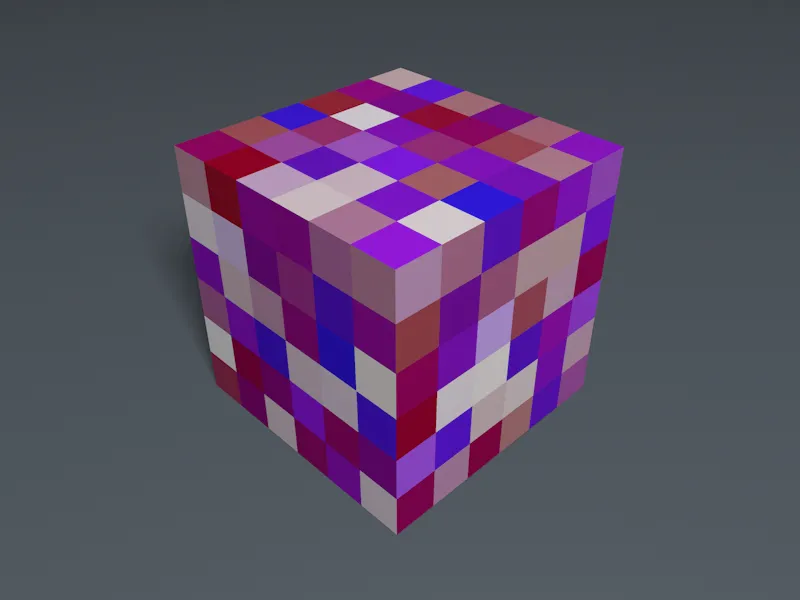
Color variation for clones
So far we have limited ourselves to the color variations for the polygons of a cube. Now let's take a look at the object-specific variation in the classic example of a clone object. In my simple example scene, a clone object causes cylinder objects to spread out to form a clone carpet. I have assigned the material with the variation shader to the clone object.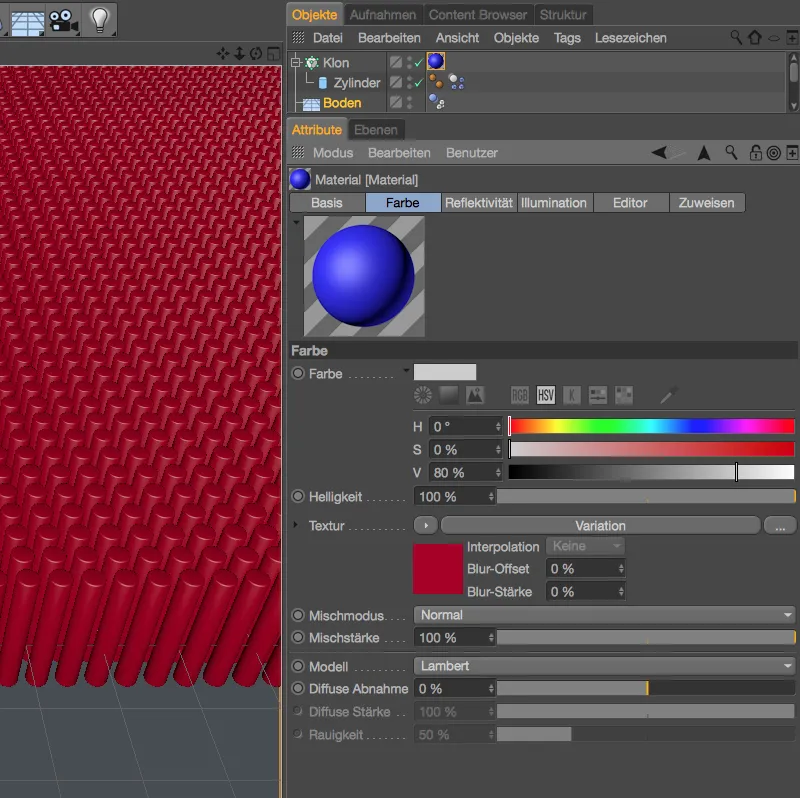
In the settings dialog of the variation shader, we need an object variation for the clones in the Variation mode section instead of the polygon variation used previously. To do this, we deactivate the polygon variation and select the Render instances mode suitable for clones for the object variation.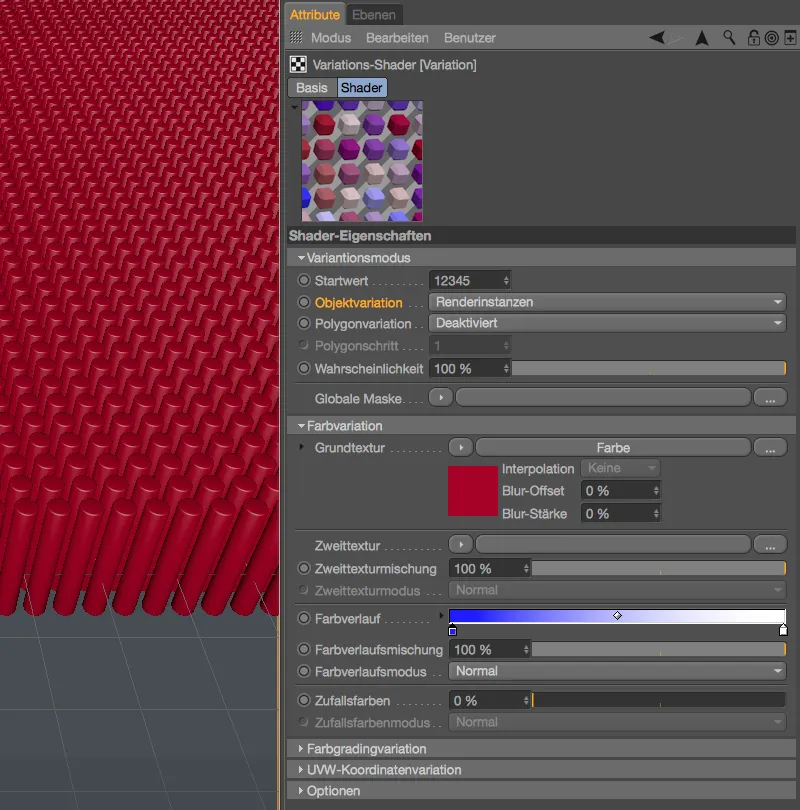
All other parameters remain identical to the last polygon variation, so the red basic texture and the blue-white color gradient in the rendering result in a correspondingly colorful clone carpet.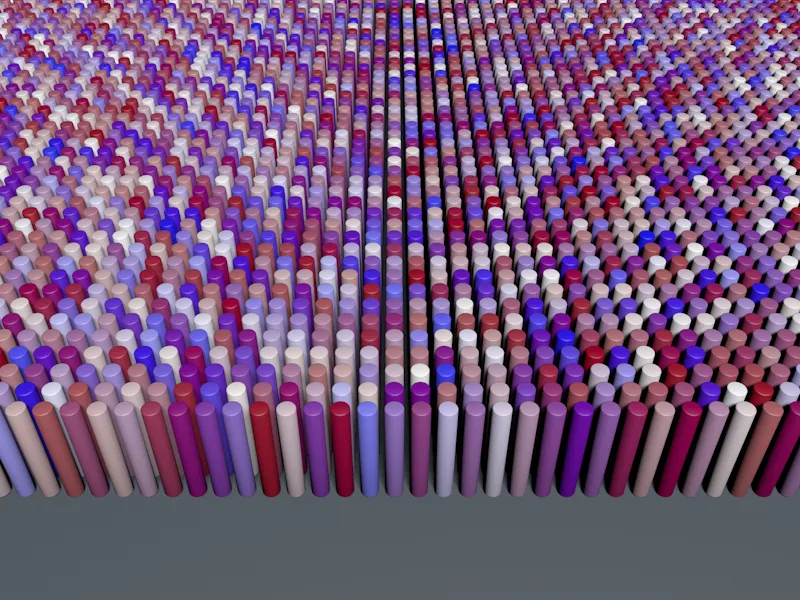
Based on this color variation, we can now take a look at the other options in the Variation mode section. We use the probability parameter to specify what proportion of the clones should be varied (can be seen in the interactive render area).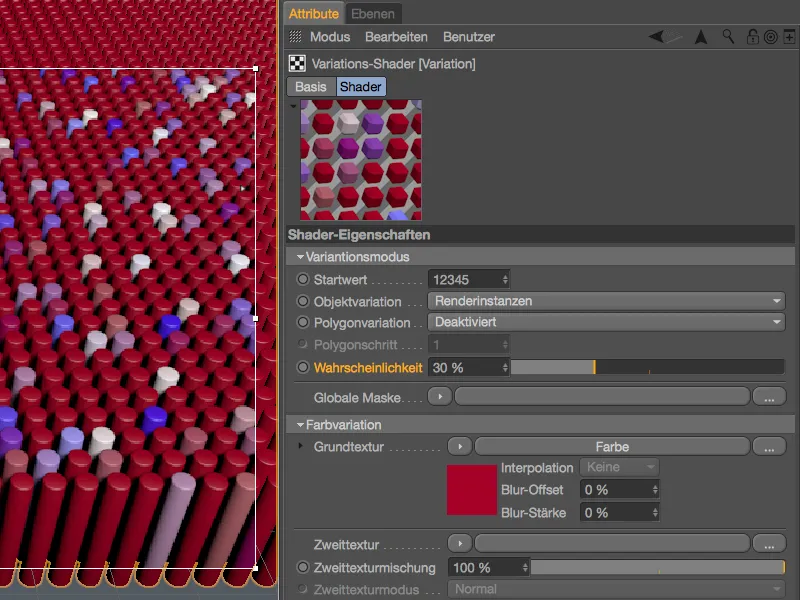
However, we can also control the occurrence or distribution of the varying clones using a texture or shader. For this purpose, the Global mask parameter again provides us with an arrow button for loading a suitable image or shader.
In my example, I have set the probability back to 100%, selected a dark blue as the basic texture and loaded a noise shader as a texture using the arrow button for the global mask.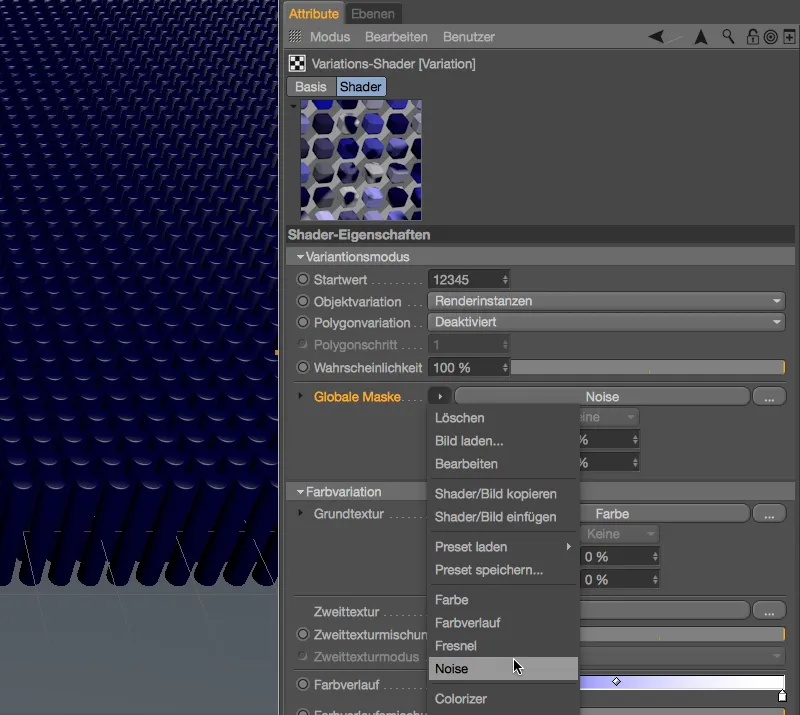
Depending on how the clones are created or how the texture is mapped to the clone object in the texture tag, the space selected in the settings dialog of the noise shader also has an effect. In most cases, World should work in the Room parameter; in my example, I have applied the texture to the clone carpetusing surface mapping and can therefore use the UV (2D) setting.
With a correspondingly high global size and clipping at the top and bottom with increased contrast, this results in a usable mask for our example.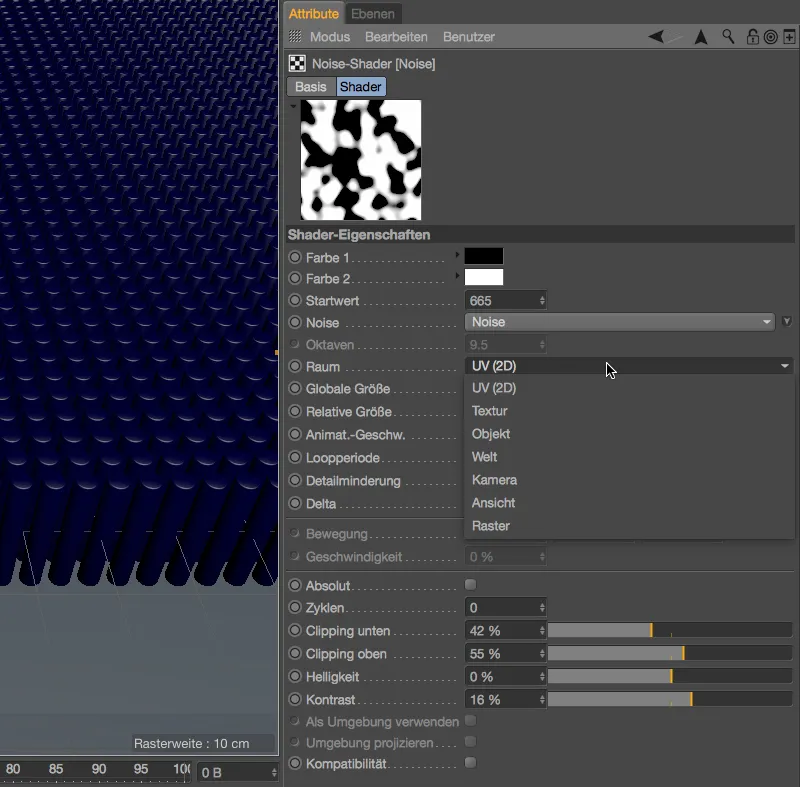
In the rendering, we can see the dark blue background texture in the black areas, while the varying clones spread out in the white areas. The foremost clones clearly show that the global mask acts on the clones from above due to the surface mapping.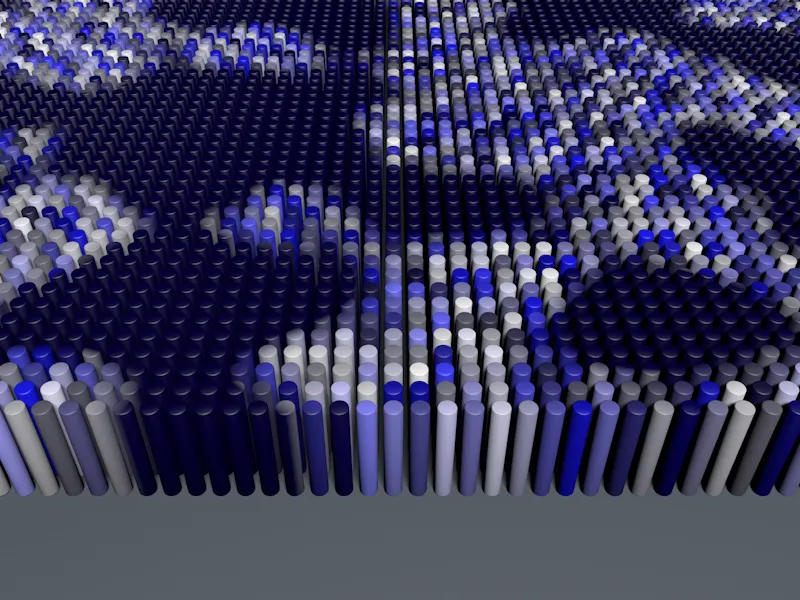
For the sake of completeness, let's take a look at the last two sections of the variation shader.
With the UVW coordinate variation, you can achieve a variation by moving, mirroring or rotating the UVW coordinates - very helpful for repetitive, tiled structures such as tiles or parquet. The Limit to 1 option causes color values greater than RGB (255, 255, 255) to be created when offsetting variations - this is of course necessary when using HDR images and should therefore be deactivated.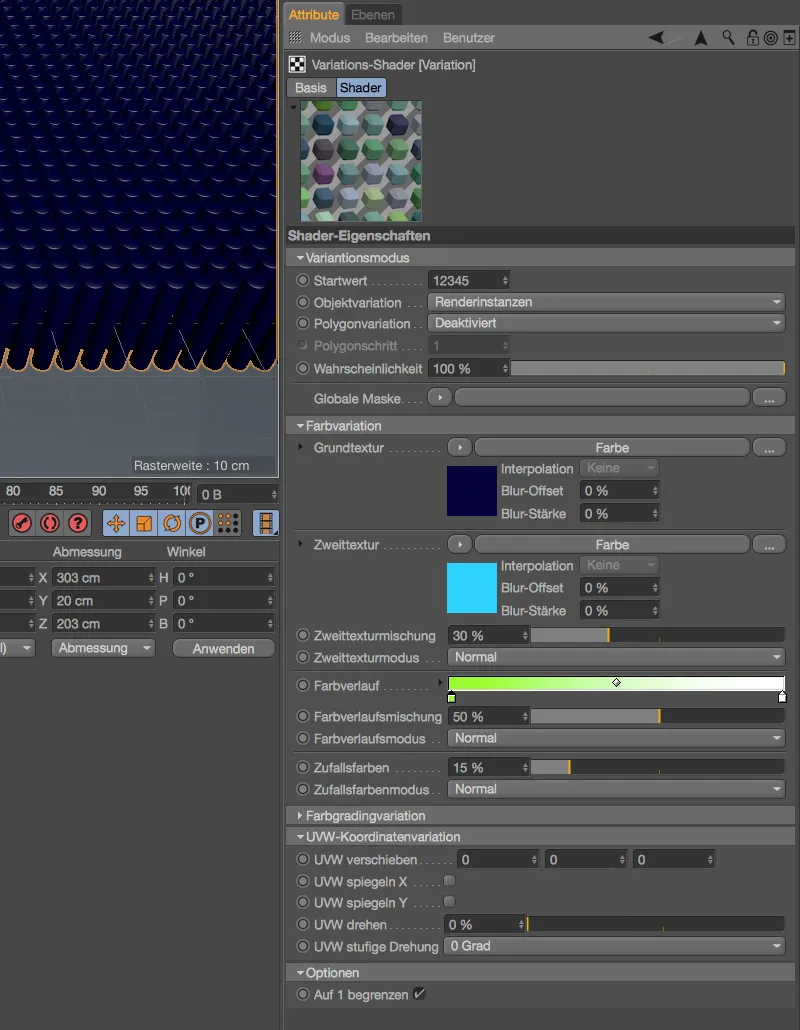
All the variation types presented in this tutorial can of course be combined and coordinated with each other.


