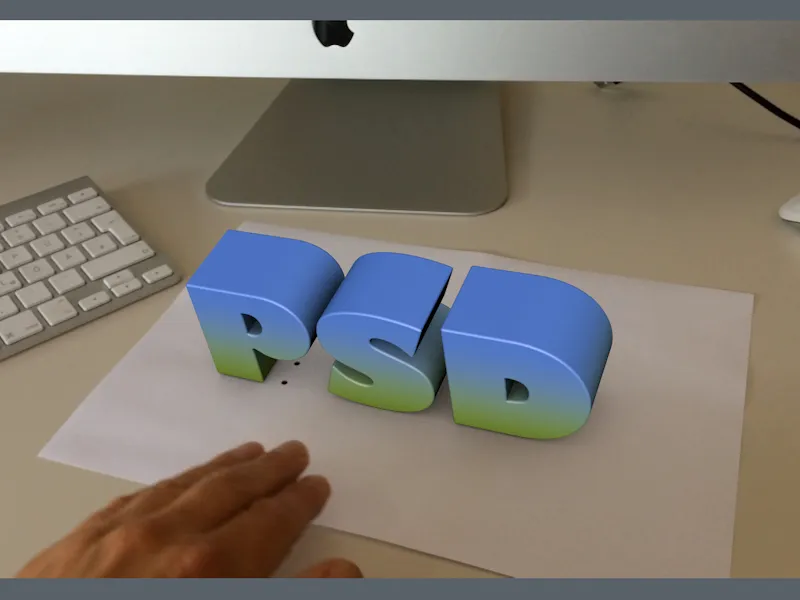
We start this tutorial with an empty project file, alternatively you can use the project "PSD_C4D_R18_ObjectTracker_start.c4d" included with the working files, then you will also have the logo to be animated in the scene.
Preparation of the motion tracker
In this case, we want to concentrate on the reconstruction of an object movement, so we only need the motion tracker to integrate the footage video file and to create and track the tracking points. In this example, we can dispense with reconstructing the camera movement or the environment.
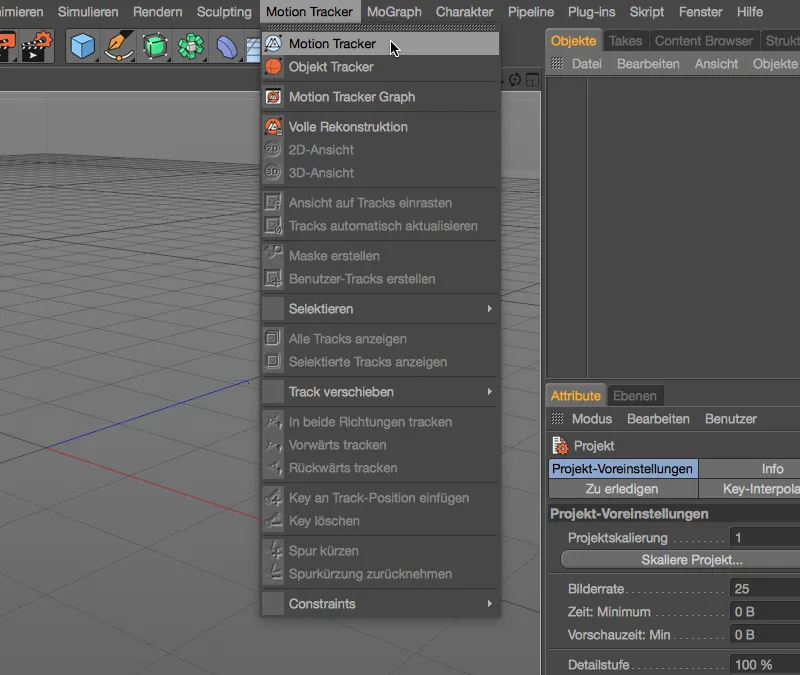
First, we get a motion tracker object from the Motion Tracker menu.
In the settings dialog of the motion tracker object, we first take care of the integration of the video sequence. On the Footage page, we click on the Load buttonin the Footage line.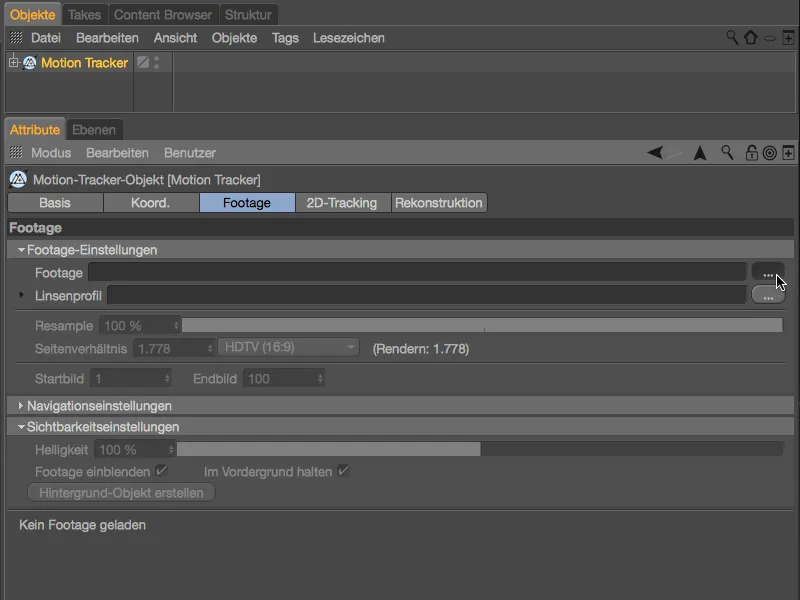
Use the Open file dialog of your operating system to select the video sequence "Desktop.mov" included in the package of working files for this tutorial.
Depending on your computer performance, you can set an even higher resample valuefor the image quality during tracking, but 75 % is sufficient for our project.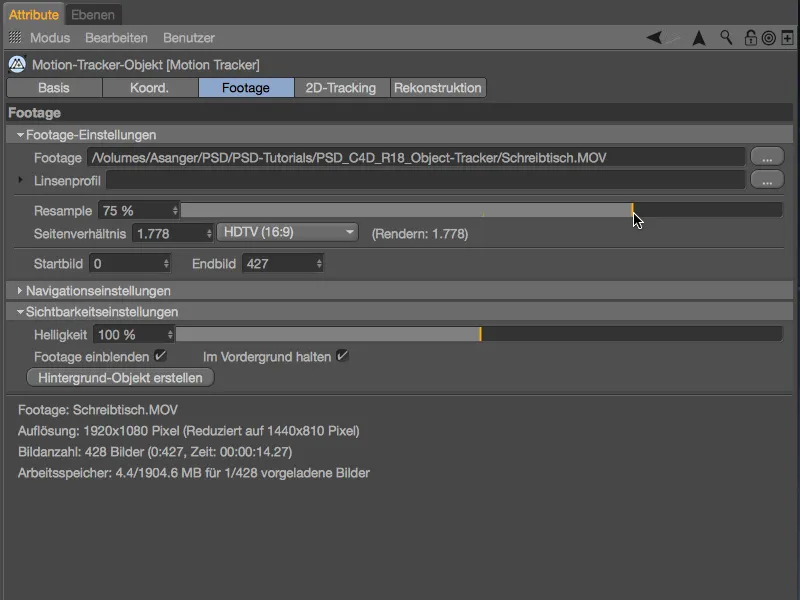
Setting and tracking the tracking points
Now that our footage material is also available in the editor view, we can start setting the tracking points. To do this, we switch to the 2D tracking pagein the Motion Tracker settings dialog and select Manual tracking.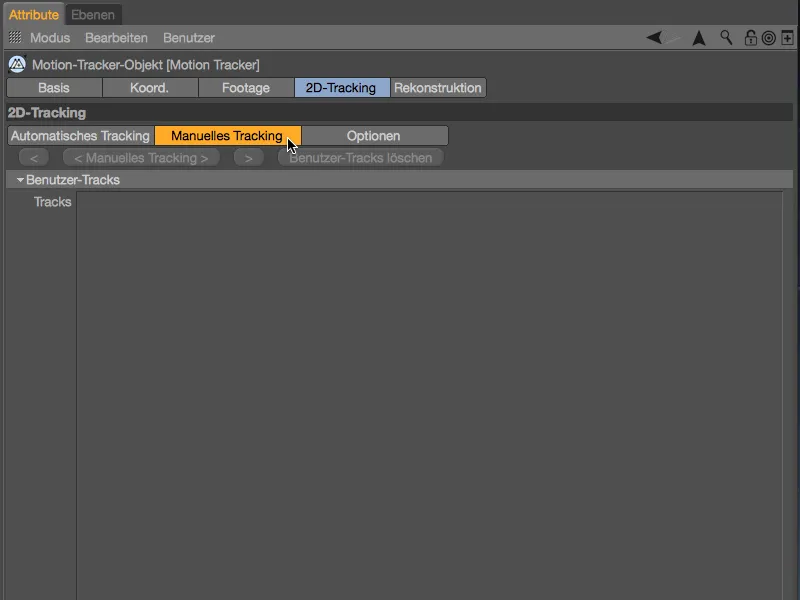
On the paper of the filmed desk, we see a total of 20 prepared points that are suitable for tracking. Cinema 4D's object tracker later requires at least seven tracking points for a promising reconstruction of a movement.
To set a tracking point, hold down the command key and click on the desired location in the editor view. You can then move the point to the exact position by touching the inner pattern square using the magnifying glass that appears. By dragging the inner pattern square or the outer search square, you can adjust the size for both.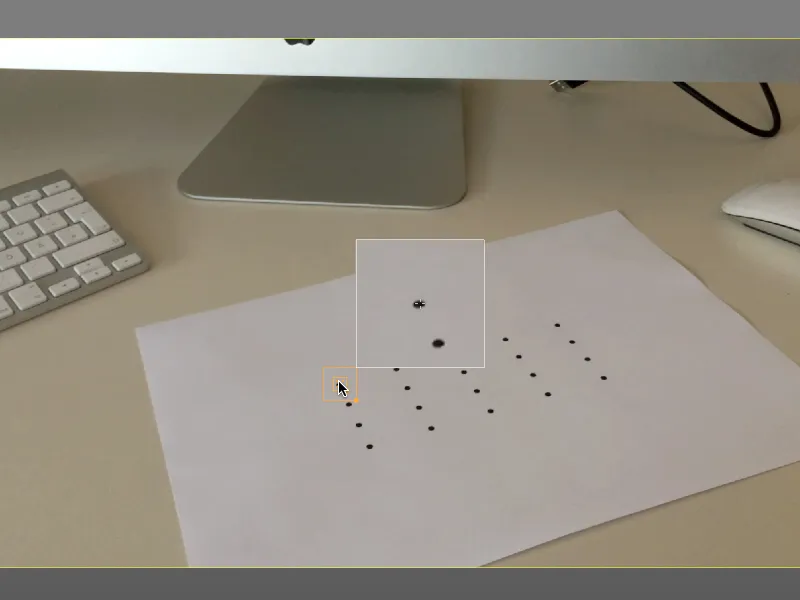
If, as in my example, a certain search or pattern size is recommended for all tracking points, you can preset this in the Options area on the 2D tracking page. We also take this opportunity to activate the Extrapolate search position option, which can sometimes help with tracking.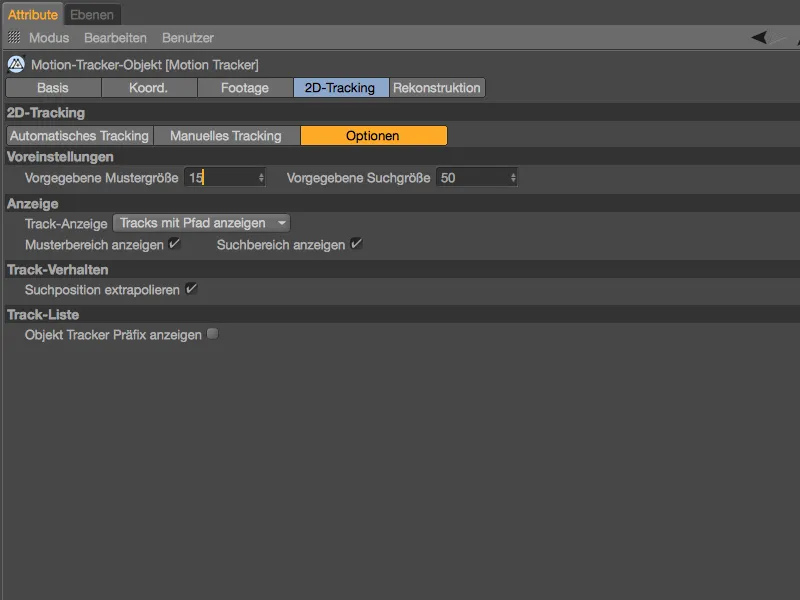
It would not be dramatic if only seven of the 20 initial points remained complete tracking points at the end of the video sequence, but in my example I will try to keep all points until the end.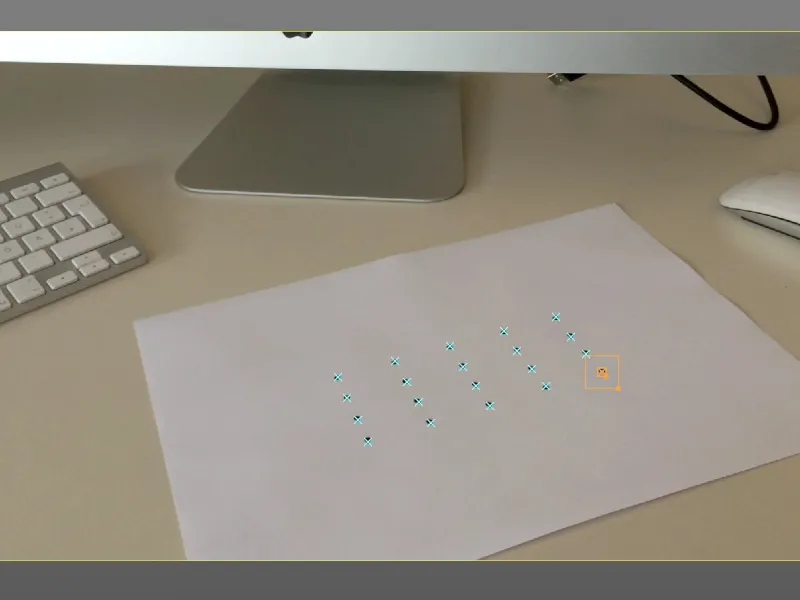
Once all tracking points have been set and adjusted in the editor view, we can start tracking. First make sure that all tracks are selected in the list or in the editor and then click on the Manual Tracking button.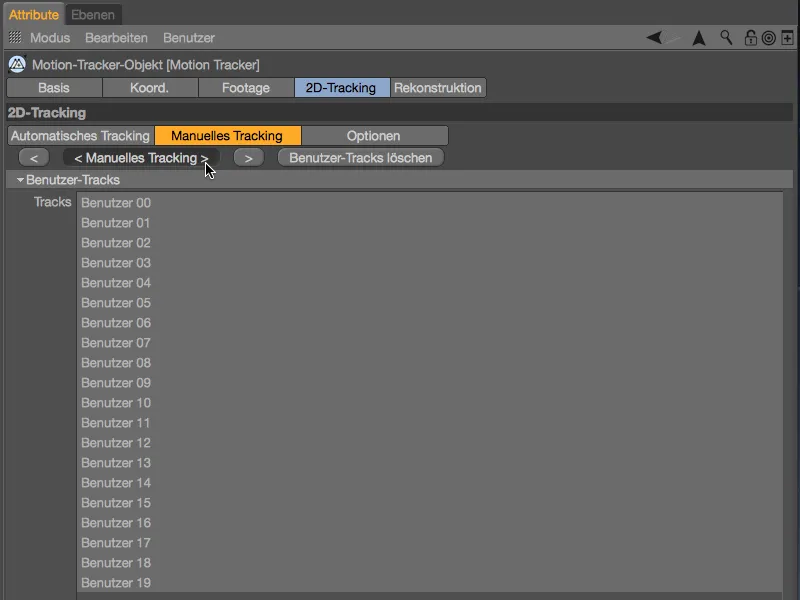
It will now take a little while for the motion tracker to track our tracking points on all images.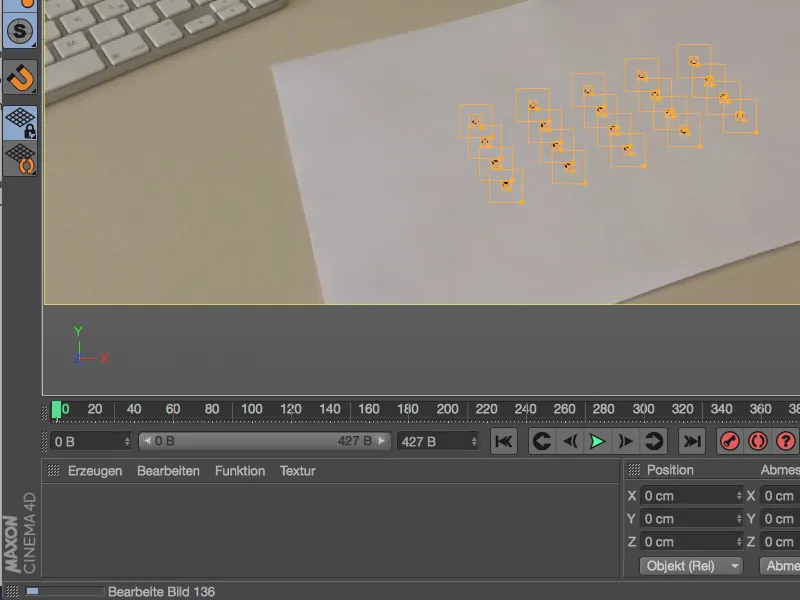
If we then move through the animation after tracking has been completed, we will probably notice the first red-marked failure of a tracking point after a few frames.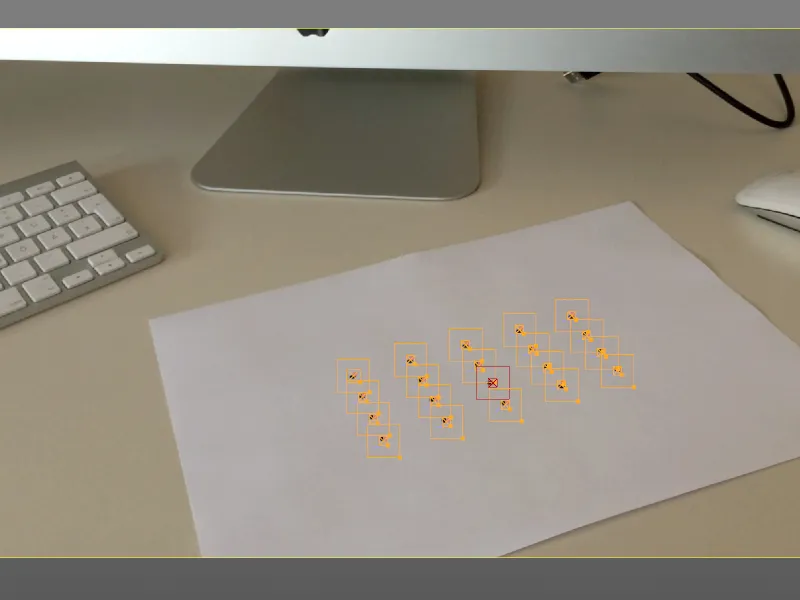
We can easily fix this by simply grabbing the slipped tracking point with the mouse pointer and placing it in the intended position. This creates a new keyframe at this point and the motion tracker adjusts the states before and after the correction by briefly re-tracking this point.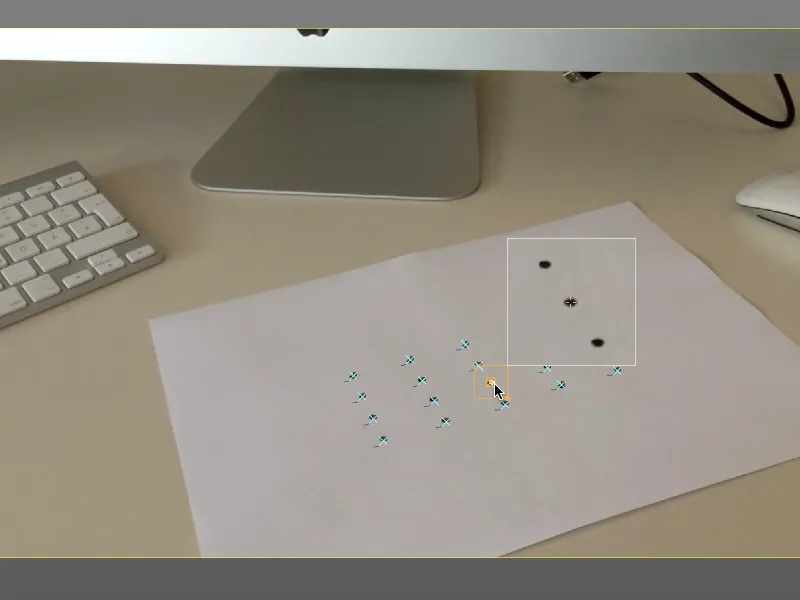
In this way, we now check the entire course of the tracked video sequence for tracking errors and correct them if necessary.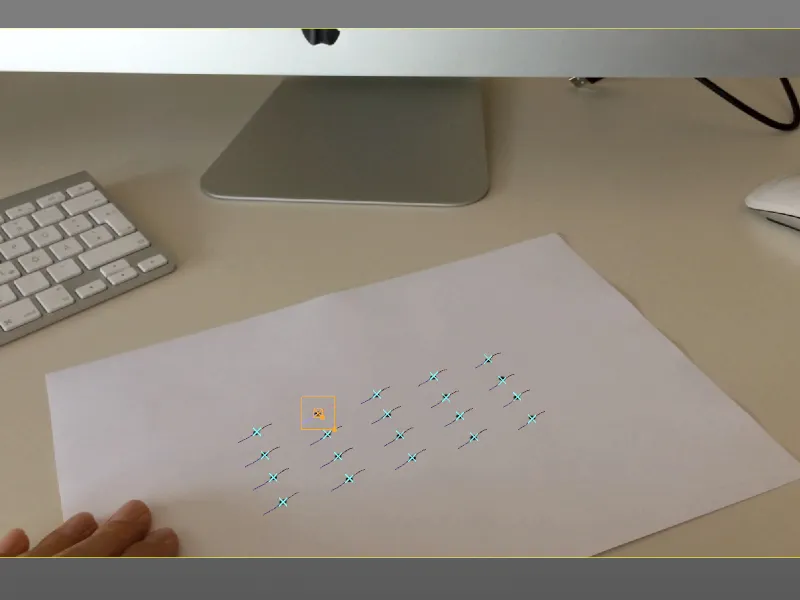
As mentioned at the beginning, I have retained all 20 tracking points for my example and corrected them where necessary. If you are satisfied with your result, run the animation through completely as a test to identify any jumps or point swaps.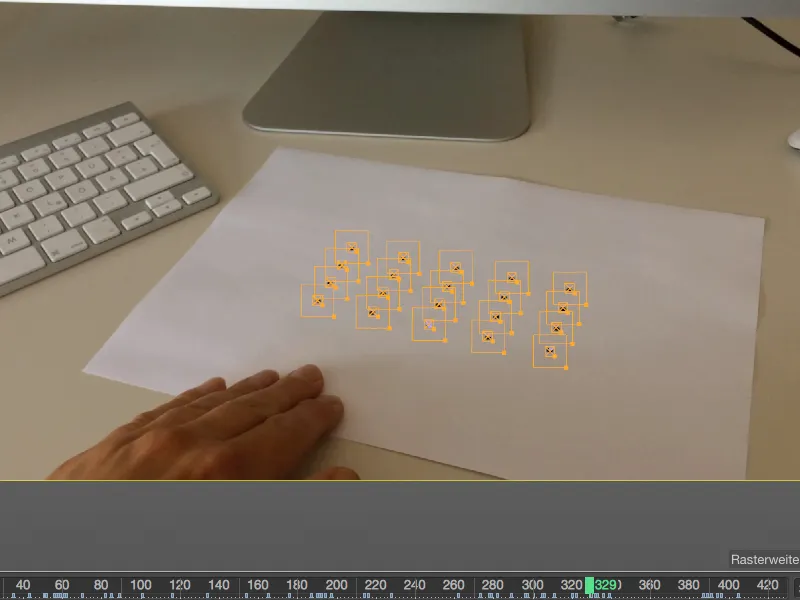
Reconstruction in the object tracker
Since we want to reconstruct an object movement and not a camera movement, our tracking points are not processed in the motion tracker, but in the object tracker. However, the points we have created and tracked must first be transferred. To do this, we first select all manually created tracks in the list of user tracks.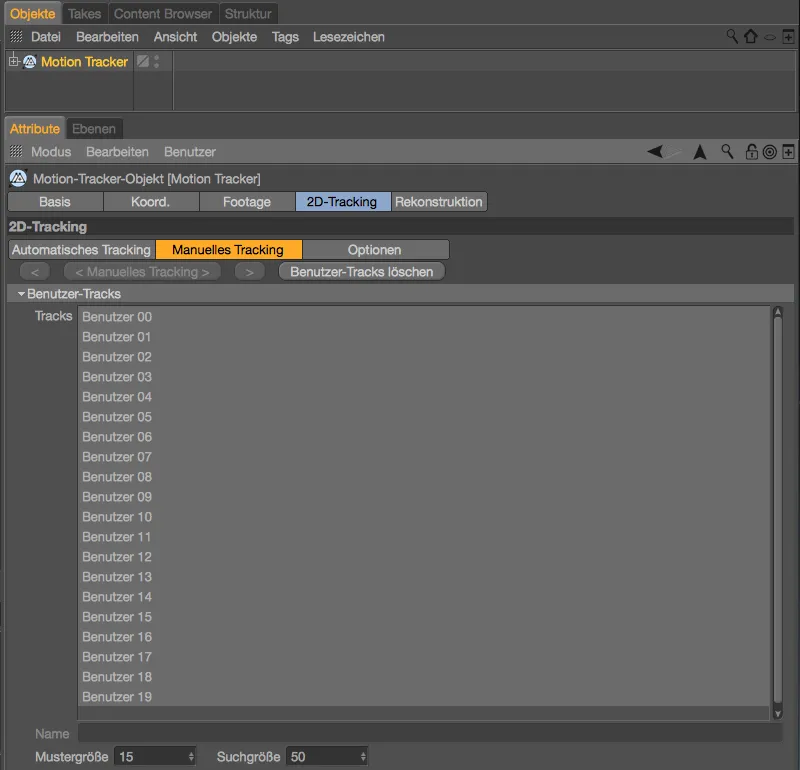
Now we add the object tracker from the Motion Tracker menu. If the motion tracker is selected in the object manager, the object tracker is immediately linked to it.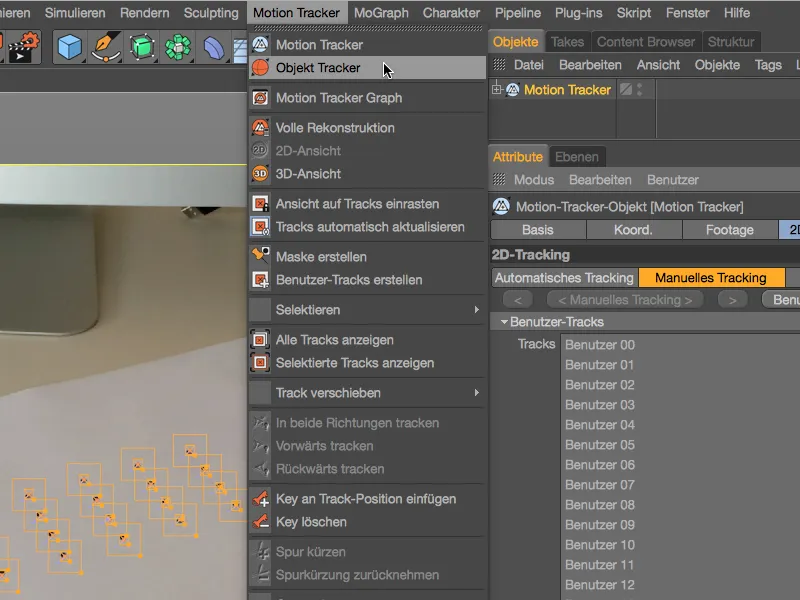
The tracks that are still selected are assigned via the Object Tracker settings dialog on the Tracker pageusing the Assign selected button at the bottom left. Here we can also see that the motion tracker we have created is stored there.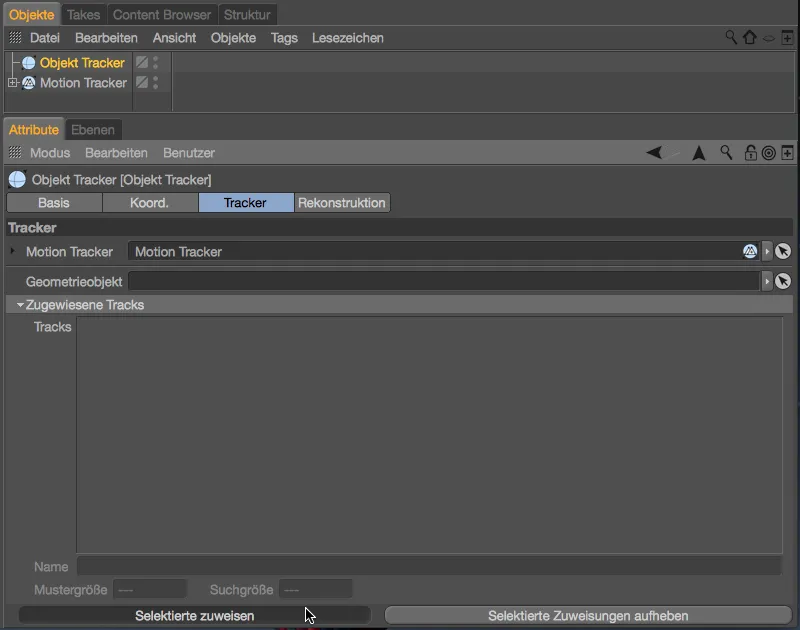
After this step, the list of tracks assigned to the Tracker object is now filled with our user tracks.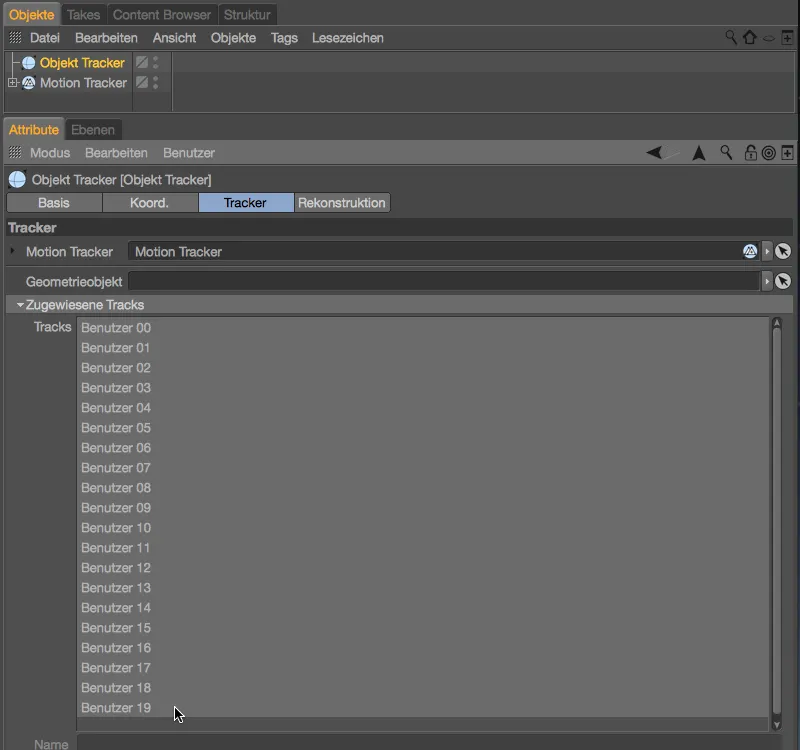
To help the object tracker with the reconstruction, we switch to the reconstruction pagein the motion tracker and set the focal length to known and constant, with a classic focal length of 36 mm.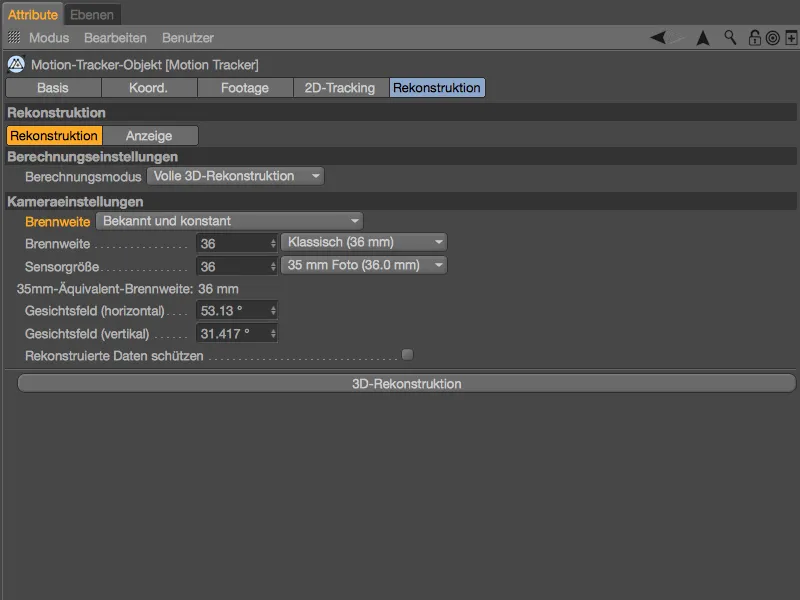
Back in the settings dialog of the object tracker, we find a button for 3D object reconstruction on the reconstruction page. Now that all the preparations have been completed, we can start the reconstruction.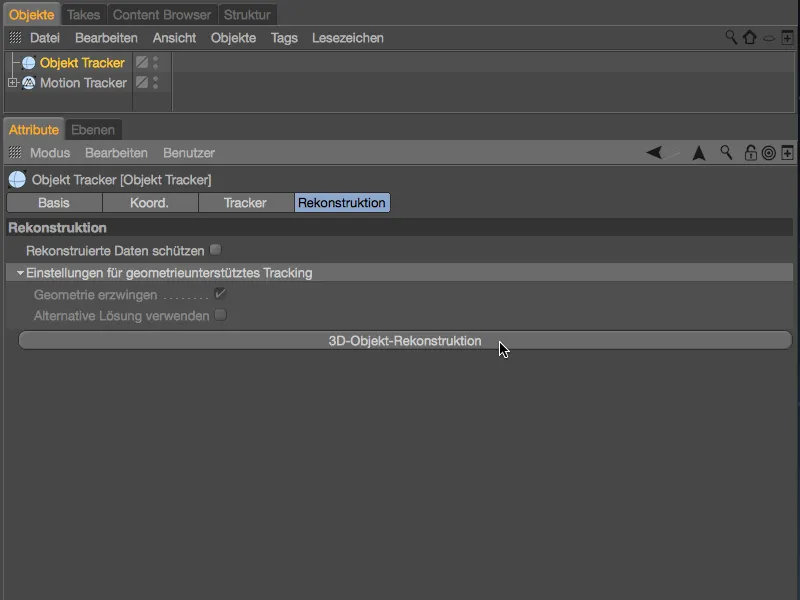
Again, some time passes until the object tracker has reconstructed an object movement from the information available to it.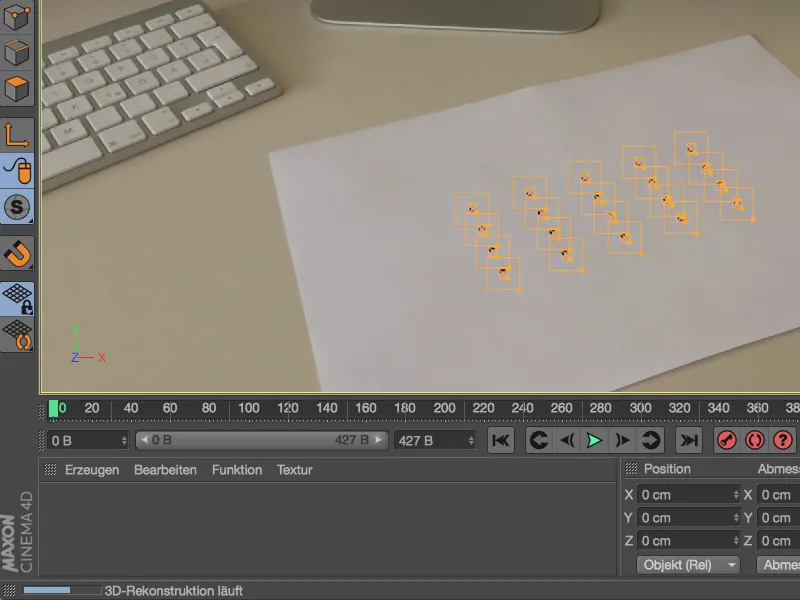
But after this short waiting time, we can already see the object axis of the object tracker objectat our tracking points. If the reconstruction is successful, the object tracker objectfollows all movements of the paper on the desk when the animation is played.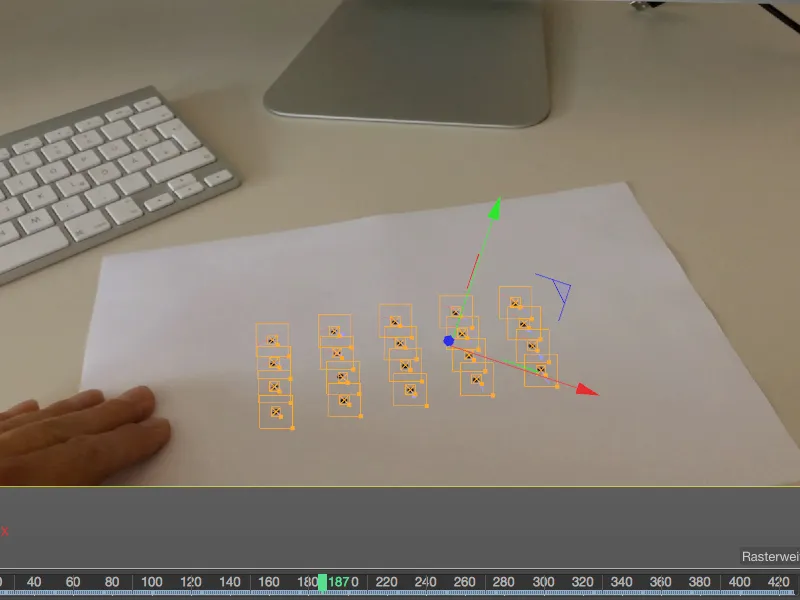
Adjusting the reconstruction
Similar to tracking a camera, the object tracker requires a few reference points in order to align its axes correctly and also to be able to set the units of our scene to the correct scale.
We can find the constraint tags required for this in the context menu by right-clicking under the motion tracker tags. We start with a vector constraint for aligning an axis; the constraint is assigned directly to the tracker object.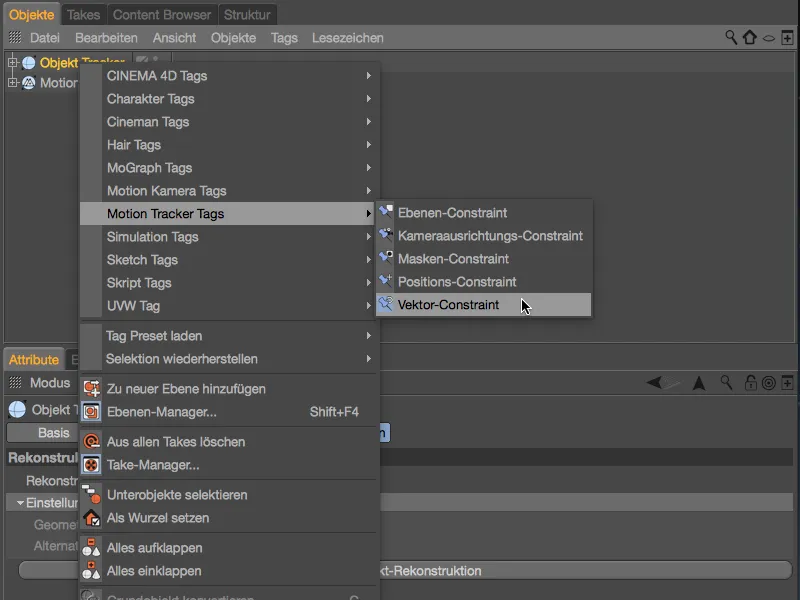
In the editor view, we place the first vector constraint from the top left to the top right tracking point on the sheet of paper.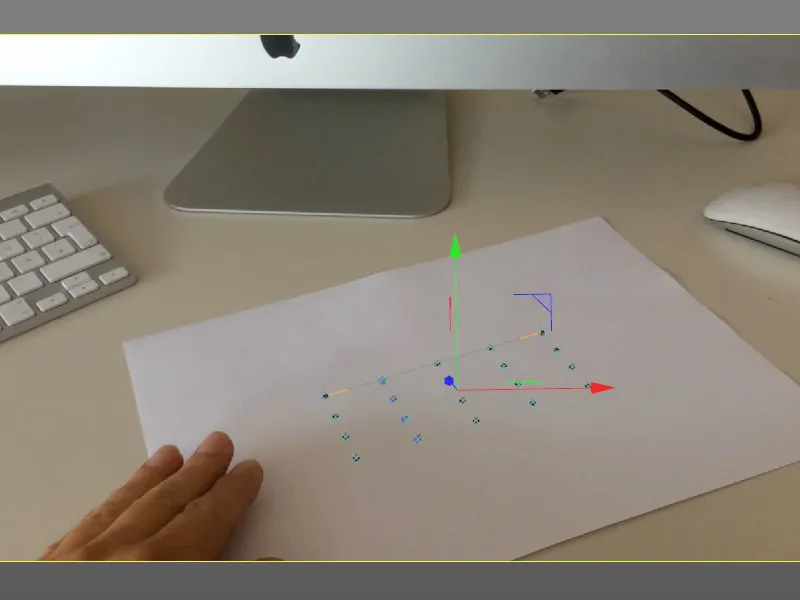
In the settings dialog of the vector constraint tag, we define the desired axis orientation, in our case the X-axis. At the same time, we can define the scale of the scene by specifying a known length. In our case, the distance between the two targets is exactly 12 cm.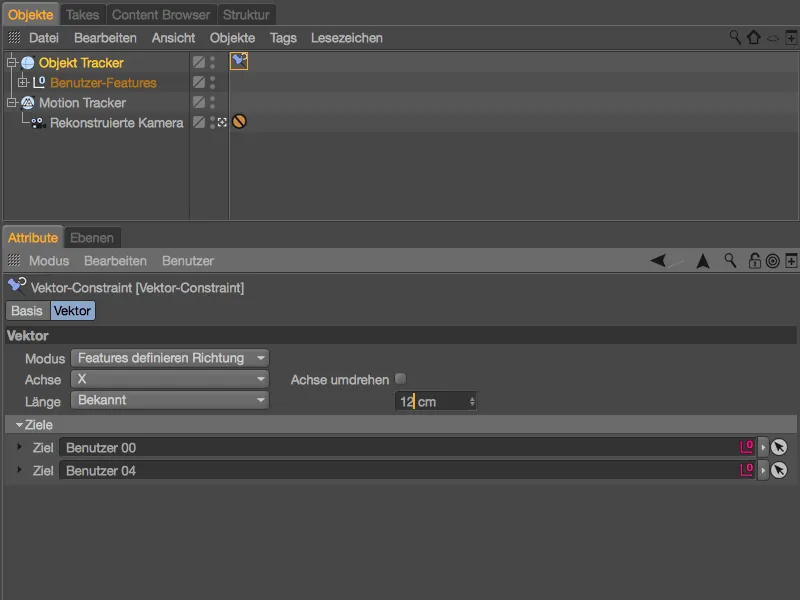
To define a second axis, we get another vectorconstraint from the context menu using the right mouse button or via the Tags>Motion Tractor Tags menu in the Object Manager.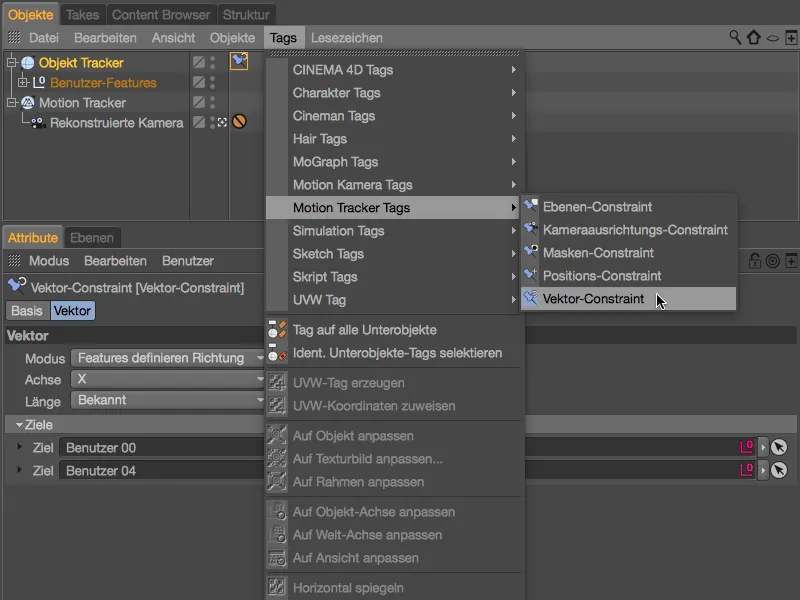
In the editor view, we place the second vector constraint from the top left to the bottom left tracking point on the sheet of paper. As we can see, our first vector constraint has already caused the red X-axis to align correctly.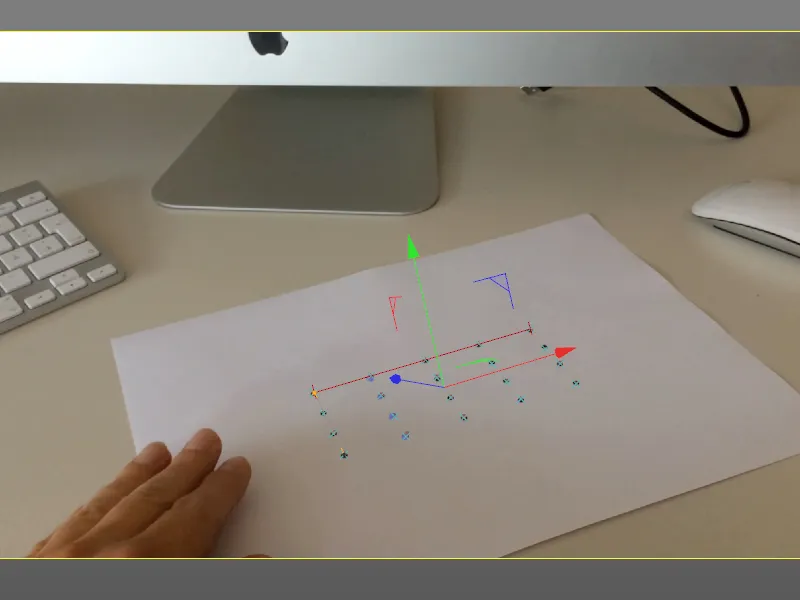
For the second vector constraint, it is sufficient to specify the adjacent axis in its settings dialog, in our case the Z-axis.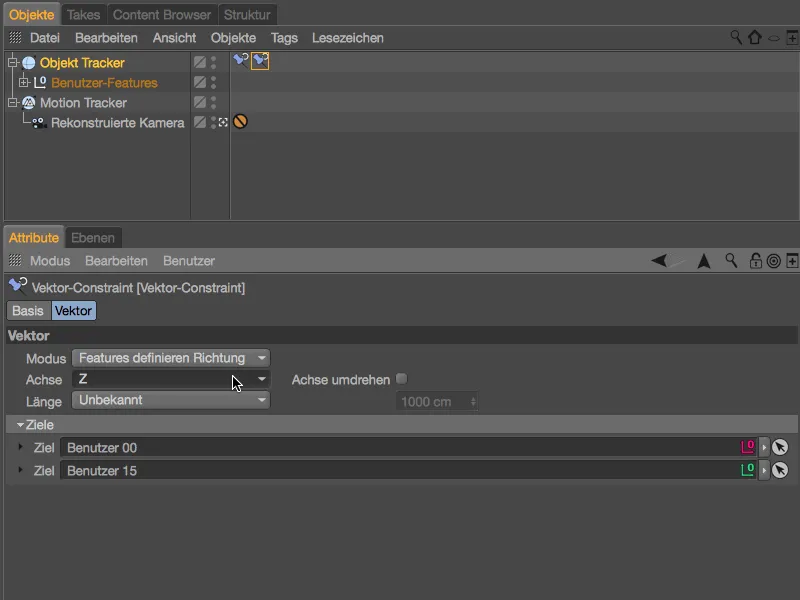
More constraints are not necessary for adjusting the reconstruction of the object tracker. As can be seen in the editor view, the axis position of the object tracker now matches our scene.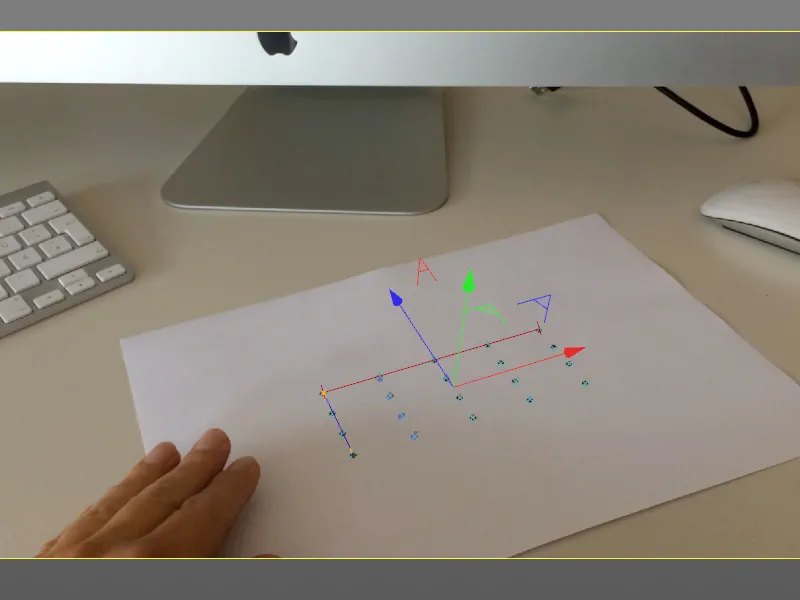
After our reconstruction, the object tracker itself is an object animated using keyframes - without geometry, of course. We can now use this object animation to integrate and animate any 3D objects in the scene.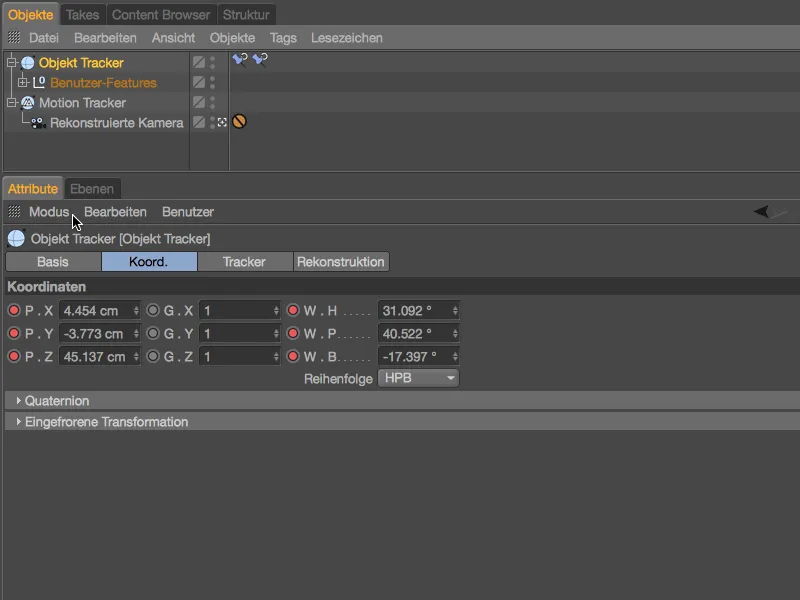
Integration of a 3D object
The title is general, as you can of course integrate any 3D object into this animation. In principle, we would only need to subordinate our objects to the object tracker via the object manager, but this is not very elegant and is also confusing for more complex scenes.
Instead, we create a null object via the Create>Object menu , to which we can assign our 3D objects. The null object is then connected using a constraint.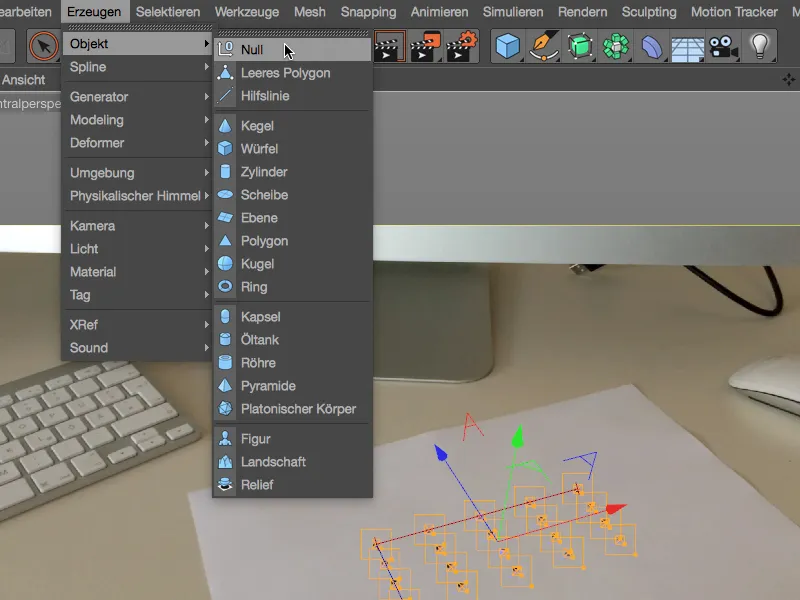
Give the null object a name that matches the 3D object and then assign a constraint tag to the null object using the context menu with the right mouse button from the Character Tags menu.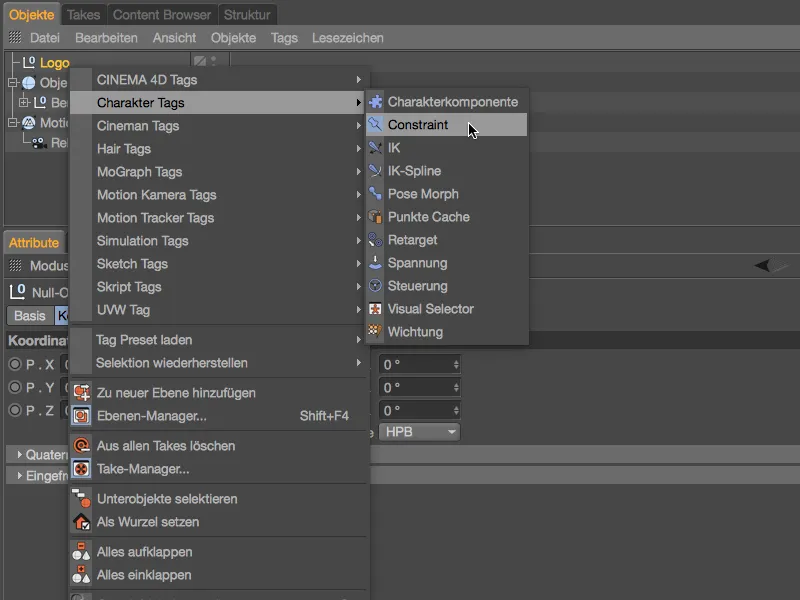
In the settings dialog of the constraint tag, we first determine the type of constraint on the base page , in our case PGW (position, size, angle). On the PGW pagethat is now available, we activate Position and Angle at the bottom for the targets.
We can then drag and drop the object tracker from the object managerinto the Target field of the constraint tag.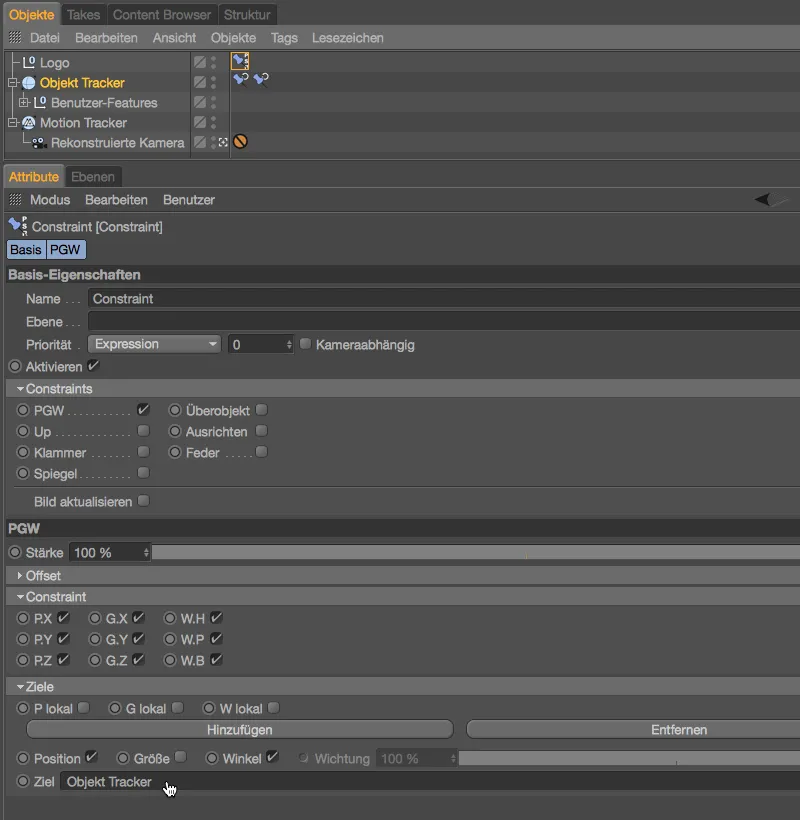
The null object has immediately assumed the position and angle of the object tracker and will do so for all movements without us having to intervene in the hierarchy of the object tracker.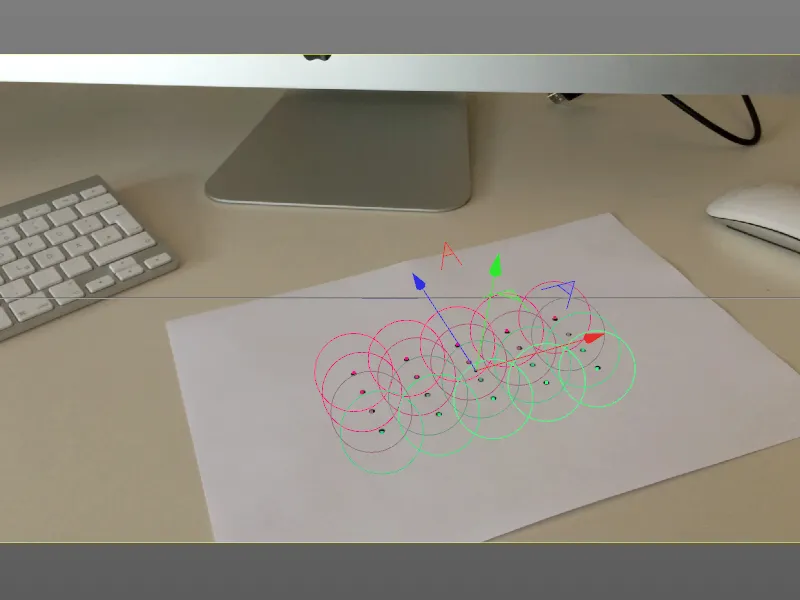
As already mentioned, you can use any object for the integration into the animation, I have created a colored PSD lettering for this purpose. Assign the 3D object to the constraint-controlled null object via the Object Manager. We can see from the object coordinates in the attribute managerof the extrude objectthat it is not yet adapted to our tracked movement.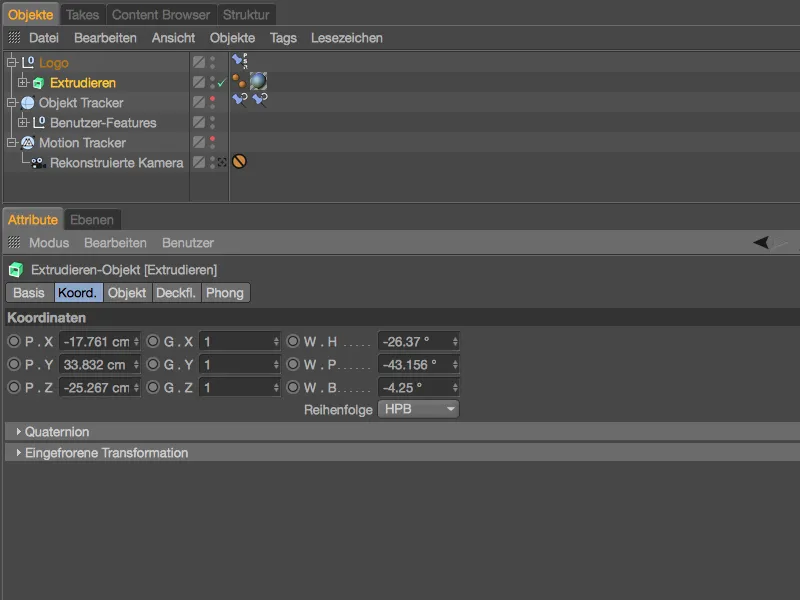
But this is quickly done, we only have to 'zero out' the position and angle parametersin the Attribute Managerso that there is no longer any offset to the parent null object.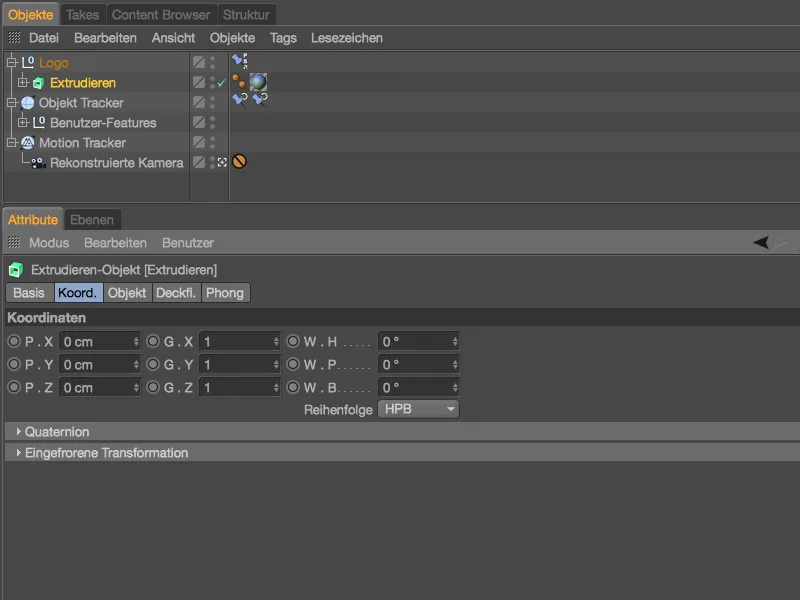
The final positioning of the 3D object or lettering is done in the editor view. We use the axis grippers of the 3D object subordinate to the null object to move the 3D object to the center of the paper.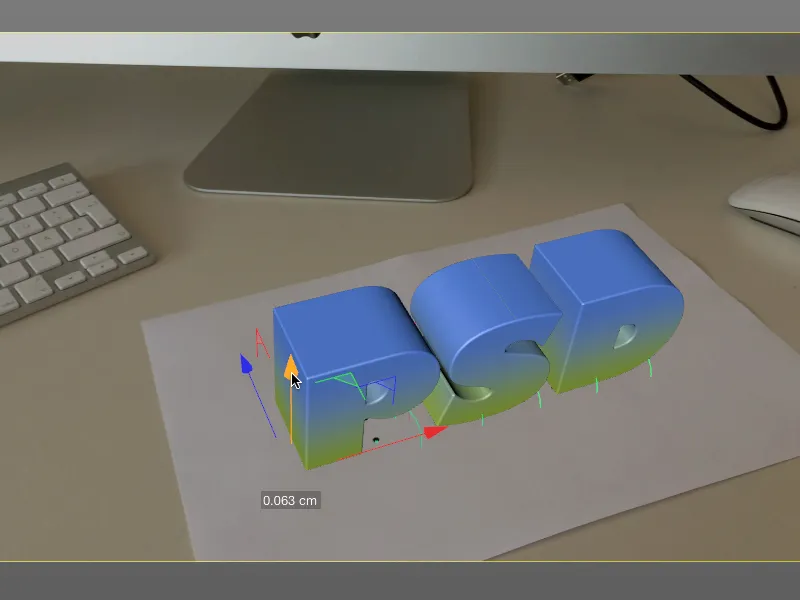
Integrating a background
As we have not created an environment or tracked it separately, we only get a moving 3D object in front of a black background as the result of a rendering. However, we need at least the footage material running in the background.
To do this, we get a floor object from the environment objectpalette and assign it to the null object in the same way as the 3D object or the lettering. To ensure that the floor object is also in the correct position or angle of the animated null object, we zero out the position and angle coordinates for the floor object using the attribute manager.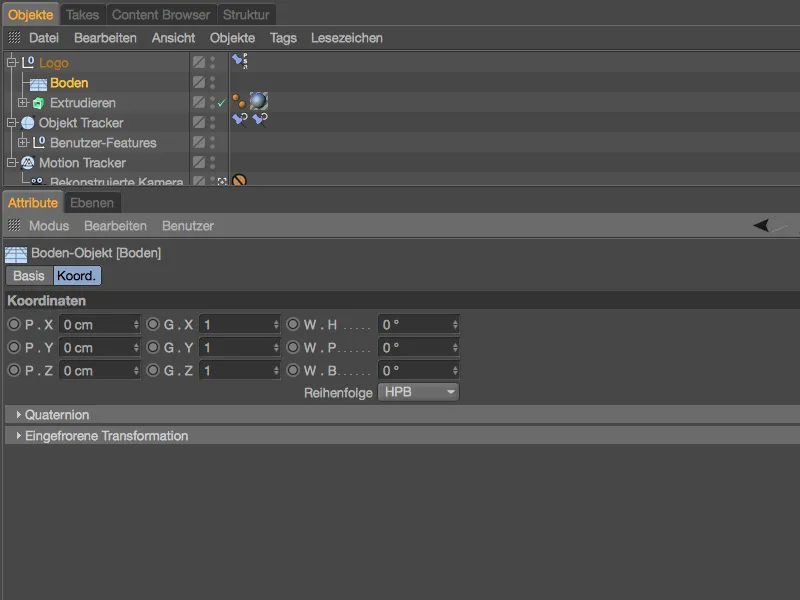
To obtain a suitable texture for the floor object, we switch briefly to the Motion Tracker settings dialog. There we find the Create background object button on the footage page.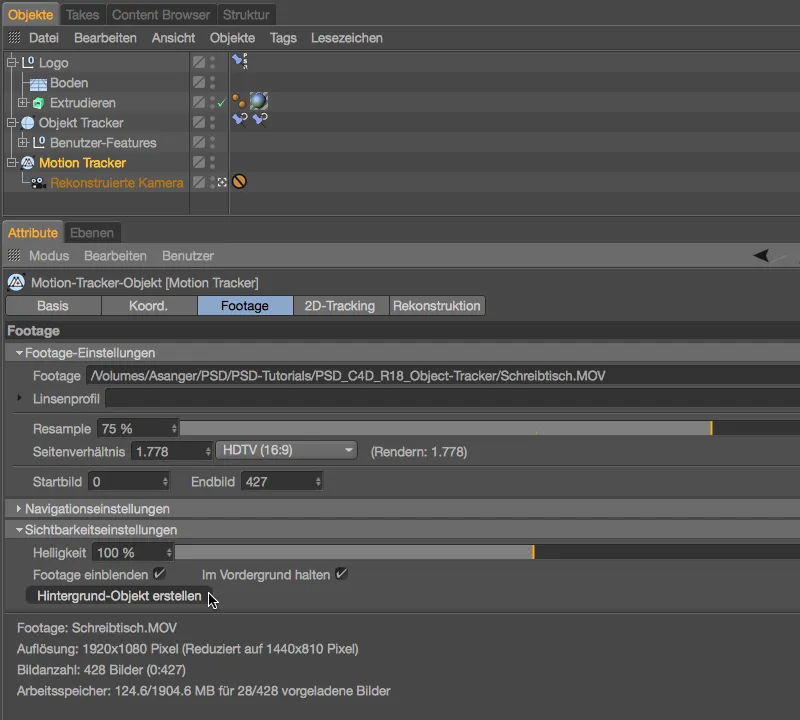
After clicking on this button, the Motion Tracker creates a backgroundobject with the texture tag we are interested in because it has been correctly defined with frontal mapping. We simply move the texture tag from the background object to our floor object in the Object Manager. We can then safely delete the background object.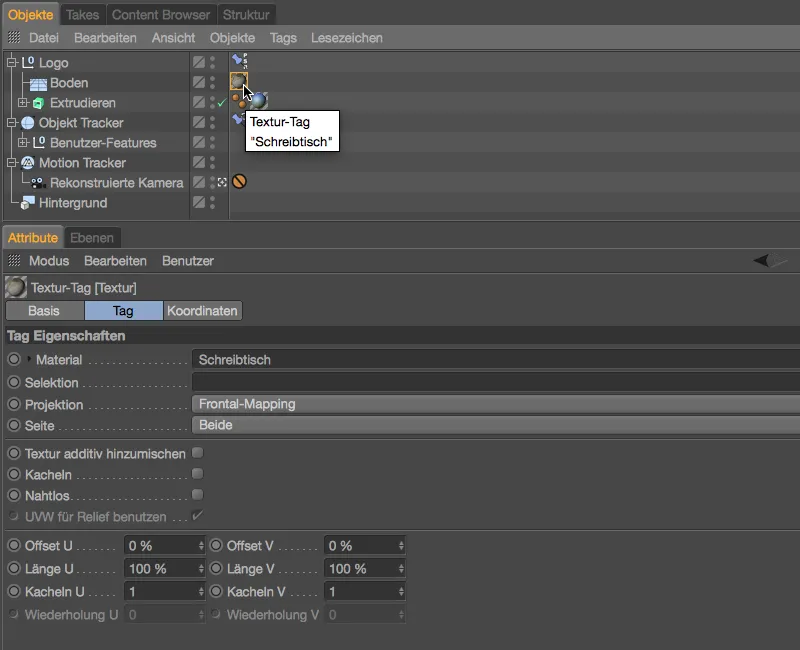
As the floor object should also only act as a background during rendering, we assign it a render tag via the Tags>Cinema 4D Tags menu in the Object Manager.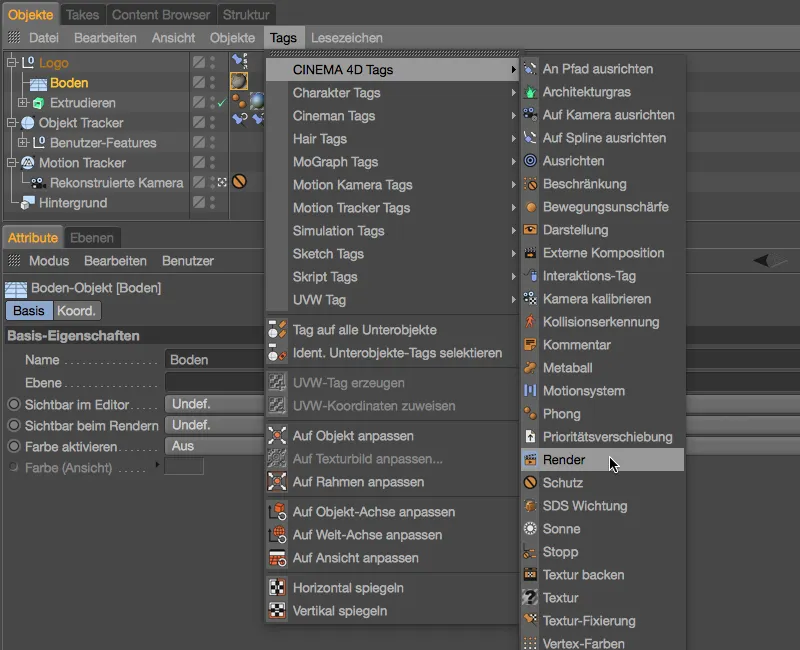
In the settings dialog of the render tag, we find the background compositing option on the tag page, which is important for us. This means that the lighting of the scene has no influence on the floor object, but it can still receive shadows.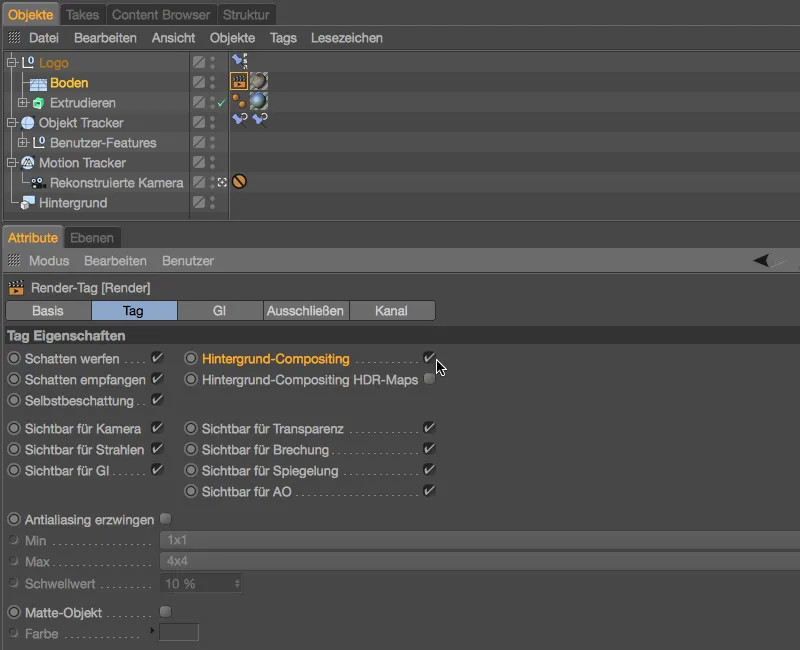
Adding shadow areas using ambient occlusion
When we render our scene now, we have both our 3D object and our footage material in the rendered image as desired. What is still annoying is the non-existent shadow cast by the PSD logo. As the lighting conditions in the desk scene are relatively diffuse, the addition of ambient occlusion during rendering should ensure a better result.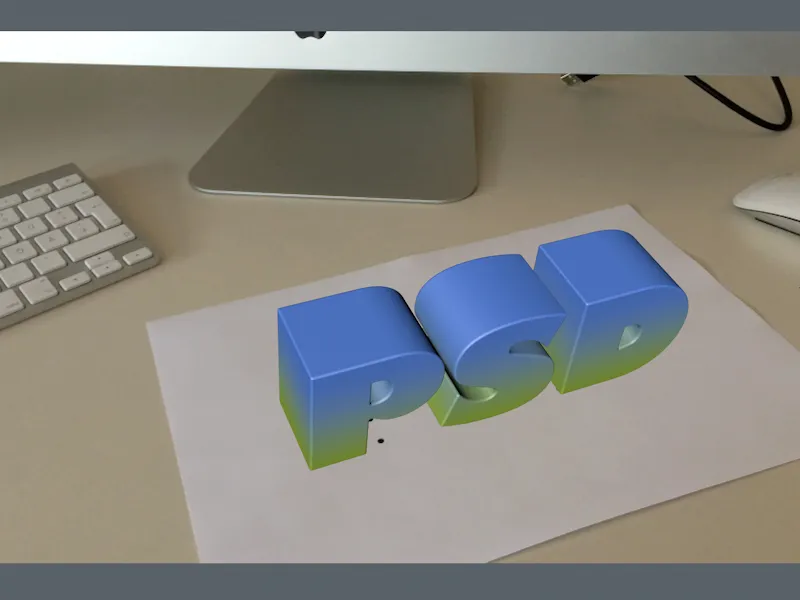
To activate Ambient Occlusion as a render effect, we call up the render presets via the Render menu or the shortcut Command + B. Ambient Occlusion is already available for us at the top of the Effects... button menu.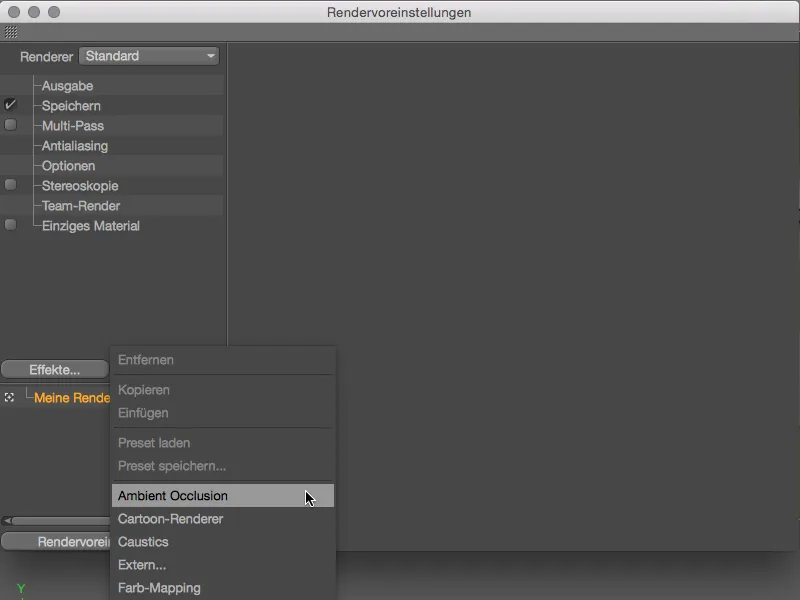
So that the shading effect is not too strong and matches our footage material, I have left the color gradient almost at the default setting and only reduced the maximum ray length to 10 cm. With the specified values for accuracy and samples, we get sufficiently softly rendered shadow areas.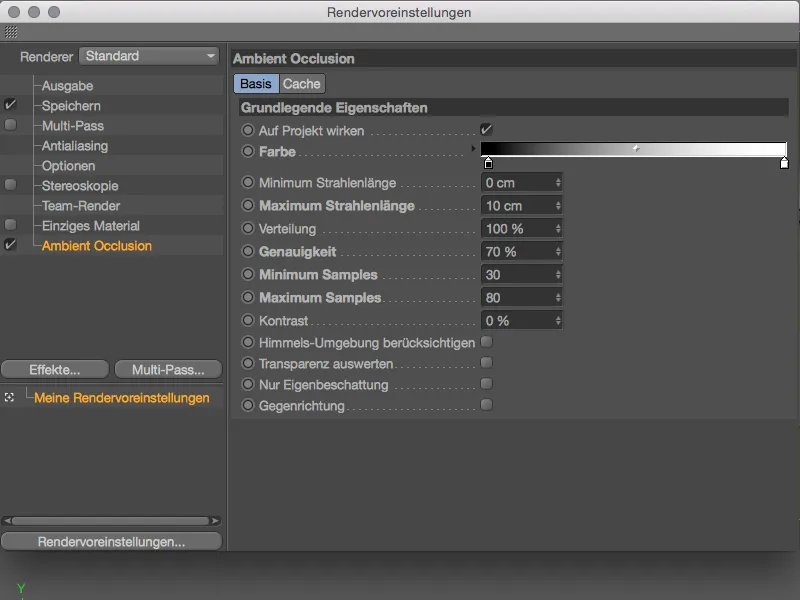
The PSD logo now looks much more harmoniously integrated into the video sequence. If you want to go the extra mile, you can of course illuminate the 3D objects adequately with light sources.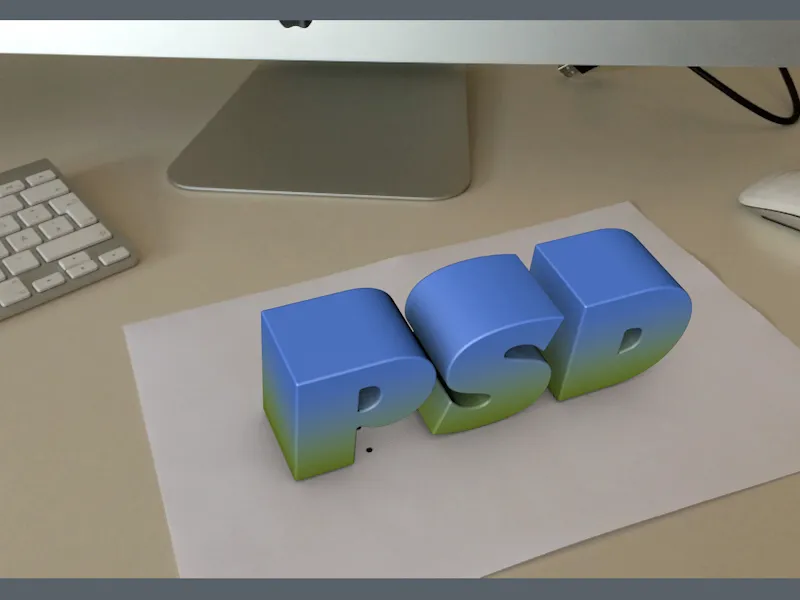
Which brings us to the end of this object tracking tutorial. For the final rendering of this project, I chose the best, quietest section of the footage I filmed myself (from image 70).