For this tutorial, I have provided the scene "PSD_C4D_R14_Sculpting_start.c4d" known from another tutorial as a common starting point in the working files. The little alien will be further modeled with details in this introduction to sculpting with CINEMA 4D.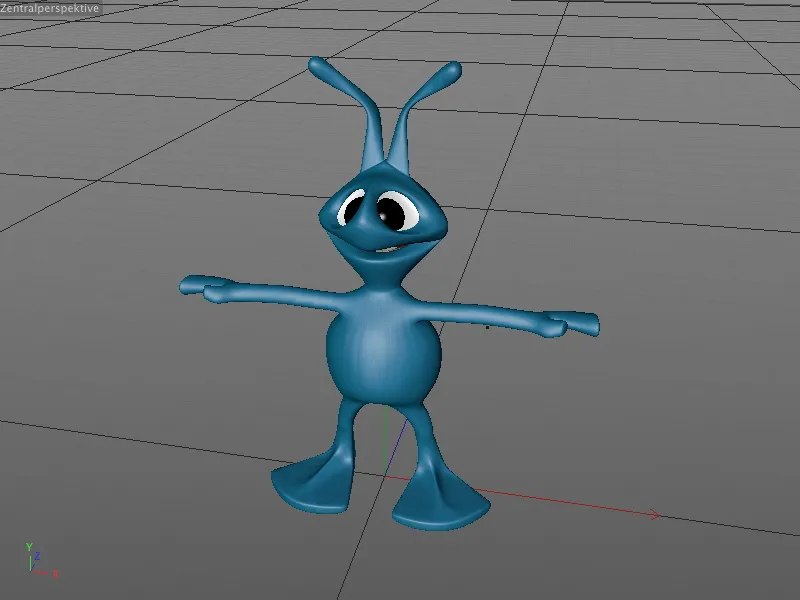
Preparations
At the moment, the alien's polygon object is still below a HyperNURBS object, from which it is "smoothed". As the sculpting functionality itself provides various subdivisions and thus smoothing, the HyperNURBS generator is in principle no longer necessary. We can therefore safely deactivate or even delete it after we have lifted the geometry of the alien from the HyperNURBS object.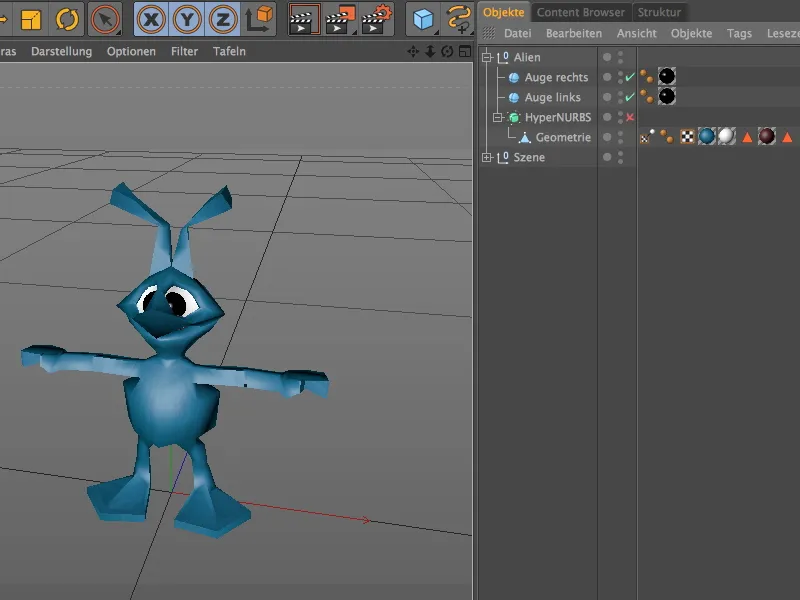
For sculpting, a modeling activity that is very similar to pottery or sculpting, CINEMA 4D offers a ready-made Sculpting layout via the Layout menu, which provides us with all the necessary tools within easy reach.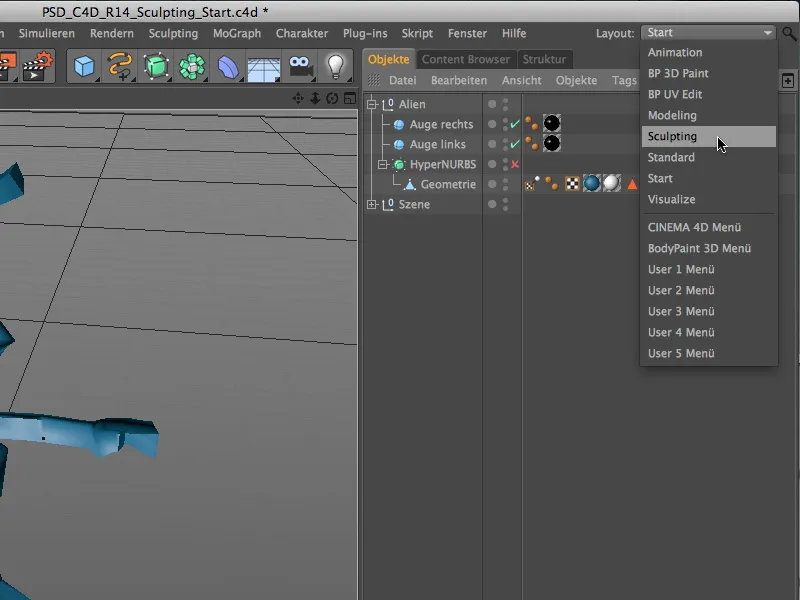
Before we can start sculpting, the polygon object needs a sculpting tag. To do this, we select the polygon geometry via the Object Manager and click on the Divide button on the tool palette in the Sculpting layout for the first time.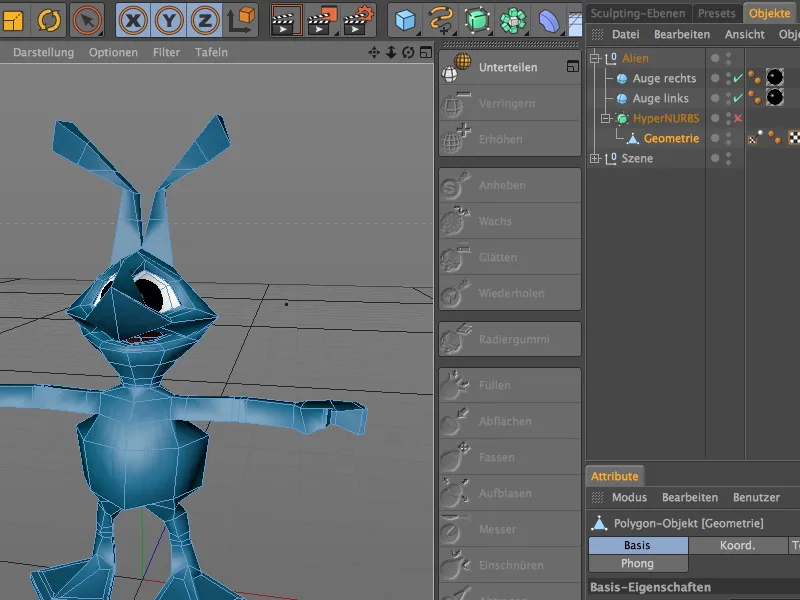
With this step, the polygon object has been assigned a sculpting tag. At the same time, we see a current display of the subdivision information in the 3D editor's head-up display (HUD). We are currently at level 0 and a polygon count of 538. To start rough sculpting, we now increase the number of subdivisions to level 3 by clicking three times on the Subdivide command.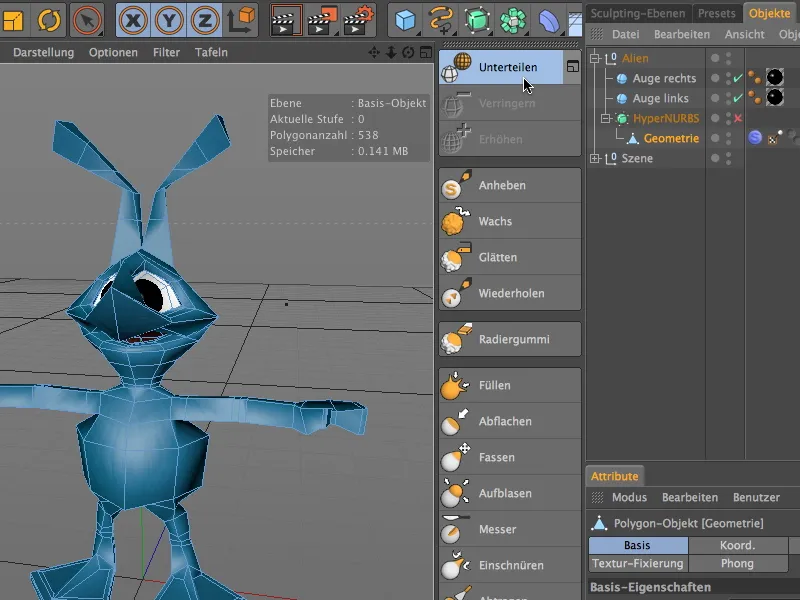
Modeling on a rough level
Now our alien is well prepared for sculpting; at level three we already have 34432 polygons available for the detailed work. Our alien looks correspondingly smooth as soon as we switch to model editing mode.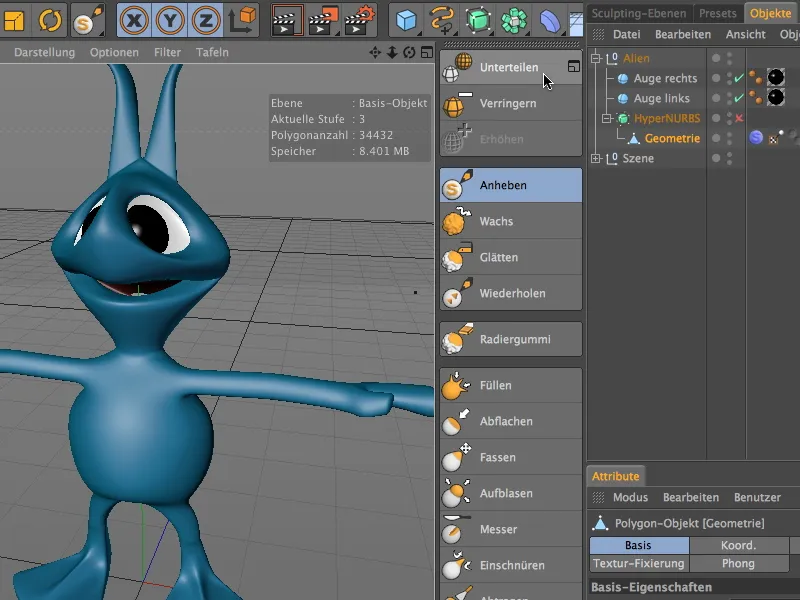
So that we do not edit the base layer of the sculpting object directly, but can soften or undo our modifications at any time, we go to the Sculpting Layer Manager to create an additional sculpting layer for rough sculpting.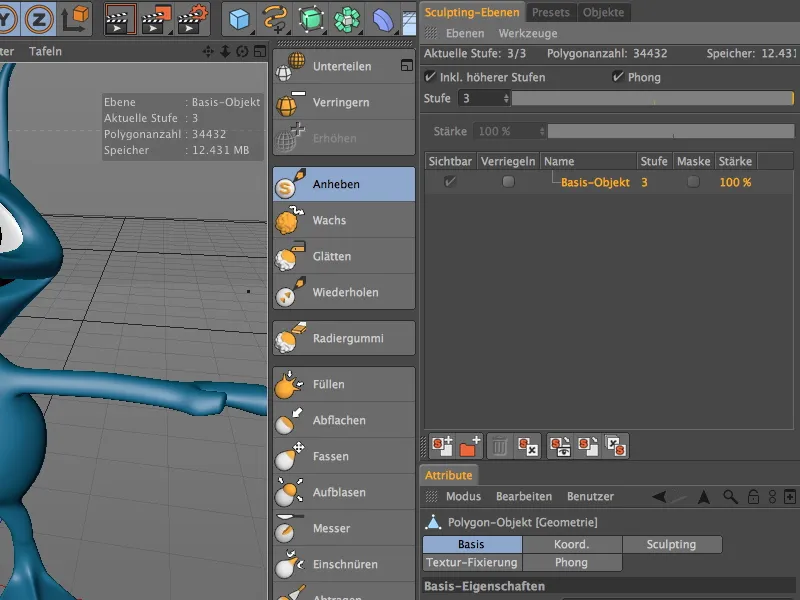
To do this, we can either use the first of the icons at the bottom of the Sculpting Layer Manager or the Add Layer command from the Manager's Layers menu.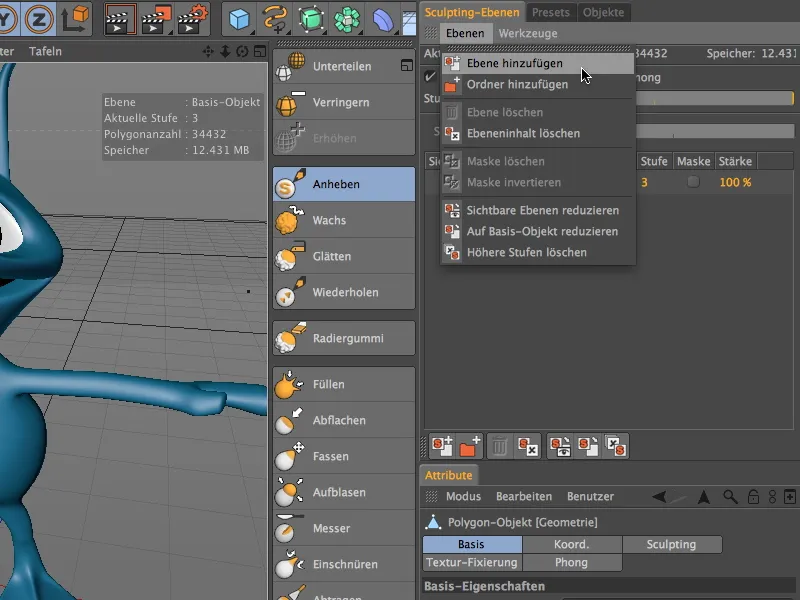
The newly created layer will be at the same editing level as our base layer. At this subdivision level, we will do our rough editing of the model. As we will be adding further layers later, we will rename them appropriately after double-clicking on the layer name for the sake of clarity.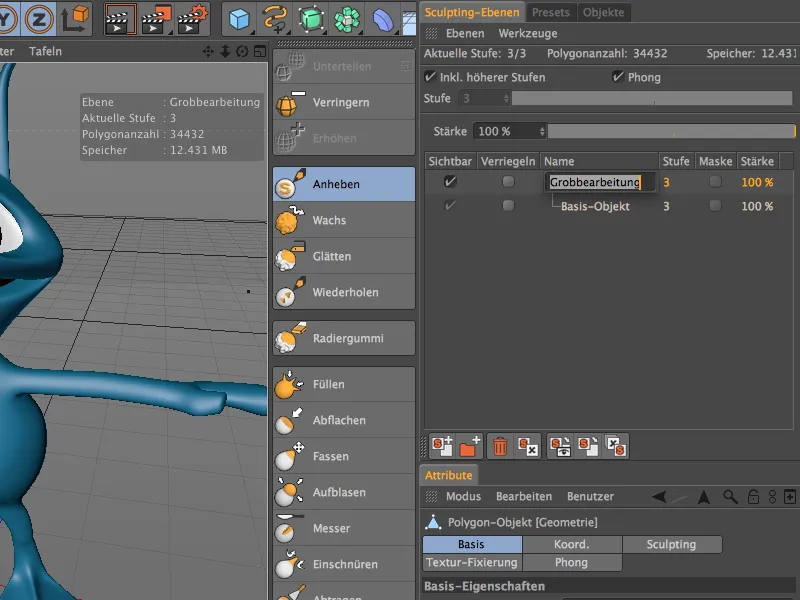
Before you start modeling, make sure that the correct editing layer is selected. To be on the safe side, you can also lock the base layer to prevent unwanted changes to this layer.
As the first sculpting tool, we select the Lift brush and activate in its settings dialog that the symmetry settings should be linked to all subsequent tools. We reduce the brush size to approx. 16 and activate the local symmetry X (YZ) on the symmetry page. This way we can concentrate on one side of the alien because all changes are automatically mirrored on the other side.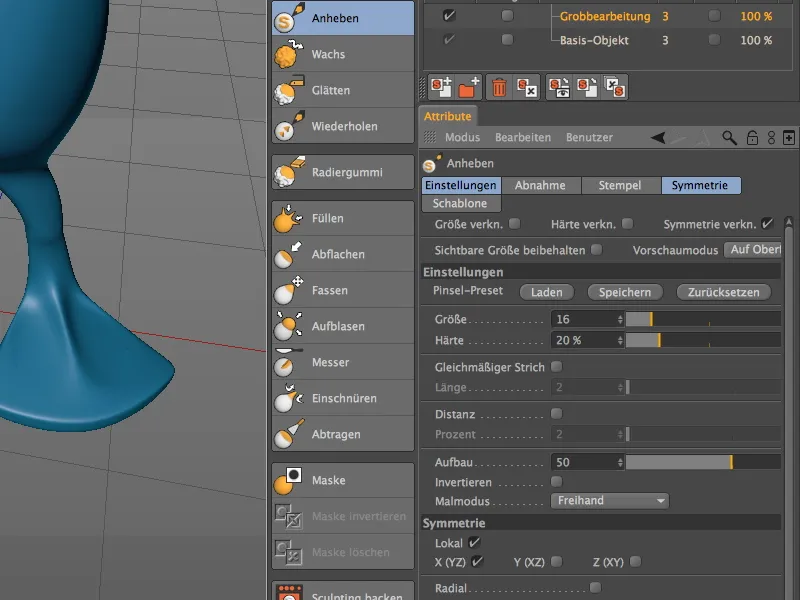
The nice thing about modeling aliens is that no one can accuse us of anatomical inaccuracy. In this respect, my modeling works are only suggestions that you can expand or vary as you wish. I start with the alien's feet, on the top of which I lift out a kind of toe ankle, ...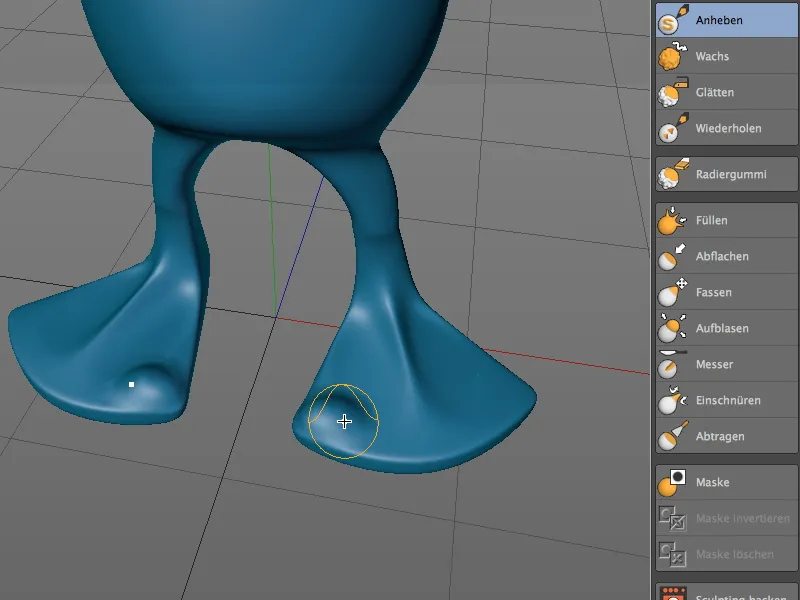
... which I then repeat for the middle and the other side of the foot. Feel free to change the perspective often to make sure you don't apply too much brush.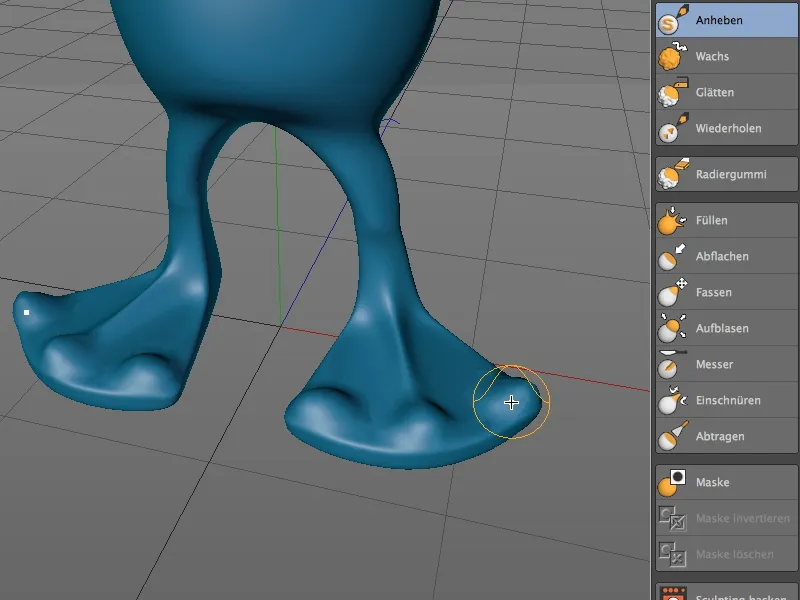
You can touch up and correct at any time by holding down the Shift key while applying the brush. This will temporarily switch to the smoothing tool and you can easily remove what was too much of a good thing.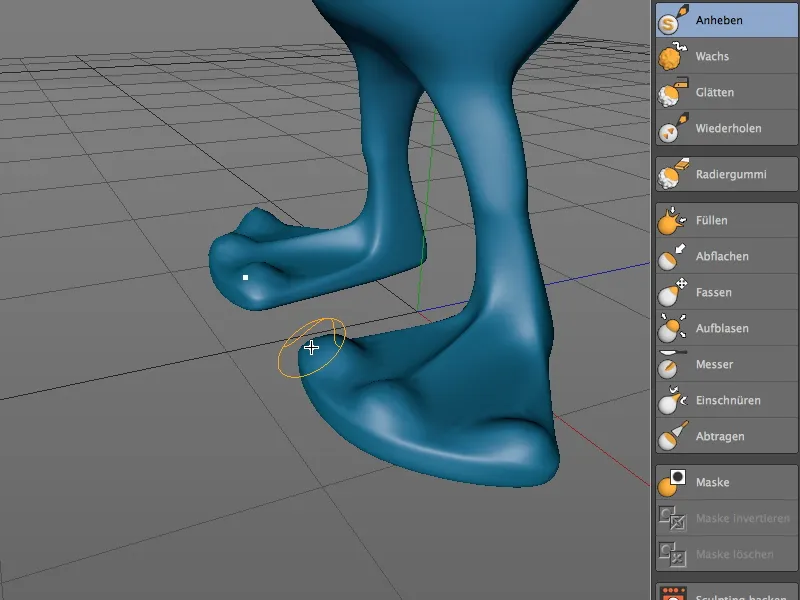
Let's stick with the Lift brush and focus on the alien's knees. After a little brush application, the knees look much more powerful and striking.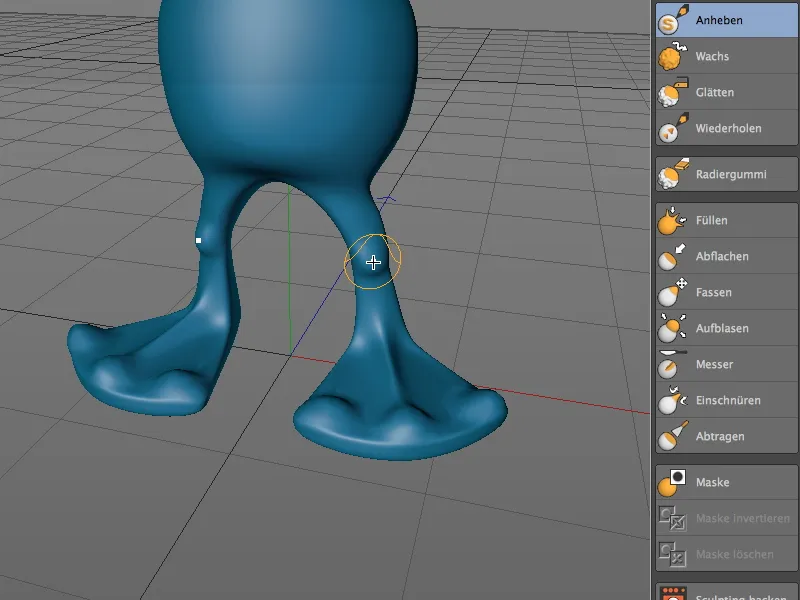
For the alien's back, we use a different sculpting tool to make the brush application a little clearer and more distinct from the base object. To do this, we activate the blow-up brush and select a size of around 12.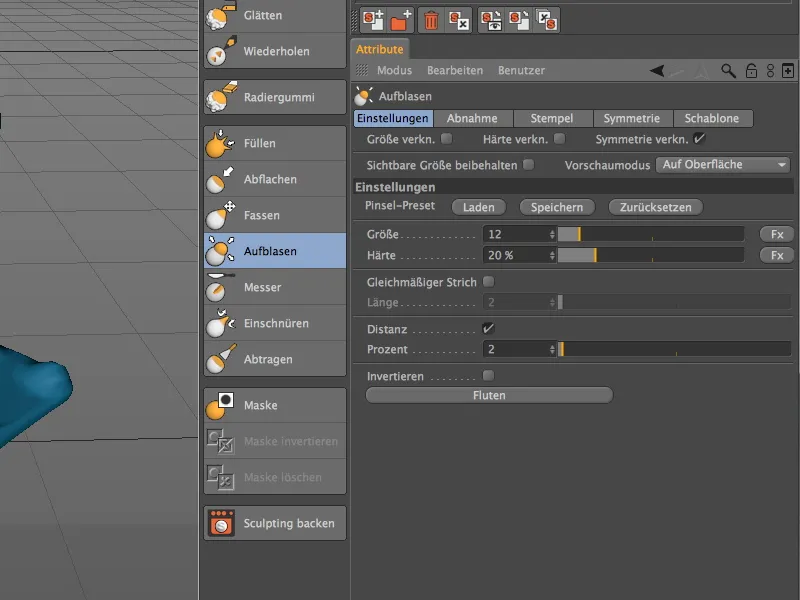
Let's turn the alien's back to us and draw the spine upwards to below the shoulders with the Inflate brush.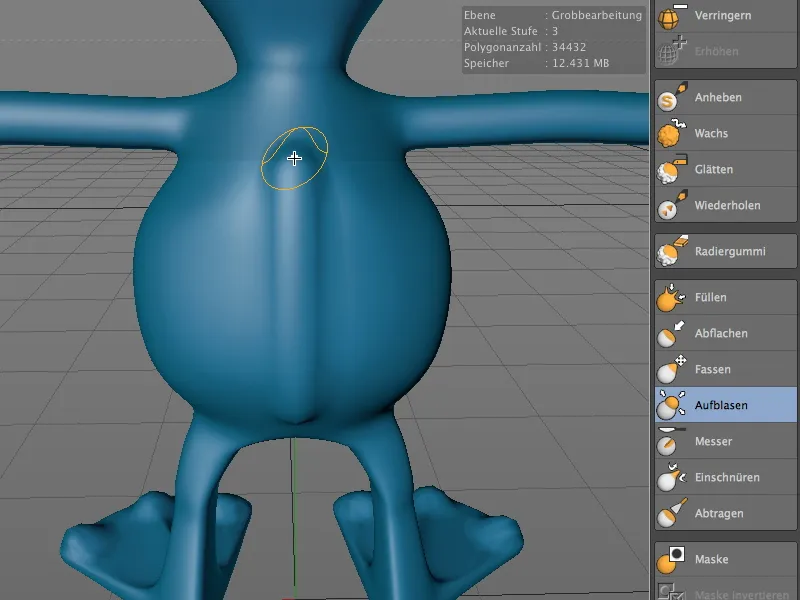
To soften the visible brush line at the top, we hold down the Shift key again to temporarily switch to the Smooth tool and smooth out the beginning of the spine.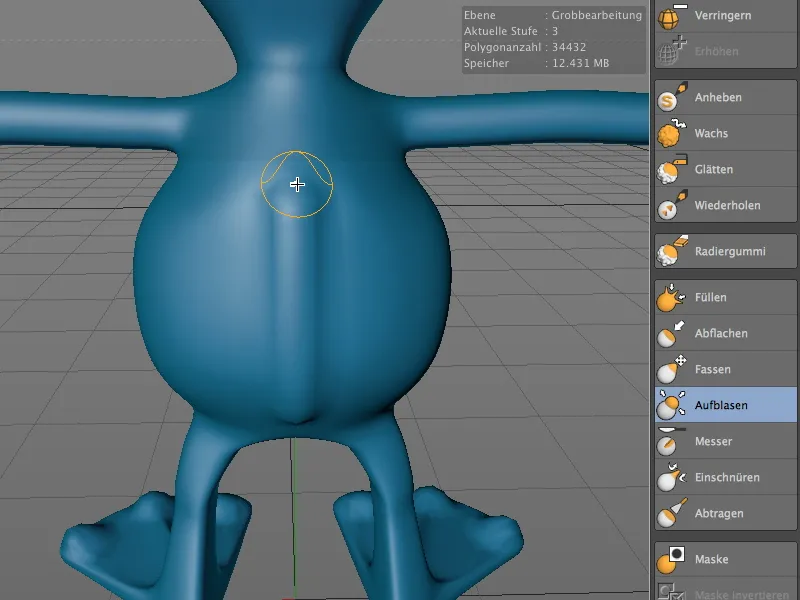
We stay with the blow-up tool, only we increase the size of the brush to about 20 in order to be able to work out the shoulders well.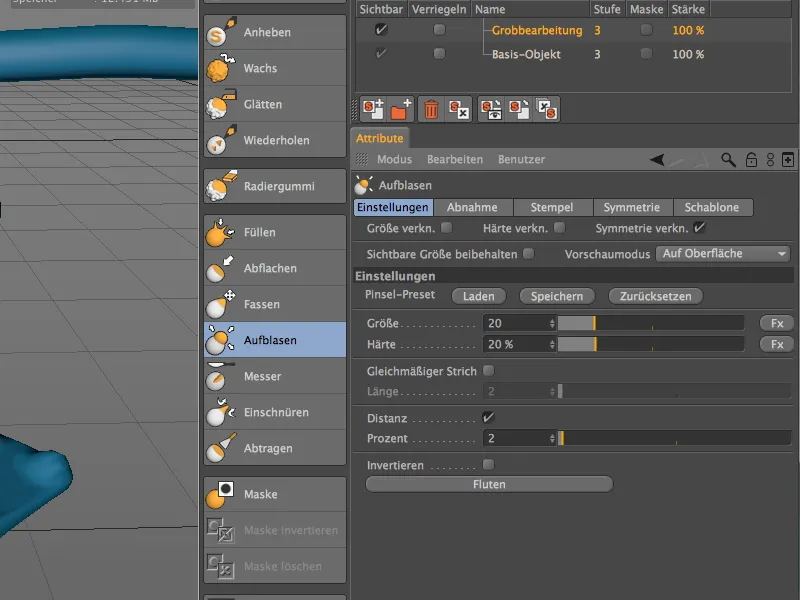
Starting from the spine, use the enlarged blow-up brush to draw up the back to the shoulder blades. Be careful not to apply too much material, otherwise our alien will look undesirably hunchbacked.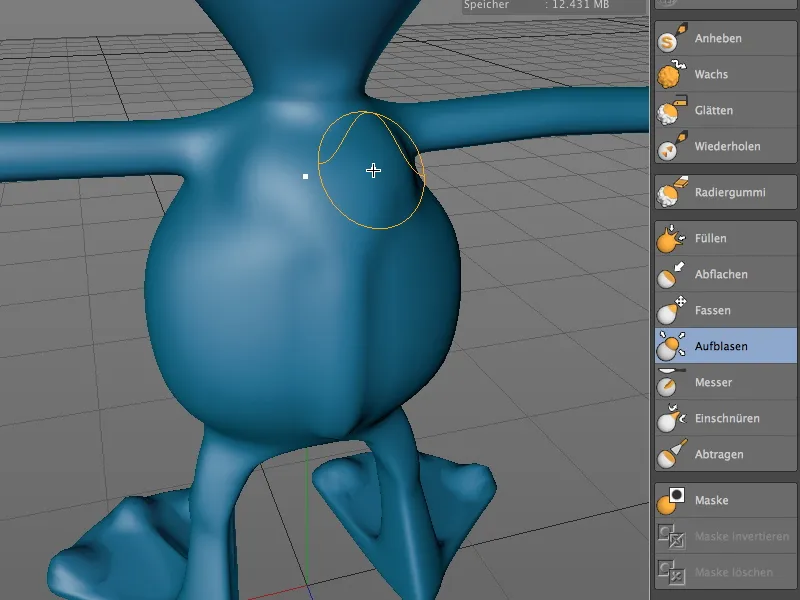
Now let's turn our attention to the alien's chest. To slowly model the chest and stomach area out of the base model, we choose the lifting brush again , this time with a size of about 15.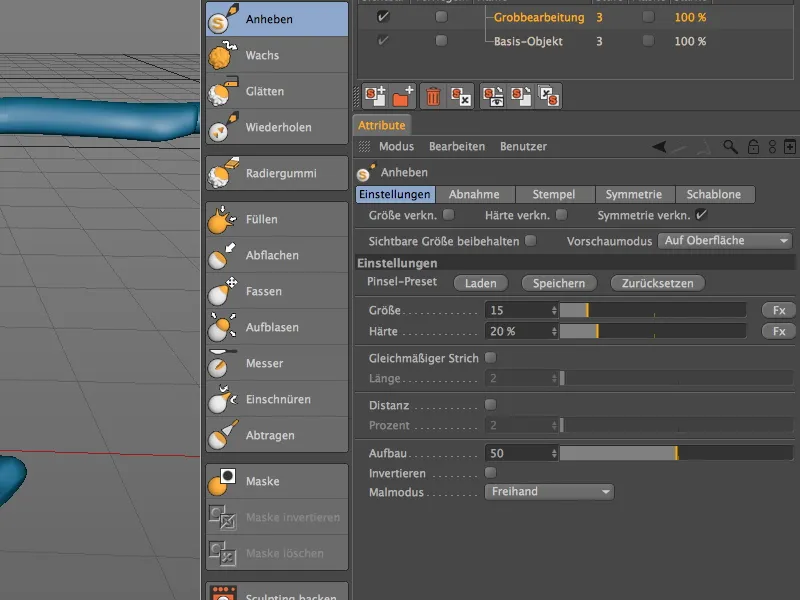
Using several fine strokes, I first drew the upper part across the chest with a slight sweep. The chest is then given a better hold on the body with curved brush strokes on the sides.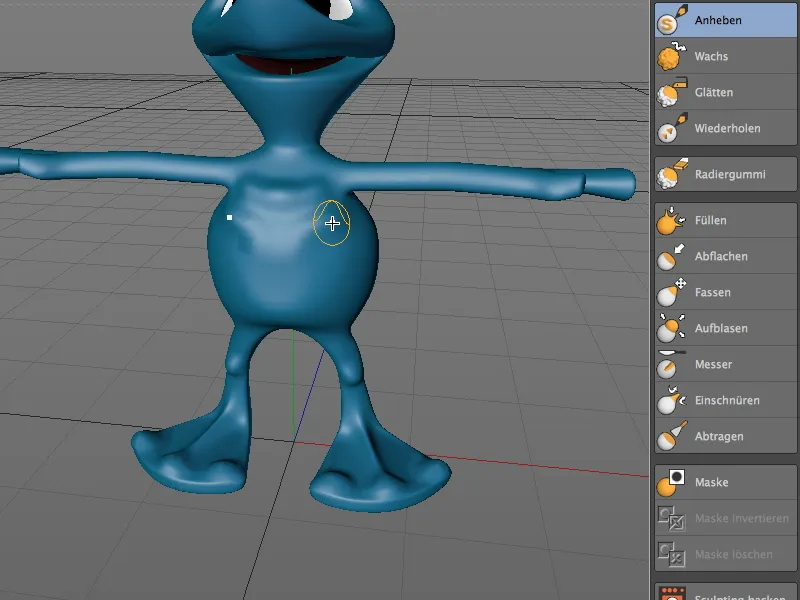
In order to make the somewhat roundish shape of the stomach appear a little more muscular, we choose the smoothing brush with a size of 20 at full hardness.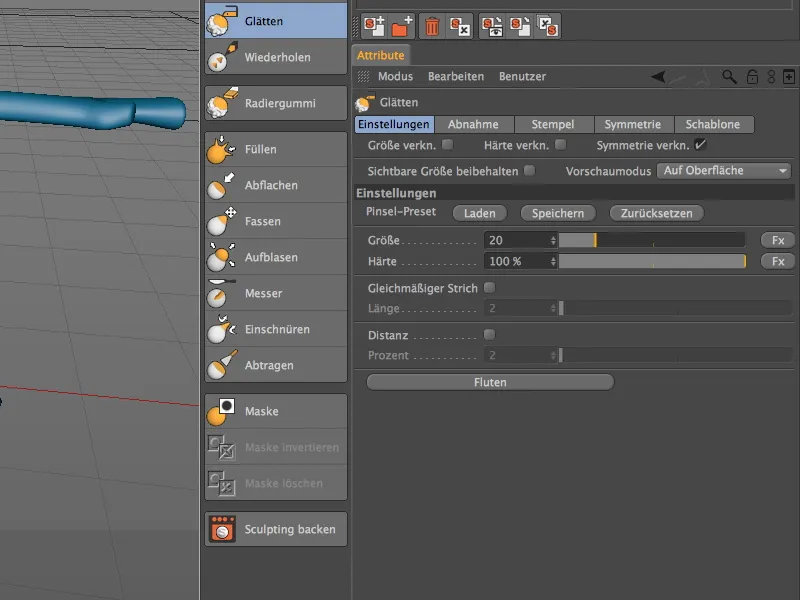
Using the relatively large smoothing brush, we now slim down the sides of the stomach by drawing from the base of the chest to just above the pelvis.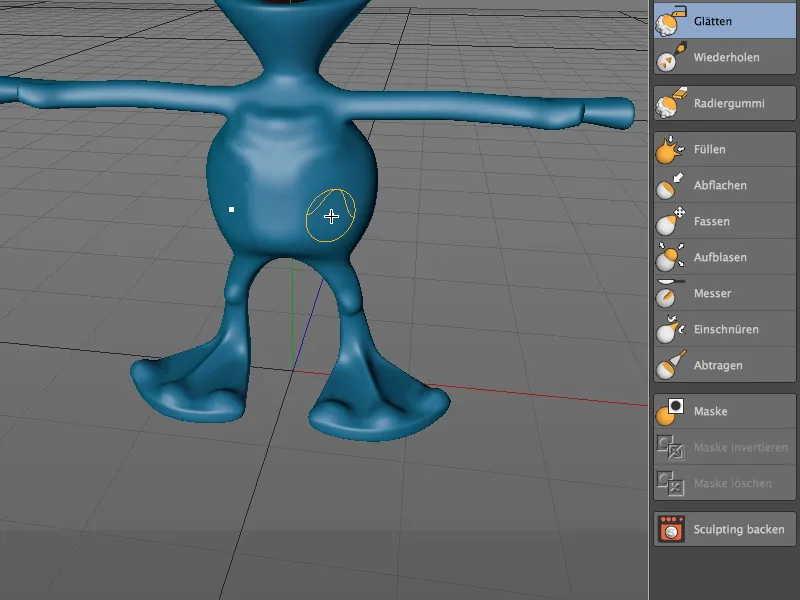
Now we can work out the alien's hips well. To do this, we switch back to the lift brush and draw an arc upwards from the edge of the stomach area we have just smoothed out to the side of the chest ...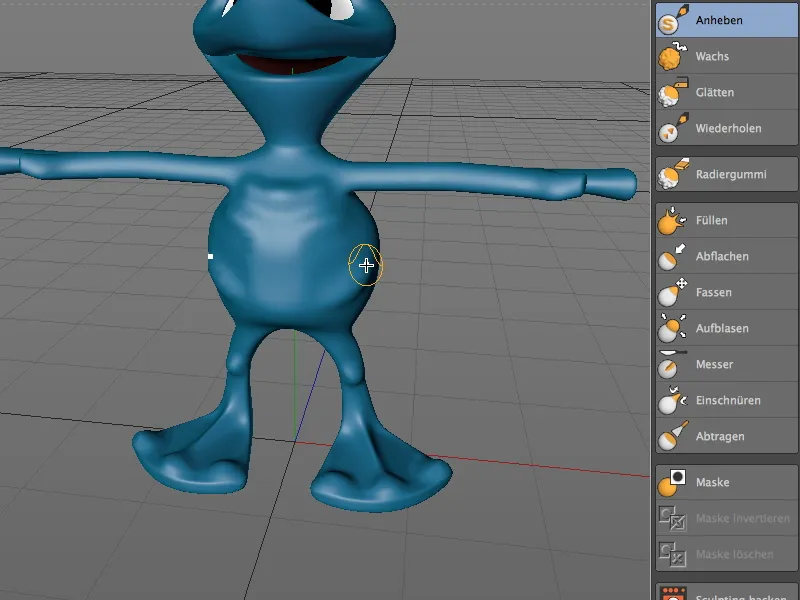
... and round off the hip line on the underside of the belly towards the center. The upper body of our alien is now roughly finished.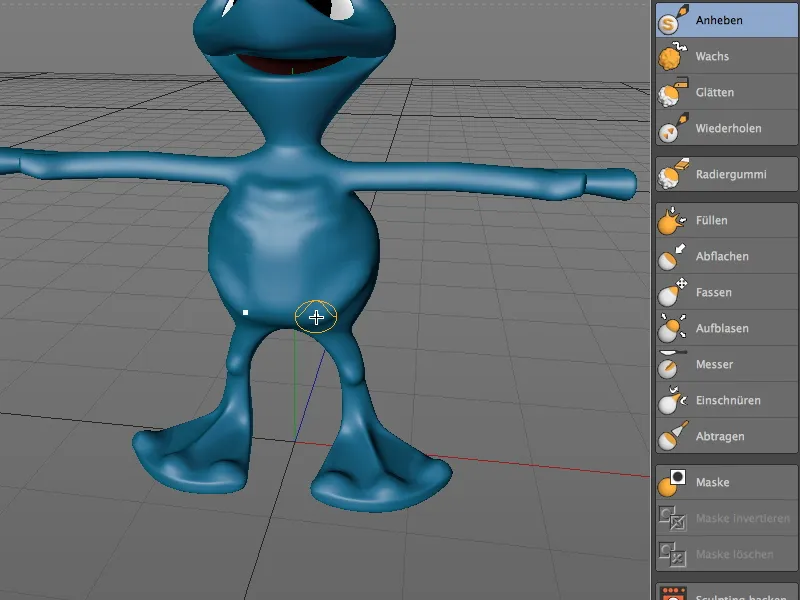
As with the knees, we use the lift brush to lightly outline the elbows or crook of the alien's arm.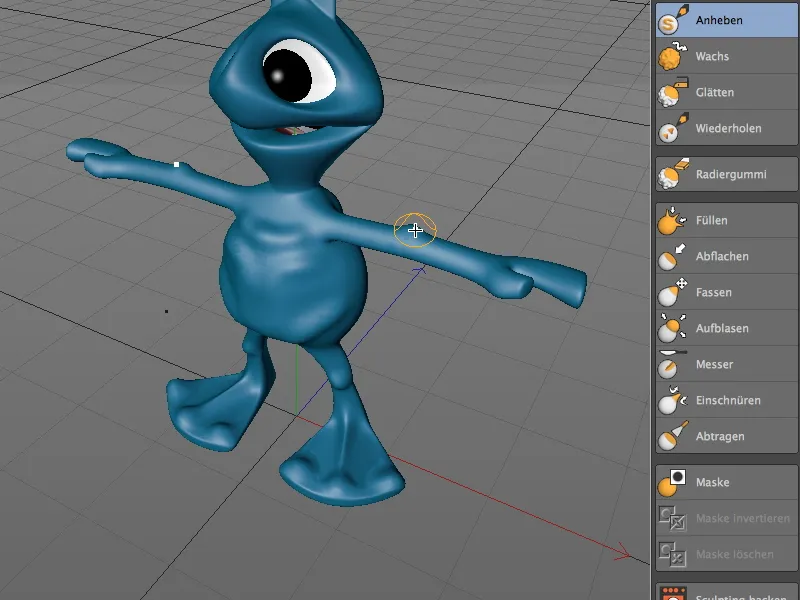
Staying with the lift brush, we turn to the alien's neck and indicate an Adam's apple from the base of the neck to the middle of the neck.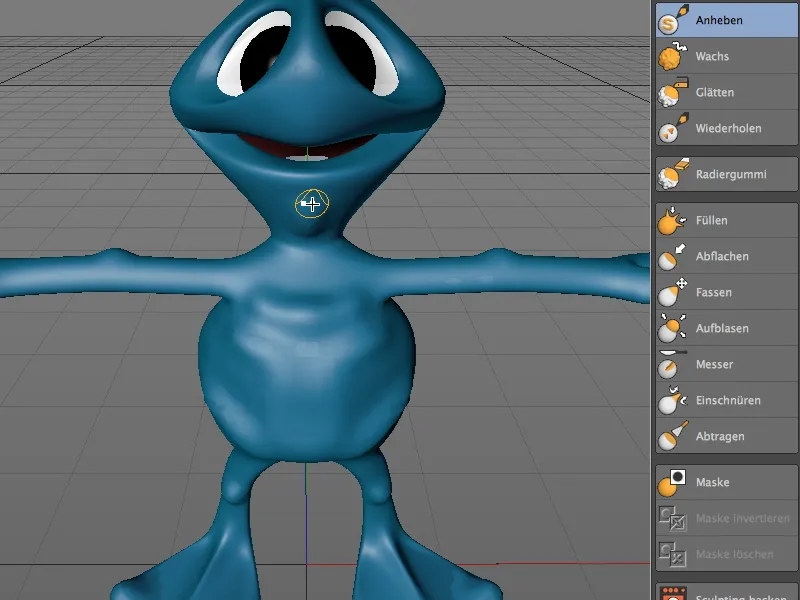
As it was unavoidable at this point that the base would turn out a little too round, we use the necking-in brush with a size of about 16 to make the sides and the lower edge of the Adam's apple stand out more finely from the neck.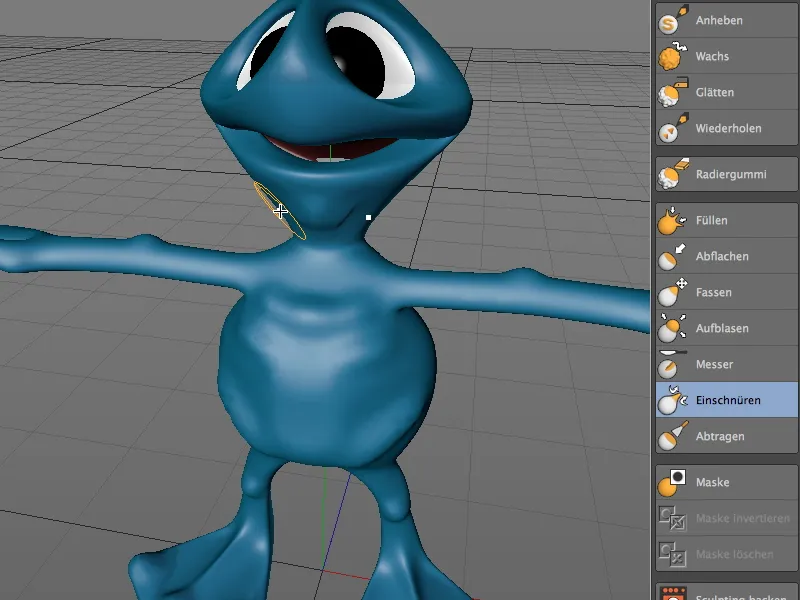
We continue with the back of the alien's head. Use the lift brush to trace the outline of the head with a slight dip in the middle of the head.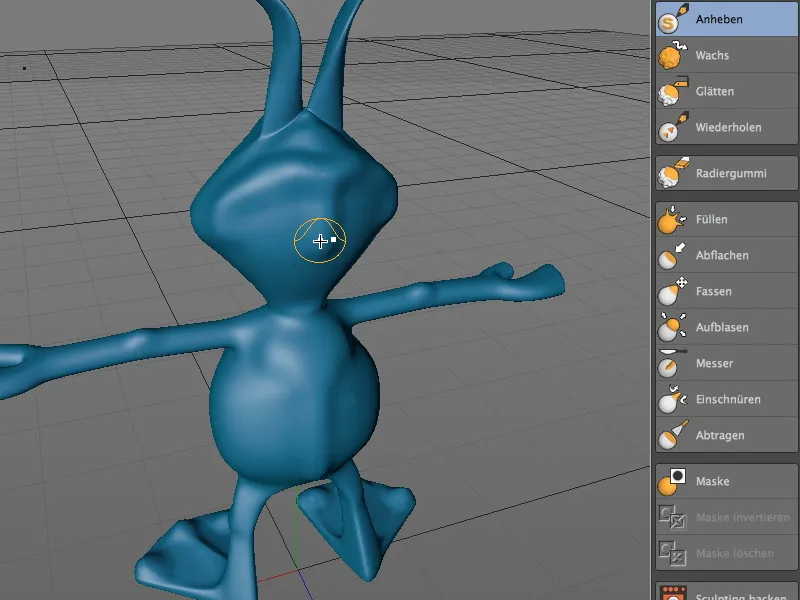
You can smooth out the slight downward curve towards the neck using the Smooth brush or the Shift key.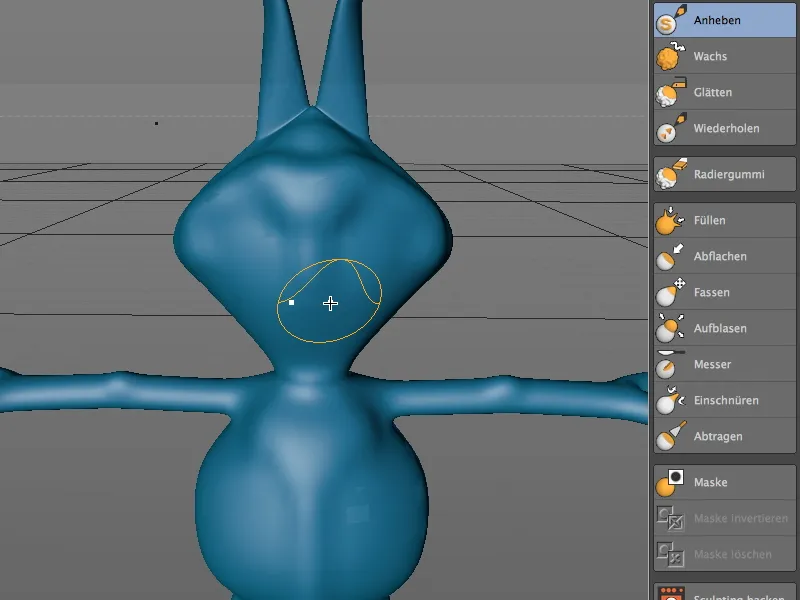
Modeling on a finer level
We have now covered all parts of the alien's body with our rough modeling. Now let's go one step, or rather one subdivision level further for the finer detailing.
To do this, we switch to the layer for the base object via the Sculpting Layer Manager and click on the Subdivide button in the Sculpting Tools palette.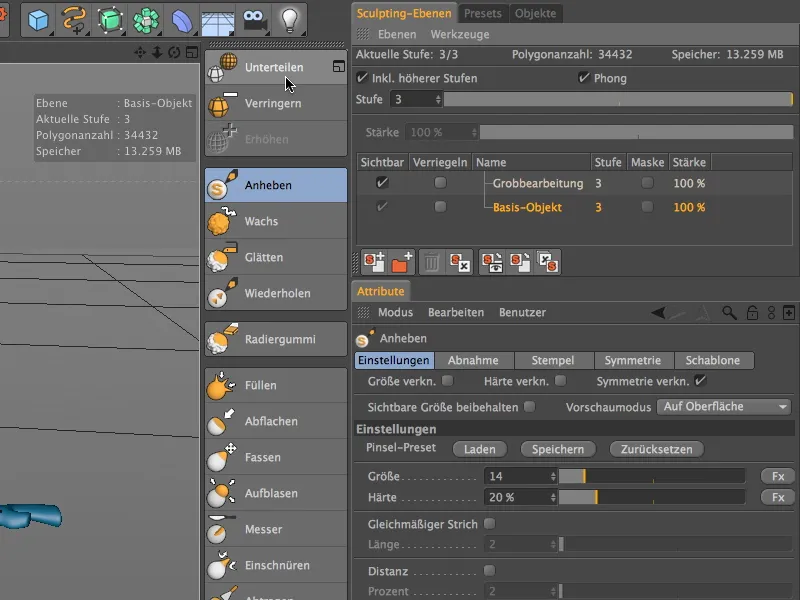
As shown in the HUD, the number of polygons has quadrupled with this subdivision step, which gives us many more options for finishing. The layer of the base object is now at level 4, which allows us to add a new layer for finishing at this level using the left button at the bottom of the Sculpting Layer Manager.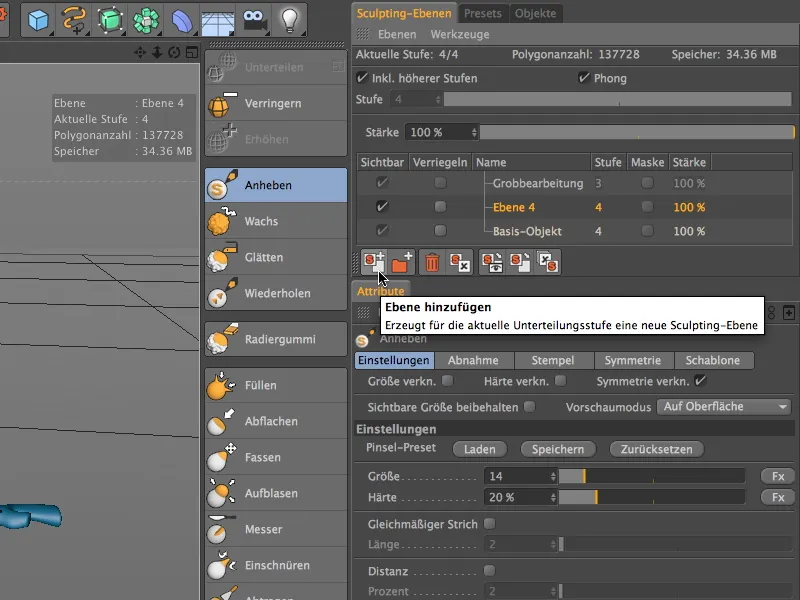
We rename this new layer appropriately and move it to the top of the layer hierarchy for the sake of order. Before the next editing steps, make sure that you have activated the new layer for fine editing.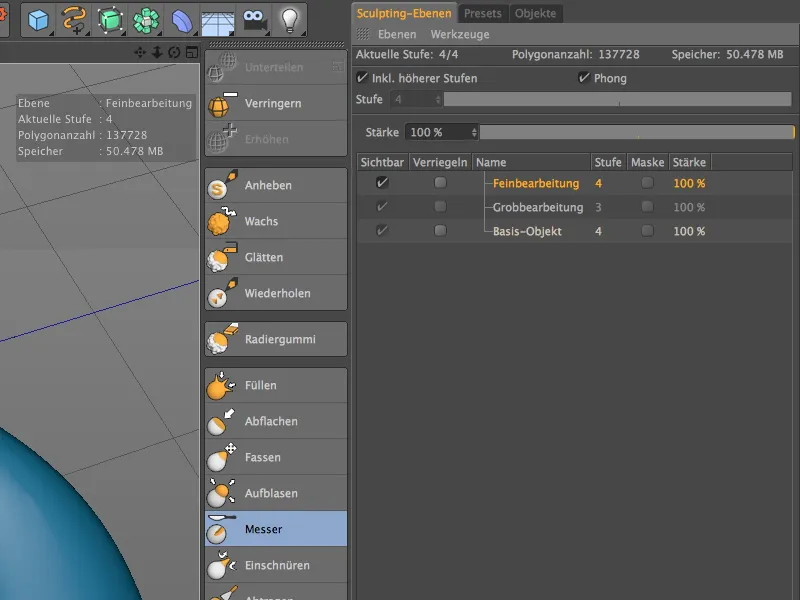
In the first step of the fine editing process, we want to take care of the alien's hands and fingers. At the moment, the alien's hands still look quite chunky. We improve this with the flattening brush and prepare the hand for fingernails. To do this, we select a relatively low size of 6 for the flattening brush with a medium hardness.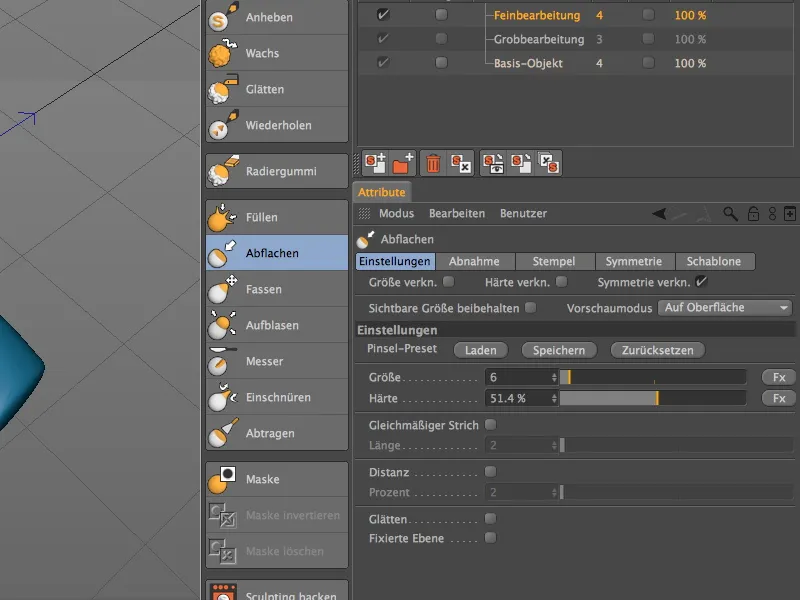
Choose a suitable perspective for working on the hand and flatten the top of the alien thumb and the back of the hand with the flattening brush.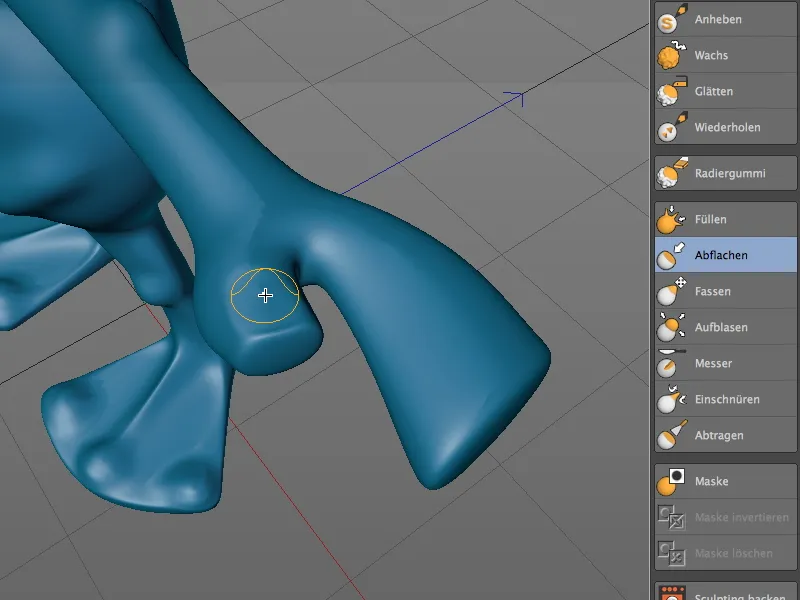
To get the surface of the thumb and the back of the hand really smooth, you can help a little with a large, soft smoothing brush.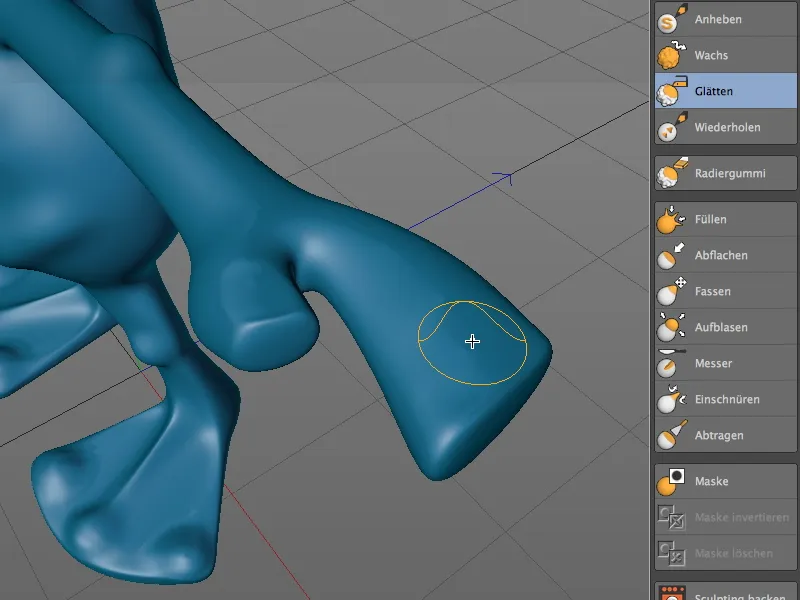
Now work out the fingernails in the flattened areas with the lifting brush. Use a brush that is not too big so that you don't accidentally go over the front edge of the finger or work on other areas in an undesirable way.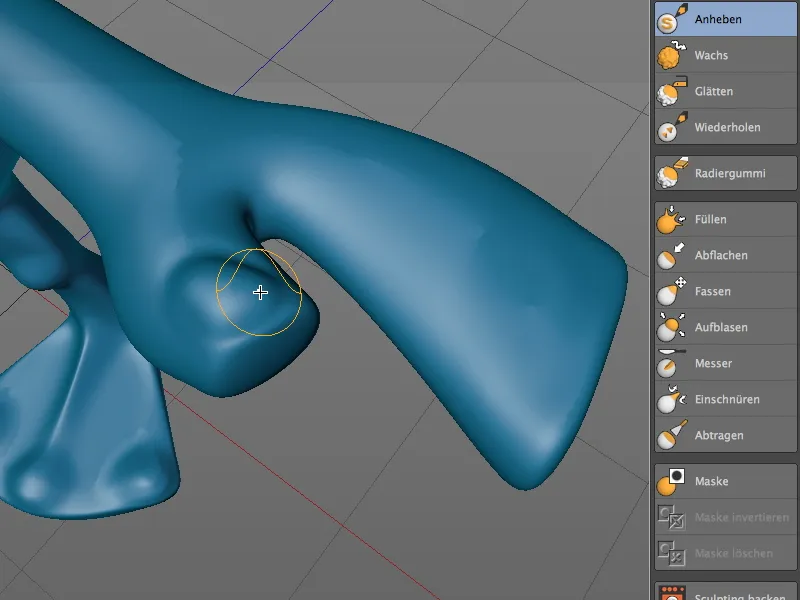
Using the same size for the lifting brush, I have outlined more nails on the back of the hand so as not to skimp on the details here either.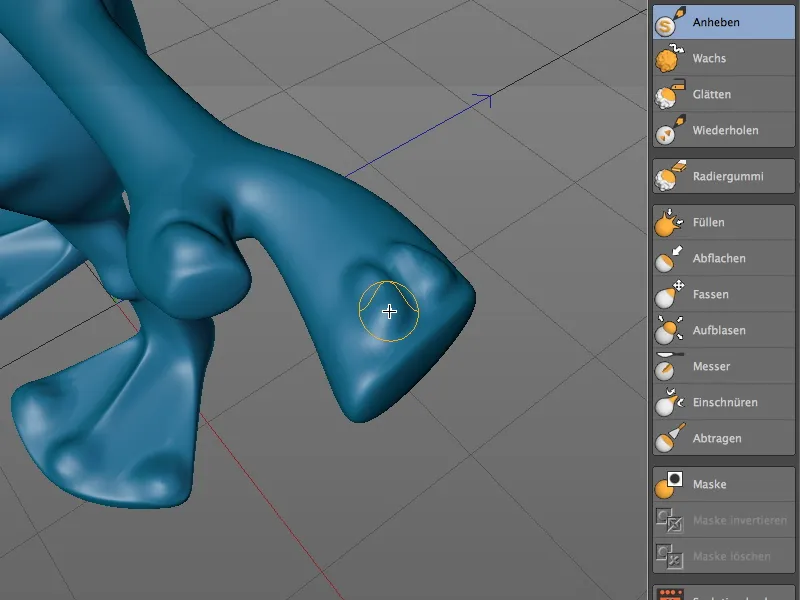
The necking brush is now perfect for working out the edges of the nails further and to better delineate them from the finger or the back of the hand. We choose the brush in a relatively small size of 5.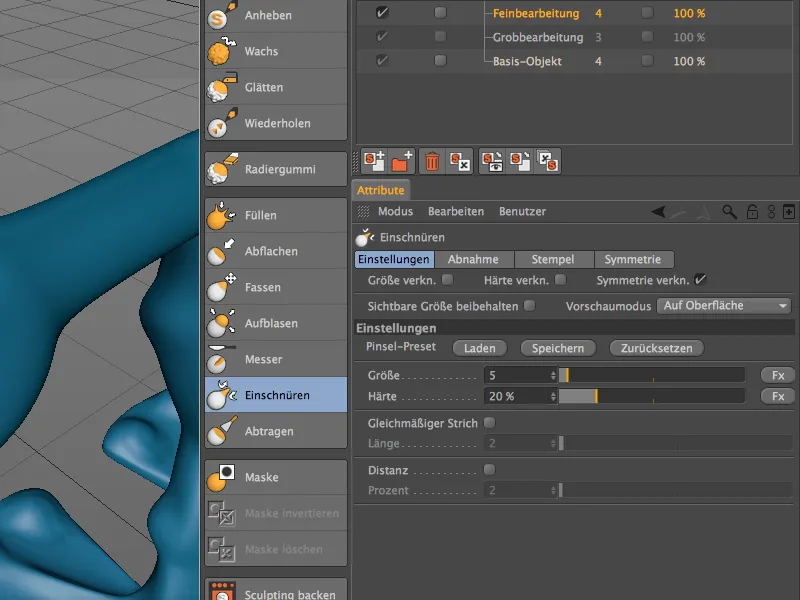
Now carefully run the brush along the edges of the nails until the nails stand out enough from the back of the hand.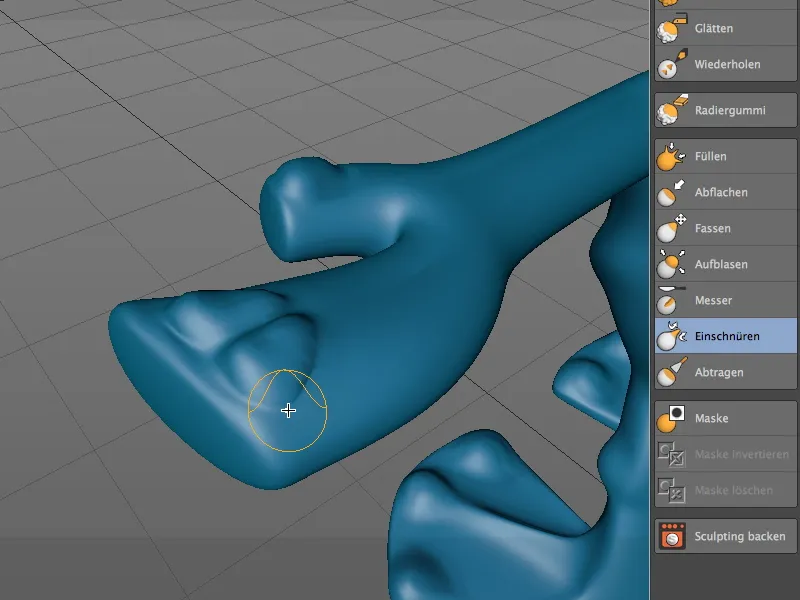
The thumbnail of our alien is then also given a stronger contour with the necking brush.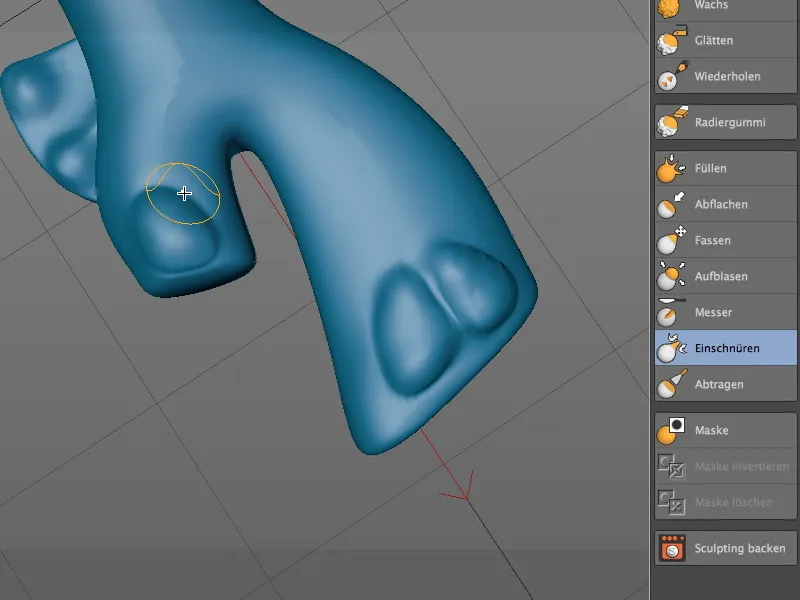
Modeling fine surface structures
Our alien has already gained a lot of character thanks to the many details. On a final, additional layer, we now paint specifically with a textured brush to give the alien a skin-like surface.
To do this, we use the Sculpting Layer Manager to switch back to the layer of the base object. Click on the Subdivide button to add another subdivision level for the skin.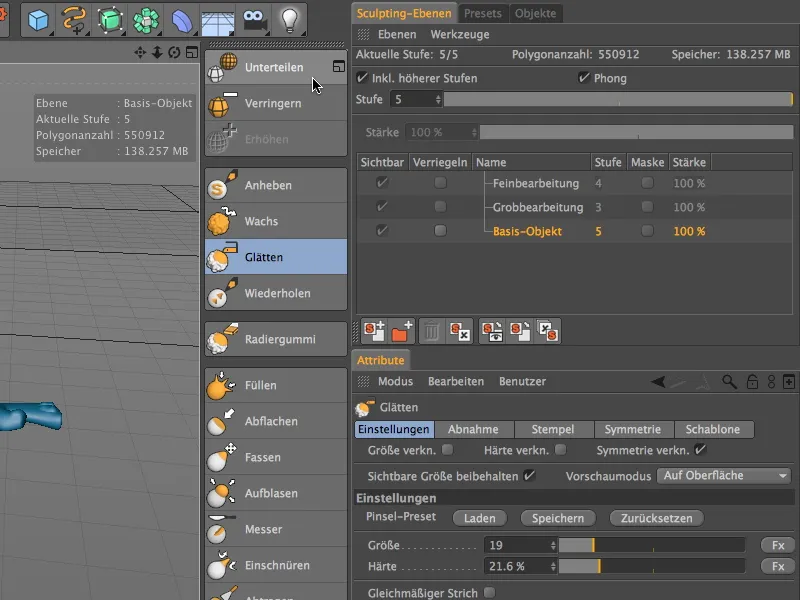
We create a new layer in the Sculpting Layer Manager, which we place at the top of our layer hierarchy, and give the layer a suitable name. Again, remember to make sure that the correct layer is activated before editing.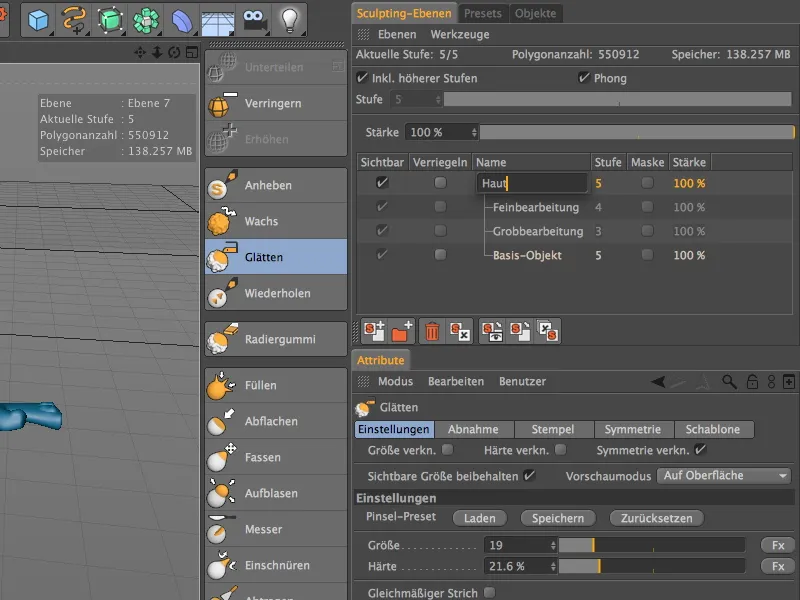
To apply the skin surface, we first select the Lift brush. On the settings page for the brush, we will find the Load button for the brush presets. After clicking on this button ...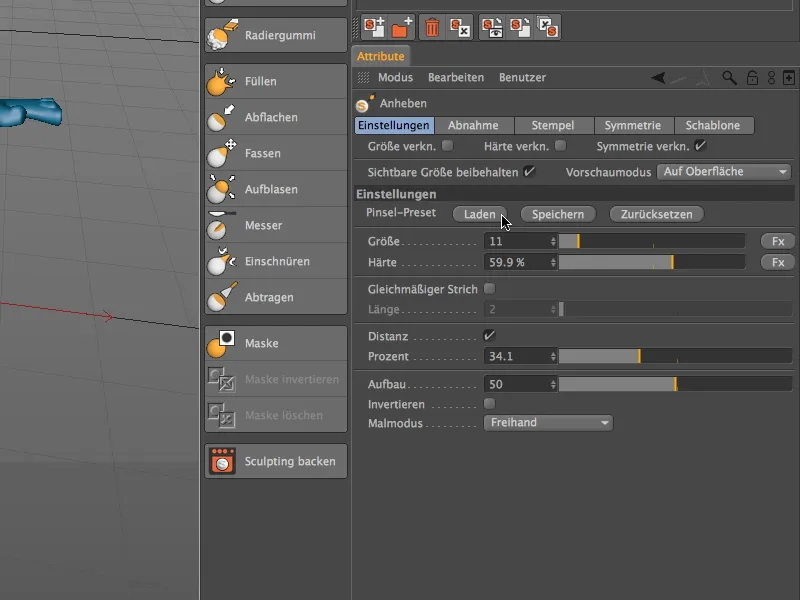
... an extensive menu of brush tips and presets opens. I have chosen the preset skin_05 for the alien's skin surface.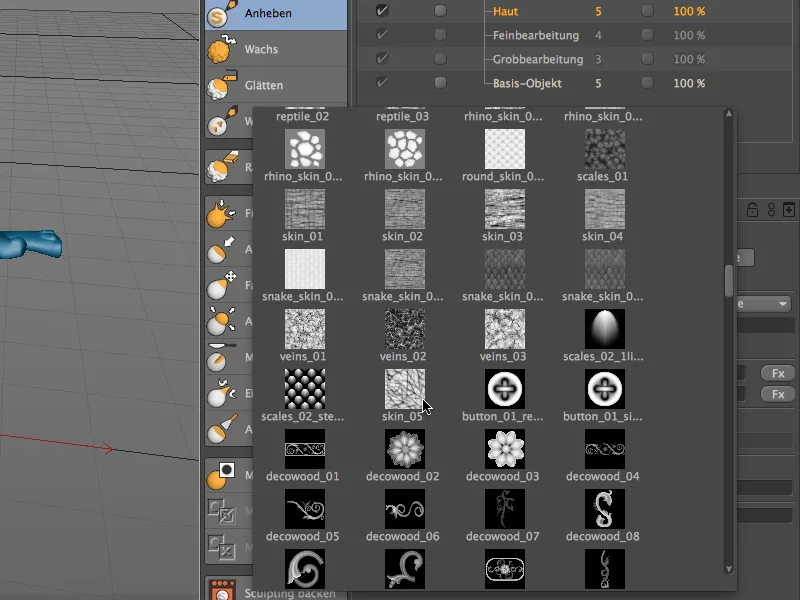
When working with brush presets, you should always make sure that a loaded preset "overwrites" the existing brush parameters. In my case, I have to reactivate the local symmetry X (YZ) on the symmetry page in order to be able to work symmetrically with the brush preset.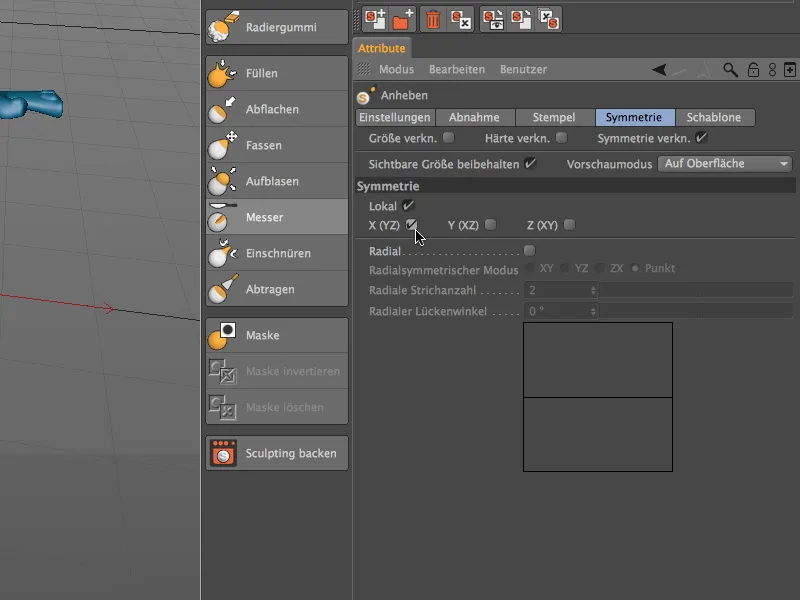
With the lifting brush prepared in this way, we now start to paint on the skin structure. It is best to adjust the brush size each time to the size you need for the body area you are working on.
In the case of the alien's feet, for example, the areas between the indicated toes are suitable for painting the skin texture.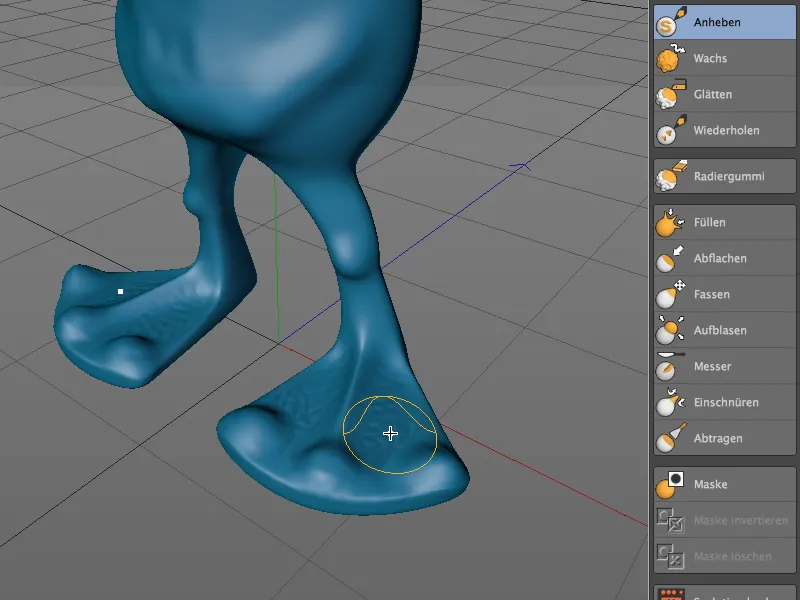
We slowly work our way up and apply our "surface texture" to the alien's knees and hips, especially at the transition to the thigh. Again, you can hold down the Shift key to use the temporary smoothing brush to smooth the transition between taut and textured skin and blend the areas smoothly into one another.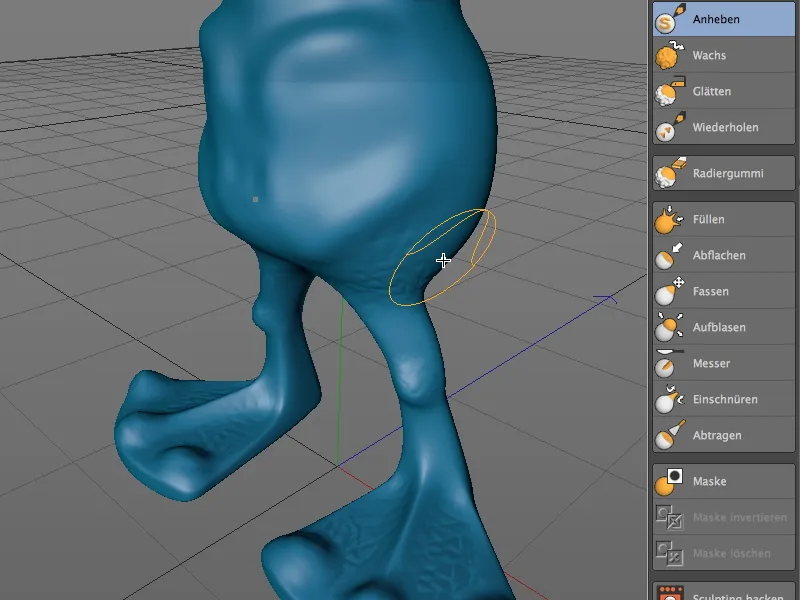
For the alien's chest and stomach area, the surface texture is best emphasized if you concentrate on the deeper areas. Make sure you use a suitable brush size here so that the skin texture is not applied too large, but also not too small.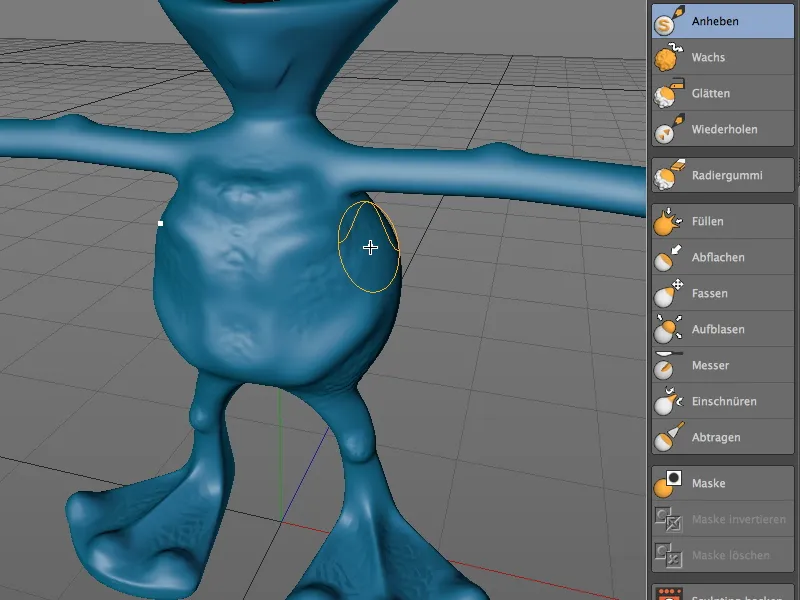
We'll do a similar job on the back of the alien. Here, too, I concentrated on the areas that were previously retained during the rough work.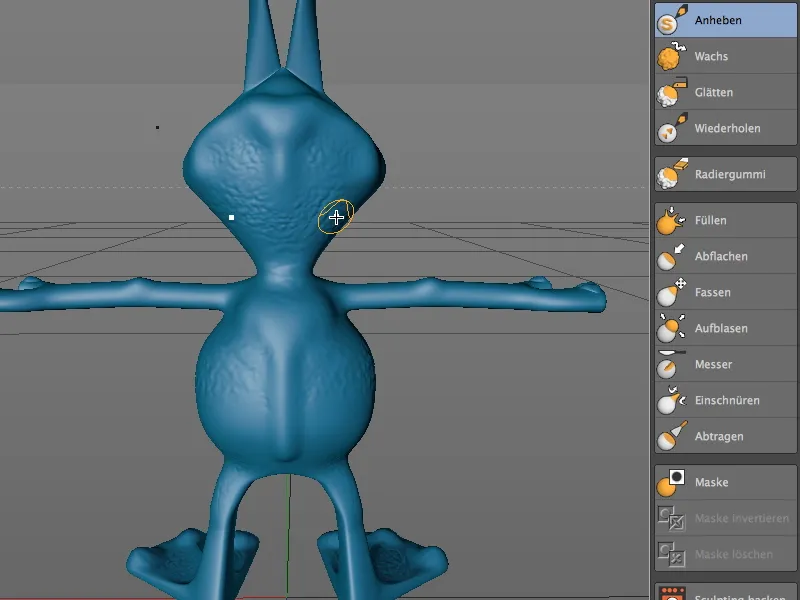
The crook of the arm or the elbow also gets some of the surface texture. When painting the hands or fingers, make sure that you don't accidentally decorate the nails with the skin pattern.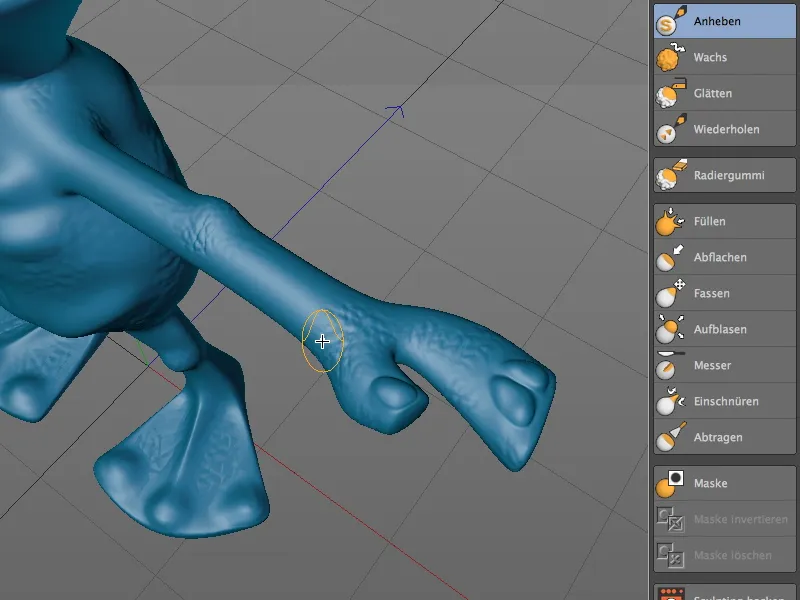
I also used a slightly smaller brush to apply the skin surface to the top of the head around the antennae of the alien ...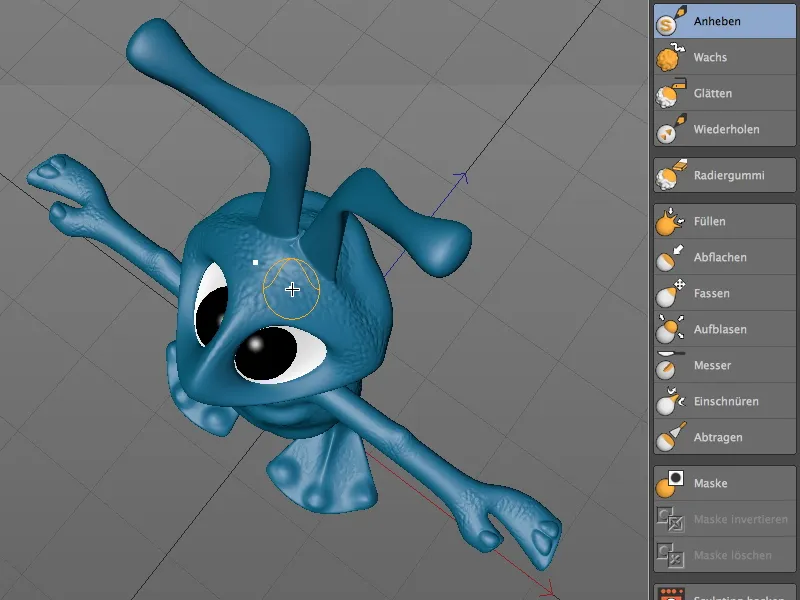
... as well as the area on the nose and lower lip of our alien ...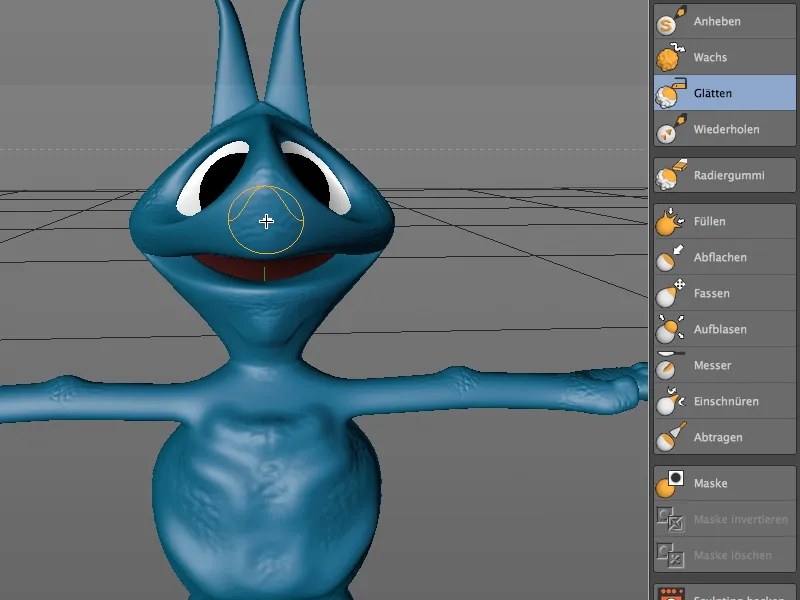
... and last but not least the antennae, where the skin structure starts softly at the base of the head and finally becomes most clearly visible at the tips.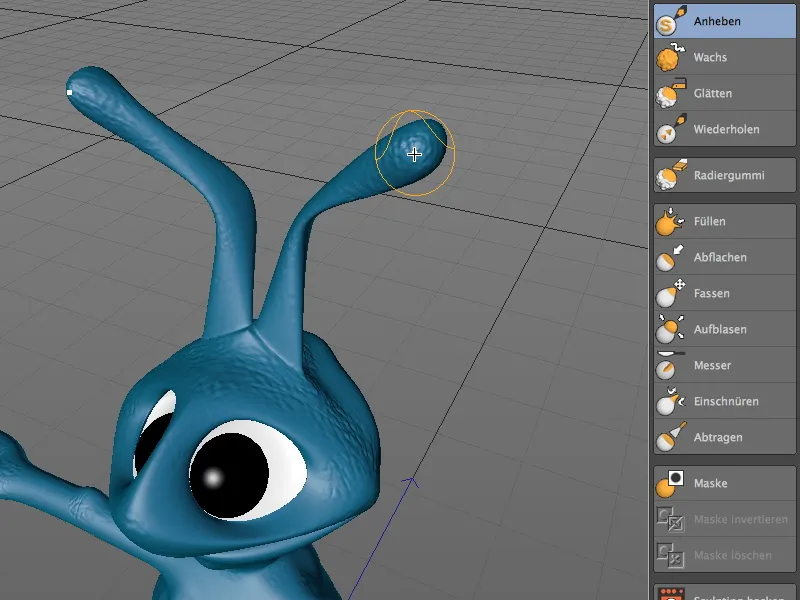
This brings us to the end of this tutorial, which of course should not stop you from adding and working out further details.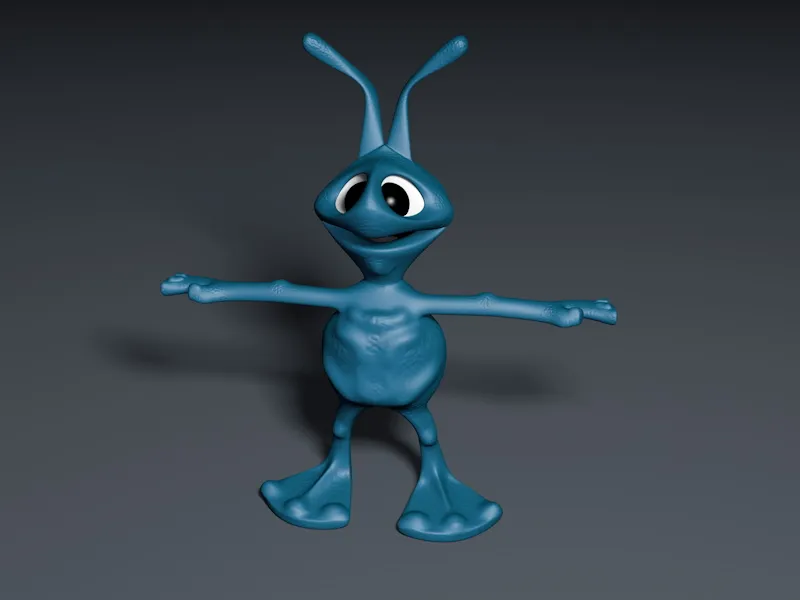
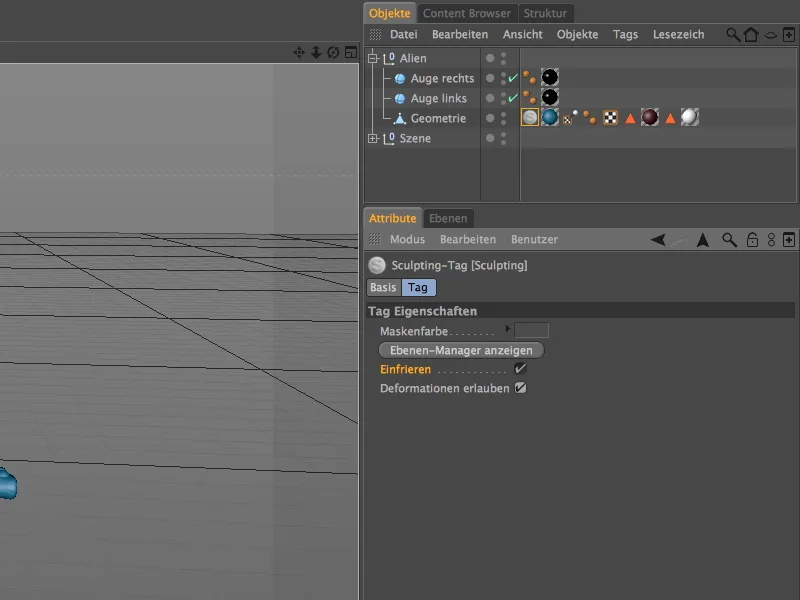
When you have finished sculpting our alien, you can recover some of the memory used during sculpting by activating the Freeze option in the settings dialog of the sculpting tag. This also protects the model from accidental changes.
With the additional option Allow deformations, you can still release the sculpted object for deformers, for example for the animation of the alien.