Part 01 - Introduction: Animal motif - beastly good!
Part 02 - The right equipment
Part 03 - The main problems: light & sharpness
Part 04 - It's all about the detail!
Part 05 - Shooting preparations and planning
Part 06 - Dog photography
Part 07 - Cat photography
Part 08 - Horse photography
Part 09 - Small animal photography
Part 10 - Indoor shoots - studio photography
Part 11 - Outdoor shootings
Part 12 - Image editing
Part 13 - Various general tips
Part 14 - Reptile photography
Here is a brief overview of the points in our tutorialPart 12 - Image Editing:
- Introduction
- Our image processing models: 2 Ridgeback females - indoor and outdoor shooting
- JPG vs. RAW
- Viewing the images on the PC with Bridge
- Processing the RAW data with Bridge
- Image editing with Photoshop: retouching
- Image editing with Photoshop: PS filter/Nik filter and OnOne
8: Image editing with Photoshop: Creative image design/composings
1. introduction
I'm still not an image editing freak, even though I've had to relearn a bit. I still think that every photographer should make their images look natural for the most part. I don't mean that you should leave every unsightly spot on the photo.
Of course, a little make-up is always part of it, at least when the pictures are shown proudly. However, I am mainly talking about correcting minor blemishes such as cleaning the nose and eyes, loose hair in the coat, stains on the photo cardboard in the studio, etc. On my website you will find 90% unedited photos in the animal section.
Very rarely is a picture subjected to more extensive editing ... But like everything in life, it's a matter of taste. I'm always amazed at what can be created from photos with a little editing. In this tutorial, I'd like to briefly touch on all the image editing options Bridge and Photoshop offer that I use in my work.
Over time, every photographer has their own workflow, their own favorite tools and uses different editing options. I am also still trying to learn in this area. I got all my knowledge from various Photoshop books, workshops with other photographers with a lot of experience and of course a lot of trial and error and self-study.
My clients receive a photo CD with all the pictures taken after every shoot. So the client sees what my pictures look like "naked" anyway. In most cases, the edits - if desired at all - are made afterwards on the basis of the client's favorite images (cropping, montages, collages, retouching or sometimes a black and white effect).
Attention: This tutorial refers exclusively to the image editing of animal photos indoors and outdoors.
2. our photo editing models: 2 Ridgeback bitches - indoor and outdoor shoot
For this tutorial I have chosen a shoot with two beautiful Rhodesian Ridgeback bitches. I first photographed the two bitches Roja and Lulu outdoors and then in the studio. The Rhodesian Ridgeback is not only a very pretty dog, but above all elegant in its appearance and very athletically built.
If the Ridgeback can be put in the limelight, which is often not a bad thing for him, the photos are a real dream. I hope to be able to repeat the shoot with Roja and Lulu again in a gravel pit or on a stubble field. Because these are the perfect background colors for these beautiful dogs.
This picture is largely unprocessed. Only a Nik filter with a blur vignette has been applied. Please refer to the explanations below.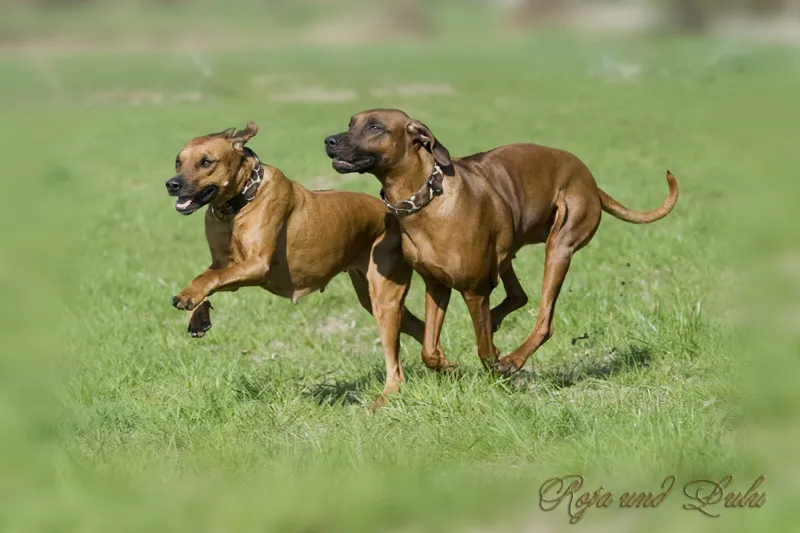
3. JPG vs. RAW
As already mentioned in some predecessors of this tutorial, I now shoot exclusively in RAW format. I now enjoy the many advantages of this image processing format on a daily basis. If you're still not sure whether this is the right format for you or if you want to stick with JPG, you can of course also use all the editing tools I've described here. But you should test the difference for yourself and see the advantages and disadvantages for yourself.
Nevertheless, let's take a look at the pros and cons of the RAW format:
Cons:
- File size: RAW formats take up a lot of space. This means that a memory card will fill up twice as quickly if you shoot in RAW instead of JPG format. Even worse if you directly assign your camera the task of recording BOTH. Even when archiving, you will probably have JPG and RAW formats on your hard disk later on and this simply eats up an incredible amount of memory if you keep them from every shoot.
- Post-processing: The RAW format must always be post-processed. You need special software for this. You usually have to convert the images into a JPG format if you want to continue using them. Another disadvantage of the RAW format is that the raw formats of individual manufacturers are not compatible and there may be differences within a model series.
Pros:
- Flexibility: We control the Blender, exposure time and ISO when shooting. Other parameters can be changed as required during RAW conversion. This is also possible in JPG format, but only to a limited extent. Editing here will result in the loss of image information and details.
- Image quality: All details of the captured data remain intact. The image quality is usually higher due to the high number of pixels and the dynamic range of the image. It is not for nothing that the recording requires double the memory. That pays off here!
Simply test the editing options and decide for yourself. Take two shots, one in RAW and one in JPG. Ideally a normal subject, correctly exposed, and an overexposed or underexposed image and correct them with Bridge or Lightroom. I can no longer imagine taking photos in JPG format.
4. view the images on the PC with Bridge
So, you've just come home after a great sunny day and have a treasure trove of wonderful photos in your luggage. Of course, the first thing you do is look at everything on your PC! So let's start by taking a first look at your photos. Either in Bridge or Lightroom or a program of your choice for editing the photos. As I work with Bridge, here is the workflow in detail: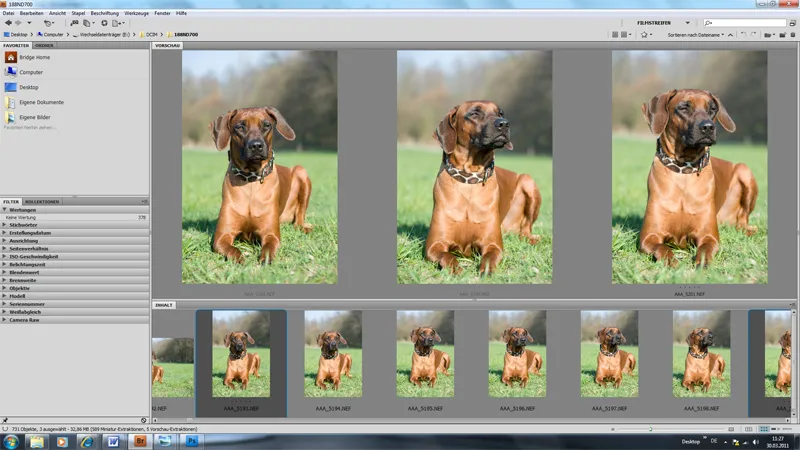
In the first view in Bridge, the photographer can already get an initial overview and, if necessary, directly sort out images that are out of focus or in which the dog's eyes are closed or similar. As most pet owners are not as critical of the pictures as we might be, I sometimes "leave" pictures that I personally don't like so much.
Here I usually make a clear distinction between pictures for private owners and pictures for breeders. The following picture shows Roja, whose ears are not erect in the left-hand picture and one ear is sticking out unattractively on the right. From a breeder's point of view, this is of course not such a good picture. A fancier may have a completely different view. The photographer, on the other hand, will pay more attention to the sharpness and appearance of the picture.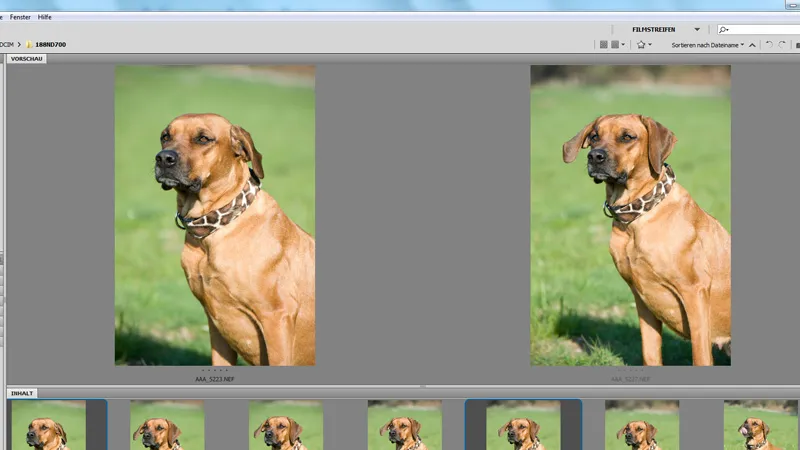
Here we can see that Roja can present herself very well. She is a very proud girl and a real Ridgeback lady. This picture is sure to please photographers, fanciers and breeders. The picture is still completely unprocessed: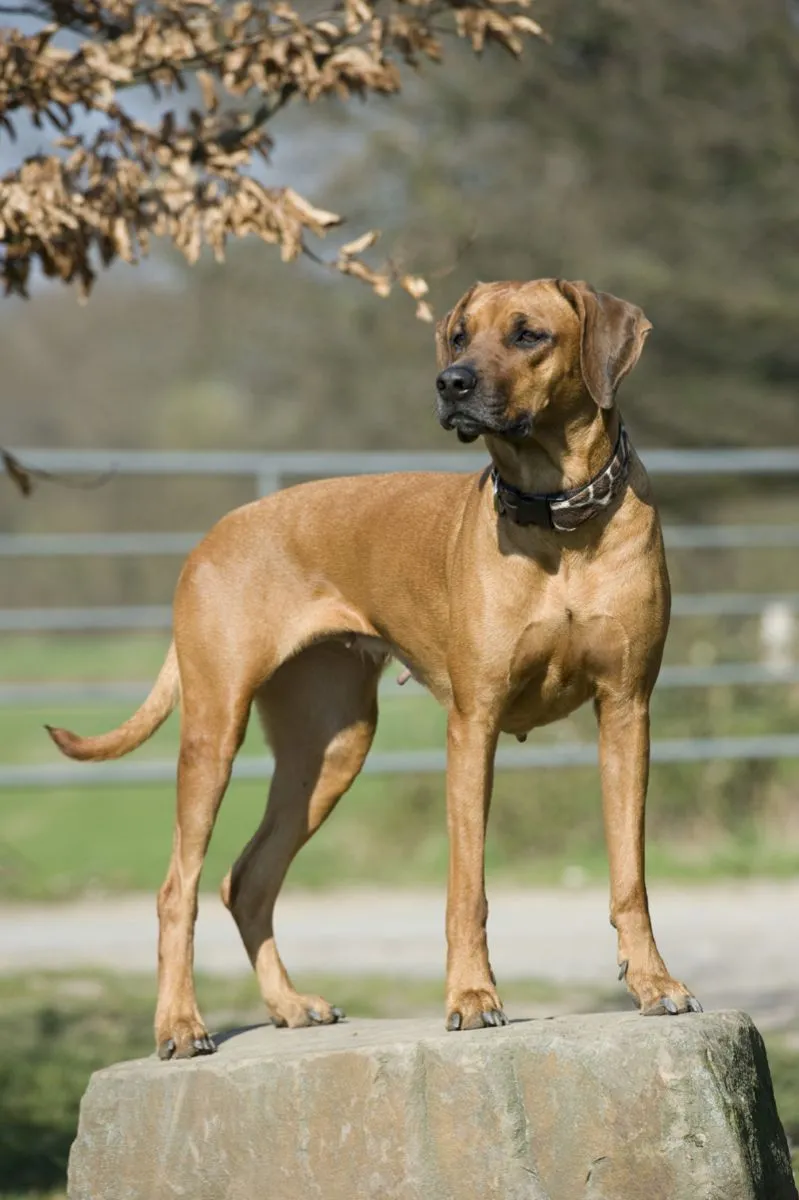
My workflow here is probably very different from yours. I would therefore like to briefly explain how I proceed. I mark all the images and open them in Camera Raw (see next image). I'm sure you'll still find one or two of them interesting.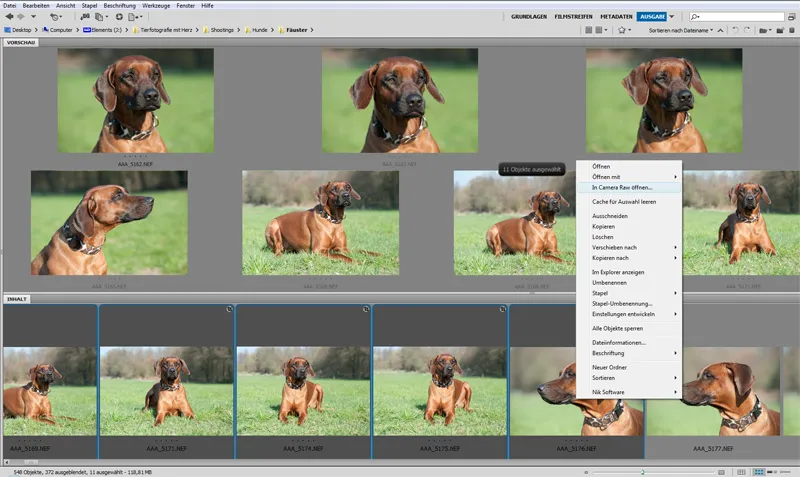
During this review in Camera Raw, I go through each shot and only delete images that are unusable or superfluous. For example, pictures where the focus is not right, where the animal's eyes are closed or if an unattractive photo is created during a moving shot. Sometimes similar portraits, which only eat up memory unnecessarily, are also dropped during continuous shooting. About 5-10% of the images are lost during this inspection. Sometimes even less.
In the case of group shots of several animals or owners with animals, more shots are deleted, as not only one model has to be taken into account here, but two images may also have to be edited together. Please bear this in mind when selecting and deleting. If necessary, leave more shots with the aim of later copying usable parts of them into another one.
The ears also play a decisive role, especially in horse shots. But cats should also have their ears pointing forwards in "perfect" shots and, of course, dogs should also have their ears "upright". I usually try to pay attention to this when taking the picture. If a picture is included, it usually falls out during the viewing.
This picture is "unattractive". The dog's ears are hanging down limply ... She needs to have her ears up for expressive shots. The photographer could have saved herself the trouble of taking this picture - shame on me!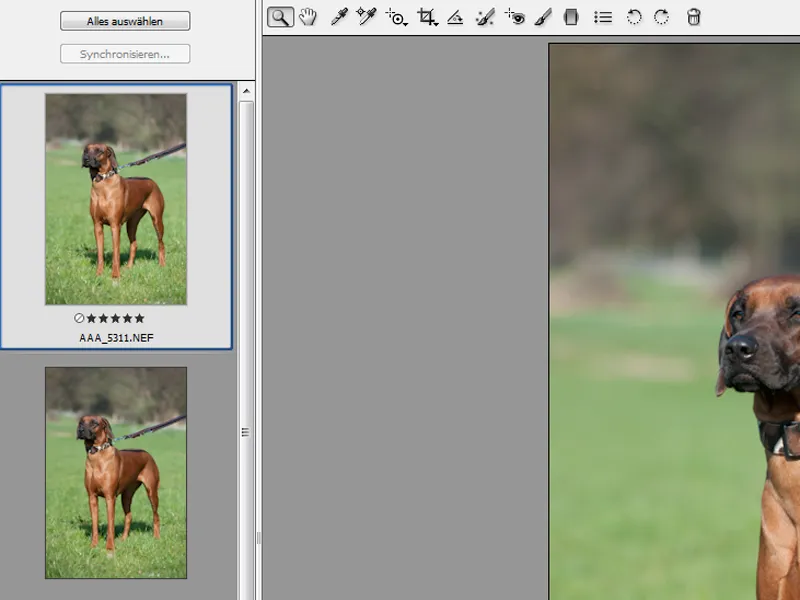
The next step is to mark "perfect" shots in this review. You can simply rate your favorite photos, which you would like to edit further later, with a star and then only display these. Your workflow will probably be such that you only mark your TOP images and simply leave the rest.
Since my customers receive all the photos, as I said, I proceed differently. But regardless of whether you later post-process 10 TOP photos or 200 photos from your entire shoot using Bridge, the viewing work is the same.
I have now also selected 2 TOP photos from my shoot, which I would like to optimize with you first in Bridge and then in Photoshop. These are an outdoor photo and a studio shot.
5. editing the RAW data with Bridge
So, here we go. Let's now edit an image in RAW format with Bridge. Let's take a look at how we can optimize our image.
Once you have selected your images, you can right-click on them to open them in Camera Raw and get to the window shown here.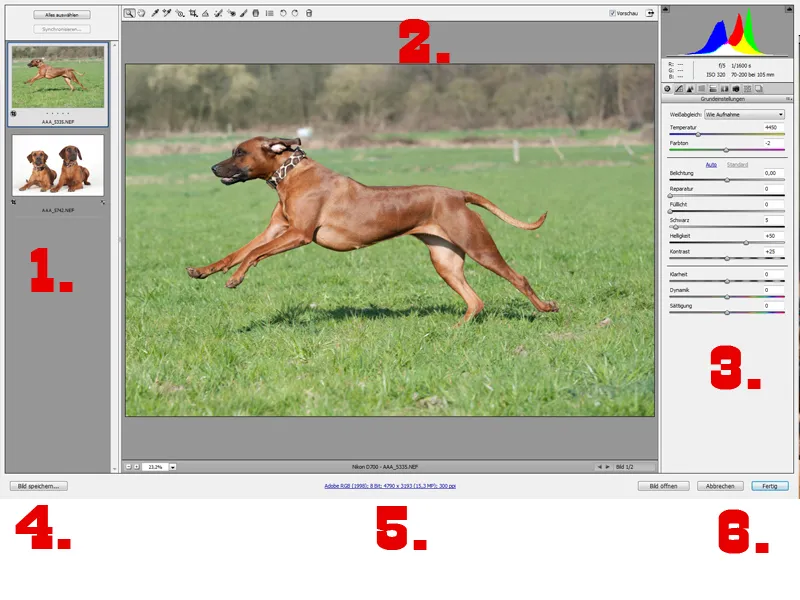
Explanation:
- Here you can see the photos you have selected: If necessary, you can scroll further down if you have selected more than two photos, as in my case. The selected outdoor photo also appears directly in the middle in a large format. Here you can also check the sharpness again perfectly.
- You can use the bar at the top to select your tools. Here I mainly use the crop tool to optimize the section, or I enlarge the image if this is necessary for sharpening.
- Here's the important editing bar, which we'll look at in detail in a moment.
- Save image: Here you can save your images later all marked as JPG files if you want to do this directly. You can make various settings here.
- You can make the following settings for your image here: Color space, depth, size after cropping the subject as well as the resolution.
- Once you have optimized your image using Bridge, you can save it or open it in Photoshop to make further edits there.
Now it's time to get down to business! Let's go to the editing bar on the right-hand side. Bridge offers an incredible number of editing options. Over time, you will find your own workflow or change it again if you come up with new ideas. BUT - very important: always try something new. My workflow is not the ultimate. I can only give you a few things that have proven useful for me and my pictures and that I generally use.
Let's start at the top:
Metadata & Histogram:
At the top we find the histogram and the metadata. The metadata once again tells us the Blender, exposure time and ISO value as well as the focal length and lens. You can also find the RGB values by scrolling over the image with the mouse.
The histogram shows us the brightness distribution of our shot channel by channel. The depth and light display, which can be controlled on the right and left via the triangles in the display, is practical.
In the studio shot, I have now activated the highlights display at the top right as an example. Very nice to see: The areas on the white photo cardboard that were strongly illuminated (light source front left & spot on the background) are marked as overexposed in red. In this way, you can check your shots to see whether partially underexposed areas are "drowning" or overexposed areas are fraying and no contour is left.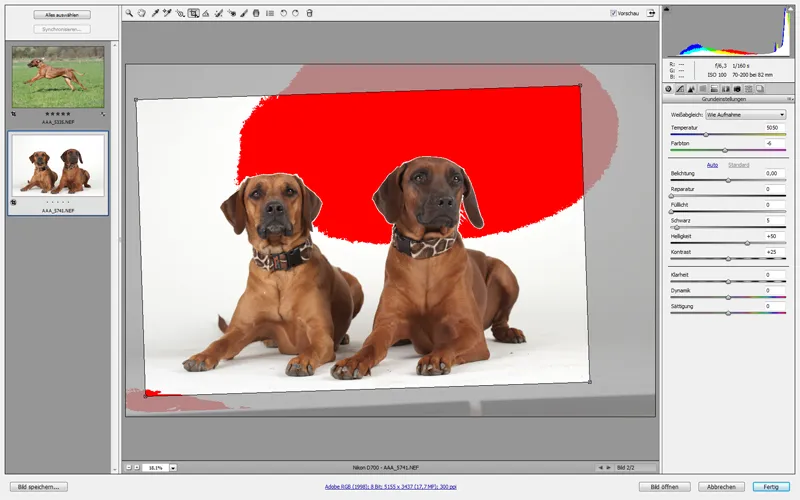
Here we have the difficulty that dark subject meets light background. This cannot always be completely avoided. It's important that the subject doesn't eat away or sink. The white background should be white and will be brightened even more later. However, if you want to correct the shadows and highlights, you can do this further down in the menu.
White balance/temperature and color tone
You can correct your white balance here. You can also change the temperature and color tone here. I rarely play around with the temperature lever. However, I often lack a creative streak here. Play around! Important: You can use the color tone to remove a certain imbalance between green and magenta.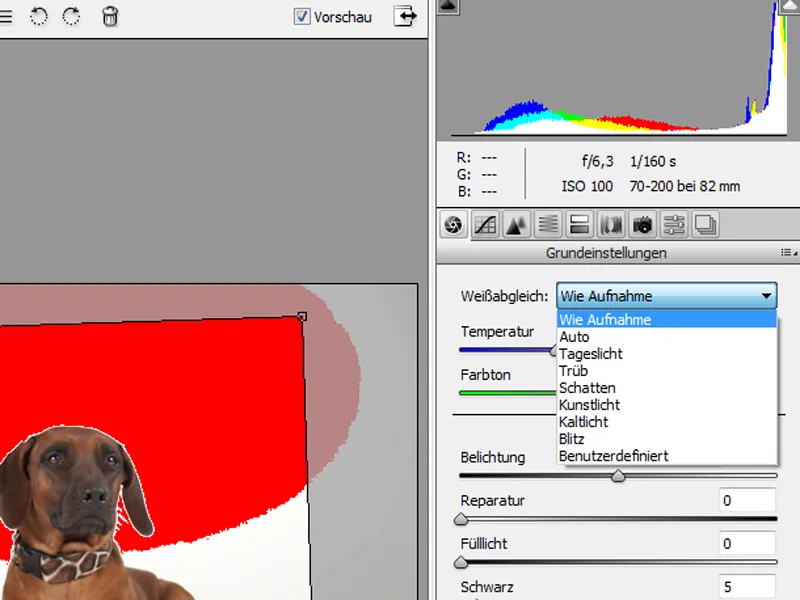
Auto and Standard buttons
Here I would like to tell you to stay away from the Auto mode. Here Photoshop tries to optimize the histogram, but not always in favor of our image.
Exposure
Here we are in the right place if we want to correct the exposure of our image. The sliders are actually self-explanatory. If you have too much depth or too many highlights in the image, you can correct this using the exposure slider or the repair slider. The important thing is the result, which is displayed directly. You will be surprised at what you can get out of "ruined" photos.
In general, this should remain the exception. You want to create perfect photos without any post-processing or correction. Over time, you will get a feel for all the right camera settings and know blindly what you need to choose to avoid overexposed or underexposed shots. But as spontaneous as we often have to be in animal photography, we sometimes have to resort to this tool if we want to save a really great picture.
Example: large horse meadow. We can't control exactly where the horse will run. That is often luck. There is light and shade in the meadow. We also have small and large clouds in the sky, which can spontaneously move forward while the horse is galloping towards us. So you have to be quick with your camera! But often that's not fast enough. In other words, you sometimes have to put up with overexposed or underexposed series of shots.
For example, this pretty frieze called Schinken ran into the clouds. This was the best I could get out of a very underexposed shot. In JPG, the shot would have been a complete waste.
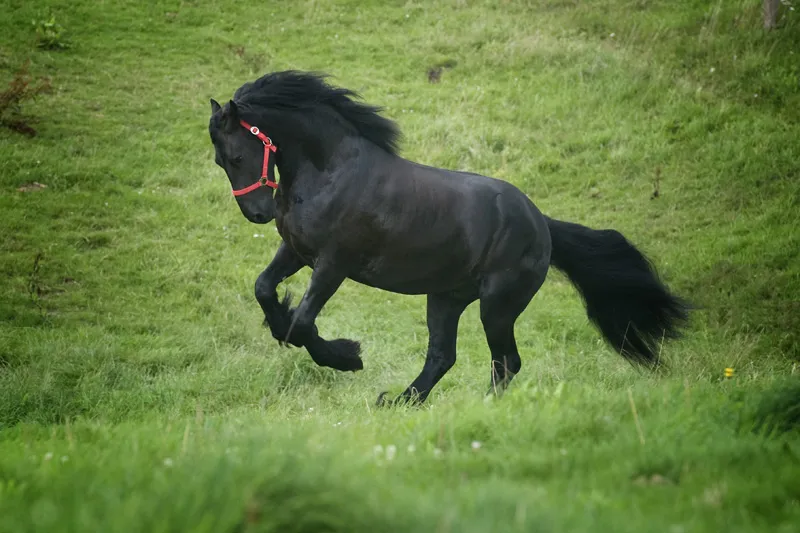
And this pretty Haflinger always took the shortcut through the shadows despite my best efforts.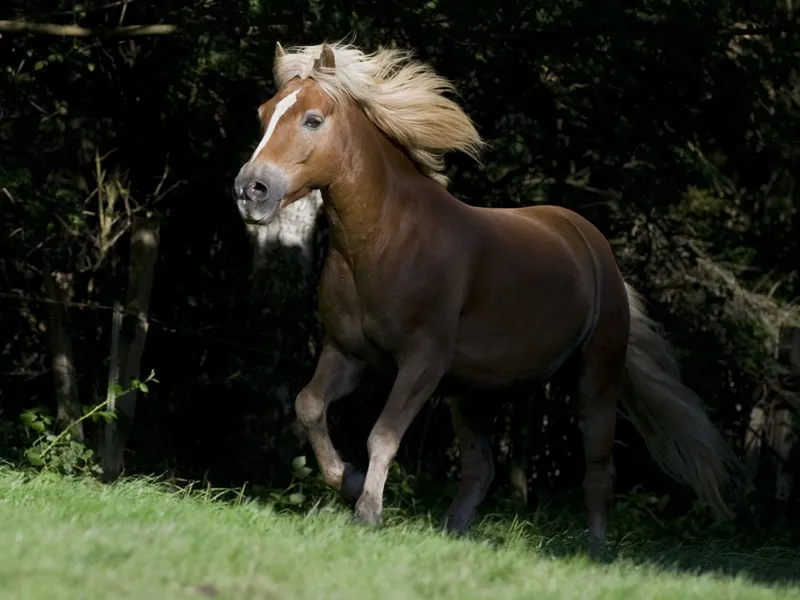
Contrast
Incidentally, I often take the liberty of turning up the contrast! Feel free to be a little bolder here. No matter what shots you have - you can always use contrast.
Clarity, dynamics and saturation
I sometimes set the clarity and dynamic range a little higher according to my feelings. I only play with the saturation if this effect is desired.
Sharpening elements and noise reduction
I usually only add a little sharpness to the image. To do this, we select the Details tab.
There are four adjustments available for optimizing the sharpness of the image. To do this, you should enlarge your image (to 200-300%) and then move the corresponding sliders to adjust the sharpness for:
- Amount: This slider adjusts the contour definition. If you want to increase the sharpening, drag the amount upwards.
- Radius: Adjusts the amount of detail that is sharpened. Very detailed photos may require a lower setting. A larger radius can be used for less detailed photos.
- Details: Adjusts the amount of high-frequency information to be sharpened in the image and the degree to which contours are emphasized. Lower settings mainly sharpen contours and thus remove blurring. Higher values emphasize the structures of the image.
- Mask: Controls a corresponding contour mask. With a setting of zero, all image elements are sharpened to the same extent. With a setting of 100, almost only areas near the strongest contours are sharpened. Press the Alt key (Windows) or Option key (Mac OS) while dragging this slider to see which areas are sharpened (white) and which are masked (black).
Bridge has many other options. After a little familiarization, you may want to read more about this in order to deepen your knowledge. However, all the important functions have already been mentioned here. I also work exclusively with these points. Now we have finished editing with Bridge. Let's move on to editing in Photoshop.
6. image editing with Photoshop: retouching
Don't scold me for my poorly organized Photoshop! I always work in a more chaotic and cumbersome way than other people. Please don't take this workspace as an example.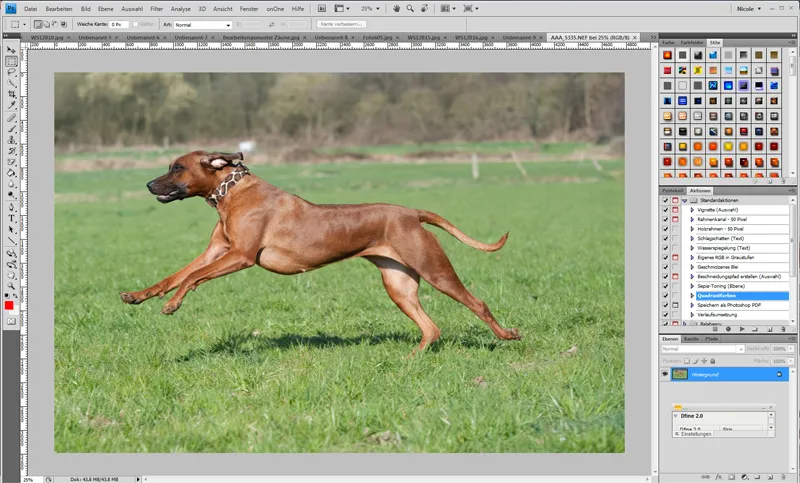
Adjust cropping
The first thing that bothers me about this picture is the cropping! I didn't do a clean job because I could have already done that with the crop tool in Bridge. I select the cropping tool and set it to a 2:3 format (here simply 30 cm x 20 cm at a resolution of 300 dpi. Now I draw a smaller section around the dog and rotate the window before I crop it so that the horizon is straight.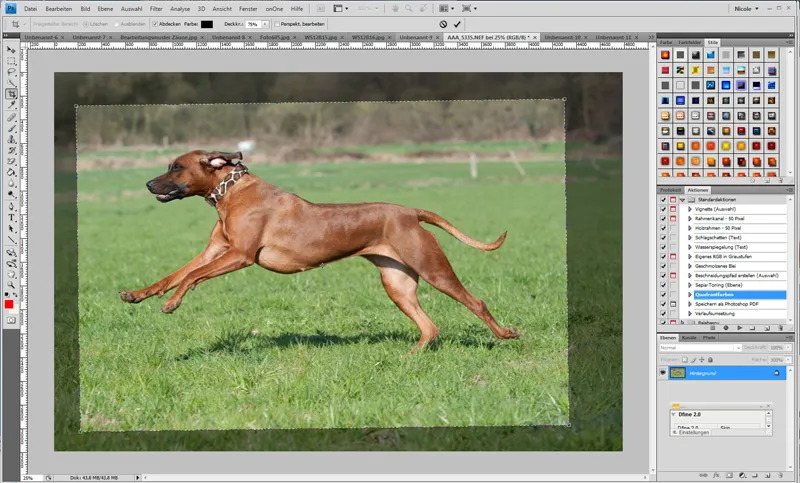
Sharpening
Much better already. Now I'll sharpen a little more, using the Sharpen filter>Selective sharpener. It's best to go to the eyes of your model to see how much sharpening you can do here! You will get a feel for it over time!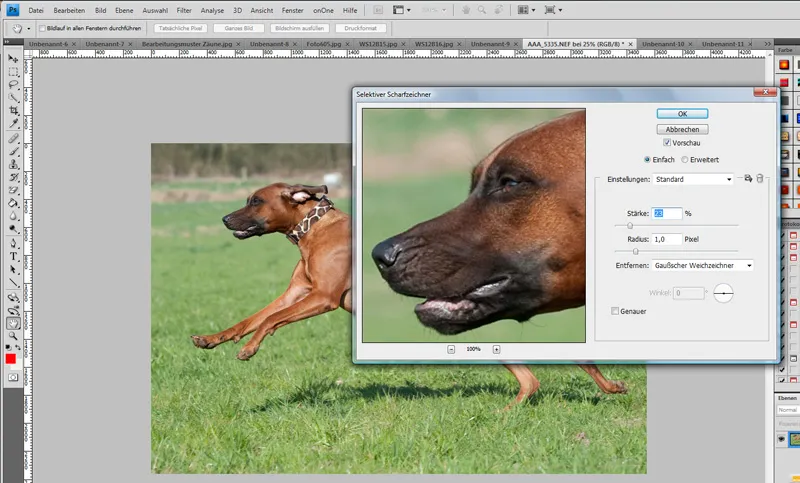
Background editing
I often work with the copy stamp to edit the background. However, I try never to stamp on faces. On the model itself - as long as it's not about contours, I often work with the repair brush. Just see what suits your problem better.
First create a copy of your background layer and add a layer mask. Now let's start removing unsightly background motifs from our image using the copy stamp. Fences, wastepaper baskets etc. With the copy stamp, use the Alt key to select an area from which you want to copy. To remove the unsightly white spot behind our dog, simply select something from the brown tones to the right of the spot. Feel free to work with a soft brush and with less opacity, go to different areas and brush over your "eyesore" until it disappears and doesn't look "copied". If you have inadvertently copied over something that should not be copied over, then remove it again with the black brush on the layer mask.
Here I have moved the mask down so that you can see the before/after.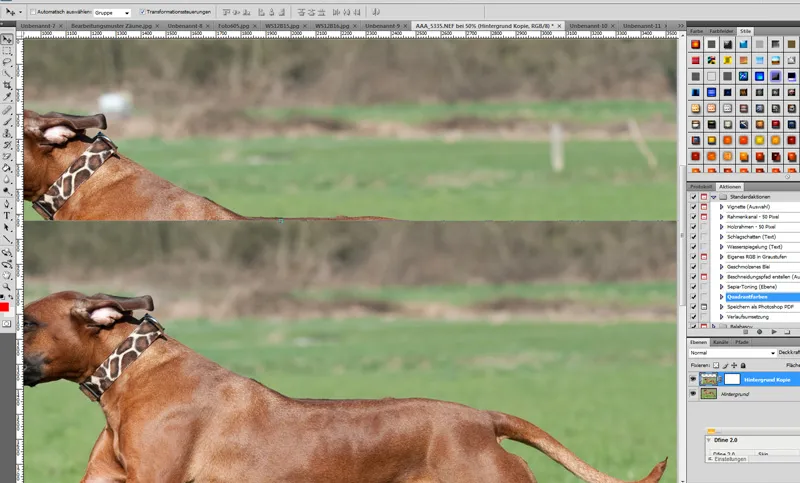
Beauty retouching
Now we come to the fine-tuning and editing of a studio shot. First of all, the cropping bothers me again here - I copy the dogs out into a pure white picture in 30x20 cm and place them in the middle. Much better! But now we still have unsightly transitions and we would like to have a pure white background for our bitches. But our two pretty mice also need a bit of beauty retouching!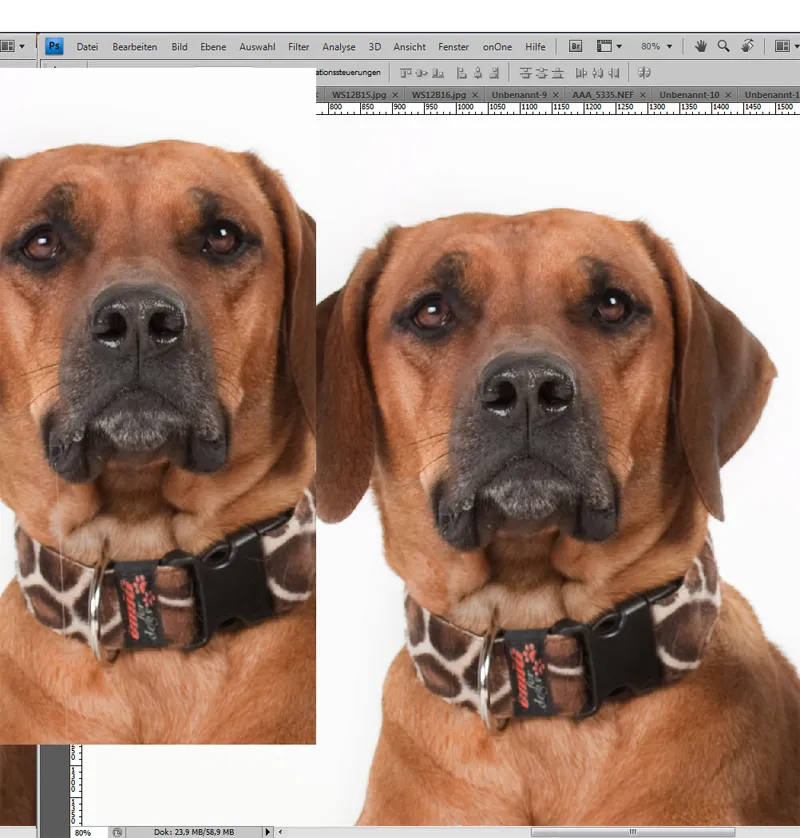
I retouched away the long drool thread using a very fine copying stamp and in the fur using the repair brush. There are also hairs on the black buckle of the collar, which I also retouched with the copy stamp. I removed the small white crumbs in the eyes with the repair brush.
Background editing in the studio
There are an incredible number of ways to lighten the background, as we want to do in this case. One that I use very often is simple brightening. Image>Corrections>Brightness. All this, of course, on a new layer with a layer mask. Now I lighten the image until I have a nice white background. Voilà. But my dogs are now also nice and white.
Now I can kill two birds with one stone. I can work out my dogs on the layer mask; I did that within 20 seconds. But I can also, if I have a white and a black dog, go over the dark dog with less opacity to lighten it up a bit! Just by the way ... From a distance, it looks quite nice now, but when I scroll in, I see something very unsightly between my dogs!
Whether it's hair or dirt, it all has to go! Zoom in on your model and look for hairs that are sticking out or other blemishes. It all has to go! Here we use the area repair brush and the copy stamp tool again.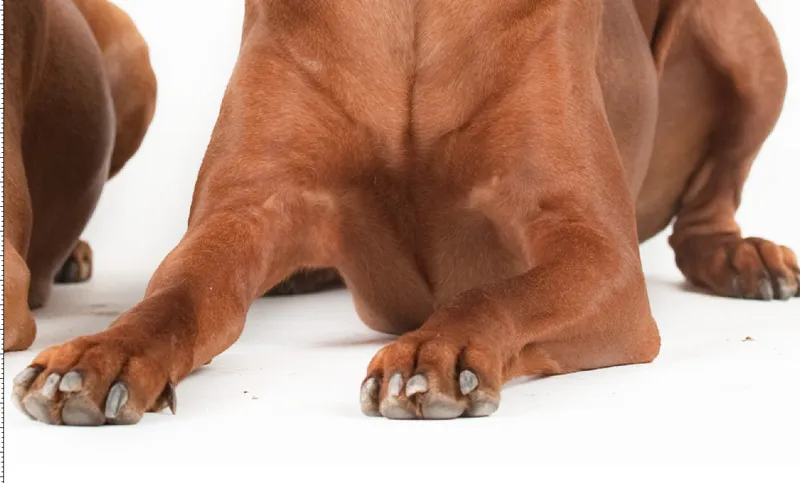
Sharp eyes, beautiful fur
Now let's apply the finishing touches: let's add a little strength and expression and, above all, sharpness to the image. Create a new layer and select the High Pass filter. Now select a radius that makes the eyes and hair stand out nicely. Simply move the slider a little. After applying, set the layer to Soft light and don't forget the layer mask. Now set this to black. We only want to highlight the parts of the image that should have this effect. Please select a soft brush with an opacity of between 30-50% and now go over the eyes and fur as required.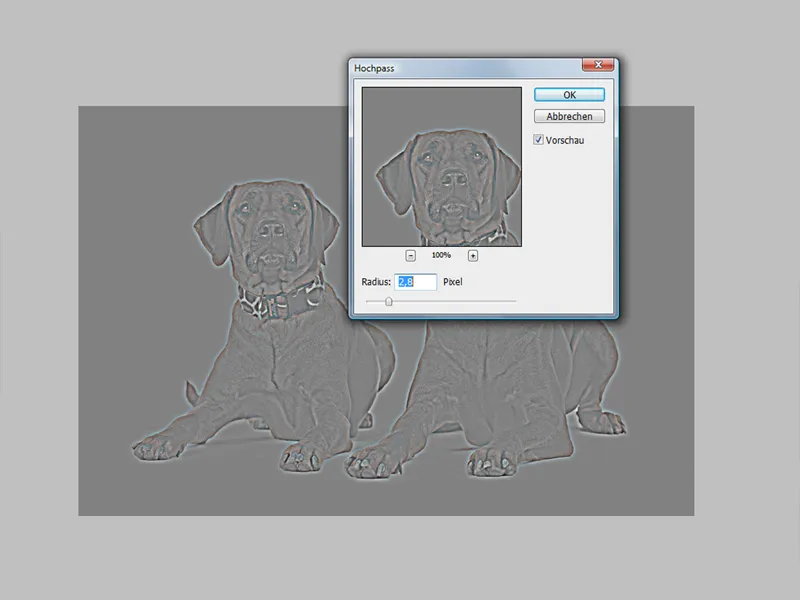
You can see that the eyes still stand out a little here. You can of course use this even more boldly and make the fur really stand out. You can also lighten the eyes a little with the dodge tool.
I also use this effect for two-legged portraits. It really brings out the eyes and hair!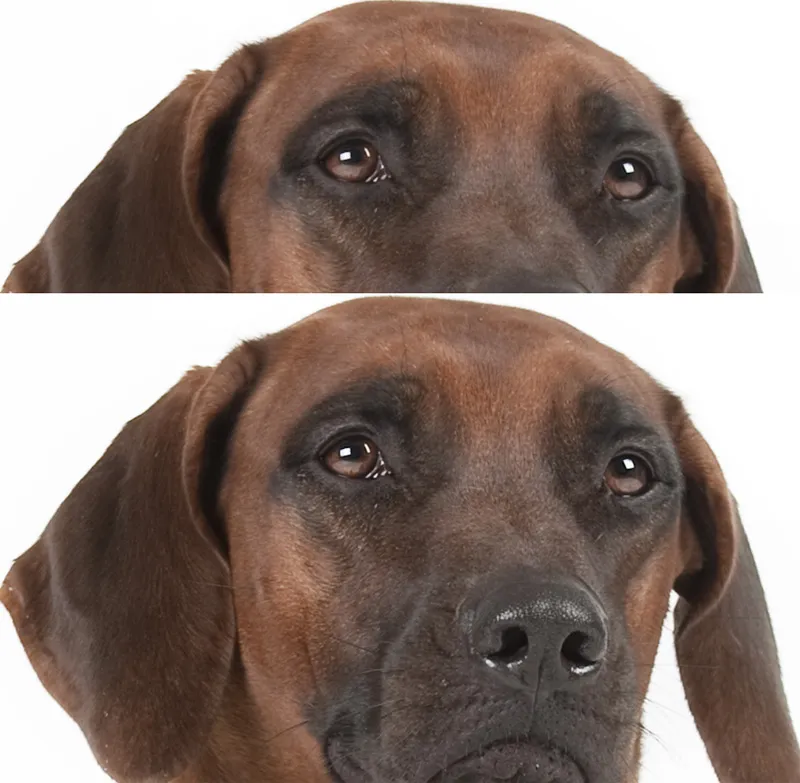
Here is another before/after image. As you can see, it's only a slight optimization. Now let's take a look at other editing options and a few special effects thanks to useful Photoshop programs!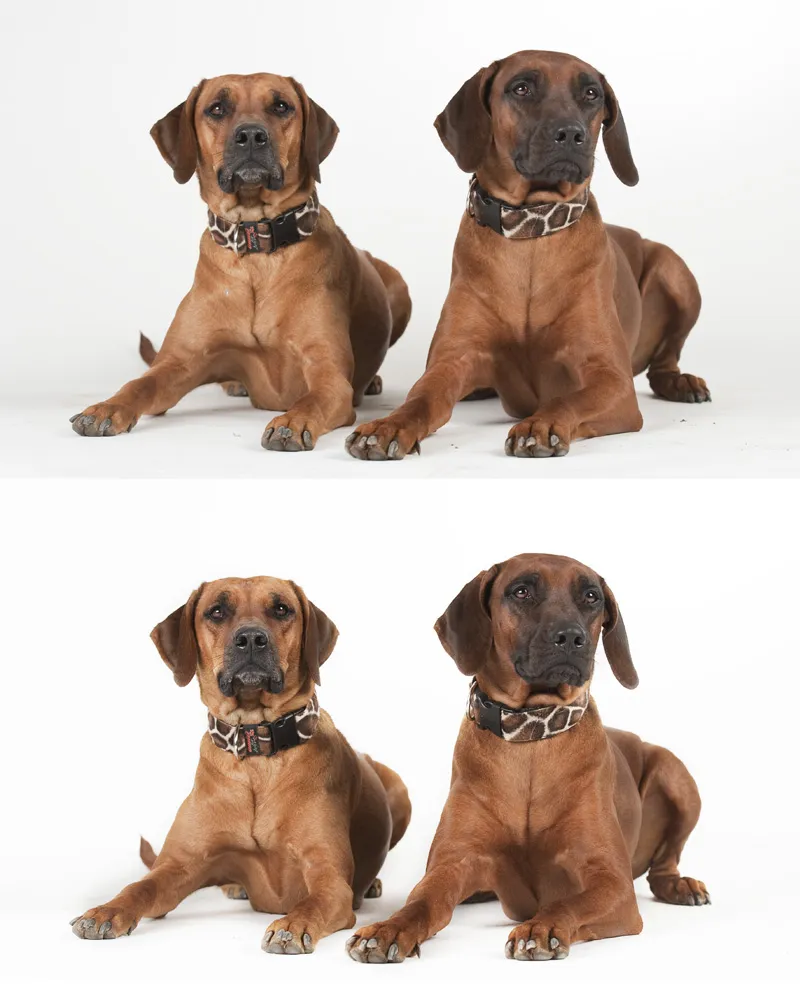
7. image editing with Photoshop: PS-Filter/Nik-Filter & OnOne
PSD-Tutorials.de offers a whole host of highlights - whether styles, actions or brushes. Anyone can let off steam creatively here! But in addition to these great features, I also work with two other programs that are unfortunately not quite inexpensive. They might also be an alternative for you if you like to work creatively and want to get more out of your pictures.
Firstly, I work with Nik software (Color Efex Pro and Silver Efex) and secondly, I use three features from onOne. The PhotoFrame program is very useful! You can put beautiful frames around your picture and let off steam creatively with great figures and backgrounds. FocalPoint and PhotoTools are also very good programs from this series.
I usually use these tools to add the finishing touches to my edited pictures. That certain something, so to speak. Whether you like it or not is a matter of taste. Here is a sample:
Applying Nik's Color Efex Pro>Darken/Lighten Center filter: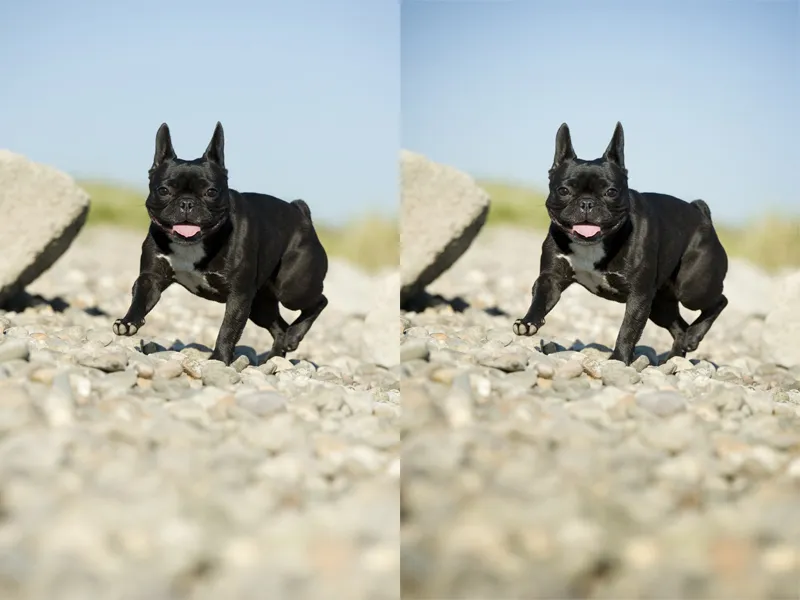
Application PSD-Tutorials.de-Action Strengthen colors: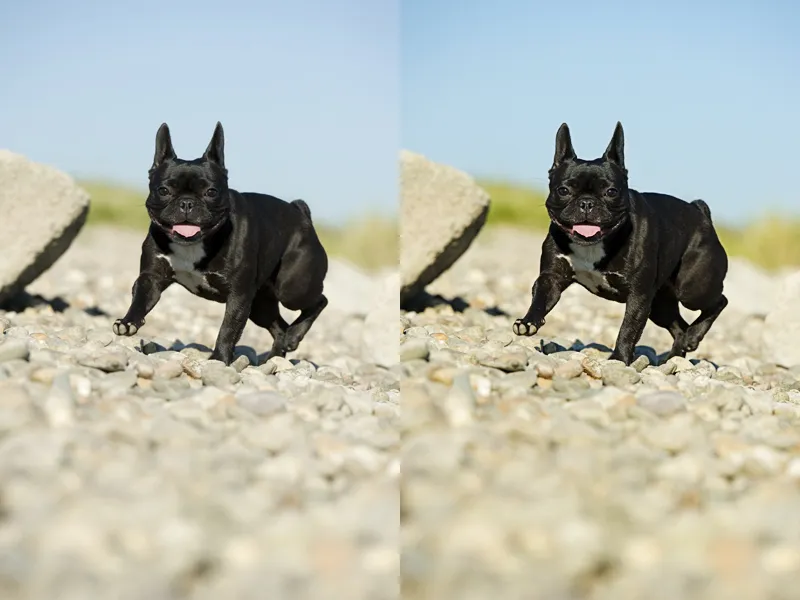
Mal Zweibeiner ... Here an element from onOne's PhotoFrames was used as well as the Red Giant software for backlight effects.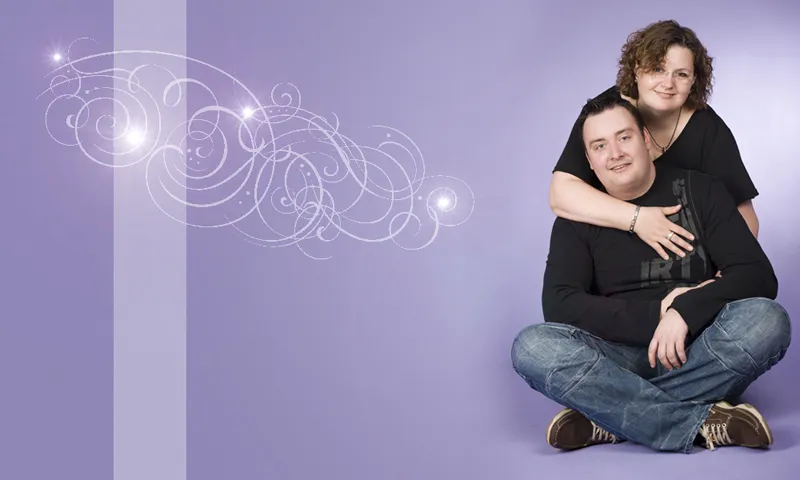
8. image editing with Photoshop: creative image design/composings
There are no limits to your imagination when editing your images. I don't want to explain for the hundredth time how to crop a horse in a meadow or how to create a beautiful collage from two images. You can also read hundreds of times how to create a composite in the tutorial series on this page. So I'll just give you three small ideas to finish with. Unfortunately, I often don't have the time to experiment and break new ground.
Simple collage with soft transitions: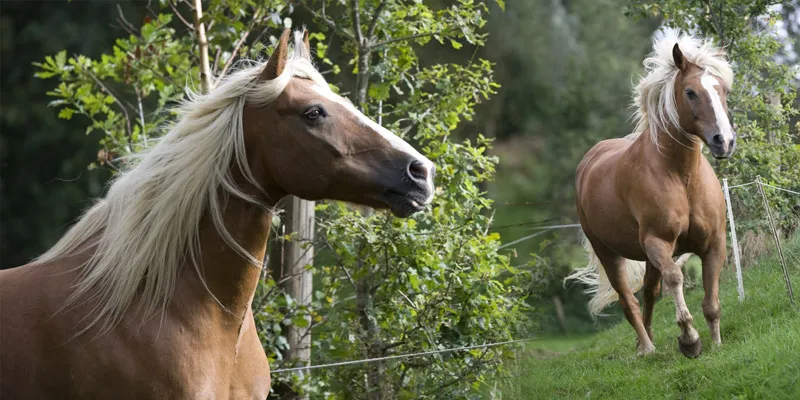
Frames & fonts: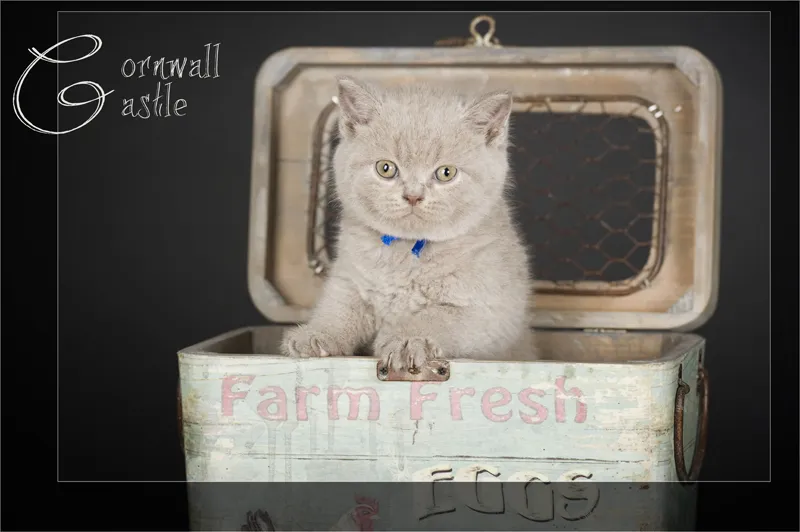
Black and white and color effect as a collage: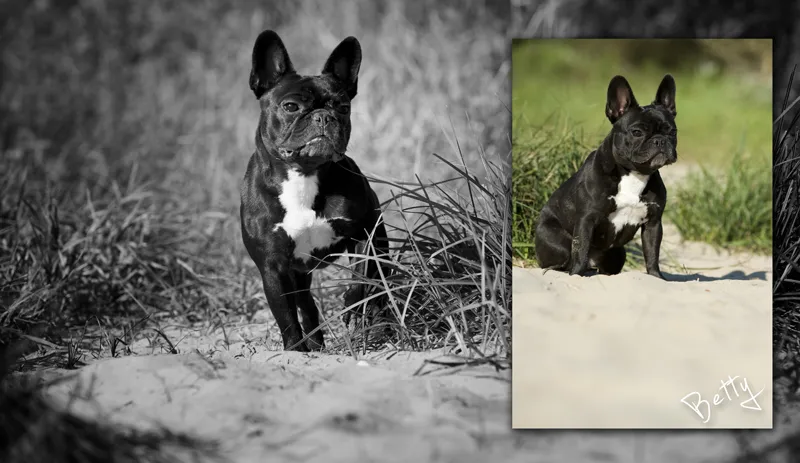
Red Giant software was used here for the lighting effects. The beautiful pattern texture is from PhotoFrames by onOne.
As always, I hope you enjoyed the tutorial. Image editing is a very complex subject and fills entire books. I hope this insight into my editing workflow has helped you a little and perhaps given you a nice idea or two on how you can optimize your images even further in the near future.
Thank you for reading this part of the tutorial!
Nicole Schick
www.tierfotografie-mit-herz.de