Introduction
I probably started out just like every other photographer when I held my first SLR in my hands. I set the dial to auto mode and started snapping away. As my subjects were somehow constantly jumping around and of course everyone was anything but still in front of the camera, I often ended up with undesirable results. So I learned more and more about Blender, exposure, ISO and learned to use the focus manually and I use it exclusively these days! When I started with studio photography, I had to rethink my approach anyway and control everything manually. Which is not difficult. With constantly changing light conditions outdoors, it's a completely different story. I've already talked about this in the indoor and outdoor shooting tutorials, but this is going to be a broader and more detailed tutorial on the subject of light and focus, because that's where I had the biggest problems at the beginning.
And yes, I also make mistakes from time to time or my pictures are too dark. I know that, but the implementation ... It's important that every photographer, regardless of whether they shoot 100 photos a year or perhaps 10,000, is constantly trying to improve. You should never be so satisfied with your photos that you rest on your laurels and stop trying to improve. Attend workshops, buy books, devour everything you can get your hands on about photography. However, what is always important and therefore also my tip:
Seek advice and help from other photographers. Look for large studios and good photographers in your area and see if they offer workshops or training courses. There are various studios in the Düsseldorf area and the Cologne Photo Academy, for example. If you have a bit of change put aside, use it. If you have put a little more aside, then ask a photographer for individual lessons and work with him step by step to see what you can get out of your pictures. It will probably hurt your ego if you have to take some harsh criticism at the beginning, but this will help you to improve immensely. Incidentally, there is the photo community, which makes it child's play for us to present our photos and have them rated, completely free of charge. Criticism and expert advice is important. We tend to have tunnel vision in all areas and at some point we no longer see that there is a common thread running through our work. We are content with what we have, and that is the death of your creativity and the search for improvements and, above all, innovations. We must never stand still.
I would like to motivate you with this! Always have the ambition to get more out of your pictures. It's actually quite simple, because you're probably only reading the photography tutorials here because you're passionate about photography, and then it's great fun to acquire more knowledge about your hobby and your passion. What could be better? Go out and try out what you have learned, and if you then combine this with your own style of photography, you will soon be taking wonderful photos and, above all, constantly improving. Anyone can take pictures and anyone can take pictures as good as a professional. Believe me. Now that we've touched on the right equipment for the wildlife photographer, let's lay a good foundation with the cornerstone of light & focus.
I hope you enjoy reading this.
- How the wrong light and focus can have a negative impact on your image
- Exposure - camera settings
- Light for outdoor shots
- Light for studio shots
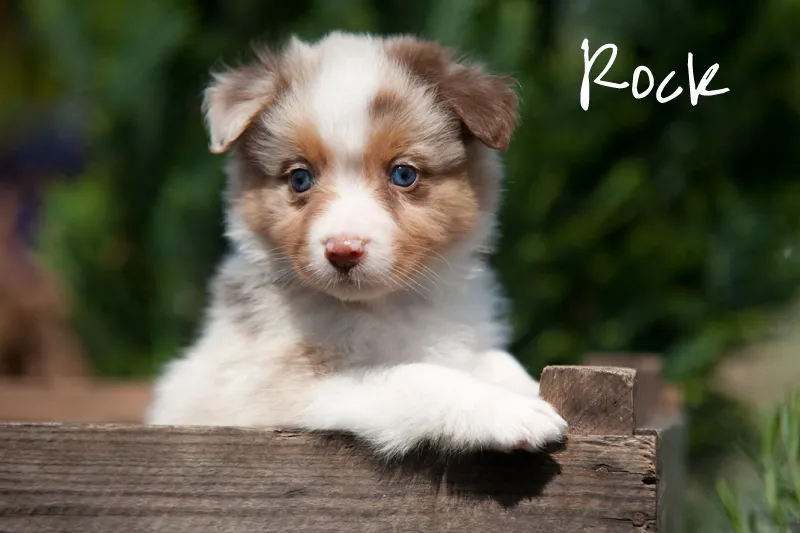
The little skirt in the box. It could have been a little sharper here.
1. how the wrong light and sharpness can have a negative effect on your picture
I've brought you a few photos for this point, a few blatant examples of shots that have been ruined by poor lighting conditions, incorrect exposure or unfavorable focus points. But see for yourself.
It's actually something that your own parents or adults who mean well by you will tell you. Never photograph against the light.
Of course there are ways and means. But here is a classic example of how not to do it.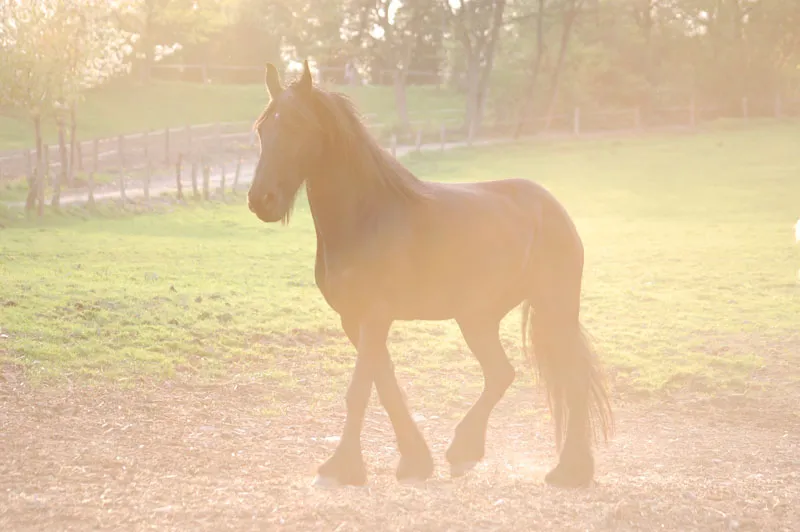
Here you can see what a small change in exposure can result in.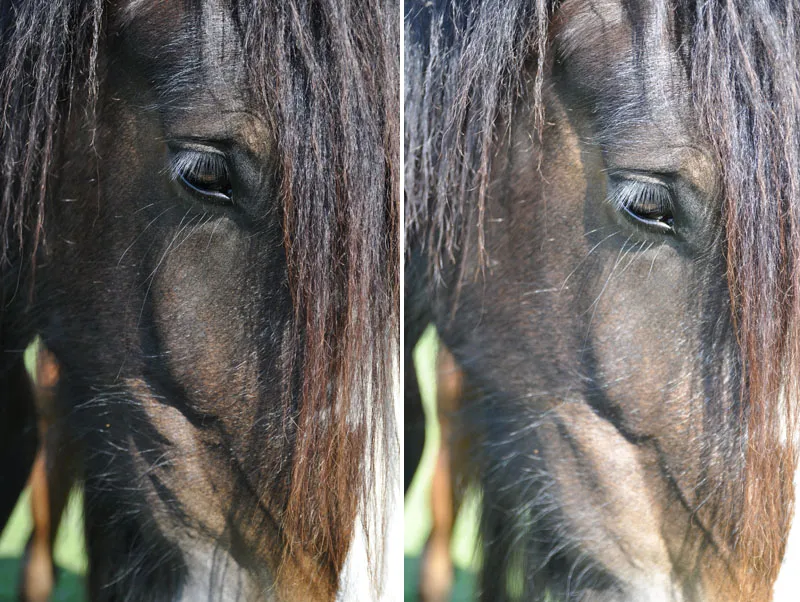

A similar pattern for a wrong angle. Photo no. 2, however, was also post-processed a little.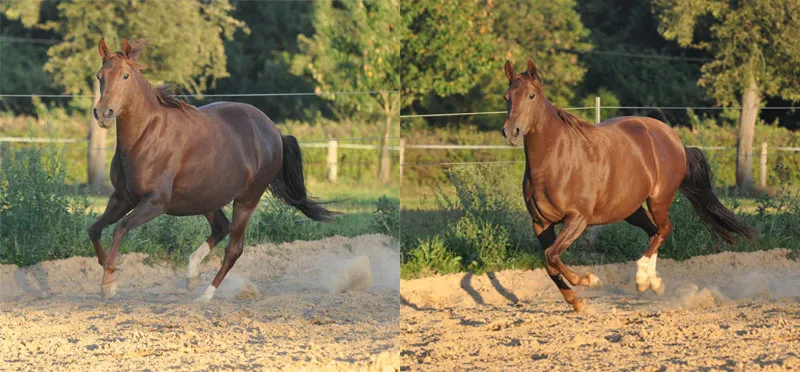
Here is the clarification of sun and shadow.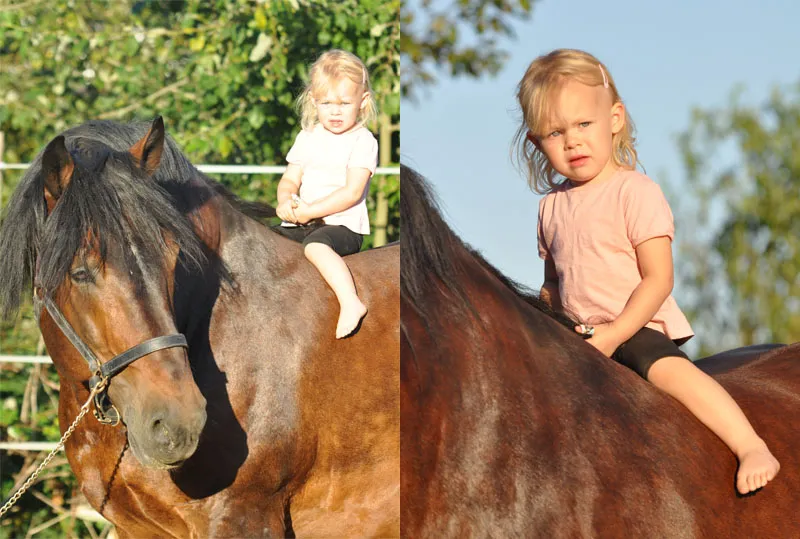
The classic case when you rely on technology and the photographer, as in my case, doesn't turn his head on. The pictures were taken with aperture priority. The Blender is around 5 and the photo was taken in the evening sun. The focus is on the dark coat of the horse, after which the camera exposed. You can see what has happened to the girl's face. In general, you should therefore use exposure compensation or expose darker when there is a lot of sun. I have written more about this below.
The two photos also make it clear that the angle to the subject is not only crucial because of the light. Image no. 1 is unfavorably cropped. I therefore decided to approach the shot differently. The large cold-blooded stallion and the little girl are already in stark proportion to each other, so it's not always easy to get a good shot.
And we come to the focus. The pretty Cap in the photo on the left is unfortunately out of focus. The shot is ruined.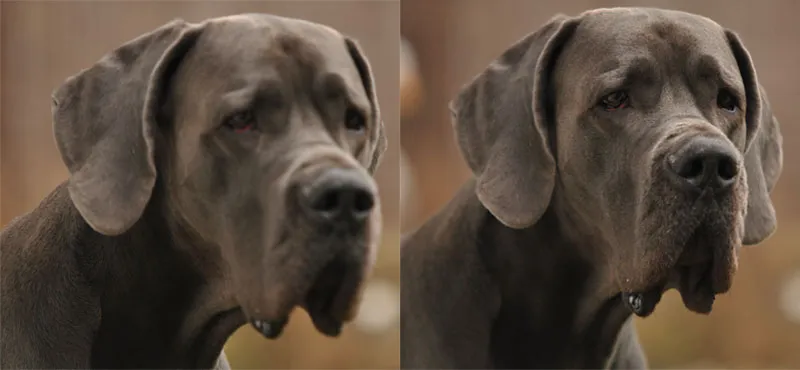
I'm sorry to cause your eyes so much pain here, I'm getting dizzy too. You can see what I want to demonstrate.
This was not a desired effect, but the focus is in the wrong position.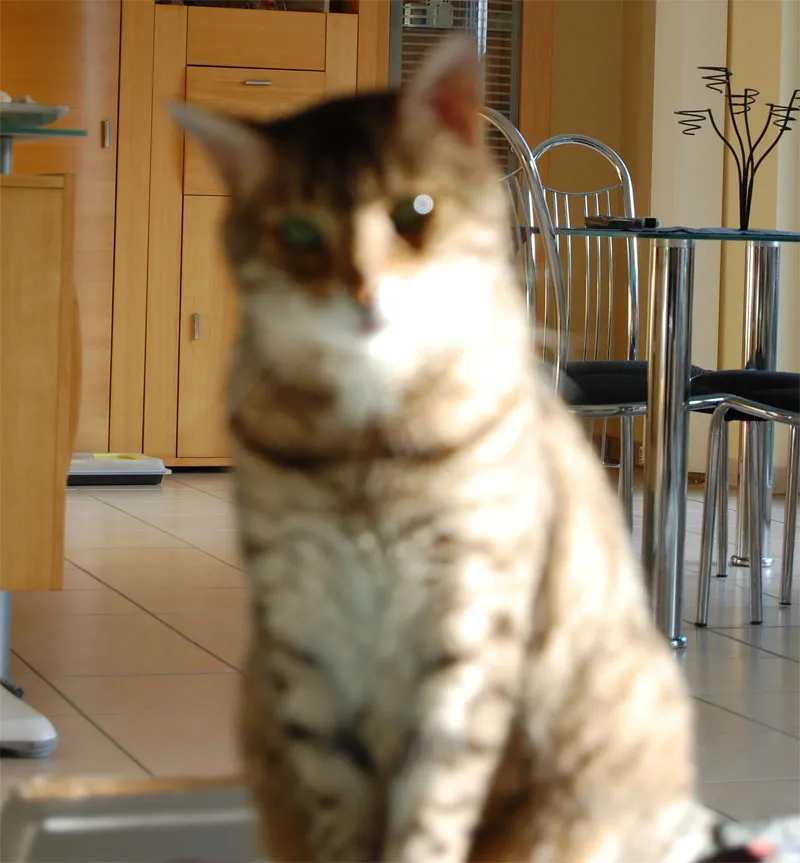
2. exposure - camera settings
Again, I would like to get rid of general points about Blender, exposure time, ISO and exposure compensation. Although I have also talked about this in other tutorials, I would like to mention it again briefly.
About my equipment: The photos here were taken with a Nikon D90, Sigma lenses 70-200mm (2.8) for outdoor use and 24-70 (2.8) for most studio shots. As mentioned several times, I use manual mode in the studio and aperture priority for outdoor shots. Now a few general notes on the automatic program modes:
The fully automatic mode (Auto)
As a beginner, you can use your camera's auto mode for outdoor shots. Pay attention to what it does with your pictures. As a rule, the camera controls everything itself (exposure time, aperture, often also the flash and ISO sensitivity). You can usually define many settings via the camera menu. On some SLRs, the auto mode is also called iA or iAuto, where the i stands for intelligent. This means that the fully automatic mode also includes additional functions such as contrast compensation or automatic scene recognition. You will soon realize how tied you are to it, how inflexible ... There will always be moments when you get annoyed because the auto mode simply does everything differently than you would like. The focus is wrong, the Blender is set too small etc. etc. Nevertheless, you can take your newly purchased SLR for a walk with a dog without any problems and then enjoy great photos afterwards. Just the right thing to start with! Most cameras also have very interesting camera settings(portrait photography, sports mode, night shots , etc.), which will also help you get started if you wish. In the beginning, I photographed a lot in sports mode when I took pictures of animals outdoors. However, some camera models only have the "normal automatic" or manual mode. In detail:
P (program automatic)
In this mode, both Blender and exposure time are set automatically. You choose whether you prefer a closed aperture/long exposure time or an open aperture/short exposure time.
A (Aperture priority)
The A stands for Aperture = Blender. Here you only select the aperture size. The shutter speed is adjusted automatically.
S (Shutter priority)
S stands for shutter. The exposure time is set by you and the aperture is adjusted accordingly by the camera.
M (Manual)
In manual mode, both the Blender and the exposure time are set by you.
With many cameras, the photographer can also save their "favorite settings" and call them up quickly. To decide now which setting is suitable for which moment, you need to go into a little more detail (if you don't already know) about the functions of an SLR. The most important points are:
Focus/exposure speed/blender/exposure compensation/ISO
Focus
Manual control of the focus point: When photographing animals outdoors, there are several ways to control the focus. You can let your camera take care of everything, you can set the focus to a center focus point on the off chance, or you can control it completely manually. I use the latter, whereby I usually have it centered. I only change it in individual cases, for example when taking portraits. I move the focus to the eyes if no special effect is desired. In many program modes, you can set how you want to control the focus in the menu. For distant subjects, it is of course advantageous to set it in the middle, as the subject will be completely in focus anyway. Simply keep the focus on the animal and follow it. It also depends on how many focus points the camera has. My first camera, a Nikon D40, only had three. I used to have no idea how to adjust the focus. Many beginners don't know that. How could they! And you are very limited without the maneuverability you control. Just read about it in the operating instructions for your camera. With Nikon, you usually have to press the shutter release button and select the focus points with the control pad. The focus is crucial, as the right sharpness makes your picture a top or flop. If the focus is on the eyes and you still need to correct it, hold down the shutter release button and drag to the desired position; the camera will then have saved the optimum focus on the eyes. As a rule, you can also select the type of autofocus mode. There is usually a setting for non-moving subjects, for portrait shots, and auto tracking of moving subjects. With Nikon this isAF-A, AF-S and AF-C. You should always consult the manual for your camera. It will give you a lot of information about this, which is very important.
Exposure times
The right combination of exposure time and Blender is always important. The same exposure can be achieved with different combinations of shutter speed and Blender. Shorter exposure times and large Blenders freeze animals in motion and blur the background. Long exposure times and small Blenders, on the other hand, bring details in the background into focus and blur the animal in motion. If you choose high exposure times (which I never actually use in animal photography), a waterfall, for example, becomes a beautiful blur of water. If, on the other hand, you photograph it with short exposure times, you will be able to see almost every drop of water.
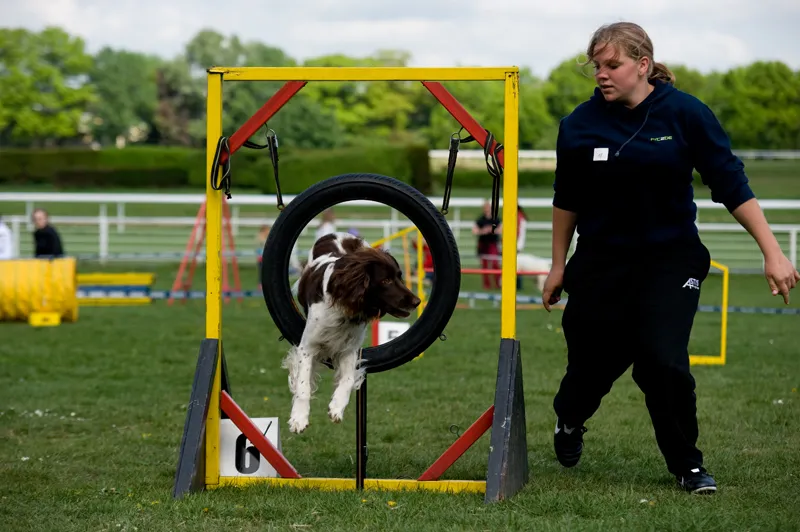
Dog in motion and clouds in the sky. Here you need a little more ISO, an open Blender and fast exposure times!
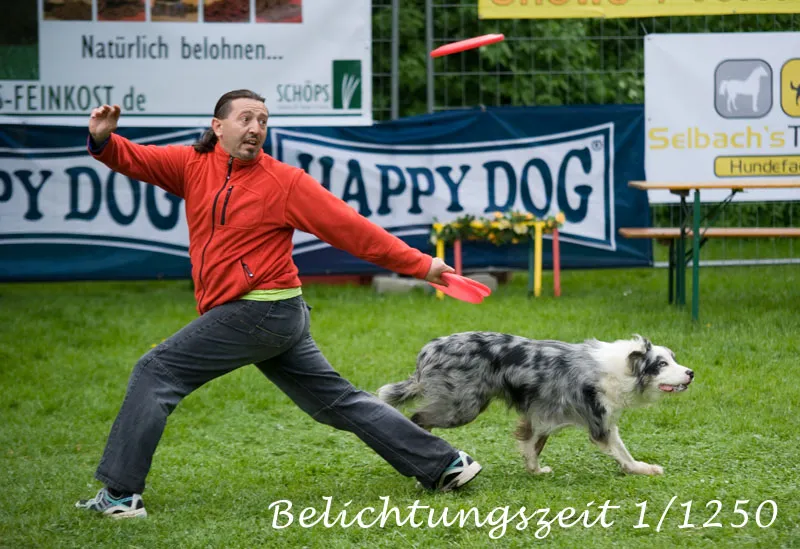
.webp)
The upper image was taken with an exposure time of 1/1250, the lower one with 1/2000 - same lighting conditions, same ISO (500) and the aperture was 2.8. The upper image could have been sharper. The exposure time was sufficient for the lower picture. Especially in dog sports, such as dog frisbee here, the animal reaches really high speeds.
Wonderful, of course, if you have plenty of light, as in the following shots.
You hardly need to worry about the sharpness of the subject. Just keep shooting!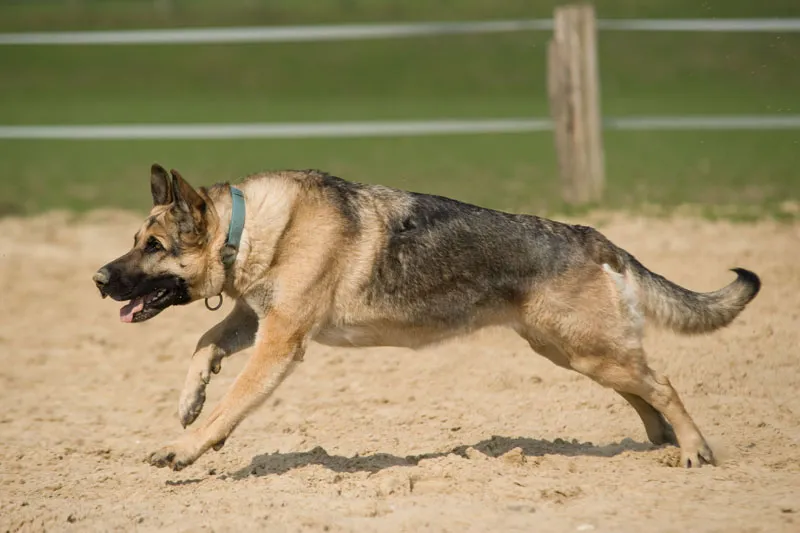
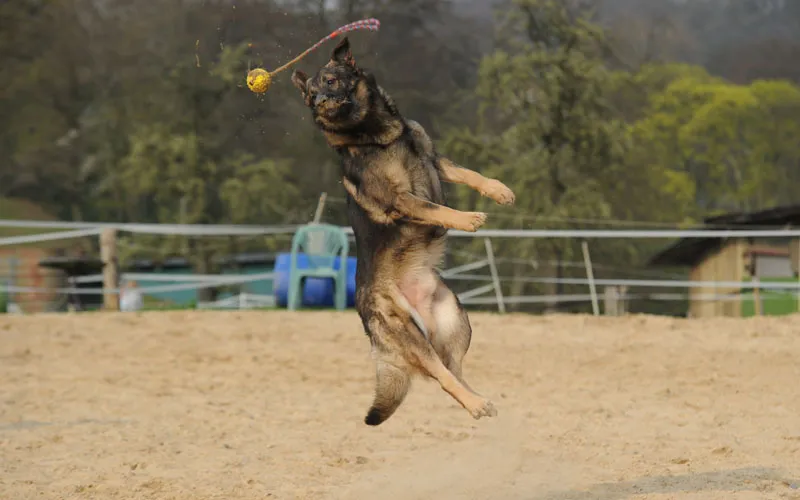
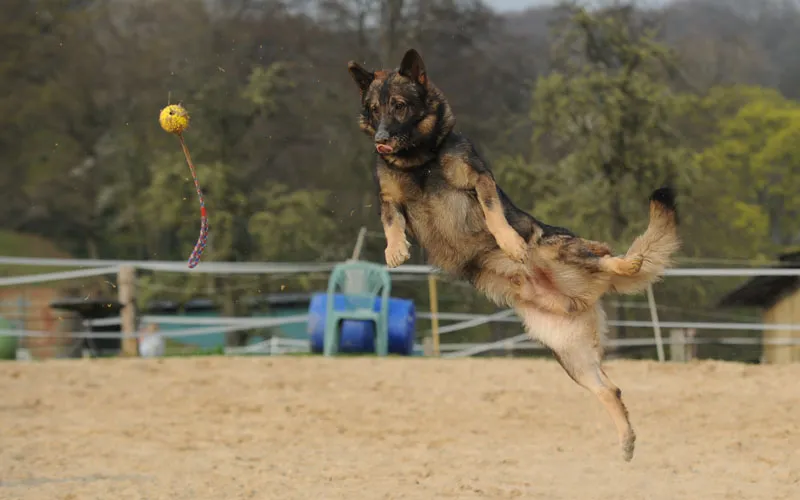
I'm always impressed by how captivating shots in motion can be.
If you control your camera completely manually and want to practise, then animal photography is of course very demanding. A dog park with alternating sun and clouds and constantly changing subjects (light and dark fur) is a real challenge. Perhaps you should also make friends with the RAW format at the beginning, as this is the best way to "get out" incorrectly exposed images. Of course, the subject must be captured in razor-sharp focus for this; if you choose the wrong exposure time, then even brightening or correcting to the opposite in RAW will not be able to get anything out of it.
Aperture
You control the depth of field with the aperture size. You can simply remember the following rule:
- large aperture = small aperture value (e.g. 2.8) = shallow depth of field
- small Blender = large aperture value (e.g. 16) = large depth of field
If we take this information for our automatic aperture priority, select the smallest possible aperture for animals in motion, depending on the lighting conditions. If you have glorious sunshine, I usually choose 4-6.5. If the light is a little worse, I go to 2.8. However, many telephoto lenses don't have an aperture larger than 4, so just take the largest one available to you.
.webp)
This picture shows what is possible in terms of depth of field. The photo was taken without artificial light in the apartment. The picture was taken with a Nikon D700 and a fixed focal length lens of 50 mm. An aperture of 1.4 was selected. Amazing, isn't it? Only the fingernails, where the focus was, are in focus, everything else is wonderfully blurred. I have rarely used this lens for animals. It's certainly a good choice for quieter or easily controllable subjects, but I like more flexibility with animals.
Exposure compensation
We don't have to worry about this in the studio, but we will have to in different lighting conditions outdoors. Exposure is a science in itself ... Some photographers control the exposure via exposure compensation and leave the ISO at 200, for example. Others, however, set a fixed exposure compensation and control the rest with Blender and ISO. At some point, almost everyone knows exactly how to overexpose or underexpose for which situation and no longer needs to look at the monitor. You probably won't feel the same way. I usually set the exposure compensation to around -1 in strong sunlight. Of course, you have to try it out to see if it is applicable to the situation in question and adjust accordingly if necessary.
That was a short recap of the general setting options that are important for you for the time being. It's not just my tip that you should always improve, but of course you should also be able to shake your camera settings out of your arm at some point and use them perfectly. This is often not as difficult as you might think. The beauty of today's world is that you can simply test it and view it on the monitor without it costing you anything but a little time. So the more familiar you are with the possibilities and the better you know your camera, the better your photos will be.
3. light for outdoor shots
The sun in the right place:
Our light for outdoor shots is usually the natural light called the sun. Even if the sun doesn't shine very often in Germany, it is of course what gives our pictures their vibrancy. In order to use the power of the sun correctly in your outdoor shots, you need to get an expert eye for it and ALWAYS incorporate the position of the sun into your search.
Example: You want to photograph a dog on a walk and are therefore looking for the right background for your subject. Suddenly you have found a nice open meadow where you can encourage the dog to run. You get into position and the dog's owner throws the ball. Unfortunately, the sun is right behind your subject ...
So if you are looking for a suitable background, pay attention to the position of the sun. You will probably already be doing this, but I would like to tell you again. The right light will either bring our pictures to life or make them unusable. And sometimes a small angle can make all the difference, as I demonstrated above.
Even though I'm not a good draftsman, I've made you a few sketches for this exercise.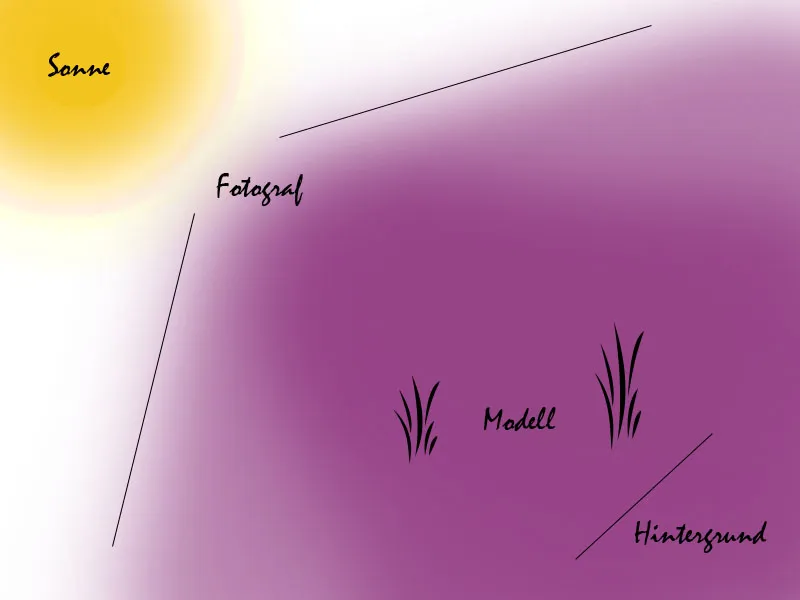
This graphic should show you how exactly you should have the sun at your back to achieve good results. The area marked in purple is therefore the best angle. The further you get to the boundary lines, the worse the result.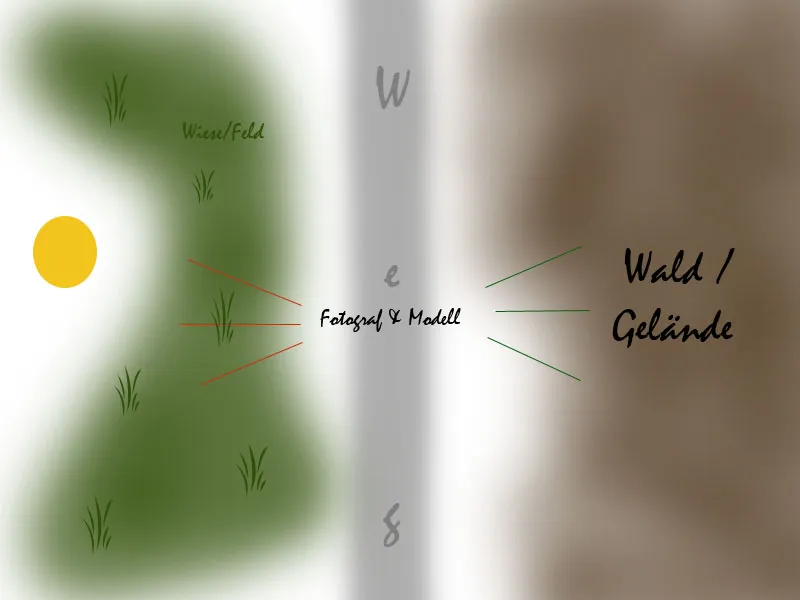
Here on our walk mentioned above. This is exactly the situation I have on my dog walks in the afternoon when we start the walk. It's the very first situation. I get annoyed every time. A beautiful meadow on the left and only moderately suitable woodland on the right. And in the middle, annoying asphalt. You can usually find solutions to this problem. In the graphic above, I have noted which angles are good (green) and which, of course, would be bad angles against the sun, towards the meadow. Exceptions are, of course, sunset pictures (silhouette or similar). Alternatively, if you walk into the meadow and turn towards the road, you will have this disturbing in the background.
I have therefore shown you two alternatives on how you could do better: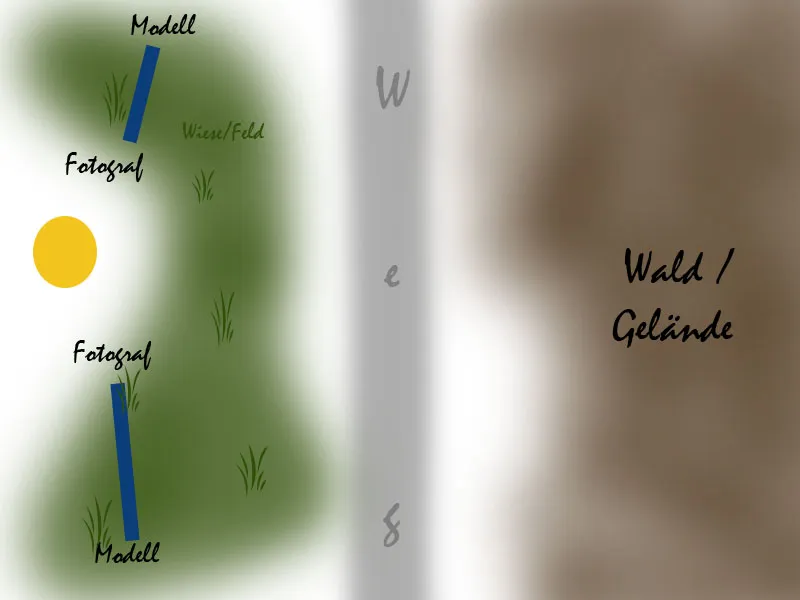
If the light is missing:
A gloomy fall mood or a cloudy sky may be desired or suit the subject. I'm a fair-weather photographer and I openly admit it. I only really take photos in bad weather when I'm at events or when it's unavoidable. It just goes to show that I'm a bad role model in this respect. Once again, in bad light it's a case of turning up the ISO, setting the Blender to the lowest possible value and using the exposure to achieve the necessary sharpness. These three play an eternal game and you need to master it, inside and out, to get good results manually. But on a walk with your model there is so much to consider that I can only advise you to use aperture priority, especially at the beginning. That way you have at least one less factor to consider in your calculations. Set the widest Blender and then test your ISO values. Your camera will do the rest. You will probably quickly run into difficulties with low-light lenses with maximum apertures of 5.6 or similar, but this should not discourage you. But as the saying goes: always get the best out of it.
Here are some photos taken in bad weather. The photos are unprocessed.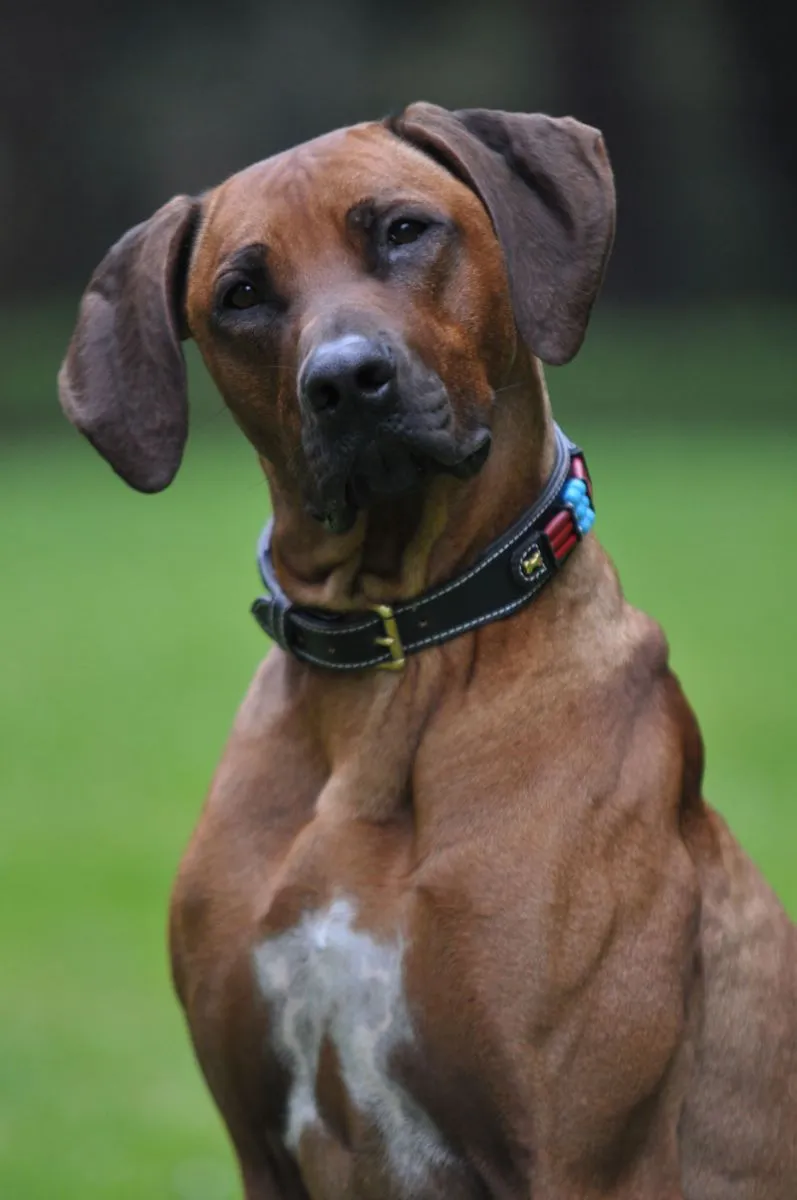
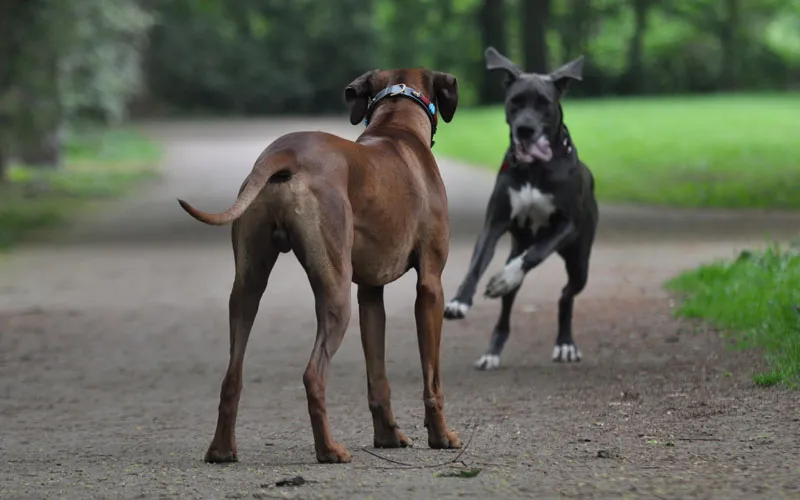
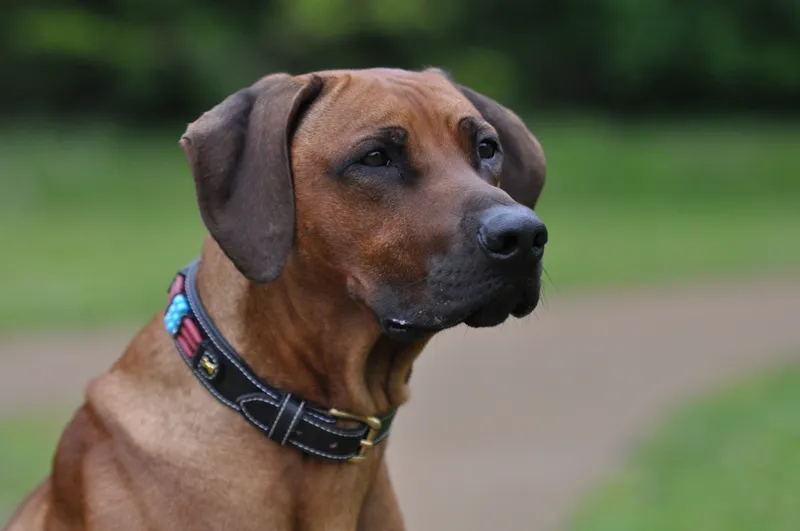
If the sky is very cloudy, it's still best to choose a "bright" location; forests are of course even more of a disadvantage.
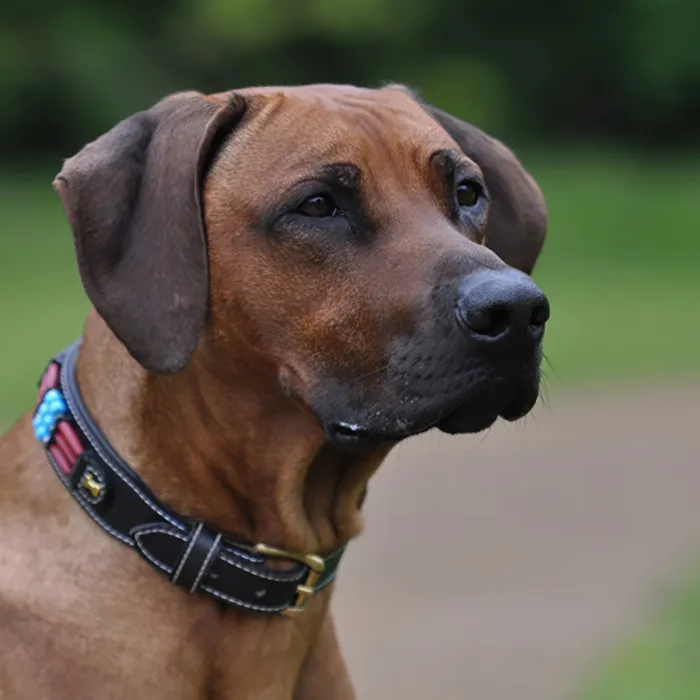
By the way, this is Fynn, a Rhodesian Ridgeback stud dog - luckily I see this handsome fellow quite often and we'll be doing a sunshine shoot again very soon. So we can say for sure: Sunlight will help you a lot - especially with simpler lenses - and make your work easier. Therefore, when buying new lenses, always pay attention to the speed. f 2.8 - preferably continuous - is of course a dream, but unfortunately also very expensive! But since you'll be photographing your neighbors' dogs for a little pocket money from now on, you'll certainly save up quickly! Believe me, the pet owners will be delighted with your photos.
I know myself how annoying it is to come home and find photos that looked good on the small display are blurred or incorrectly exposed. You can often hardly see this, especially in sunlight. Everything is reflective and the photographer is blind. Just look for a shady spot from time to time to check your photos. Otherwise you won't be able to take countermeasures in an emergency.
4. light for studio shots
General information:
In my studio photography tutorial, I go into the subject of lighting in the studio in detail, but books cannot be filled with this subject for nothing. Effortlessly, I would say. Well, and I'm not standing still either, I now also have the fourth flash unit in my studio. If you enjoy photography, then you won't be satisfied with the first piece of equipment, but will always have your eye on the next goal. In general, however, I would like to say a few things about exposure in studio photography that might help you a little. Perhaps you are planning to buy your first studio equipment or maybe you need a tip or two in addition to the one you have already bought.
Regardless of which and how many light sources you use, a light meter can of course always help you to find the ideal settings for your camera. I have a light meter, but I'll be honest, despite all my intentions, I don't use it. Why? Because I work without a concept. Why? Because my models are mostly animals. Only in very few cases can they be positioned precisely and even then it's boring if they're not constantly moving and doing something new.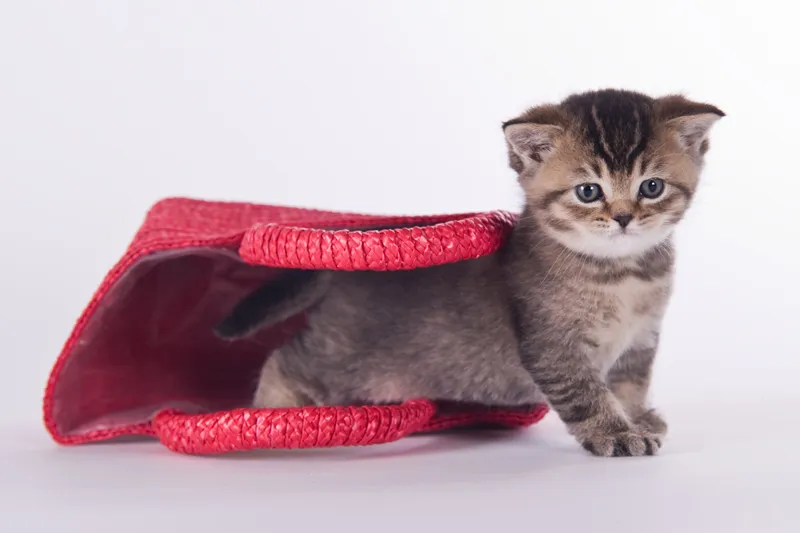
Example:
Just like me, you will rarely have very well behaved dogs who, despite the excitement and new surroundings, have not forgotten everything they are actually capable of. When the dog sees you for the first time and your strange equipment hanging around your neck, then the exciting flash ... Many dogs are immediately irritated. For example, there was one dog that ran into the hollow trowel of the box and was so frightened that we couldn't get it back onto the background despite our best efforts. We then chose a fabric background, but the mistrust remained. The dog was very nervous, and you can see that in the pictures. Her great fate. Now let's not assume the worst case scenario in this example. You position your lights, set the camera to the subject and instruct the pet owner. Then off you go. Bello is placed. SIT and STAY or whatever command he knows. There is often something tasty as a bribe. That's obvious! The whole thing should be worthwhile for Bello.
Now you will quickly realize that your subject is moving, he will keep running to his mistress and has to be repositioned. Often you only take 2-3 photos between each new movement. In very bad cases, the dogs are so excited and don't listen at all. They won't sit at all. So what good is it if you have set up your exposure for the middle of the box if the dog is always running towards his mistress when he thinks she's not watching? Or when your mistress has finally placed her dog with great effort and visibly breathes a sigh of relief, but unfortunately he is sitting 2 meters too far to the left or right? You work with animals. Here you have to work flexibly and, above all, quickly! There is no fixed concept here. I always realize this difference when I talk to photographers who only photograph two-legged friends and yes, animal photography is more difficult in many ways, but it also has its own special charm. And I think a tense two-legged friend (I'm one of them too, so no offense meant) is just as difficult to photograph as an anxious dog.
As a rule, however, you have of course chosen an ideal spot for your subject in the studio and illuminate precisely this place; but you must not assume that Bello will lie down exactly there and stay there for your photos, preferably in various poses, until you have your pictures in the box. As you cannot constantly adjust the lights, you will have to rely on your experience and control the Blender; constant checks on the display are essential. If you are photographing on cardboard in the studio, make sure that your master or mistress does not step on the cardboard with their shoes, as this is often necessary. It is best to ask politely if the shoes can be taken off or if they can perhaps be placed next to the box. In addition, the dog is often brought to the right place by "pushing", but the claws often leave their mark. So before your box hangs down like strips of tinsel afterwards, give this information to the dog owner too; he cannot know.
IMPORTANT: Make sure that nobody is standing in your light sources and instruct the pet owners before the shoot. It can happen that you are so focused on the animal that you only realize after a few important shots that your mistress has snuck in front of your main light unseen. This is annoying and your fault.
Another important tip: always try to be at eye level with Bello. This usually means sitting or lying on the floor. Perfect, that's how it should be. For cats that are on a table, it's usually the chair that puts you at eye level.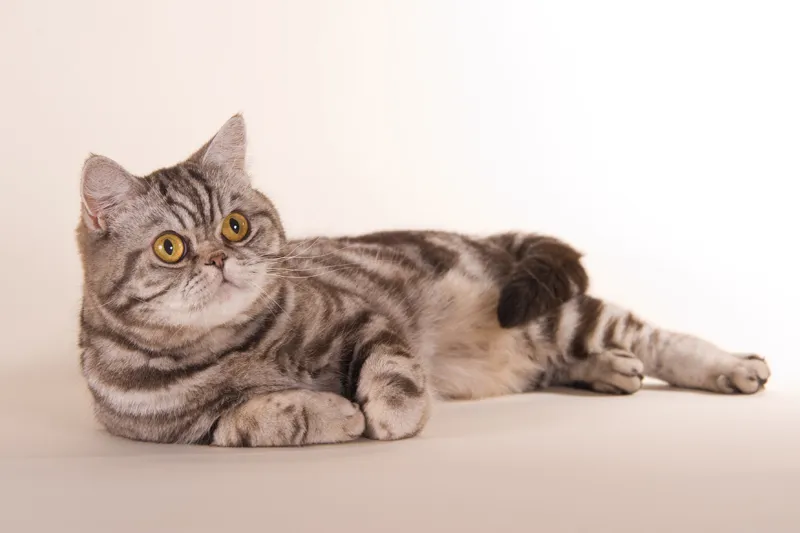
I have read many, many books on studio photography, and of course at some point you know a lot about light sources and light shapers and what they do to your subject and how they light it. Whether you work with 1, 2, 3 or 4 light sources, with softboxes or umbrellas or whether you use continuous light lamps - it's all a matter of taste. If you are perhaps considering buying studio equipment for hobby use, I can always recommend a set from Walimex; with 2 lamps it is completely sufficient to start with. There is also an overall solution; every photographer has their own solution for the studio.
In the mobile studio I am currently using a Walimex system with 3 light sources (2 softboxes and a reflector for the back wall). In the studio, I work with Hensel equipment and larger softboxes alternating with umbrellas or a beauty dish and various attachments for the back wall. Of course, the budget always plays a role and the question of whether the studio needs to be portable or not. Thank goodness there are very affordable and good options these days, also thanks to the rental studios that are now available in almost all major cities. Incidentally, it's also a good idea to simply enquire there. Many photographers also offer workshops and explain the various attachments and are certainly happy to make recommendations in this regard.
Camera settings in the studio:
I currently use the following settings with my Nikon D700 or Nikon D90 in the studio:
- ISO 100
- Exposure time at 1/125-1/160 sec.
- Blender varies, of course, depending on the subject and the shot
Otherwise, please refer to the studio photography tutorial on this topic.
Otherwise, I would like to end this workshop at this point and say once again that the interplay of ISO, exposure time and Blender is the be-all and end-all and, of course, the focus. Once you have mastered these factors, correct focus and light are no longer a problem. Hopefully this workshop has given you a little insight into how you can do one or two things better in the future.
See you at the next tutorial!
Yours
Nicole Schick
www.tierfotografie-mit-herz.de
