Part 01 - Introduction: Animal motif - beastly good!
Part 02 - The right equipment
Part 03 - The main problems: light & sharpness
Part 04 - It's all about the detail!
Part 05 - Shooting preparations and planning
Part 06 - Dog photography
Part 07 - Cat photography
Part 08 - Horse photography
Part 09 - Small animal photography
Part 10 - Indoor shoots - studio photography
Part 11 - Outdoor shootings
Part 12 - Image editing
Part 14 - Reptile photography
General information about studio photography
When I bought my first SLR camera and tried to photograph my cats indoors, I very quickly reached my limits. The eyes reflected, the light from the built-in flash looked cold and harsh. I was totally disappointed. As a newcomer, I naturally didn't know why this was the case, so I asked around in forums, searched the internet and kept reading literature on the subject. The photographers quickly advised me to use a clip-on flash and a clip-on diffuser. I should bounce the light off the ceiling, etc. None of this sounded convincing, and my tentative attempts were even less so.
Then I saw the solution in an online photo store: my own studio! And that was the beginning of my love for studio photography. The idea was born there. Today, although I've always been an absolute fan of daylight, I photograph almost all animals in the studio. If I had the choice of taking a dog out for a run in the sunlight and photographing it, this would always be my first choice, BUT studio photography simply has various advantages and it can be great fun!
Pros:
- Independence from the weather
- flexibility
- Nice alternative to outdoor shooting
Cons:
- Equipment is expensive and takes up a lot of space, difficult to transport
- Time needed to set up
- Nervous animals are difficult to photograph
- More post-processing necessary
- Costly transportation
Ultimately, taste will be the deciding factor, as studio shots are not everyone's cup of tea. Many people want to see their four-legged friends photographed in the great outdoors. And sunlight cannot be imitated, BUT there are shots by well-known photographers that convince me personally and I also enjoy working in the studio. You either love or hate studio photography, that's just the way it is. I now very often do a combination of both shoots. It works really well.
Generally speaking, you need to know: A studio with lamps (especially softboxes), a background system and possibly decorations and lots of background fabrics is difficult to transport. In a normal car, the photographer quickly reaches the capacity limit. Not to mention the storage of these items, because you also need a place to park your entire studio when you are not on the road.
In addition, setting up on location in constantly changing conditions takes up a lot of time, and in warm weather a lot of sweat. Because if you decide to possibly offer client shoots with the portable studio, this also means that you may have to lug your equipment up to the 5th floor. You should not let this be to the detriment of your enjoyment and think carefully beforehand whether you really want to go to this considerable expense. If you are taking photos for a fee, then you also need to take into account the additional time and work involved.
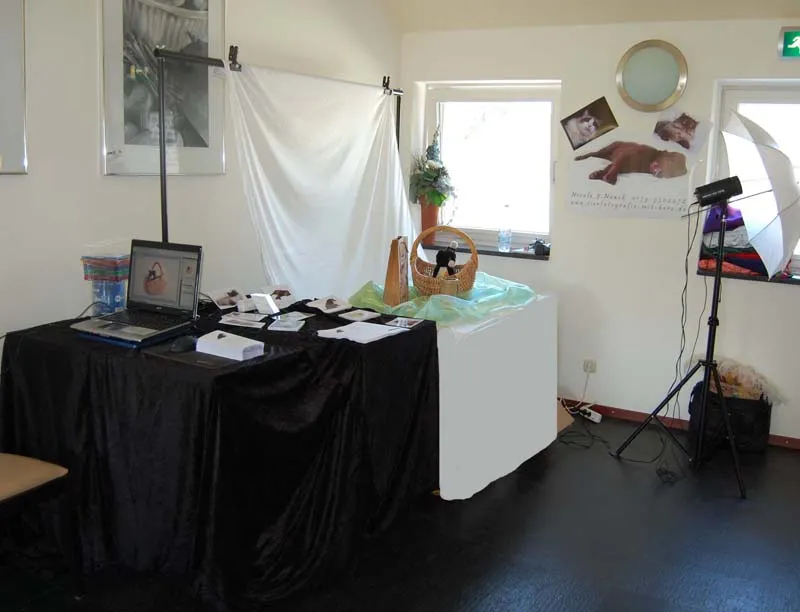
I didn't take these things into account beforehand either and after some experience I can say that setting up and dismantling an entire studio with various backgrounds and decorations (possibly a laptop and color printer) can sometimes be very exhausting. On average, it takes us two people half an hour to get everything in place and connected.
But I don't want to talk the studio down, quite the opposite! I just want you to consider these points if you're thinking about buying a studio to use for mobile shoots. Because these were things I hadn't really thought about, but which I now consider to be not insignificant. Nevertheless, it has to be said: I'm always happy when the studio is complete and I can get started, I wouldn't want to do without it. Only infinitely expand it!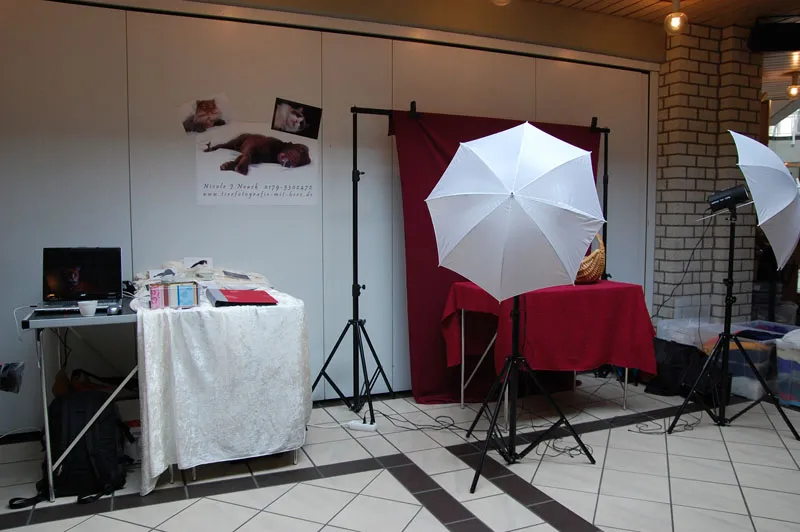
1. the background
The choice of background system
There are various options when choosing the background. If you are planning to take photos in a fixed space, it is of course worthwhile using permanently mounted suspensions for rolls or similar (from 20.00 euros). If you are a little handy, a well-tied clothesline will also be able to hold the fabrics. This is of course much cheaper than a mobile background system. www.foto-walser.de offers a large selection of different background systems for studio photography.
Because of my work - as I also photograph at exhibitions, trade fairs and other animal events - I opted for a mobile system. It has a width of 2-3 meters and can be extended to a height of approx. 2.5 meters. When put together, the three support poles and two tripods are easy to transport in a bag and save space. The system from Walimex is suitable for cardboard rolls as well as with clips for fabrics - costs approx. 150.00 euros. For horses, I would tend towards a larger version, unless you are only taking portraits.
Fabrics or cardboard
Here, too, the question of taste arises: cardboard or fabric? But the nice thing is: why not both? You can simply test and work with both cardboard and fabric. Both have various advantages and disadvantages:
-Advantages cardboard: nice smooth and soft background colors, does not reflect, no wrinkles
-Disadvantages of cardboard: Difficult to clean and disinfect, more expensive than cheaper fabric versions
-Advantages of fabric: Easy to wash/disinfect, offers a comfortable lying surface, inexpensive
-Disadvantages of fabric: May crease, which can be seen in the photos, may reflect or change color depending on the fabric, slips on tiles or similar surfaces
In order to have a large selection of backgrounds as quickly as possible, I chose fabrics. Terry cloth, fleece, panne velvet and cotton in various colors. If you want to take photos of your own animals and want to buy a lamp first, it is of course also sufficient to drape a nice fleece blanket over the couch. However, this only works with cats or small dogs, otherwise large dogs will not be completely framed by the background. This can look unprofessional.
But be inventive. Large plain-colored blankets or fabrics, white bed sheets or similar items can certainly be hung or attached somewhere in the home to act as a nice background. And large cardboard papers can also be glued to the background. There are many ways to create beautiful backgrounds easily and for little money. Your creativity is required.
Fabrics can be bought easily and cheaply on the Internet. Panne velvet, for example, is usually sold as a 1.50 m wide fabric and you can determine the length as you wish. For small animals, cats and smaller dogs, a size of 1.50 x 3.00 m is sufficient. For large dogs it should be 3.00 m wide and 4 m long. For horses, it becomes quite tricky and above all expensive. A width of 5 m is appropriate for large horses and it should be 6 m long so that you can stand the horse comfortably on it.
For portraits, of course, there should be much less of everything. If you don't want to sew them yourself, these large fabrics are very expensive and, above all, they are not as easy to wash and handle. Internet stores for fabrics include http://www.stoff4you.de, http://mcstoff.de. If your wallet is a little bigger or your next vacation has already been postponed, you can also look around for so-called motif photo backgrounds. The fabrics are usually specially made for use in photo studios, sometimes painted with an airbrush or similar, and with wonderful motifs!
The format is 3 x 5 or 3 x 6 m. They are actually intended for photographing bipeds, but why not use them for our purposes too? If your wallet is not quite so well filled, it's best not to look at all. Otherwise your fingers will itch just as badly as mine. You won't be able to get rid of these fabrics.
Cardboard rolls are hard to find on the Internet, unless you go for the two-legged sizes: 2.75 x 11 m. That's where transportation comes into play. There are suppliers who offer 1.35 m wide rolls. These are around 40.00 euros / piece and are absolutely sufficient for smaller animal motifs such as cats. Such narrow rolls are available from http://www.studioexpress.de and http://www.fotomayr24.de, among others. I cannot make a recommendation here as I have only photographed on fabric so far. As most professionals prefer cardboard paper, this will probably give better results. But you have described the advantages and disadvantages here.
This pretty ragdoll didn't want to stay in the studio and moved to the couch. I then took the lamp to this position and photographed her there.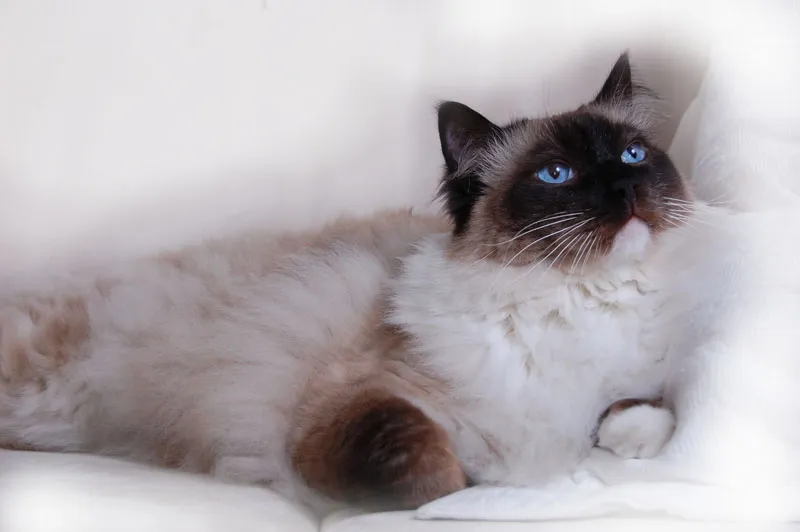
Hygiene with fabric backgrounds
Very important with fabrics: If you are photographing several animals in a row and have no opportunity to wash the fabrics, you should always disinfect them with a good spray! Even if it is not obvious, animals can always be ill and pass this on to other four-legged friends. As the photographer, you are responsible for ensuring that they cannot become infected in your studio.
Fabrics must be washed at 60° C after every shoot. In the case of fabrics such as panne velvet, which can only be washed at 30°C, I disinfect them with spray after washing. If necessary, I also do this with fabrics that I don't wash at all, such as organza scarves. The decorations and toys are also sprayed with it after the shoots and cleaned properly. Of course, this also applies to you. Wash your hands regularly. If you are shooting with several animals, disinfect your hands as you will be touching the four-legged friends frequently. If you also have your own animals, you must also protect them and keep pathogens and bacteria away from them as best you can.
This dog clearly feels comfortable on the fabric surface. Hygiene is the top priority so that he doesn't catch any diseases!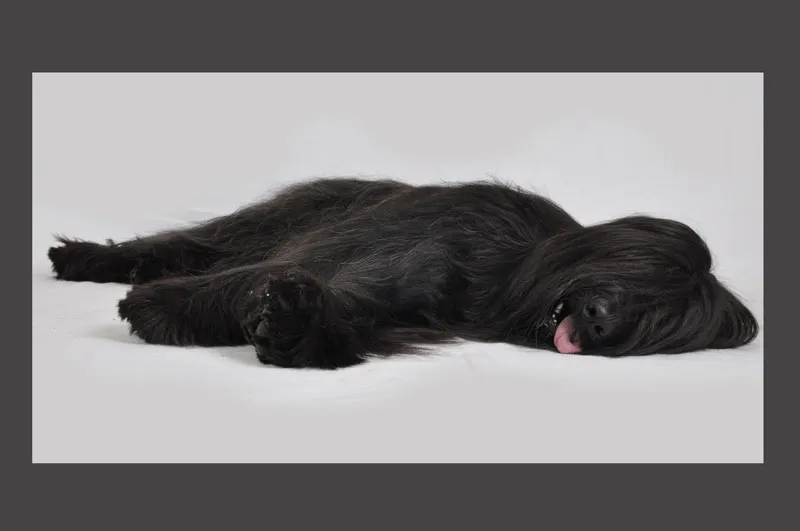
2. decoration
As already mentioned, there are no limits to your imagination. Whether your idea will look good or bad on the finished picture is another matter, but in general you can of course try anything. So far, I'm not a decoration artist, although I have a lot of ideas. If the cat is in the picture, everything else looks out of place and badly arranged. I clearly still lack practice. My favorite colors are black/white/dark blue and bordeaux. Black and white in particular are great, expressive colors, the subject is the focal point that stands out well without the colors in the background distracting from it.
When it comes to decorations of any kind, you simply have to try them out. Of course, motifs such as Blum, straw or wood are always beautiful. But a dog bed or a doll's pram can also be the highlight of your photo. Take a look around the internet if you are looking for inspiration, there is an inexhaustible supply. Get a little inspiration for your very own ideas. Try something completely new.
When choosing your decorations, it is important that the animal cannot injure itself on or with them. Just as I wouldn't put a rabbit in an object that is high, for example, some things (old crates or similar) need to be checked to see if there are any small nails sticking out that could injure the animal. Don't say "That goes without saying." I agree with you, but such things often get lost in the joy of experimentation. Don't forget: when photographing animals, it's not always just the animal that's nervous - the photographer is often tense too! Let's not even mention the owner.
In addition to flea markets and eBay, small craft stores can often be treasure troves of beautiful decorative items. Treasure chests, doll's prams, baskets, Christmas hats. Otherwise you can also go online.
At http://basteln-de.buttinette.com, for example, you can buy beautiful things! If you have a full wallet, you can equip yourself at Schaufenster Paradies: http://www.dekowoerner.de/.
Once in the Christmas decorations!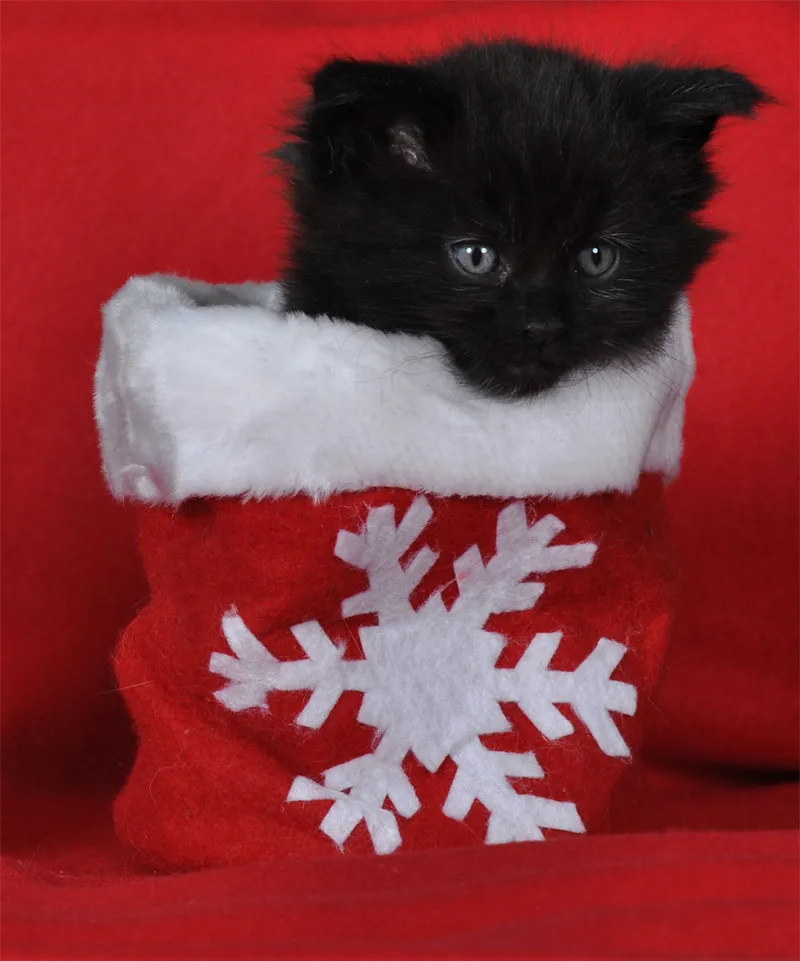
Here's a filled treasure chest, but make the three models smile in your direction!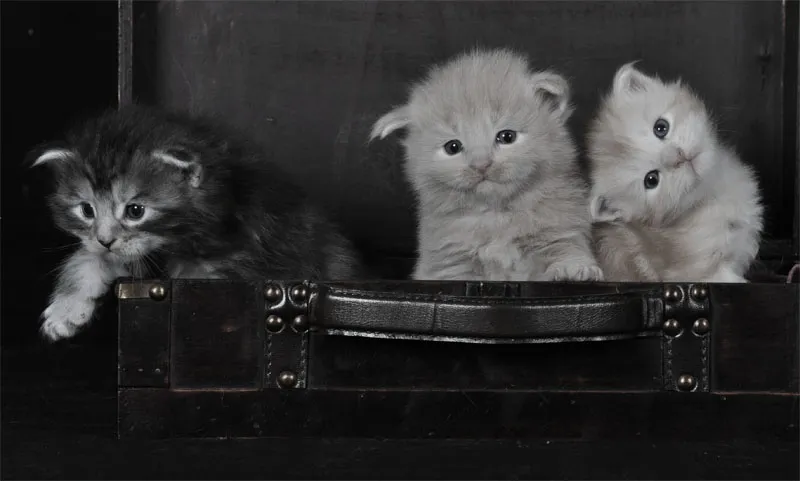
Here is the born model, a beautiful Ragdoll. She didn't care what we draped around her.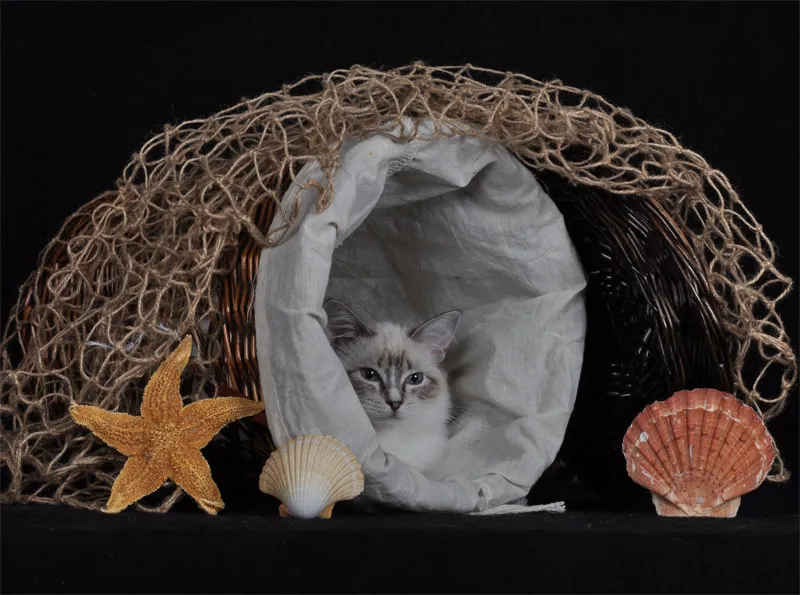
Here are little blue-eyed mice in a picnic basket: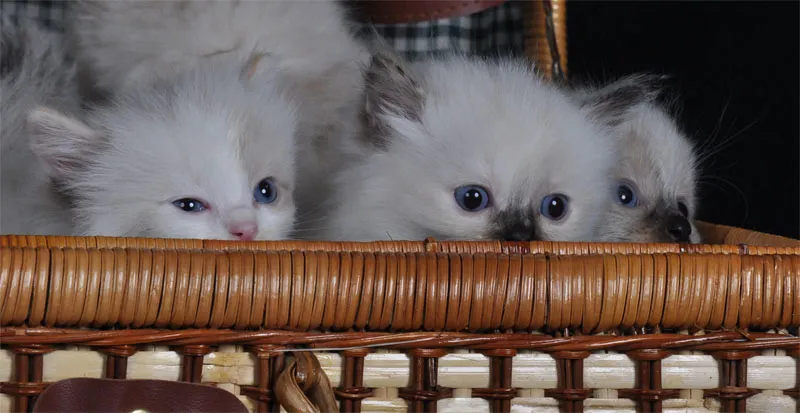
Believe it or not, the little guy climbed into the bag all by himself and didn't want to get out either!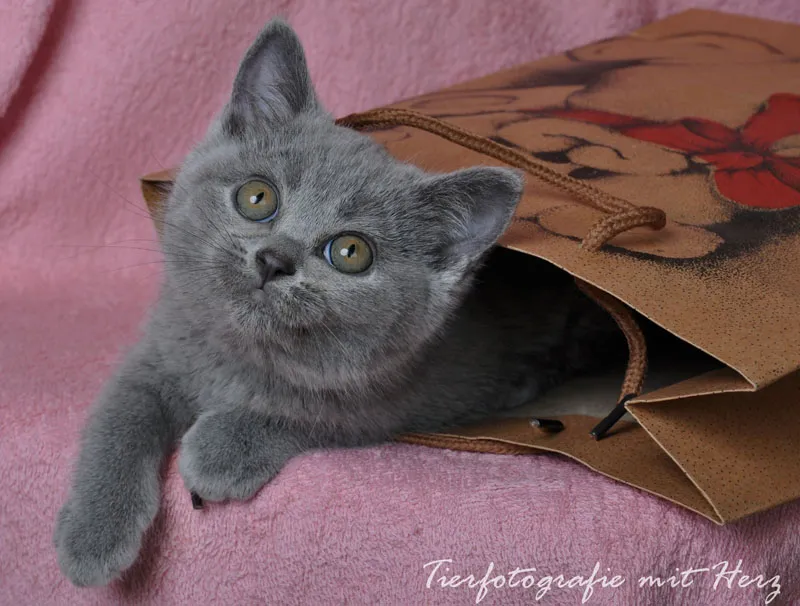
This mouse, on the other hand, felt very comfortable in the jute bag! The fabric costs very little money and looks great in photos!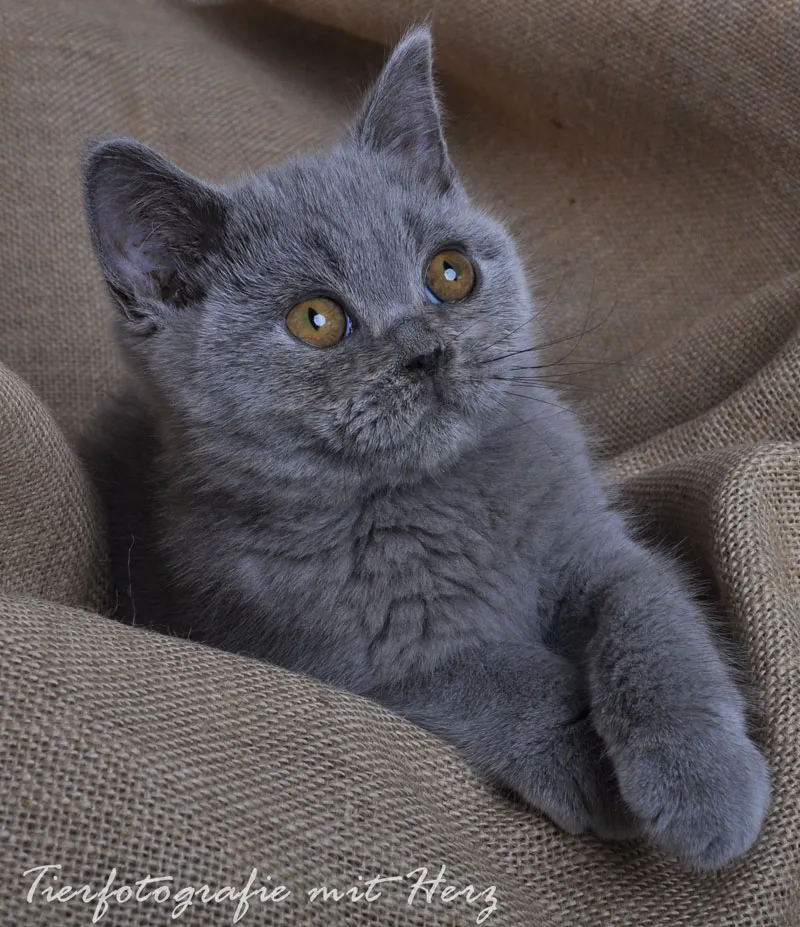
3. lamps and accessories
The studio flash
Light is, of course, your constant companion in studio photography and plays a decisive role in the result - whether good or bad. You have the option of illuminating your subject from all sides. For example, you can photograph a dark subject in front of a black background and use a background lamp. This illuminates the subject from behind and makes it stand out from the background! This can have particularly beautiful effects. Many photographers use this tactic to conjure up a fringe of light around the fur. It looks fantastic!
You can also light your subject from the side or from the front. I often shoot with two lights, one on the right and one on the left side of the subject. This gives me flexibility. No matter where the animal is walking in the studio, I have the opportunity to take good pictures of it without it shading itself. Of course, this means that the animals always have two points of light in their eyes and there are two shadows. This doesn't matter on a black background, but there are cases where the result looks very unnatural.
The fur structure itself looks almost contourless, which is another disadvantage of too much lighting. You simply have to decide spontaneously whether a second lamp is necessary or not, or whether you would generally prefer to work with more or less light. In the beginning, my pictures were always overexposed. No matter what I tried, I had terribly bright subjects and bright cats that shone so brightly on me that I almost went blind. Less would have been more here. Later I had photos that consisted of shadows. It can be completely different for you and you may already have a perfect exposure after the fifth shot!
When working with two light sources, one of them should be set higher than the other, i.e. you use a main light and a second light source, e.g. a folding reflector or a second lamp. I would advise you to try out for yourself what suits you best. Move the lamps to a different position every now and then, illuminate your subject from all sides, simply to find out what the light does to your subject. At some point you will find the way to your photo and then it won't matter at all whether other photographers throw up their hands in disbelief at the HOW of this shot. Or do they? Practice makes perfect, so let's go.
RESULT: In conclusion, one light source is sufficient in almost all cases. This is definitely the best way to imitate nature and that is our real aim. So, start looking for a good studio flash. Cost factor 150.00 - 200.00 euros.
The continuous light
I would also like to mention continuous light and at least briefly touch on it. The continuous light is a fantastic thing and a real alternative to the studio flash. These lamps spread a wonderfully soft light. However, it is almost unsuitable for animal photography as there is no frozen movement without flash. However, it could possibly be an alternative for you as a second light source. Of course, I would advise you to use a flash, as you will almost always be photographing lively animals jumping in front of your camera. What a shame if you couldn't capture that.
Umbrella vs. softbox
Well, and when you buy your studio flash, you'll also need something to soften the harsh light it flashes around you. So what should it be? Umbrella or softbox? That's a difficult question to answer. I read a lot about both, weighed up the pros and cons and finally simply tested them myself. Initially, I worked with umbrellas. There are reflective umbrellas that are attached to the lamps and reflect the light back onto the subject - so the lamp has its back to the subject.
There are also so-called transmitted light umbrellas. Here, the lamp points towards the motif and the light shines through the shade, as the name suggests. The shades are available in various designs. If, for example, a silver shade produces rather cold light, a golden shade will tease out soft moods in portrait photography. I was always happy with the results of my umbrellas, but have since switched to softboxes. That doesn't mean that I don't still use umbrellas. I use them again and again. However, there is no specific rule here. Just let the facts speak for themselves and you'll be spoiled for choice:
Umbrellas:
-Advantages: Easy to store, inexpensive, indirect soft light, quick to install
-Disadvantages: The light is difficult to control, the light reflections in the eye don't look nice
Softbox:
-Advantages: Soft, easily controllable light; with round softboxes there are natural light reflections
-Disadvantages: Expensive, difficult to assemble and mount, very large and bulky, difficult to transport
MY TIP: Try an umbrella first. The costs are between 10-30 euros. If you want to try something new later, try a softbox; these start at around 60.00 euros. But: the bigger the box, the softer the light. So you will have to invest a good sum if you want a really good box. Very important when buying your flash: find out if it is compatible with both things. That was the reason I sold my first set.
Synchronization hot shoe/radio trigger
To control your lights via your camera, you need a corresponding connection. Suitable cables are already included with the lamps, but you usually also need a corresponding synchronization hot shoe, which has to be plugged onto the camera. I would consult a specialist beforehand. The costs for this should be around 20.00 euros. If you would rather do without tangled cables - which is a good idea when working with four-legged friends - and instead work without tripping hazards (and sources of danger for your equipment), then it is better to use a radio trigger.
They cost around 50.00 euros and are of course available in different versions. The radio trigger is attached to the hot shoe on the camera. The corresponding counterpart is attached to one of the lamps and that's it. From now on you can move around freely and are completely independent of any cables! When I made the switch, it was a huge relief for me. A cable was constantly slipping out of my shoe or I was getting tangled up in the cables myself. Working wirelessly is much more pleasant.
The health risk for everyone involved is reduced. The photographer no longer suffers a heart attack when the studio lights shake because the German shepherd has got tangled up in a tangle of cables. Wonderful! Another advantage of wireless control: you can annoy your roommates! Simply set up the lamp in the next room and go for it. Put on an innocent face and blame it on the studio flashes! The radio triggers also work through walls.
4 Camera and studio flash settings
Settings and operation of studio flashes
If you have just received your new studio lights and have never had to deal with such things before, please don't bury your head in the sand. Because you will be tempted to do so, at the latest when you realize that no detailed instructions are included. My softboxes came with an assembly explanation that I couldn't have understood any better in Chinese.
I can really comfort you: the lamps are very easy to use. Even for "women" without any technical understanding, they are an ideal working tool. The Billy shelf of photography, so to speak. The only exception is the mounting of softboxes. This is a little trickier, as already described under lamps and accessories. You should only be careful with the lamps; the rings are very expensive and it will hurt you if the tripod is not screwed tight. One slip can be enough to destroy the bulb. 20.00 - 50.00 euros are quickly lost.
The settings on the flash are not really worth mentioning. There is usually an on/off switch and a controller for the light intensity. You simply have to try it out. Always take a few test shots. For example, place a stuffed animal on your table to see what the lighting conditions are like. Use your camera's functions and check for any overexposure or underexposure. Less is more! If you have the choice, especially with bright subjects, underexpose rather than overexpose.
You can usually save a lot more in retrospect thanks to Photoshop & Co. Of course, your goal should be to always expose correctly! But who can do that? If you are working in a room with a lot of light, one lamp is often enough. I have also often worked with a 150 Ws lamp from Walimex and had good results. The lamp was usually only on a low setting. Of course, you can also regulate a lot of things via your camera. The lamp serves to bring a little light into the picture and to illuminate the subject ideally, the settings of your camera regulate the rest.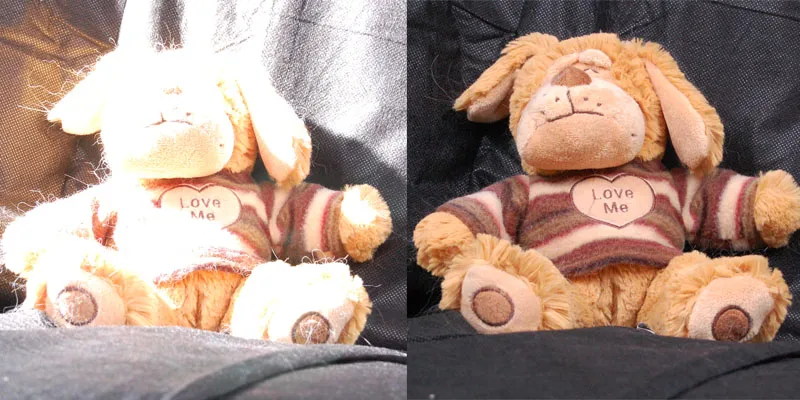
Oh, that can sting your eyes ... A little adjustment of the flash and the results are amazing.
Camera settings
In studio photography, you work in manual mode. I usually adjust the camera once to the respective lighting conditions and the background. Once I've found the ideal ratio and I'm satisfied, I hardly change anything unless I notice that I still need to make improvements, which is rarely the case. BUT: If the color of the background changes or I suddenly photograph a very bright animal, I have to revise the settings 90% of the time.
In order not to go beyond the scope of this tutorial and not to repeat what has already been described in other tutorials, I will demonstrate some camera settings using a few examples. The ISO values were mostly between 100 and 200. It is great fun to experiment with the depth of field and you will always notice how different tastes are.
So whether you work with large Blenders and little depth of field (always focus on the animal's eyes!) or whether you opt for a large depth of field is up to you. Just try everything out. Work with Blenders from 2.8-16 and higher. Just test what it does to your subject and what possibilities you have. In part 3 of this workshop, I will also go into this topic in more detail, so I will leave it at that here.
Focal length: 66 mm / Blender: 10 / Exposure 1/160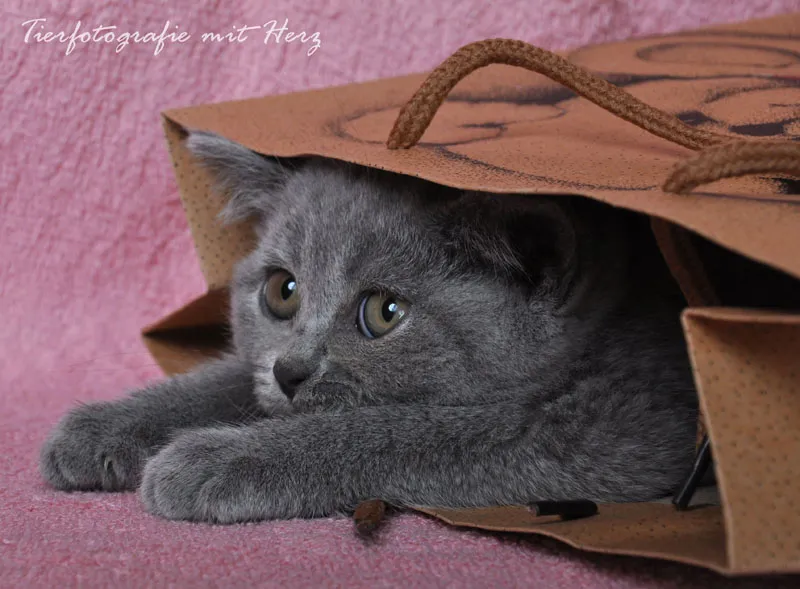
Focal length: 30 mm / Blender: 14 / Exposure 1/160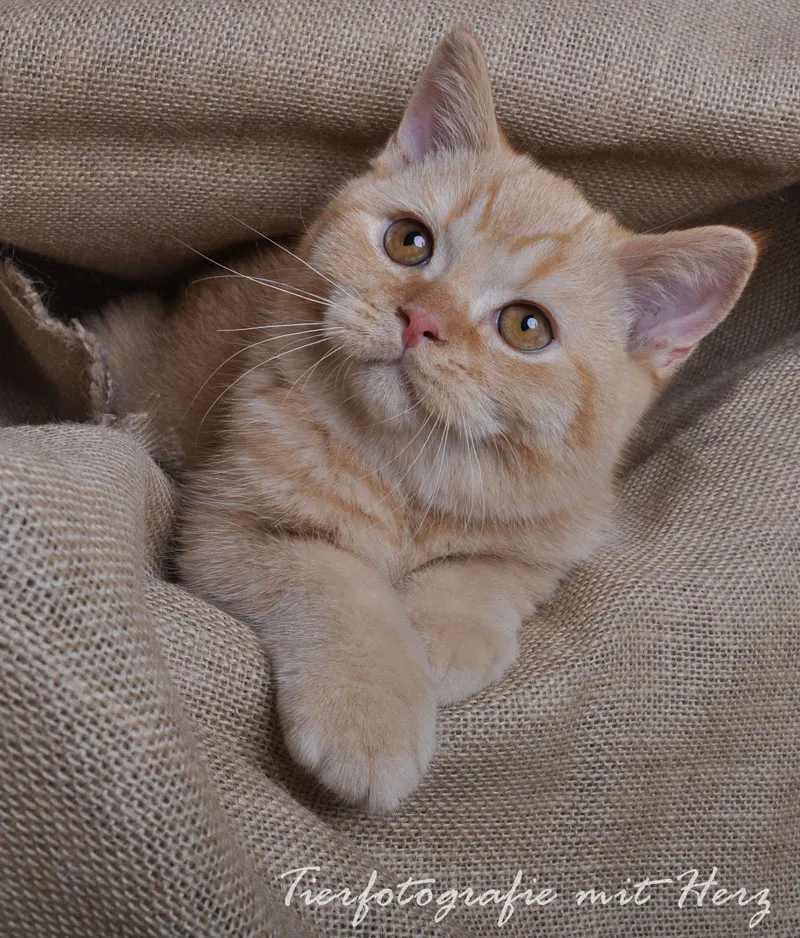
Focal length: 70 mm / Blender: 13 / Exposure 1/200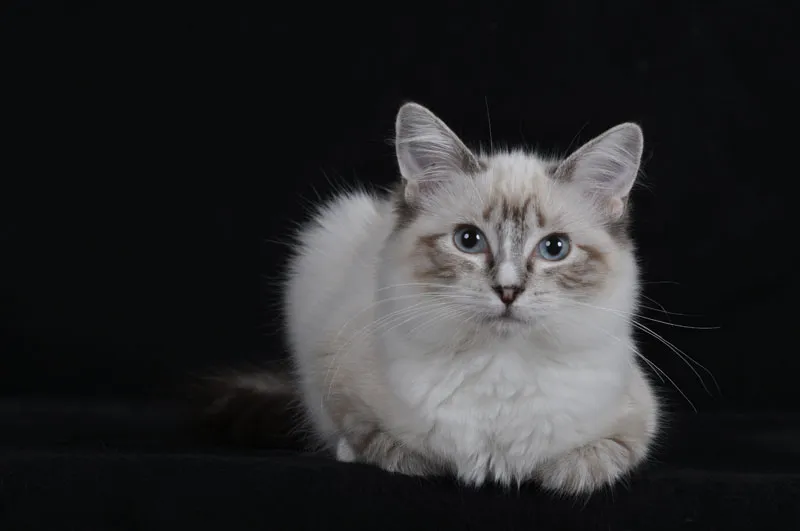
Focal length: 200 mm / Blender: 9 / Exposure 1/250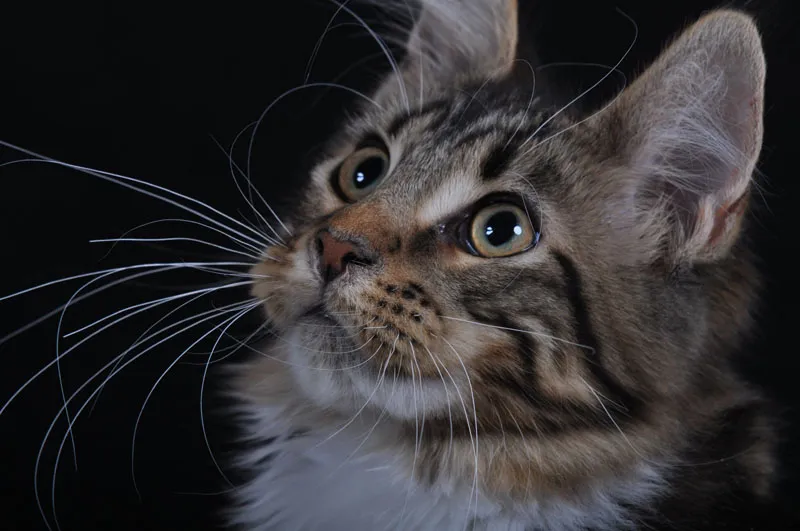
A shallow depth of field was intended here - the aperture is set to 4. An unfavorable choice, as this setting would have worked better on a ferret with the focus on the eyes. Unfortunately, the other two ferrets are out of focus here.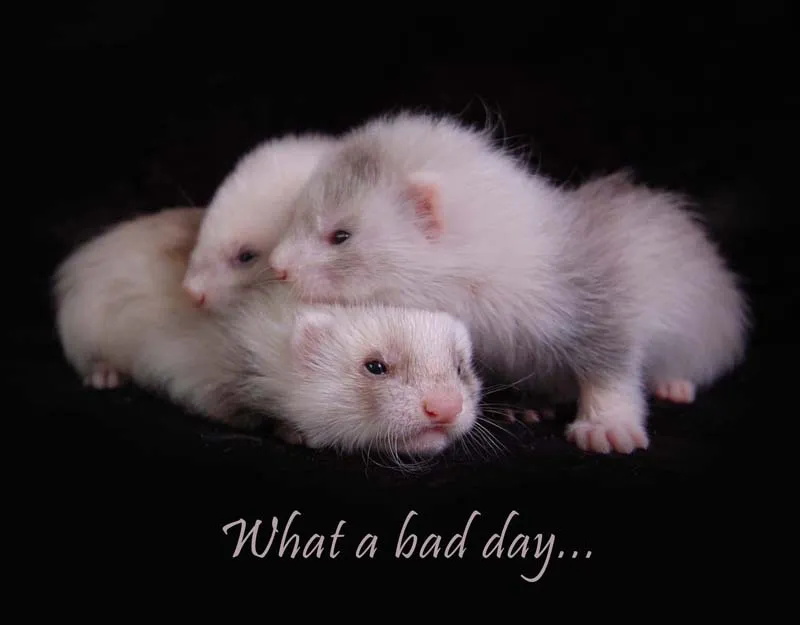
Lenses
Of course, almost all lenses are suitable for animal photography; the general rule is: it must be bright (for outdoor shots). This is the criterion by which you should buy your lenses, regardless of the subject.
For studio photography, you are free to choose what you prefer. Both zoom lenses and telephoto lenses are suitable. Ultimately, you should try out what you like better. I photographed with an 18-50 mm lens for a long time, but have now switched to a 70 - 200 mm. But ask me again in three months' time. I already have a lot of lenses on my wish list again! Although the large zoom lens is now considerably heavier, I find it wonderful to be so flexible. I can stand further away from the subject, which is great for shy animals. But I can also zoom in very close without the animal finding me too intrusive.
Telephoto lenses are good for photographing shy animals. Of course, the lenses are very heavy. A tripod can help to prevent camera shake. Short zoom lenses are certainly very suitable. Popular focal lengths are between 85 and 100 mm. A lens with 24 - 120 mm would cover all of this perfectly and could also be used as a standard lens. I find lenses with fixed focal lengths such as 50 mm unsuitable for animals.
The subject is simply photographed too small and the photographer is also very inflexible. You can even use a macro lens for very still subjects. There are no limits. I personally haven't tried this yet. Like everything in life, it's a question of taste, and I've rarely experienced a shoot without changing lenses. Initially, I would advise you to use a zoom lens. You will certainly be very happy with it in studio photography at the beginning.
5 What is photographed in the studio?
If you have studio lamps, you can easily take pictures of anything you want, even with small versions (150 Ws/200 Ws). With my 200 Ws studio flashes, I have photographed people as well as all kinds of four-legged friends. Of course, cats and dogs are particularly suitable. With small animals and reptiles, this is a very difficult undertaking, depending on the species. I've never seen a chinchilla that was born to be a model. But of course there are always exceptions.
Photographing horses in the studio is a tricky business. Many horses react very anxiously to the equipment. I know from experience (not least with my own horse): If the nostrils puff out to the limit and the horse frantically backs up even though it is still 5 meters away from the studio, the photographer is best off buying a supply of the familiar chocolate bars. Oh, and before I forget: The lamps must be put in a safe place. Because with horses you should be particularly careful with your expensive equipment. Even big dogs can knock things over, but a horse that gets spooked and stupidly stands in the studio can break just about anything! It's best to provide helpers who can perhaps keep an eye on your equipment and quickly pull the lamps aside if necessary.
It is very difficult to persuade a frightened horse. 500 kg and more cannot be moved very effectively. Move calmly with horses, try not to make any loud noises with your equipment and try not to scare the horse.
My TIP: Simply say this before every shoot and stop the shoot if the animal cannot be persuaded. Horses are not always suitable photo models in the studio. You just have to respect that.
This gentleman was photographed without any problems ...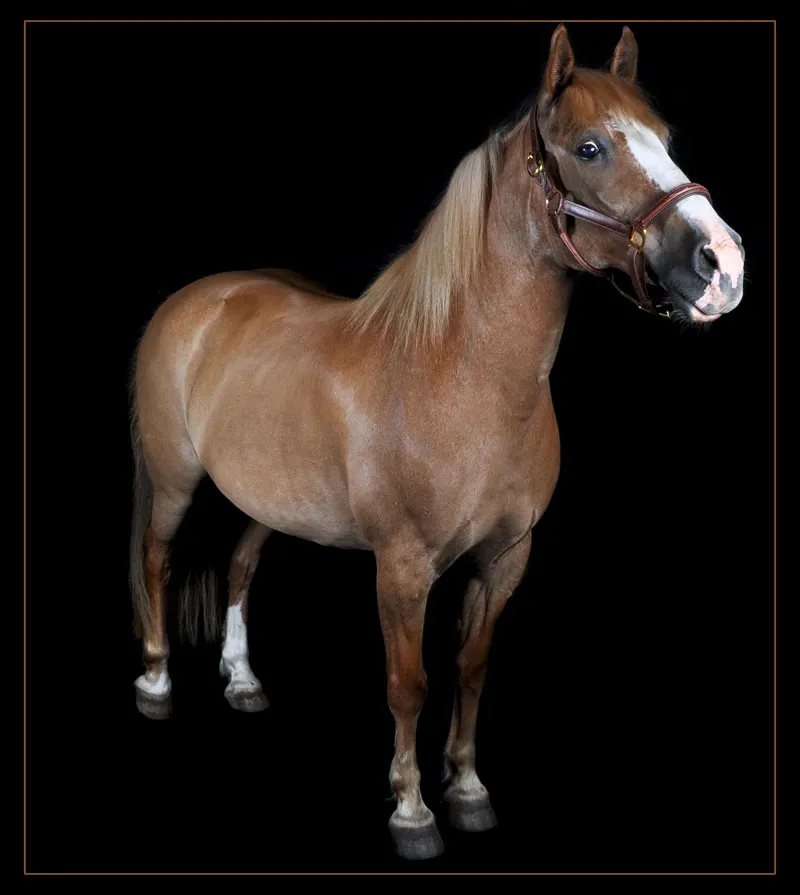
... in our studio.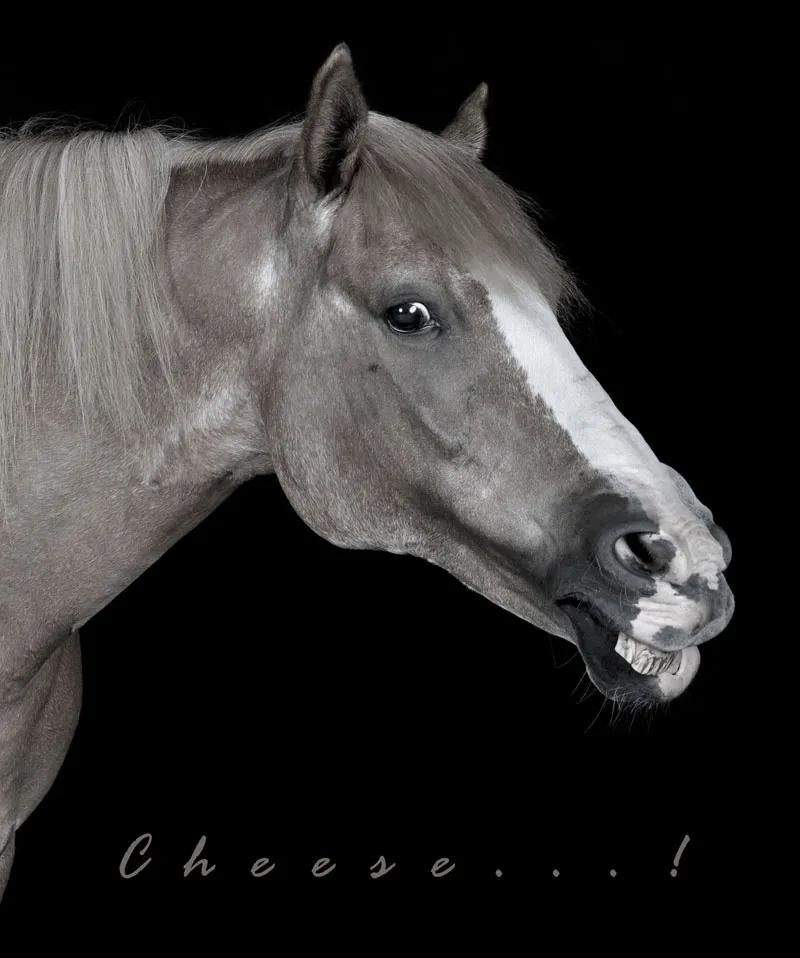
He trusts his owner blindly.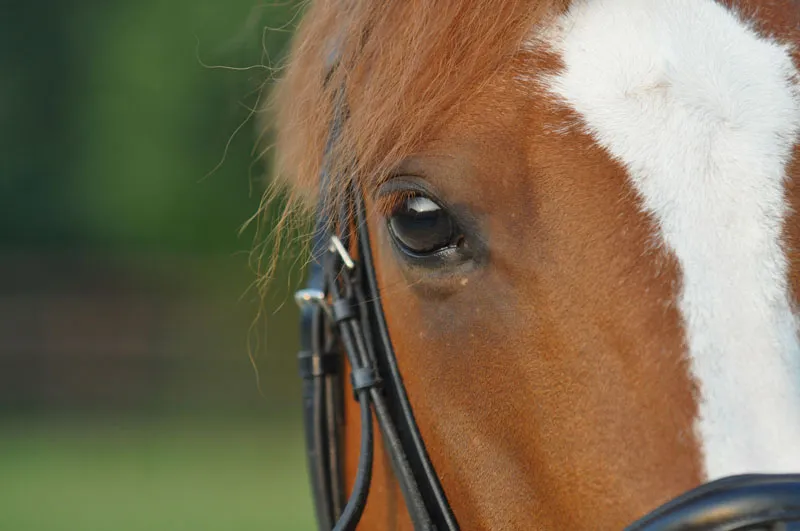
6. other accessories
Here is a small list of things that are very useful in studio photography or that you should definitely have with you:
- Extension cord
- Multiple plug
- Toys for dogs and cats
- Treats for dogs and cats
- Spare battery and memory card (as always)
- Mat or pad for the photographer to kneel or lie down on
If you are photographing several animals:
- Disinfectant spray for the fabrics
- Disinfectant lotion for the hands
7. tips
Cable clutter
The cables required for studio work should always be covered. They are not only dangerous for you as the photographer, but also for the fussy mistress who just wants to push Bello's curl away. The model itself can also quickly be struck down by the cables. Depending on the size of the animal, the equipment can also be swept away. If you have expensive lights, you'll be sweating blood and water on such shoots, I promise you!
Hygiene
Here, too, I would like to come back to the hygiene point mentioned above. Work with disinfectants for decoration and toys, wash your fabrics as hot as possible and make sure you have a healthy studio (detailed information under Backgrounds / Hygiene for fabric backgrounds).
Strength lies in tranquillity
It takes a lot of practice to photograph in the studio to really know which settings are needed in which lighting conditions. Don't let yourself get discouraged. You have to be the rock in the surf for two- and four-legged friends. If you are calm in person, you will also transfer this to your surroundings. But if you get nervous and hectic ... you know what I'm saying. But a few things only come with time. Time pressure and incorrect camera settings can cause the photographer to break out in a sweat. Just take a deep breath and pause. Everything will be fine! You can do it.
8. acquisition costs for a studio:
A photographer will constantly ask themselves when they will finally have the money together to upgrade their equipment. It usually takes agonizing weeks before he can finally buy the coveted object of desire. Precisely because very few of us are millionaires who can draw on a never-ending supply of money, we should think carefully about what is an improvement and what is not. You should also ask yourself whether you only want to test such a studio once or whether it will become a permanent part of your photography. It would be annoying if you bought something for 200 euros only to realize a short time later that you would rather have bought the next best model. Even if it is difficult to be patient, think carefully about what you buy next and whether you actually need it.
If you currently shoot a lot and only want to try out studio photography once, then you would be well served with alternative 1. Unless a new lens is on your wish list, then I would lean towards this. On the other hand, for those who are serious about studio photography and want to work with it regularly, I would recommend alternative 2. It doesn't have to be the lamps suggested.
Just ask around and test them for yourself. I have only listed the equipment that I have tested myself. I can recommend these with a clear conscience. You can see the results with this equipment in my tutorials. But this is just one opinion of many. If you want to spend more money, the sky's the limit. I can always recommend the telephone advice from Foto Walser. You can certainly pick up a tip or two here.
Alternative 1 for those on a budget:
- Background: Fleece blankets for the background draped on chairs or the couch (costs approx. 3.00 euros at discount stores)
- Lamps: A simple 150 Ws/200 Ws studio flash light (from 120.00 euros or buy used on eBay) - TIP: A tripod and umbrella are usually already included in the set for approx. 140.00 euros!
- Other accessories: Synchronization flash shoe, if necessary, for the camera to connect the studio flash (approx. 20.00 euros), possibly extension cord
Possible source of supply: Foto Walser(http://www.foto-walser.biz/)
TOTAL COST approx. 170.00 euros - used certainly a lot cheaper
Alternative 2 for the big purse:
- Background: A complete background system for cardboard and fabrics 150.00 euros / fabrics and/or cardboard rolls in different colors approx. 300.00 euros / decorations approx. 100.00 euros (there are no upper limits here)
- Lamps: A lamp set for beginners / hobby photographers e.g.
2 x Walimex 150-Ws studio flashes including tripods and umbrellas / background lamp approx. 300.00 Euro
OR
a single lamp: 1 x Walimex CY-420K 420 Ws (approx. 200.00 Euro)
- Radio trigger: approx. 60,00 Euro
Possible source of supply: Foto Walser(http://www.foto-walser.biz/)
TOTAL COST approx. 1,000.00 - 1,300.00 euros - used certainly a lot cheaper
As you can see, there are no limits. Especially when it comes to technology. There are studio flashes and lamps whose prices I won't go into at this point, e.g. Elinchrom flashes with 1200 Ws. The question is whether we can really make good use of this in animal photography. In the second alternative, I have only included cheap fabrics or cardboard and the bare essentials in terms of decoration. 2,000.00 - 3,000.00 euros just for the studio are quickly reached. But isn't that always the case in photography? Just keep buying something new and enjoy how your studio grows and grows and how your pictures become more and more beautiful with practice and time.
I wish you good luck and much success!
Nicole Schick
www.tierfotografie-mit-herz.de
