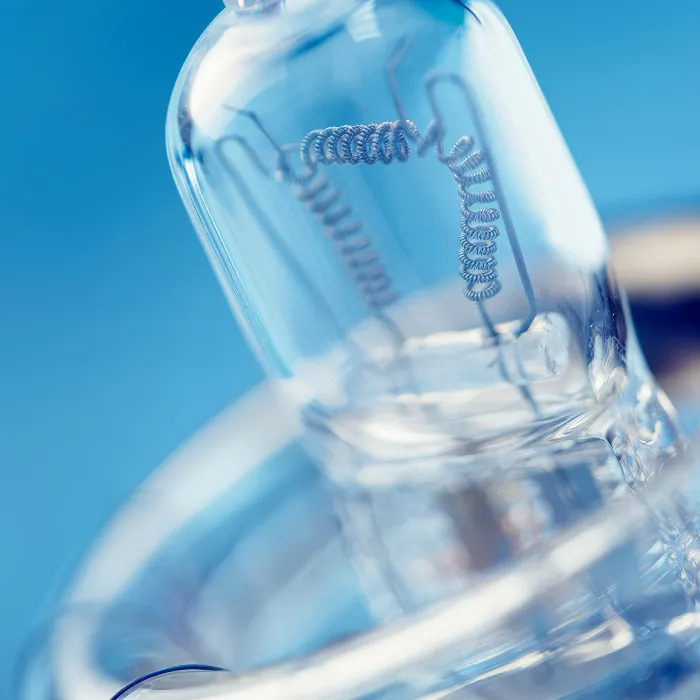
Professional indoor lighting
Figure 9-1: Anyone who photographs for "big", well-known brands must place great value on quality in their work. This also includes professional lighting. Unfortunately, there is no one-size-fits-all approach to lighting, which is why really good photographers never stop experimenting with light. However, if you work with flash systems and have a sufficiently bright modeling light at your disposal, you should be able to master almost any lighting challenge with ease.
Because according to the principle "What you see is what you get", you only need to look closely: The photographer sees every effect caused by changing the light position or the light characteristics (by changing the light shaper or changing the distance).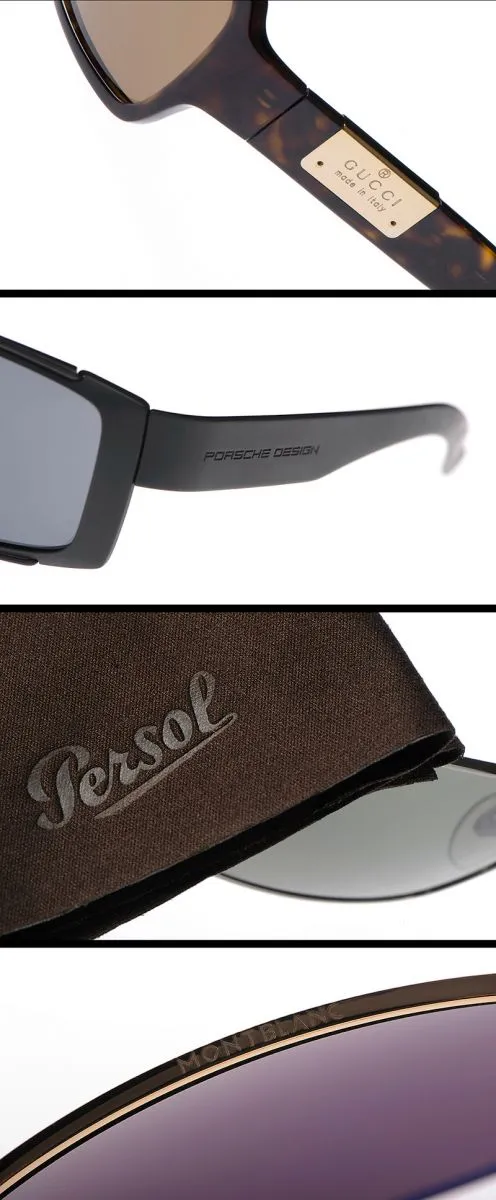
(Photo ©: Jens Brüggemann - www.jensbrueggemann.de)
9.1 Naturalness is "in"!
The purpose of using flash is not to make every photo look "artificial" or "dead-flashed". Unlike in the seventies and eighties, a more natural-looking light is in demand nowadays.
Figure 9-2: In this photo, the main light comes from the daylight coming in through the windows (to the right of the boy and behind him). The system flash was only used to brighten the shadows on the boy's face. The flash was used indirectly at an angle over the white wall (to the left of the boy's position).
(Photo ©: Jens Brüggemann - www.jensbrueggemann.de)
9.2 Less is sometimes more!
You don't always need 3 or 4 flashes to create effective photos. In most cases (around 70% of my photos) I work with just one or two flash heads. This guarantees natural-looking light and allows me to work efficiently.
Figure 9-3: Normally, a white background must be flashed separately so that it is rendered white (and not unattractively gray). This is best done with two flashes so that there is no light gradient from light to dark (which is the case when only one flash is used). In this series, however, I was able to do without additional background lighting because the model was leaning directly against the wall.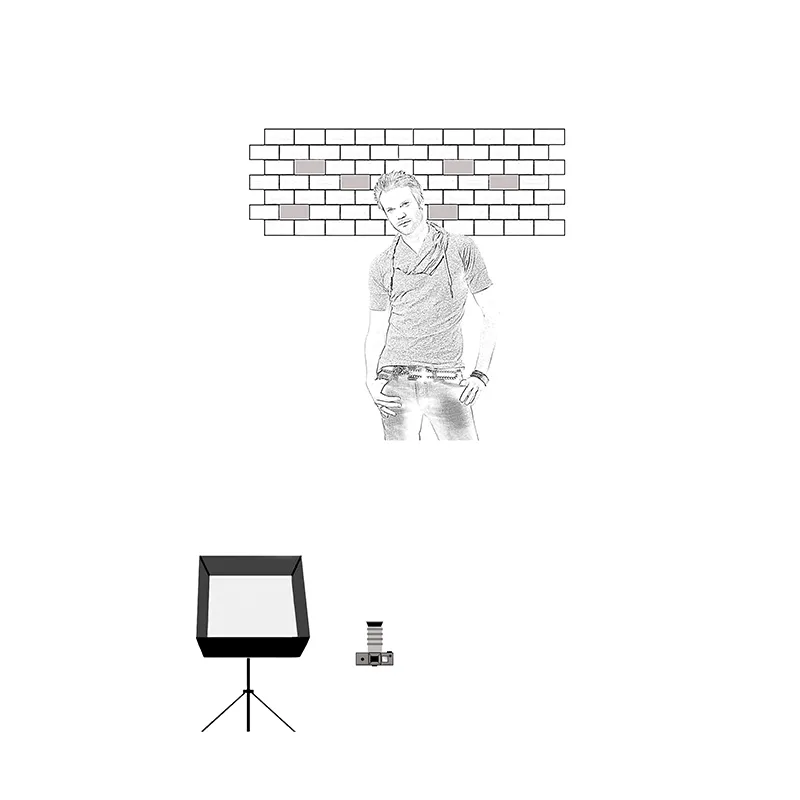
Figure 9-4: Only if the distance between the model and the wall is relevant (i.e. present) does the light fall-off ensure that the wall is rendered too dark. Then it must be illuminated separately. Here, however, the light from a single large softbox was enough for me, both for the model and for the background. Nikon D3X with 1.4/85mm Nikkor. 1/125 second, Blender 5.0, ISO 200.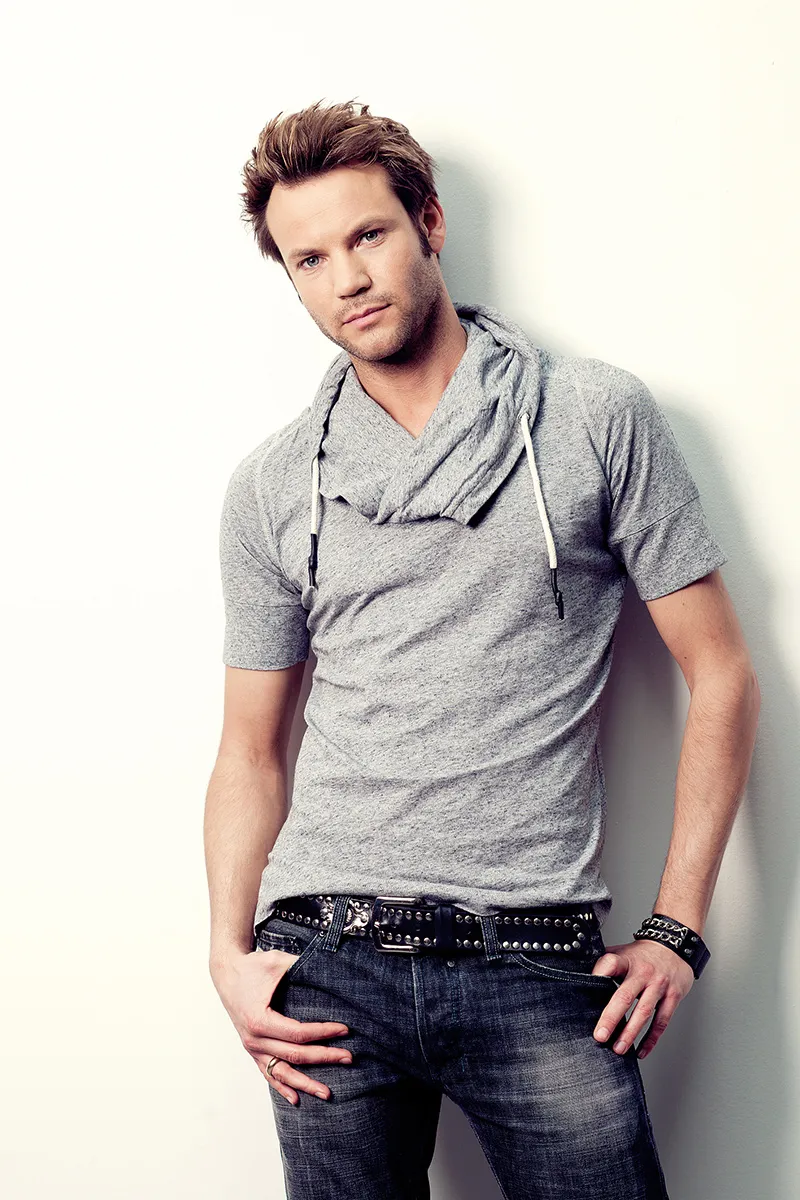
(Photo ©: Jens Brüggemann - www.jensbrueggemann.de)
9.3 Photographing in a dark room
Photo studios are normally completely dark or can at least be darkened. Only if there is no other light entering the studio can you judge the light pattern when using the modeling light. This is the only way to create sophisticated lighting situations.
Interfering continuous light hinders the assessment of the light progression and light characteristics, because it suggests that it has a stronger influence on the image result than is actually the case. This is due to the fact that the flash is usually much stronger than the modeling light.
When using flash (with high power), the ambient light is much less important than when assessing the lighting, where the ambient light meets the (weak) modeling light. The stronger the modeling light of the studio flash system is, the less disturbing are any other lights that enter through window openings or door slits.
So either the flash system used has a very strong modeling light or the pictures are taken in a darkened room.
A strong modeling light also has the advantage that the autofocus of your camera focuses much faster and more precisely. A point that should not be forgotten when buying a new camera, because the slow focusing of the autofocus when taking photos can be quite "annoying" ...!
Fig. 9-5: If you take a photo in a darkened room, you can see the progression of the light very clearly when setting up the lighting (i.e. before taking the photo). In this photo, I used three lights: the main light from the front (beauty dish with honeycomb grid), the effect light from the left side (to the right of the boy; an elongated softbox) and the background light (a normal reflector with a large honeycomb).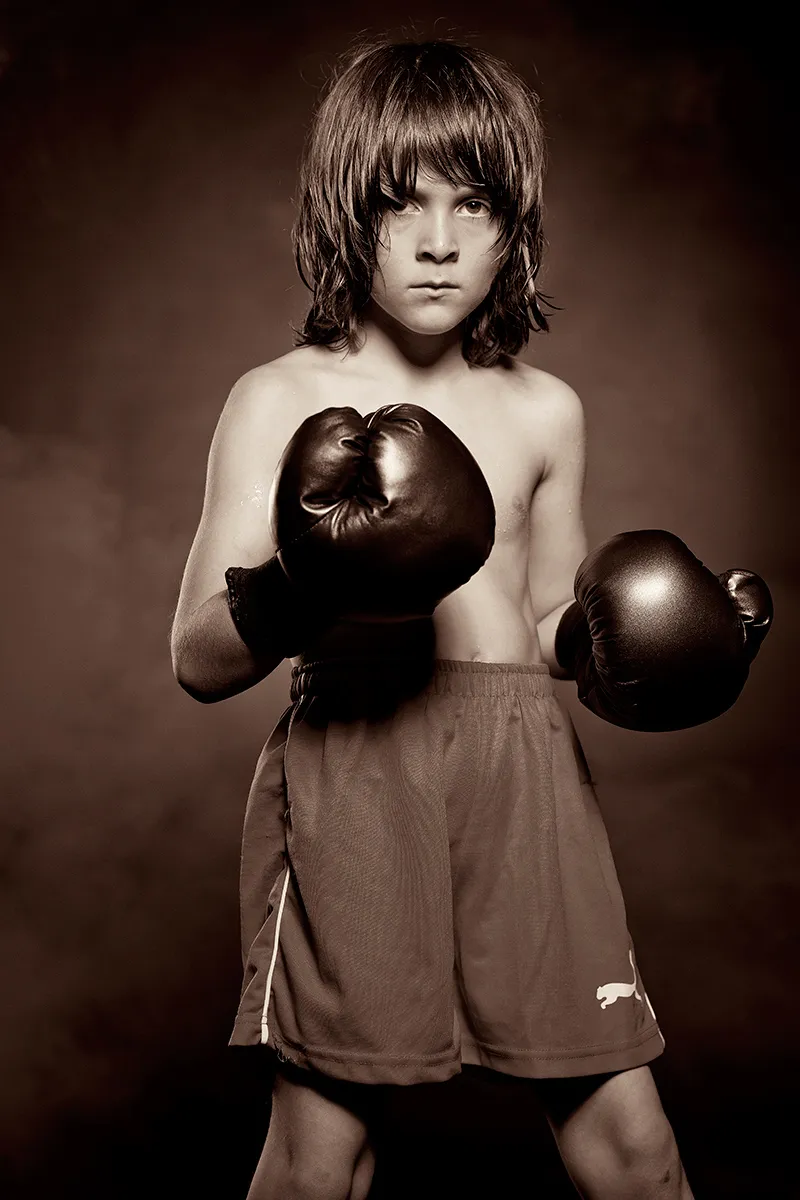
(Photo ©: Jens Brüggemann - www.jensbrueggemann.de)
9.4 For beginners: document the lighting setup!
To speed up the learning process, I recommend that you document your lighting setups - at least at the beginning when working with a flash system. This can be done with a schematic sketch or simply with a making-of photo (taken with a wider angle of view).
This will make it easier for you to understand later on where the light was positioned for which photo series, how many flash heads you used and which light shapers were used. Errors can also be identified more easily in retrospect.
Figure 9-6: Often, when I like the lighting of a photo, I ask myself how I set the light and which light shapers I used ...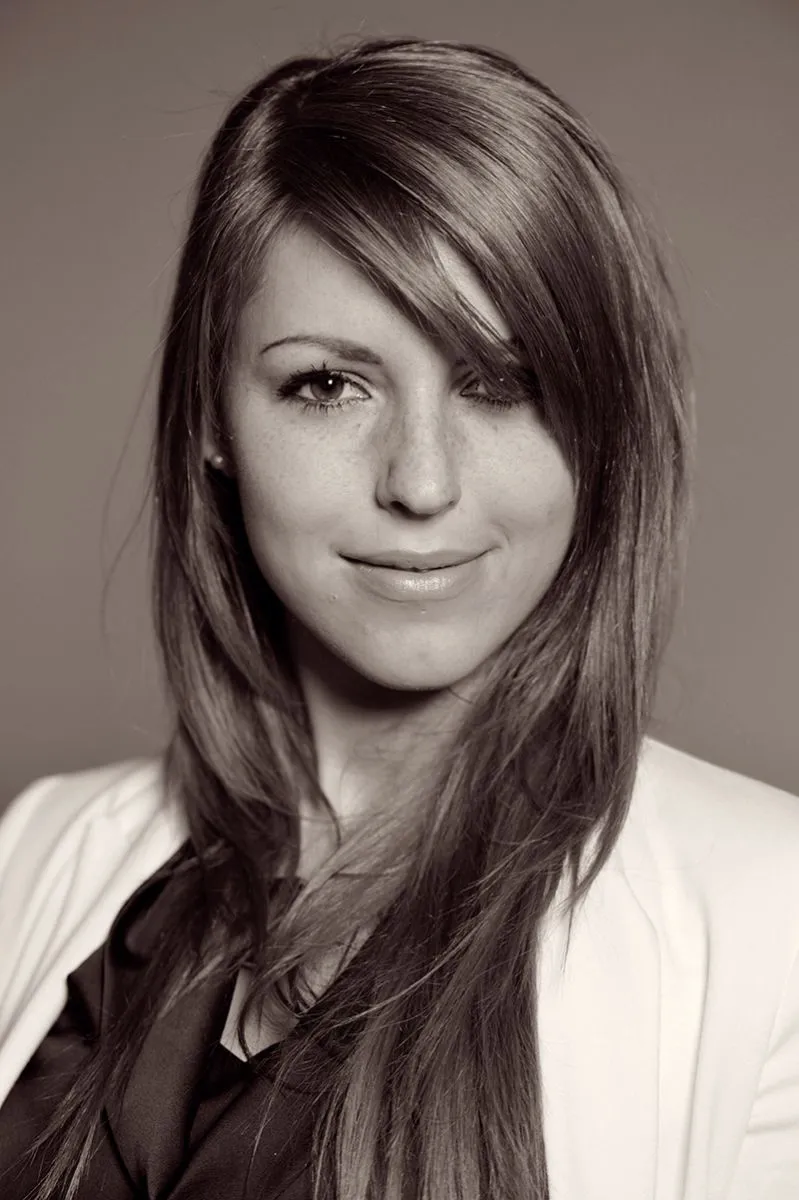
(Photo © 2013: Jens Brüggemann - www.jensbrueggemann.de)
Figure 9-7: It would have been helpful if I had photographed the lighting setup for every motif, just like here. Unfortunately, this idea only came to me now, while writing this tutorial ... ;-( So don't make the same mistake as I did, but start documenting the respective lighting setup from the beginning!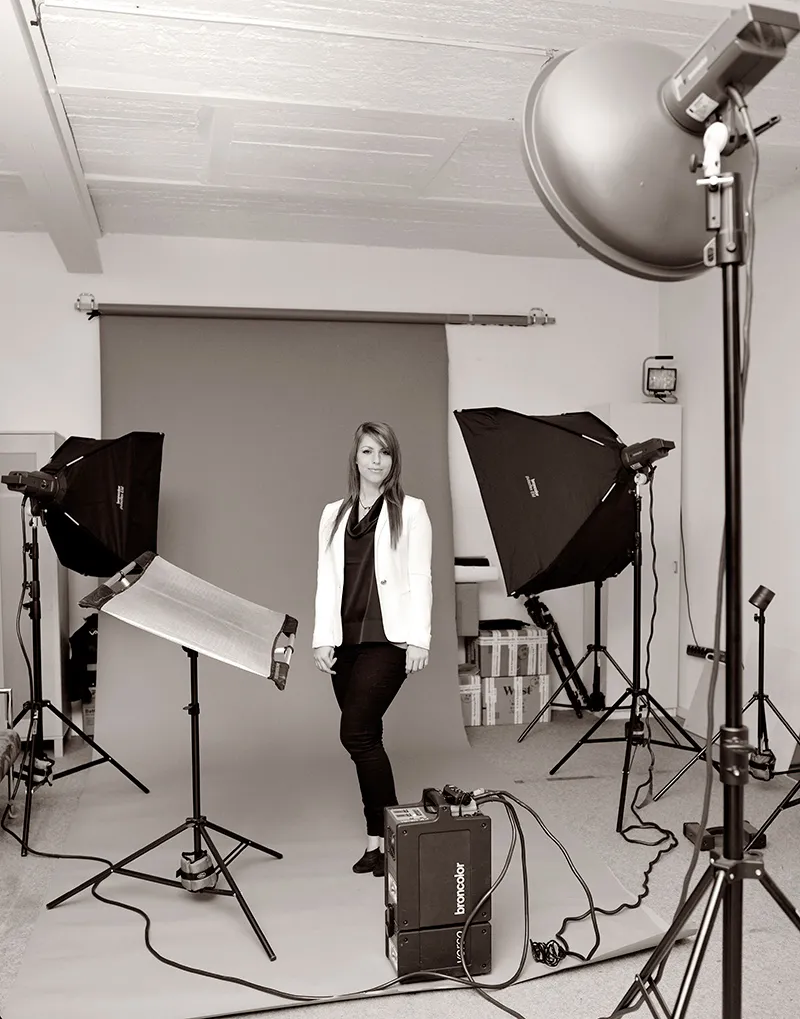
(Photo © 2013: Jens Brüggemann - www.jensbrueggemann.de)
9.5 Photographing in mixed light
But it can also happen indoors that you need to photograph in mixed light. This can be the case when photographing rooms, for example in hotels.
The flash must then be adjusted to the available light. This is easily possible using the control range of the flash system. However, the prerequisite is that the control range is as large as possible. I recommend that the control range is at least 7 f-stops. Only then can the system really be used flexibly.
Figure 9-8: For this series, I set myself the task of creating a mixed lighting situation. I wanted to make the umbrella in the background appear colder. Normally it is silver-colored, but for my picture idea I wanted to make it appear bluish. To do this, I set the white balance on my camera to the light bulb symbol.
I then flashed the umbrella in the background as normal, while I only illuminated the model with the modeling light.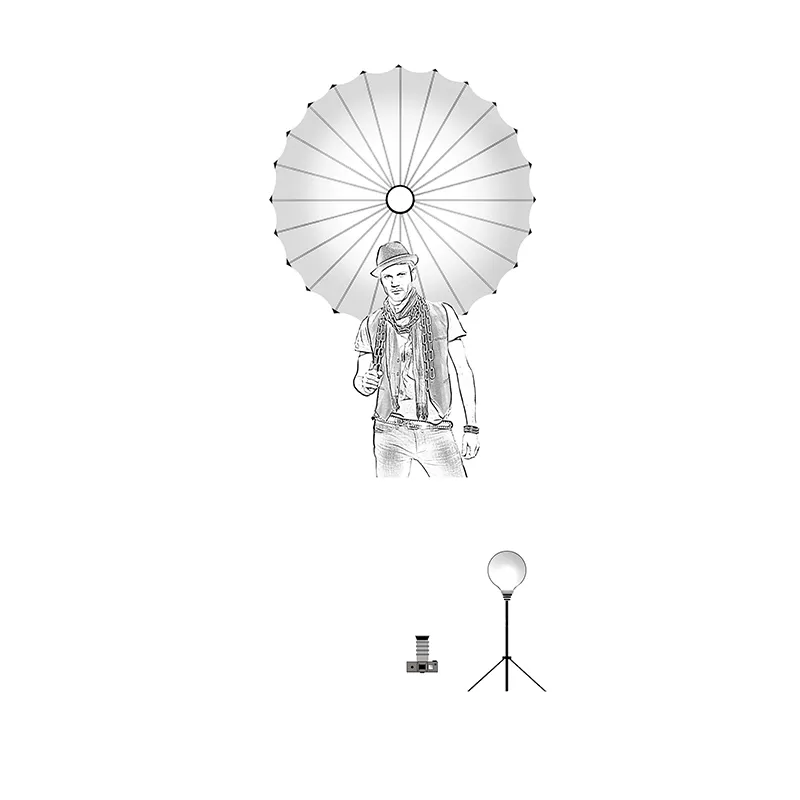
Figure 9-9: In this way, the model was rendered correctly ("normal"), while the background appears "colder" than normal. Nikon D3X with 1.4/85mm Nikkor. 1/80 second, Blender 3.5, ISO 200.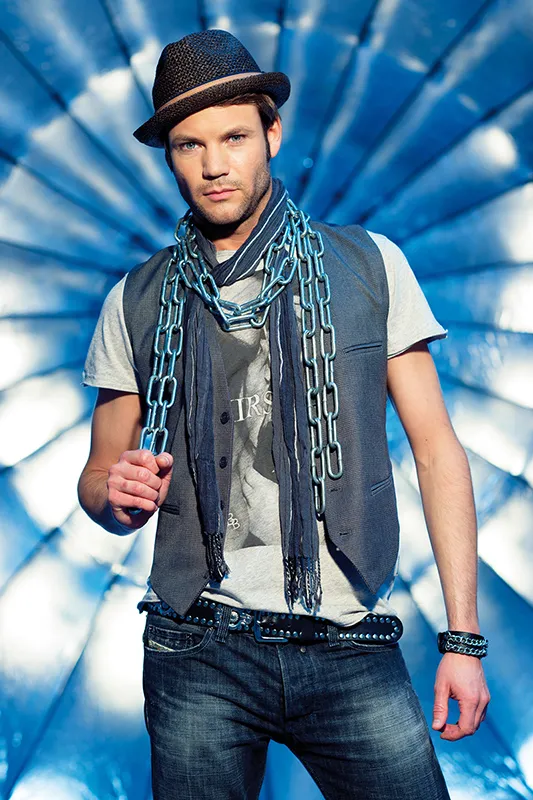
(Photo © 2012: Jens Brüggemann - www.jensbrueggemann.de)
9.6 Light shapers in comparison
In the following, I have listed some sample photos to illustrate how the light changes when using the different light shapers. The distance between the flash head and the model was approx. 1.20 meters (except when using the large umbrella, where the distance was approx. 3 meters). The distance between the model and the background was approximately 1 meter. The photos that illustrate the progression of light and shadow were taken by me at a slight angle (from an angle of approx. 10 degrees to the light source). The photos on the left show the light shaper used; the photos on the right show the respective light-shadow progression (on the model's face and on the white wall).
Figure 9-10: Light shaper used: (none). If no light shaper is used on the flash head, the result is very hard light that radiates in almost all directions. The shadow is clearly defined. Only to be used in emergencies.
(Photo © 2013: Jens Brüggemann - www.jensbrueggemann.de)
Figure 9-11: Light shaper used: normal reflector (broncolor P70). The normal reflector has a high light output due to the silver coating. The light can be described as quite hard. The illumination angle is relatively large. Very suitable for striking portraits or for evenly illuminating the background.
(Photo © 2013: Jens Brüggemann - www.jensbrueggemann.de)
Figure 9-12: Light shaper used: normal reflector with narrow honeycomb attachment (broncolor P70 with narrow honeycomb). If a honeycomb is used in addition to the normal reflector, the light is emitted more directionally. The light cone becomes significantly smaller. Very suitable for setting hair light or for creating portraits with striking lighting. Attention: Model should be very well made up and have smooth skin without blemishes.
(Photo © 2013: Jens Brüggemann - www.jensbrueggemann.de)
Figure 9-13: Light shaper used: square softbox (broncolor Pulsoflex EM 110cm x 110cm). The light is very soft, which is due to both the diffuser fabric and the large surface area of this softbox. Very well suited for beauty portraits of models with bad skin or as flat lighting for product photos, where the light is reflected.
(Photo © 2013: Jens Brüggemann - www.jensbrueggemann.de)
Figure 9-14: Light shaper used: narrow softbox (broncolor Pulsoflex EM 40cm x 155cm). Narrow softboxes provide a soft light, whereby the shadow results more clearly when the softbox is positioned vertically than when it is positioned horizontally. Very suitable for light edges, both in fashion photography and in product photography. With reflective surfaces such as bottles or sunglasses, the reflective softbox produces a beautiful reflection.
(Photo © 2013: Jens Brüggemann - www.jensbrueggemann.de)
Figure 9-15: Light shaper used: beauty dish (broncolor soft beam reflector P-Soft with silver coating). My favorite light shaper! This light shaper provides a light between hard and soft. Ideal for beauty portraits when the model is well made up.
(Photo © 2013: Jens Brüggemann - www.jensbrueggemann.de)
Figure 9-16: Light shaper used: beauty dish (broncolor soft beam reflector P-Soft with silver coating + honeycomb louvre attachment). With honeycomb louvre, the light of the beauty dish is emitted more directionally. Also well suited for portraits of men who can tolerate a somewhat more striking light and which emphasizes stubble. Can also be used well in fashion photography, for example to emphasize the structure of leather.
(Photo © 2013: Jens Brüggemann - www.jensbrueggemann.de)
Figure 9-17: Light shaper used: Reflex umbrella (broncolor umbrella silver with 102cm diameter). A traditional, tried and tested light that is somewhere between hard and soft. Similar to the P-Soft in terms of light characteristics. (Only much cheaper to buy and easier to transport, as the shade can be folded up).
(Photo © 2013: Jens Brüggemann - www.jensbrueggemann.de)
Figure 9-18: Light shaper used: opal acrylic glass ball (broncolor Balloon). The balloon was designed for use in interior photography. It provides a very natural-looking light thanks to its 360-degree emission. Ideal for lighting interiors. Can also be used in model photography if the result should look very natural. The photos look "non-flashed" with multiple reflections of the flash light through ceilings and walls.
(Photo © 2013: Jens Brüggemann - www.jensbrueggemann.de)
Figure 9-19: Light shaper used: large umbrella (broncolor Para 330 FB; 330cm diameter with centered focusing). With centered focusing (I use the Para with a ring flash centered around the center pole), the result is a very three-dimensional light, which is ideal for photographing models beautifully and slightly dramatically.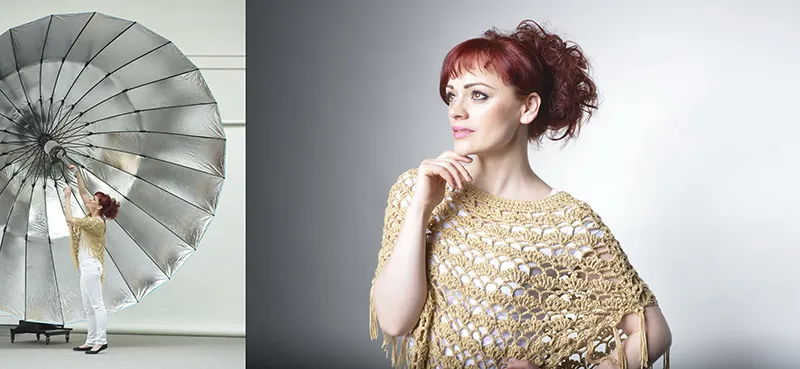
(Photo © 2013: Jens Brüggemann - www.jensbrueggemann.de)
Figure 9-20: Light shaper used: large umbrella (broncolor Para 330 FB; 330cm diameter with decentered focusing). Decentered focusing produces a flat, very soft light. The cone of light is then much larger than with centered focusing and is sufficient to illuminate an entire set.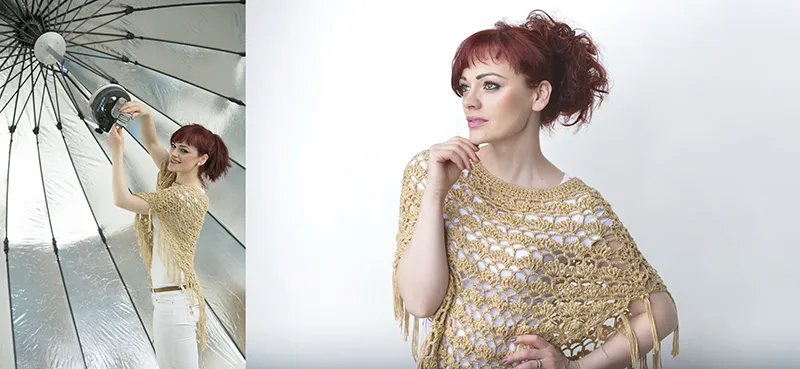
(Photo © 2013: Jens Brüggemann - www.jensbrueggemann.de)
Figure 9-21: The flash head (or, as shown here, a ring flash) can be attached to the center pole of the large umbrella and focused. The light characteristics change significantly, as we have seen from the two examples above. Here the ring flash is in a centered position, close to the center of the umbrella.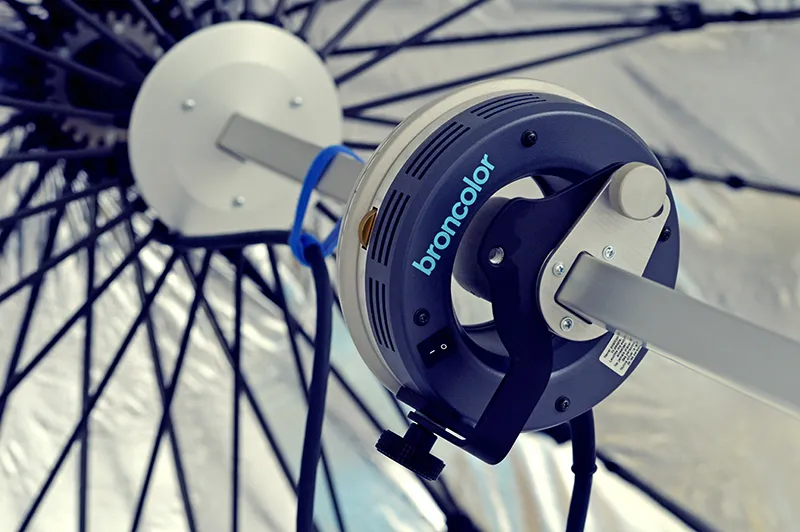
(Photo © 2013: Jens Brüggemann - www.jensbrueggemann.de)
Figure 9-22: The ring flash has modeling lights mounted along the circular flash tube. This makes it easy to view the progression of light without having to take a single photo.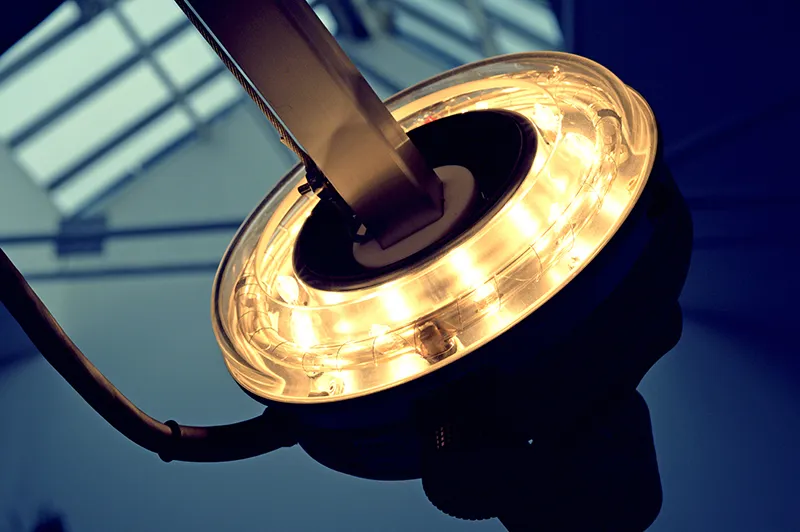
(Photo © 2013: Jens Brüggemann - www.jensbrueggemann.de)
Figure 9-23: When the model stands at a distance from the background (in this case it was about 1 meter), the light from the ring flash causes a shadow of the model to be visible behind him on the white wall. Unlike the previous examples, this shot was not taken at an oblique angle, but directly from the front. The ring flash was attached to the camera and the lens of my DSLR was positioned in the center of the opening of the ring flash.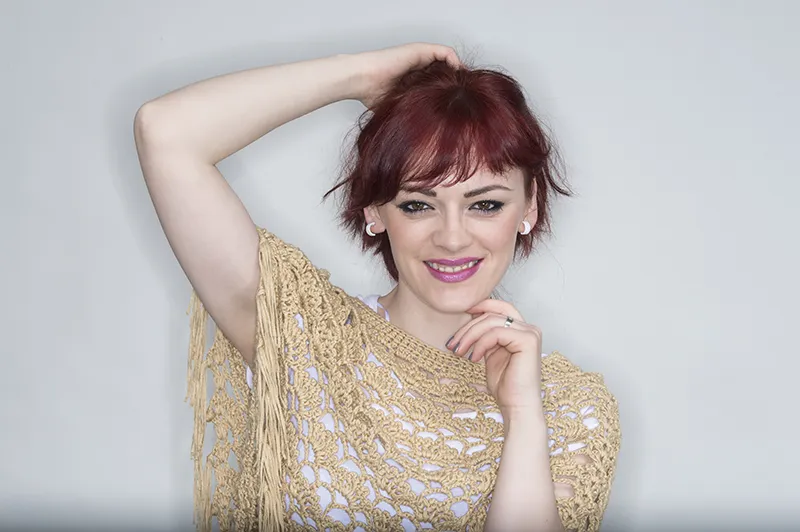
(Photo © 2013: Jens Brüggemann - www.jensbrueggemann.de)
Figure 9-24: The circular shadow can be avoided if the model stands directly (i.e. without distance) in front of the background. This shot was taken in exactly the same way as the previous example, except that the model was standing directly against the white wall. Only the right arm still casts a shadow, which is due to the fact that it is held about 30 centimeters in front of the white wall.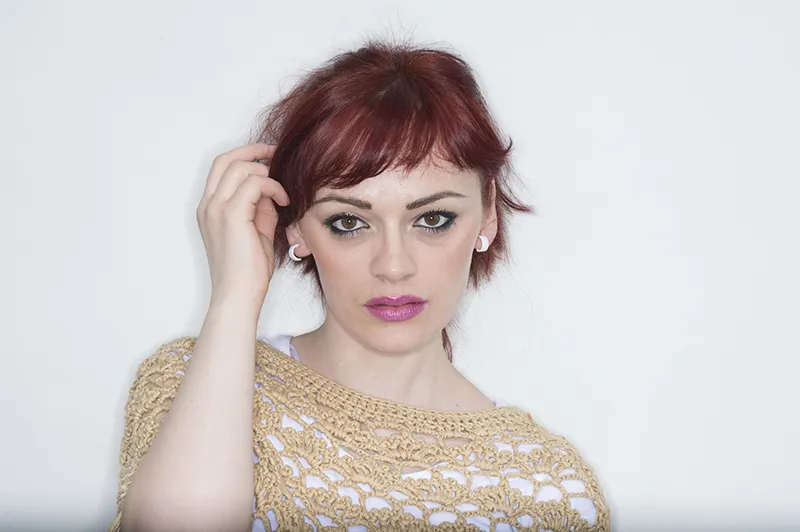
(Photo © 2013: Jens Brüggemann - www.jensbrueggemann.de)
Figure 9-25: Shielding flap sets (which are attached to the normal reflector; this photo shows an attachment to a demo wall) do not change the light characteristics. However, they do influence the angle of illumination. They are used when the light is only to be directed onto individual parts of the subject, while others are to be protected from being illuminated by this light. Caution: After prolonged use of the barn doors, they become very hot (with a strong modeling light)!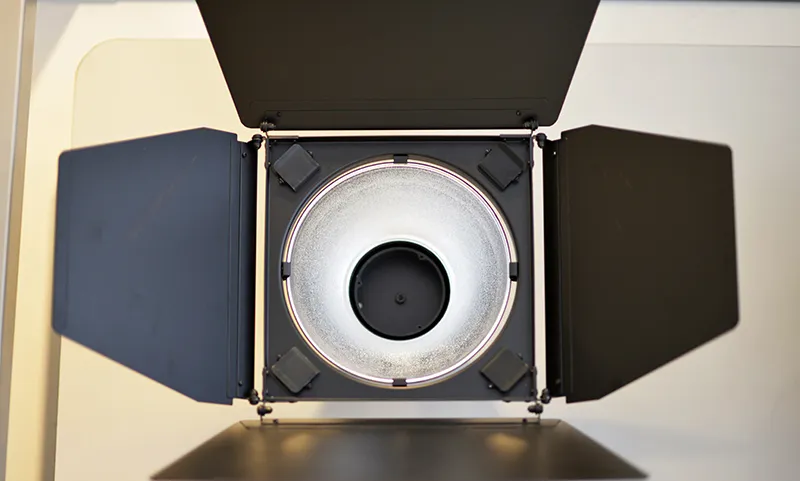
(Photo © 2013: Jens Brüggemann - www.jensbrueggemann.de)
9.7 Light shapers in product photography
In product photography, the choice of the right light shaper is crucial for the product's sales opportunities. Imagine a fine wine that is to be sold in a designer bottle: How would a potential customer like the whole thing if, in the advertising photos, the bottle comes across as unattractive rather than Schick due to inappropriate lighting? Bottles are not photographed with umbrella reflectors, for example, but with narrow, angular surface lights, as these can emphasize the lines of an elegant bottle.
Figure 9-26: Surface lights are also the first choice for shiny shoes. The elongated light reflection on the shoe looks classy and thus supports the image of the product.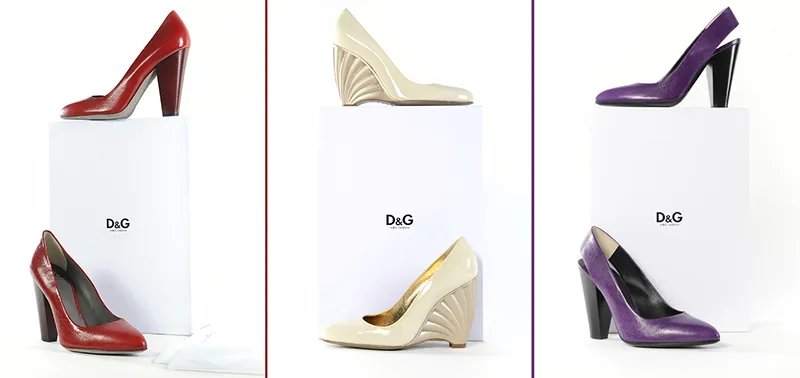
(Photo ©: Jens Brüggemann - www.jensbrueggemann.de)
Figure 9-27: If the surface of the shoes is made of fabric or suede, other light shapers can also be used. I have had very good experiences with the broncolor P-Soft, equipped with a honeycomb grid.
(Photo ©: Jens Brüggemann - www.jensbrueggemann.de)
Figure 9-28: The directional light then ensures that the rough surface of the material is shown to its best advantage.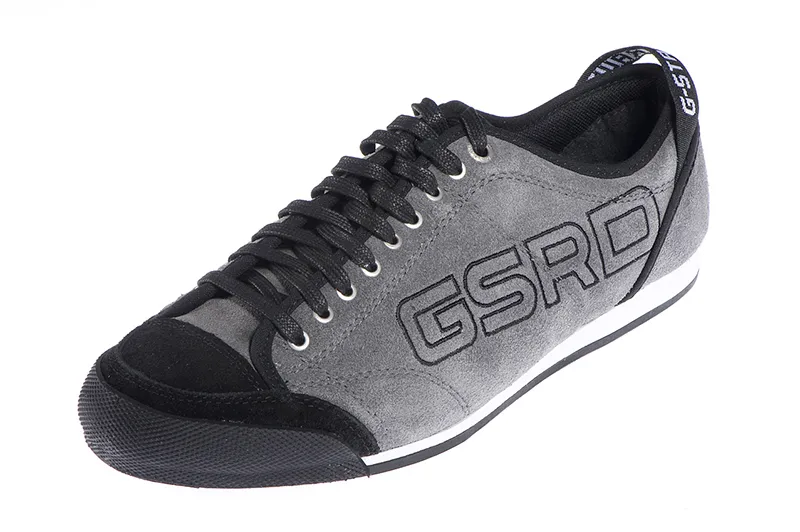
(Photo ©: Jens Brüggemann - www.jensbrueggemann.de)
Figure 9-29: Whether embossing, knitting patterns or leather structures: those who want to emphasize the surface texture of products will tend to use hard, directional light.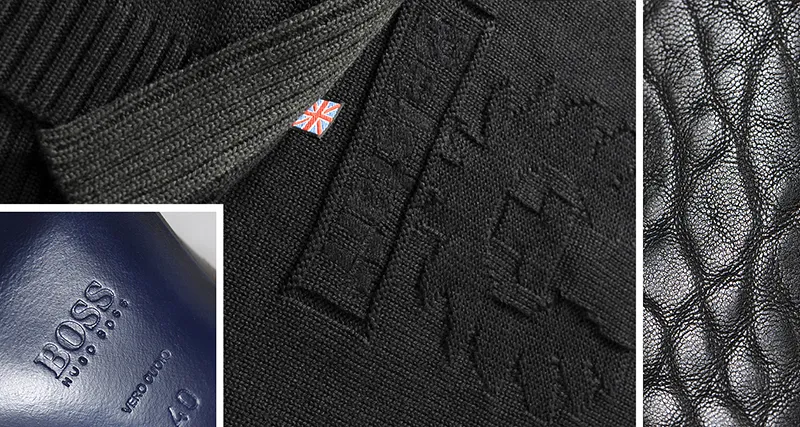
(Photo ©: Jens Brüggemann - www.jensbrueggemann.de)
Figure 9-30: Product photography generally requires "a lot of light". This is especially true for small objects when working in the macro range. So if you want to earn your money with product photography, you will (have to) make sure that you buy a flash system with a lot of power (1,500 watt seconds minimum with 3 flash heads) when purchasing lighting technology.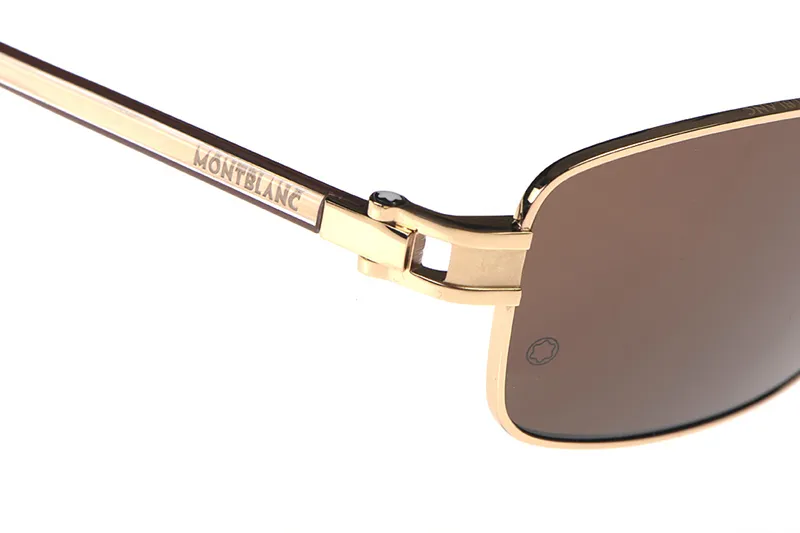
(Photo ©: Jens Brüggemann - www.jensbrueggemann.de)
Figure 9-31: Photographing designer eyewear is fun; however, you have to be careful about which light shapers are best to use. And from where. I prefer narrow softboxes for this, which I use horizontally, vertically or at an angle, depending on the curvature of the glass. As there are no standard settings in product photography, the same applies here: Just try out different possibilities!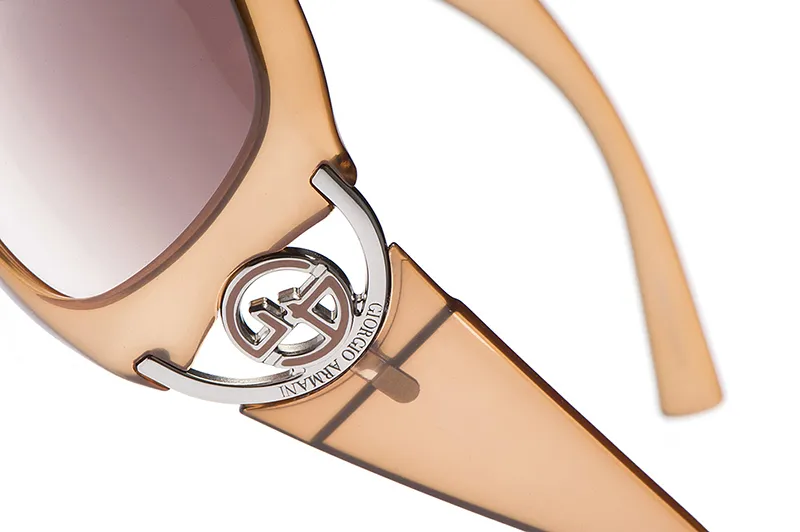
(Photo ©: Jens Brüggemann - www.jensbrueggemann.de)
Preview
In the next (and last) part of this tutorial, we will look at professional lighting outdoors.
