Foreword "Professional lighting technology and lighting control"
A professional flash system does not necessarily make the photos better. But in the hectic day-to-day work of a professional photographer, efficiency is particularly important. Unfortunately, you don't always have time for lengthy trial and error on photo jobs. What usually counts is the price-performance ratio in a predefined (and always too short) period of time. After all, most photographers charge for their work according to time ("daily rates"). And clients naturally expect a fast and smooth production process. (The fact that this can be at the expense of creativity should only be noted in passing) ...
Lighting technology that you can rely on and that can be used and operated quickly and easily is definitely helpful when completing photo jobs!
- What is "the" correct exposure?
- Why does a photographer need lighting technology at all?
- Which light sources are suitable for professional photography and what is the best way to use them?
- Which camera settings are necessary?
- Are there flash systems that are equally suitable for indoors and outdoors?
- What mistakes can be made when using flash units and how can I avoid them?
- What are the differences between outdoor and indoor lighting?
- What do I need to consider when buying flash systems?
- What requirements should professional systems meet?
- Which systems are recommended - and why?
I will explain all these questions in the course of this tutorial series.
Here is an overview of the individual chapters:
Part 1 - What is "the" correct lighting?
Part 2 - Three reasons why lighting technology should be used
Part 3 - Light sources relevant for professional photography (?)
Part 4 - Requirements for professional flash systems
Part 5 - Flash systems for indoor and outdoor use?
Part 6 - Alternatives?
Part 7 - Camera settings when working with studio and mobile flash systems
Part 8 - Practical tips for working with studio and outdoor flash systems
Part 9 - Professional indoor lighting
Part 10 - Professional outdoor lighting
In addition to the many practical tips on exposure and lighting, I will present various professional flash systems. The emphasis here is on "professional" flash systems. I won't be covering "electronic junk" from the Internet here. I will concentrate on those units that I have worked with over the course of 15 years as a commercial photographer and lighting consultant or that have been recommended to me by other professional photographers as being particularly suitable for professional requirements.
This cannot be a market overview; it was important to me that I only report on the technology that I know personally. The practical report will therefore be very subjective and sometimes critical. After all, I want to give you real help in choosing suitable flash units (and not just compile the technical data of different units, as is usually done).
After all, flash units are investment decisions that will be valid for the next twenty or more years. So it makes sense - both because of the purchase price and because of the long service life - to find out exactly which system best meets your individual requirements.
Last but not least, various light shapers are presented in comparison. This allows you to see which light shaper is suitable for which task based on the light characteristics. Examples of professional lighting (from photos taken both indoors and outdoors) round off this tutorial.
Figure 0.1: I hope you enjoy reading and wish you "good light" at all times from Jens Brüggemann, www.jensbrueggemann.de, in April 2013.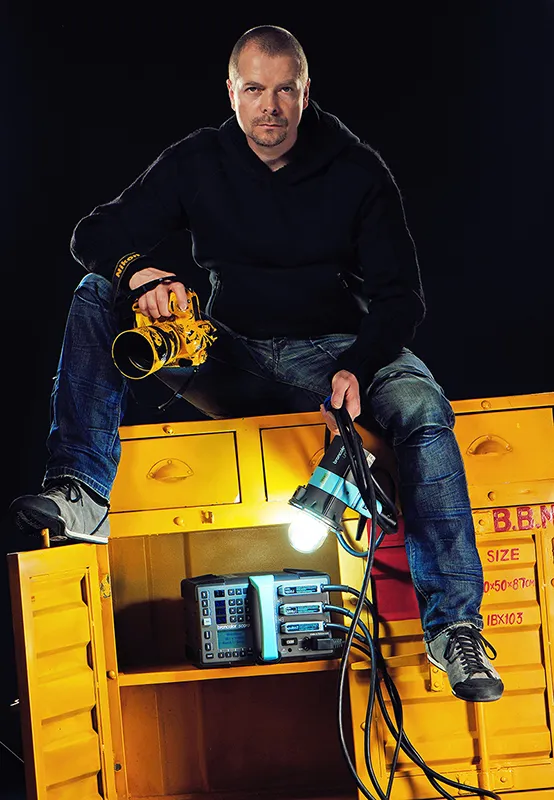
(Photo © 2013: Hodzic ; Lighting: Brüggemann).
1. exposure and lighting
To expose a photo "correctly", you first have to measure the brightness of the subject. A combination of the respective values of time, Blender and ISO sensitivity then results in the "correct" exposure. Unless it is too dark. Then the photographer must provide the lighting so that the camera can expose in such a way that the subject is sufficiently bright.
Figure 1.1: The human eye becomes accustomed to different levels of brightness, which is why even professional photographers find it difficult to estimate the correct exposure. Even in manual mode, professionals are guided by the results of the automatic exposure system, which appears as information in the viewfinder and is implemented by the photographer in the form of selecting a suitable combination of time, Blender and ISO sensitivity (tracking metering).
(Photo © 2013: Jens Brüggemann - www.jensbrueggemann.de)
But is it really that simple? Does it always work so smoothly?
1.1 What is the "correct" exposure?
First of all, the question arises as to what the "correct" exposure is. To answer this, we first need to clarify what the different exposure metering methods are and why they often lead to different results.
1.1.1 Exposure metering methods: light vs. object metering
A distinction is made between light metering and object metering. With light metering, the actual light present is measured at the point that is important for the image, for example on the face, or on the object in product photography, etc. This requires a hand-held exposure meter. This requires a hand-held light meter.
This is (normally) held in front of the subject so that the white dome points in the direction of the photographer's point of view (the photographer's position during the exposure).
Time and ISO sensitivity are usually specified by the photographer, so that the result is the Blender. The combination of preset time, preset ISO sensitivity and determined Blender then results in an exposure that delivers a correctly exposed image. It should be noted that the exposure is correct in relation to the point at which the brightness was measured.
Figure 1.2: This light meter from broncolor not only enables the existing light and flash light to be measured, but also allows the flash unit to be controlled (wirelessly) in 1/10 f-stop increments. This saves time when adjusting the flash up or down. In this example, the measurement of the available light ( ambi for ambience) (with a preset ISO 100 and a time of 1/60 second) resulted in an aperture of 4.0 ½ (i.e. 4.8).
A light meter measures the amount of light that is actually present. This is called light metering. This is much more accurate than the measurement of reflected light (object measurement), as carried out by the light meters built into the cameras. This is because incorrect exposures can occur due to the reflective properties of the subject, for example if a very bright or very dark subject is photographed. These varying degrees of reflection are incorrectly interpreted by the camera's built-in light meter as varying degrees of brightness. A better name for "object metering" would therefore be reflection metering.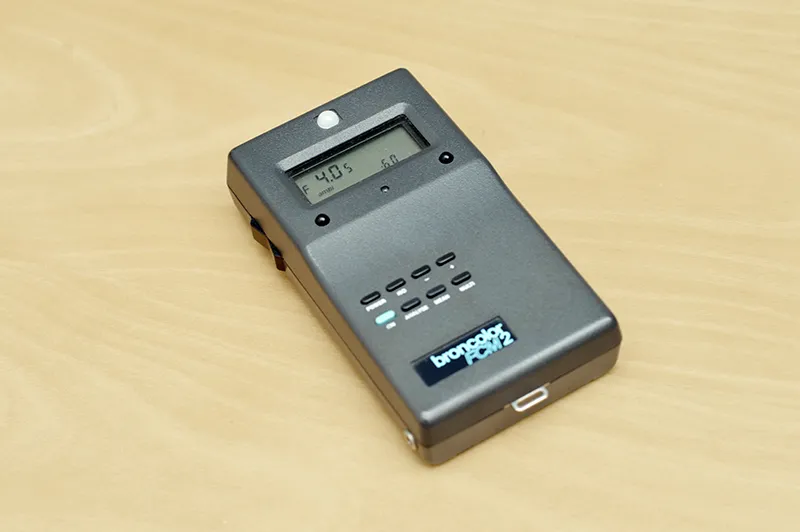
(Photo © 2013: Jens Brüggemann - www.jensbrueggemann.de)
Figure 1.3: The white hemisphere of the light meter is called the calotte. During the measurement, the light meter is normally held so that it points towards the photographer. However, there are exceptions: In backlighting and grazing light, it is best to hold it so that the dome points in the direction of the bisector (i.e. in the middle direction of the photographer's point of view and the direction of the light). Otherwise a correct light measurement would not be possible.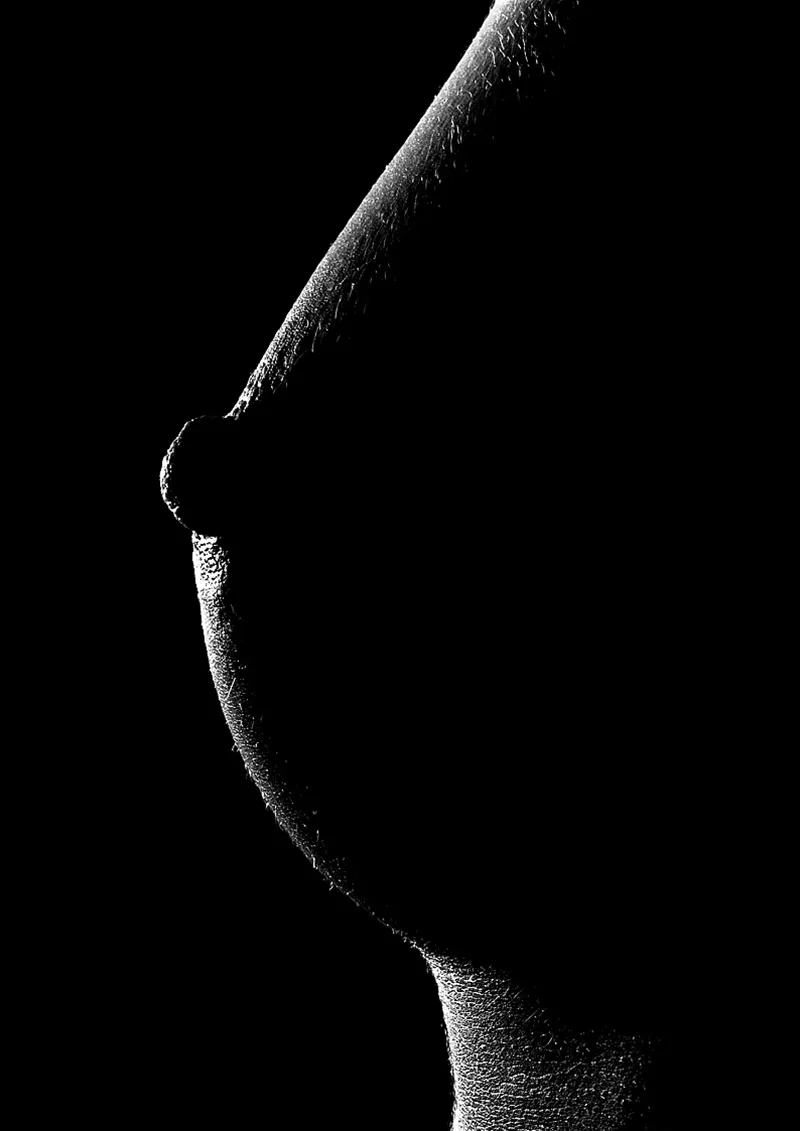
(Photo ©: Jens Brüggemann - www.jensbrueggemann.de)
Object metering, on the other hand, is carried out from the camera. Consequently, the light meter built into the camera is used. The principle here is that the subject brightness is measured by the built-in light meter immediately before the picture is taken, from the photographer's point of view (i.e. from a distance).
But what is actually measured? The brightness of the object to be photographed? No! Only the reflection of the light is measured, i.e. what light is reflected from the object towards the camera. It is immediately obvious that this method is very prone to error, because there are subjects that reflect a lot of light due to the subject colors, for example, and those that reflect little light.
It does not matter whether the matrix (multi-zone), spot or integral measuring method is used. The principle of measuring the reflected light is common to all three.
Figure 1.4: I photographed a white surface and a black surface with program automatic under otherwise identical conditions (especially under absolutely identical lighting conditions). The light meter built into the camera turned both into a gray surface. The reason for this is that the light meter is calibrated to a medium gray value (18% gray). The object metering method leads to incorrect results if the average subject brightness does not correspond to 18% gray.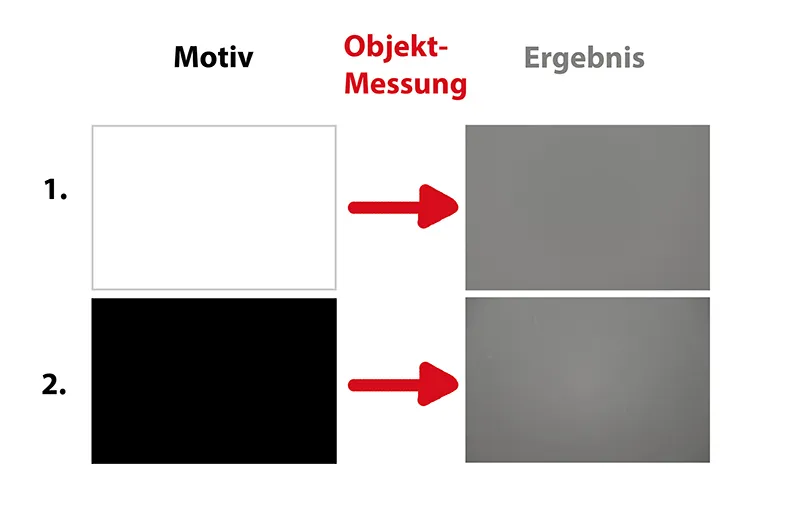
Figure 1.5: If I had used a handheld light meter (and thus used the light metering method), the result would have been as shown here. This method is therefore clearly superior to the object metering method, it is more precise.
To be fair, however, it must be admitted that in the vast majority of cases the object metering method produces usable results. In most cases, subjects such as family celebrations, landscapes, crowds of people etc. produce an average gray value in the average sum of all brightness values. Nevertheless, the photographer should be able to recognize the exceptions and take appropriate countermeasures in order to achieve usable results.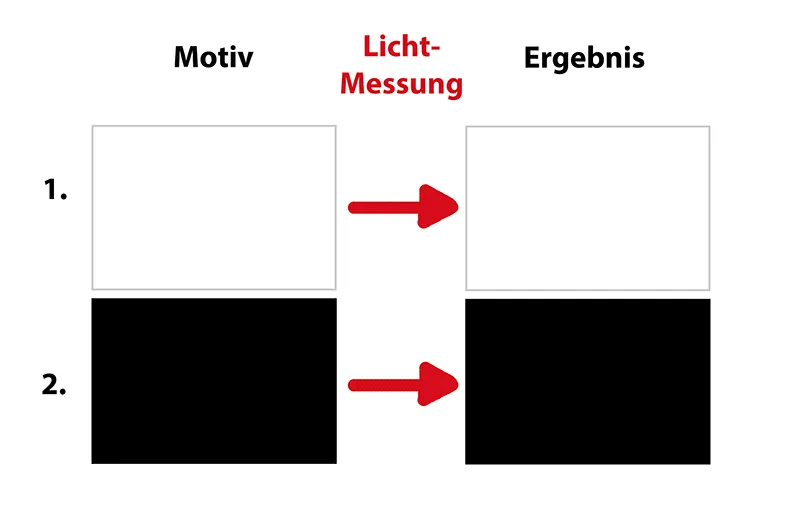
Figure 1.6: Photographers who use one of the camera's automatic settings can still achieve optimum results with critical subjects (which are likely to be too dark or too bright due to their reflective properties) by using exposure compensation (also known as plus-minus correction). If there is a risk that the subject will be rendered too dark (for example, if a blonde-haired woman in a white dress is standing in front of a white wall), the exposure compensation should be set to approximately +2.
The same applies to shots of a snowman on a snow-covered meadow. If you want the snowman to appear bright white in the photos instead of dirty gray, the exposure compensation should also be set to +. The situation is different, however, if you want to photograph a chimney sweep from South Africa in front of a black wall, for example. Then an exposure compensation of approximately -1 or -2 is necessary so that the photo is not too bright.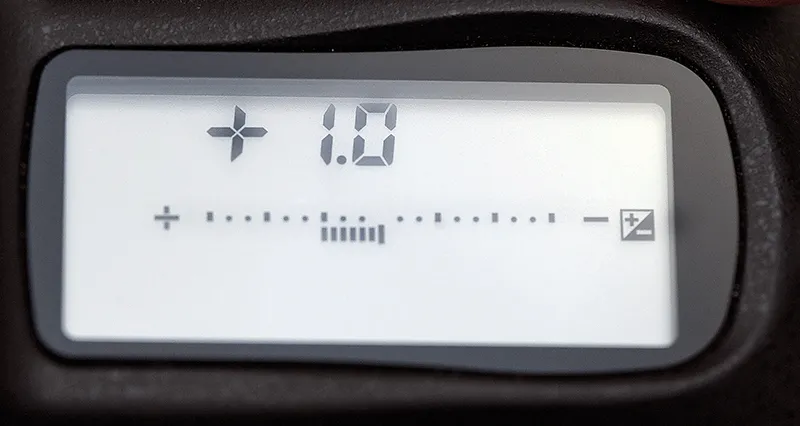
(Photo ©: Jens Brüggemann - www.jensbrueggemann.de)
The advantage of object metering (which should better be called reflection metering) is the ease of use for the photographer. He can leave the measurement to the camera's built-in light meter immediately before taking the picture without any additional effort. He does not need to leave his position and does not lose any time. Ideal for press and sports photographers or when photographing distant objects (e.g. landscapes) where it is not possible to measure the actual light directly on the object to be photographed.
A photographer who is aware of the problem and thinks about it (and counteracts it with exposure compensation for critical subjects) can also achieve optimum results with object metering. Anyone who owns a hand-held light meter and has the leisure to use it will get precise results and deliver correctly exposed photos.
The pitfall of using a hand-held light meter, however, is that the time between the light measurement and the actual shot can be long enough for the lighting conditions to change imperceptibly but significantly, so that the measured values may already be out of date under the new lighting conditions. (Of course, this only applies to the available light; studio flashes usually remain constant in terms of power output).
Figure 1.7: The human eye quickly becomes accustomed to changing lighting conditions. Differences in brightness, provided they are not abrupt, may therefore go unnoticed. The combination of clouds and wind often results in constantly changing light conditions (especially at sea). If you try to take photos purely manually, without built-in automatic exposure and without using a light meter, you are "lost":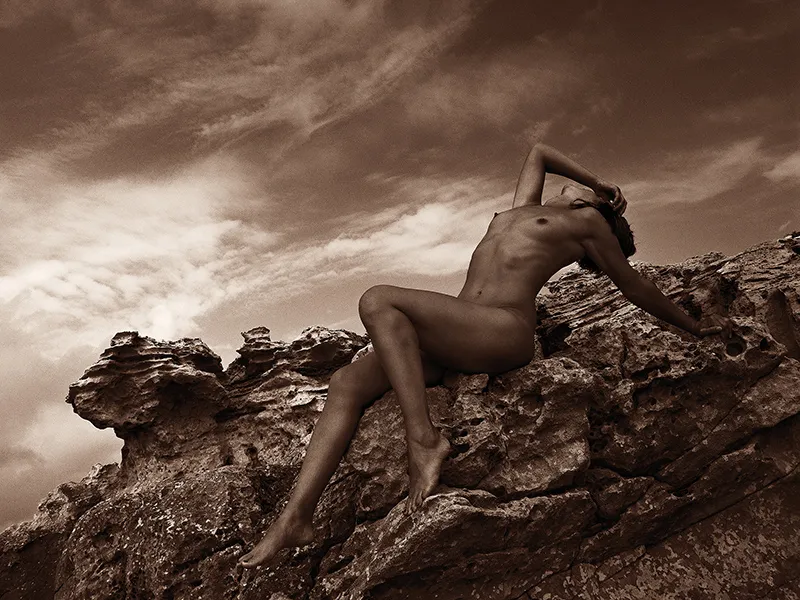
(Photo ©: Jens Brüggemann - www.jensbrueggemann.de)
Even professional photographers cannot simply estimate the exposure by selecting the time, Blender and ISO setting so that all photos are correctly exposed. Even professionals need a guideline according to which they select their settings.
Manual metering does not mean that the photographer estimates all the parameters, but that he chooses the combination of time, Blender and ISO value that seems suitable to him, but aligned with the measurement of the (camera-internal or external) light meter.
1.1.2 High key and low key
However, the "correct" measurement determined does not always lead to the desired result. There are enough examples where we do not want to have photos based on an average brightness value. For example, who wants to look at photos from a winter vacation where the snow-covered landscape looks dirty grey? Or where the newly purchased black sweater looks washed out in the photo?
Figure 1.8: If you rely on the built-in light meter for this motif, the result will be a photo that is too dark. Such photos, in which the bright areas of the image clearly predominate, are called high-key shots.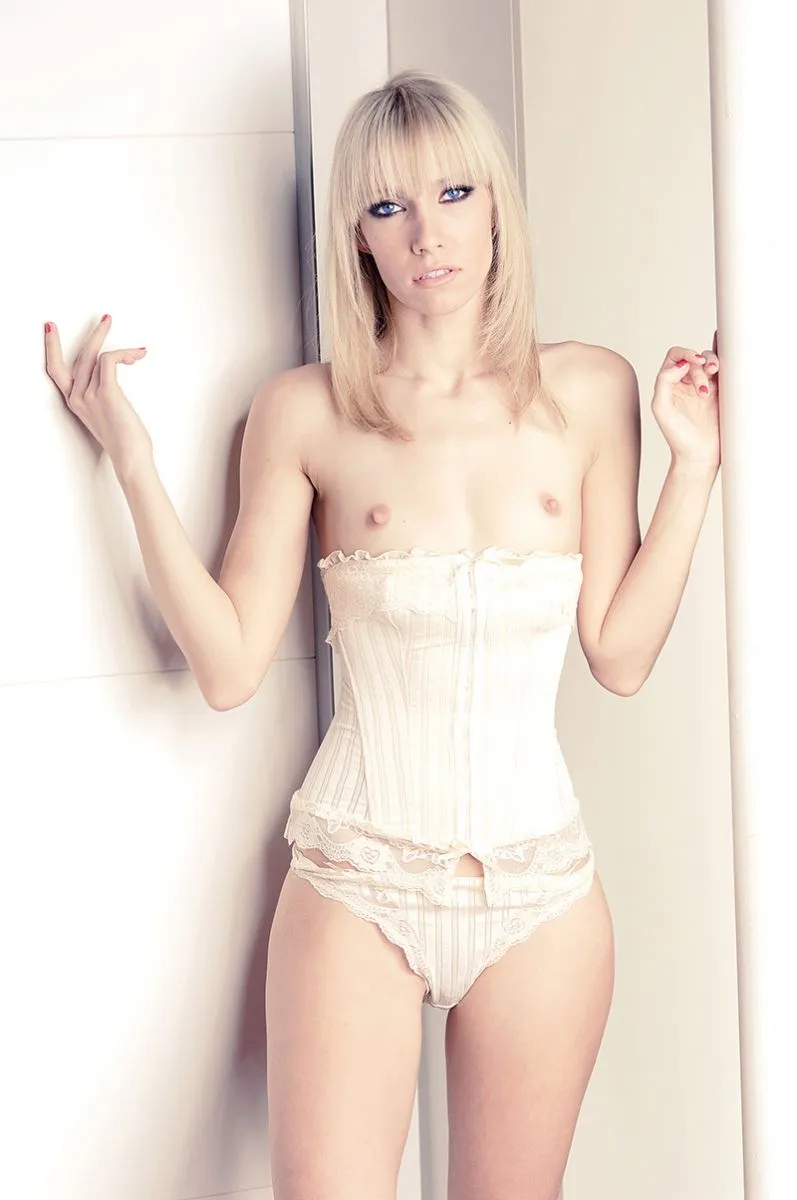
(Photo ©: Jens Brüggemann - www.jensbrueggemann.de)
Many photographers mistakenly equate high key with "lots of light" and low key with "little light". This is wrong! The high-key or low-key character of a photo does not depend on whether a lot of light was available or used, but only on whether and to what extent it was overexposed or underexposed or on the colors or reflective properties of the photographed subject and the surroundings depicted.
Figure 1.9: In this low-key photo, I used "a lot" of light in order to be able to stop down the Blender as far as possible to achieve the greatest possible depth of field. "A lot of light" here means 1,200 watt seconds. Nikon D3X with 2.8/70-200mm Nikkor at a focal length of 200mm. 1/160 second, Blender 22, ISO 100.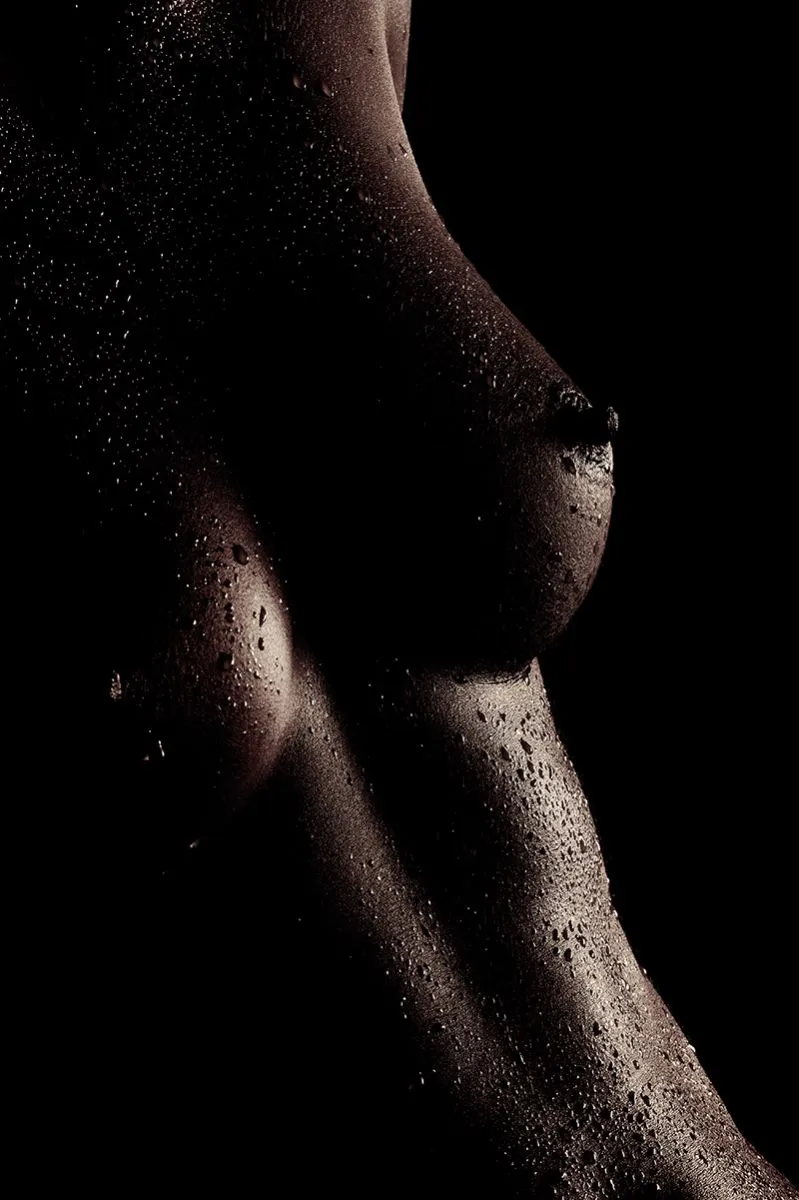
(Photo ©: Jens Brüggemann - www.jensbrueggemann.de)
There are therefore two methods of achieving a high-key or low-key photo:
- By deliberately overexposing or underexposing, or 2. If the subject is predominantly composed of bright (or dark) image elements (and is correctly exposed, i.e. for example by light metering using a handheld light meter).
Sometimes, however, very bright areas in the subject (e.g. lamps such as car headlights shining into the camera) cause the photo to be underexposed (often unintentionally) and thus become a low-key photo.
Figure 1.10: This photo was taken in strong backlighting on October 21, 2008, in the afternoon at 3:57 p.m. on Ibiza, in bright sunshine. In order to emphasize the shapes of the rocks and bodies, I decided not to correct the brightness of the backlight. Canon PowerShot G9 with 7.4-44.4 mm with 7.4 mm focal length used. 1/6000 second, Blender 8, ISO 80, program automatic. Multi-zone metering.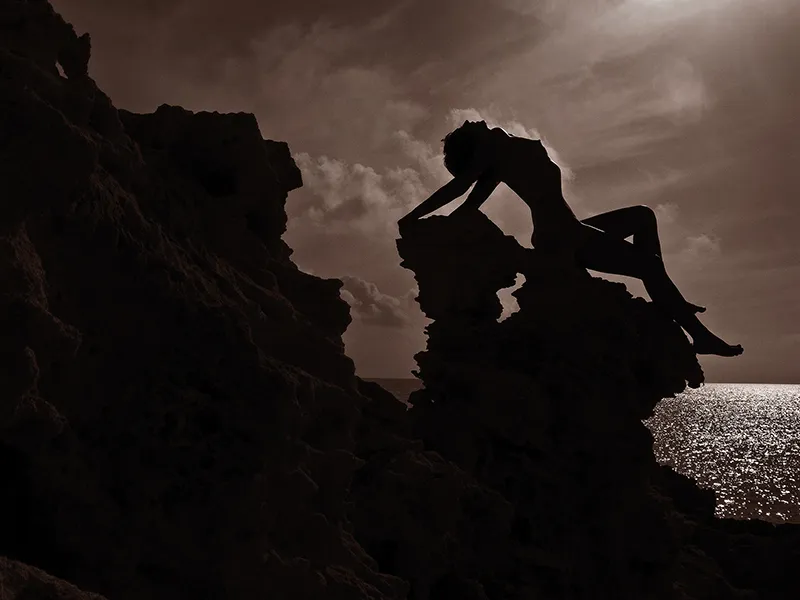
(Photo ©: Jens Brüggemann - www.jensbrueggemann.de)
1.1.3 The "theory of relativity" in photography
What we humans perceive highly subjectively as "a lot of light" or "little light" cannot be quantified. There is no such thing as "much light" or "little light" in photography, because it depends on
- how much light we
- how long
- on a light-sensitive medium.
The statement "There was a lot of light" is therefore relative. It says nothing about whether the photo is normal, overexposed or underexposed.
In this respect, it can be very bright during the day in midsummer - if the photographer wants to, he can still take underexposed photos. In the same way, it is possible to take overexposed photos at dusk (by using a tripod and a long exposure or by selecting an extremely high ISO sensitivity). The photographer alone (ideally) decides what the photo will look like.
1.1.4 The significance of the histogram
I have often been taken aside by participants in my workshops and told that the photo already looks quite good, but that the exposure still needs to be corrected because the histogram does not yet have the ideal curve. These participants complained that the curve shows deflections almost exclusively in the highlights. And that was at least sub-optimal, if not completely wrong.
My advice to judge the shot based on the photo and not on the curve of the histogram fizzled out: No, the histogram clearly shows that the shot is overexposed and therefore wrong, said the participants. But they were wrong. Everything was done perfectly correctly, because the photo was of a blonde model in a white blouse in front of a white wall. The histogram must have the shape described. A correction, on the other hand, would have made the model's blouse look gray, as would the wall. And that would have been wrong!
Quite a few photographers prefer to have the histogram displayed immediately after taking the picture instead of the picture taken for checking purposes. They hope to be able to detect any errors in the exposure of the photo using the histogram.
For me, the histogram is completely meaningless. I can't recognize anything with its help that I wouldn't recognize from the photo taken. Not everything that is technically feasible has to make sense ...! No dedicated photographer can be caught taking photos with one of the motif programs (for example "Portrait" or "Landscape" or "Sport") - so why cling to the histogram as a source of supposedly universal truth? The histogram merely shows the distribution of the various brightness components in the photo. The histogram shows the proportion of pixels of different brightness/color.
It is a bar chart because it shows many different brightness values, from the deepest black to the brightest white. As there are normally no purely uniform color gradients in a photo, but rather differently bright and dark areas with shadows and highlights, the histogram shows jagged curves. These jagged curves represent the frequency distribution of a certain brightness value. It is not uncommon for the histogram to be misinterpreted by inexperienced users, for example in the case of subjects with high contrasts, unusual color distribution (as can be found in monochrome subjects) and in the case of high-key and low-key subjects.
Figure 1.11: Shown here is the histogram with an often postulated "normal distribution". The deflections are greatest in the centers. At the edges there are only a few deflections, which means that there are only a few areas in the image with extreme depths and brightest highlights.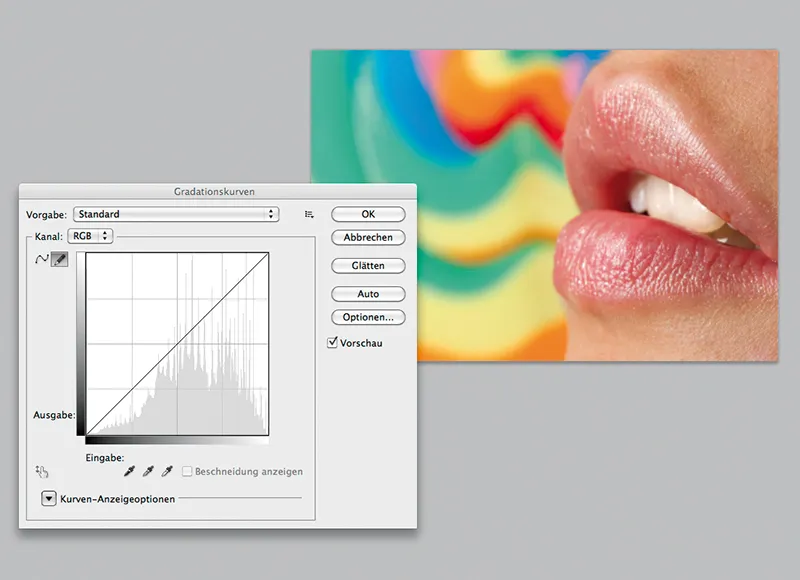
(Photo ©: Jens Brüggemann - www.jensbrueggemann.de)
Quite a few photographers are only satisfied when they have taken a photo that - in terms of the frequency distribution of the brightness values - corresponds to the example shown here. If the histogram has the shape shown here, it is also referred to as the "normal distribution" of the histogram.
If the shape of the curve is different, the exposure is corrected until approximately this shape is achieved. The background to this is the desire to achieve an almost "mathematically calculated" (correct) exposure. But what is wrongly sought here as the optimum is the misunderstood belief in the infallibility (of the Pope and) of mathematics.
That is wrong!
Photos cannot be calculated. Adhering to a certain curve of the histogram, for example, says nothing at all about the quality of the photo!
On the contrary! It is often the unusual photos that inspire, also in terms of exposure. One of the reasons why high-key and low-key photos are so popular with photographers is that they represent an alternative to the (exposure-related) uniformity, to normality.
But let's take a look at the histograms of a high-key and a low-key photo:
Figure 1.12: A photo of two light-skinned blondes kissing must look different in terms of exposure than that of two black girls kissing. In the example on the left, the deflections in the light areas can be clearly seen in the histogram, while vice versa in the example on the right, the deflections occur in the depths.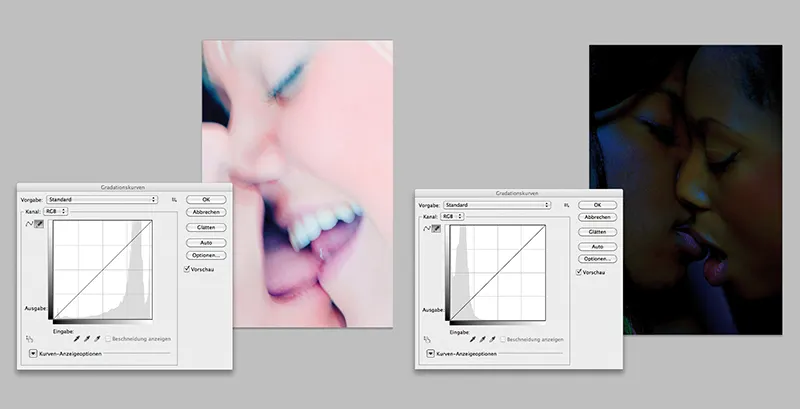
(Photo ©: Jens Brüggemann - www.jensbrueggemann.de)
Conclusion
The histogram gives the photographer the illusion of a seemingly scientifically sound decision-making aid as to whether the photo has been correctly exposed. Anyone who interprets the histogram in this way will always be disappointed by the results. It is better to assess the photo in its entirety and then decide whether the selected exposure suits the subject - or whether a different exposure, an overexposure or underexposure, for example, would lead to a better result.
1.2 F-stops
In order to make the quantity of light comparable, even if we are talking about different exposure parameters, photographic practice likes to calculate in f-stops. One f-stop more means twice the increase in light (brightness). Accordingly, one f-stop less means halving the light (brightness).
The term "Blender" comes from the aperture in the lens: opening it by one stop means that twice the amount of light passes through the lens (under otherwise identical conditions, i.e. at constant speed and the same ISO value).
The shutter speed and ISO sensitivity can also be calculated in f-stops: Doubling the shutter speed, for example from 1/60 second to 1/30 second (2* 1/60 = 2/60 = 1/30), causes the photo to be twice as bright as before. Similarly, doubling the ISO sensitivity from 200 ISO to 400 ISO means that the sensor reacts twice as sensitively to the incident light and the photo becomes twice as bright.
Note: Light adds up
Light adds up. Anyone who has ever switched on a lamp in their living room and then switched on more lights after it seemed too dark knows this. Doubling the amount of light (in terms of time or as a doubling by two identical light sources) causes the brightness (in our case: the resulting photo) to double.
Figure 1.13: Flash units are also calculated in f-stops. This flash generator (broncolor Scoro) has three lamp connections whose output can be set individually ("asymmetrically"). The value 9 was set for lamp connection 1 (the maximum value usually used by flash system manufacturers is 10). This means that it is 5 f-stops higher than lamp connection 2 and a further 3 f-stops higher than lamp connection 1 (i.e. a total of 8 f-stops more power output than connection 1). In addition to the display in f-stops, the power in joules (= watt seconds) can be displayed in the menu.
To check: 25 joules are 5 f-stops less than 800 joules: 800 - 400 - 200 - 100 - 50 - 25. Each halving of the power (here: each step to the right) corresponds to one f-stop. The Scoro allows a maximum power of 1600 joules and a minimum power of 3.1 joules to be used. This allows the photographer to take product shots using a lot of light output as well as portrait photos with a shallow depth of field using very little flash output. This is referred to as the control range of the flash unit. This generator can be adjusted from 10 (1600 joules) down to 1 (3.1 joules). The control range is 9 f-stops. The power can be halved nine times (starting from the maximum power of 1600 joules).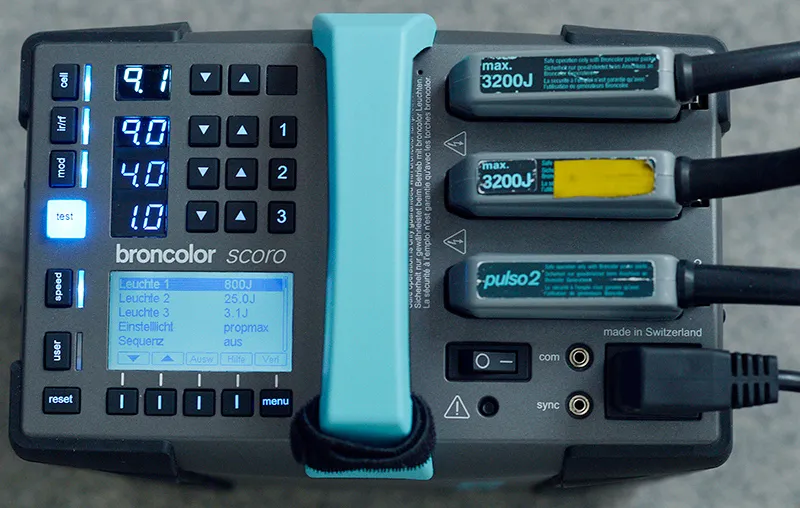
(Photo ©: Jens Brüggemann - www.jensbrueggemann.de)
Note: The greater the control range of a flash system, the more options are open to the photographer. A control range of 9-10 f-stops for professional generator flash units is now the upper standard. For compact flash units, a control range of 7 f-stops (e.g. the Profoto D1) is top of the range. A control range of 4-5 f-stops is more normal.
When buying a new flash unit, I recommend that you make sure it has a large control range so that there are no (technical) limits to your creativity and you don't need several flash units for different purposes! The next parts of this tutorial will deal in detail with the requirements that lighting technology should fulfill.
1.3 The interplay between time, Blender and ISO sensitivity
To help you better understand the following explanations, the usual values (in whole Blender steps) of the three exposure parameters shutter speed, a perture and ISO sensitivity are listed first:
Shutter speed (in seconds)
8 - 4 - 2 - 1 - ½ - ¼ - 1/8 - 1/15 - 1/30 - 1/60 - 1/125 - 1/250 - 1/500 - 1/1000 - 1/2000 - 1/4000 - 1/8000
A step to the right here means a decrease in the amount of light by a factor of 2: The light hitting the sensor is halved because the time available for this is also halved.
Blender
1,0 - 1,4 - 2,0 - 2,8 - 4,0 - 5,6 - 8,0 - 11 - 16 - 22 - 32 - 45 - 64
A step to the right here means a decrease in exposure by a factor of 2: The light hitting the sensor is halved because the opening (of the Blender) through which the light falls has become smaller. So much so that the amount of light is halved for the same amount of time.
ISO sensitivity
50 - 100 - 200 - 400 - 800 - 1600 - 3200 - 6400 - 12800 - 25600
A step to the right here means an increase in exposure by a factor of 2: the light hitting the sensor (which remains the same) is weighted twice as much because the sensitivity of the sensor has been set to double the sensitivity.
As we know, the combination of these three parameters (shutter speed, aperture and ISO sensitivity) results in a specific exposure. This was already the case with the first camera. And nothing has changed to this day!
Figure 1.14: Just as with new digital cameras, the exposure of old models was determined by the three parameters shutter speed, aperture and ISO sensitivity (of the film material).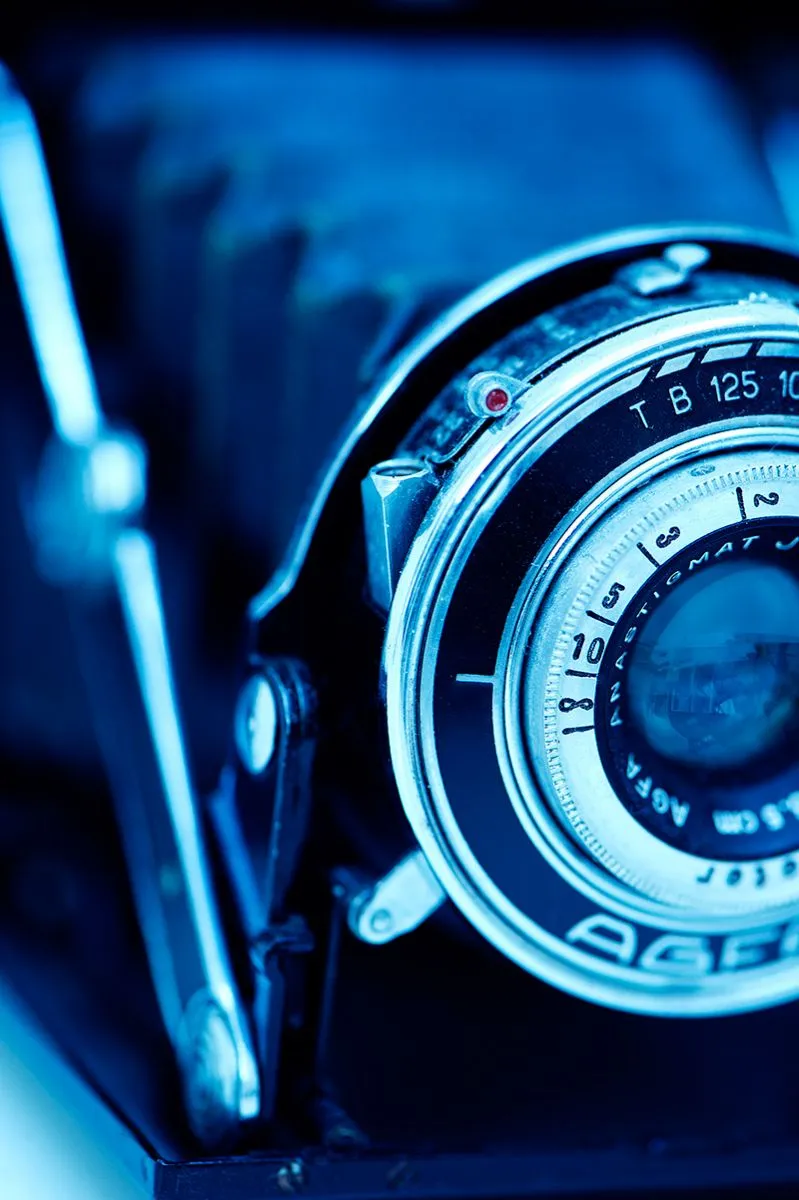
(Photo ©: Jens Brüggemann - www.jensbrueggemann.de)
Figure 1.15: This photo, which was taken with the Canon PowerShot G11, was exposed as follows: 1/2000 second (shutter speed), aperture 4.0, ISO sensitivity 100.
(Photo ©: Jens Brüggemann - www.jensbrueggemann.de)
The parameters 1/2000 second, Blender 4.0, ISO 100 resulted in this exposure for the photo shown above. I was working with program automatic, so I should actually write that the camera (after measuring with the built-in light meter) selected these values (according to a scheme unknown to me). I could have intervened as a photographer, but when I took the photo of this cortijo, I was only interested in documenting it as a location for my workshops abroad.
I could also have chosen a different combination of parameters, for example:
1/500 second, Blender 8.0, ISO 100
or 1/125 second, Blender 11, ISO 50
or 1/1000 second, Blender 16, ISO 800.
All these combinations (and many more) would result in the same brightness of the photo. Differences would only be seen in the different image quality (when higher ISO values lead to image noise), different depth of field extension (due to different aperture settings) and blurring and smudging effects (at different shutter speeds). At first glance, however, the photos would look identical because these different combinations all result in the same image brightness.
Another example: The following parameter constellations lead to the same exposure (same brightness of the photo):
1/125 second, Blender 5.6, ISO 400
or 1/500 second, Blender 4, ISO 800
or 1/8 second, Blender 11, ISO 100
or 1/30 second, Blender 8, ISO 200 or 1/30 second, Blender 16, ISO 800 and so on. As you can now easily understand, there are many time/blender/ISO combinations that all lead to the same exposure (!). But since these three parameters also have other effects on the image result, it is not always advisable to rely on the combination suggested by the camera. It is better to check which parameter setting would be advisable for creative reasons, for example.
Exercise:
Figure 1.16: Fill in the missing fields in the table so that the same exposure results in each case.
| Time | Blender | ISO | |
| Output combination | 1/60 | 8 | 400 |
| Variant 1 | 1/500 | ? | 200 |
| Variant 2 | ? | 2,8 | 800 |
| Variant 3 | 1/4 | 11 | ? |
| Variant 4 | 1/30 | 5,6 | ? |
| Variant 5 | 1/1000 | ? | 1600 |
| Variant 6 | ? | 8 | 100 |
You can check whether you have calculated correctly here: www.jensbrueggemann.de/news.html (entry from 31.12.2012).
Figure 1.17: Ultimately, as a photographer - in terms of exposure - you only have these three parameters: Time, Blender and ISO sensitivity. Their interaction leads to a correct or incorrect exposure. However, they are also important factors for creative composition. By selecting the appropriate shutter speed, you can freeze movement (e.g. flying hair on a runner) or depict it (e.g. the flowing water of a mountain stream). Nikon D700 with 4.0/24-120mm Nikkor using a focal length of 120mm. 1/800 second, Blender 7.1, ISO 200.
(Photo ©: Jens Brüggemann - www.jensbrueggemann.de)
In terms of the camera's capabilities, we have covered everything that can have a creative influence on the exposure with the three parameters of time, aperture and ISO sensitivity. However, there is a fourth way of influencing the exposure, namely the deliberate setting (or taking) of light. To do this, however, we leave the technical camera side and expand our creative potential to include lighting technology.
Photographers expand their creative scope when they actively add (or take away) light from the subject. This adds a fourth parameter to the three exposure parameters: the actively added (or removed) light. From now on, the photographer has the following four parameters to control the brightness of the image:
- Shutter speed = camera
- Aperture = camera
- ISO sensitivity = camera
- Additional lighting = lighting technique
Note
There are three reasons for using lighting technology: 1. practical reasons, 2. technical reasons and 3. creative/design reasons. We will deal with these in detail in the next part of this tutorial: Chapter 2: "Three reasons why lighting technology should be used".
