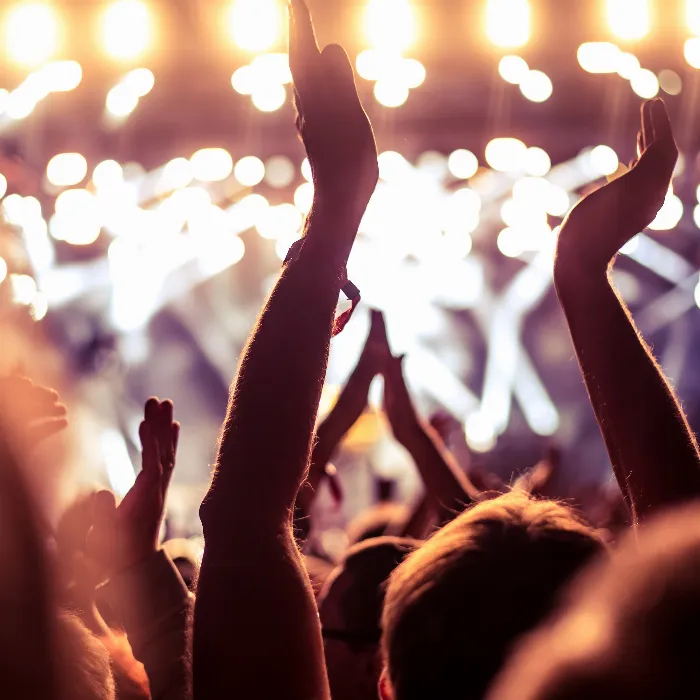
So before you start thinking about setting the three exposure parameters shutter speed, aperture and ISO setting while preparing for the concert, try to find out what the lighting situation will be like in the concert hall. If this is not possible, you will be forced to do this just before you start photographing, right at the beginning of the concert in the press pit.
9.1 White balance
Color casts in the color of the dominant spotlight(s) are a desired effect in concert photos. For this reason, you could actually say that the white balance does not play a role. But that would not be entirely correct.
Even if most concert photos essentially live from being colorful or at least quite colorful, a wrong color (hue) can be quite disturbing, at least in the face of the artists.
Figure 9.1: At classical and pop concerts, a strongly colored light show is generally frowned upon. Here the lighting conditions are much more pleasant for us concert photographers, especially as the lighting doesn't change so quickly. Pictured here is a visibly exhausted Udo Jürgens at his concert on October 23, 2006 in the Max-Schmeling-Halle in Berlin.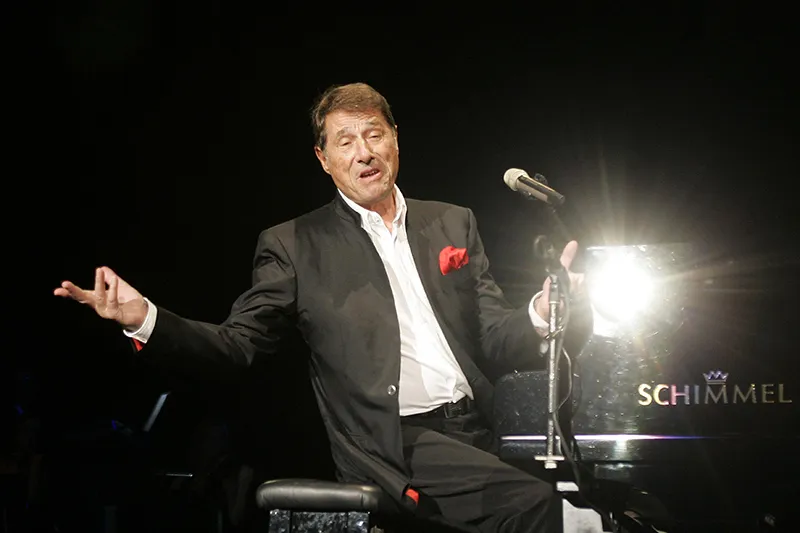
(Photo © 2006: DAVIDS/Sven Darmer - www.svendarmer.de)
Actually, the lighting technicians responsible for the light show during a concert should follow the rule of using multi-colored spotlights from behind, off stage, and only white, neutral light from the front to illuminate the artists. This would ensure that the musicians "come across" well and presentably in all photos.
However, most lighting technicians don't think about what we photographers would want and how the colors of the spotlights used to illuminate the musicians' faces would look in the photos. This is certainly different for important TV recordings of large live concerts; for the majority of concerts, however, we photographers have to reckon with everything - at least with regard to the lighting situation.
Figure 9.2: At most live concerts, the most colorful light show possible plays an important role. It can quickly happen that the band members are exposed to colored light. This doesn't always have to be disturbing, as in this photo. For close portraits of the artists, however, we photographers usually want a more "neutral", white light, at least on the faces of the performers. The photo shows drummer Iain Bayne at work. RUNRIG concerton August 29, 2012 in Bochum/Witten, as part of the Ruhr Tent Festival. Nikon D4 with 1.4/85 mm Nikkor. 1/250 second, aperture 2.2, ISO 2,500. automatic exposure Blender priority (aperture priority).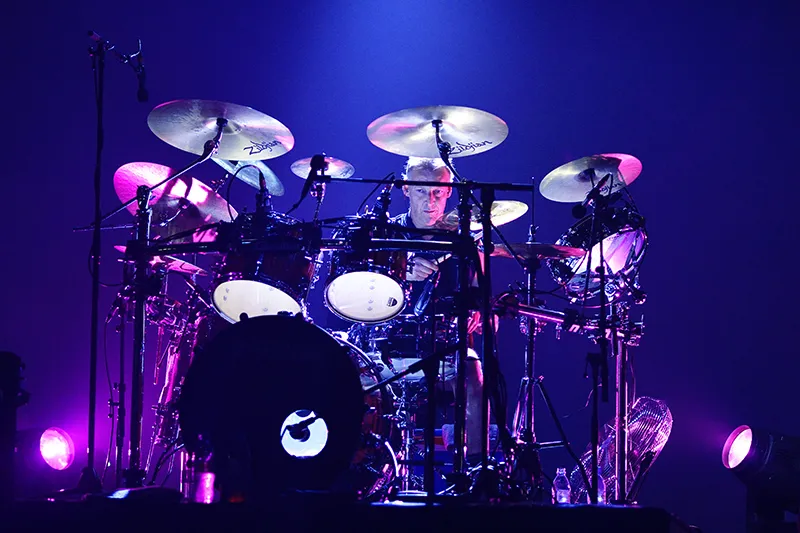
(Photo © 2012: Jens Brüggemann - www.jensbrueggemann.de)
Now, many concert photographers could go and set the white balance to automatic per se. But this has disadvantages, which is why I recommend a different approach: Shoot in RAW format! This allows you to change and adjust the white balance afterwards.
Then decide on a specific white balance; either artificial light or daylight or even a fixed manual setting. Even if this is not always correct and the automatic setting would often produce better results. However, this has the advantage that if several photos (with the same work steps) are to be edited in post-processing, you can also carry out the color adjustment steps identically.
If all photos of a concert were photographed with the same white balance, the image processing can also be largely automated (save the command sequence in Photoshop under Actions!). If, on the other hand, you were to take all the photos in automatic mode, the photos would turn out differently, which would make it impossible to edit them using fixed command sequences.
Figure 9.3: Culcha Candela at the concert on August 20, 2011. If the light is too colorful for portrait shots, you should look for other options. Here I decided to photograph the entire stage situation, i.e. the group as a whole, including the stage lighting. Photographers have to be flexible. The conditions are not always ideal. It is not always possible to photograph what you had planned beforehand.
But if you adapt to the circumstances, which are unalterable for us photographers at a live concert, and "make the best of it", so to speak, then you can also take home some great, atmospheric shots.
So don't insist on something that is impossible under the prevailing circumstances. Be flexible, adapt, and then you will be successful. Nikon D3S with 4.0/24-120mm Nikkor with 24mm focal length used. 1/500 second, Blender 5.6, ISO 3,200.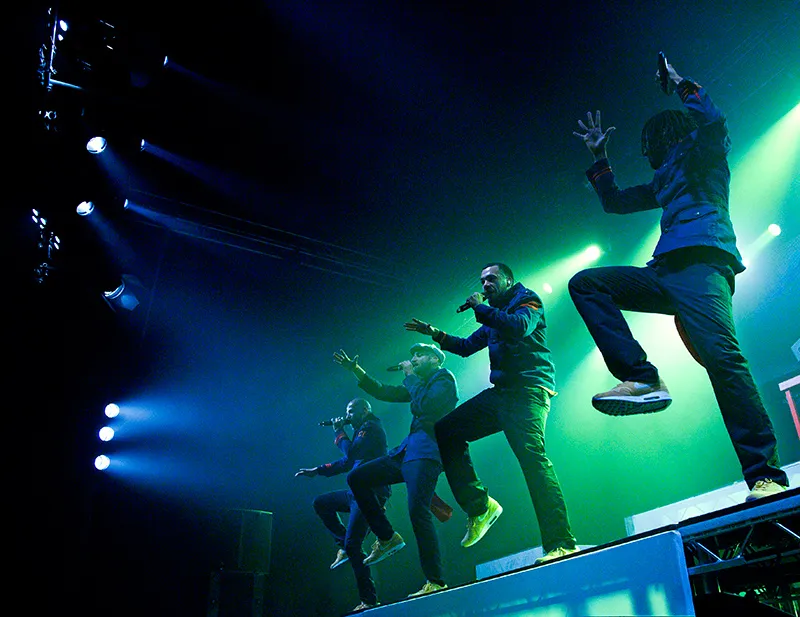
(Photo © 2011: Jens Brüggemann - www.jensbrueggemann.de)
9.2 Automatic image playback
Many photographers do not use the decisive advantage of digital technology, or at least use it far too seldom: the possibility of quickly and easily checking the images taken directly during the shoot (for example, for correct exposure, focus, cropping, facial expression of the artist portrayed, etc.).
Figure 9.4: Peter Doherty in concert at the Berlin Festival 2009 on August 7, 2009. The automatic image playback function, which can be set in the camera menu, allows the last photo taken to be displayed for a short time without losing any time. This means that every concert photographer can quickly check whether the camera settings they have made are producing the optimum result, which is particularly advisable in difficult lighting conditions (as with this photo). I recommend taking a quick look at the results every twenty shots or so, but at least every 1-2 minutes. In this way you can avoid the same error spreading across all the photos you have taken.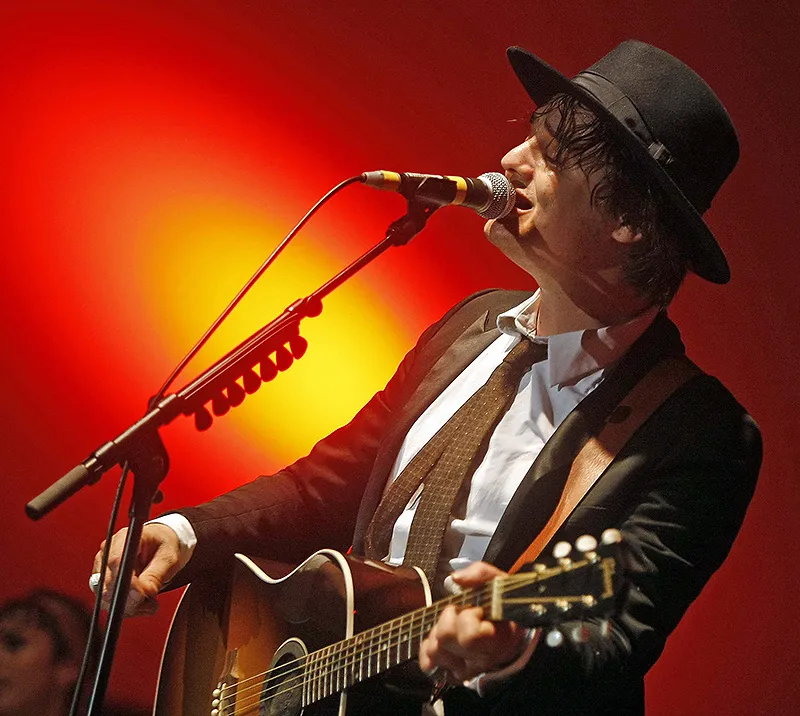
(Photo © 2009: DAVIDS/Sven Darmer - www.svendarmer.de)
You should always take a quick look at the camera display every few minutes to at least check the last shot. It's all too easy to accidentally select the wrong setting (or unintentionally change something) and take pictures for the entire time available.
Then all the shots will be unusable. This can certainly happen, because in the hectic rush of the short photography time (often only for the duration of three songs), many concert photographers get stressed and no longer keep a cool head, but try to take as many photos as possible in the short time available.
However, it is better to set the camera settings calmly and decisively and to at least check the last shot at regular intervals (approx. 1-2 minutes) in order to correct any incorrect settings that make the photos suboptimal.
Note: Don't let the short time available stress you out! Keep a cool head, check the photos you have taken using the automatic image playback (which can be set in the camera menu so that each photo is displayed briefly and in full format, i.e. without pointless additional displays such as histogram etc.).
In any case, it is better to bring home only a few, but usable and good photos from the concert than many bad or even completely unusable ones!
Don't panic if you realize in the middle of the concert that the photos you have taken so far are unusable. Try to think calmly about why this might be the case and then correct the settings. It's easy to inadvertently reach a wheel on the camera in the crowd in the press pit that adjusts the shutter speed, for example. You are no longer taking photos with the previously set shutter speed, but suddenly with a shutter speed that is much too slow, which can result in motion blur and camera shake (if it is clearly too slow for concert photos).
Or the switch is accidentally changed from autofocus to manual focus and all shots are blurred (which you would of course notice with normal and telephoto focal lengths, but not necessarily with wide-angle shots).
It can also happen that you have set the exposure compensation to +2, for example, for a certain lighting situation and then forget to take it out again under different conditions during the concert, resulting in all shots being hopelessly overexposed.
There are many possibilities for incorrect camera settings, which is why a quick check of the camera display every few minutes is essential, especially for concert photographers! (Incidentally, I have seen photographers forget to do this several times in the heat of the concert and have had to leave the press pit with completely unusable photos).
Figure 9.5: The indie rock band Mega! Mega! with singer and frontman Antonino Tumminelli in concert at Bochum Total on July 12, 2013. If I can quickly and automatically display the photos I've taken without having to press any buttons, I save time when checking the images. This is particularly important for concert photos, as you rarely have an abundance of time here. A large camera monitor with a very good resolution is therefore (also) an important purchase criterion for concert photographers! Nikon D800 with 2.8/70-200 mm Nikkor with a focal length of 125 mm. 1/320 second, Blender 3.5, ISO 800.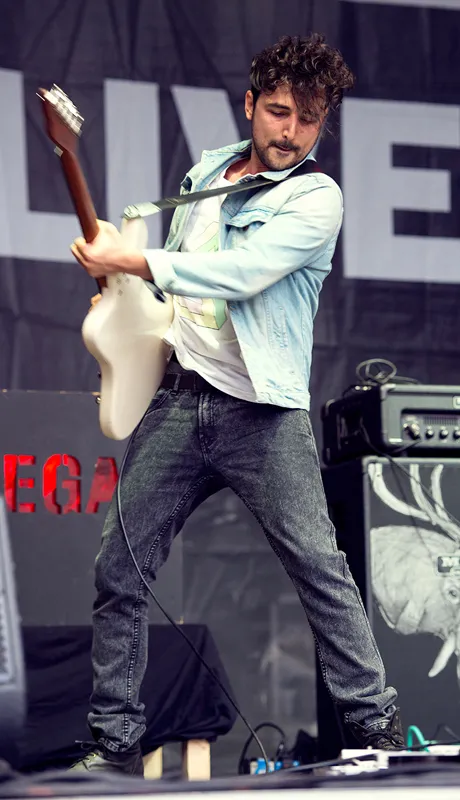
(Photo © 2013: Jens Brüggemann - www.jensbrueggemann.de)
9.3 Autofocus settings
It's hard to imagine, but not so long ago photographers still had to focus manually. It wasn't until the early 1980s that autofocus was added as a feature to 35 mm SLR cameras: in 1981 with the Pentax ME F and in 1983 with the Nikon F3 AF (the one with the bulky autofocus viewfinder and of course only in conjunction with a few special autofocus-capable lenses).
In the meantime, we have become accustomed to having the camera focus automatically. And the ability of many autofocus systems to focus quickly enough in very low light conditions is also impressive and particularly important for us concert photographers. (For example, the autofocus on the Nikon D4 I use still works at up to -2 EV). However, even the best AF moduleis useless if it is used incorrectly by the user. Here, too, the rule applies that the photographer should know exactly what his camera is doing. Unfortunately, this is not always the case: many (concert) photographers do not use a specific autofocus field, but leave it up to the camera to decide which of the up to 51 focus points to use for focusing.
This can be problematic, especially when photographing from the press pit (upwards) towards the stage, because the camera uses the autofocus field that catches the point in the subject that is closest to the camera.
In other words, it focuses on the closest point. However, due to the lower perspective from the pit, this is often (depending on the image section, of course) the artist's thigh, the guitar body or a box standing at the edge of the stage or the microphone stand in front of the artist.
In short, it is more than problematic to rely on what the camera is focusing on. It is better to choose a single autofocus point, or at least a group of points (for example, in the center of the viewfinder).
If you use a single autofocus area, the middle, centered one is the first choice, as this is always the most efficient. In any case, make sure that you only use cross-type sensors for focusing. If you use the center field, you will have to work with autofocus measurement memory, depending on the image composition.
However, this works very simply in single autofocus mode (AF-S). Here, the shutter release button is pressed until the first pressure point and the value is saved until the correct image section has been selected by the photographer and then released by pressing the shutter release button. The use of continuous autofocus (AF-C) can also be useful in concert photography, for example when focusing on the singer who is moving dynamically back and forth on stage. Depending on the camera model and technical progress, however, the use of AF-C leads to a lower hit rate, which is why - if possible (with stationary objects) - AF-S should be preferred.
Figure 9.6: Kurt Ebelhäuser from Blackmail during a short drink and smoke break between two songs at the concert on July 12, 2013 in Bochum. Songs from the band's new, highly recommended sixth album Blackmail II were played here. Blackmail is a German independent band that was founded in Koblenz in 1994. If the artist on stage is as still as here, then the use of single autofocus together with metering is definitely the best choice. This allows you to focus specifically on the musician's face for optimum results. Nikon D800 with 2.8/70-200 mm Nikkor at a focal length of 112 mm. 1/320 second, Blender 3.5, ISO 800.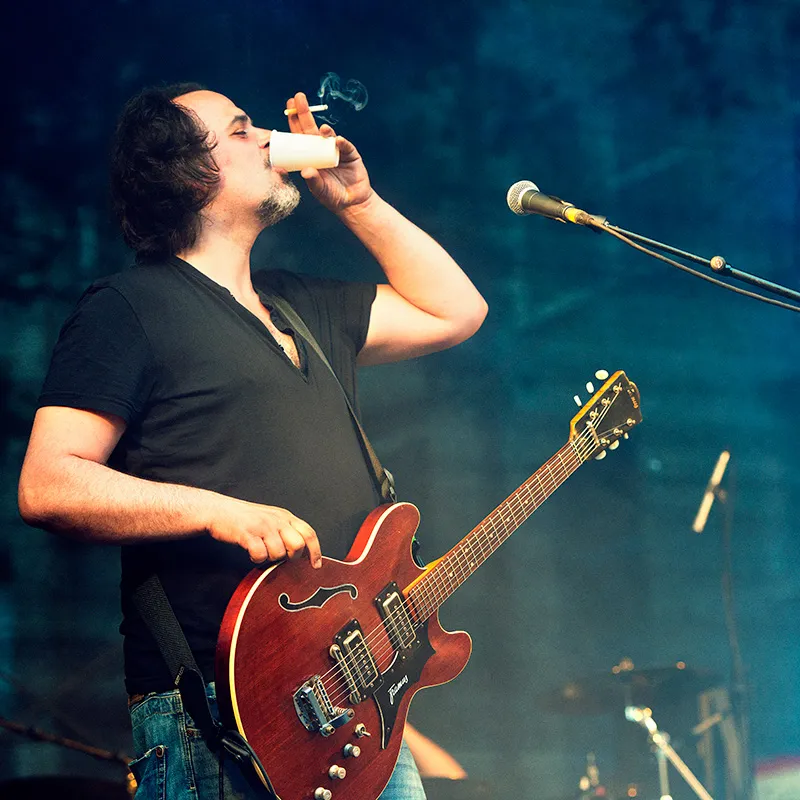
(Photo © 2013: Jens Brüggemann - www.jensbrueggemann.de)
Autofocus (metering field) and exposure control (spot metering) can also be combined: If you use spot metering as the exposure metering method and a single autofocus metering field for focusing, the exposure is measured selectively where the selected autofocus metering field is located.
This can be particularly useful in concert photography if the artist's face is to be correctly exposed (and in focus), but there is different lighting there than in the background of the picture (where colorful spotlights often provide bright backlighting).
However, the reverse is also conceivable in concert photography and is also regularly encountered: The singer is bathed in bright light, while the lights in the background are off and the stage sinks into deep black. If the musicians are also dressed completely in black, which also happens frequently, this method (single autofocus combined with spot metering) is the only sensible approach.
Figure 9.7: A very common situation: The artist is largely dressed in black, the stage background is unlit and is therefore also in complete darkness. The singer is illuminated, but due to the black clothing, a conventional exposure metering method such as integral metering would fail (the light meters of the cameras are calibrated to a medium gray value). The result would be an overexposed photo in which both the clothing and the background would be gray (and therefore too bright), while the singer's face would be far too overexposed.
The best way to deal with such a situation is to use a combination of single autofocus and spot metering. BAP with singer Wolfgang Niedecken in concert on August 24, 2011. Nikon D3S with 4.0/24-120 mm Nikkor at a focal length of 44 mm. 1/200 second, Blender 4.0, ISO 3,200.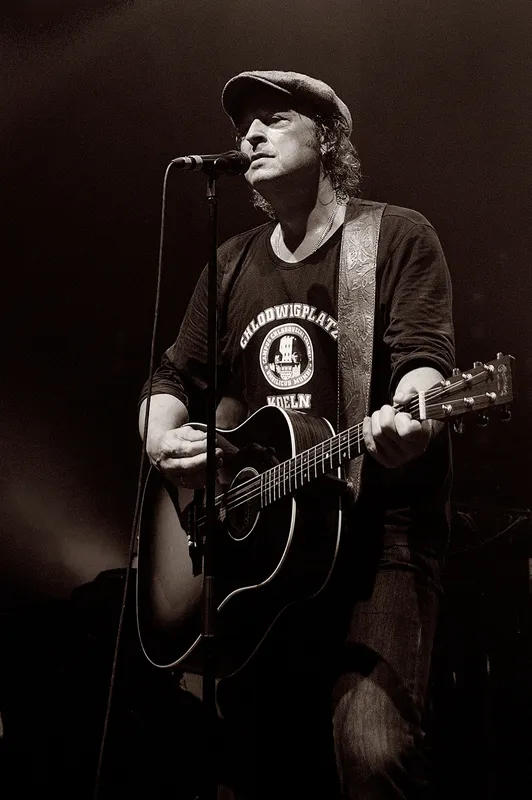
(Photo © 2011: Jens Brüggemann - www.jensbrueggemann.de)
9.4 Camera settings: Automatic exposure
Using one of the camera's automatic exposure settings has great advantages not only in concert photography: The photographer leaves something as banal as the (hopefully correct) exposure of the shot to the camera, allowing him or her to concentrate better on the subject, the composition of the image and getting the right moment. But this approach, if taken uncritically, also harbors risks.
Figure 9.8: SEEED with singer Pierre Baigorry aka Peter Fox in the foreground at a concert in the Wuhlheide in Berlin on August 22, 2013. With motifs like the one shown here, it is important that the photographer does not blindly rely on the time/blender/ISO combination suggested by the camera's automatic system, but rather thinks about it and - if necessary - makes an exposure correction.
This would have resulted in a significant underexposure because large parts of the image have bright highlights and bright fog, which would have distorted the exposure measurement. Exposure compensation of 1-2 f-stops, on the other hand, produces the desired (correctly exposed) result. Canon EOS-1D Mark IV with EF 2.8/24-70mm at a focal length of 32mm. 1/200 second, Blender 6.3, ISO 1,250.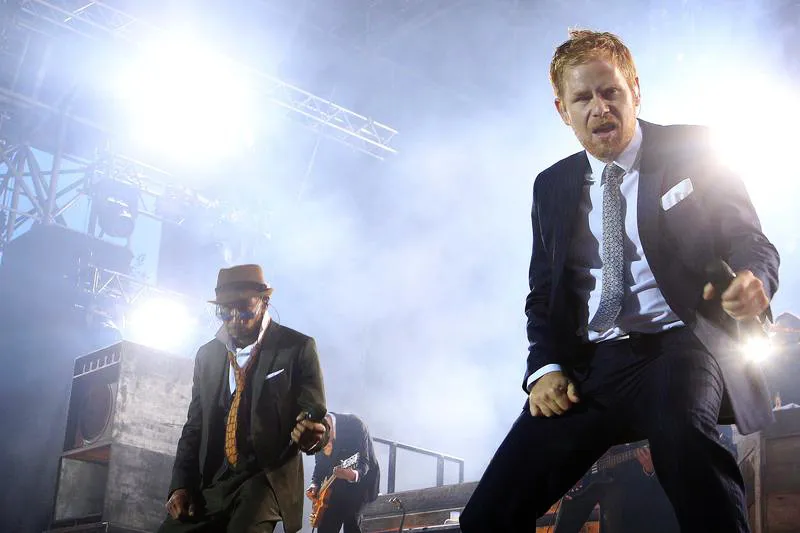
(Photo © 2013: DAVIDS/Sven Darmer - www.svendarmer.de)
Conclusion
The cameras' automatic exposure systems are calibrated to a medium gray value (medium brightness value). If we photograph subjects that deviate from this, the result is underexposure (in the case of many bright image areas, for example backlighting) or overexposure (in the case of many dark image areas, for example black clothing and a black stage backdrop). We must therefore take corrective action if we notice that too many bright or dark areas in the image are preventing the correct exposure (correctly related to the important parts of the image, such as the faces of the artists). It is not for nothing that exposure compensation (also known as plus-minus compensation ) is located in a prominent, easy-to-reach position close to the shutter release button on most camera models; it is a very important, almost indispensable feature of professional cameras.
9.4.1 Automatic ISO?
The use of automatic ISO is absolutely not recommended. Here, the time and Blender are set manually while the camera searches for the right ISO value to expose the shot correctly. The danger here is that the camera may use such high ISO values that the results can no longer be used professionally because the image noise becomes too strong and the photos become unusable for sale, publication or passing on to third parties. After all, a photographer should never hand over poor quality photos.
How high the ISO value of a camera can be without the technical quality suffering varies from camera model to camera model. In addition, it is probably also a question of the photographer's taste, and the intended use also plays a role. For example, the technical quality of a photo that is used for the Internet or appears in a daily newspaper may be lower than if the photo is to be used for poster printing or for a glossy magazine.
Figure 9.9: I have noted the following (subjectively based) limits for the cameras I use: The Nikon D3S used for this photo has a limit of 2,500 ISO. Values above this (here: 3,200 ISO) lead to image noise that no longer meets my high standards, even if the quality is still perfectly adequate for many uses (daily newspaper, Internet publications). I can use the Nikon D4 up to a maximum of 3,200 ISO without clearly disturbing image noise making commercial use of the results impossible. With my Nikon D800, this limit is already reached at 400 ISO. However, it does matter whether the results are correctly exposed or underexposed.
In my experience, a correct exposure at ISO 3,200 looks better than an underexposure of, for example, a whole f-stop (at the same ISO value). The image noise is lower in the first case than with underexposure; at least it is more noticeable in the darker areas with underexposure. It may therefore make more sense to photograph with a higher ISO value (correctly exposed) than with a lower ISO value with simultaneous underexposure. Culcha Candela in concert on August 20, 2011. Nikon D3S with 4.0/24-120 mm Nikkor at a focal length of 82 mm. 1/500 second, Blender 5.0 ISO 3,200.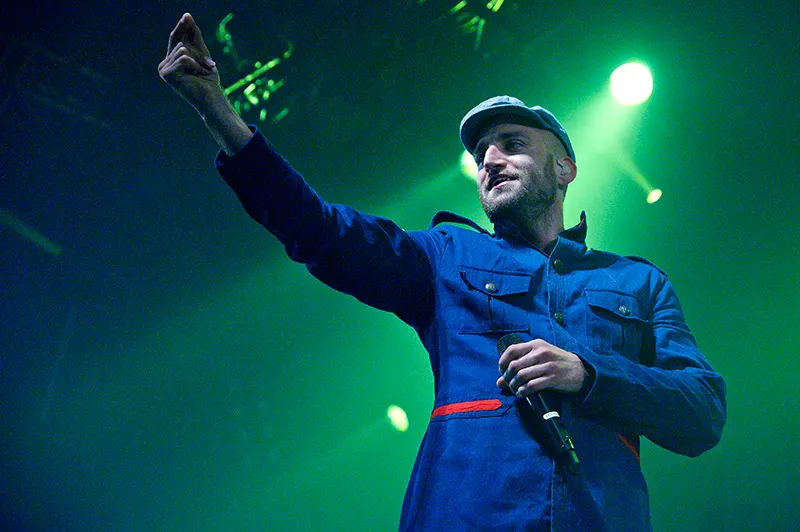
(Photo © 2011: Jens Brüggemann - www.jensbrueggemann.de)
Conclusion on the subject
The automatic ISO setting is not suitable if you value high technical quality in your photos. ISO values can be selected on the camera side that are so high that the image noise in the photo would be too disturbing.
9.4.2 Program, shutter speed or aperture priority?
It doesn't really matter which automatic mode is preferred. It is certainly also a matter of getting used to what we concert photographers use, or a question of photographic style. Good results can be achieved with all three automatic modes.
As mentioned above, it is crucial that the photographer continues to think when using one of the automatic camera modes, i.e. checks whether the automatic exposure system is really determining the correct exposure or whether the photographer needs to intervene to correct it.
Program automatic is well suited for quick snapshots, as the photographer has only decided on an ISO value (in advance) and set it without having to think about a specific shutter speed or Blender while taking the photo. However, if you want to have more influence, for example on the composition of the image, you will prefer a different automatic exposure mode.
Those who like to work with the interplay between sharpness and blur and like to photograph artist portraits so that only the face is sharp and the background is blurred will prefer the automatic shutter speed. In this case, the Blender is also specified (set) with a previously defined ISO value. The automatic exposure control then selects the appropriate shutter speed, which results in the correct exposure.
Figure 9.10: Blackmail with singer Mathias Reetz in concert on July 12, 2013. I like to separate the main actor from the background by placing the focus on him, which, when using an (almost) open Blender (and resulting in a shallow depth of field), causes the background to blur. However, the effect is greatest when the distance from my camera to the subject is as small as possible and the distance from the subject to the background is as large as possible. The decisive factor is that I determine the extent of the depth of field by selecting the Blender, which is why aperture priority is the best choice here. Nikon D800 with 2.8/70-200 mm Nikkor at a focal length of 155 mm. 1/320 second, aperture 3.5, ISO 800, aperture priority.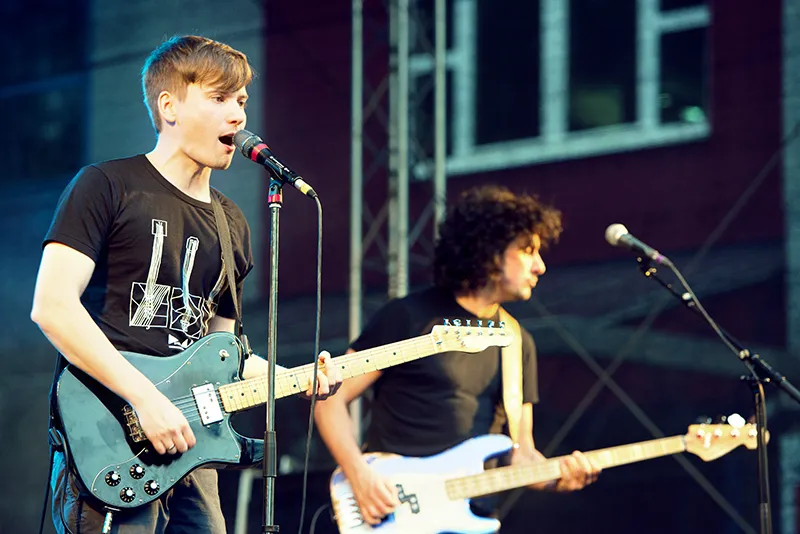
(Photo © 2013: Jens Brüggemann - www.jensbrueggemann.de)
Those who use long and therefore heavy telephoto focal lengths at concerts, for example due to their position from further away, will prefer aperture priority. With a preset ISO value (often at the limit of the value that still delivers low-noise results), a shutter speed is selected that is required to use the heavy lens without blurring. The camera's automatic exposure control (in this case the automatic aperture control) then selects the aperture that guarantees the correct exposure within the shutter speed/ISO combination (with fixed parameters for shutter speed and ISO).
Figure 9.11: If a concert photographer chooses to shoot with a certain fast shutter speed, it is either because he or she is using a heavy lens or because the artist is constantly moving on stage. Or both. Lena Meyer-Landrut on August 3, 2013 at the RS2 radio concert at the Wuhlheide in Berlin.
Canon EOS-1D X with EF 2.8/70-200mm with 135mm focal length used. 1/320 second, aperture 5.0, ISO 320, shutter priority (aperture priority).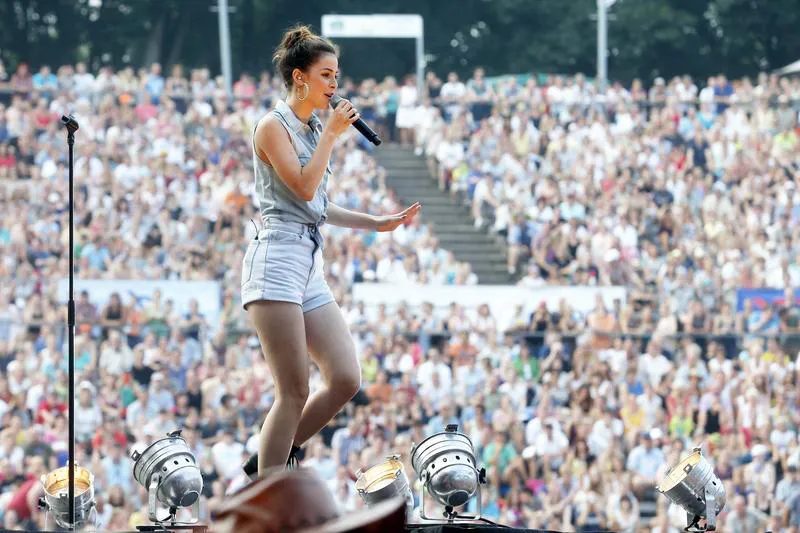
(Photo © 2013: DAVIDS/Sven Darmer - www.svendarmer.de)
9.4.3 Or manual setting?
The manual setting of shutter speed, aperture and ISO value requires that the lighting conditions do not fluctuate, but remain constant. The best results can often be achieved with constant lighting conditions, which are most likely to be found in concert photography in the areas of classical, jazz and pop music. The prerequisite is, of course, that the photographer determines the correct exposure at the beginning (using the results of the automatic camera as a guide, perhaps measured using spot metering).
Figure 9.12: The photographer then makes sure that the light illuminating the artist remains constant. Even if colored lights in the background alternate and vary in intensity (or even go out almost completely at times), this is not a problem as long as the artist receives constant light from the front. Old master Rod Stewart in concert at the Color Line Arena in Hamburg on July 18, 2007 (the only German concert during "The Rodfather" tour).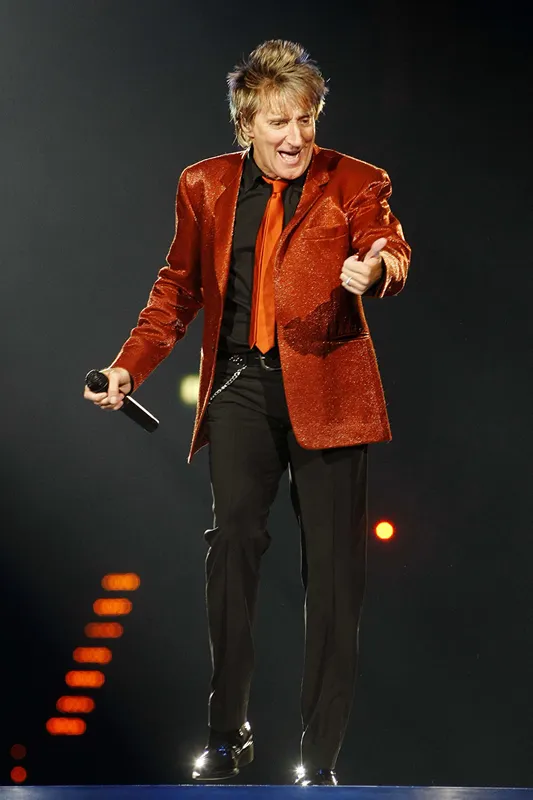
(Photo © 2007: DAVIDS/Sven Darmer - www.svendarmer.de)
Note: Concert photographers divide the lighting into 1: light that illuminates the artist(s) from the front (relevant light for shooting artist portraits) and 2: light that is used for background lighting and effects. In this case, it doesn't really matter if backlighting falls on the camera as long as the lighting from the front remains constant.
The former is therefore responsible for the success of the artist portraits (correct lighting of the face), while the latter ensures great, atmospheric effects (which is what concert photography is all about).
