Introduction:
Many of you will have been a guest or photographer at a friend's wedding at one time or another. But maybe you've never had the pleasure of attending such a festive event before. No matter how much experience you have, thanks to the many weddings I have attended in recent years - and I am still learning a lot - I have already experienced a lot and can certainly give you a little help if you don't yet know what you are getting yourself into.
In this tutorial, we will briefly cover the camera settings at a wedding and the general preparations before a wedding ceremony. I have also separated the registry office and church wedding, as they differ slightly in terms of the process. Of course, there are other wedding ceremonies, but I would like to focus primarily on these two. As it has now become modern, I also want to write a few words about the "free wedding ceremony".
Here is the following outline:
- Camera shots
- Before the ceremony
- The civil wedding
- The church wedding
- The free wedding ceremony
- Congratulations and specials
1. camera settings
In this tutorial, I have documented the camera settings for some of the shots. I would also like to mention that I always control the camera manually - not just at weddings. This means that I set the Blender, exposure time and ISO. With a little practice, this is something that can definitely be managed, even if quick changes are required and there is not always a lot of time to adjust.
For example, if the couple has just come out of the dark church into the sunlight, where they are welcomed by the guests, I sometimes have to change several values on the camera quickly. There's no reason why you shouldn't work with aperture priority. Once you have set the desired aperture, you only need to adjust the ISO in rapidly changing light conditions. With the exposure compensation (+/- symbol on your camera), you can of course still influence your result if you generally want to take slightly brighter or darker pictures.
In the beginning, if you are not 100% confident in manual mode, I would even recommend shooting with aperture priority. Only when you are really experienced and can control your camera perfectly manually in all positions should you take the helm completely into your own hands. It is usually the desire and the challenge to be able to adjust everything all by yourself!
Before I tell you a few things about camera settings, I'd like to say something else: Every photographer has developed and internalized their own style, their own taste and their own camera settings. Many roads lead to Rome, if you ask me. If the result is right, then perhaps the way to get there is not really decisive. One photographer will swear by daylight shots, the next will use a flash unit all the time.
Every photographer will set their "pain thresholds" differently and a not insignificant aspect is also the available equipment. Therefore, my taste and my approach should only give you an idea and not be considered irrevocable. It is intended as a guide, not a guideline. Please make your own experiences in this regard and test out the possibilities for yourself. However, you should never take photos according to a set pattern.
Even if you realize after a few weddings that everything is going well and you consistently achieve "worth seeing" results, don't just choose the same settings one day and fall into the same "rut" - this is the beginning of the end of your creativity and will rob you of any opportunity to develop further. The goal must always be to improve, to break new ground, to try out new possibilities.
Your camera gives you plenty of scope to realize your ideas, so use it. Not just today, when you are still feeling the urge to take action, but also in 3-4 years' time, when you think you already know everything or have read everything. Photography always offers you new paths and invites you to take them!
Over the last few years, I have attended many wedding workshops and devoured a lot of literature. However, I clearly prefer any practical workshop to pure theory. It was only then that I realized how far opinions differ. This applies to all the points listed here. Starting with the technology and the camera settings through to image processing. So I wouldn't confirm every test report I read and always form my own opinion.
The first photographer I was allowed to learn from gave me certain values that he considered to be "decisive". I tested these sufficiently, found them to be good or even modified them. Again, I read a good book whose author has the same technique as me and can only marvel at his camera settings, as they go far beyond my own pain thresholds and personal experience. Of course, practice and personal feeling also play a major role here. Last but not least, the style and creativity of the photographer.
At this point, I would like to draw your attention to three books on the subject of weddings that I would like to recommend:
- Hochzeitsfotografie - Vom Schnappschuss zum perfekten Bild - by Nicole and Ralf Obermann (here they work with Nikon technology)
- Wedding Photography - Photographing Special Moments Safely and Stylishly - by Kerry Morgan
- 500 Poses for Photographing Couples - by Michelle Perkins
Exposure times
I thought about this point for a long time and also did a bit of research in other books. Because what I use as optimal settings for myself doesn't have to be a requirement for you. In this point, I don't want to deal with the topic of exposure time in full, but rather go into the lower limit values that you should perhaps know, especially at a wedding ceremony, when you have little light available and have to/want to do without the flash.
During my research, I came across a rule of thumb on the internet that perhaps shows a little of what is possible and I would therefore like to list it here. Of course, it depends on many factors! This rule of thumb says (without image stabilizer), measured on full format:
Exposure time = reciprocal of the focal length
This means that with a 50 mm lens, the minimum exposure time should be 1/50s. For a 200 mm lens, 1/200s. However, this rule only applies to subjects that do not move at all or only very little. When changing rings, for example, I would not want to test one of these limits. It also depends on how steady you can shoot handheld. Any camera shake will affect your image in the form of blurring; the higher the focal length, the greater the effect. I rarely expose myself to anything less than 1/125s, no matter what lens I'm using. For slight movements of my couple (standing up) I usually use 1/250s or shorter exposure times.
According to this rule, you have even more leeway with an active image stabilizer, but here I am careful with my recommendations, because according to this you are still on the safe side with a 200 mm lens with a 1/50s ... This is in line with the camera settings of the literature I have read, again and again I find snapshots of slightly moving subjects with a 1/30s, e.g. taken with a 50 mm lens. For me, this is a limit that I have rarely tested successfully. The quality of the image stabilizer certainly does the rest.
You should try out these settings for yourself in different situations or when it is not quite as important to achieve perfect results as at a wedding! In general, however, you should choose a shorter exposure time if you're not sure and get the light you need with a larger Blender or a higher ISO. Blurred wedding pictures due to camera shake or movement of the subject are a bad alternative.
Here is an example of too short exposure times. The little man on the wall is bobbing up and down. Even at 1/400s there is still some motion blur, which is certainly difficult to recognize here, but it is there.
Blender
You will know what Blender is all about, but here is a brief explanation:
- Large aperture (small f-number e.g. f/2.8) = lots of light = shallow depth of field
- Small aperture (large f-number e.g. f/16) = little light = a lot of depth of field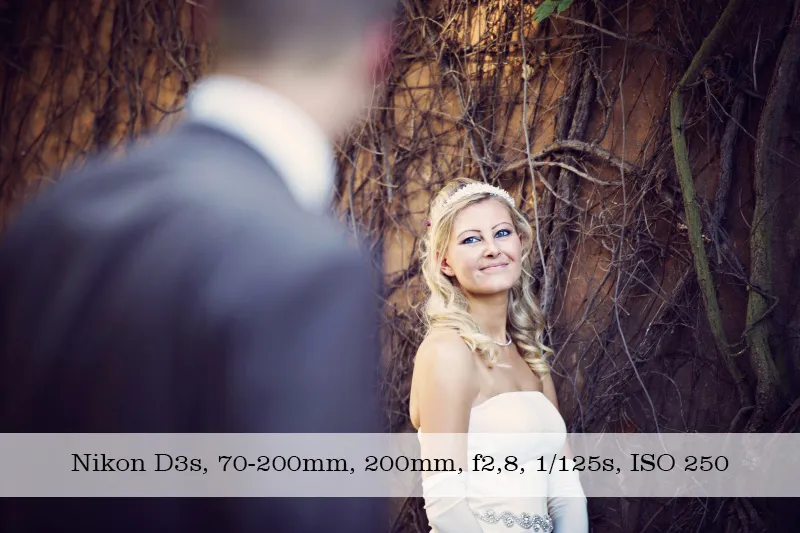
So if we have little light available in a dark church, for example, we choose the largest possible Blender. BUT be careful. Depending on the focal length and distance to the subject, you must take into account that the depth of field may no longer meet your shooting requirements. For example, if you are standing close to the bride and groom and have selected f/2.8 (focus on the bride), the groom may already be too blurred. The same applies here: gain experience and play it safe if necessary. It's better to choose a slightly smaller Blender and get a nice sharp image of the bride and groom, but bring light into the picture with a higher ISO.
As I am very close to the bride and groom here, you can see the strong blurring at f4.5 when the focus is on the bride.
On the other hand, the aperture size gives you an incredible amount of scope for creativity. Because sometimes the large aperture and shallow depth of field are what make the image and you can use them wonderfully for your ideas! I would like to mention that the faults of a lens are usually most noticeable at the open aperture (vignetting, contrast, sharpness). Exceptions prove the rule..webp)
ISO
I have already written a few words about ISO and noise behavior in a previous tutorial. If you have tested and checked your technology sufficiently, you will quickly know what you can expect from it and in which areas you can still be happy with the pictures. With my D3s/D4, I don't like to go above ISO 2,500. That's my personal pain threshold, which I only exceed if I have to take pictures in a dark church without flash, for example. I rarely take photos with daylight at weddings. But that's also a question of taste. For all other occasions, I leave out the flash if I can at all!
In general, however, I can say that you should keep the ISO as low as possible so that the quality of your pictures doesn't suffer. For example, it makes no sense to choose a 1/1600s for still subjects or a small Blender that you don't need at the moment, at the expense of a high ISO.
If I need as much light as possible in a dark room, I therefore first adjust the Blender and exposure time, reduced to the lightest level for the corresponding conditions, and then set the ISO high.
A photo with daylight only, ISO 2500.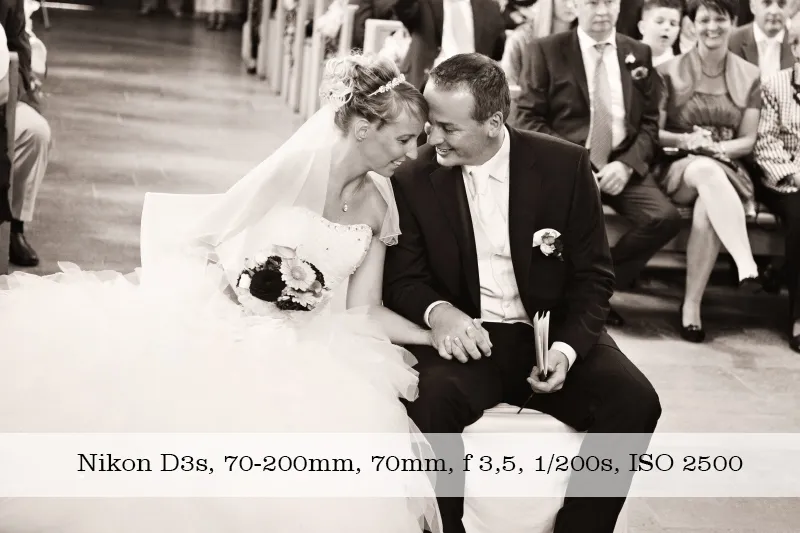
Exposure metering
I would also like to briefly mention the exposure metering, which you can set for your camera so that it captures exactly what you have in mind. There are three settings available for this:
- Integral metering (center-weighted)
- Matrix metering (multi-segment metering)
- Spot metering (single-point metering)
In order to know in which situation you are best off with which setting, you need to know what exactly the camera does in the respective mode and then outputs the image exposure.
With integral metering, the camera measures the lighting conditions in the entire image, but the middle area is more important here. With matrix/multi-segment metering, the camera measures the light at several pixels. Matrix metering is popular with many wedding photographers, but it also has its difficulties with strong light contrasts. Integral and multi-segment metering is sufficient in most cases.
Spot or selective metering only uses a small part of the image for exposure metering (selective metering approx. 10%, spot metering less than 5%). It is therefore suitable for strong contrast differences and the measurement of small image areas.
This is a small preliminary guide on the subject of camera settings. Since there are already countless tutorials here that deal with the basic knowledge and settings, this must suffice at this point so that the tutorial does not become too long.
2. before the wedding ceremony
In the right place at the right time!
Whether it's the registry office or the church, your time window before the ceremony should never be too short. For me, it's at least half an hour to three quarters of an hour beforehand. If I have to travel a long way, I sometimes have to wait well over an hour before there is anything to photograph. No photographer in the world can afford to be late for a wedding. It's my absolute nightmare scenario. A complete blockage on the highway, a broken-down car ... Fortunately, this has never happened before and I have always survived longer traffic jams without stress thanks to arriving early.
It should be noted that I do not charge for this "advance time". It is not compulsory for the couple to pay me half an hour before the actual wedding date. This is free time, so to speak, which I use to prepare myself and capture the first pre-event. Of course, you can advise your couple to start the reportage in good time and get paid for it.
And that brings us to the point of what needs to be done before the wedding. This should help to take away some of the tension and nervousness and help you not to get stressed. I was always very nervous at first. Because now comes the part of a wedding where you should of course know what you're doing and you have to prepare your technique accordingly.
You have everything with you that I described in the preparation tutorial. The batteries are charged, there are enough empty memory cards in place and your lenses are shining brightly in the sun. Your flashes should have fresh batteries. Important: If you have accompanied the couple before and have used the flash, make sure you have new batteries for the wedding ceremony! I leave my accessories, which I need for the couple reportage, in the car at the wedding ceremony. You should only bring what you absolutely need. Your back will thank you for it. Of course, I never leave expensive equipment in the car.
Capturing the backdrop
My first job when I arrive at the location is to take a wide-angle shot of the building, whether it's a town hall, church or castle... It's always nice when your reportage starts with this. Of course there are exceptions, I admit that the registry office is not always worth seeing.
You're not always so lucky: the wedding location here was Neuhaus Castle in Paderborn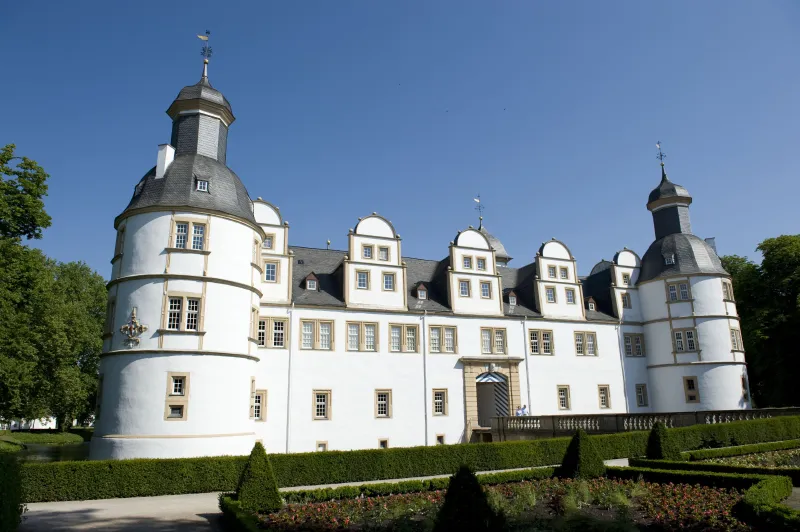
Tour of the wedding room/church
In addition to welcoming the groom - if he is already there - there is also a tour of the wedding room/church to familiarize yourself with the surroundings. Where do you stand during the ceremony, where do you have the best view of the couple and how do you set up your camera optimally? You can try this out now. It's a good idea to take a few test shots so that you know the right setting for your camera later and don't have to make any major adjustments during the ceremony.
Once you have found a place for yourselves, look for "disturbing" motifs in the picture. In the wedding room, there is often a vase of flowers on the table or other decorations. Before you realize later that they are blocking your view of the bride and groom, reposition yourselves or - if you can only do it from this position - I have already redecorated the table with the help of the registrar! But please do this before the wedding ceremony and as lovingly and discreetly as possible. Of course, never without consulting the registrar.
It can get quite cramped here. Not only was there hardly any room for the guests, I was also standing right next to the window.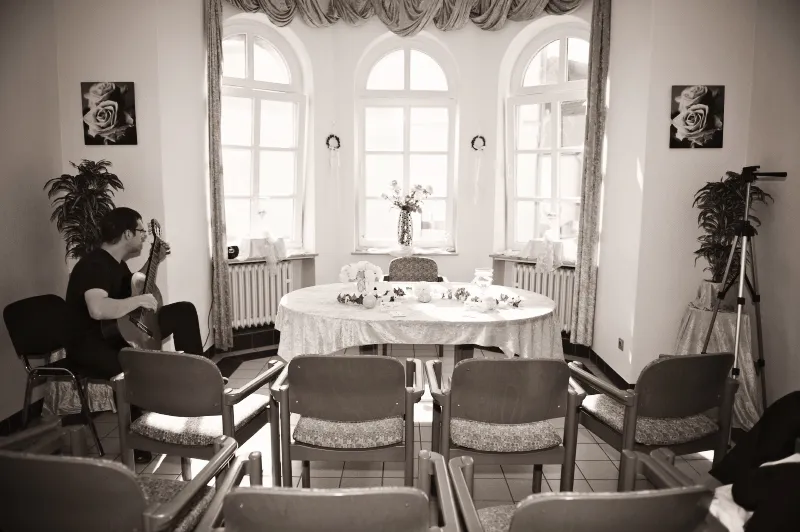
The right focal length for the wedding ceremony
I also looked at what focal length I would need for the wedding ceremony. It's important that I get everything in the picture and remain as flexible as possible. In the church, I usually choose my 70-200 mm due to the greater distance and discretion. This allows me to shoot a little further away from the action and I still remain flexible for the odd close-up of the couple. At the registry office, I usually shoot with my 24-70mm. I often stand right next to the registrar and only a table forms the distance between me and the bride and groom.
Some wedding rooms are very small and you may already be standing with your back against the wall and have no way of creating space for yourselves. I find this focal length ideal so that I can capture the whole scene during the exchange of vows and rings, when both of you stand up. The 70-200mm would often be too much of a good thing here. But you can quickly see this when you look around the wedding room or the church. Last but not least, it's also a question of taste, your way of working and your lens stock.
Even small chapels can be cramped!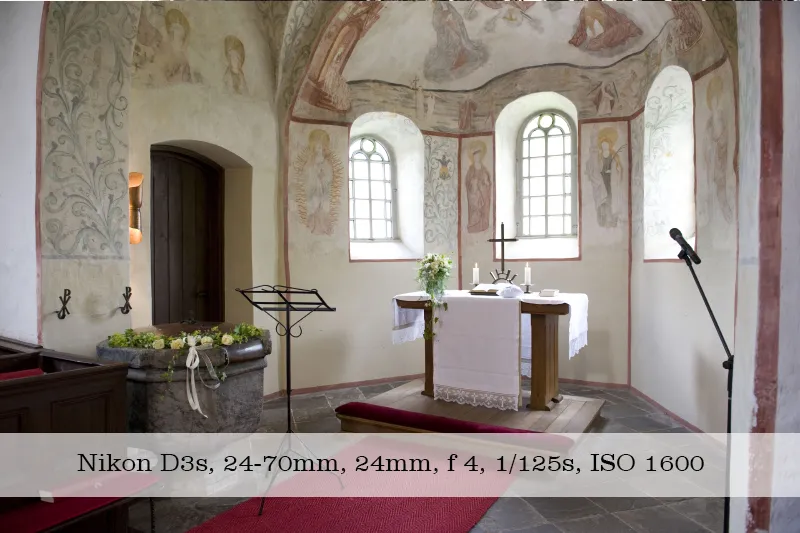
Since changing lenses during the wedding ceremony is only possible to a limited extent, choose your focal length correctly. I never change lenses during the ceremony. Of course, you can sneak to the back and quietly change the lens if you know what's going on during the ceremony. But it's usually so quiet during a ceremony that you could hear a pin drop ...
I wouldn't dare interfere with the proceedings in such a disruptive way. I would therefore personally advise against it. If possible, it's better to use a second camera and set both up before the ceremony so that they are ready for use. Just in case for some reason the technology lets you down at that moment!
You usually have the option of positioning the camera inconspicuously next to you so that it doesn't get in the way but is ready to hand. And if necessary, you can simply reach for the spare camera with a different lens if you wish. I always have two cameras ready to go and use them alternately. At least before and after the ceremony, when I want to switch between group photos and snapshots of the guests without constantly juggling the lenses. During the ceremony, I usually only use one camera and therefore one lens. But that's up to your own taste.
You should discuss with the registrar/pastor where and to what extent you are allowed to take photos during the ceremony; more on this in the next points.
Capturing the pre-event
After I've ticked these things off, I go back into the action and wait for newly arriving guests, who I photograph as they greet the groom, when they are talking to each other and of course all the hustle and bustle before the bride arrives. There will be plenty here for you to photograph. Never stand around lost in the area, always look for an interesting subject.
Not a snapshot, but posed ... Groom with his mother in front of the church..webp)
Other photographers
You may have already asked about other actors during the wedding ceremony during your preliminary talk. The videographer, who is usually only allowed to work at church weddings, is important here. Filming at civil weddings is almost always prohibited. I would therefore like to deal with the "videographer" point later in the "church wedding" section. But perhaps there are amateur photographers from the couple's circle of friends who would also like to take a few pictures.
In general, I always say: the more photographers, the better. It would be a shame if this were generally excluded. This way, different motifs can be captured and the couple has many beautiful pictures to choose from afterwards. BUT: I must not be hindered in my work and during a wedding ceremony and moments that cannot be repeated, I want to have a front row seat and not have to push another photographer aside to take my pictures.
However, if the couple has given permission for another person to take photos during the ceremony, then I clearly discuss the rules beforehand. It has already happened that 2-3 photographers stood next to me and the ring exchange and saying "I do" took place in a flurry of flashbulbs. That's not on!
Someone was constantly running through my picture or standing behind the couple in the background of my shots. You have to assert your position clearly and, if necessary, say "no". Apart from that, other photographers are always very welcome, but it should always be a cooperative effort and not a competition for the best spot for the subject.
The wedding of a good friend a few years ago, long before I was self-employed as a photographer. Hence the place in the second row. You'll soon be able to give it up for good!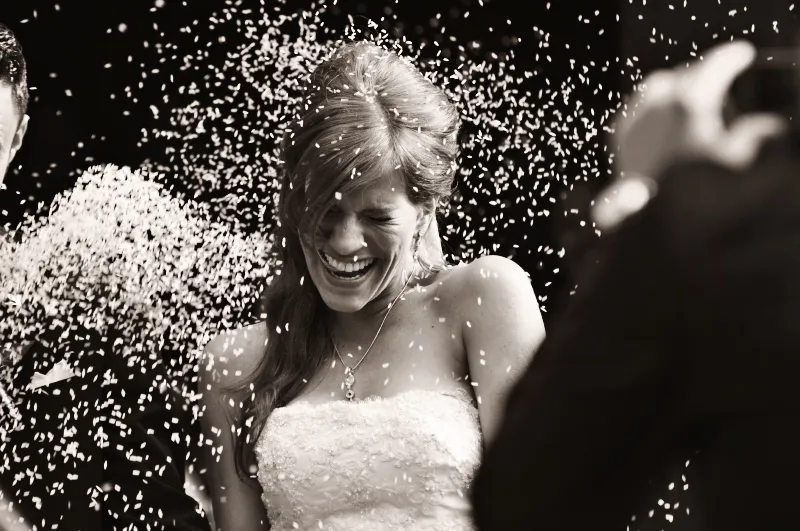
Taking photos during a wedding ceremony
Before we move on to the wedding ceremony process, I would like to mention something very important. Over time, every photographer will find their own style of photographing weddings. What is often not considered when you attend a wedding ceremony for the first time is the fact that you and the registrar are usually the only people "standing" or acting in front of the couple. Especially in the registry office - when you are much closer to the couple - than in a church.
The couple is nervous, the atmosphere is emotional, it's incredibly exciting. A few tears may already be flowing and those present will be eagerly awaiting the start of the ceremony. It gets quiet ... While the registrar sits quietly and says his first words, you will suddenly realize how loud your camera is when you take your photos. The flash will seem much brighter than usual, and as soon as you move just a few centimeters, the first glances will be directed at you. The whole thing is a very intimate moment that you get to share with the couple.
I can't help but enjoy this front row seat at any wedding ceremony. Because I am allowed to participate directly and immediately. I get to see things that not even the witnesses or the parents can "see", as the couple almost always have their backs to them. The looks the couple gives each other, the tears of joy, the smiling faces, the hands holding each other!
A wedding photographer can never get enough of that. Happiness you can touch and you're sitting in the front row!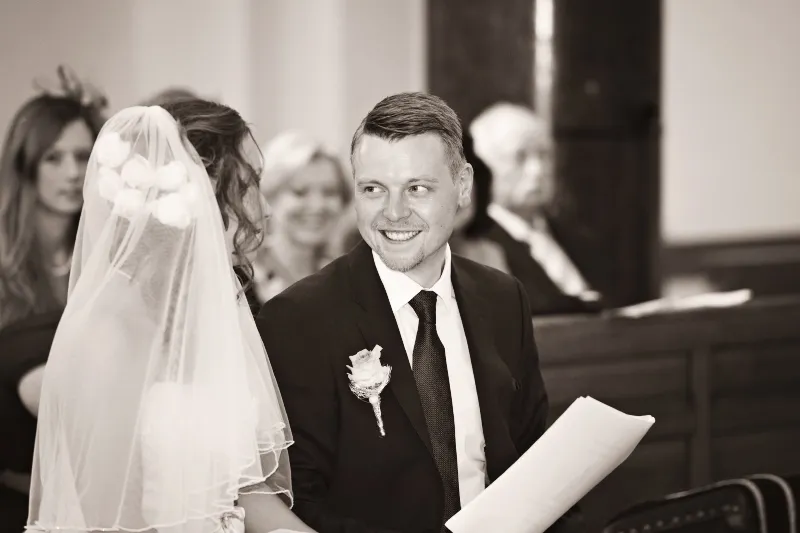
It is not possible for me to give you a patent recipe on how many shots you should take during a wedding ceremony. It is not possible for me to really describe this moment to you, you will certainly have to experience it yourself a few times and use your intuition. Just look forward to it, because it's a wonderful part of your work.
But for the reasons mentioned above, you should be incredibly discreet and keep as quiet as possible. Take as many shots as you deem necessary, but also take breaks and give the couple the opportunity to concentrate on the wedding speech. Take a shot every now and then, but of course I take more photos during the saying of the vows, ring exchange and kiss. Never interfere too much with what is happening, keep calm. If you want to move to choose a different shooting position, do it slowly and quietly.
All other things are now more specific to the registry office or church, so I would like to cover these in the next few points.
3. the civil wedding
Wedding room
I like to photograph the wedding room as a whole in advance, before it is conquered by the first guests. It's not always a gray town hall room. Perhaps your couple has chosen a special location for their civil ceremony and you are taking photos in a castle, for example. If you have enough time, photograph a few details before you forget them later. The decorations in the registry office and perhaps even the decorated ring pillow or family register before you go outside in time to document the guests, groom and the arrival of the bride.
gives
Of course, it may be that the wedding room is a little further away from the "meeting point" of the guests. In a large town hall, for example, it may be on a higher floor and you will have to take the elevator. Depending on the location and the time available, you will have to decide whether you can visit the wedding room beforehand without missing anything important. In this case, you may have to forego this and stay with the bride and groom the whole time to be on the safe side.
Note: Although there are now beautiful locations for civil weddings, the other side of the coin is the "mass processing". I can no longer call it anything else. One wedding follows another every 45 minutes, sometimes even in several rooms next to each other. It can happen that two parties suddenly mingle or the next bride's carriage pulls up during the group photo. Over time, you will certainly know your wedding venues, otherwise you can simply ask the registrar what the time slot is and when the next ceremony starts. Sometimes it is better to wait with the group photo in front of the location until the next ceremony starts. Then you'll have some breathing space. 80 guests want to be set up properly!
Conversation with the registrar
It is advisable (actually essential) to exchange a few words with the registrar in addition to the greeting. This is not just an act of courtesy, you will always benefit from the registrar supporting you in your work. Even though I have never met a registrar who would have restricted me in my work in any way, it is only friendly if you tell him your desired location and get his approval.
It's also not unusual for a singer or choir to accompany the wedding ceremony, so you need to position yourselves accordingly so that you don't get in each other's way. A smile and a frank word will definitely help you here, even if you ultimately just want to do your job well. At this point, I have to praise all the registrars I have met at my weddings in recent years.
The wedding speeches are now so loving, sometimes even personalized to the couple. I always receive a warm welcome, especially if I have met them before, and they allow me to work freely without any restrictions. There are even one or two registrars who ask me at the wedding ceremony whether the "shot" is in the box or whether the couple should "kiss" again. You should always answer yes to this question.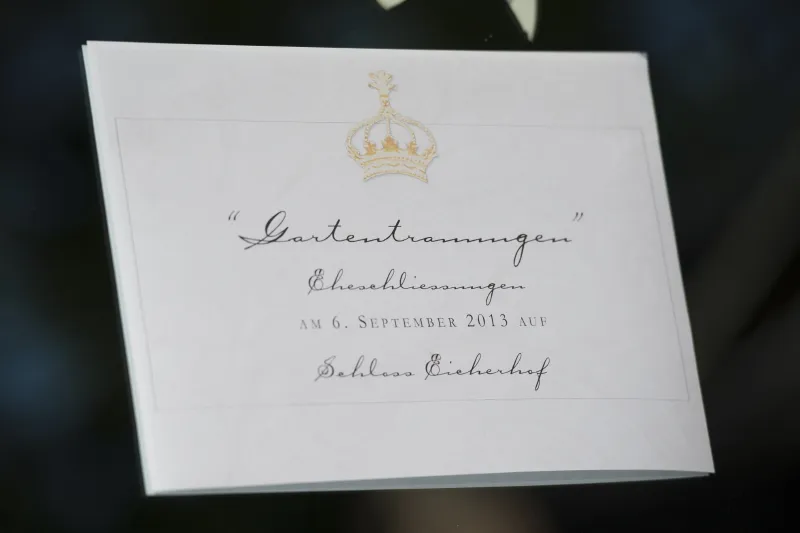
The witnesses
There are not always witnesses at a civil wedding. However, there are always places reserved for them at the registry office. They will sit close to the couple and sometimes even diagonally next to them. You should also make sure that they don't get in the way and obscure the view of the couple. It's better to ask them to keep a little distance before the ceremony. This is never really a problem, as it's only a few centimetres that will give you more room to maneuver. At a church wedding, they can be more dangerous for your work; more on this in the next point.
It is customary for the witnesses to sit to the right and left of the couple. You have a good view of the most important players.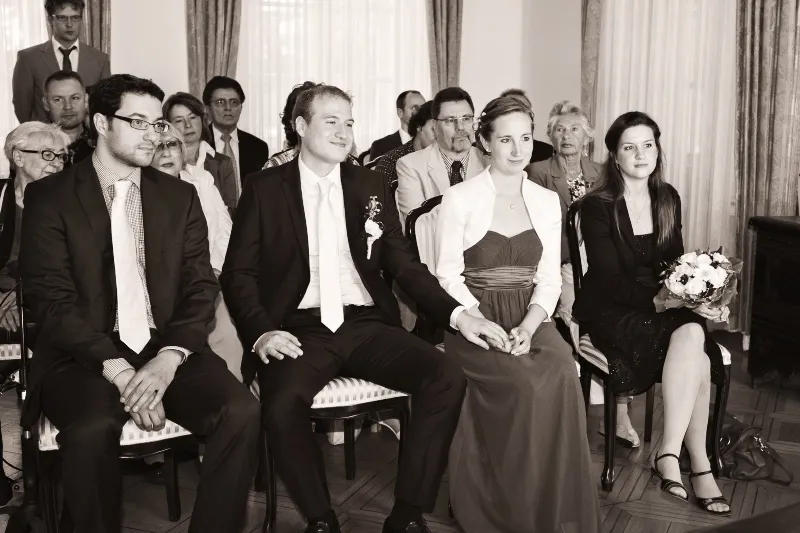
The bride is coming!
Even if the course of a civil wedding ceremony "may" be very classic, the bride will rarely appear at the end. Nowadays there are registry office locations where it is possible for the bride to make a proper entrance. The procedure hardly differs from that of a church wedding. This will not necessarily be the case at a normal "town hall wedding", i.e. the bride and groom may even receive their guests together and make their way to the wedding room together.
In any case, you will always stay with them, they are the main focus, apart from guest snapshots and detail shots. The focus is always on the couple themselves. During your reportage, you'll have more time to focus on each of them; before and after the ceremony, it's better to spend too much time on the couple than too little. And a bride will never complain to you that she has too many photos of herself!
If the ceremony is "classic", then guests and the groom will usually be waiting for them in the wedding room. You are therefore a particularly important person, as you are the first to receive and accompany her. Maybe you can take her picture as she gets out of the car, sometimes she gets to drive right up to the door! From now on, you will not leave her side. Whether the bride is entering the ceremony room with her father or with her groom, always walk at a sufficient distance and photograph them as they walk to the ceremony room and finally enter.
A few quicker steps are allowed so that you have some space to intercept them again from the front as they walk towards you. If the groom only sees his bride now, position yourself between them in time to capture both the bride and groom in the picture.
Once I've done this, I move on quickly so that I can capture their greeting and, if necessary, the handover by the father of the bride. Only when the bride and groom sit down do I move to my previously chosen position! Apart from a few excursions, I will remain here the whole time. As discreetly and quietly as possible. I'll be present, but discreet. Not too much, but not too little. I've already mentioned that. A sure instinct is required..webp)
In situations like this, it's okay to tap a guest on the shoulder if they're in your way or gently push them aside. Your work is important now. Nobody wants to hear later why you weren't able to capture this or that moment in the picture. If there is a bridal bouquet, the bride will place it on the table in front of her, perhaps you will have time to turn it towards you while it has not yet fallen silent. This is always an advantage for the photos. For example, you can photograph it in the foreground during the ceremony and let the couple appear out of focus behind it. However, it's important to weigh things up here, because I wouldn't want to disrupt a wedding ceremony just because the bouquet is positioned awkwardly!
The ceremony
The procedure for a civil ceremony is always similar. Some registry offices offer more personal freedom than others. Sometimes they will play their own music or there will be a singer/choir, sometimes the couple's wishes for the wedding speech will be incorporated and perhaps the ceremony will even exceed the usual 15-20 minutes. I have already experienced many variations here. From the short town hall ceremony, where everything was over after 10 minutes, to the beautiful ambience in a castle, where the choir and registrar together made it to a whole 45 minutes of wedding ceremony. Accordingly, your reportage will also document more or less emotional things.
After the greeting, the registrar will read out his personal wedding speech, which he has usually written with a lot of love, sometimes also referring directly to the couple. You should not take your eyes off the couple and always take a picture at the right moment. They will look at each other again and again, smile at each other and perhaps even get very emotional. If the couple hold hands, this is also a nice moment to capture.
There's a bit of time before they say "I do", so you can quietly walk around the room at the right moment and change your perspective of the bride and groom. Perhaps take a shot of the bride and groom from the guests' perspective. It can also look nice if you capture the couple from the side as they look at each other. I also like to photograph the guests, but also very discreetly. Above all, you shouldn't miss the emotions of the bride and groom's families.
The groom may have caught the perfect emotional moment, but unfortunately the bride has her eyes closed!
Yes/change of rings
Then comes the big moment that everyone has been waiting for. Where saying "I do" is of course obligatory, there is not always a ring exchange. This is of course nicer to capture photographically and so it's great when there is one. Everyone in the room will stand up for the couple to say yes and now you can be more diligent! Keep taking photos and playing with your framing. I try not to move too much with steps, but rather lean forward or lean back if necessary. Once again, it's a matter of sensitivity to capture everything correctly and catch the perfect moment.
This is usually not that difficult, as the ring change often takes long enough to take several photos. Unfortunately, couples don't always wait for the registrar's "go" before kissing, so you can prepare yourselves. Some couples only kiss briefly and hastily, while you might not even be expecting it. Missed the moment! If the audience or the registrar don't criticize it, they won't repeat it. So stay tuned and pay attention. The kiss should be included in the album. You don't want someone next to you to have just snapped this moment with their cell phone.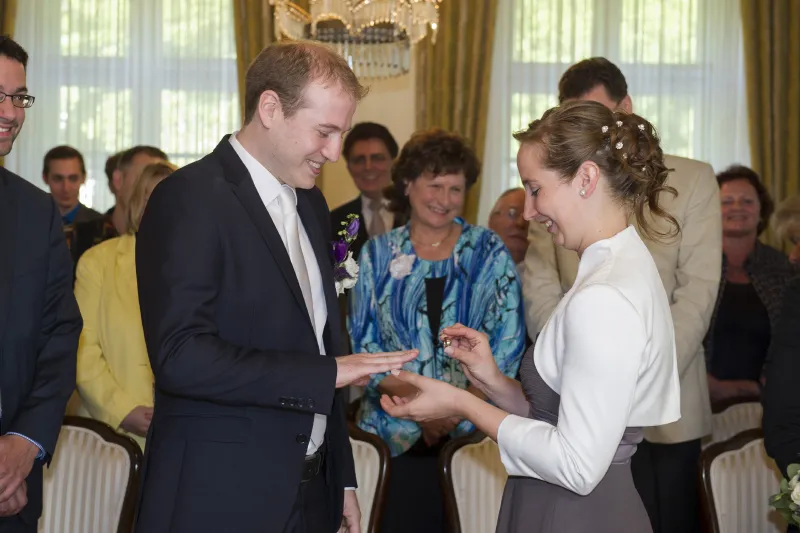
Outdoor weddings are always a nice change. However, they can be a challenge, especially when the sun is high in the sky with strong sun/shadow contrasts..webp)
Last but not least
Now that our bride and groom are officially married, the formal and bureaucratic part of a German civil wedding ceremony takes place and everything is documented. After the wedding document has been read out, it is of course signed by the bride and groom and the witnesses. Then the registrar adds his signature and everything is sealed. He may then say a few final words, hand over the register to the family and, of course, be the first to congratulate the couple before dismissing them. Of course, you will capture all of this in a picture.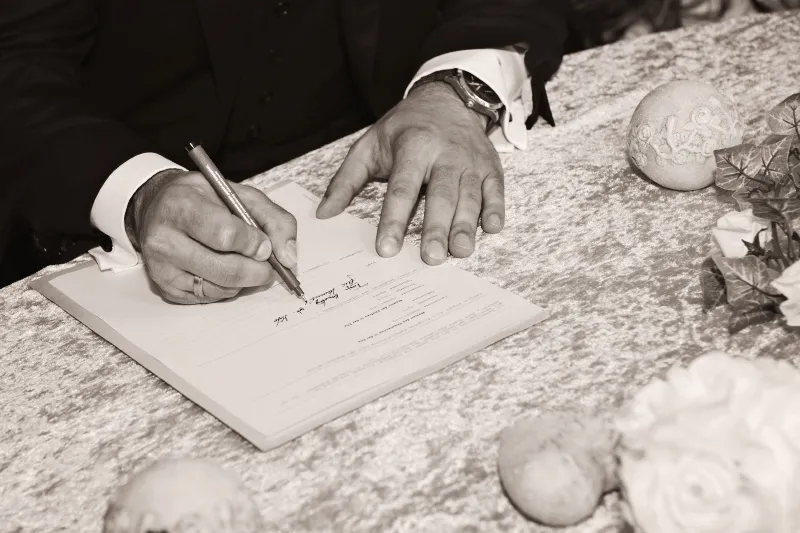
After that, the procedure varies. Depending on the event, the couple will either leave the wedding room first or accept the congratulations directly. You should definitely document the couple's exit, as well as the congratulations from the families. The rest of the process and everything that happens after the wedding ceremony can be found further down in this tutorial.
4. the church wedding
Here I would like to describe the classic process of a church wedding. Of course, there are always exceptions, but it would go on too long if I were to address every single one of them here. I would therefore like to be more general. Please note that I won't repeat everything I've already explained in the previous point so that the tutorial doesn't become too lengthy. To be on the safe side, you should also read the explanations on the civil wedding ceremony.
The church
As in the registry office, I take a long shot of the empty church, photograph the decorations, the church booklets and a few details. Sometimes the wedding candle is also placed on the altar. You should include all of this in your reportage. I have listed some sample images for this.
Then I look around for a suitable location for my photos; I have already mentioned lens selection and test shots in the introduction.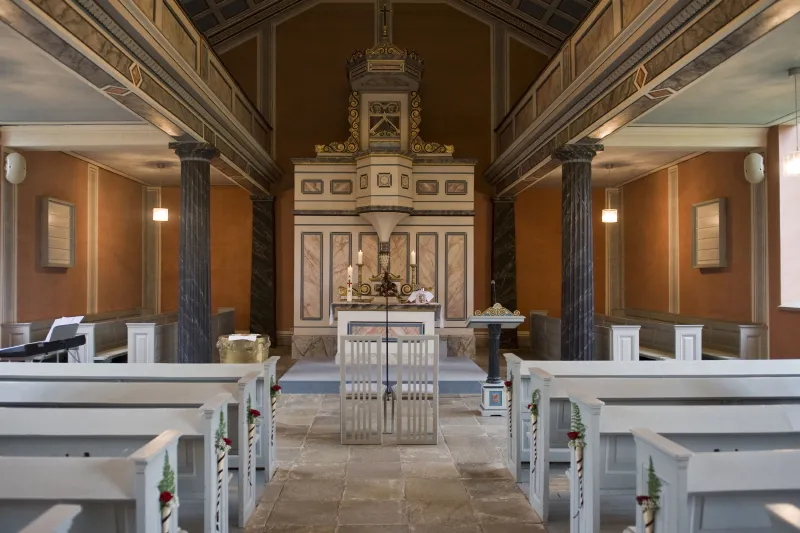
The first hustle and bustle has already begun here. You don't always have the church to yourself.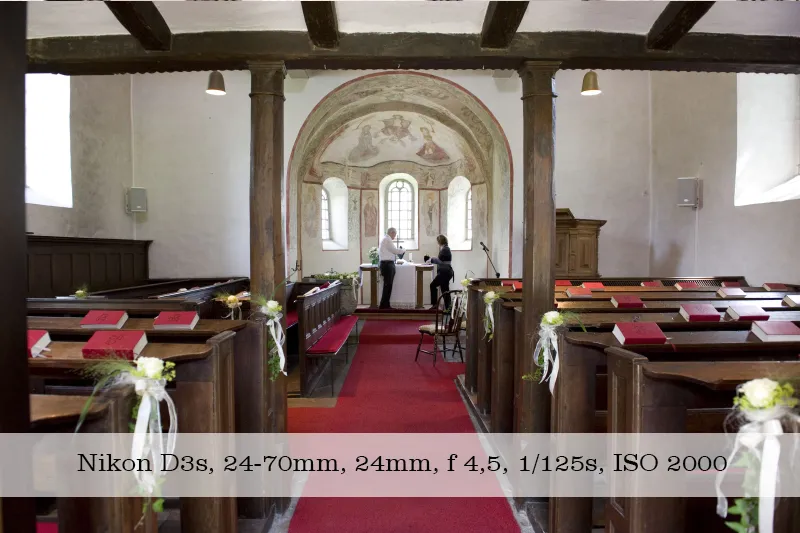
Supporting actors/videographer
Here, too, there is the question of other actors with whom you need to consult. For example, singers, choir or videographer. Especially if two videographers are following the action from two different angles, you can get into each other's way. Even if most videographers have experience of sharing a front row seat with a photographer, everyone wants to do their job perfectly and this can lead to problems. One person jumps in front of the other's camera and this disrupts the workflow considerably.
In the meantime, the question of a videographer is also part of my preliminary discussion with the couple and, if possible, I arrange a meeting with the video team before the ceremony. This is not a must, but unfortunately I have also had bad experiences in this regard, and this is always at the expense of my bridal couple. One thing that can be prevented if there is sufficient communication. If necessary, the bride and groom have to decide on a focus and the other party can then hold back at this point.
However, it has also happened to me that my bridal couple did not inform me of the subsequent booking of a video team. When I arrived at the church, there were already two tripods to the right and left of the bride and groom and the priest was also very restrictive in what we could do. It was work with obstacles. The videographer defended his position with his elbows during the reportage and showed no consideration for me at all. If you then work with a telephoto lens, you are certainly at a disadvantage. Either you do the same or you lose out on your shots. It wasn't a pleasant experience, but I learned a lot from it and still stood my ground that day. I wouldn't wish such an experience on you.
Fortunately, my experiences with very professional videographers were largely positive. It was perfect work, even without prior agreements, just as it should be. We complemented each other in our work, because that is definitely possible. If one of you doesn't have an important situation in mind, the other can point it out. Working with a videographer can be great. If it goes wrong, you're usually dealing with an unprofessional videographer. If you have discussed these things with your bridal couple in advance, nothing will go wrong. I don't want to scare you, I just want to include all possibilities and unfortunately this also includes bad experiences that I had to make.
Never forget: the little things that are so important for your photos and belong in every reportage..webp)
Preliminary talk with the priest/priest
At church weddings, it is not always a matter of course that you are allowed to work freely. I have already experienced many constellations here. As I already described in the preparation tutorial, you should point out to your bridal couple during the consultation that they should clarify this with the priest in the preliminary talk. There are also parishes or priests who do not allow photographs to be taken during the wedding ceremony. That would be more than annoying to find out five minutes beforehand. You will then suddenly only be a guest and your bridal couple may have to pay for an empty hour. There is also the possibility that you have to do without the flash, that you are only allowed to take photos from a certain position - which is not necessarily favorable - or that you are subject to other restrictions. Here are a few examples that I occasionally come across:
- You have a small, dark chapel that severely restricts you both in terms of space and light. A challenge for you and your technology.
- You are not allowed to enter the back of the church. You are forced to photograph the couple from "behind" from the guests' point of view from the center aisle or from the side. This is not an ideal perspective, so you have to be inventive and make the best of the situation.
- You are tied to a fixed location, which may restrict you. Especially if groomsmen or altar boys are standing around the couple as they say "I do". More on this later.
In general, you should exclude certain situations from your photo series, such as prayers and communion. I don't document that. In most cases, the priest will also tell you exactly what is not allowed to be photographed; these points will often be included. Even if I'm not subject to any restrictions, I still leave them out.
No two church weddings are the same, and unfortunately every church has its own peculiarities when it comes to photography. Sometimes I'm told: "As long as you don't climb on the altar" and sometimes it's a very long preliminary talk and I'm subject to various restrictions. In the meantime, I'm no longer annoyed about it, even if it's at the expense of my bridal couple. It just can't be changed. If I were you, I would stick 100% to these guidelines and not simply ignore them. Believe me, the priest will tell you in front of all the guests that he doesn't like what you're doing! Again, friendliness will get you further..webp)
Arrival and entry of the bride
After you have taken a few shots of the guests and the groom's greetings, the party will make their way into the church. Now is the right time to wait outside for the bride. You document the exit and everything that may happen around her. The priest may greet her personally and accompany her into the church together with the altar servers. Then they form the vanguard of the bride.
Finally the bride arrives, a little late, but the gorgeous wedding car makes up for it!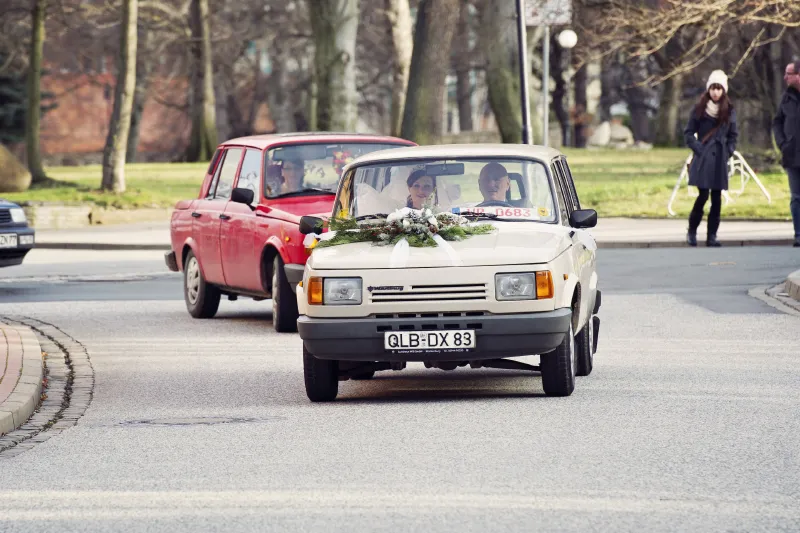
In most cases, the groom will wait at the end of the center aisle for his bride, who will probably be escorted down the aisle by her father. How you want to photograph the entrance is certainly also a question of taste and you can also vary here. I usually position myself in a row of benches relatively far in front of the groom, where I have a good view of him. This allows me to document the bride on one side as she marches in and also capture the face of her happy groom. However, I move away quickly so that I can document the handover from father of the bride to groom from the side and, of course, the greeting of the two. This can be a very emotional moment; stay close to the action so that you can capture everything!
First right, then left. You are perfectly positioned.
You have shifted your position in time to capture their greeting.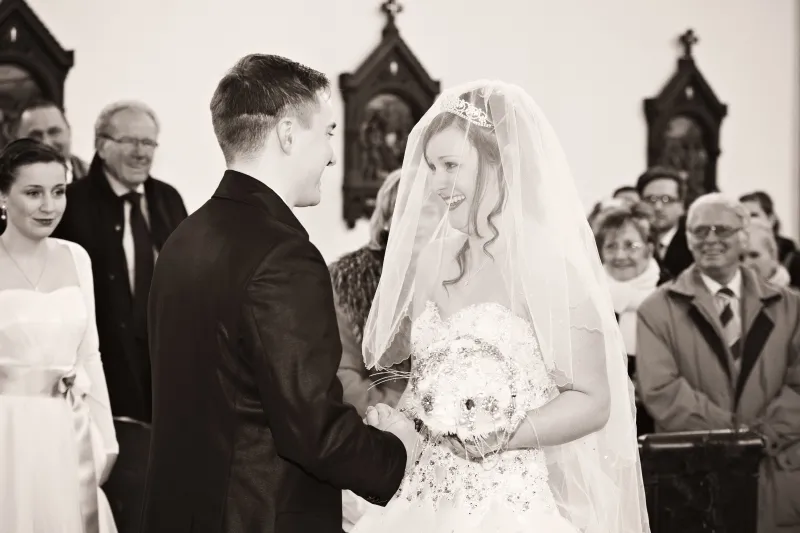
Positioning during the service
During the service, I have a fixed position with the best possible view of the couple. Sometimes I move discreetly and quietly into the center aisle during the ceremony (an empty pew further back is best for this, through which you can scurry without disturbing) or photograph the guests who are attentively following the ceremony. You shouldn't miss any tears of joy from family and friends either. Otherwise, I only move around if the situation requires it. It is important that you do this when there is still time before the wedding. Don't rush back to your seat all at once. Either do this right at the beginning or after you have said yes. The times when the choir / singers are active are also ideal. Otherwise, take photos carefully and not too much. Be discreet and take a genuine part in this intimate ceremony.
View of the bride and groom from the center aisle.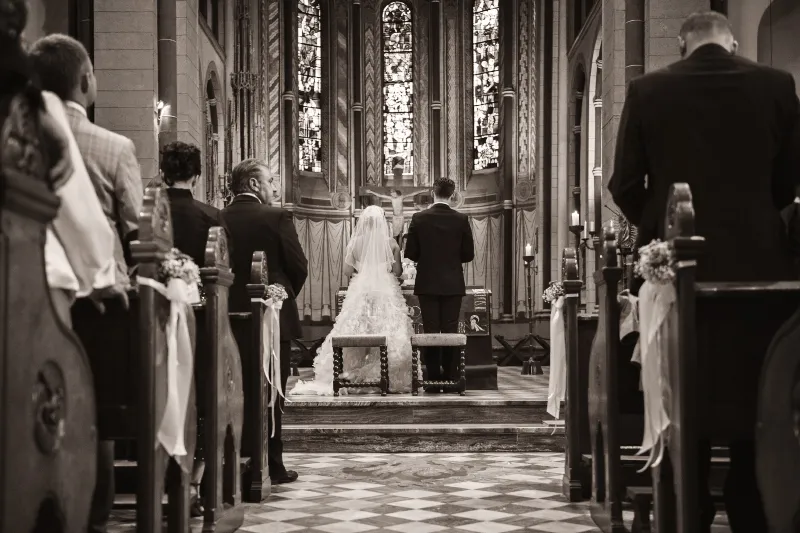
Course of the ceremony
Church weddings usually last 45-60 minutes. Various factors are decisive, such as the number of songs played, whether a confirmation or baptism is included or whether communion is part of the program. The order of events will also vary depending on whether the ceremony is Catholic or Protestant. In addition to the service, there will probably be a reading by a relative and the intercessions will usually follow after the wedding. You should capture this in a picture.
Yesword/change of rings
In order not to repeat myself, I would like to list here only the points that differ from the registry office. This includes, for example, the best possible view of your bridal couple at this important event. There are certain unexpected factors that you will not always be spared, despite a preliminary talk. The worst-case scenario would be: The priest stands very close to the bride and groom. He brings in an altar boy, who does not move from his position even after the rings have been blessed and blocks your view.
The groomsmen also stand to the right and left, surrounding the couple to the side. Then you will no longer have a clear view of the couple, no matter which lens you use and how far away you stand. Then it would only help you to move the people to the side, which I would advise you not to do! Furthermore - although I always mention it in the preliminary talk - it can happen that the couple turns towards the guests during the vows and ring exchange. In both cases, you can't avoid moving to the center aisle to photograph the action from there. However, this all happens so quickly and sometimes unpredictably that you should be prepared for it. Positioning yourself directly in the center aisle is not an option, because fortunately such incidents are rare and in most cases you have the best spot to the side in front of the bride and groom.
The priest and witnesses stand in front of/next to the couple and it will be a tight squeeze for you.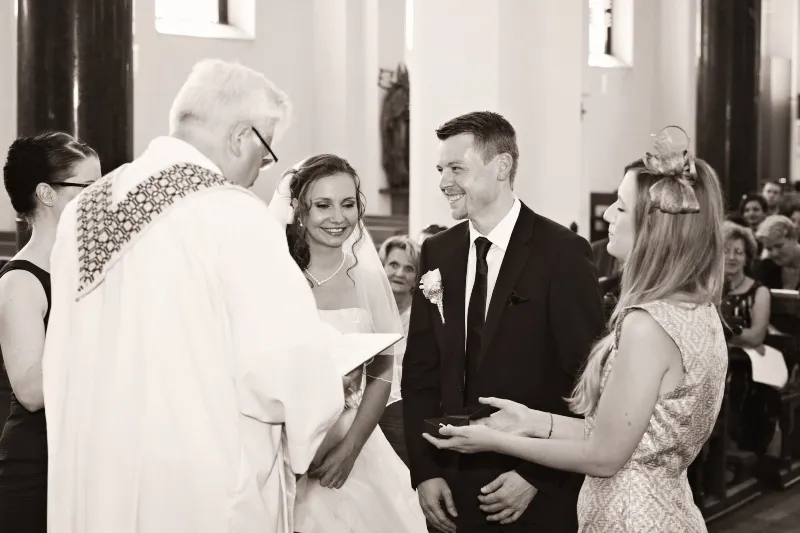
Here's another example! In a church that I attend regularly, I have a very open pastor who also incorporates a very nice idea into his service. Unfortunately, it's an idea that makes me break out in a sweat every time. Shortly before saying "I do", he asks all the children and young people present to come forward so that they can experience this moment a little "closer". Maybe that's enough of an idea for you to imagine it. With a lot of luck, sometimes there are only a few smaller children present who don't get in the way. But we have also had what felt like more teenagers in the front row than remaining guests in the pews! The priest won't necessarily tell the bride and groom these things beforehand, so they won't always be thrilled.
Around the vows, the ring exchange and the kiss, you should of course be diligent again and document everything that happens now. Make sure you always have enough pictures to cover all the important points afterwards. There are factors that can spoil your picture, and then it makes sense to have a little choice. For example, closed eyes, a sudden turn of the head, etc. When changing rings, I like to get closer and photograph the hands in detail. However, you should also have pictures that show the bridal couple as a whole.
At this wedding, the priest, altar servers and witnesses left me no other choice. I had to move to the center aisle. Fortunately, the couple turned around and I had a good view.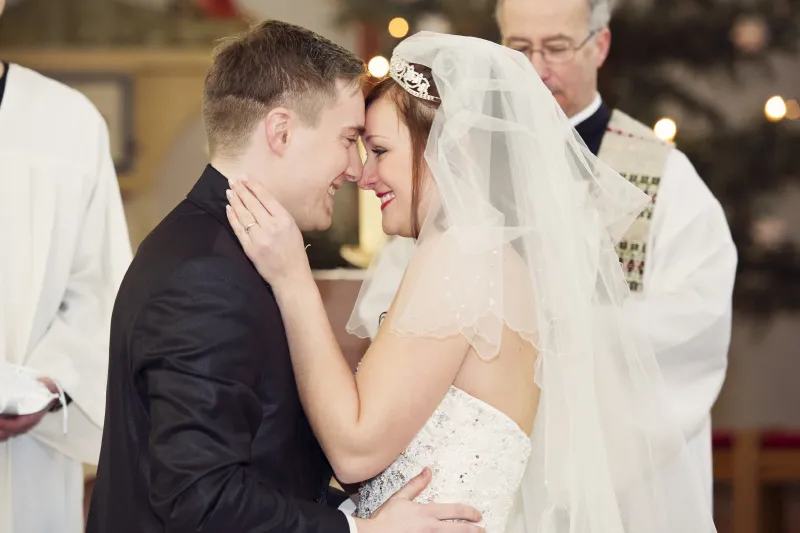
Marching out
As with the march in, there will be differences here. Sometimes the priest and altar servers walk in front, then you should walk in front accordingly or photograph the couple from a row of pews. If the couple leave the church alone, you will have a clear view anyway and can photograph them all the way out. This often results in very beautiful pictures. By the way: I am also happy to take a photo of the couple together with the priest!
Whether the guests leave the church first or the bride and groom can also vary. In any case, you should stand at the exit beforehand and receive the couple. It is important that you adjust your camera in good time to the strongly changing light conditions. I will describe what follows in part 6 of the tutorial.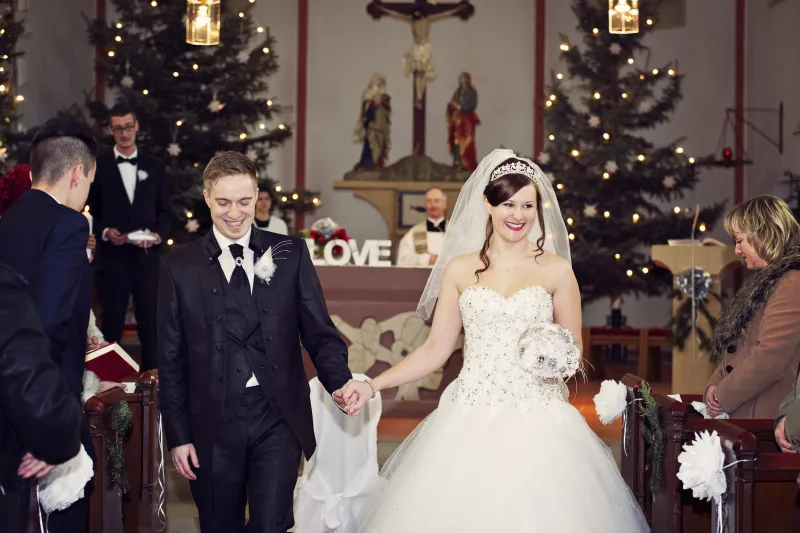
5. the free wedding ceremony
I only want to talk briefly about free weddings, as this tutorial will be very lengthy anyway. The procedure can vary here and usually has components from the two previously described ceremonies. The theologian will be able to tell you in advance exactly what will be part of the free wedding ceremony, whether there will be a vow, whether a ring exchange will take place or whether a special procedure is planned. This includes, for example, working with sand or stones, which requires the help of the guests. In my opinion, this is a very lovely way to organize a free wedding ceremony, which can also be beautifully documented in photographs.
Of course, this should also be captured in the picture. When the groomsmen collect the sand glasses or the stones with the guests' wishes written on them, this offers many beautiful motifs.
Often a candle is also lit.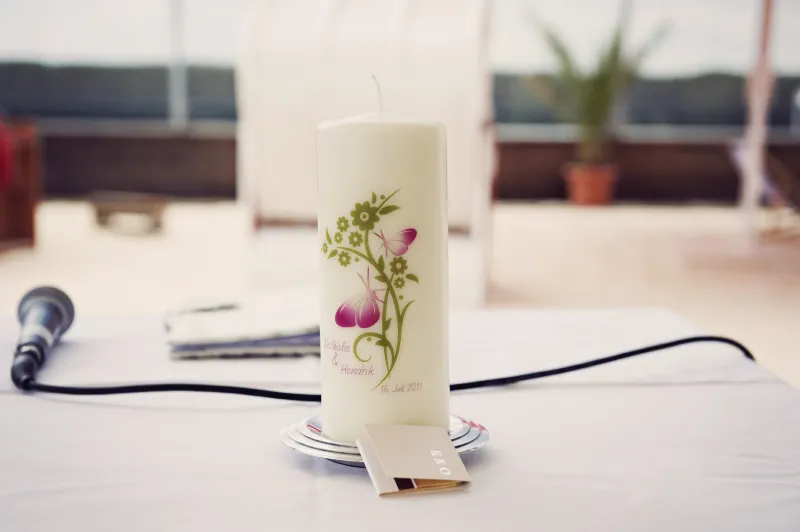
All the theologians I have met in my work are very open to your work. They are often happy to have their picture taken during the ceremony. If they don't ask you for it, why not suggest it yourself, that will certainly give you a big plus!
The wedding speeches are tailored to the wishes of the bride and groom and are usually very personal. That's why I find free wedding ceremonies very emotional if they are done well. Don't be afraid to get a little carried away. The bride and groom often sit facing the guests at the free wedding ceremony and allow you to take pictures from different positions and have a clear view of the couple.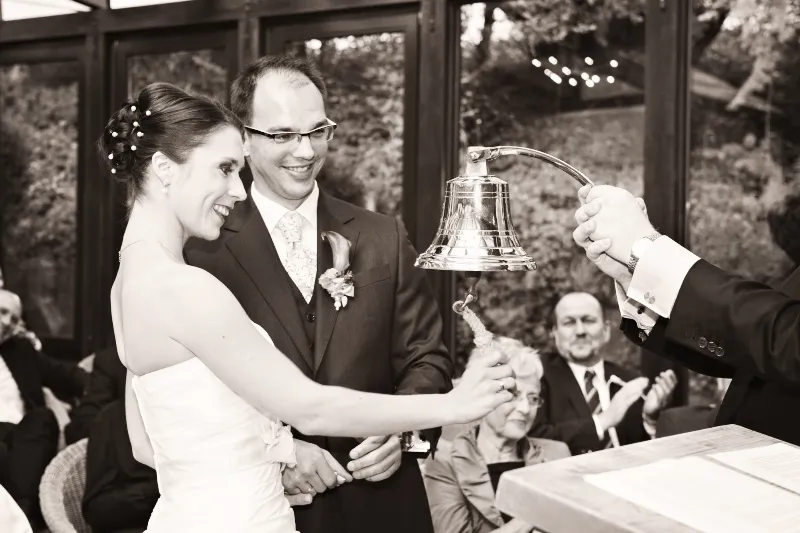
6. congratulations and specials
Congratulations to you, you have now completed the wedding ceremony and it's on to the next point. There are a few more specials waiting for you before we move on to the group photos in the next tutorial. Here I have listed the most important and most common events for you that you shouldn't miss.
Congratulations
You should take photos of the congratulations from all sides and also capture details. Especially when it gets emotional. Change the perspectives so that you sometimes have the bride, sometimes the groom in the picture and also show the faces of the guests from the side while they offer their congratulations. Feel free to change your position often so that you can hand over a colorful bouquet of photos later. For large parties, the whole thing can take a while. My record for a congratulations documentation was around one hour. There was a whole carnival club and the fire department waiting outside the church, as well as another 120 guests.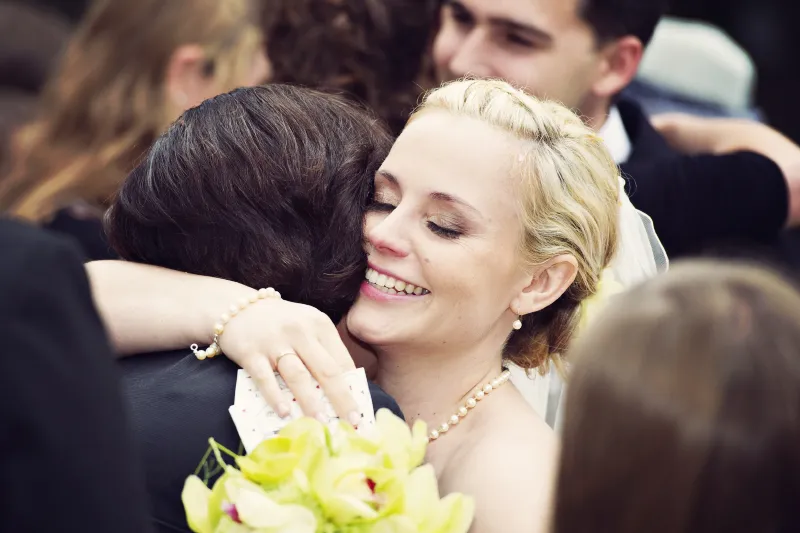
Specials after the wedding ceremony
First of all, your bridal couple may have a few flower girls; a beautiful moment that you should capture. In the same way, the guests might stand in a trellis and welcome them with bubbles or Blum. On the other hand, you will only rarely come across rice throwing.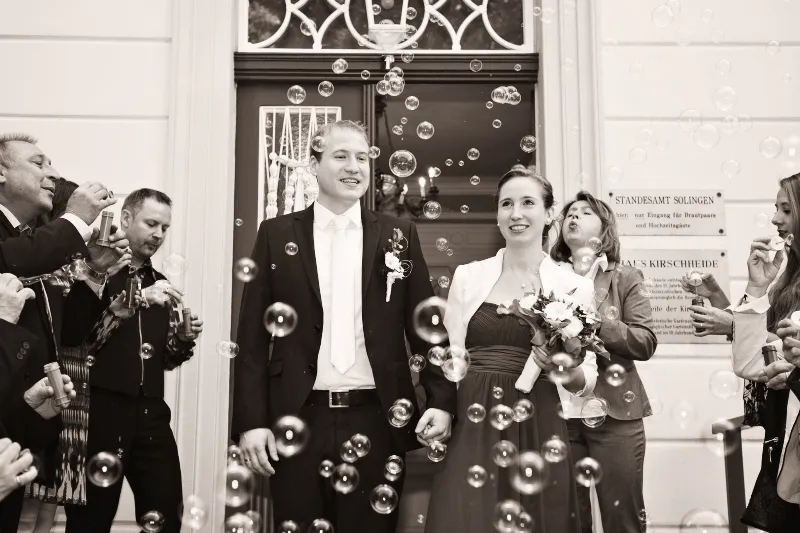
There are also various "surprises" for the couple that the guests or witnesses have prepared. The only important thing is that you get into position in good time to photograph them from all sides.
There are, for example, the classics such as cutting out the fabric heart and sawing wood. White doves are also often added, which the bride and groom release into the sky together. If the fire department arrives, there are often other great specials waiting for you. You have to take it all with you! Maybe you'll even be lucky and a fire engine can later be included in the photo reportage with the bride and groom!
Sometimes the bride and groom are also presented with colorful balloons, which they release into the air!
I would like to take this opportunity to thank you for reading, your comments and, of course, both positive and negative criticism of the tutorial series. I hope that the tutorial has helped you a little and I look forward to the next parts.
Nicole Schick
