Now it's sledding fast: we'll show you how to create a modern business Christmas card in InDesign in just 10 easy steps. Forget the classic bold fonts - and go for an eye-catching, grungy look!
Christmas cards are all too happy to ring in the festive season with beautifully curved fonts that almost look handwritten. Want to try something different? Then welcome to this compact InDesign tutorial .
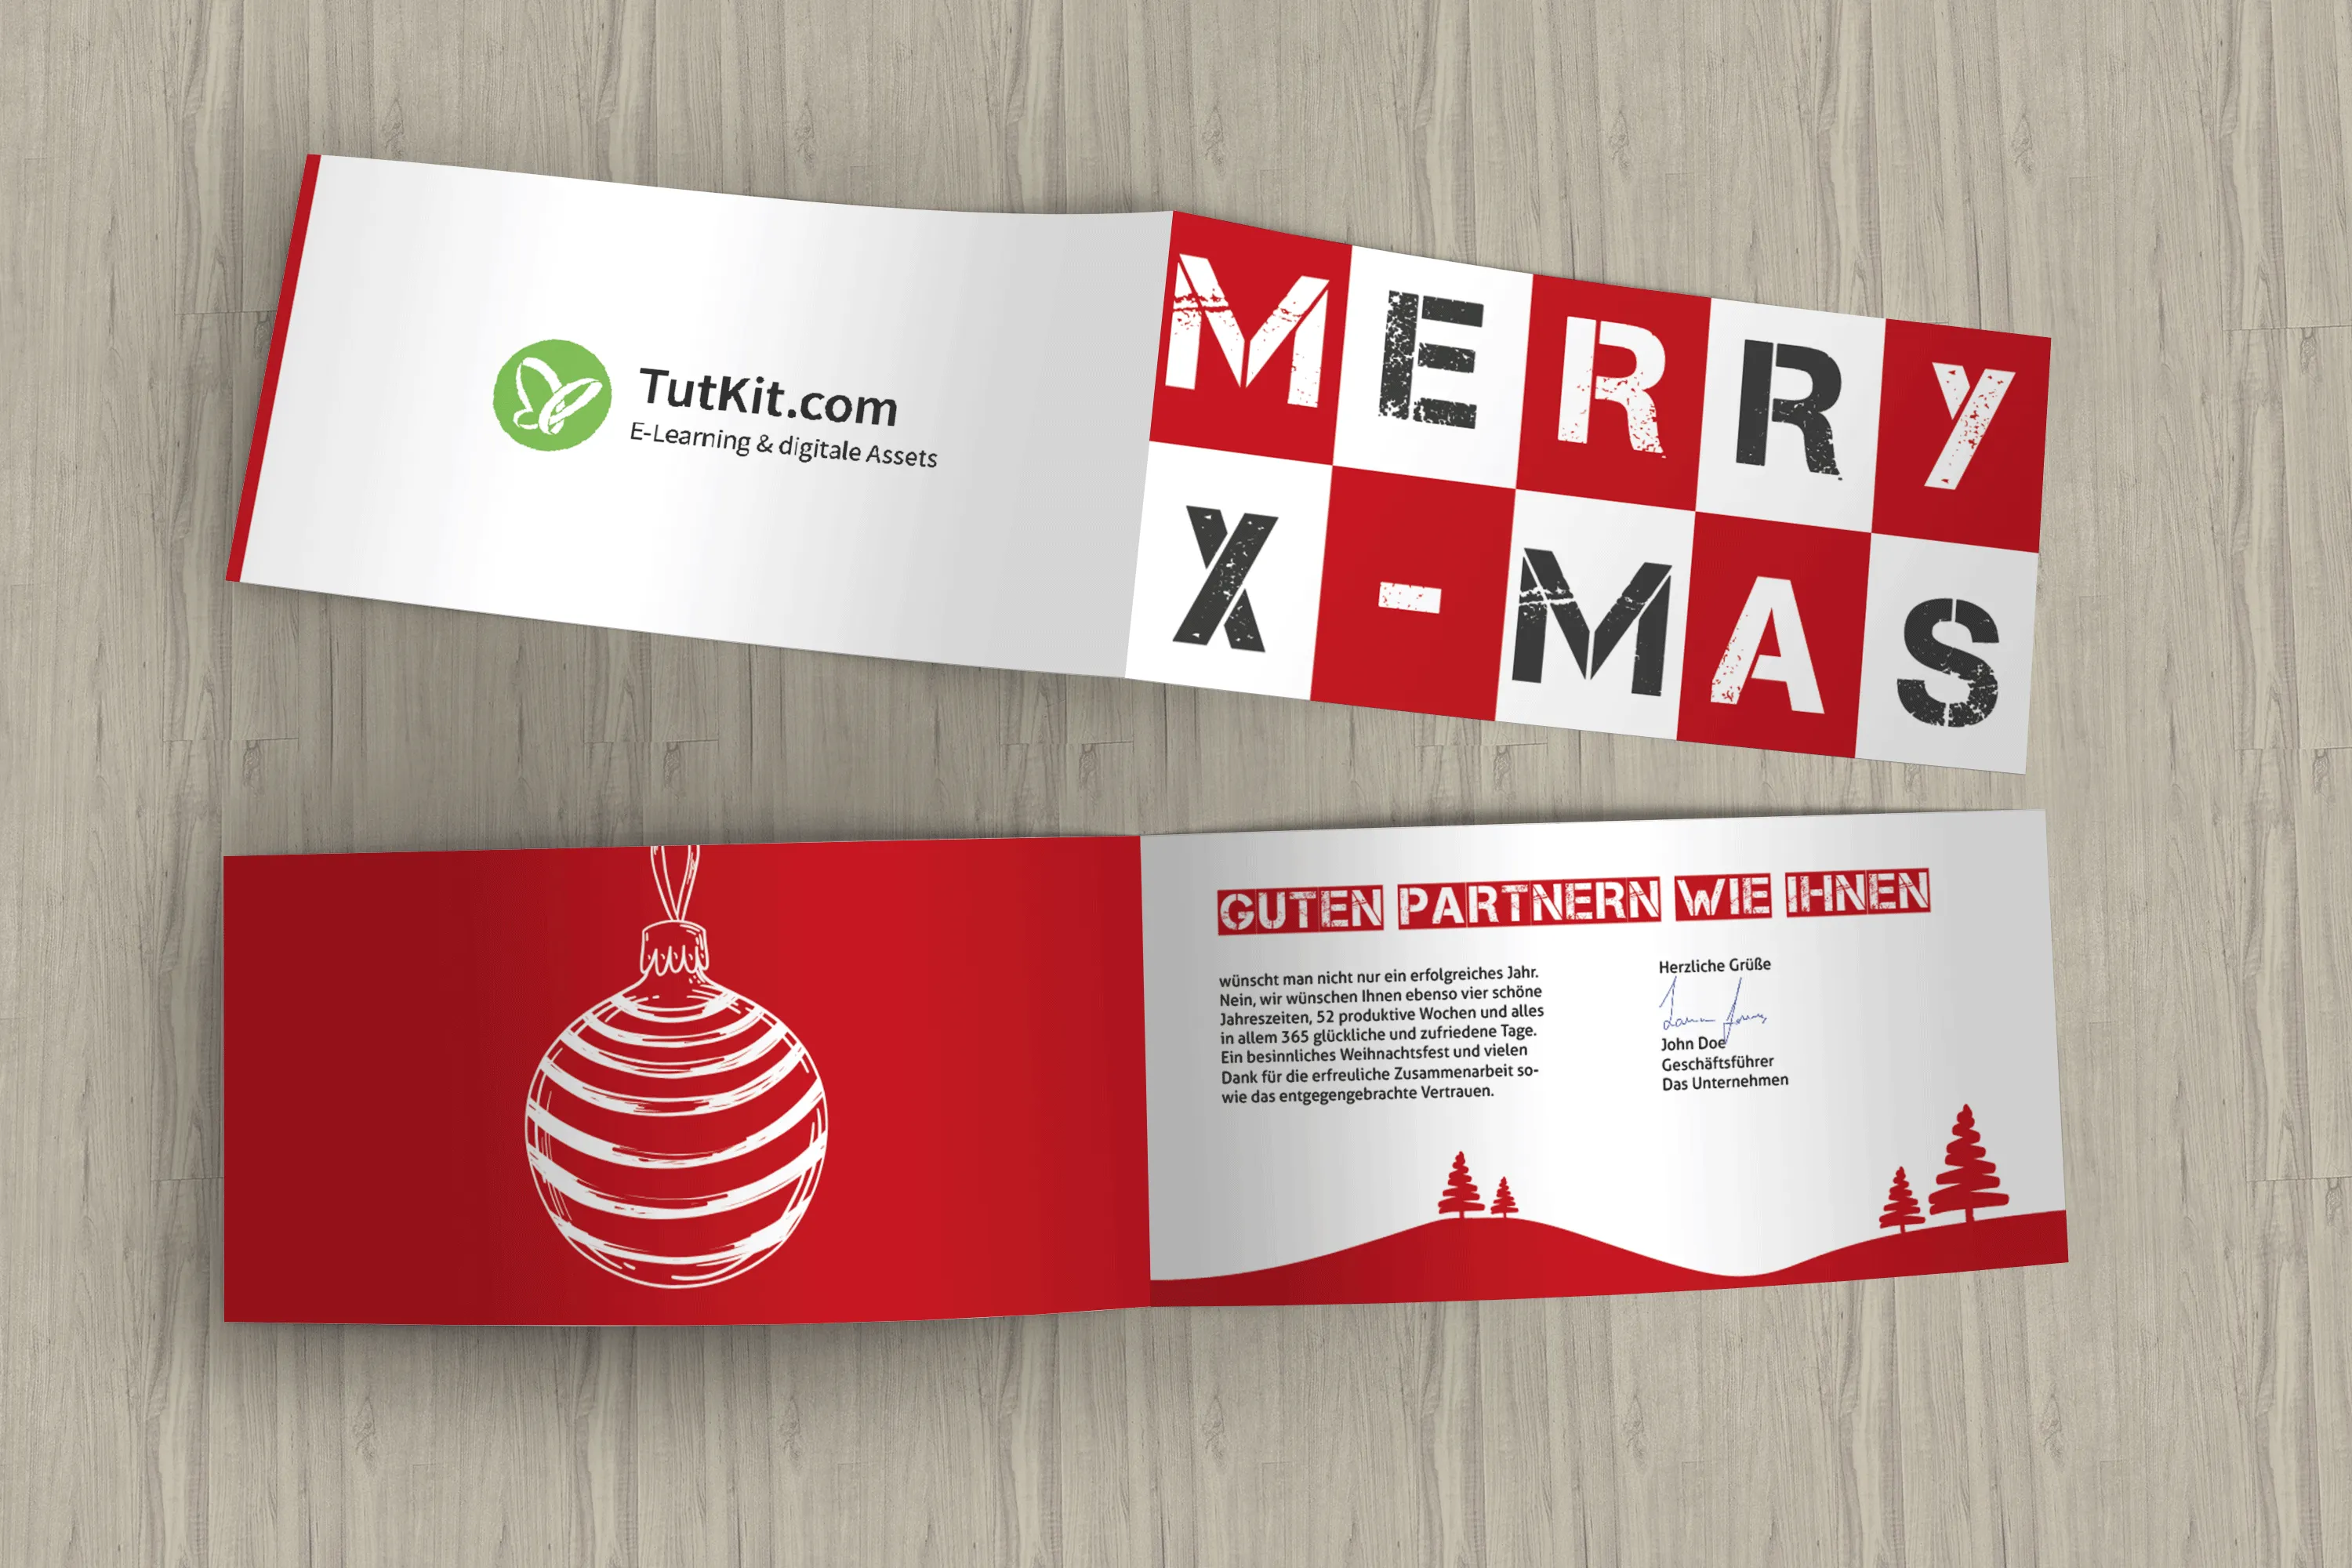
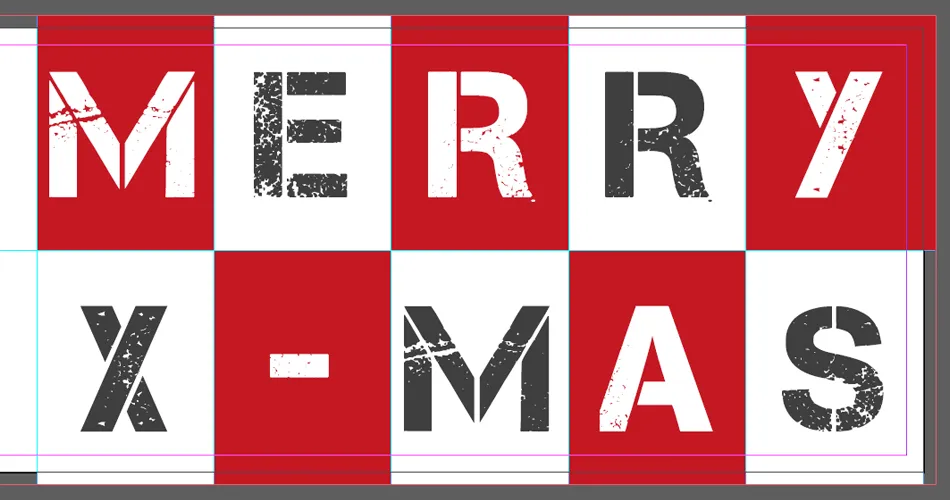
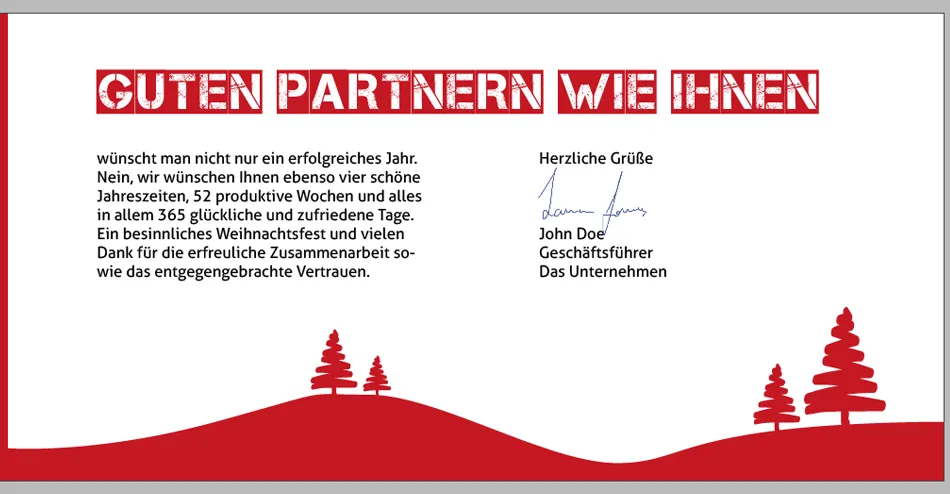
On the front of the business Christmas card , the rather grungy-looking Capture it writes a thick "MERRY X-MAS" on red and white tiles. On the reverse, a snow-white carpet sets the stage for your logo. The left inside of the business Christmas card evokes a contemplative Christmas mood with just a single illustration. And the inside right-hand side sets the final design point behind your Christmas greeting with a minimalist winter landscape.
How to design an extraordinary business Christmas card in InDesign . .. in just 10 steps:
1 | Set up a new document in InDesign
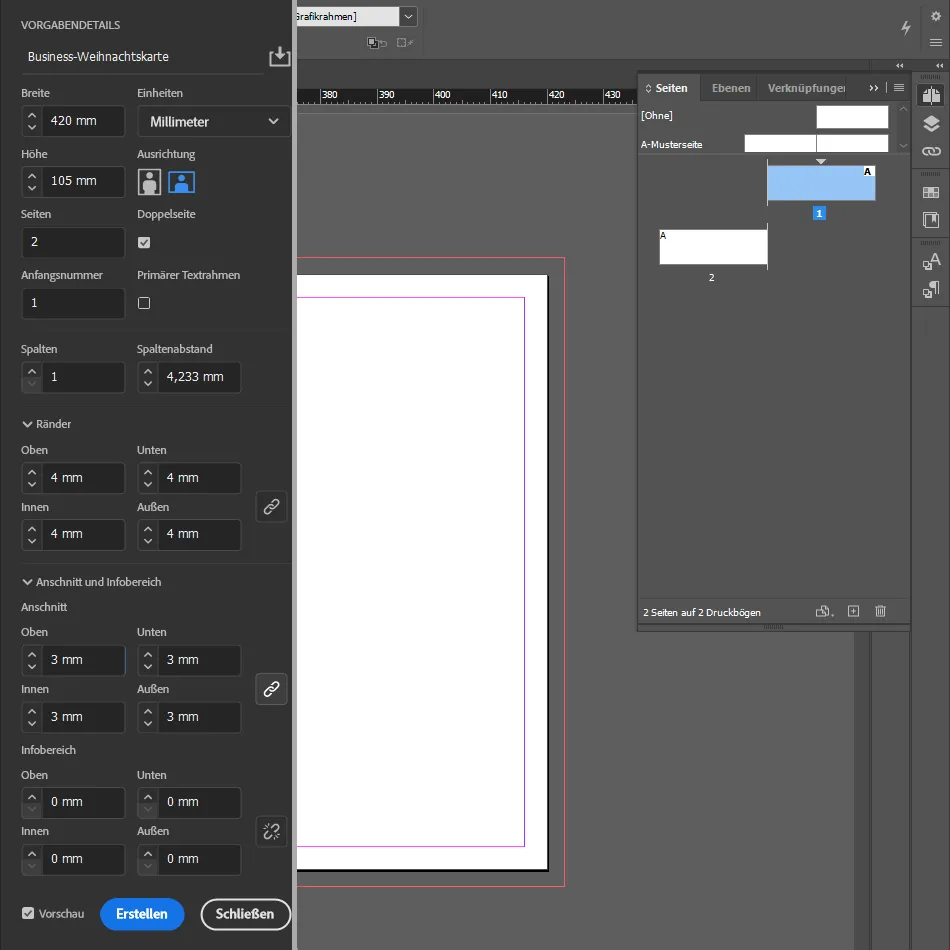
Open InDesign and create a new document. The settings for your Christmas card in DIN long landscape folding format are as follows: Width 420 mm, height 105 mm, 2 sides, margins 4 mm and bleed 3 mm. Click on Create.
2 | Draw guides
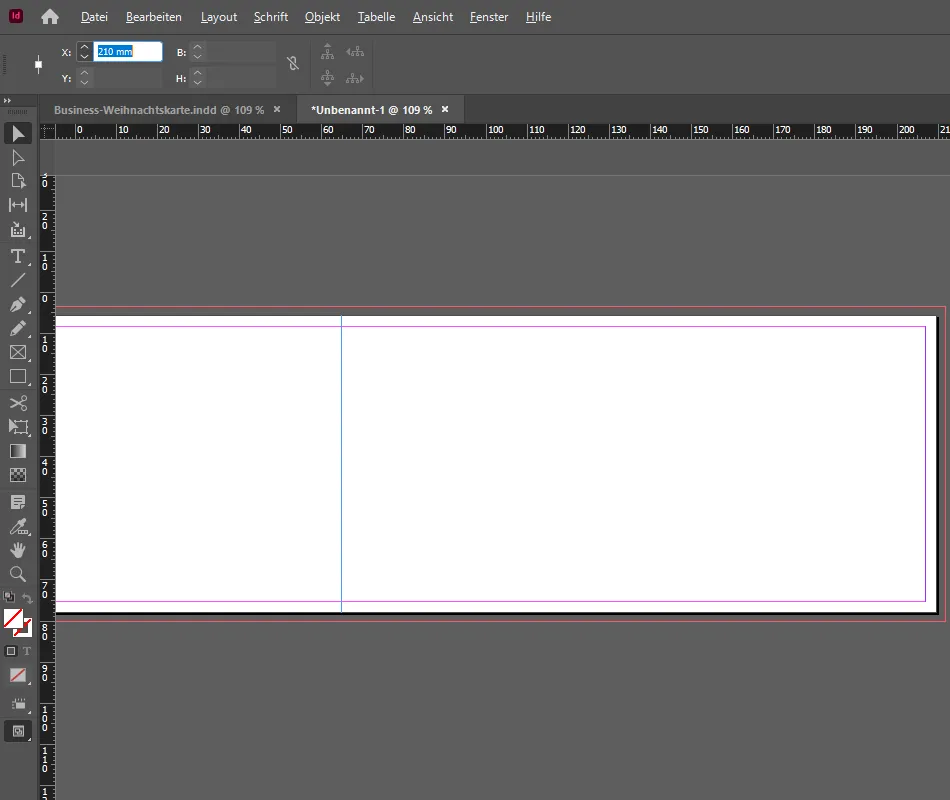
The blank pages for the outer and inner sides of your Christmas card are available in the pages control panel.
Draw a guide line from the left-hand ruler on both sides and place it exactly in the middle at 210 mm. This is the fold for folding the Christmas card.
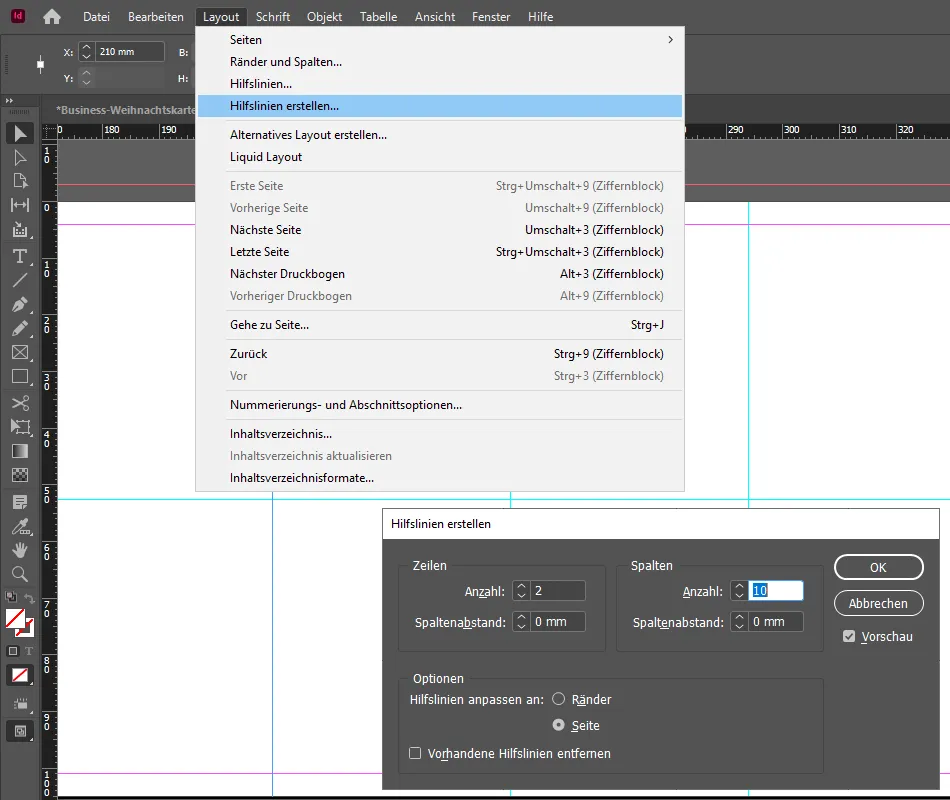
Create a structure for the later tile pattern on the first page . To do this, open the Create guidelines window under Layout. Enter the number 2 under Rows and the number 10 under Columns. Set the column spacing to 0 mm in each case. Select Page under Adjust guides to. Click on OK - and the basic structure for the business Christmas card is ready.
3 | Prepare illustrations, fonts and colors for the business Christmas card
Prepare the illustrations for the Christmas card. Use your own or download them directly from TutKit.com. We use the following as an example:
- Illustration for the left inside: a Christmas tree ball
- Illustration for the insideright: a Christmas tree (If you use these illustrations: First select the desired Christmas tree in Illustrator and copy it into the design in step 10).
You will need your company logo for the back. The following fonts are also used in the design of the business Christmas card :
- For the front: Capture it (for example, downloadable here: https://www.dafont.com/capture-it.font)
- For the inside right: Capture it 2 > (for example here: https://fonts2u.com/capture-it-2.font)
- For the Christmas greeting, we use Aller - it's best to use your company's corporate font for this.
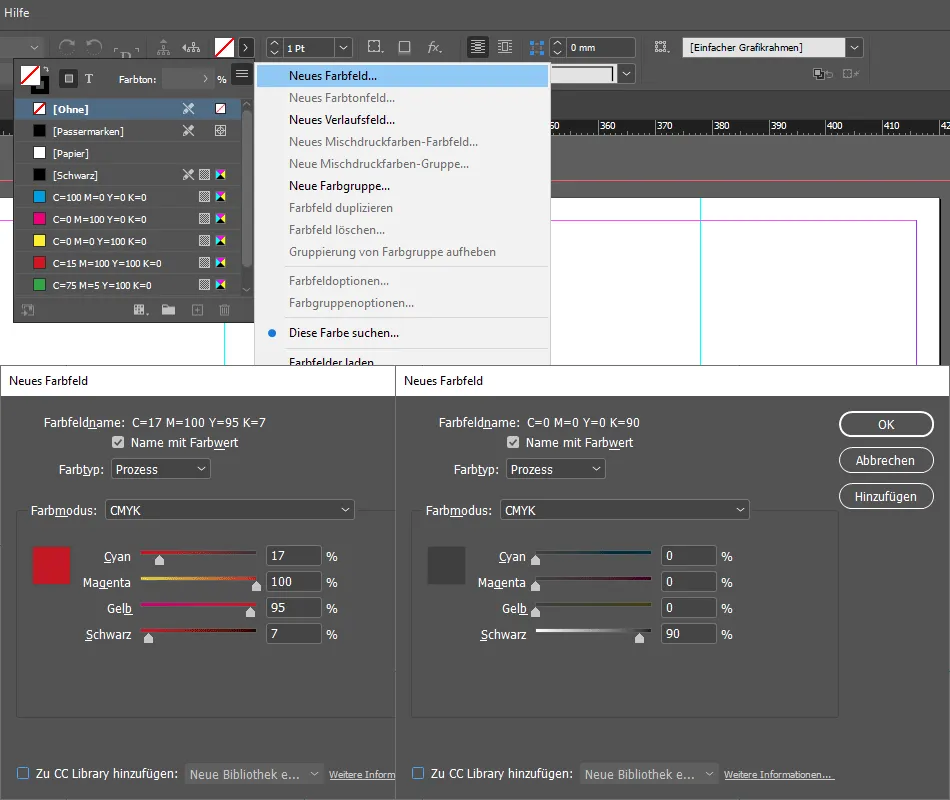
Now we need a Christmassy tint . Create a new color field, set cyan to 7, magenta to 100, yellow to 95 and black to 7 percent. Create a second color field for the font - cyan, magenta, yellow remain at zero, only black gets 90 %.
4 | Create a red tile with white lettering
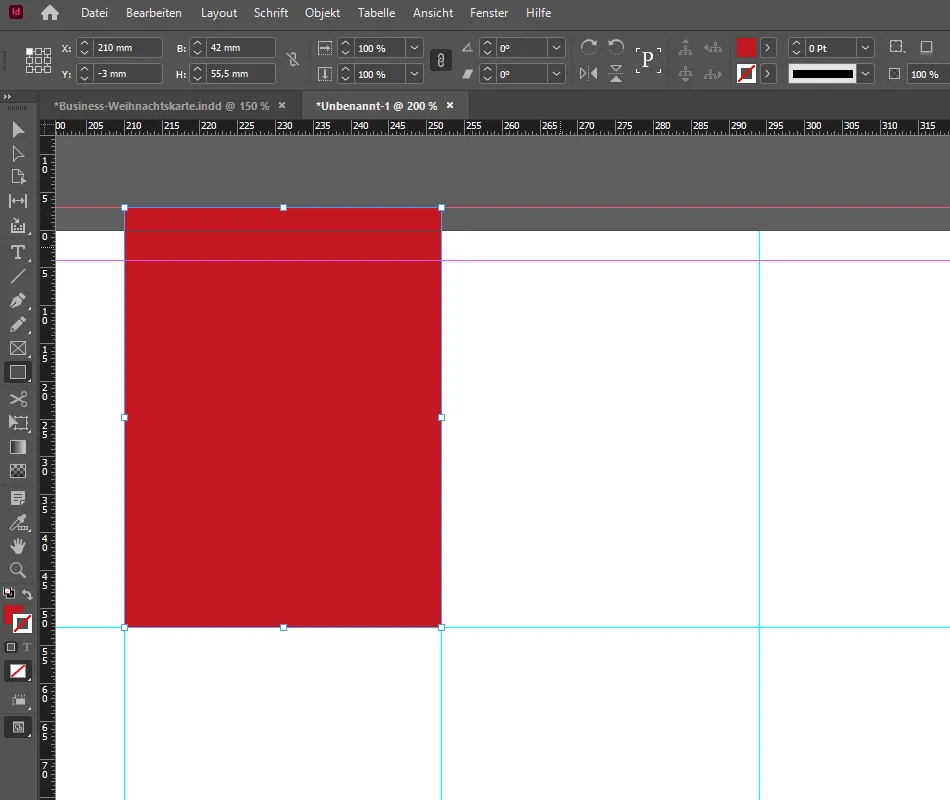
Activate the rectangle tool (shortcut M). Deactivate the outline for this. On the tile pattern made of guidelines, go to the upper rectangle to the right of the fold guideline (at 210 mm). Draw a rectangle there up to the bleed.
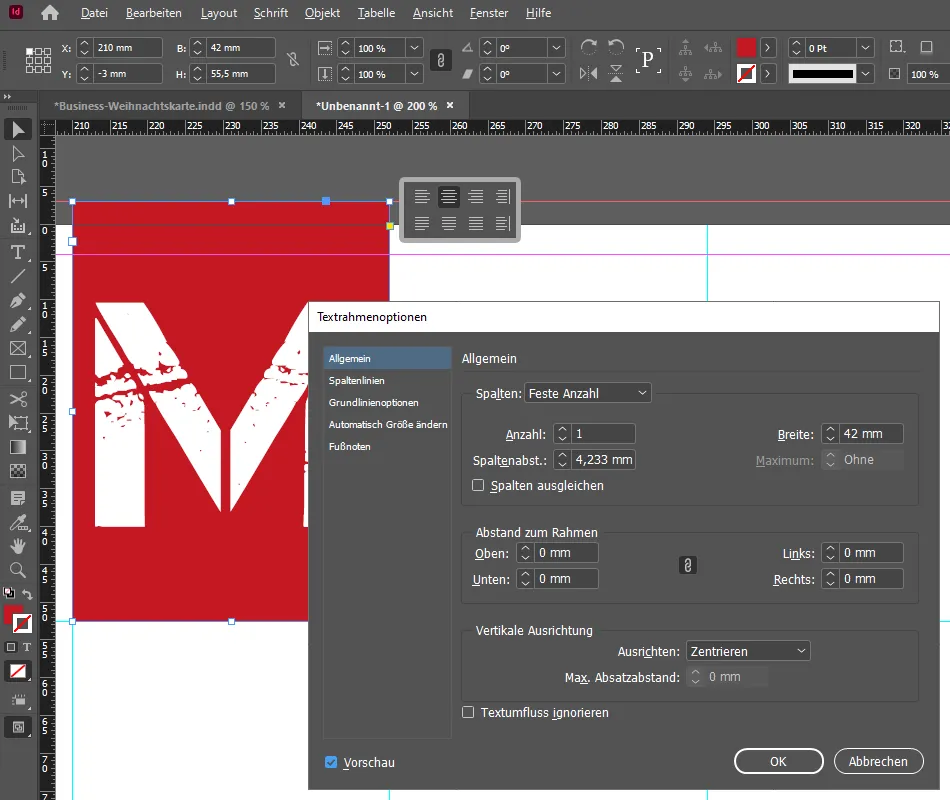
Grab the text tool (shortcut T) and the font Capture it. Set the font color to paper white, the font size to 120 pt and center the text. Write an "M" in the previously drawn tile.
To center the letter vertically, open the text frame options. You can do this by right-clicking and using the context menu. Or hold down the Alt keyand double-click on the tile. In the General tab, select the Center option under Align.
5 | Create a white tile with black lettering
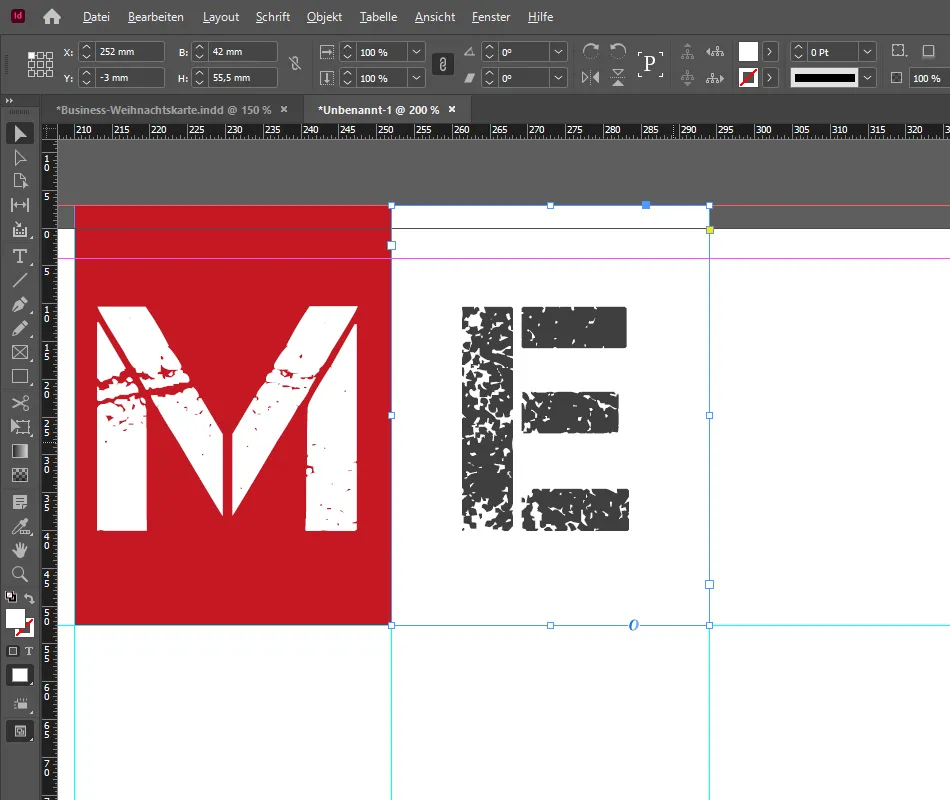
Activate the direct selection tool. Hold down the Alt key, click on the red tile you have just created and drag the copy you have created into the neighboring tile.
Change the letter there to "E" and match its color to the black color field created in step 4. Set the color of the tile to white.
6 | Greetings with a cheerful MERRY X-MAS
Now copy the rectangles to their original places and write "MERRY X-MAS" in them. Important for the tile at the top right: drag it to the right up to the bleed.
7 | Design the back of the business Christmas card
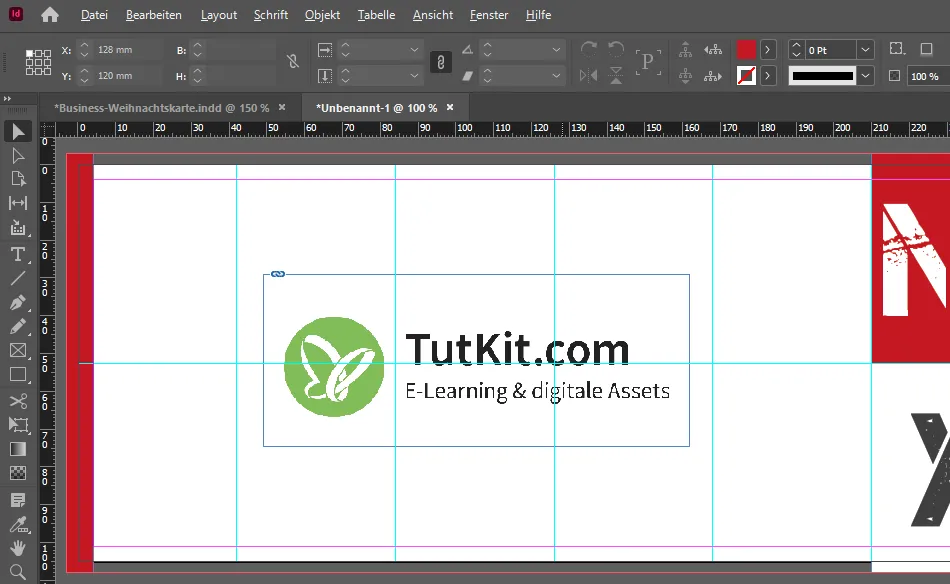
The front is ready. The back of the business Christmas card is designed quickly afterwards: draw a red bar to the left of the bleed line in the design using the rectangle tool. Also place your logo in the middle of the page.
8 | Design left inside page
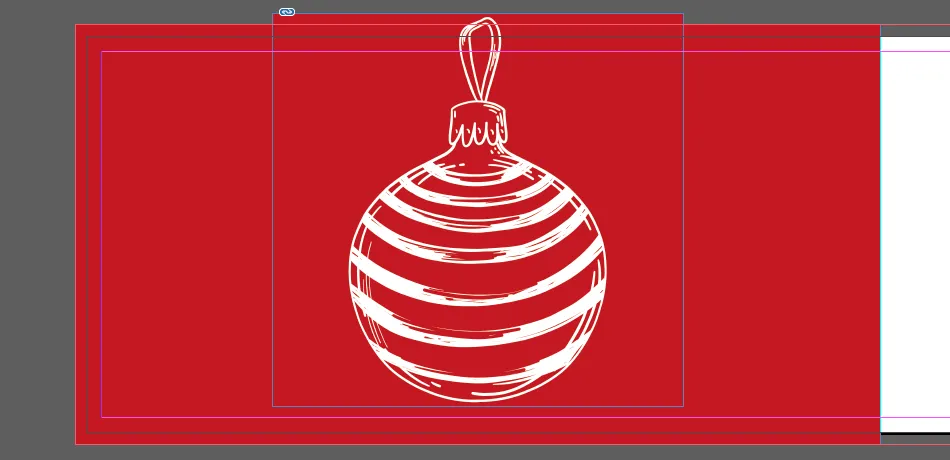
Now go to the inside left-hand side of page 2 of your document. Draw a red rectangle across the entire page - again from the bleed and up to the fold. Then place the illustration you have selected - in our example, we will use a Christmas tree ball, which we will position in the middle and let it "hang" into the page from above.
9 | Add text to the right inside page
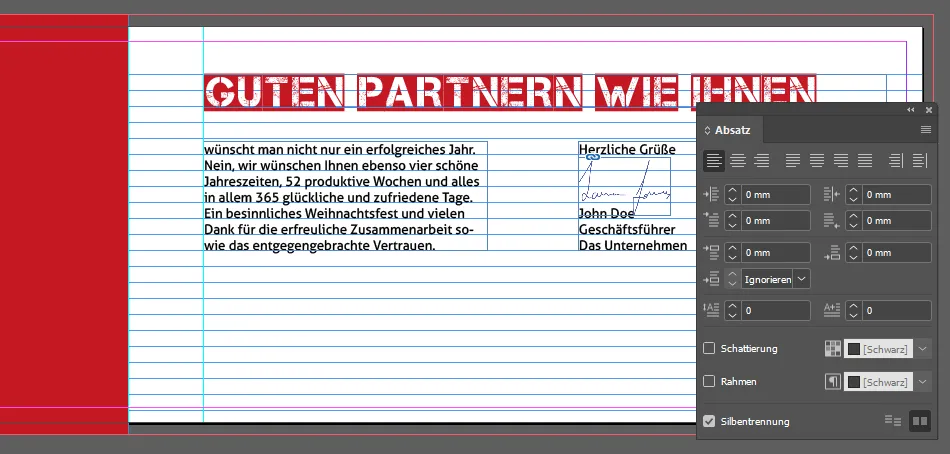
As we are now working with continuous text, we recommend activating the baseline grid . To do this, go to Grid and guides under View and click on Show baseline grid. Alternatively, you can also use the shortcut Ctrl+Alt+ß. Also add an auxiliary line at 230 mm to which the heading and body text should be aligned.
Draw a first text frame , this time select the Capture it 2 in size 32 pt, with the red text color we have defined, and write the heading.
Draw a second text frame and insert your greeting text. For this, we will use the font Aller in Regular with font size 10 as an example - you should use your company's corporate font. Open the paragraph windowvia Font and activate the symbol for Align to baseline grid at the bottom right.
Create a copy of the text frame to place the closing phrase on the right. You can also place the corresponding signature directly. By the way: You can find out how to crop your signature in our Affinity Photo tutorial and in our Photoshop tutorial. There is also a Photoshop action available on TutKit.com that automatically crops your signature.
10 | Wintery landscape on the right-hand side of the Christmas card
Finally, reach for the pencil. Switch off its outline and use our Christmas red as the color again. Draw a gently curving hilly landscape from the red area on the inside left.
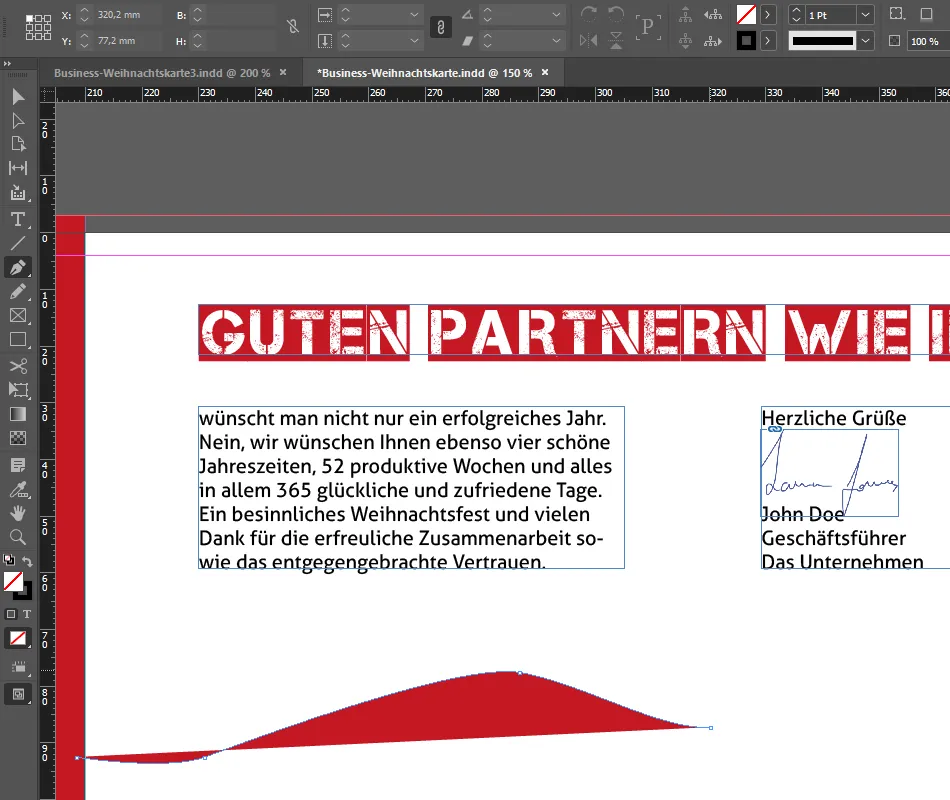
Draw this hilly landscape all the way to the right beyond the bleed. Run the path underneath the map to the starting point and close it there. Finally, place a few Christmas trees to transform the hilly landscape into a winter wonderland.
If you want to watch the tutorial in the video: You can find it here! Have fun and enjoy designing your business Christmas card in InDesign! And here's an extra tip if you want to save time and use ready-made templates:
