Step 1 - Idea & preparation
In my illustration, I would like to show a scene in which a young, curious tomcat tries to steal fish that people have just caught. The fish should be at a height, e.g. on a table or a wooden shelf. There are two fish on the table, one of which is in a bowl of water, and the other is trying to escape. As the whole thing is to take place in nature, I will draw a pair of insects, a worm, a fishhook and a green meadow with Blum.
.webp)
Preparation
After the idea comes the search for reference images! No artist paints from their head, everyone uses images and objects. This helps to reproduce the structures and shapes correctly.
This is particularly important if you don't have much experience or knowledge of anatomy. I chose these reference images, among others, for my illustration.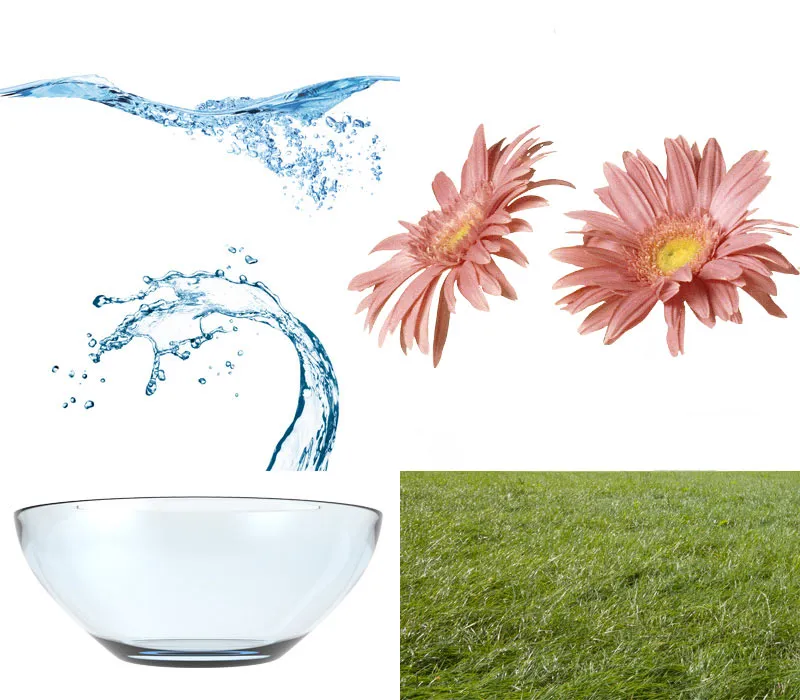
Step 2 - Basics
Drawing cartoon animals is not much different from drawing real animals. However, the proportions are exaggerated here; it always depends on what you want to emphasize, e.g. a big head, long legs, a big belly, etc. The cartoon animals are deliberately depicted in human poses and clothing.
Cat
In my case, I have divided my cat into three almost equal parts, with the middle part being slightly larger because the emphasis is placed on the big belly. The eyes also play a major role here, because emotions are conveyed through the eyes. It is a happy, young cat who is trying to catch a fish with enthusiasm and curiosity. And I want to reflect that by drawing big, bright eyes.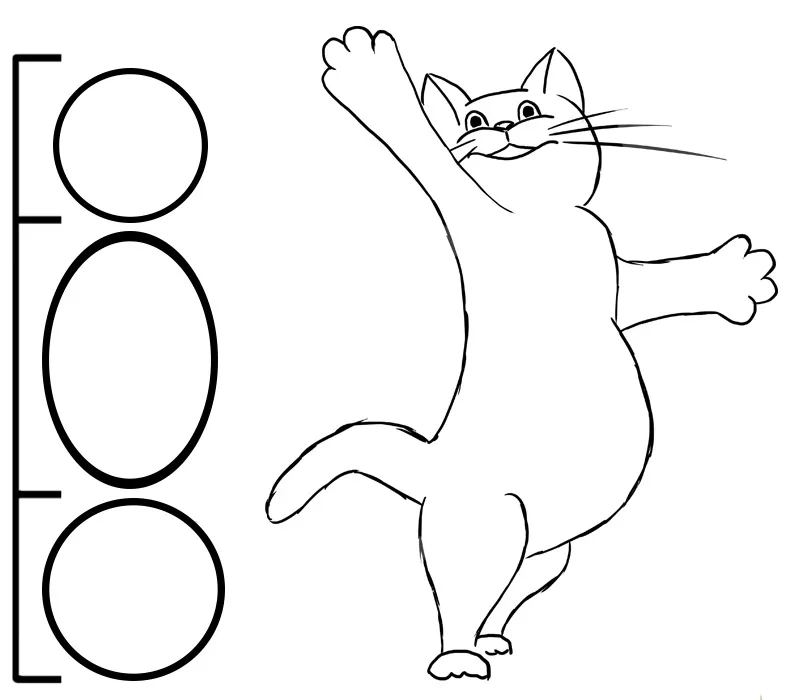
Fish, worm and insect
I also used reference pictures for the fish and changed the proportions slightly. I wanted to reflect the emotions of each animal. The fish in the bowl makes big eyes and hopes that it will not be discovered by the tomcat. The fleeing fish makes a very frightened face, which is emphasized by its large eyes and open mouth.
As I have already written, the eyes are very important because they convey emotions. So I will also paint big eyes on the frightened worm trying to escape from the hook.
I chose a reference picture of a dragonfly for my insect because I liked the wings. To make the insect look funny and fit in with the rest of the picture, I wanted it to have a slightly thicker body.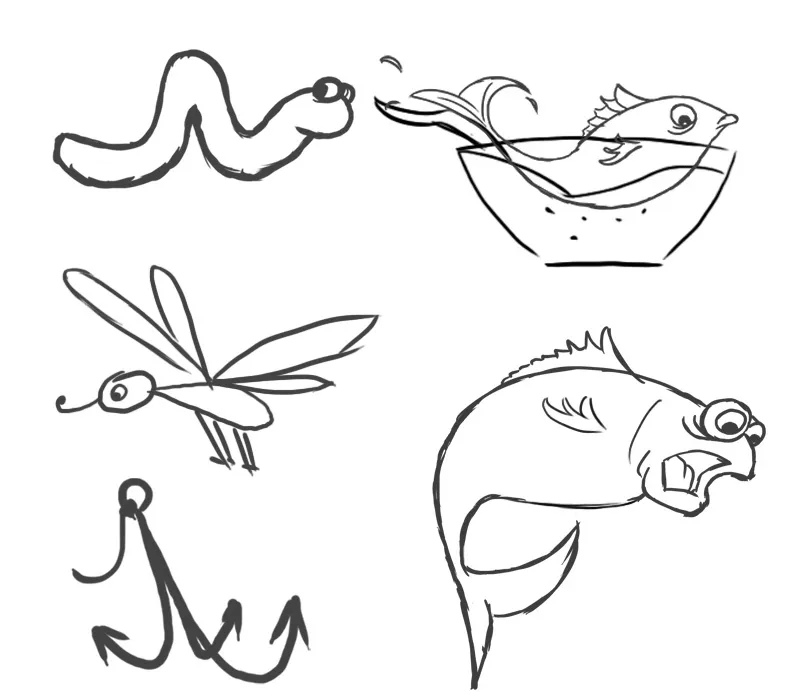
Golden spiral
I will design the sketch according to the golden spiral, which is an extension of the golden ratio. The golden ratio is nothing more than a division in a certain ratio and is perceived by people as harmonious. The aspect ratio of section a to section b is 61.8% to 38.2%. If you divide a sheet according to the golden ratio, the larger area A is named the smaller area B. Area B is now also divided using the golden ratio. A larger area is created in area B (we will now call it C) and a smaller area (we will call it D). Draw a ¼ circle in each of the resulting areas. This gives us a Fibonacci spiral..webp)
Step 3 - Sketch
Once all the details have been clarified and collected, such as the idea, reference images and the section, it's time to draw the sketch. As I have opted for the golden spiral, the eye-catcher will be in the center of the golden spiral. In my illustration, the eye-catcher is the fleeing fish and the cat's paw. The cat's eyes are also in the golden section. I have painted the two fish and the hook together as a group that belongs together. I have drawn the little worm almost at the edge, which shows once again that the little one has almost managed to escape the evil hook.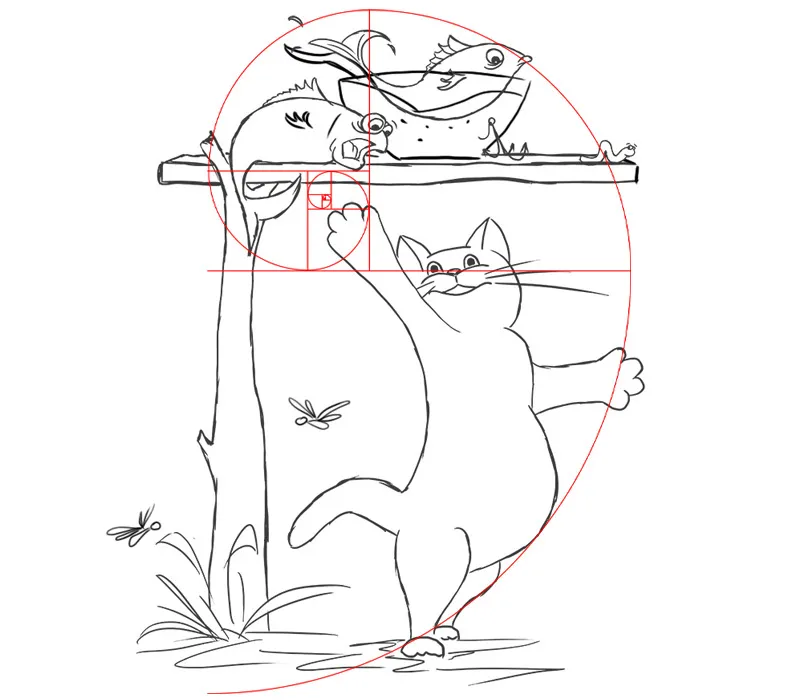
Step 4 - Define colors
The next step is to assign the colors to my illustration, which I will use as a guide for the design. I have limited myself to two basic colors, the complementary colors orange and blue. And as additional colors for the grass, I chose two shades of green that are slightly different. I paint each object on a new layer and name it accordingly. And I put each of these layers in a folder, which I also give the respective name: Cat, Fish Blue, Fish Orange, Bowl, Water, Worm, Hook, Table, Meadow, Grass, Blum, Insects and Background. That's how many layers there will be. This way you have a better overview and don't get confused.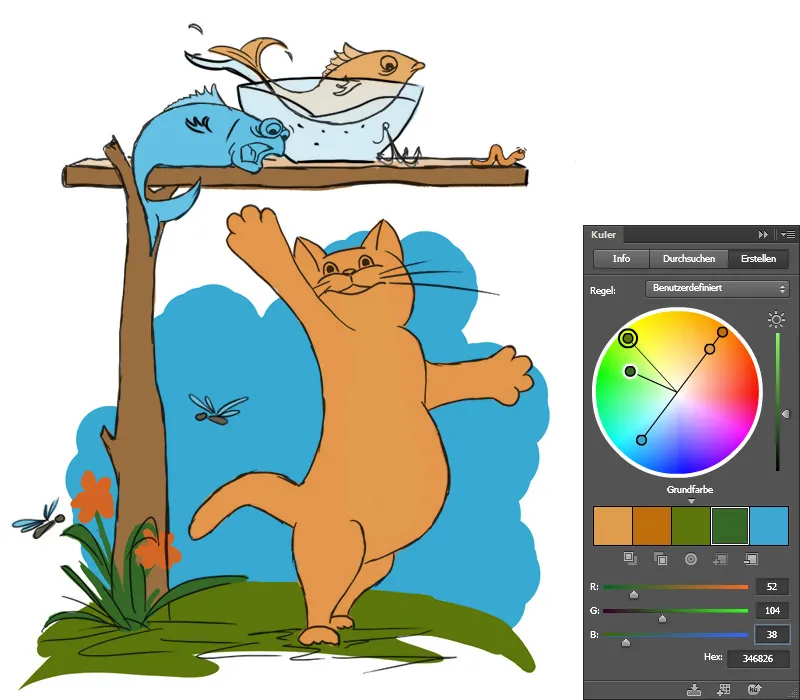
Step 5 - Prepare brushes (brush tips)
The right choice of brushes is important for every drawing, illustration, etc., because it makes the work easier and leads to the desired results. For my illustration, I used two types of brushes; one for the basic drawing and the second to reproduce structures..webp)
Here is an overview of the brushes used:.webp)
Step 6 - Painting the cat / fur
Right at the beginning I would like to say that you should use a graphics tablet for detailed painting!
I'll start my illustration with the cat and Blender out all the other folders with the objects so that they don't get in the way.
In the first step, I'm going to paint my cat with a nice, fluffy coat. To do this, I choose my self-made cat hair brushes (which you can download from the working materials). In the brush settings, only the middle part under brush shape is important, where you can set the size, x-axis or y-axis as well as the angle and distance.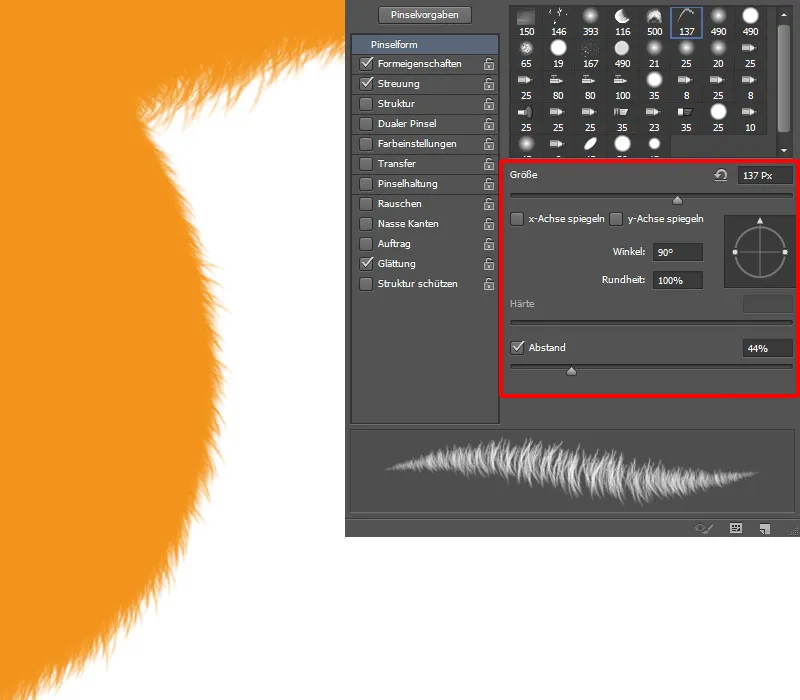
I have marked the direction of movement with red lines. It is important to change the setting constantly so that the fur looks realistic, e.g. the fur on the back, chest, under the paws, legs and tail is much longer than on the ears and paws. I paint the fur on the plane with the cat.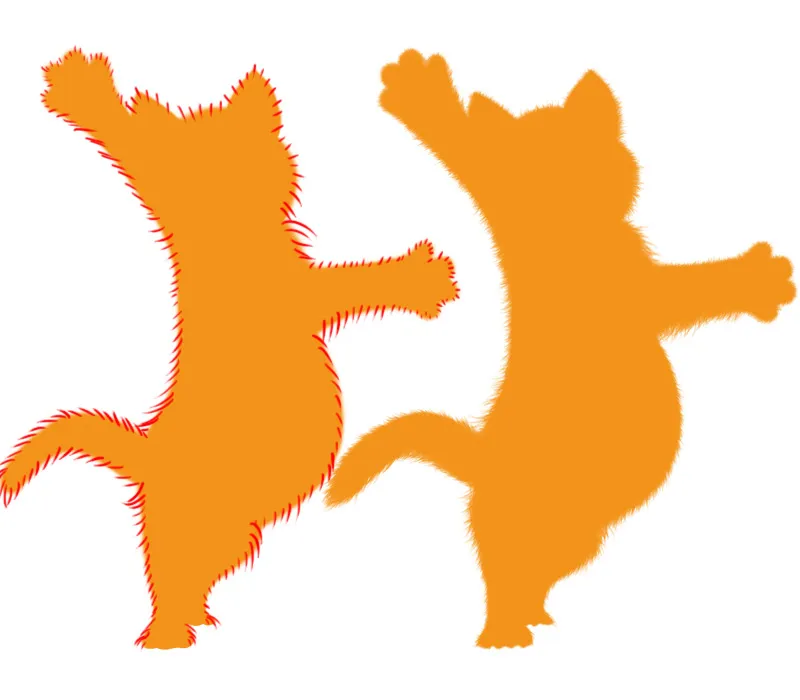
Step 7 - Cat / light and shadow
By playing with light and shadow, we can see the shape of the object. I create a new layer above the layer with the cat and create a clipping mask; I will shape my cat on this layer. To do this, I Blender in the sketch with the cat again and reduce the opacity so that the contours are easy to see. To make it easier for me to paint, I painted a sphere on which I can see the color gradient and light and shadow. This allows me to pick up the colors from the sphere with the pipette tool. I select the Painting 2 brush , reduce the opacity and flow a little (to approx. 70%) and paint the light and shadow with broad strokes.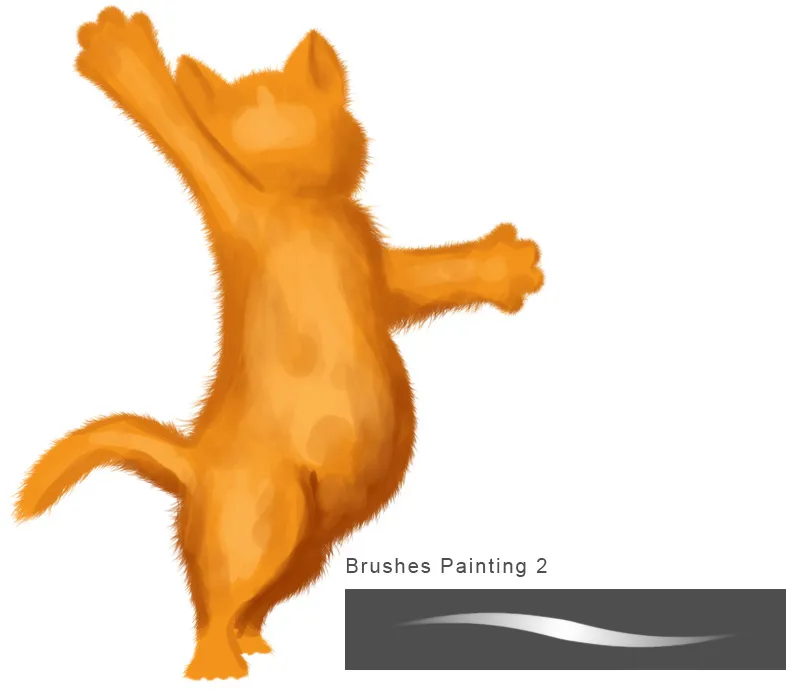
I can already see the rough shape of my cat; now I use the Wipe Finger tool (with the Wipe Finger brush from my palette) at a strength of approx. 70%, select Pick up all layers and lightly blur the color gradients. In between, I paint again and again with the brush tool and smudge it with the smudge finger until I have achieved my desired result.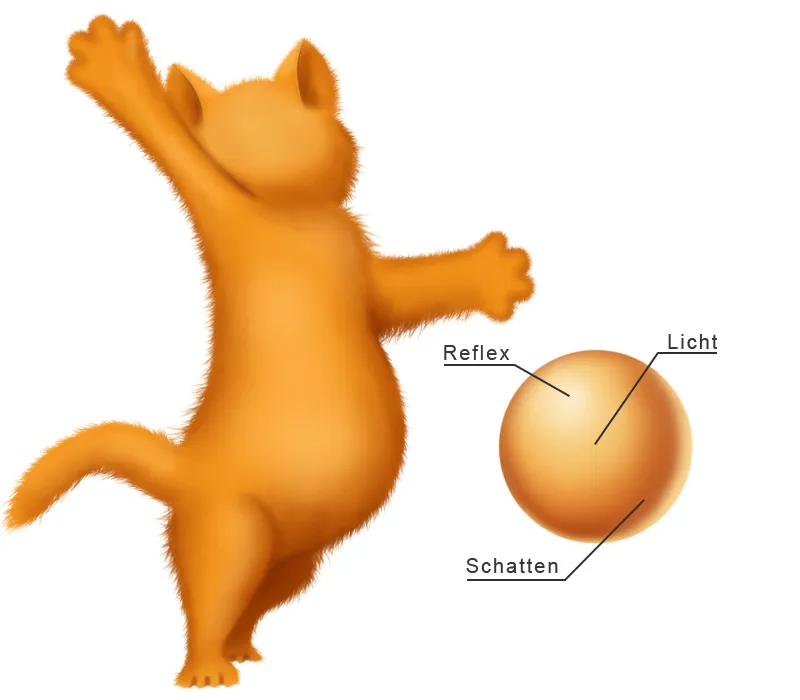
Step 8 - Shaping the cat / face
In the next step, I paint a face for the cat. I paint the white of the eyes on a new layer with white paint and the iris, nose and mouth on another new layer. It is better to create more layers; you can join them together later.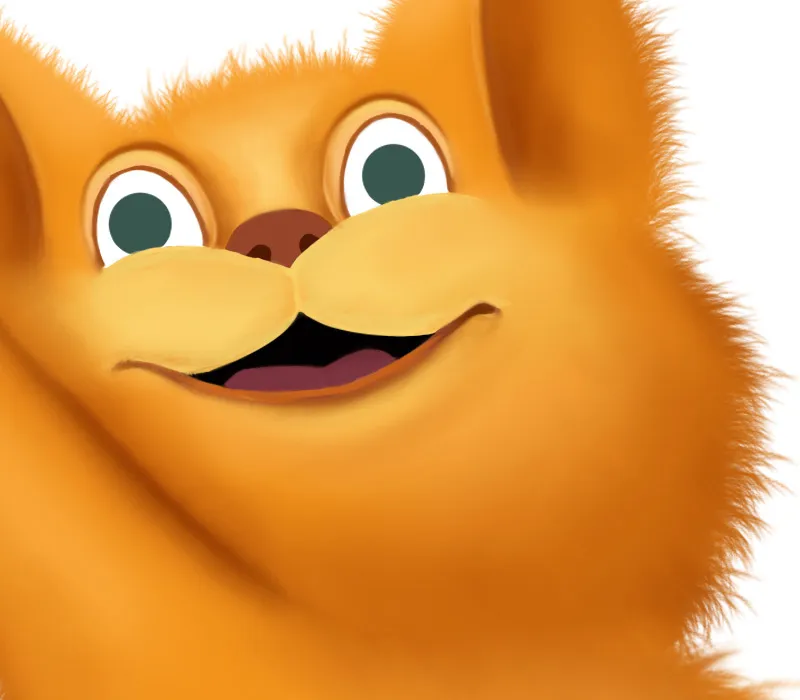
Cat / Face - Eyes
I select the layer with the white of the eye and click on the Fix transparent pixels icon , select the Soft 1 brush with a soft edge, reduce the opacity and flow to approx. 20%, use a slightly grayish tone and paint in the outer area. The eye no longer looks flat. Now I paint a slightly harder edge with the Painting 2 brush.
Then I select the layer with the iris and fix the layer with the same icon Fix transparent pixels. I continue painting with the same brush tip, select a dark green color and carefully paint around the edge of the iris. Then I choose a rich yellow and paint the iris fibers with light strokes. For the pupil, I use the Hard 1 brush with a hardness of 90% and paint in the middle of the iris with black paint. Now I paint light reflections: I choose a rich, light shade of yellow and paint with the same brush tip. Opposite the light reflex, I paint the highlights. I use the Painting 2 brush tip with low opacity and a flow of 20% and paint light strokes.
I paint on the layers with the nose and the tongue with the same brush and smudge it with the smudge finger. It's important not to smudge the light reflections with the smudge finger! As you can see, you paint from the back to the front.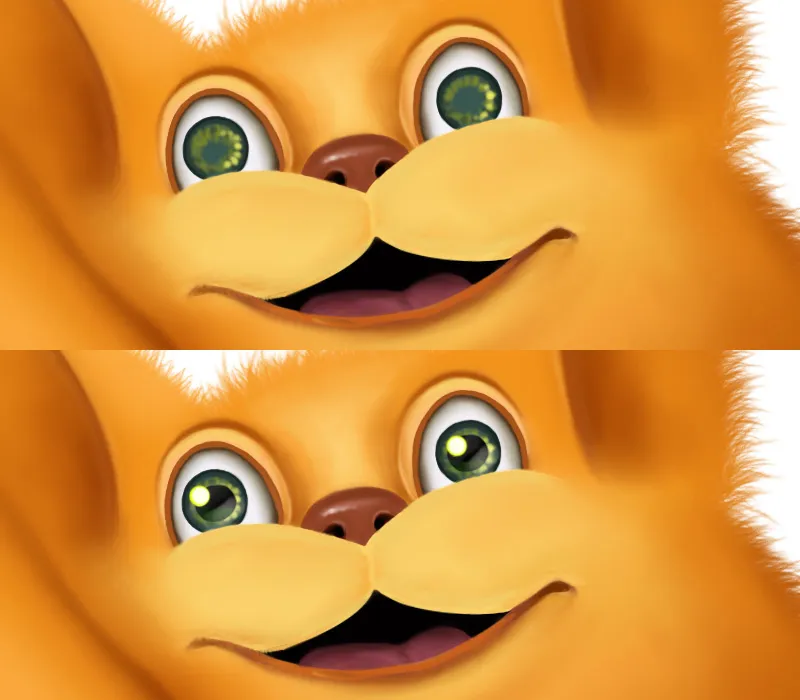
Step 9 - Cat / basic fur
I used the Painting 2 brush for the fur. I set the opacity and flow to 50% and used light strokes in the direction of the hairs. After a lot of trial and error, I realized that it looks much better if you paint the hairs individually and not with the brushes especially for fur. Of course, it's a matter of habit! Just try out both options! If you do decide to use the fur brushes, you will need to adjust the brush settings a little, e.g. the spacing, which needs to be increased considerably!
I used the same brush tip and the same color to paint around the main and toe pads on the paw.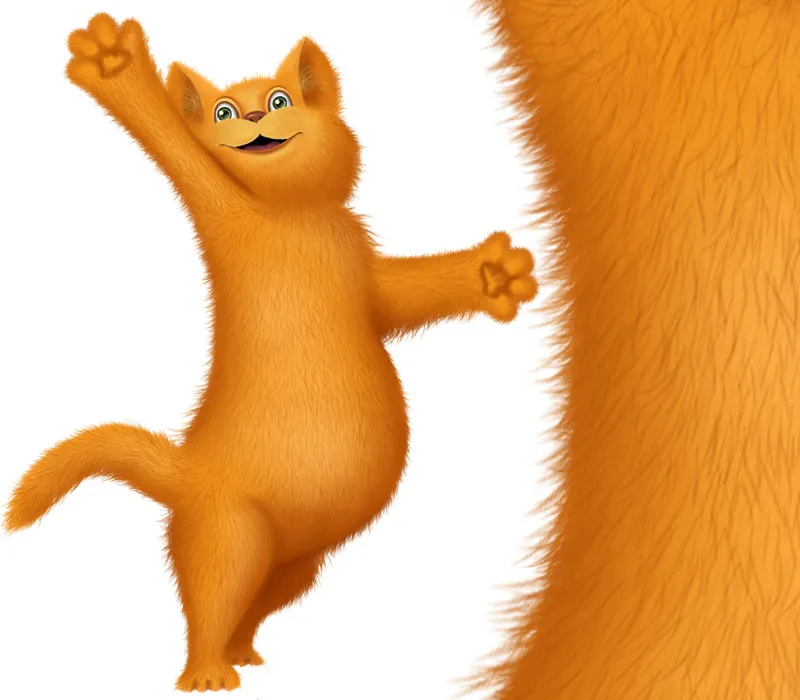
Step 10 - Cat / paws
In the next step, I paint the main and toe pads on a new layer. I select the Hard 1 brush with a hardness of 90% and paint the pads with a dark color, then click on Fix transparent pixels, select the Painting 2 brush , paint with a light color in the middle and then smudge it with the smudge finger tool. I paint the structure with a lighter shade of color and light strokes and dots.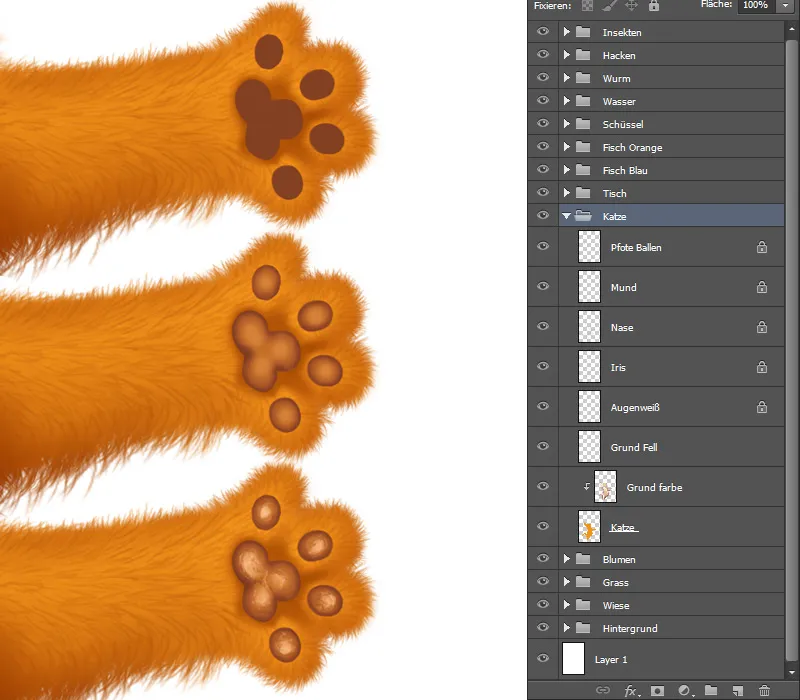
I paint small hairs around the pads with the brush for the fur (cat hair).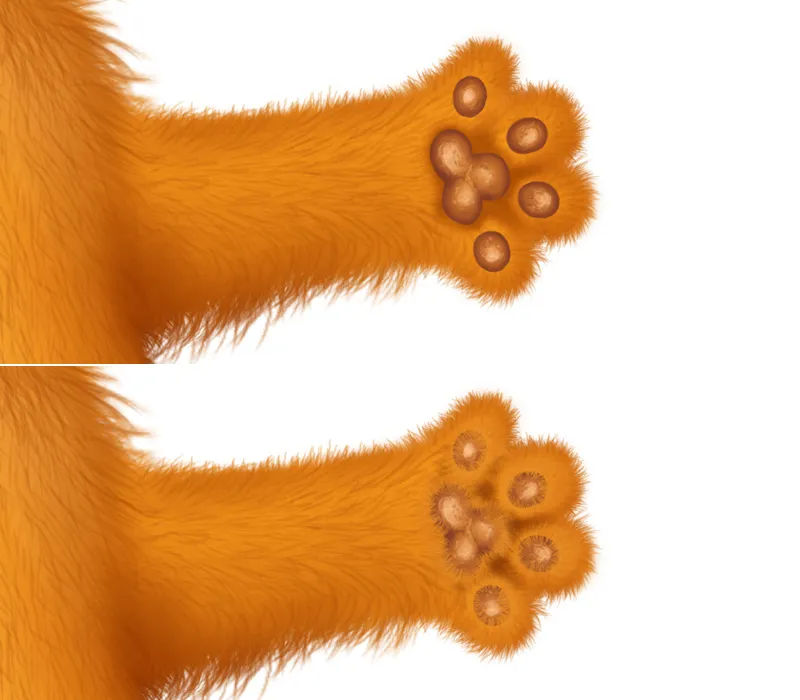
Step 11 - Cat / fur
Face
To make the fur look soft and fluffy, I paint in more fine hairs. To do this, I choose the cat hair brush again and increase the distance to approx. 200% with a very low opacity and a flow of approx. 20%. I pick up the color from the ball, which is a medium tone ( 1 ). Don't forget to change the size and angle so that the fur lies nicely! I paint the fur on a new layer, which I name Fine Fur. Now I choose the brush Painting 2 and use the color from the ball ( 2 ) to paint individual light hairs on the forehead, ears and cheeks.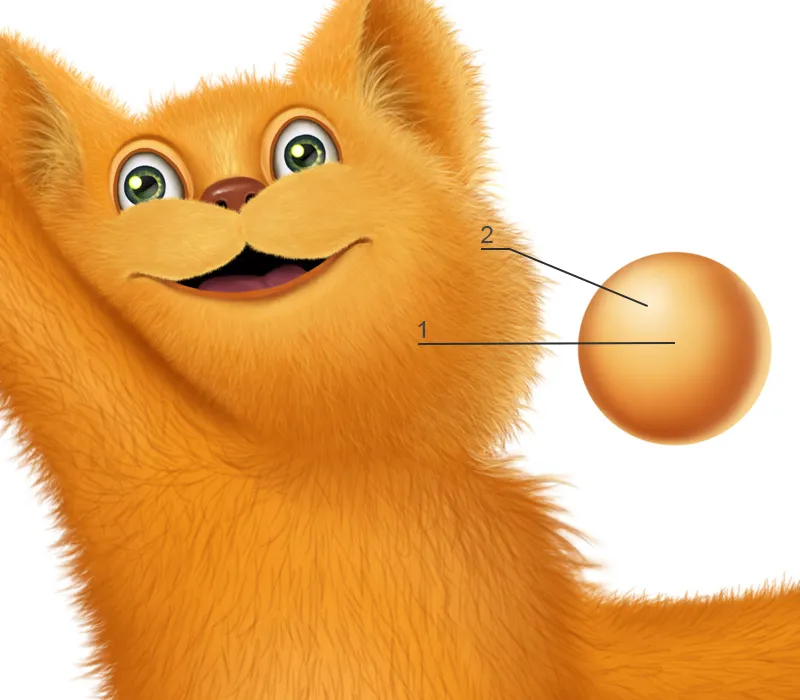
Cat / Face - Details
I will paint more details on the muzzle on a new layer. Here, too, I'll use the Painting 2 brush tip and paint from the back to the front. First, I'll paint the dark dots, which are the areas from which the whiskers grow. To do this, I choose a dark shade from the ball and paint the dots with light strokes.
I choose a light shade from the ball and paint long and short hairs with the same brush.
As a final step, I paint fine, small hairs and whiskers in the nose area with almost white paint, a small light reflection on the lip and eyelashes.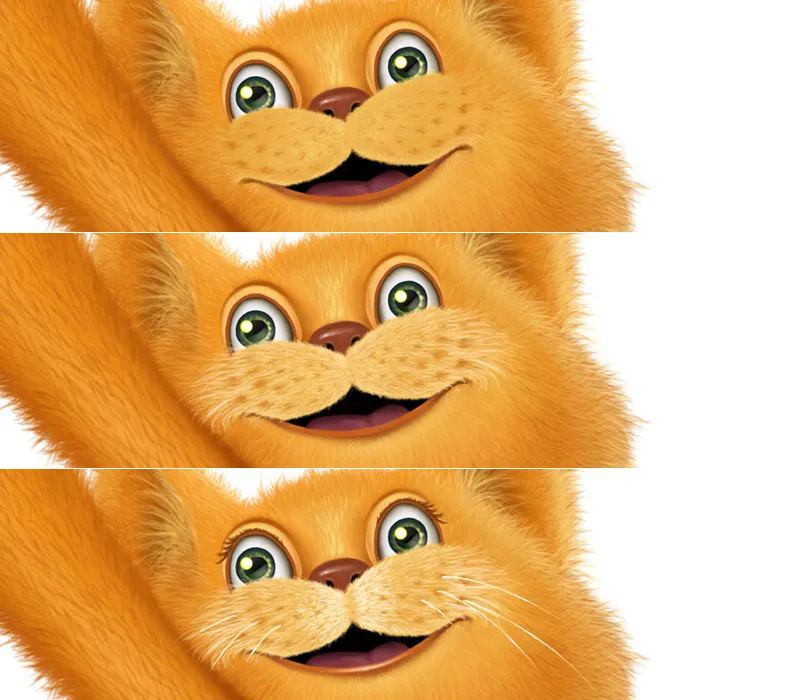
Cat / stripes
I'll make the stripes using the gradation curves, creating one for light areas and one for dark stripes. I blend out the two layers with the black mask. Using a white foreground color and a soft brush tip, I first paint light stripes on the body and in the area of the face.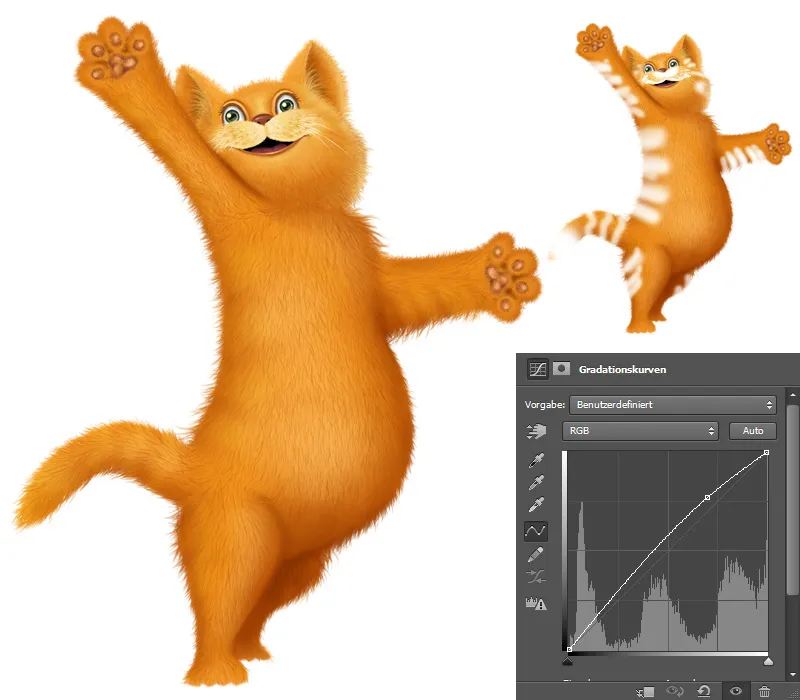
On the other layer, I paint dark stripes on the body and ears.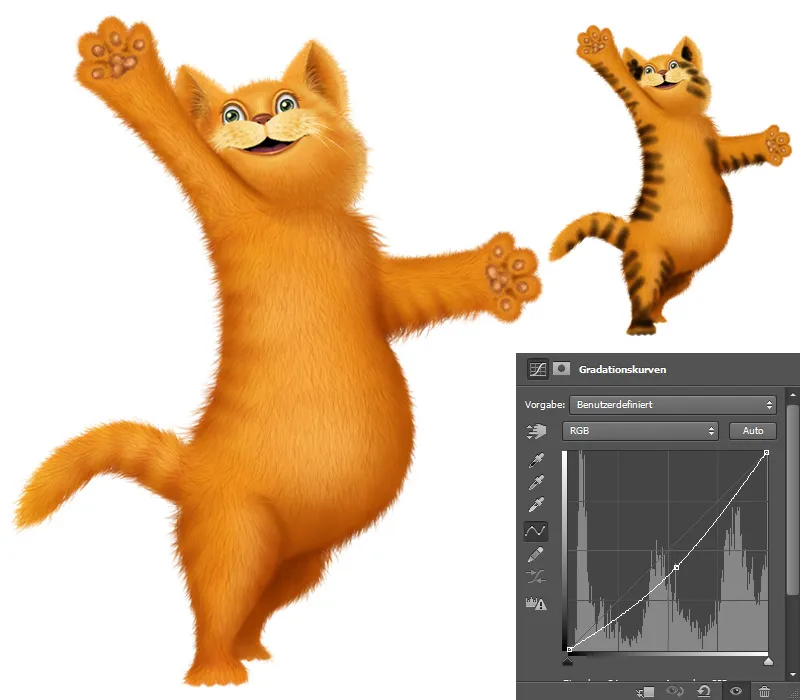
Refining the fur
The next step is to refine the coat even more. To do this, I select the Painting 2 brush and paint detailed hairs on a new layer. To make the fur look fluffy, the hairs need to be fine, and this is achieved by setting the opacity and flow to around 50% and painting with light movements. I choose a dark color for the dark stripes so that they stand out nicely; I use the light color to paint the contours.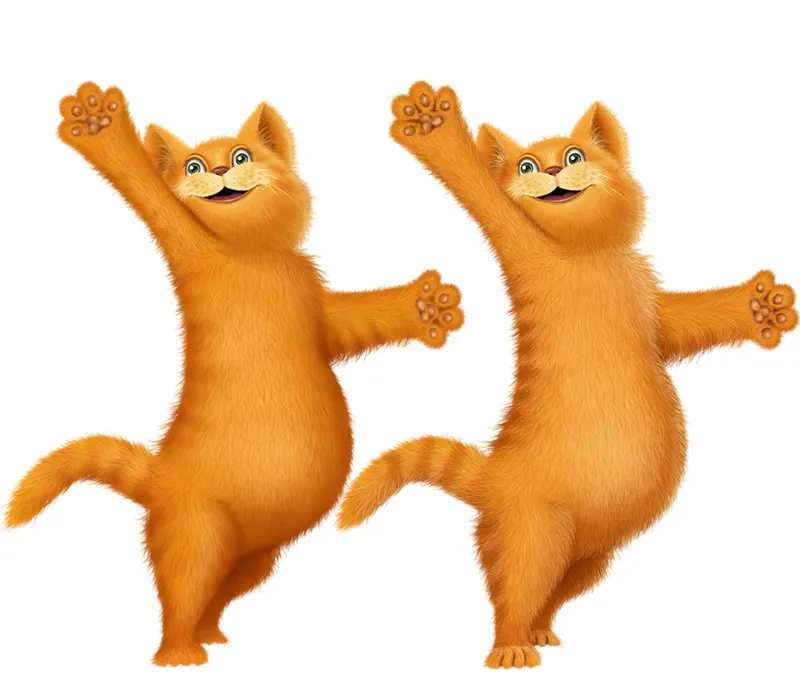
It's very laborious work and takes a lot of time and patience! As I wrote above, you can also use the brushes for the fur, try out both options and decide for yourself what works for you.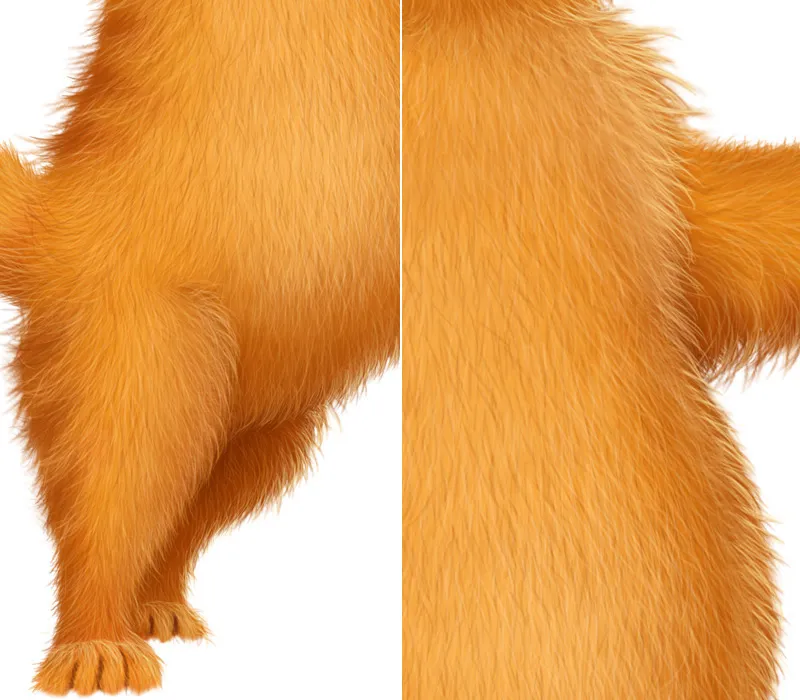
Making the fur shine - final
The cat is painted so far! What's missing now is a nice shiny coat. To do this, I copy all the layers with the cat onto a new layer and Blender out all the other layers. I create a new layer with a clipping mask in the Multiply Negative blend mode. And using a soft brush with a low opacity and a flow of approx. 20% and a light yellow tone, I paint light reflections into the fur. I copy the two layers together on a new layer and assign the Soft Light blend mode at 43% to the layer. This gives the cat more contrast.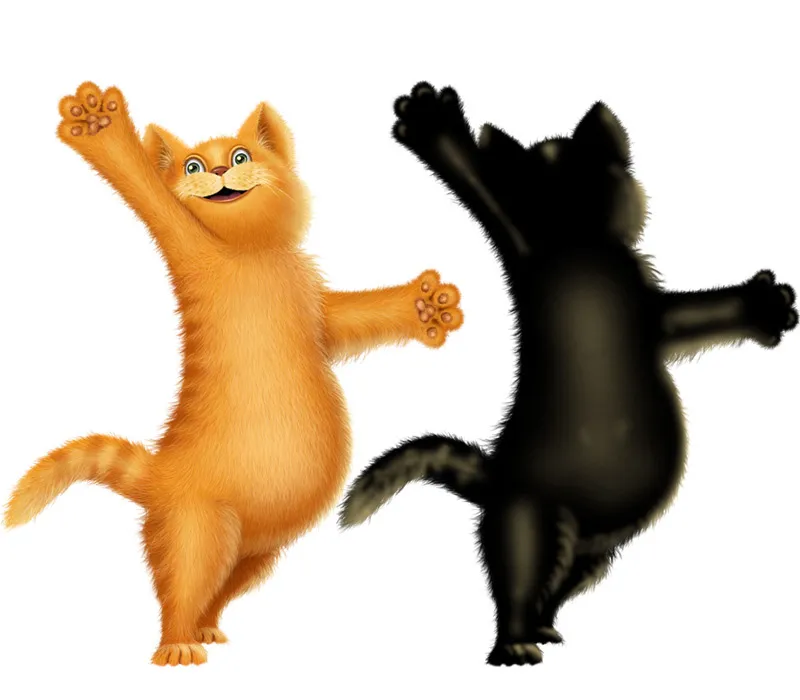
The last step is to adjust the color of the cat to my sketch using the Hue/Saturation adjustment: I adjust the hue and reduce the saturation! Now the cat is finished.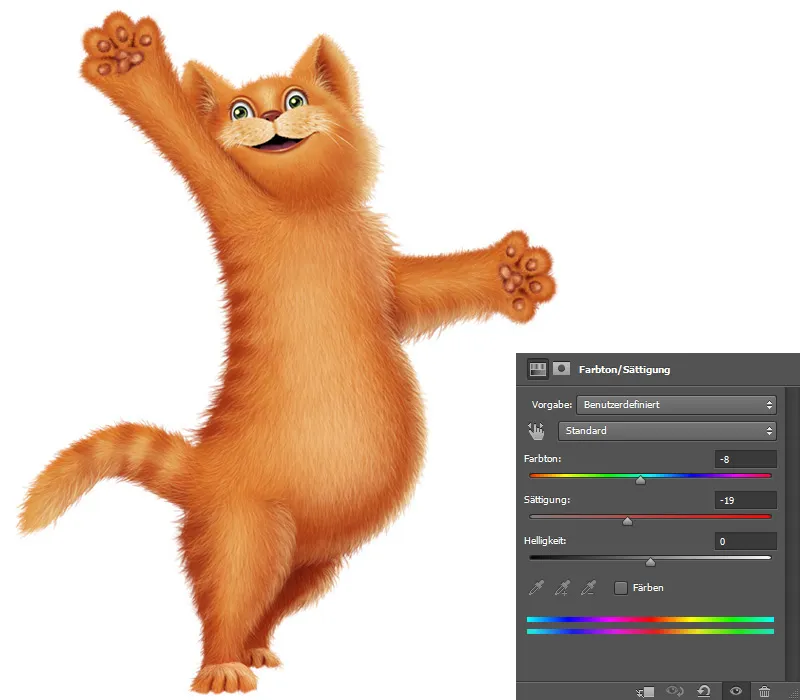
The layer overview: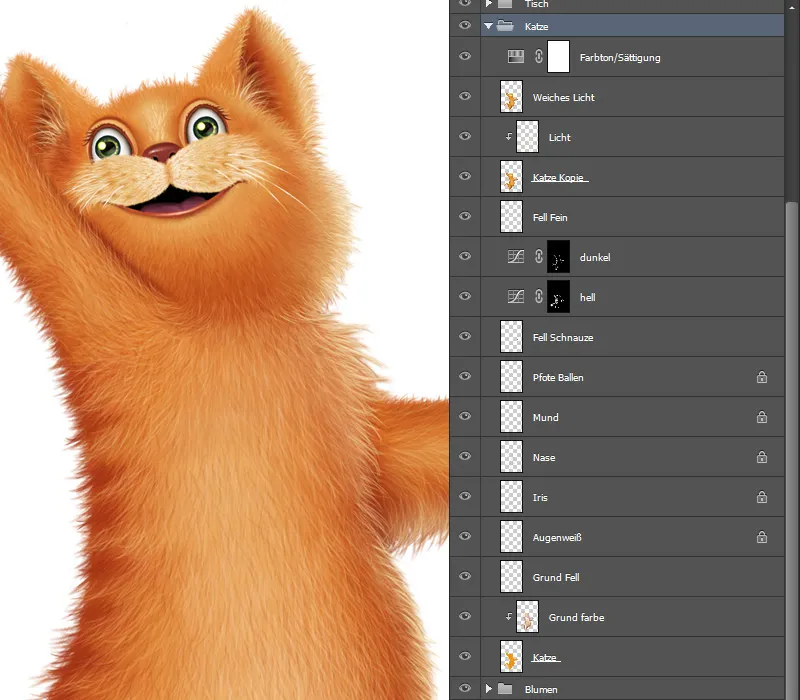
In the second part, I will create a suitable environment for the cat by adding the background, the meadow with plants and a table.
