In today's fast-paced world, efficiency is the key to successful communication. Mail merge letters are an effective tool for sending personalized messages to a large number of recipients. Because let's face it, a letter has a 100% open rate, something emails can only dream of.
Microsoft Word offers a simple yet powerful function that allows you to create mail merge letters in just a few seconds. Whether you want to send invitations, newsletters or information material, in this guide we will show you how to master this process quickly and effortlessly.
Table of contents
Understand what a mail merge is and when to use it.
A mail merge is a powerful tool in the world of communication that allows you to create a single letter or document and send it to multiple recipients at once, personalizing certain parts of the content for each recipient. Imagine you need to send invitations to an event to a hundred different people. Instead of writing each invitation individually, a mail merge allows you to create a basic outline for your message and automatically insert specific information such as the recipient's name, address and other personalized details.
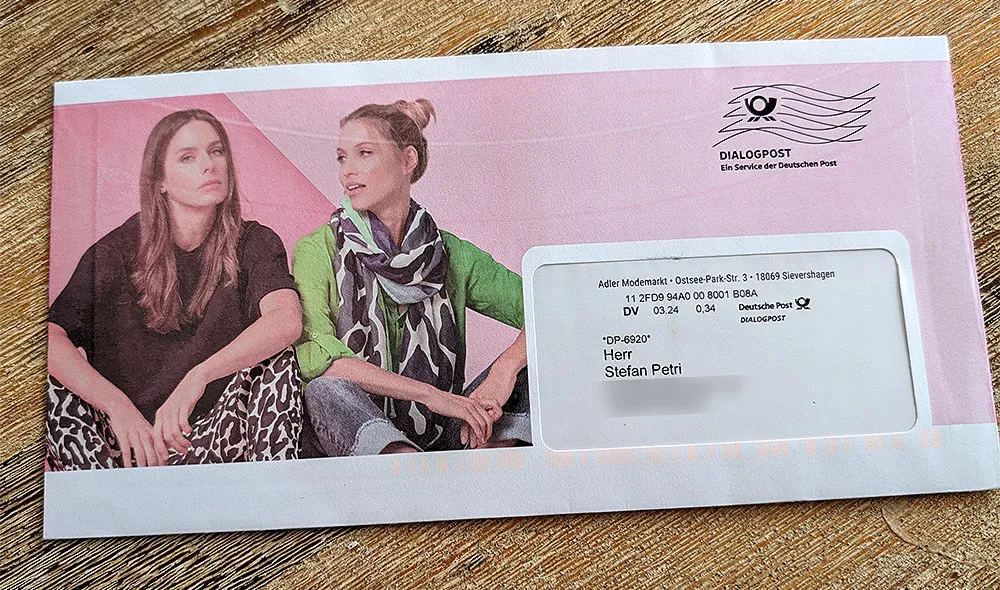
When is a form letter used?
Mail merge letters are useful in many scenarios, for example
- Marketing and advertising: companies use form letters to send personalized offers and information to their customer base.
- Invitations: Whether for business events, weddings or birthday parties, you can use form letters to add a personal touch without having to design each invitation individually.
- Information dissemination: organizations and institutions often send updates or news to their members or interested parties through form letters.
- Education: Teachers and schools often send reports or information to their students' parents using form letters.
The use of form letters not only saves time and resources, but also ensures consistent and error-free communication. In the following sections, we'll walk through the process of creating a mail merge in Word so you can utilize this powerful feature in your next project.
Preparing the data source: How to import your recipient data into Word or use an existing list
Before you start creating your mail merge in Word, it's crucial to prepare your data source. This data source is a list of information about your recipients, such as names, addresses and other specific details that you want to personalize in the letter. Here are the steps to prepare your data source effectively:
Selecting the data source: you can use different types of data sources, including Excel spreadsheets, Access databases, or even Outlook contacts. The most common and simplest method is to use an Excel spreadsheet, where each column represents a different type of information (e.g. first name, last name, address, etc.), and each row represents a different recipient.
Create a new data source: If you don't already have a data source, you can create a new one in Word or Excel. In Excel, this would be a simple table with relevant column headings. In Word, you can use the mail merge functions to create a new list and define the corresponding fields. To do this, click on "Enter new list".
Importing an existing data source: If you already have a data source, you can import it into Word. To do this, go to the mail merge wizard and select the option to use an existing list. Then navigate to your file and import it.
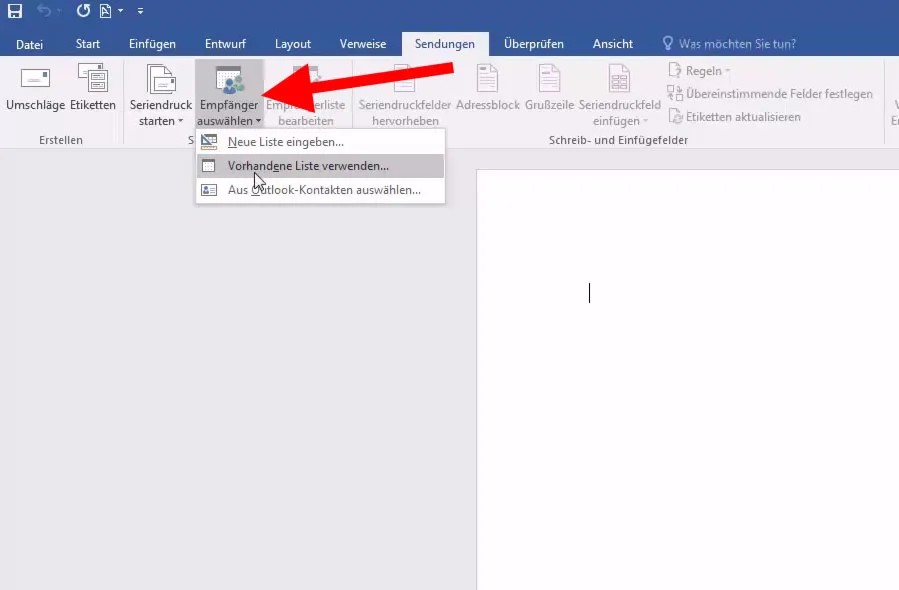
Check and clean up the data: Before proceeding with the mail merge, it is important to check the data and make sure it is correct and consistent. Remove duplicates, correct spelling mistakes and ensure that the data is in the correct formatting. To do this, click on "Edit recipient list".
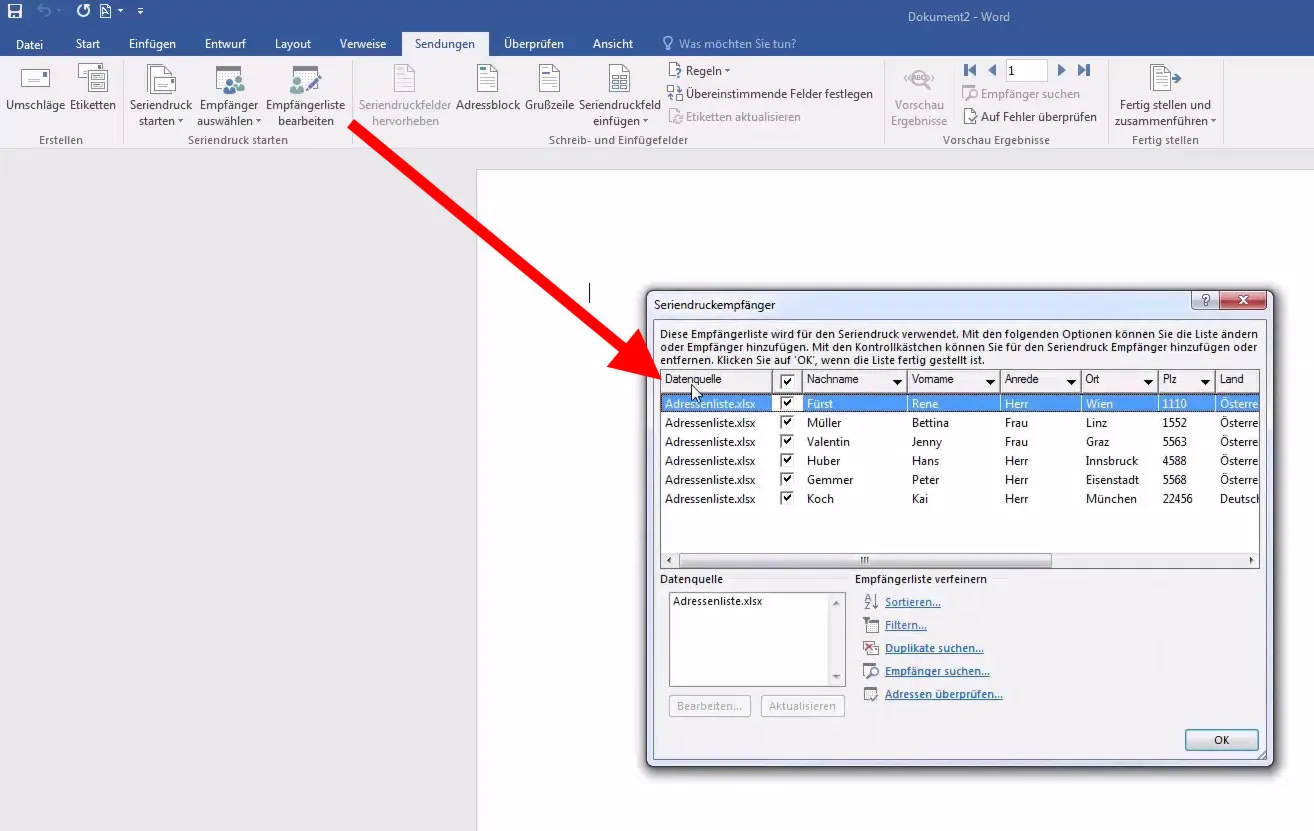
Linking the data source to your Word document: Once your data source is ready, you can link it to your Word document. There is an option in the Word mail merge menu to select a data source. Once the link is established, you can place the various fields from your data source in your document.
By carefully preparing your data source, you will ensure that the process of creating your mail merge runs smoothly and the final products are as personalized and accurate as possible.
Step-by-step guide to creating your mail merge in Word
Once you have prepared your data source and linked it to Word, you can start the actual mail merge creation process. Here is a simple step-by-step guide to show you how:
Step 1: Set up mail merge document
- Open a new Word document.
- Go to the menu item "Mailings" or "Mailings", depending on which version of Word you are using.
- Select "Start mail merge" and decide on the document type, in this case a letter.
Step 2: Select your data source
- Within the "Mailings" tab, select "Select recipient".
- Select "Use existing list" and navigate to your data source if you already have one, or create a new list.
Step 3: Insert mail merge fields
- Position the cursor where you want to insert a personalized field in the document (e.g. the recipient's name).
- Click on "Insert mail merge field" and select the corresponding field from your data source (e.g. first name).
- Repeat this step for all fields you want to personalize (e.g. last name, address, etc.).
- You can also insert an entire address block directly:
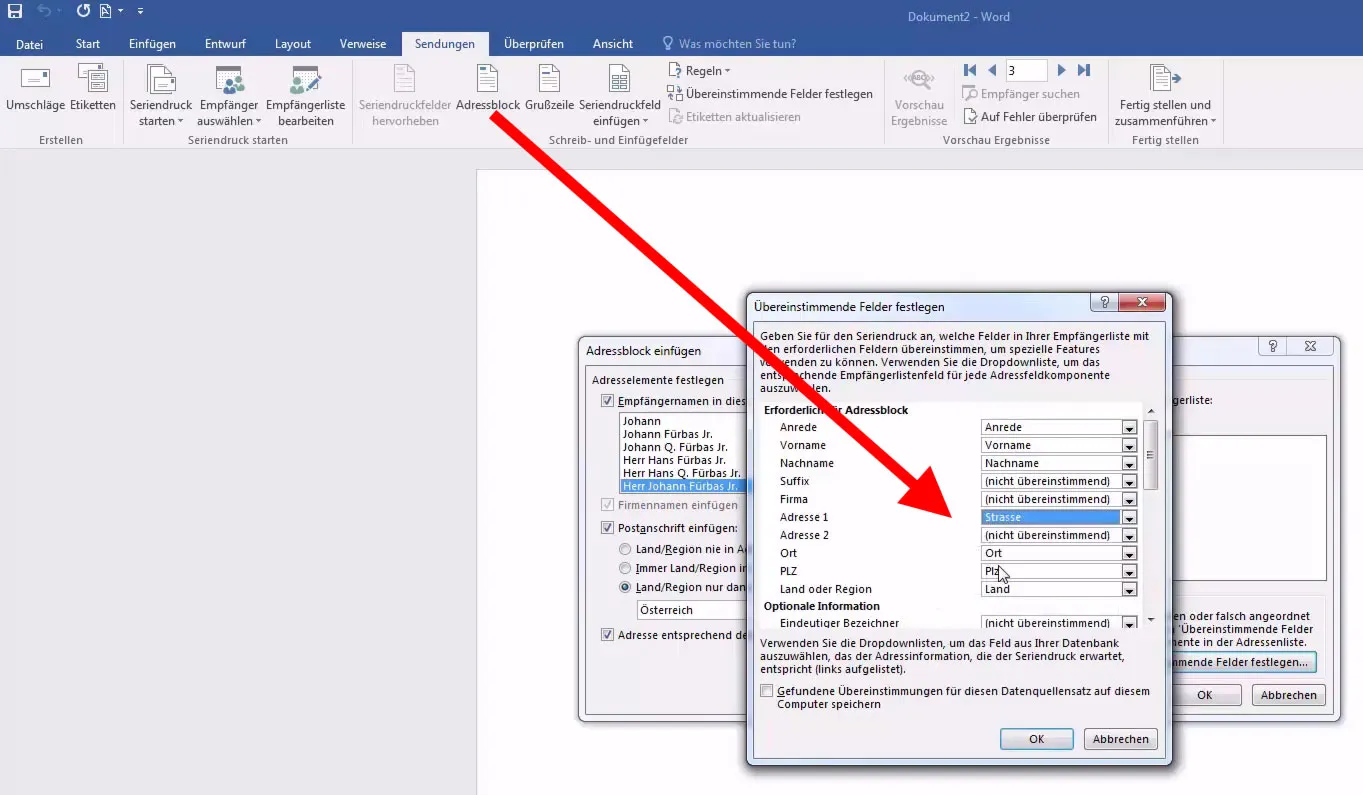
Step 4: Preview and customization
- Use the preview option to see how the letters will look for the individual recipients.
- Check the placement and format of the mail merge fields and make adjustments if necessary.
Step 5: Finalize the mail merge
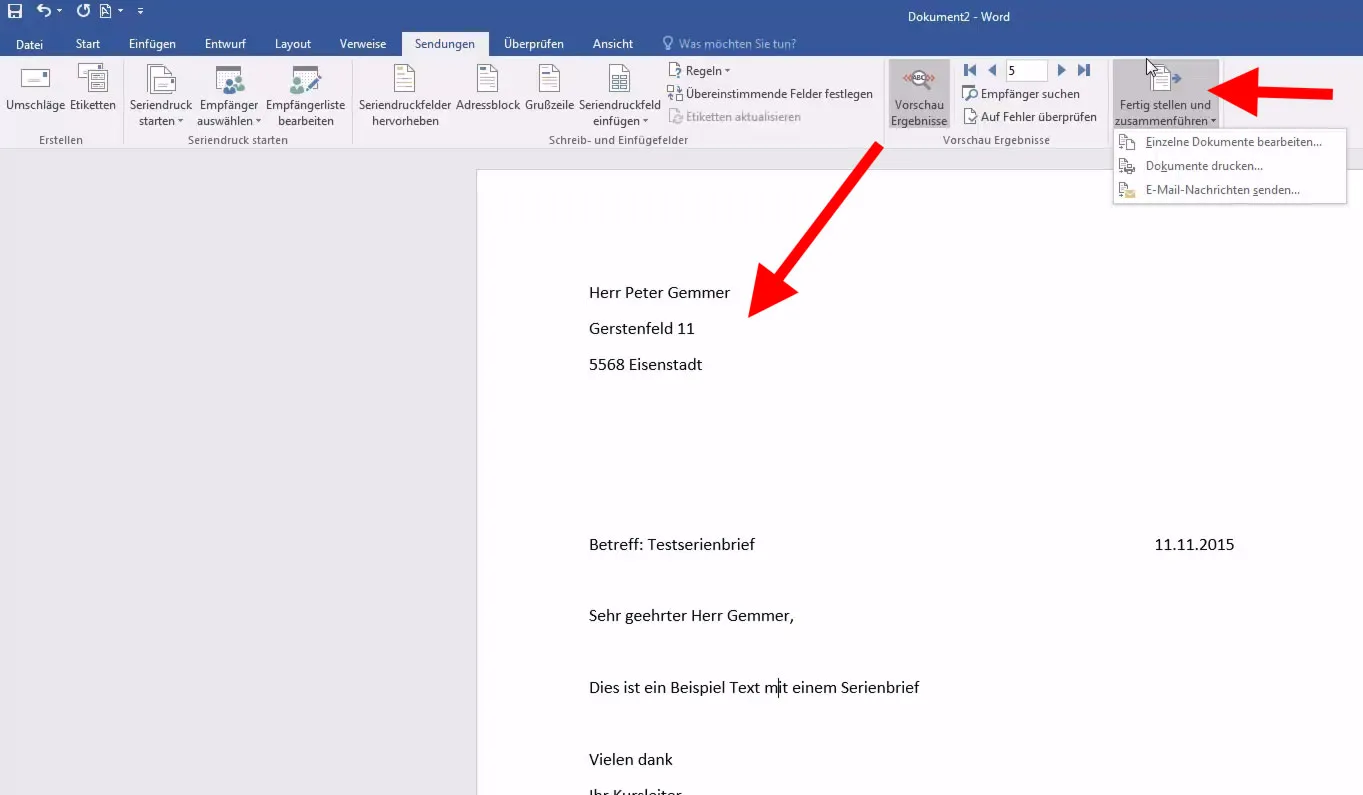
- When everything looks correct, select "Finish and merge".
- You can choose whether you want to print the documents directly, save them as individual documents or send them as email messages.
Step 6: Save and print
- Save your mail merge document so that you can reuse it for future mailings.
- Select the desired print option to produce your letters or send them digitally, depending on your needs.
Personalization and dispatch
Printed form letters stand out in the daily flood of digital communication as they offer a tangible, personal touch that is rarely found in a cluttered email inbox. They often come across as more valuable and thoughtful, which can encourage recipients to pay more attention to them and take them more seriously. Unlike emails, which can be deleted with a click, physical letters leave a stronger and longer-lasting impression as they can be experienced haptically.
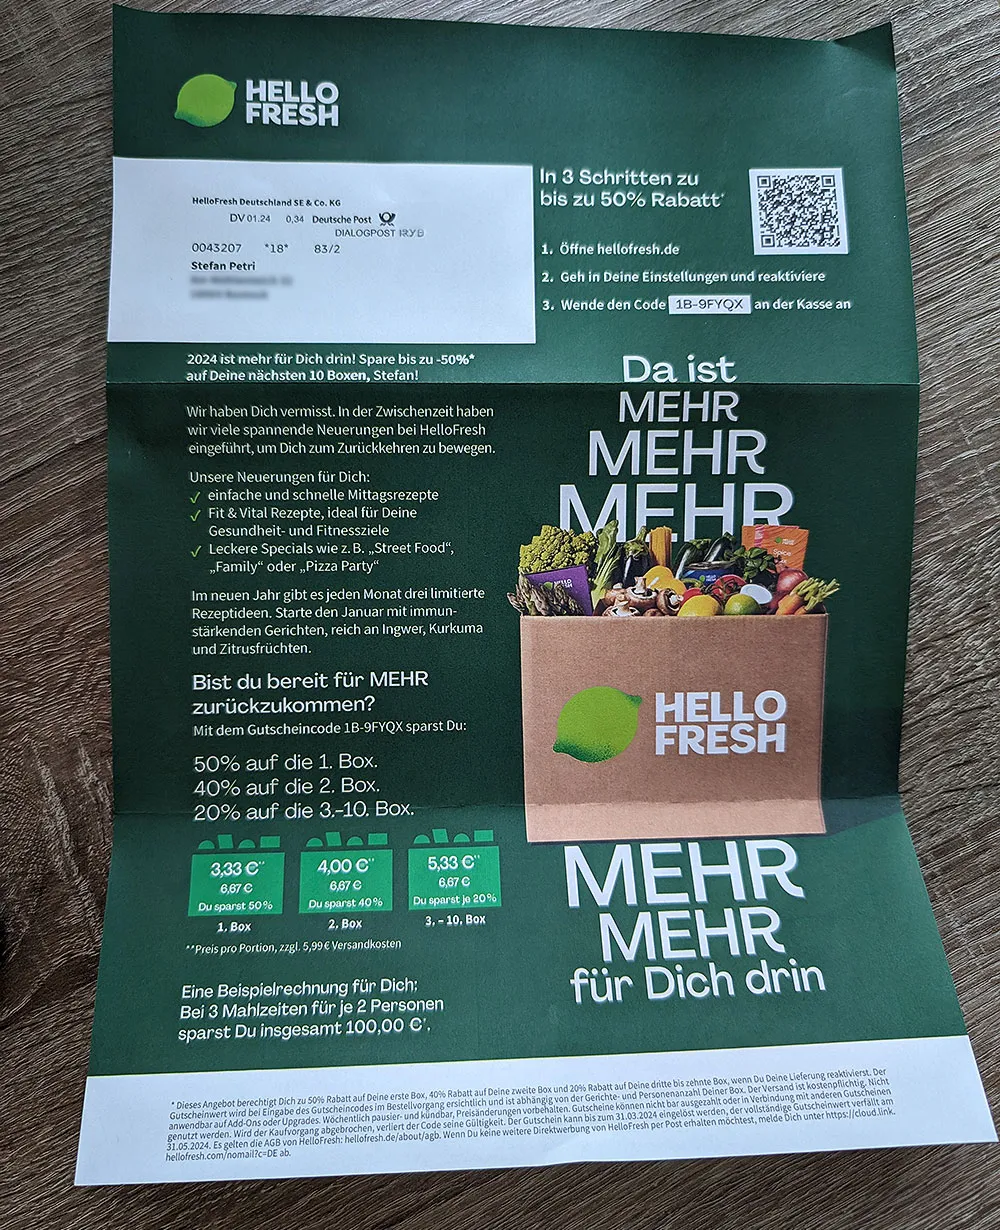
The physical presence of a letter in the real world can also increase the likelihood of the content being taken note of, as it is present in the recipient's immediate living environment. In addition, the individual design and personalization of printed form letters can increase the recipient's feeling of appreciation, which also increases the willingness to respond. Incidentally, it feels like I get a letter from Hello Fresh every month telling me to finally reactivate my subscription. And with the enclosed voucher, I am actually more willing to comply with this request than if they had tried it by email. Why is Hello Fresh doing this by post? Because I'm receiving so many emails at the moment and therefore don't have time to deal with the promotional emails. Funnily enough, it's completely different with a letter: I really do open every letter :-)
But I don't want to withhold a few more tips from you. Once you have created your mail merge in Word, the last step is to personalize it and prepare it for sending. Personalization goes beyond just inserting names and can significantly improve the response from your recipients. Here are some tips and steps to effectively personalize and send your form letter:
Personalization tips:
- Content relevance: make sure the content of your letter is relevant to the recipient. This can be achieved by segmenting your data source according to interest groups or needs.
- Salutation: Use not only the name, but also other personalized information you have about the recipient to make a connection. For example: "Dear bicycle friends" for a group interested in bicycles.
- Visual elements: When possible, embed personalized images or graphics that are relevant to the recipient. This can be made possible through advanced mail merge options or specialized software.
- Offer: When making an offer, make sure it is tailored to the recipient. A personalized offer can significantly improve the response rate.
Dispatch preparation:
- Verification: Always perform a final check to ensure that all personalized elements are correct. A print test on paper or a digital check can help here.
- Formatting: Ensure that the format of the mail merge is suitable for mailing. This includes checking the size, paper type and print quality.
- Mail processing: If you are physically mailing the letters, consider aspects such as folding, inserting and franking. Mail processing machines can speed up this process.
- Paper: Use a high quality paper as it conveys a classy feel and professionalism that emphasizes appreciation for the recipient and increases the likelihood of a positive response.
- Digital options: If you're sending the letters digitally, make sure the files are compatible and won't overload the recipient's email systems.
Follow-up:
- Feedback: Consider incorporating a method to collect feedback or measure response rates, such as a dedicated landing page or tracking number.
- Optimization: Use the collected data to optimize future mailings. What worked well can be kept, and what was less successful can be improved.
By following these tips, you can ensure that your mail merge is not just a message, but an effective communication method that creates a personal connection with your recipients and achieves the desired effect.
