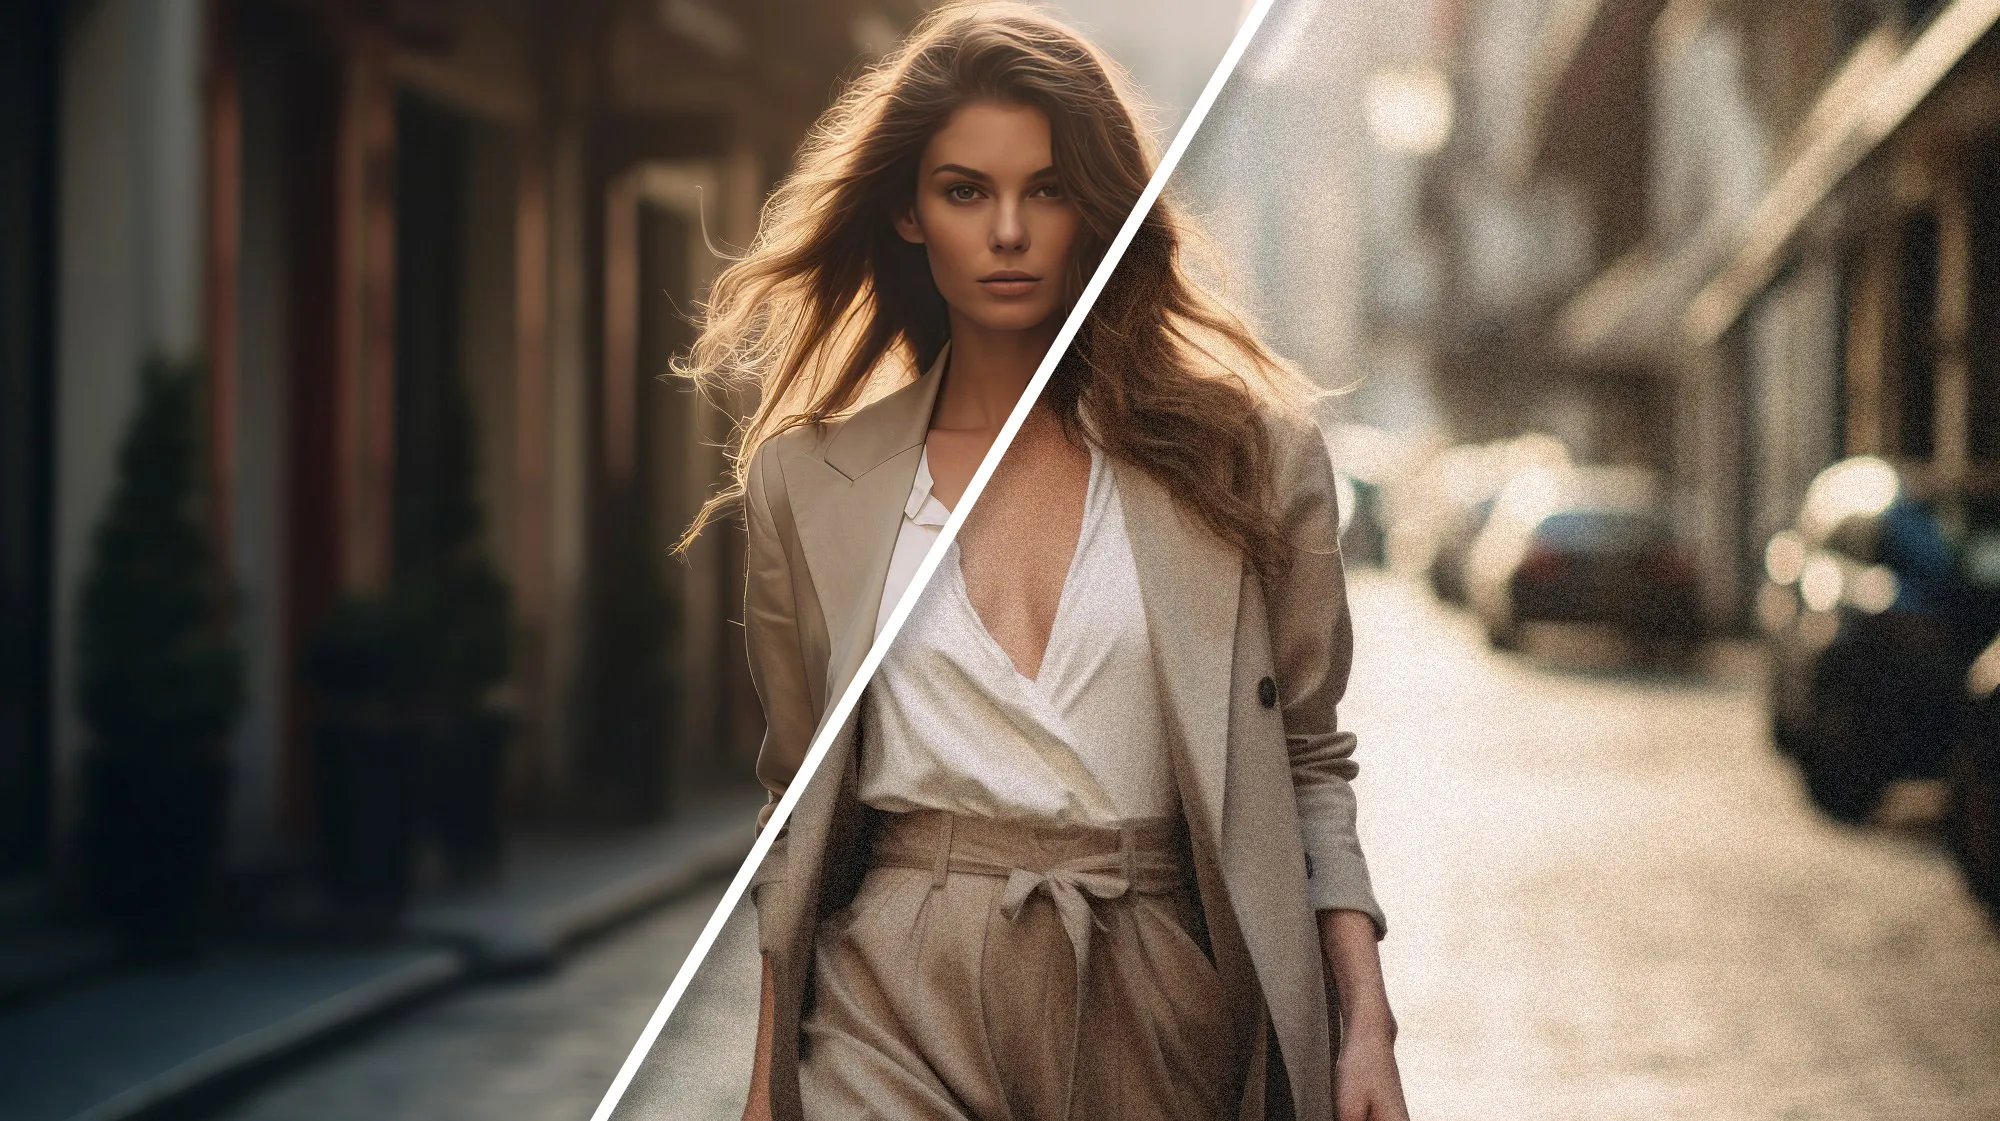
Image noise is a common problem that photographers encounter when taking pictures. It is a random fluctuation in brightness and color that can affect the overall quality of a photo. Image noise can be caused by various factors, such as poor lighting conditions, high ISO settings or even the camera sensor itself. Regardless of the cause, image noise can significantly affect the clarity and sharpness of an image.
Table of contents
Understanding the effects of image noise is crucial for photographers who want to create high quality photos. Noise not only affects the fine details and textures in an image, but also introduces unwanted artifacts that can distract the viewer from the actual subject. This is particularly evident in low light or high ISO situations, where noise tends to be more pronounced.
Fortunately, there are various methods to remove noise and restore clarity to photos. Popular software programs such as Photoshop and Lightroom offer powerful tools designed specifically for this purpose. With these tools, photographers can reduce image noise while preserving important details and image quality.
In addition to traditional editing software, advances in artificial intelligence (AI) have led to the development of specialized denoising tools. These AI-powered tools use complex algorithms to analyze and automatically denoise images. They are becoming increasingly popular among photographers as they can effectively reduce noise while minimizing the loss of detail.
In this comprehensive guide, we'll look at different techniques for removing noise from images using Photoshop, Lightroom and AI tools. I will discuss the strengths and limitations of each method and give photography enthusiasts valuable advice on how to achieve optimal results with noisy images. In addition, we will provide a step-by-step guide that demonstrates practical approaches to denoising images using these software programs.
By mastering these techniques and understanding the role of the different tools in reducing image noise , photographers can improve their skills and produce visually stunning photos with improved clarity and sharpness. So let's delve into the world of image denoising and unlock its potential to transform noisy images into captivating works of art. A comprehensive overview ...
Image noise removal tools at a glance
| Tool name | Name Description | Positive | Negative | Cost |
| Topaz Photo AI | The program gets updates every month and is therefore constantly improving! Almost as good at noise reduction as DeNoise AI. | Solves several problems at once | expensive | 199 $ |
| Topaz DeNoise AI | Can remove noise very well | Really fast and good even with JPG it can denoise well and slightly sharpen | 79,99 $ | |
| DxO PureRAW3 | Can remove noise very well, but only from RAW images | Very good noise removal | 129 € | |
| DxO PhotoLab | Can remove noise very well (JPG and especially RAW). Also so many settings possible in the program (similar to Lightroom) | Very good noise removal | 219 € | |
| Adobe Lightroom | Really good since April 2023 thanks to the new AI denoising module. | OKay | in subscription from approx. 12 € | |
| Adobe Photoshop | Really good since April 2023 thanks to the new AI denoising module (via Camera Raw). | OKay | subscription from approx. 12 € | |
| AI Upscale Image Online and on Software | Scale, denoise or sharpen images. Best downloaded as software. | Does the job very well | from approx. 40 $ per month or one-off 129.9 $ | |
| On1 NoNoise AI | Very good denoising and can be combined well with sharpening | Very good at denoising | 67,78 € | |
| Topaz Gigapixel AI | Really good enlargement of images possible. Good result when denoising (although the program is intended more for enlargements). The best result with photos that have been scanned and have a halftone effect. | Results sometimes very good | 99,99 $ |
Methods for noise reduction in Photoshop
To reduce image noise, Adobe Photoshop offers several effective tools and techniques. Two commonly used methods are the Reduce Noise filter and the Camera Raw filter. These filters offer photographers the opportunity to enhance their images and remove unwanted noise while retaining important details.
Using the "Reduce noise" filter
The Reduce Noise filter in Photoshop is a powerful tool that allows users to reduce both luminance and color noise in their photos. To access this filter, simply go to the "Filter" menu, then select "Noise" and at the end select "Reduce Noise". Once selected, a dialog box with various sliders and options will appear. To be honest, I'm not at all convinced by these functions in Photoshop. That's why I no longer use Photoshop to remove noise (except in conjunction with Camera Raw)!
Using the Camera Raw filter to remove image noise
Another powerful tool for reducing noise in Photoshop is the Camera Raw filter. This filter provides photographers with advanced control over noise reduction settings.
To access the Camera Raw filter, open your image in Photoshop, go to "Filters" and then select "Camera Raw Filter". Then navigate to the "Detail" tab, where you will find various sliders for noise reduction.
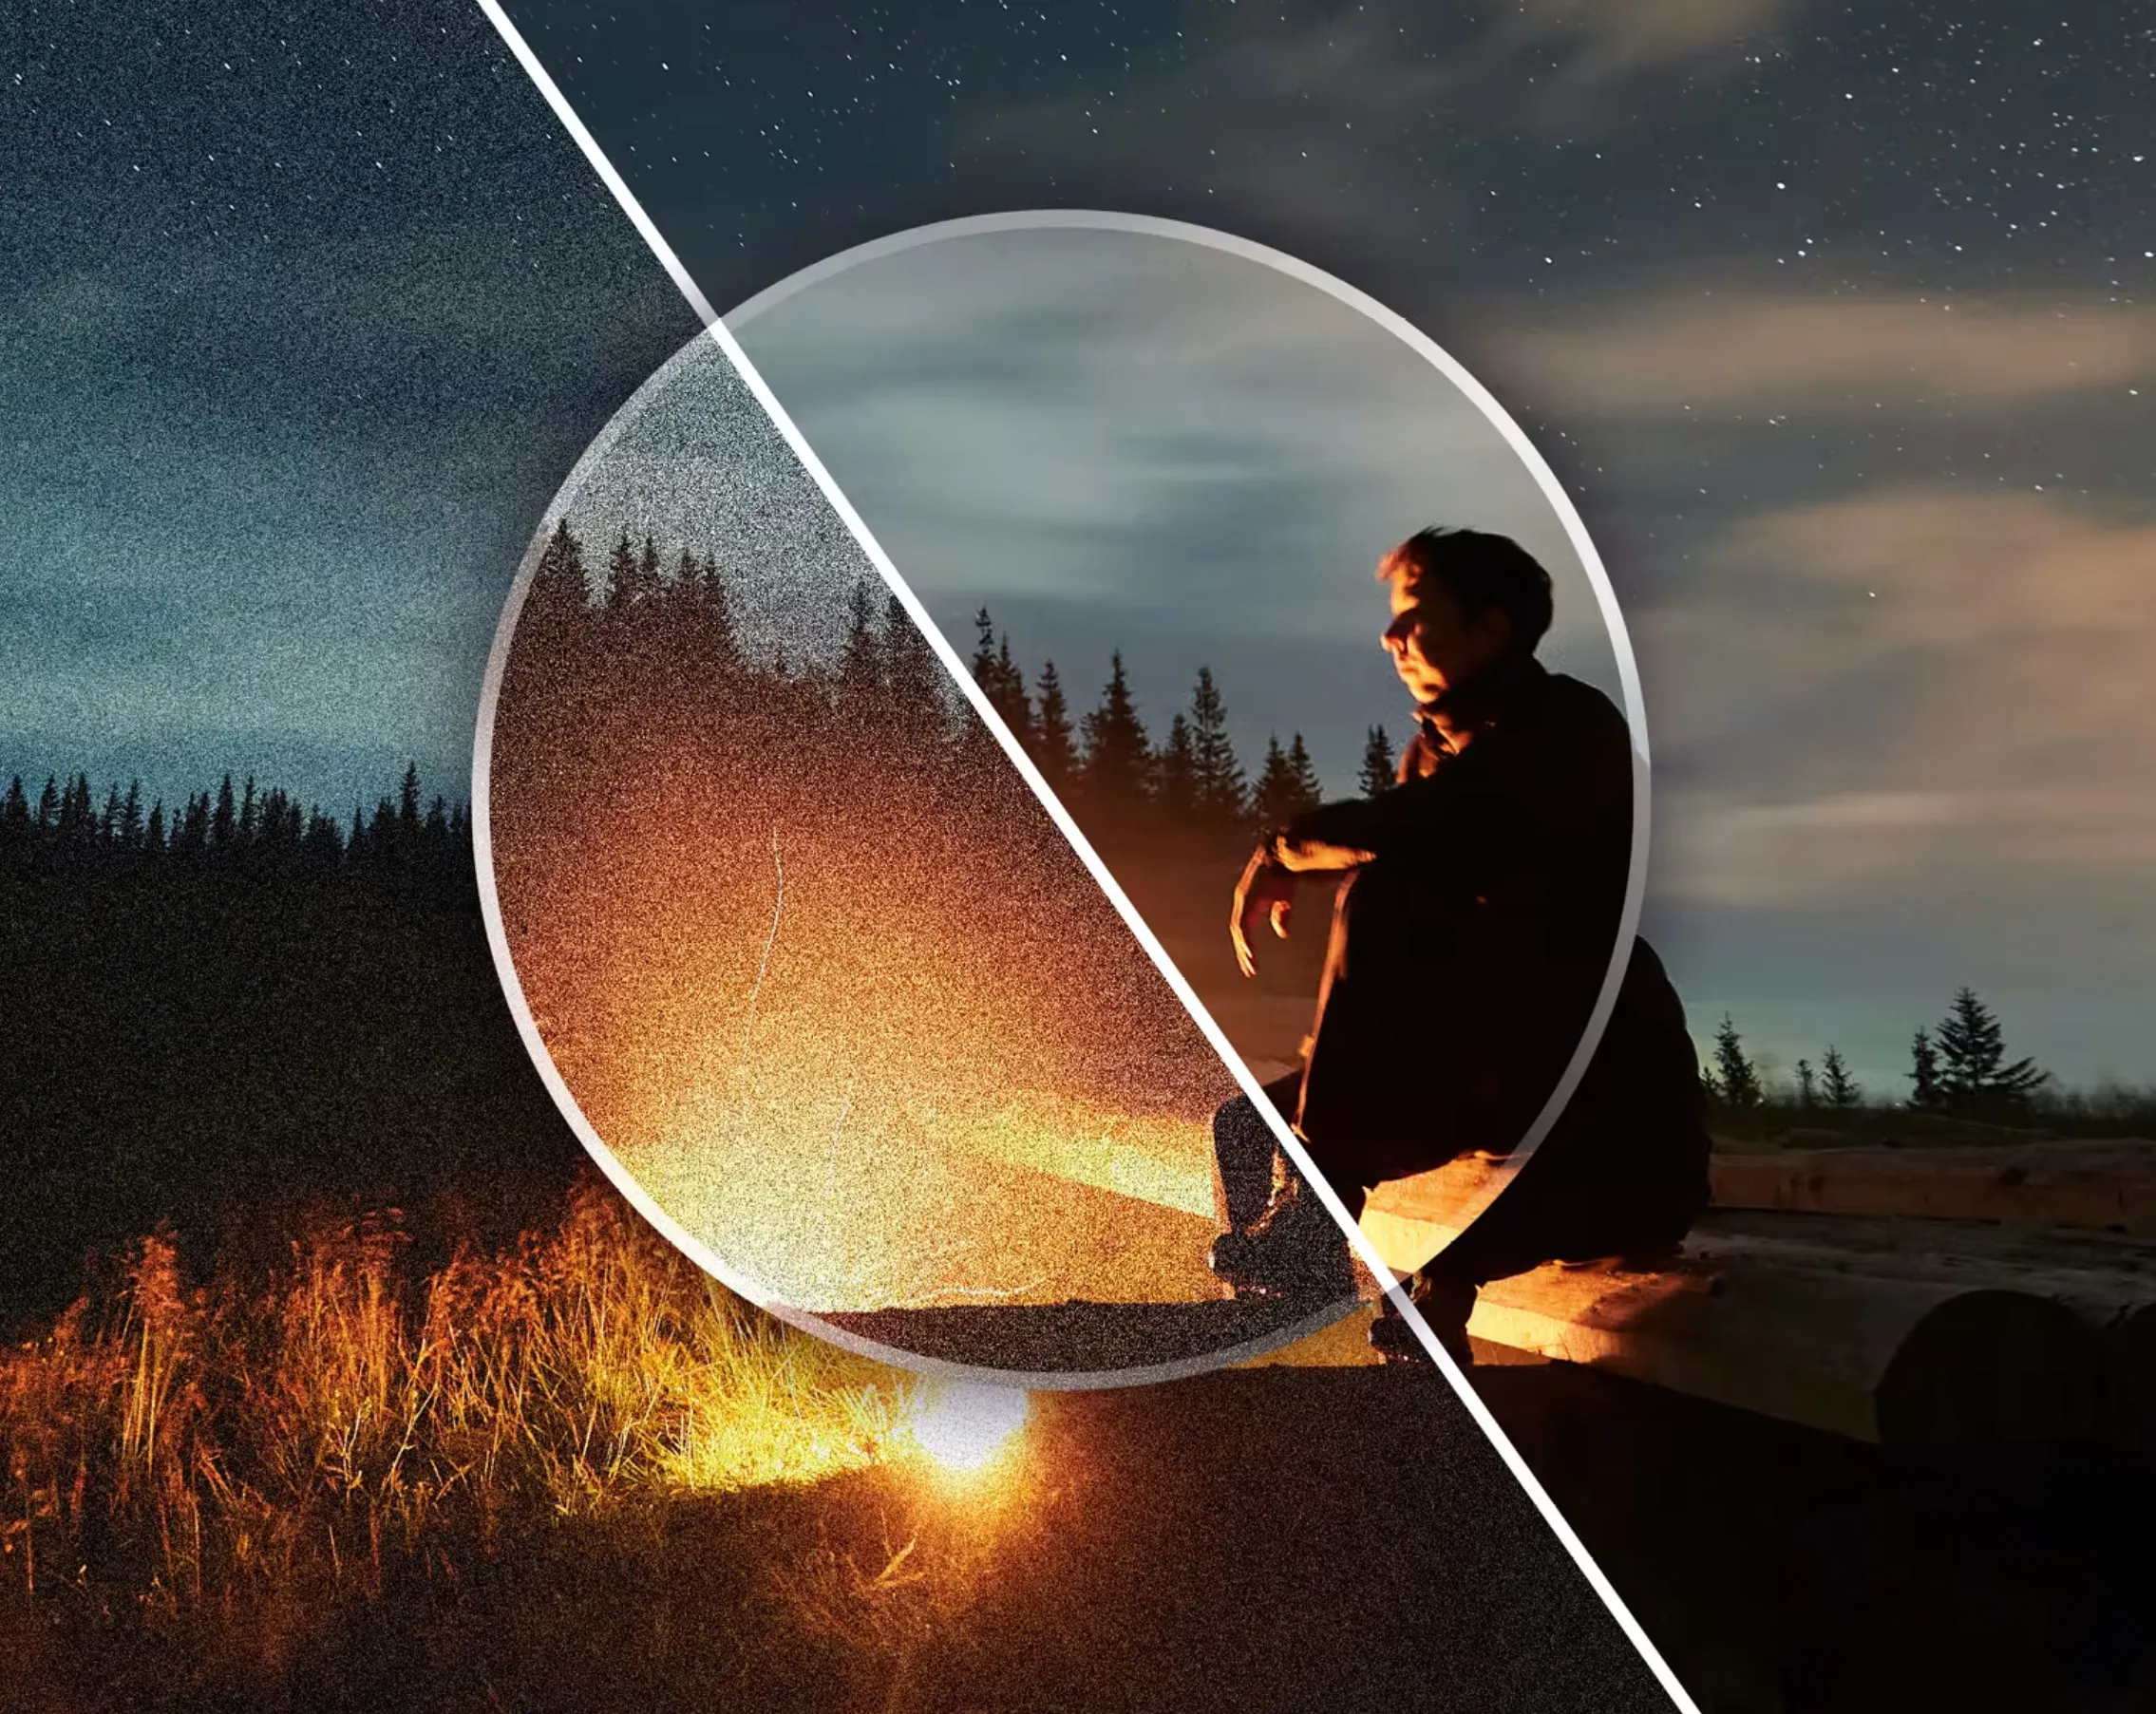
The two most important sliders for noise reduction are "Luminance" and "Color". You can use these sliders to remove both luminance (grainy) and color (chromatic) noise from your photos. Similar to using the Reduce Noise filter, it's important to find a balance between removing noise and preserving image detail. For a few months now, however, it has also been possible to simply use the AI for RAW images and the noise is simply gone in about 1 minute. I'm still thrilled with the result. Unfortunately only for RAW images.
In addition to noise reduction, the Camera Raw filter also offers options for sharpening and reducing artifacts. Experiment with these settings to achieve optimal results for your images.
Using the Reduce Noise filter and the Camera Raw filter in Photoshop, photographers can effectively reduce image noise while preserving important details. These tools provide advanced control over noise reduction settings, allowing photographers to enhance their photos and create stunning images without distracting noise.
Effective noise reduction techniques in Lightroom
Lightroom is a really cool thing when it comes to getting rid of that annoying noise in your photos. Here I'll show you two tricks to do this: firstly with the Details panel and then with a few predefined settings.
Checking the details panel
So, in the detail control panel you can really get down to business and get the noise under control. Just look in the "Develop" module on the right-hand side, that's where you'll find it.
First of all, you should zoom in on your photo to check the noise more closely. Simply click on the zoom tool or press Ctrl/Cmd + space bar and then click on the area you want to take a closer look at.
When you are closer, go to the detail area and look for the noise reduction controls. With "Luminance" you can reduce the bright noise and with "Color" the colorful noise.
Start with "Luminance" and move the slider so that your image looks less grainy but the details are still there. Don't overdo it, otherwise the fine details in the image will disappear.
Then continue with the "Color" slider. Move it so that the strange color spots become less. But be careful not to overdo it, otherwise the image will end up looking unnatural.
Then go to the "Colour" slider and adjust it so that colour artefacts caused by noise are minimized. But be careful not to overdo it, otherwise the images will end up looking artificial.
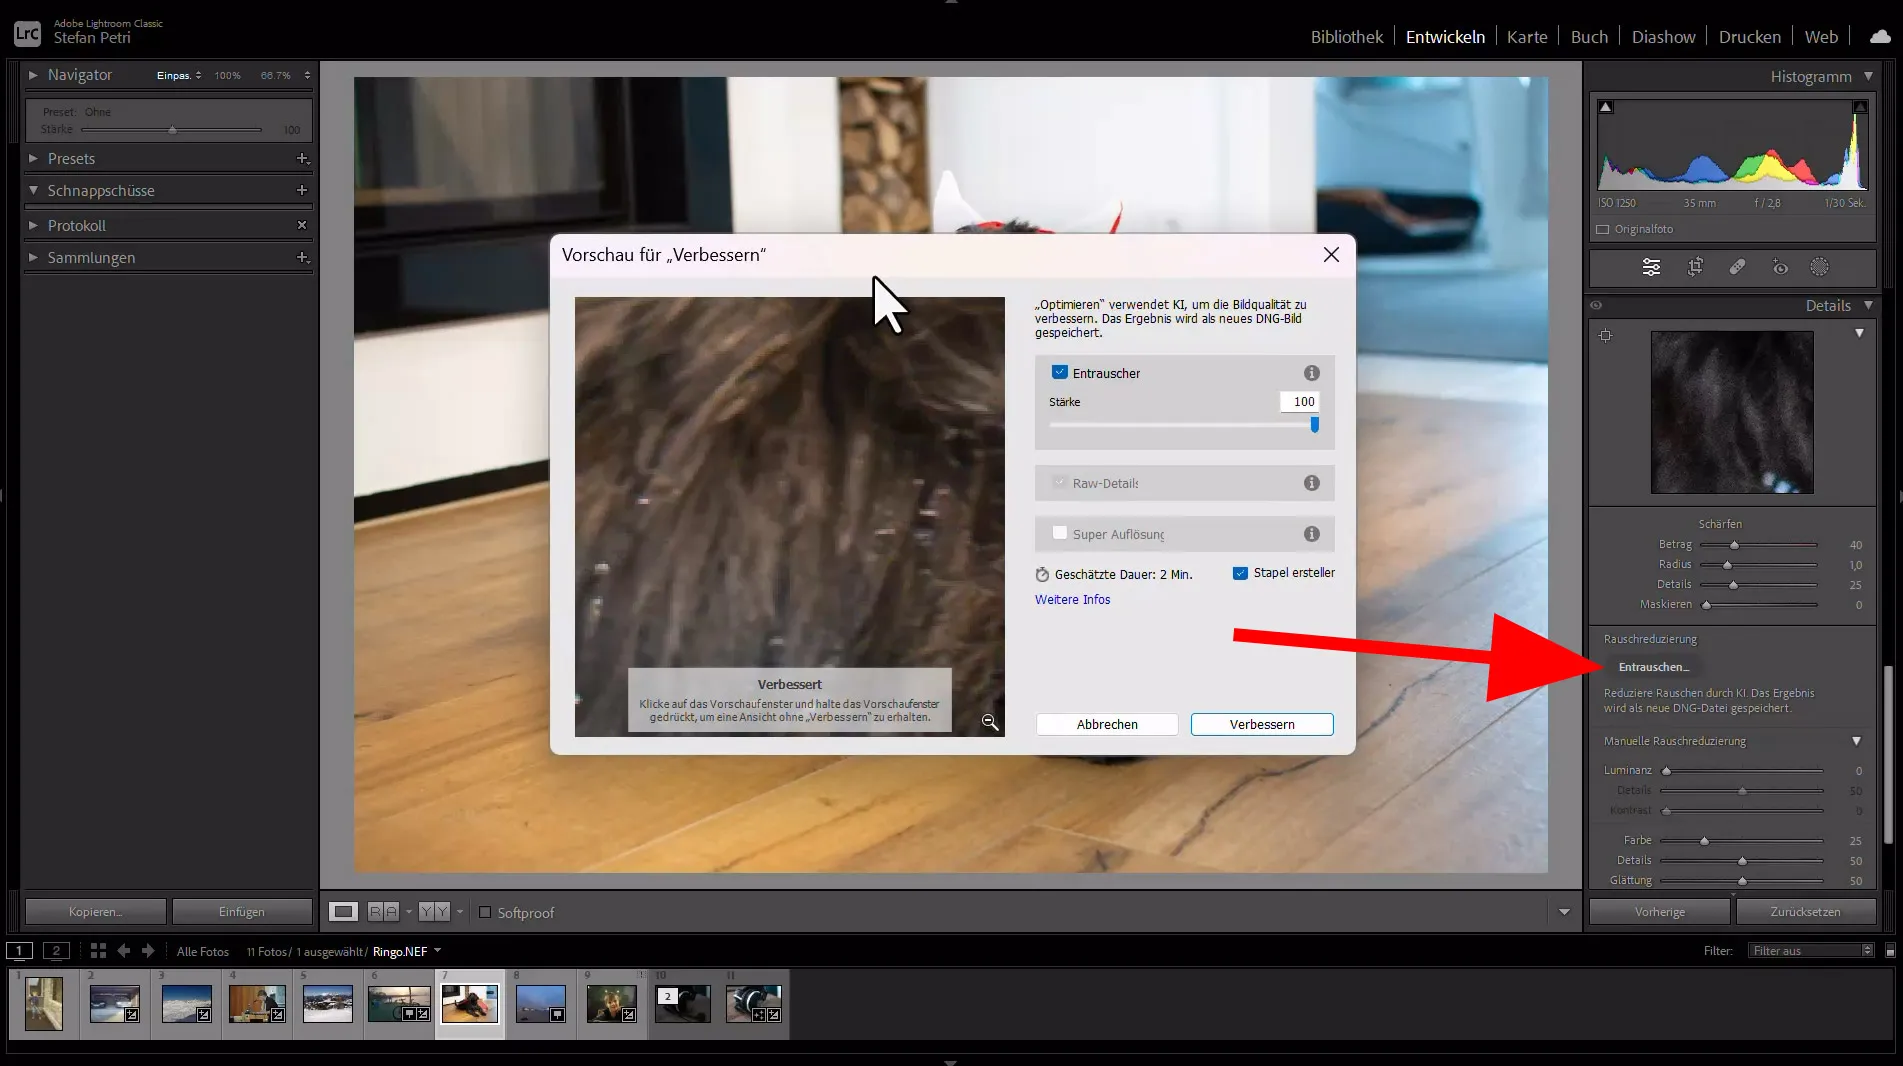
Just like in Camara Raw, there is a button that lets the AI take care of everything and after about 1 minute your RAW image will be noise-free. Really brilliant (unfortunately only for RAW photos).
Applying noise reduction presets
Another way to effectively & quickly reduce image noise in Lightroom is to apply presets for noise reduction. Presets are predefined settings that allow you to quickly make certain adjustments to your photos with just one click (even up to 1000 at once).
To apply a noise reduction preset, go to the "Develop" module and find the "Presets" panel on the left side of your screen.
Click on the "+" icon in the top right corner of the preset window to create a new preset.
In the "New Develop Preset" dialog box, give your preset a name that reflects its purpose, such as "Noise Reduction - Low" or "Noise Reduction - High".
Select the "Detail" checkbox under the Noise Reduction section and adjust the sliders according to the desired level of noise reduction.
When you are happy with your settings, click on the "Create" button to save your preset.
If you now want to apply the noise reduction to an image, simply select it in Lightroom and click on the preset you have created. This will automatically apply the specified noise reduction settings, saving you time and effort.
With these effective noise reduction techniques in Lightroom, you can significantly improve the quality of your photos by reducing unwanted noise while preserving important details. Experiment with different settings and presets to find out what works best for each individual image.
I really hope that Lightroom will extend AI support for removing noise in images to JPG files. Only then will I be really happy about this function.
The role of AI tools in image denoising
The role of AI tools in image denoising has revolutionized the field of image processing. Thanks to advances in artificial intelligence and machine learning, these tools are getting better at removing noise from photos. AI algorithms are trained using large amounts of data to recognize patterns and distinguish between noise and actual image details. This allows them to effectively reduce noise while retaining important image information. A key advantage of AI tools is their ability to adapt and learn from different types of noise. Traditional denoising methods often rely on predefined filters or settings that may not be optimal for all types of noise. In contrast, AI tools can analyze the unique characteristics of each image and apply customized denoising techniques accordingly. This flexibility allows for more accurate noise reduction, resulting in cleaner and sharper images. Another advantage of AI tools is their speed and efficiency. Traditional image denoising methods can be time-consuming and require manual adjustments and multiple iterations to achieve satisfactory results. AI-powered denoising algorithms, on the other hand, can process images quickly and automatically, saving photographers valuable time and effort.
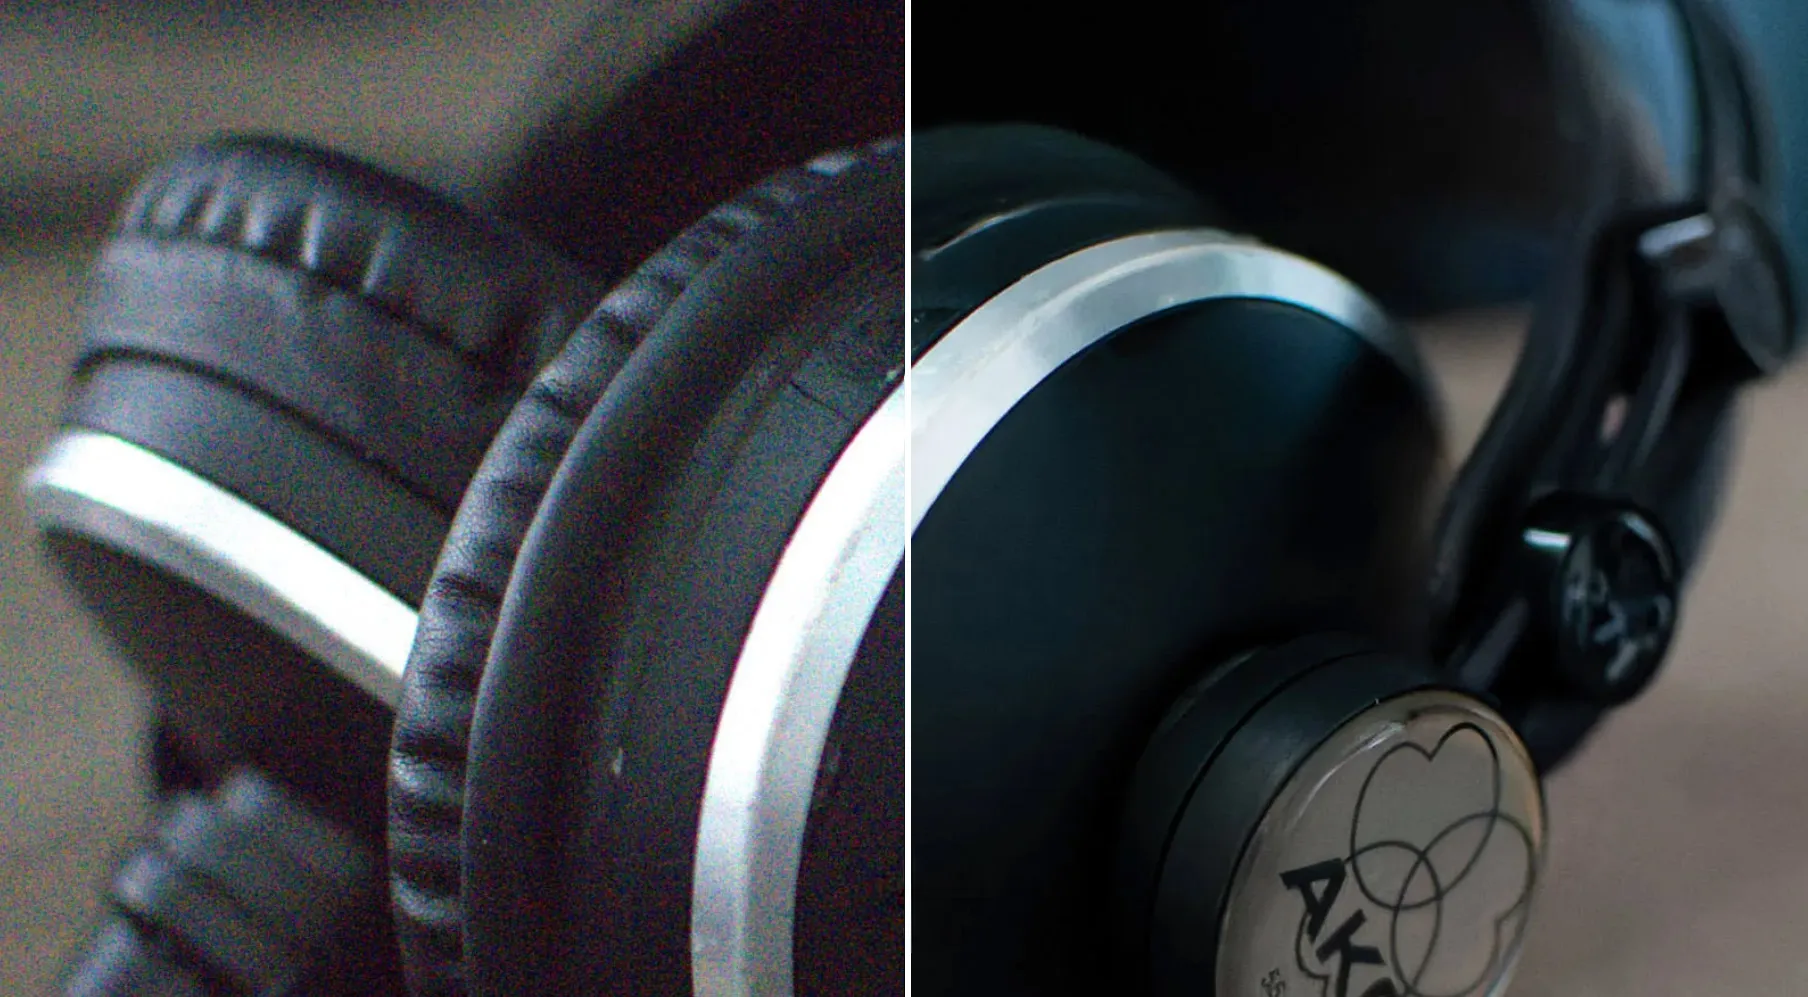
In addition, AI tools offer a level of automation that simplifies the denoising process for users with different levels of knowledge. These tools often have user-friendly interfaces that require minimal input from the user. By simply selecting an image and applying the denoising algorithm, photographers without extensive knowledge or technical skills can achieve impressive results.
However, it is important to note that while AI tools have greatly improved noise reduction capabilities, they are not infallible. Depending on the complexity of the noise in an image, there may still be cases where manual adjustments or additional editing techniques are required to achieve optimal results. My favorite program for this is definitely Topaz Photo AI. Just give it a try and be as amazed as I am!
Step-by-step guide to removing image noise
To effectively remove noise from images, it's important to have a step-by-step guide that covers different software options. In this tutorial, we'll look at removing noise from images using Photoshop, Lightroom and AI tools.
Noise removal with Photoshop
Open the image in Photoshop and duplicate the layer. Go to Filter > Noise > Reduce Noise.
Adjust the sliders for Strength, Preserve Details, Reduce Color Noise and Sharpen Details to achieve optimal results.
Click OK to apply the changes.
If necessary, use the Clone Stamp tool or the Repair Brush to further refine the denoised areas.
Effective noise reduction techniques in Lightroom
Import the image into Lightroom and open the Develop module. Scroll down to the Detail panel and adjust the Luminance slider under Noise Reduction. Increase the Luminance slider until most of the noise is reduced and the details are preserved. If necessary, adjust the Color slider to reduce chroma noise. Use the Masking slider to selectively apply noise reduction by holding down the Alt/Option key while adjusting the slider. Try out the new AI Denoise button if you have a RAW file open.
The role of AI tools in image denoising
AI tools have revolutionized denoising techniques through the use of advanced algorithms and machine learning techniques. These tools can intelligently analyze images and remove noise while preserving important details. A popular AI-powered denoising tool is Topaz DeNoise AI. It uses artificial intelligence to recognize patterns in images and effectively reduce noise without compromising image quality. Another notable option is DxO PhotoLab's DeepPRIME technology, which uses deep learning algorithms to remove both luminance and chroma noise from images. I recommend trying out a few of my featured tools from the table above. Almost all of them have a free trial version.
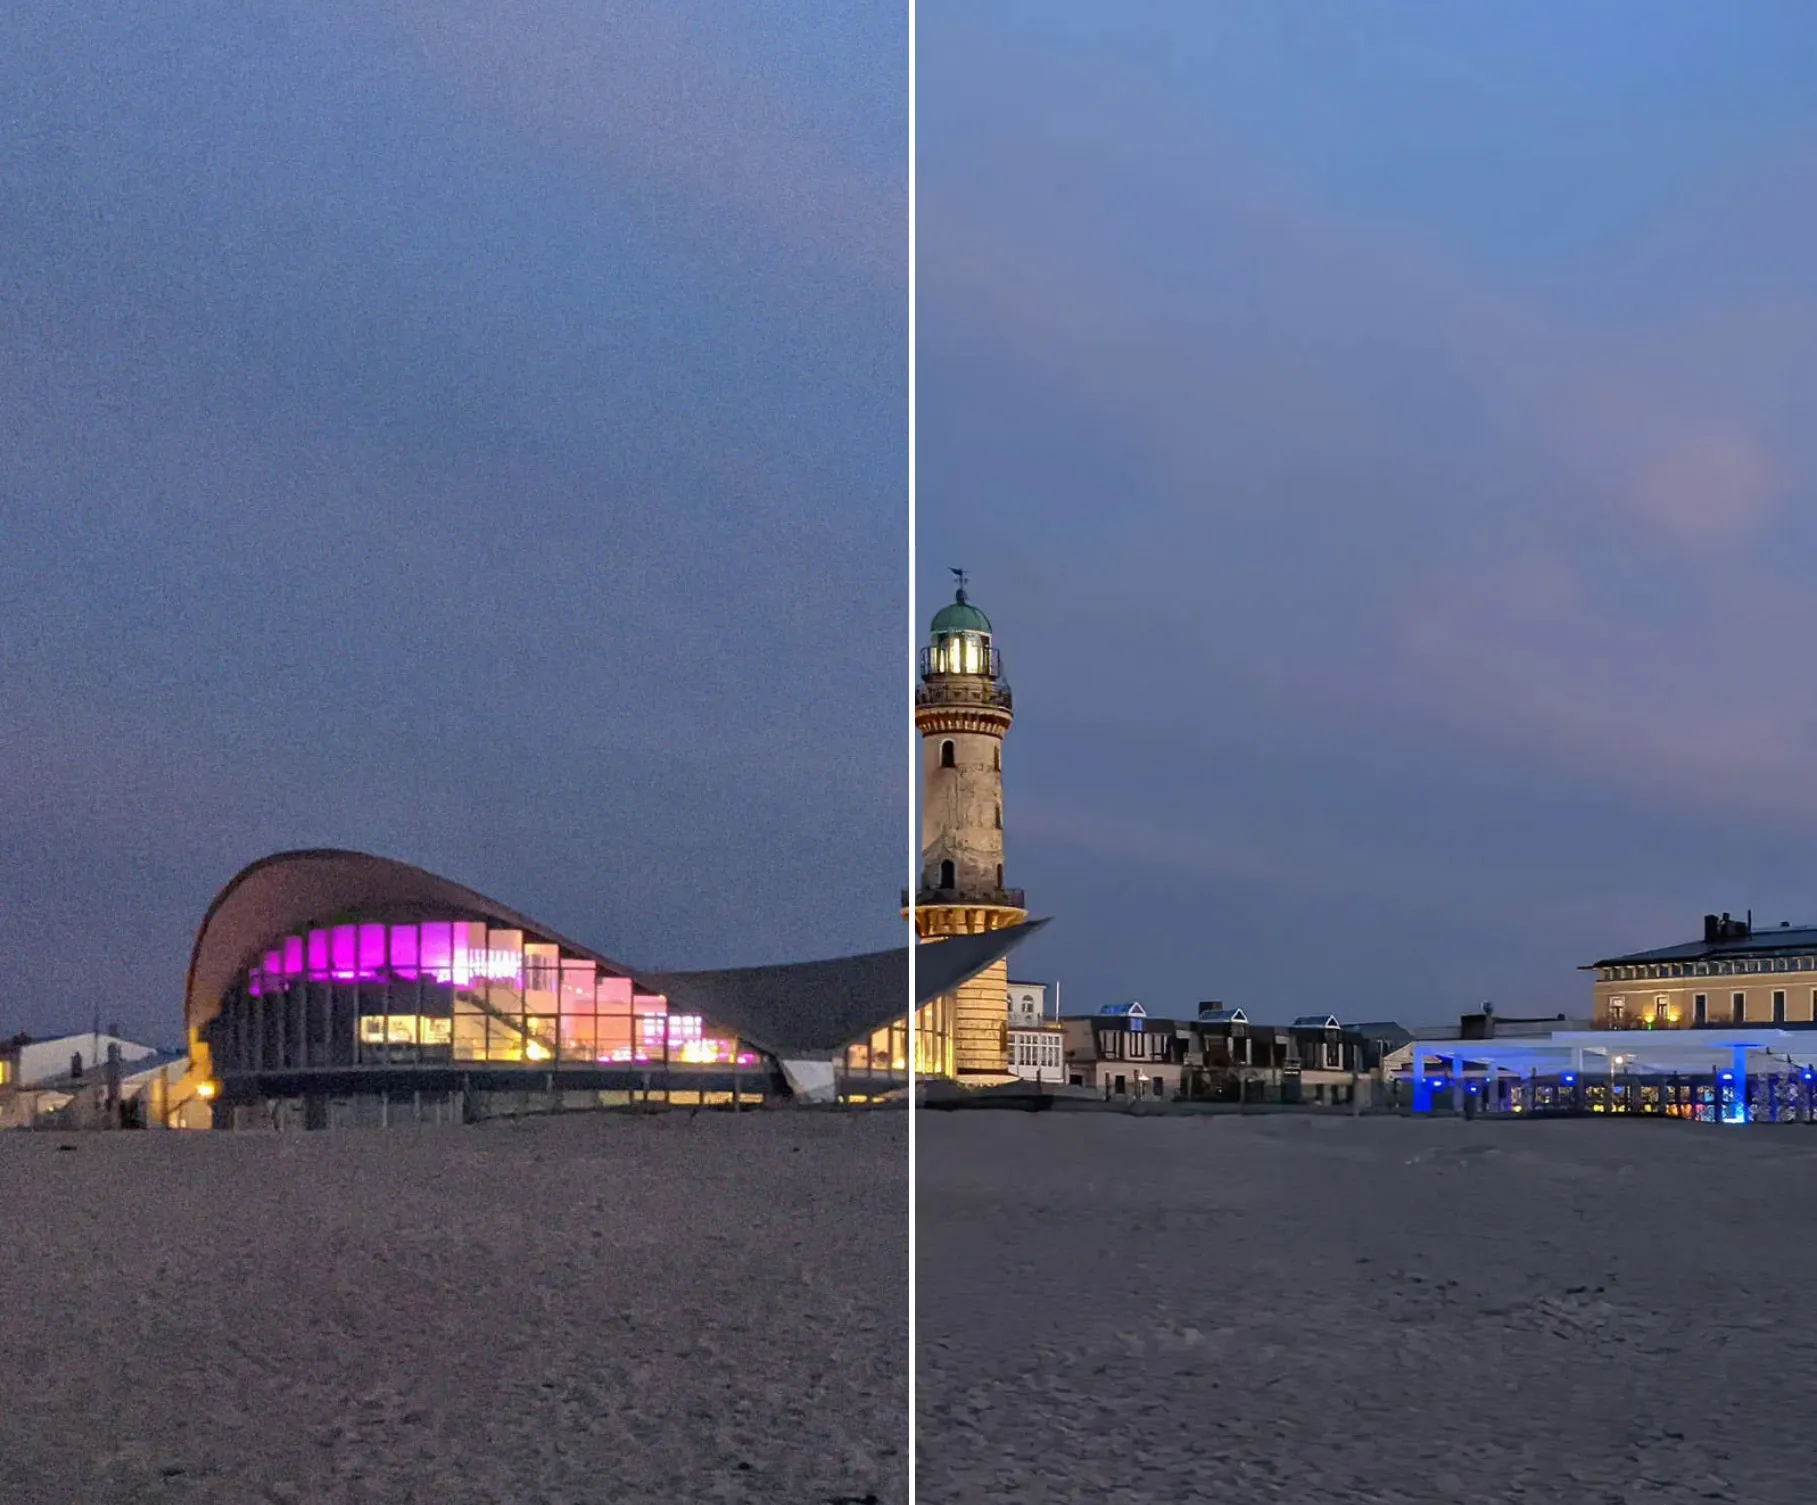
Conclusion on image noise
To summarize, removing image noise is an essential step in improving the overall quality of photos. By understanding the effects of noise on images and using the right tools and techniques, you can significantly improve the clarity and sharpness of your photos. Photoshop offers a range of noise reduction methods, including filters such as Reduce Noise and Dust and Scratches, as well as advanced techniques such as Frequency Separation. These tools allow you to selectively reduce noise while preserving important details in your images. Lightroom also offers effective noise reduction options with the Noise Reduction panel. By adjusting parameters such as luminance and color noise reduction, you can achieve smoother and cleaner results without compromising image quality. It feels like there are more and more tools that can remove noise with the help of AI. You can see my favorites in the table above. I bought Topaz Photo AI myself and use it almost every day.
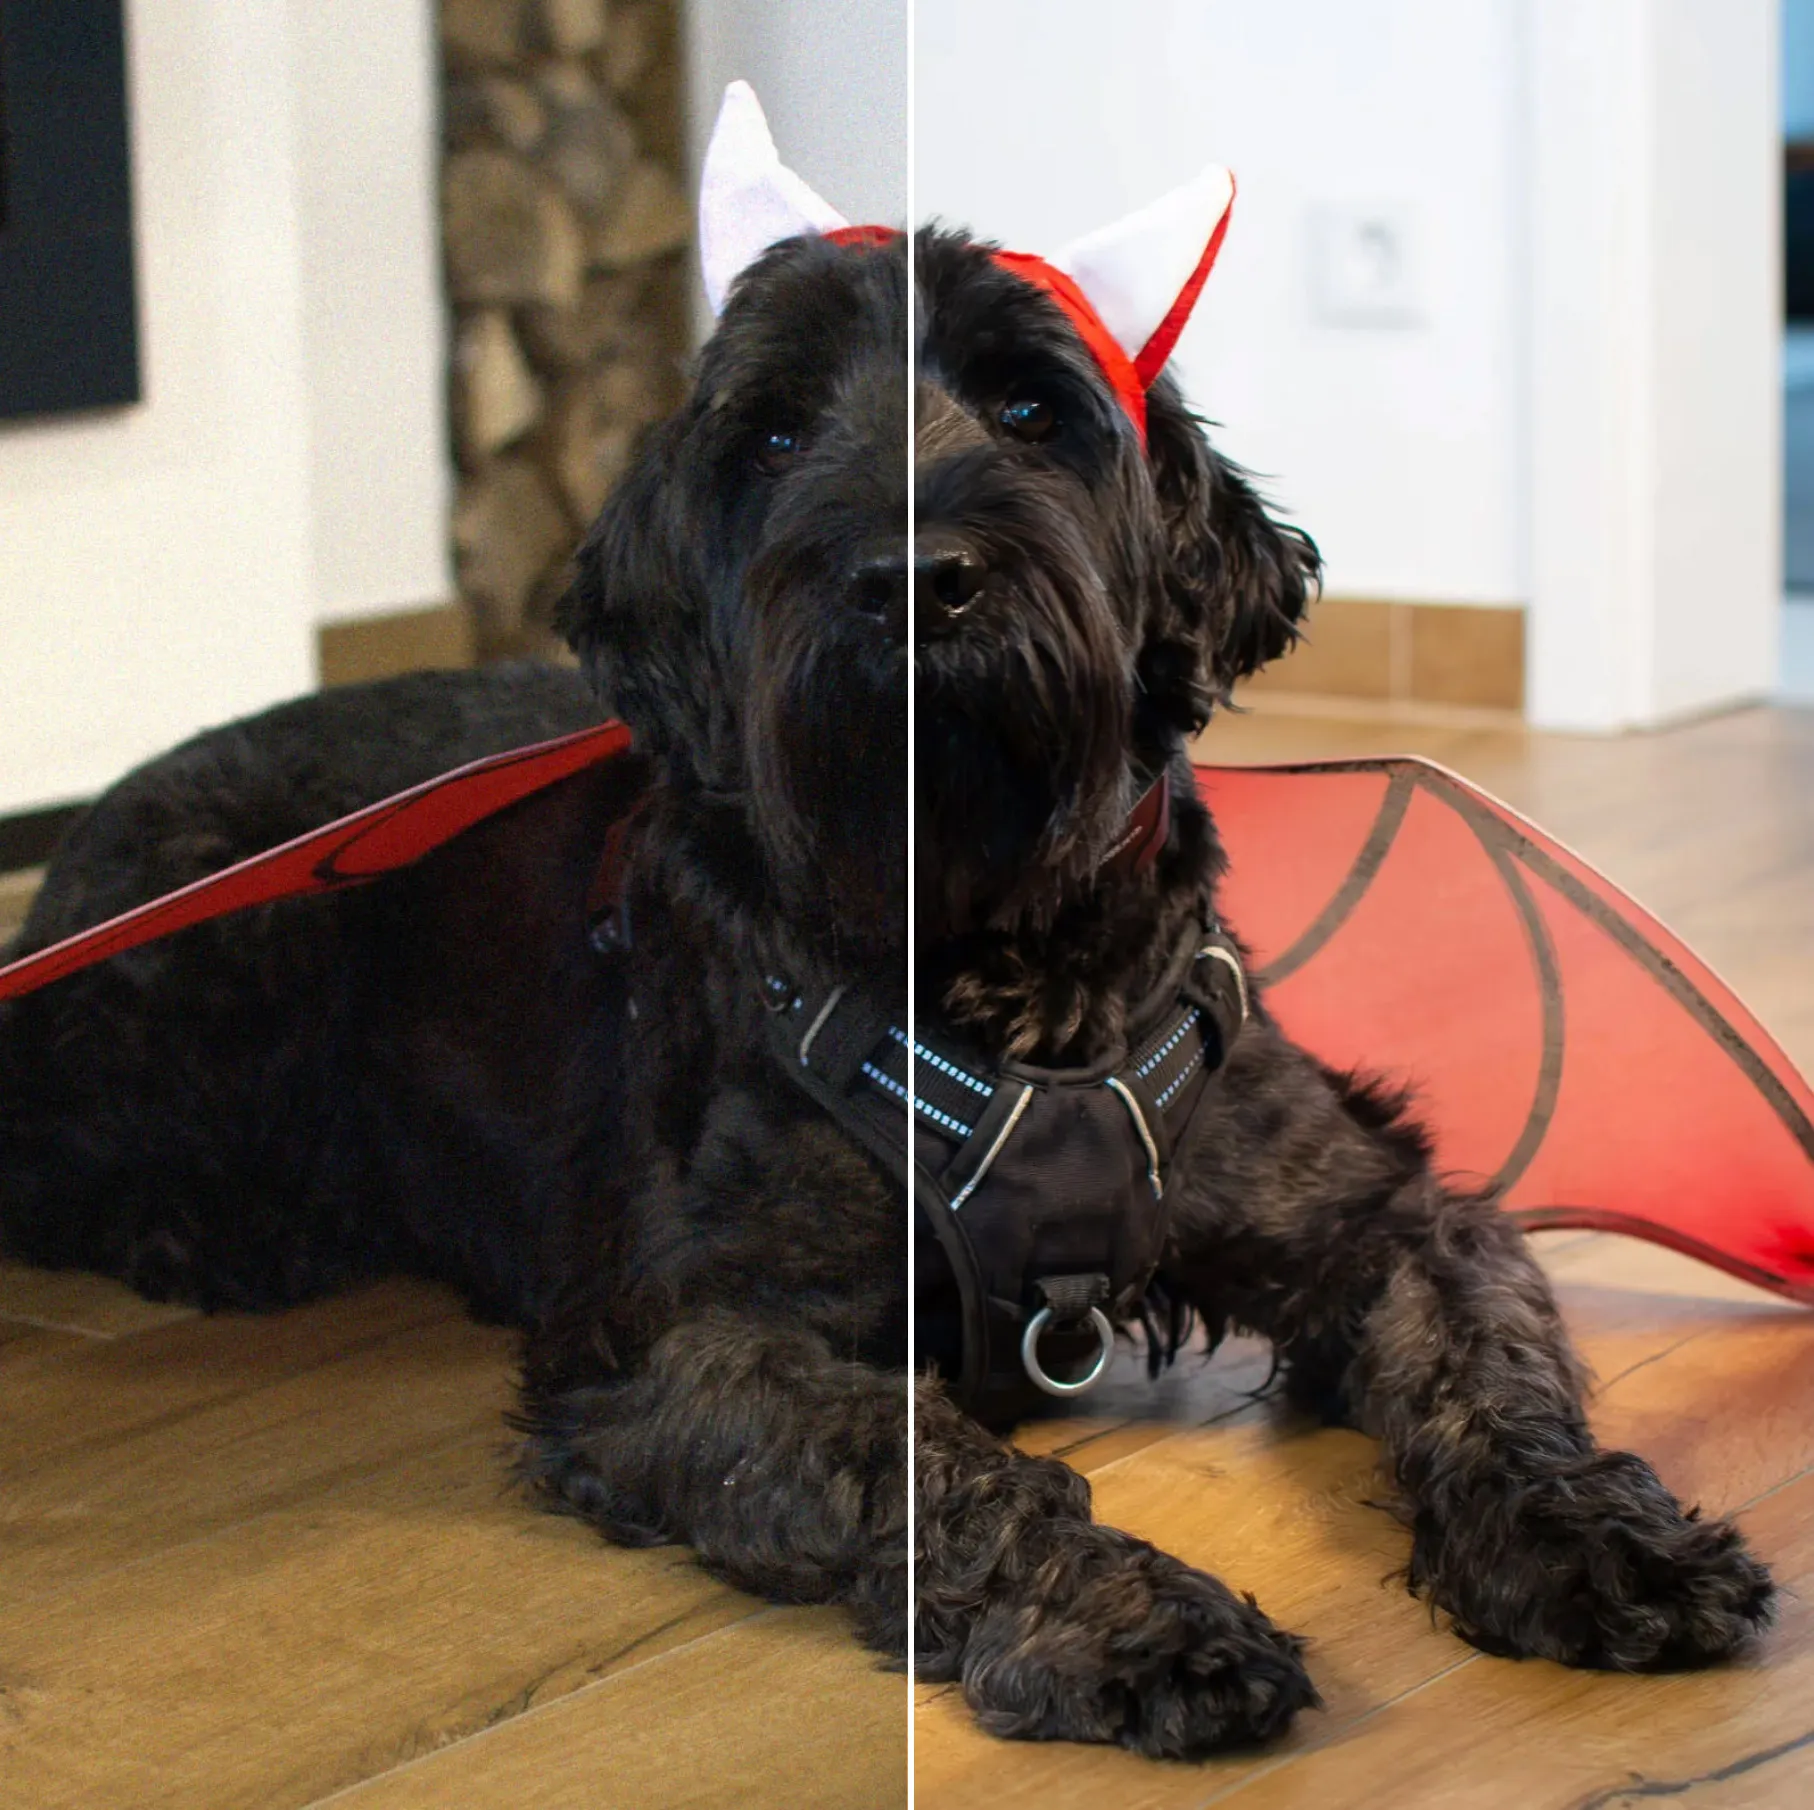
In addition, AI tools have proven to be powerful solutions for image denoising. Using machine learning algorithms, these tools can intelligently analyze and denoise photos, often achieving impressive results with minimal user intervention. However, it's important to note that while AI tools can be very effective, they don't always offer the same level of control or customization as traditional software like Photoshop or Lightroom. To help photographers remove noise from their images, we've created a step-by-step guide that introduces different software options.
You can use this tutorial to gain practical experience in removing noise from your own images and achieve professional-looking results. To summarize, removing noise from images is an important aspect of post-processing for photography enthusiasts, professionals and hobbyists alike. Whether you use Photoshop, Lightroom or AI tools, knowing the different methods available and applying them effectively can greatly improve the visual appeal of photos by reducing unwanted noise. So don't let noise distract from your stunning shots - take advantage of these powerful tools and techniques to bring out the true beauty of your images. I myself almost only take photos with my smartphone and almost 99% of all photos are noise-free because an internal AI already processes the photos for me (unless I actively turn it off or edit the RAW photo). However, I think that the issue of noise in photos will occur less frequently in the future because the hardware and, above all, the software is improving from year to year.
Do you already like these tips? Then you'll really like my training: Removing image noise: Photoshop, Lightroom and AI tools (tutorial for Denoise). Check it out now.
